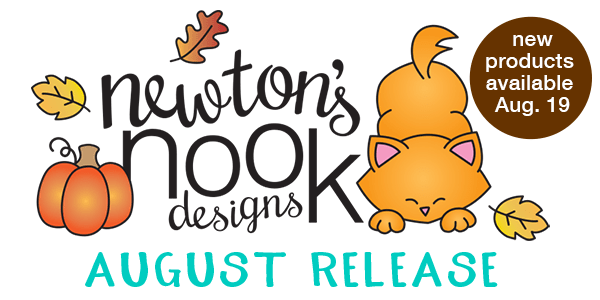
Continuing on with our final day of release reveals for the Newton’s Nook August Release, we have even more gorgeous fall goodies to share.
Harvest Haul stamps and dies
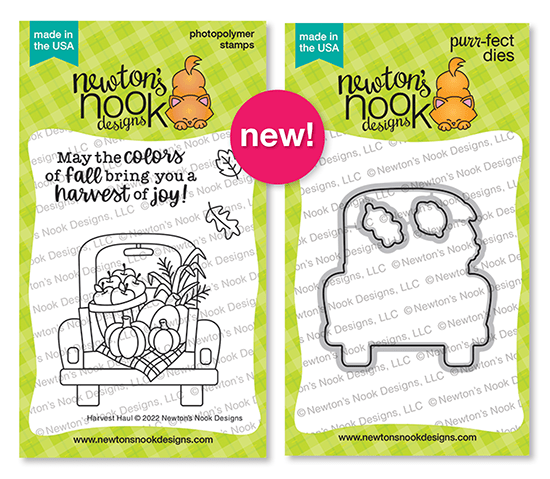
Newton’s Crate stamps and dies

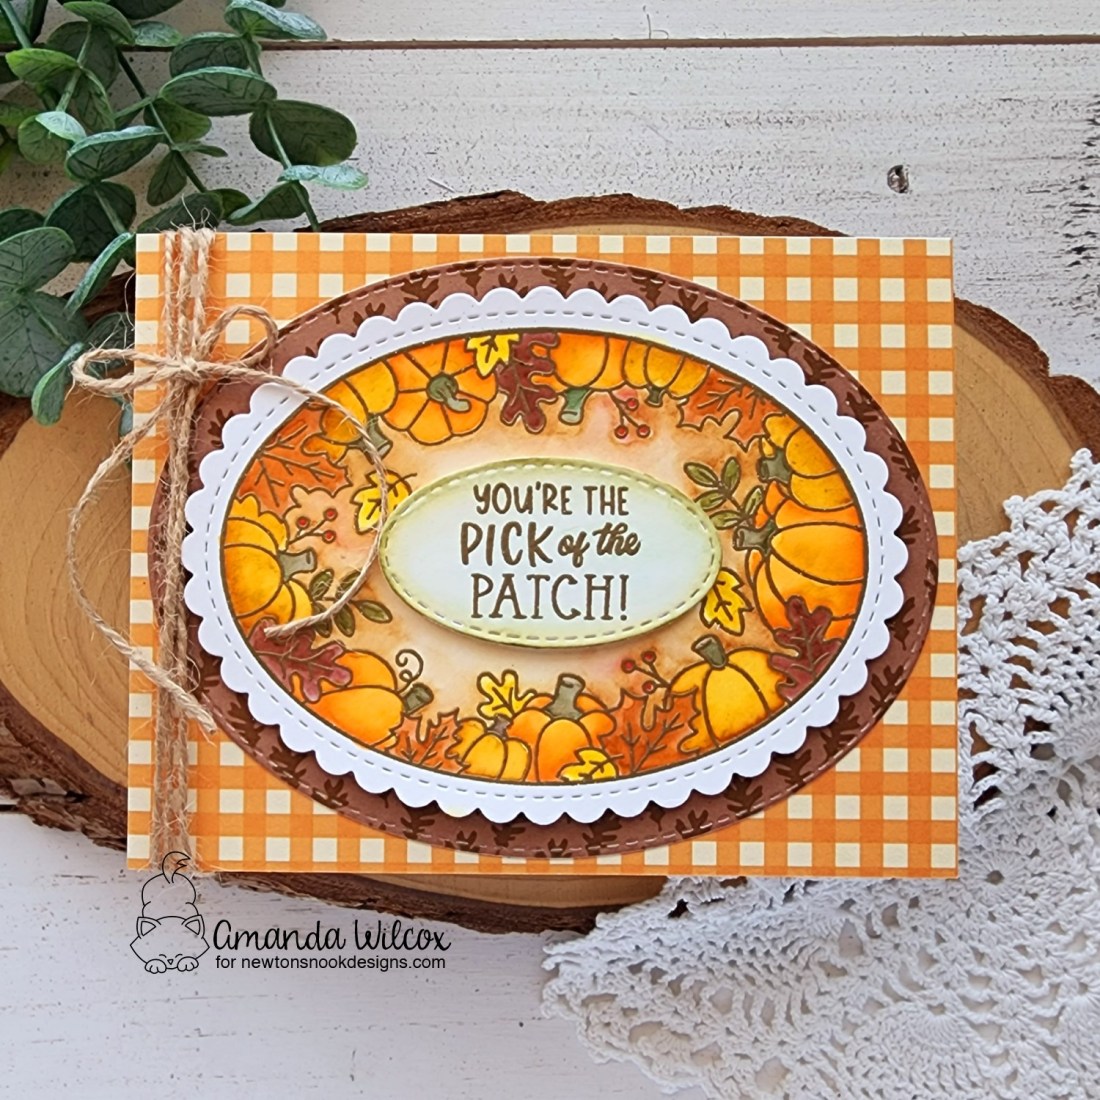
Aren’t these images just amazing! I love them so much! Let’s start with a card I made with Harvest Haul.

I started, like usual, by stamping and coloring the image with copic markers. Then I used the coordinating die to cut it out. For my mini scene, I decided to use the oval frames dies for a different look. I cut one white oval and inked it up with the Sunscape stencil using orange and yellow ink. After removing the stencil I went over the whole panel lightly with the yellow ink still in my brush to take away the stark white areas. Then I cut another partial oval from kraft cardstock and used a Land Borders die to cut a hill from that.
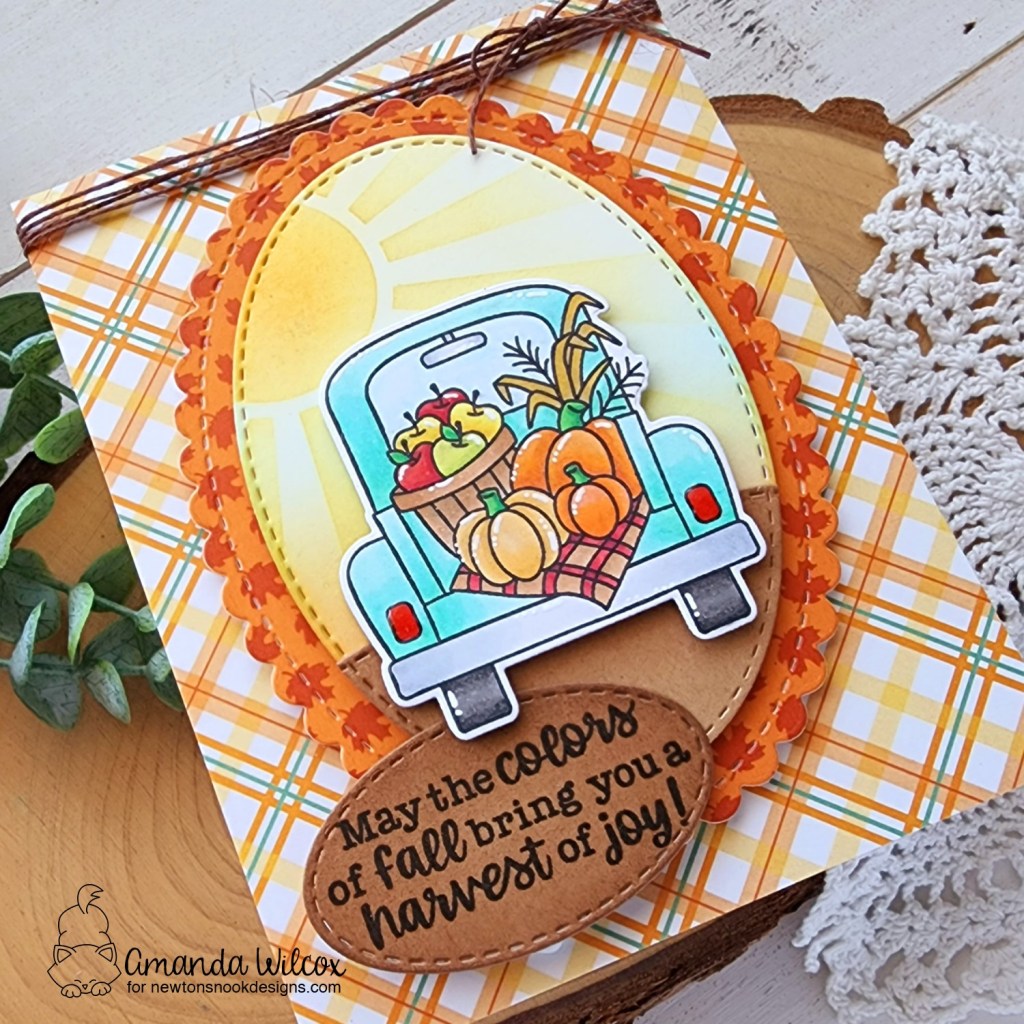
I cut a scalloped oval using the Autumn paper pad and a smaller one from kraft for my sentiment. Next, I trimmed a piece of plaid down to fit an A2 card front and started adhering everything.
I added the plaid to a white card base with liquid glue, then the scalloped oval with foam squares and the scene oval with liquid glue. Finally, the truck and sentiment oval are adhered with foam squares too.

For finishing touches, I added white gel pen highlights to the image and glossy accents to the taillights. Last, I tied some brown twine around the top of the card and tied it in a bow.
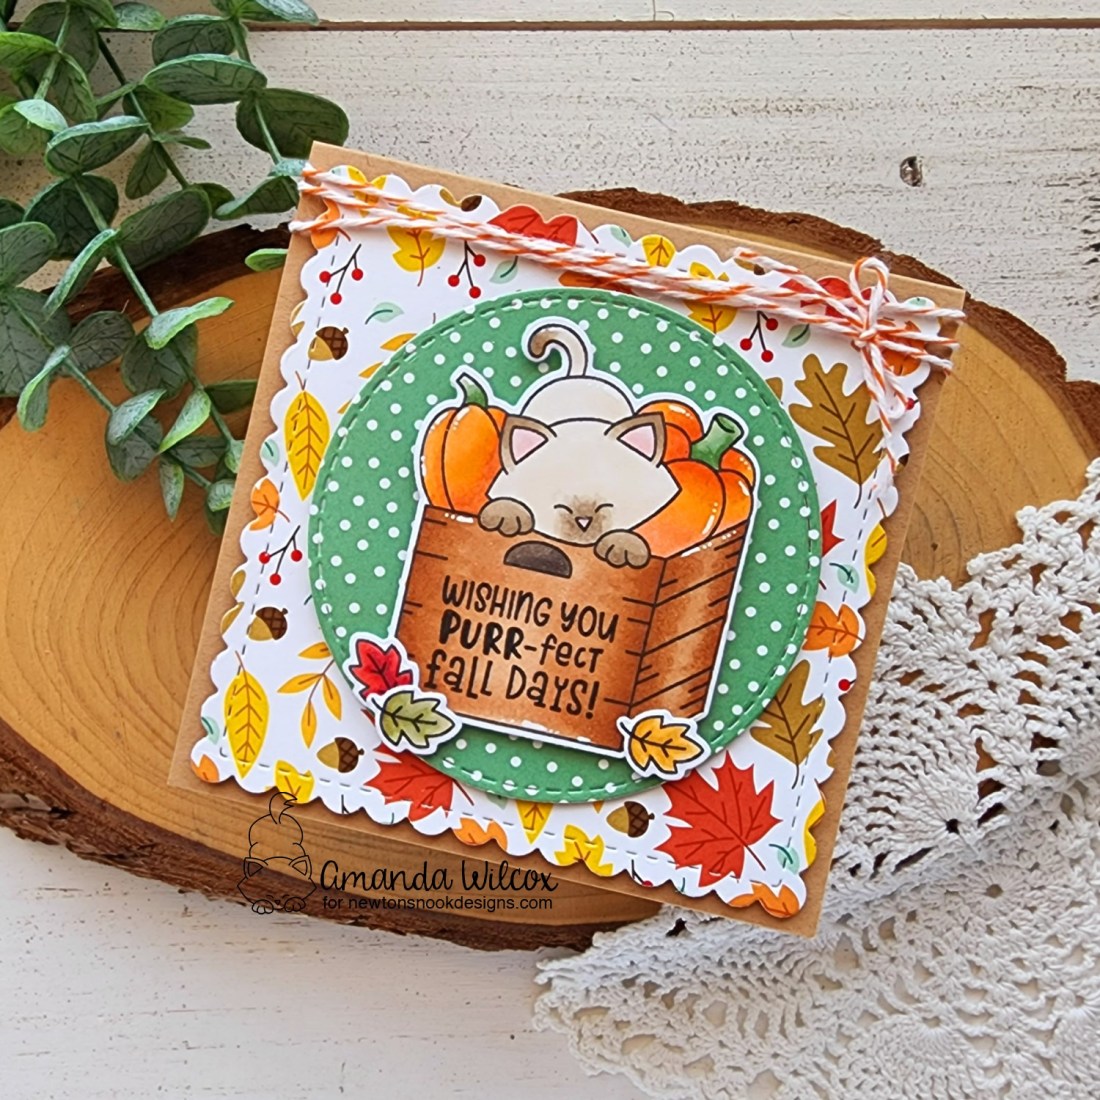
I love how that last card turned out but let’s take a look at the adorable new Newton’s Crate stamp set too! This is extra fun because all of the sentiments can be stamped on the side of the crate if you want to! Isn’t that fun!?!

I stamped Newton and some extra leaves first, then colored them with my copics and cut them out with the coordinating dies. Next, I stamped my sentiment on the side of the crate. I try to do this after coloring to help with potential smearing and bleeding.
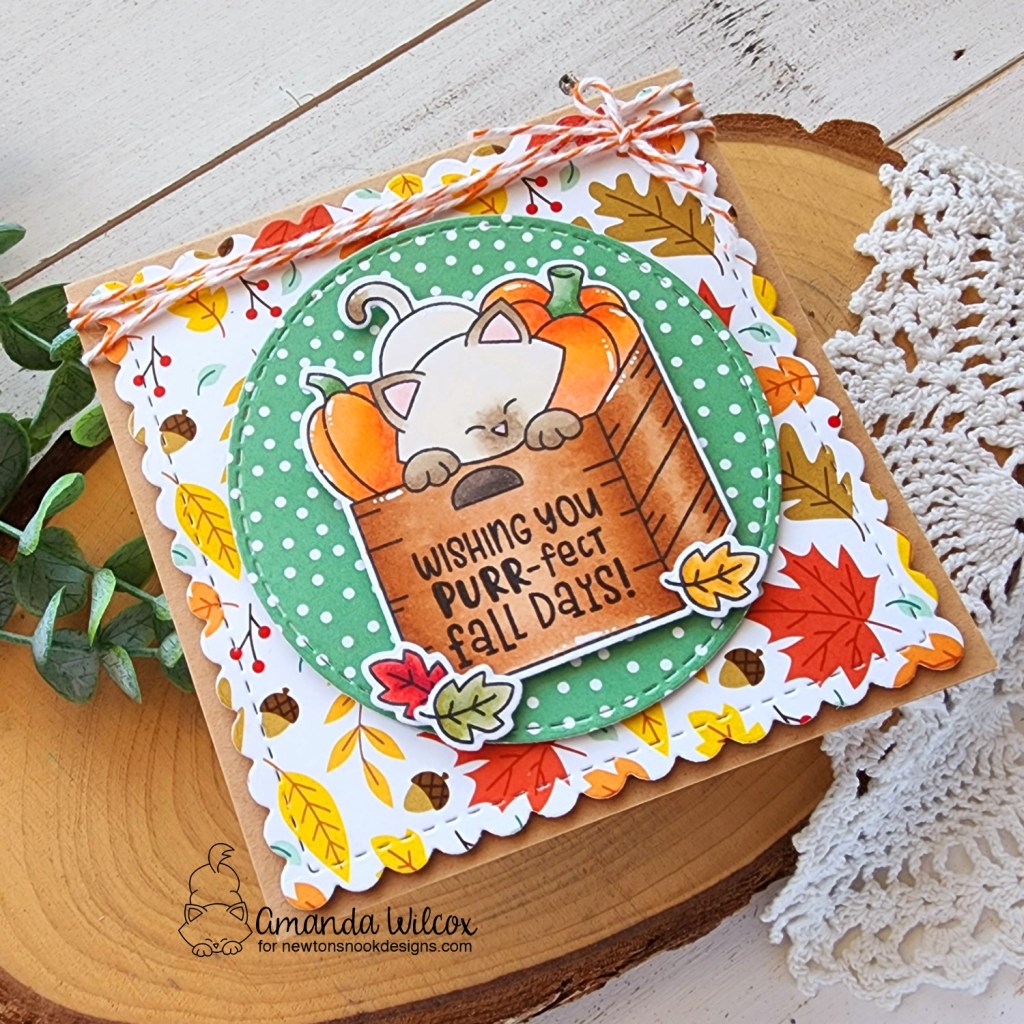
I thought this image was perfect for a square card so I pulled out the Frames Squared dies and cut a scalloped square from the Autumn paper pad and then a focal circle using the Circle Frames dies. Then adhered everything to a kraft card base measuring 4 1/4 inches square. This way it still mails in an invitation envelope with regular postage.

The scalloped square, circle and Newton are all added with foam tape, along with the accent leaves too. Then I finished the design off with orange twine I saved from older Newton’s Nook packages.
For finishing touches I added white gel pen highlights to the images and glossy accents to Newton’s nose.
Would you like to win the “Harvest Haul” or the “Newton’s Crate” Stamp Set? We will choose ONE lucky winner for each stamp set!
Here’s how to win: Comment on the NND blog and Design Team blogs (see list below)! Thewinner will be chosen at random from the collective reveal posts. Make sure to check out each of their blogs and comment for your chance to win. You will not know which blog has been chosen so the more you comment on the better your chances are of winning! You have until Thursday August 18th at 9pm ET to comment — winners will be announced on the blog post on Friday August 19th.
Check out all the awesome Design Team Blogs below to enter:
Newton’s Nook Designs
Donna Idlet
Ellen Haxelmans
Tina Herbeck
Larissa Heskett
Samantha Mann
Zsofia Molnar
Maria Russell
Farhana Sarker
Tatiana Trafimovich
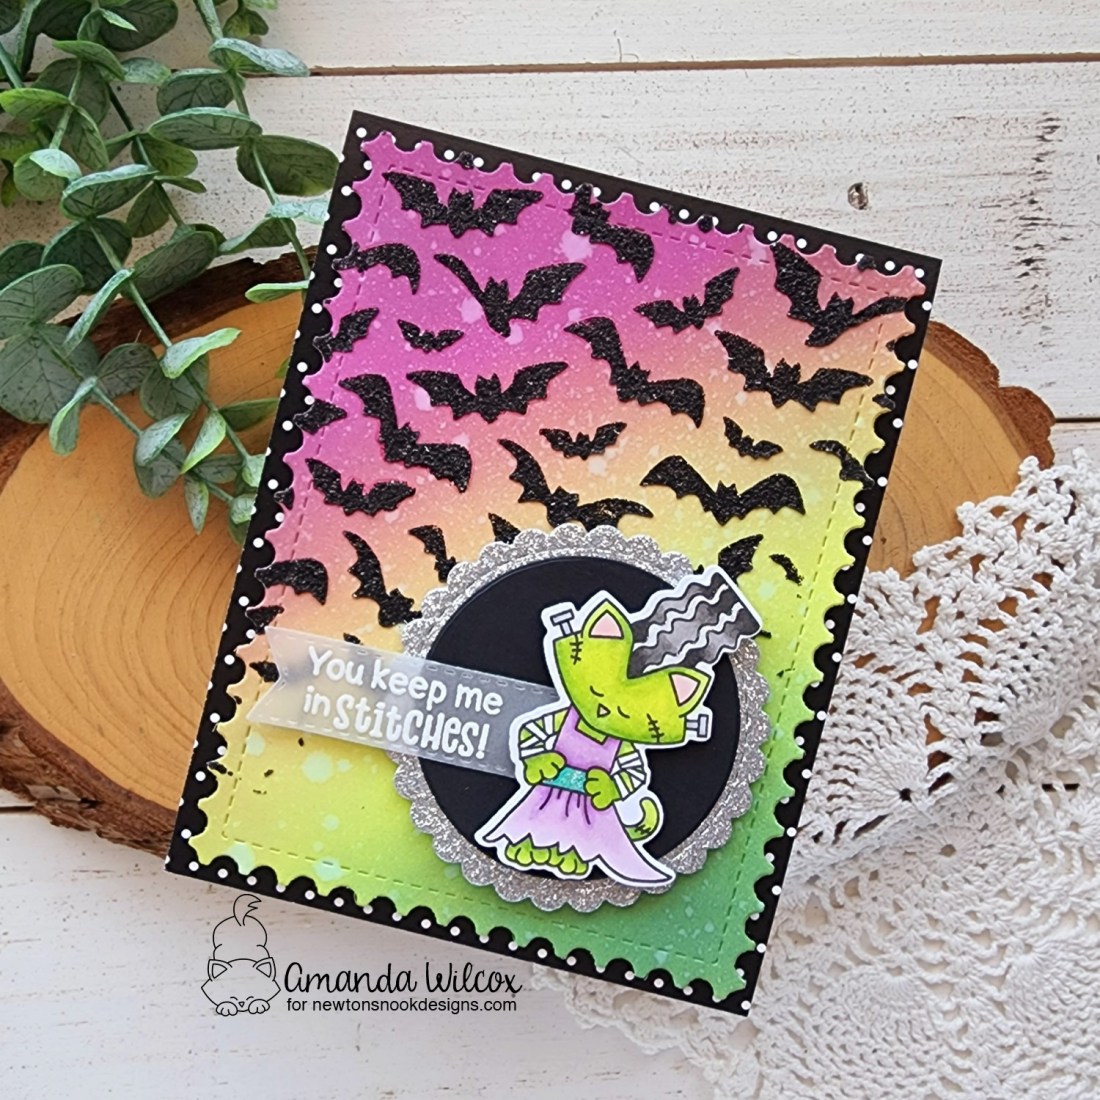
Amanda Wilcox