Coffee Loving Cardmakers – A Forest Christmas

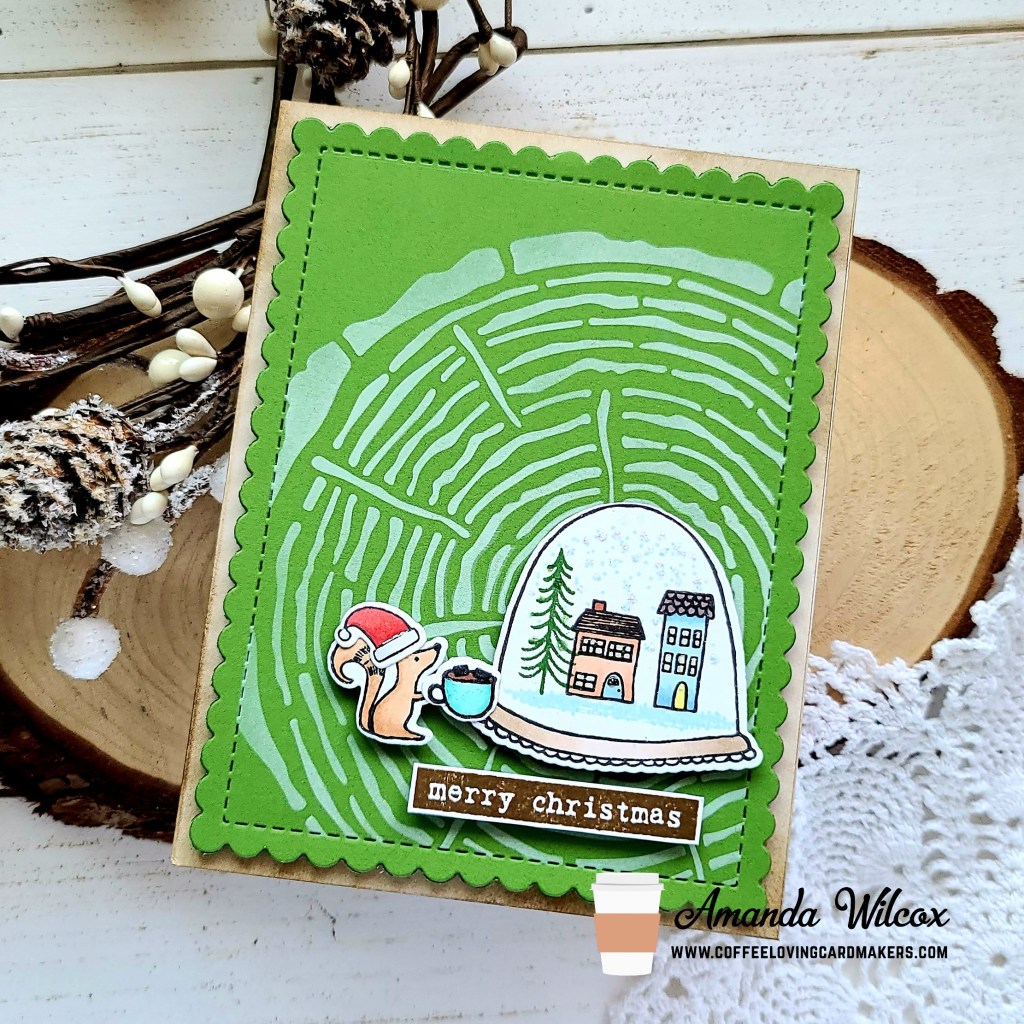
Hey friends! It’s Tuesday Tea over on the Coffee Loving Cardmakers and I am thrilled to share a fun card featuring my prize from the Fall | Winter Coffee Lovers Hop from Flora and Fauna! As soon as it came in the mail this weekend I pulled out all of my sets to see how I could mix and match.

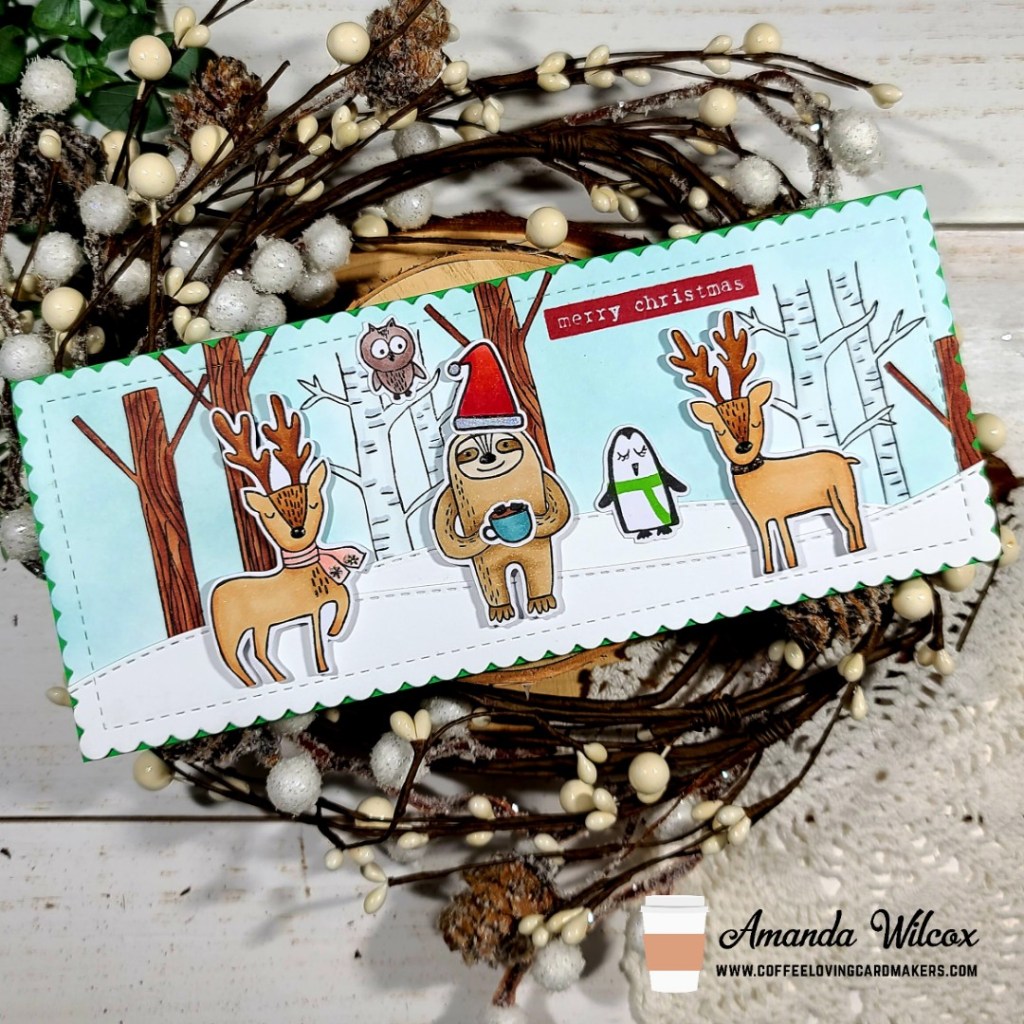
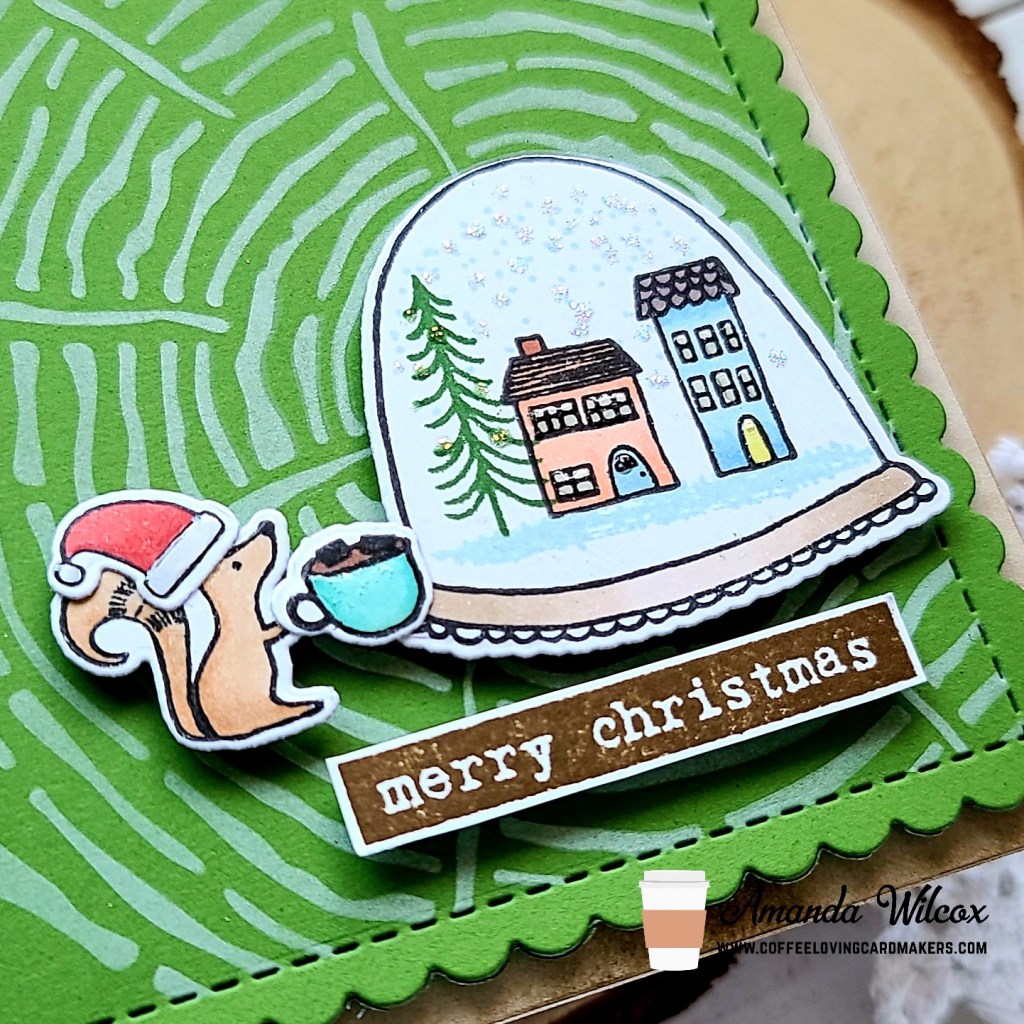
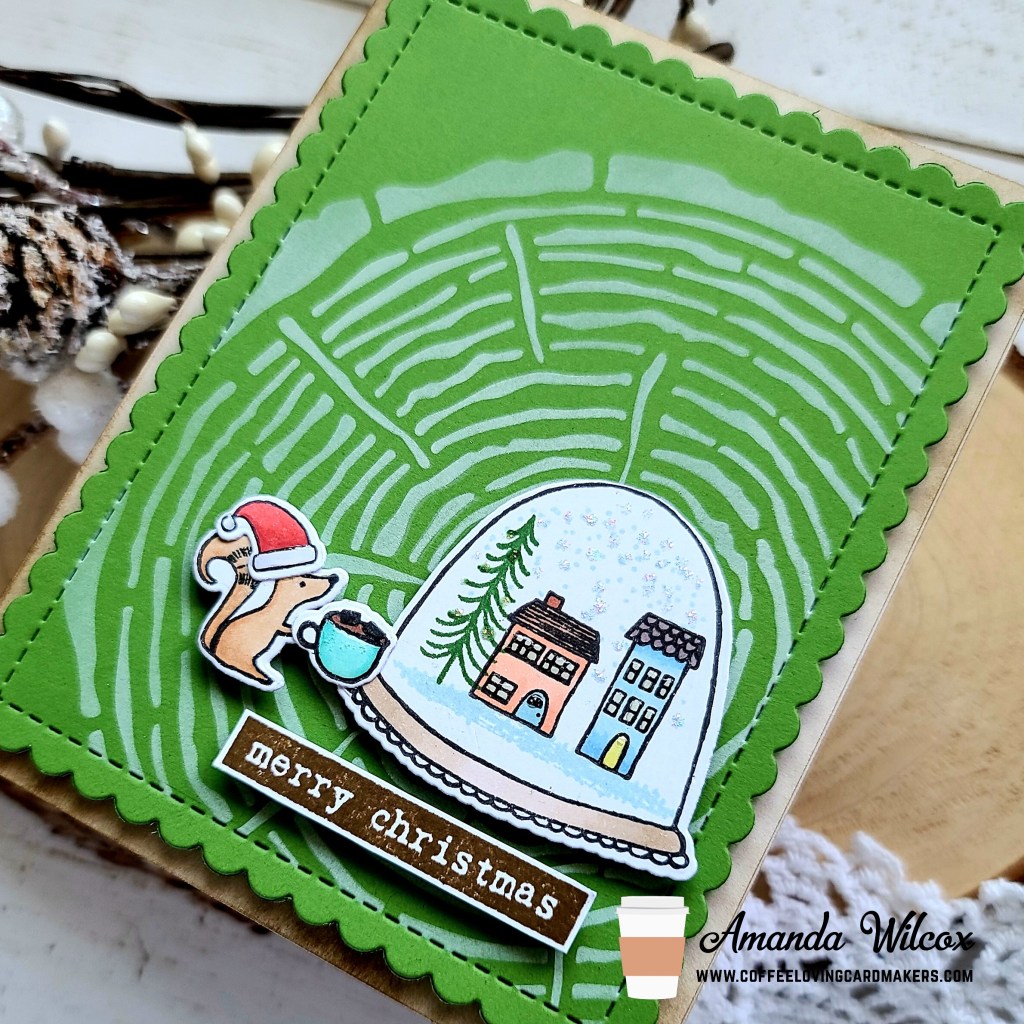
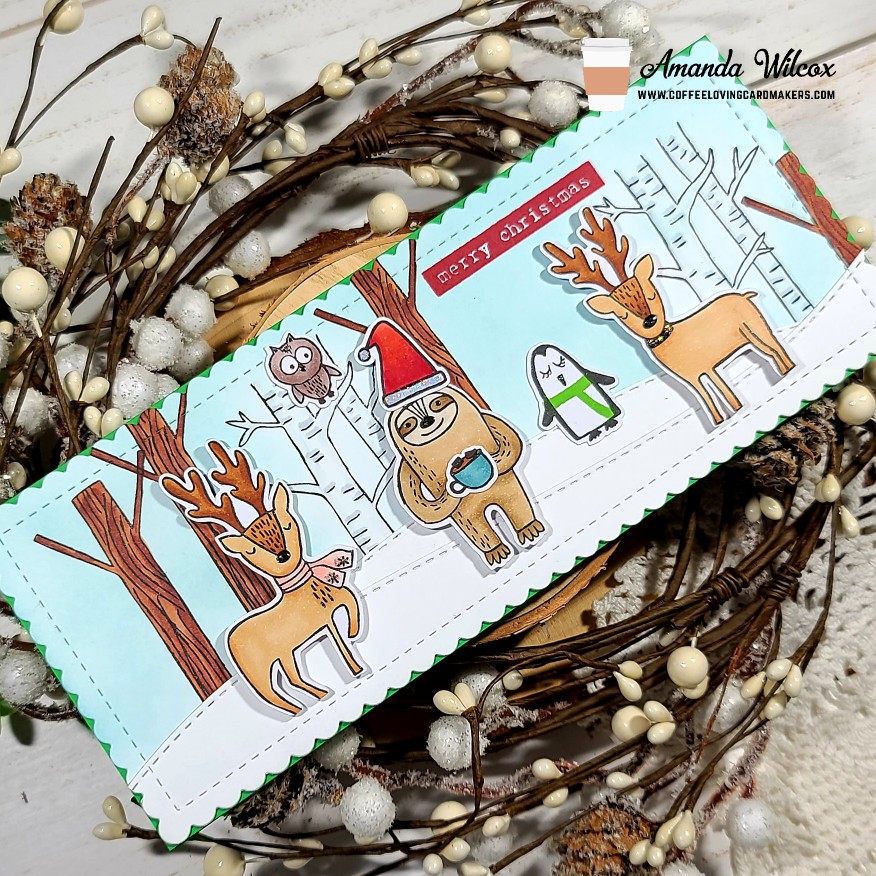
I stamped images from Outline Deer Wonderland, which was my prize and added others from Mini Sloth (we’re pretending he’s a sasquatch this time though) and Woodland Snowglobe and colored it all with my copic markers. Then I used my scan-n-cut to cut them all out. I cut an oversized panel and stamped some of the tree trunks from Outline Deer Wonderland and used my copics to color them in. Then I used my Trinity Stamps blending buddy brush to ink up the sky just a bit with a light blue ink. I cut it out with a Trinity Stamps Slimline Scalloped Panel die, along with a couple of white panels too. Then I used the Slimline Scenic Borders and Slimline Great Outdoors Borders to cut some snowy hills.

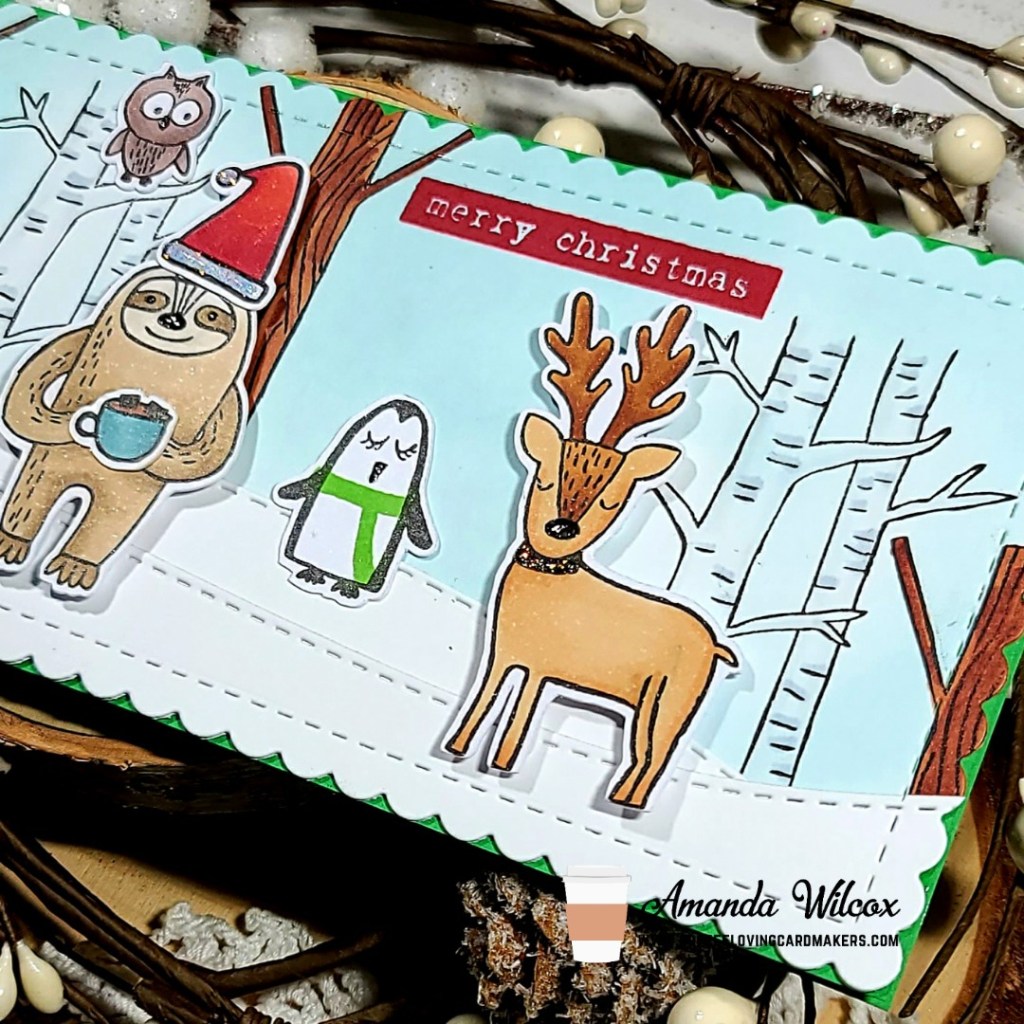
I used liquid glue to adhere my layers together and used my images as a guide to stamp the sentiment I chose from the Woodland Snowglobe set. Then using a combo of liquid glue and foam squares I attached all of my critters.

I cut a cardbase from green cardstock that matched my penguin’s scarf for festive fun and attached my whole scene panel down. Moving on to finishing touches, I added Unicorn Stickles to the Santa hat and reindeer scarves. Then I added glossy accents to things like noses and eyes and beaks. My card is all finished and ready to go.

I had so much fun mixing and matching so many products together for this whimsical scene! I hope you enjoyed it too!

I appreciate you sharing your time with me. Have a fabulous day!

Coffee Loving Cardmakers – Merry Christmas Snowglobe

It’s time for tea everyone! Grab a cuppa of your drink of choice because it’s Tuesday Tea with Twiddler’s Nook over on the Coffee Loving Cardmakers blog today.

I had so much fun putting this silly, adorable card together with some products from Flora and Fauna, along with Newton’s Nook stencil and dies. I stamped my images from Woodland Snowglobe and colored them with copics. Then I used the coordinating dies to cut them all out and set them aside.

I die cut a green panel with my Newton’s Nook Frames & Flags dies and inked it up with white pigment ink and their Tree Rings stencil. I took a white card base and inked up the edges with a blending brush and brown die ink and then popped the green panel up with foam tape.

Then I added my images with foam squares, stamped a sentiment from the same Woodland Snowglobe set, cut it out with my scissors and popped it up too. For finishing touches I added some glossy accents to the house windows, squirrel’s hot cocoa mug and hat and Stickles to the snow for a little shimmer in the light.

I just picture this cute squirrel enjoying his hot cocoa while watching the snow fall in his fun snowglobe. haha. Silly critters…

I appreciate you sharing your time with me. Have a fabulous day!

12 Days of Christmas Tags – Day 7

Thanks for stopping by today! We’re all the way to day 7 of our series and I’m really excited about today’s tags. I bought this Flora and Fauna stamp set at least a month ago, hoping to have a chance to use it. These tags were the perfect excuse!

Do you ever have leftover from another project laying around that you don’t want to waste? I hate that and it usually drives me nuts until I find a use for it. Today’s tags started with that. Those white panels were the centers of the frames from Day 5! Pair them with these great Flora and Fauna stamps and we have adorable, easy to mass produce tags!

I used my Misti to stamp the pieces one at a time so it went really fast. I saved the Fa La La for last because I knew I wanted to heat emboss it in gold. After that was done, I die cut the base and glued them all together, adding black twine to the top.

I made 10 of these tags in about 20 minutes total, which is pretty quick for me. You could save even more time if you didn’t heat emboss and just used another color of ink too! I will be honest, I contemplated adding Stickles to all of the berries but I held back…this time. 🙂

Don’t forget there are prizes to be won. Comment each day on here, on my Instagram post for the day and then head to Caffeinated Craftiness and do the same for her. Four comments per day gives you a shot at any one of four prizes!

I appreciate you sharing your time with me. Have a fabulous day!

Flora and Fauna Mermaid Trio

Thanks for stopping by today! I’ve got quite the line up today with a trio of Flora and Fauna mermaids to share with you!

For this first one, I watercolored the background and then stamped the sentiment, oyster shell, bubbles and plants on there. I stamped, colored and cut the mermaid and narwhal and attached them with foam squares. For finishing touches I added glossy accents to the mermaid hair and heart, the bubbles and glitter to the sea floor.

Look at that glossy shine and the sparkly glitter! I love it all!!!

Here’s the next mermaid to say hello!

For this one I embossed a purple background and added gems. I watercolored a small panel and stamped the floor, waves and plants on that. I stamped, colored and cut the images and popped them up with foam squares; then attached the panel to the card base along with a sentiment strip. Finishing touches here are Stickles on the mermaid tail and waves and glossy accents on the mermaid’s heart.

I don’t know about you but mermaids and glitter just go together. It’s only natural.

Our final beauty swimming by today…

Another watercolored background with the sentiment, ocean floor and waves were stamped directly on it. The images were all stamped colored, cut out and popped up with foam squares. Finishing touches here were Stickles for bubbles, glossy accents coated with glitter for the mermaid tail and chunky glitter glued to the ocean floor. Glossy accents were also added to the jellyfish and the mermaid’s heart.

I always gravitate toward ocean themes, especially mermaids. I’m definitely a mermaid at heart. I know this is a long post but I hope you’ve made it all the way through and enjoyed these cards.

I appreciate you sharing your time with me. Have a fabulous day!

Flora and Fauna Gnome Life

Today I’m sharing a special card with you. My sister-in-law has a birthday today and I made this card specifically for her and her love of all things gnome. It was just too perfect! Happy Birthday Kellie!!! And here is her card.

Here’s how I made it:

  • Stamped, colored and cut the images and set them aside.
  • On the card base I stamped the two mushrooms from the set in gray ink.
  • I cut a piece of white cardstock and stamped the greenery directly to that and then popped up all the other images with foam squares.
  • I attached the scene to a piece of teal cardstock matching the pot and popped that panel up with foam tape.
  • For finishing touches I added glossy accents to the gnome’s beard and mushroom dots.

This was such a fun card to make and I really think she liked it when she opened it yesterday.

I’ve been having a blast with Flora and Fauna sets lately because they take me outside of my comfort zone and I have to think outside the box. Stay tuned this week for some of Flora and Fauna’s friends swimming through!

I appreciate you sharing your time with me. Have a fabulous day!