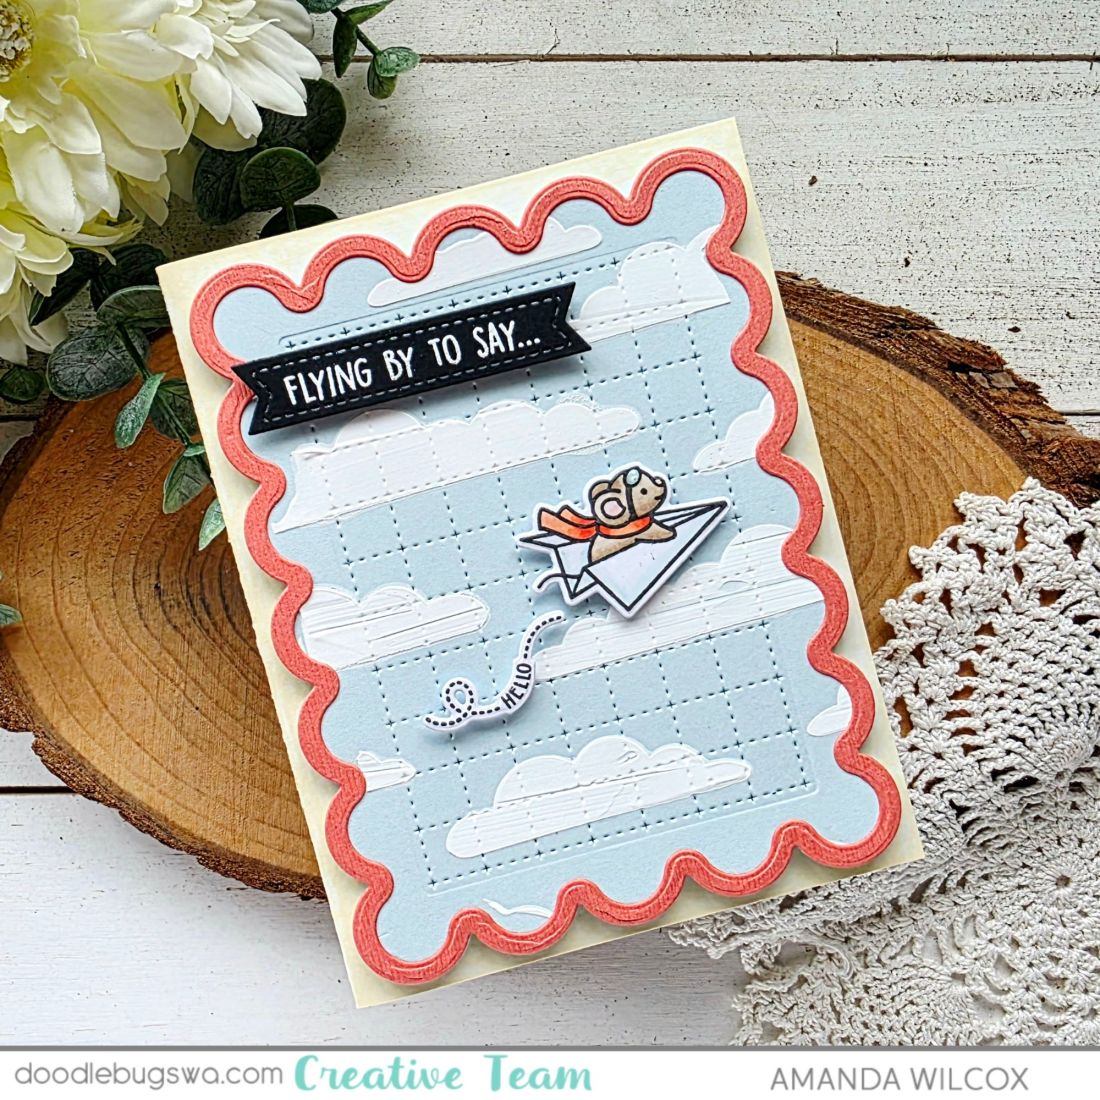
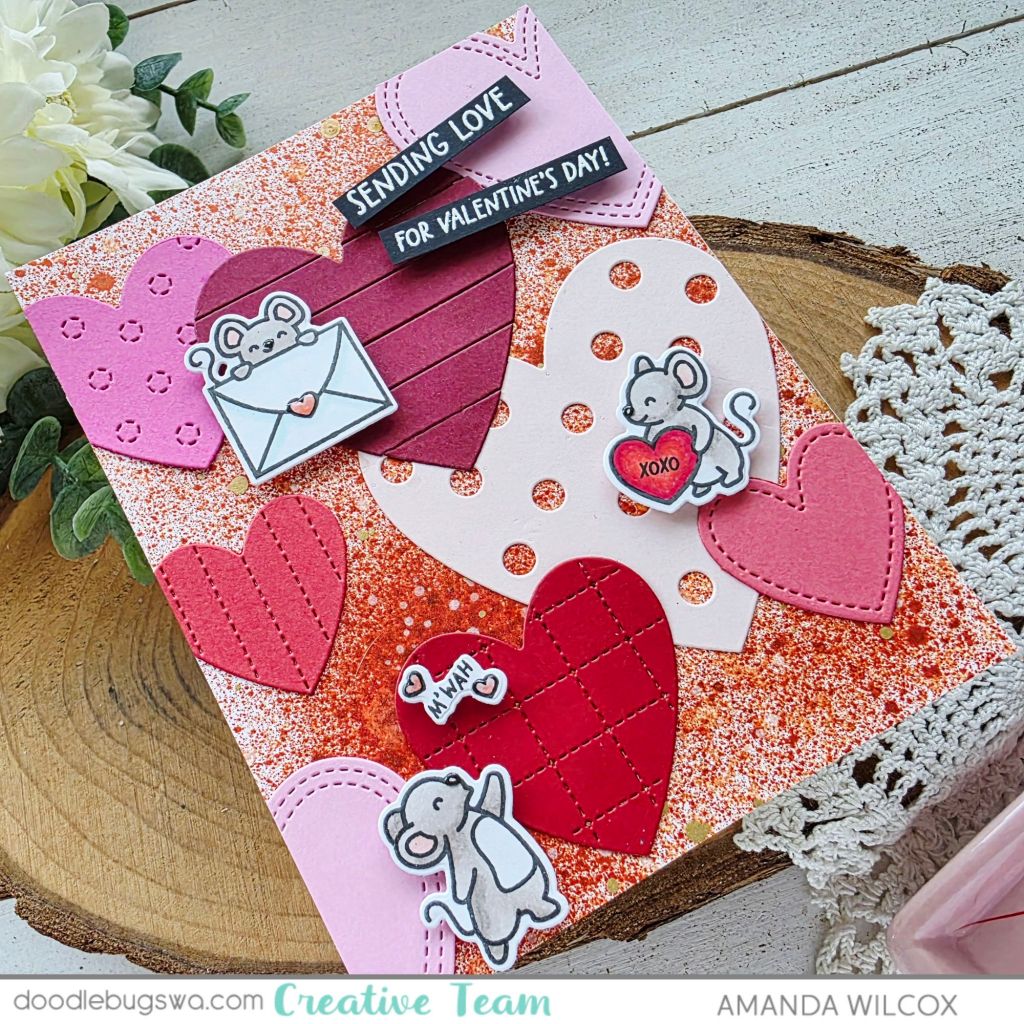
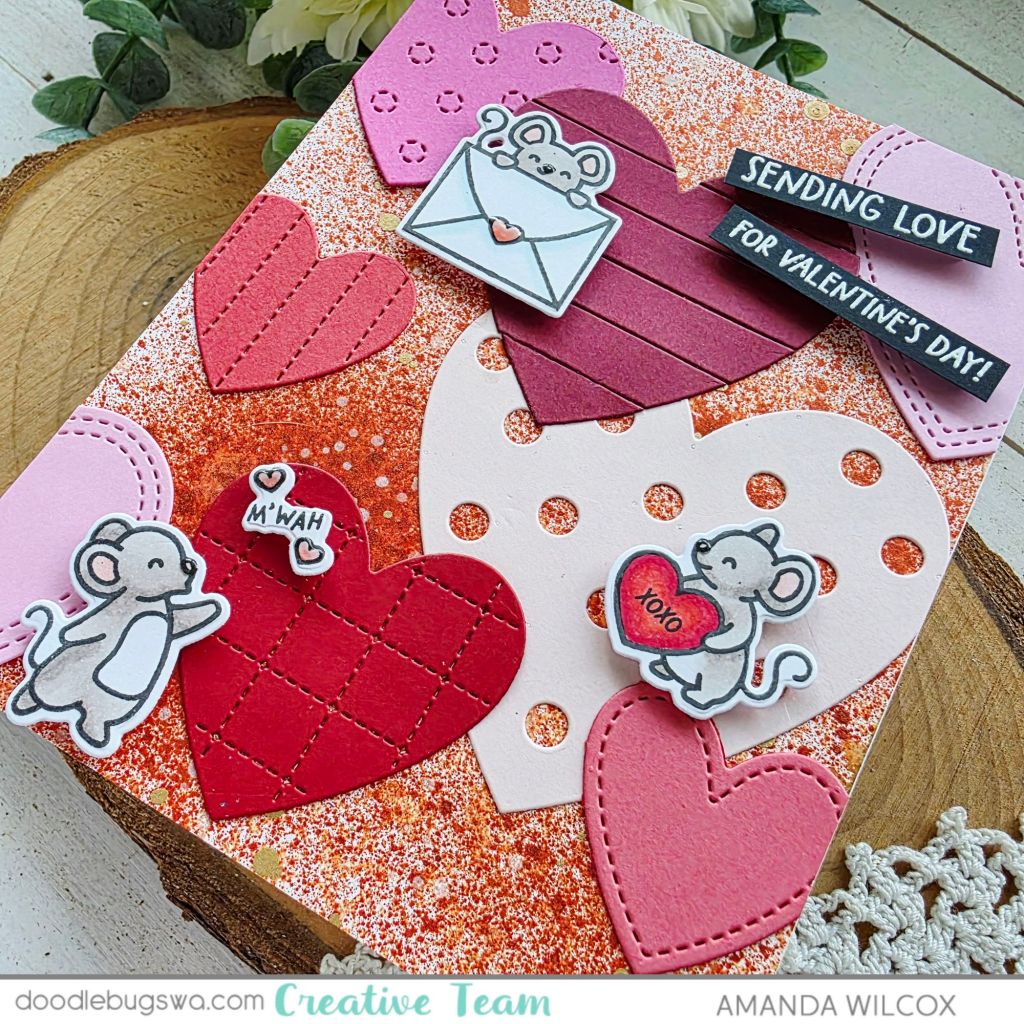
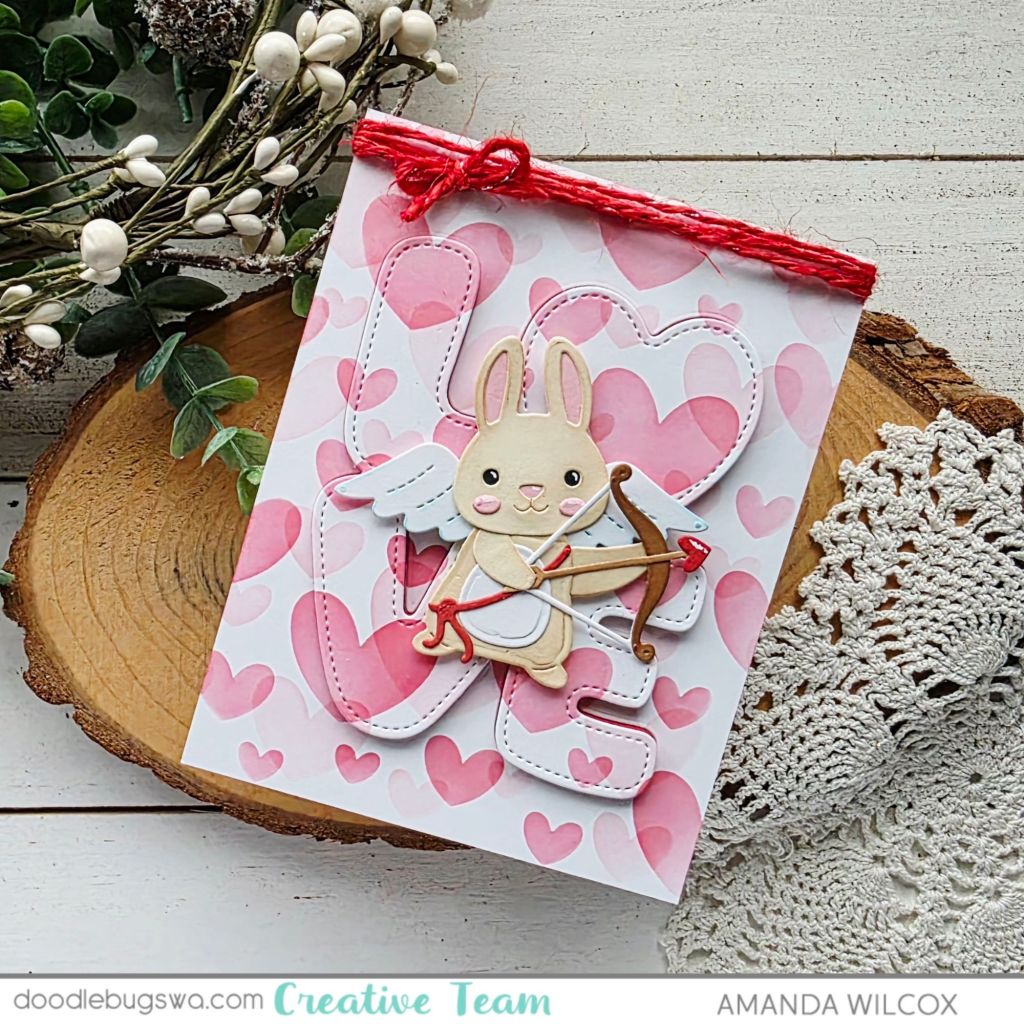
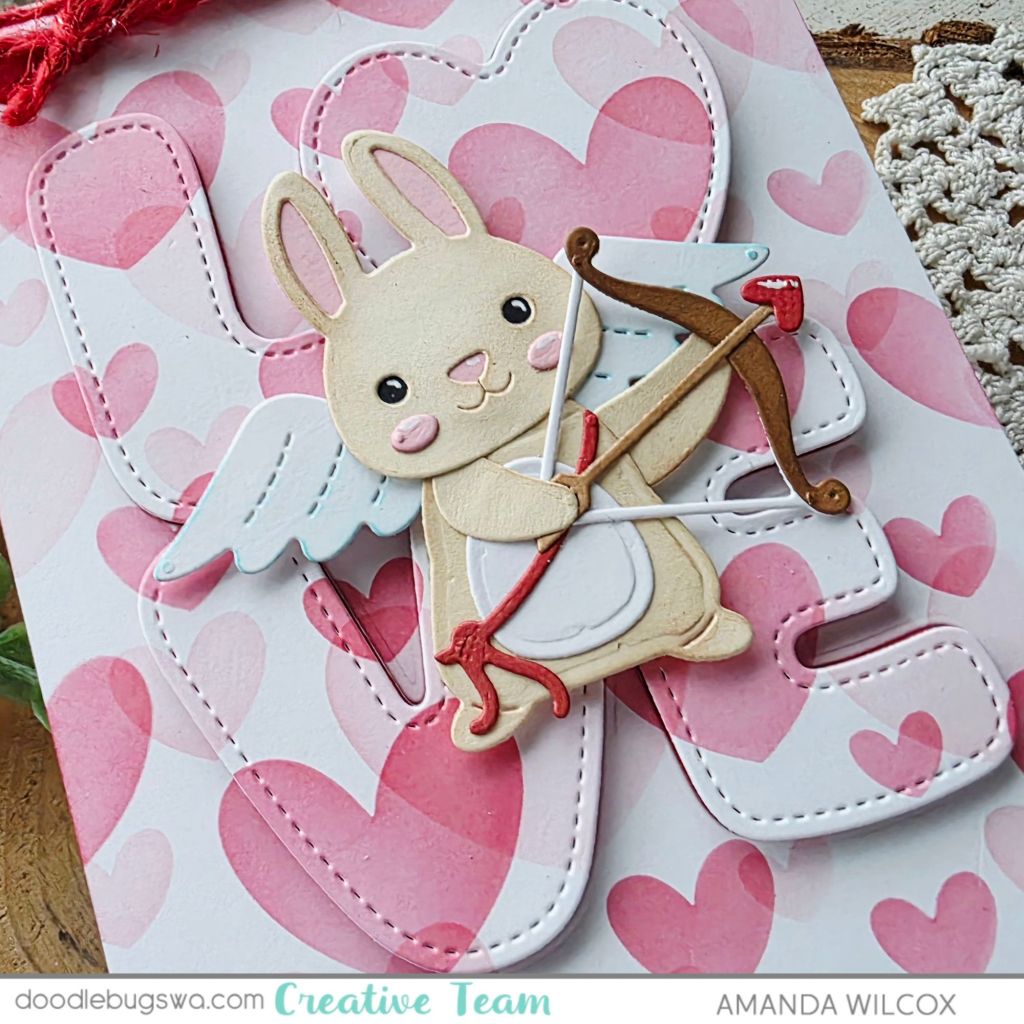
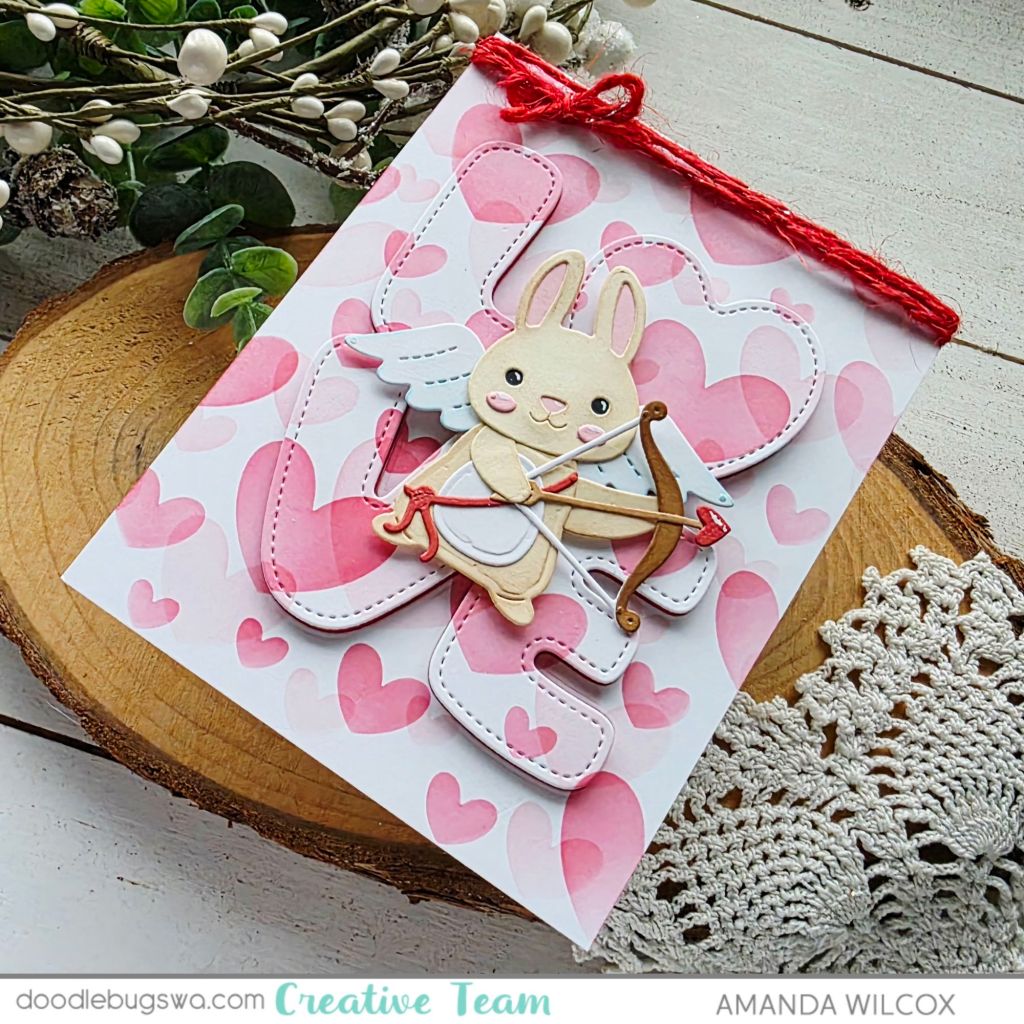
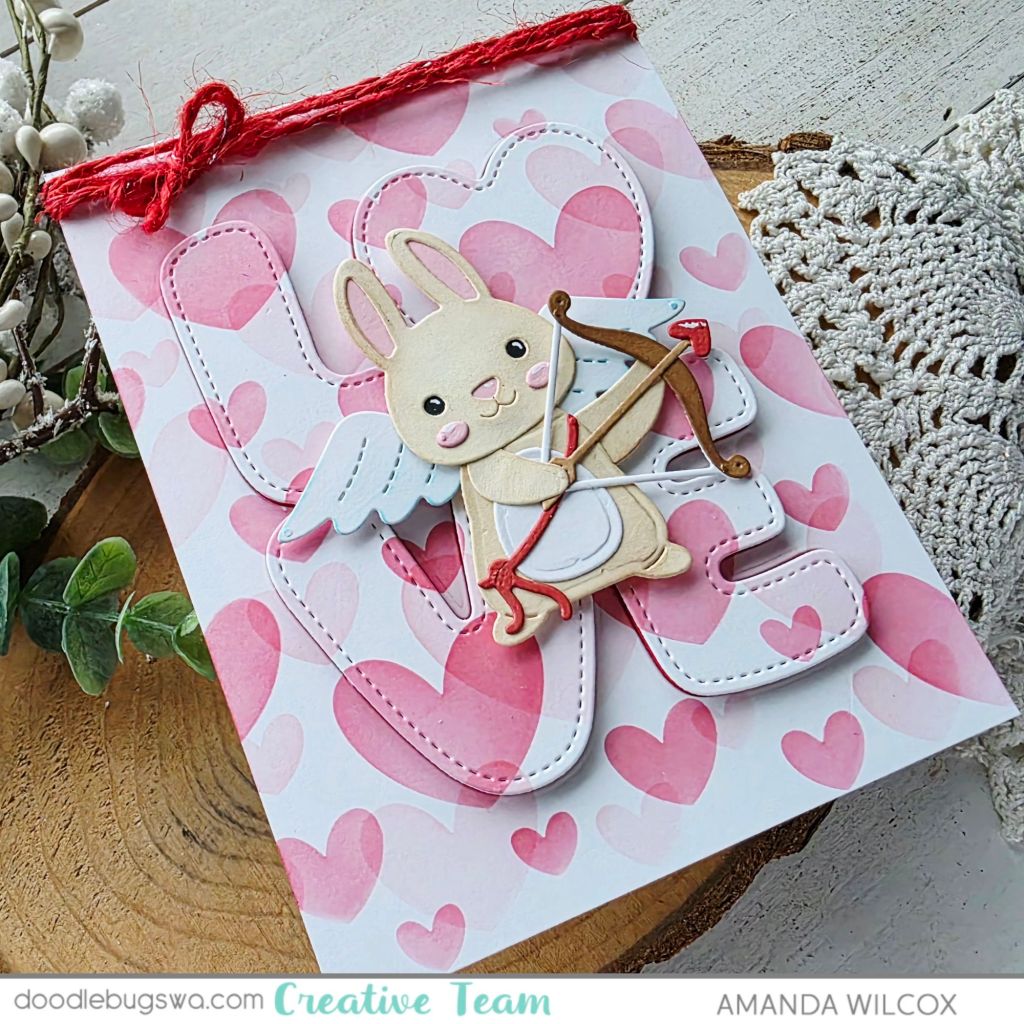
Welcome everyone! I’m pining for sunshine and summer vibes lately so I pulled out some older favorites to craft my way into sunshine.
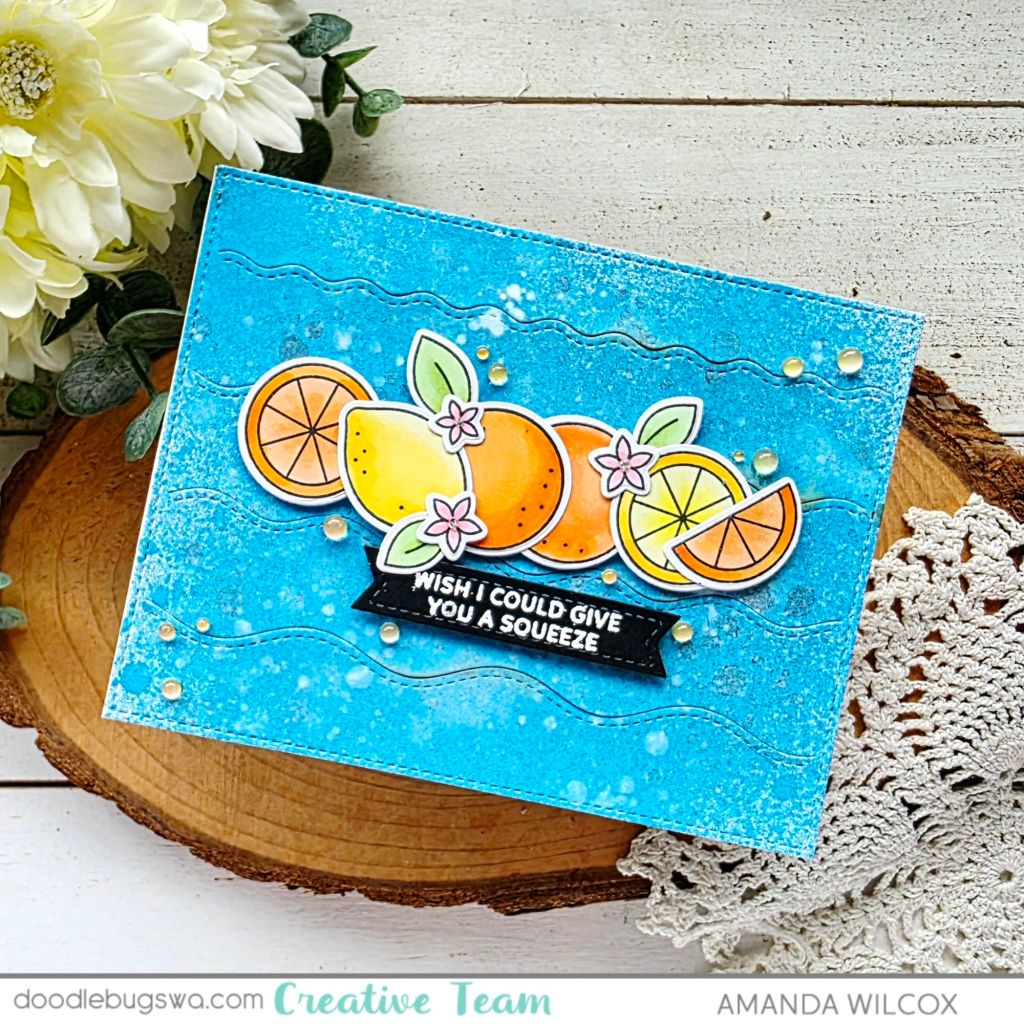
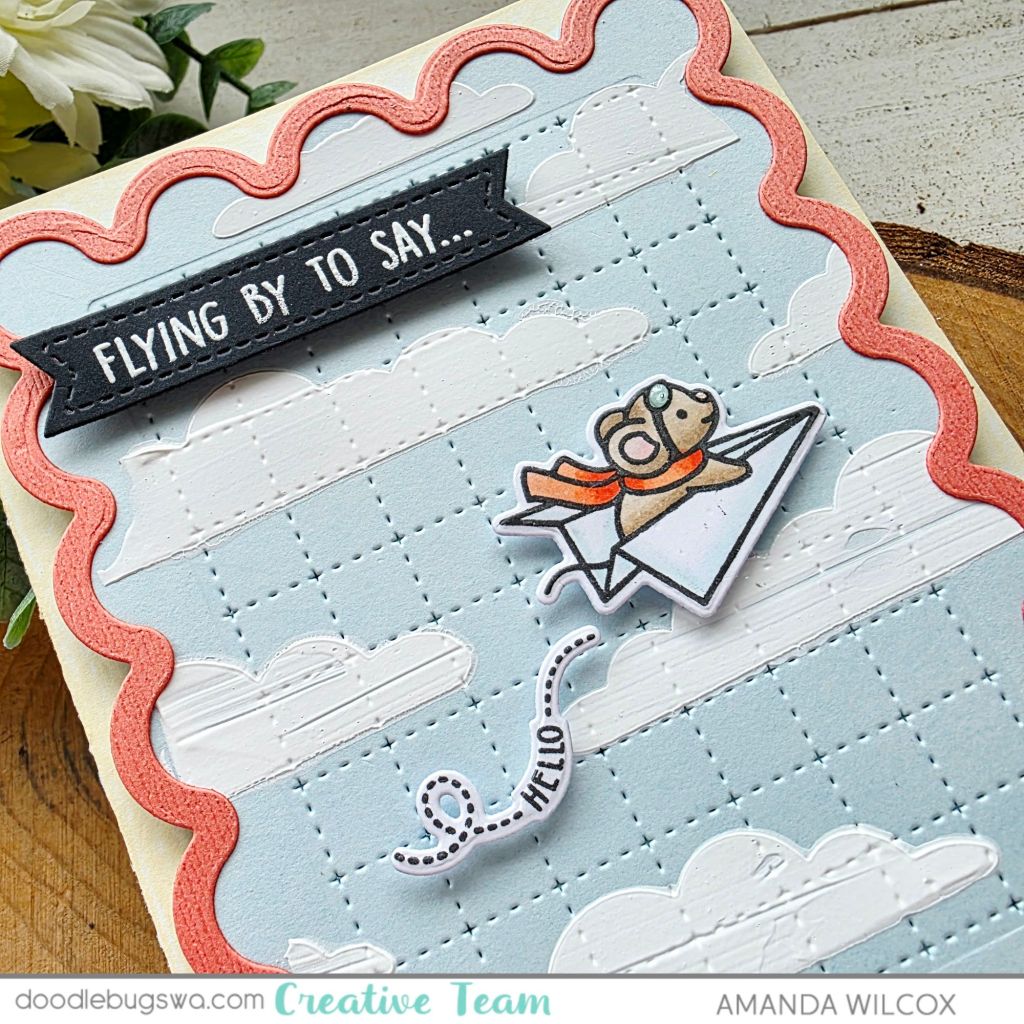
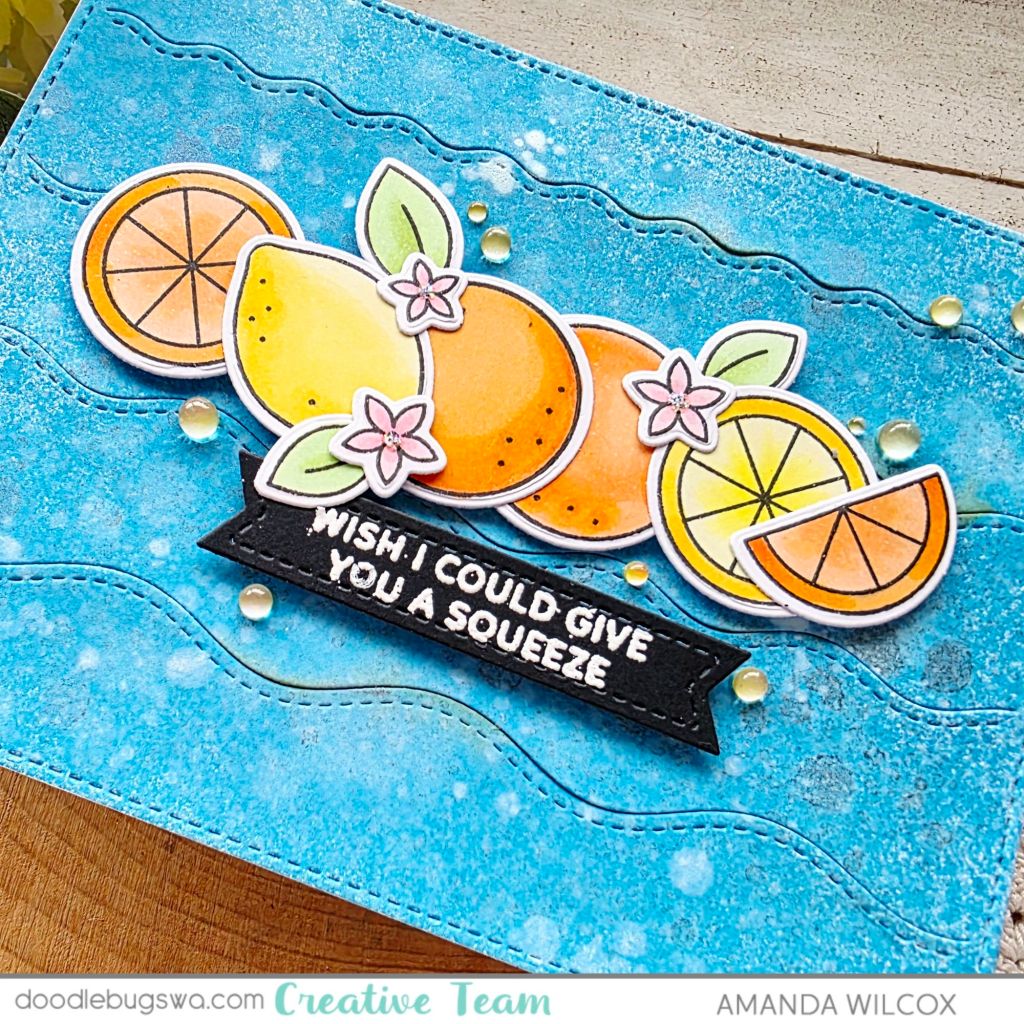
First I pulled out the Pretty Pink Posh Citrus stamp set and stamped a whole bundle of each image in the set. I colored everything with copic markers in combos of oranges of lemons on my mind. Then I used the coordinating dies to cut everything out and started playing around with arrangements. I landed on this line of fruit vibe and used liquid glue to adhere them all together.
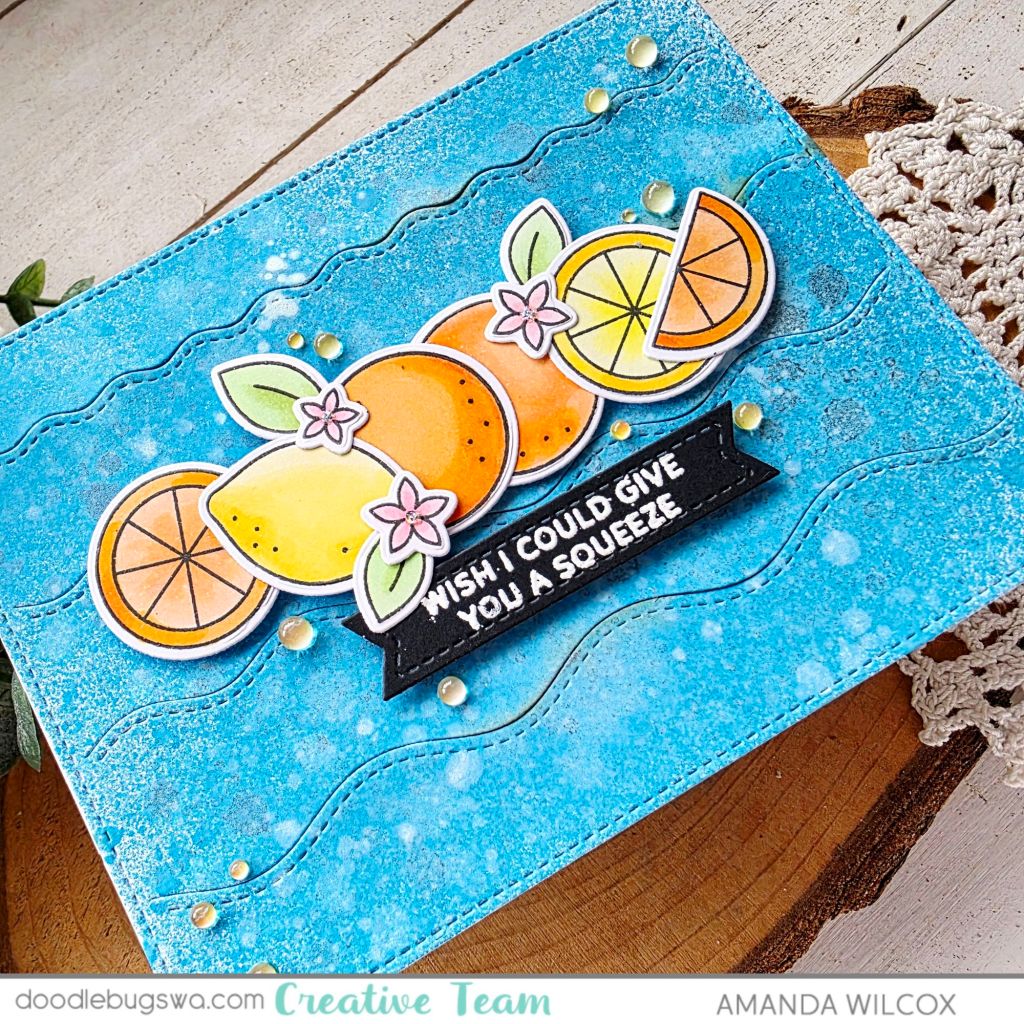
With this much direction I knew I wanted a vibrant, fun background so I pulled out this Lawn Fawn Stitched Wavy Backdrop. I spritzed distress oxide sprays on a panel. Let it dry and then spritzed it with water and watered down white paint. When that layer dried, I cut it out with the backdrop die.
Finally, I glued the background to a card base, then popped the strip of citrus up with foam squares. Last, I stamped and heat embossed a sentiment in the Citrus stamp set on black cardstock and die cut it with a Pretty Pink Posh Sentiment Strip die. This is also popped up with foam strips.
For finishing touches I added stardust Stickles to the flower centers and glued a scattering of yellow baubles I had in my stash.
I appreciate you sharing your time with me. Have a fabulous day!