Happy New Year everyone! It’s been a while since I’ve been on here but I plan to remedy that getting back into the swing of things in the new year. I hope your holidays were wonderful and you’re recharged and ready to start anew.
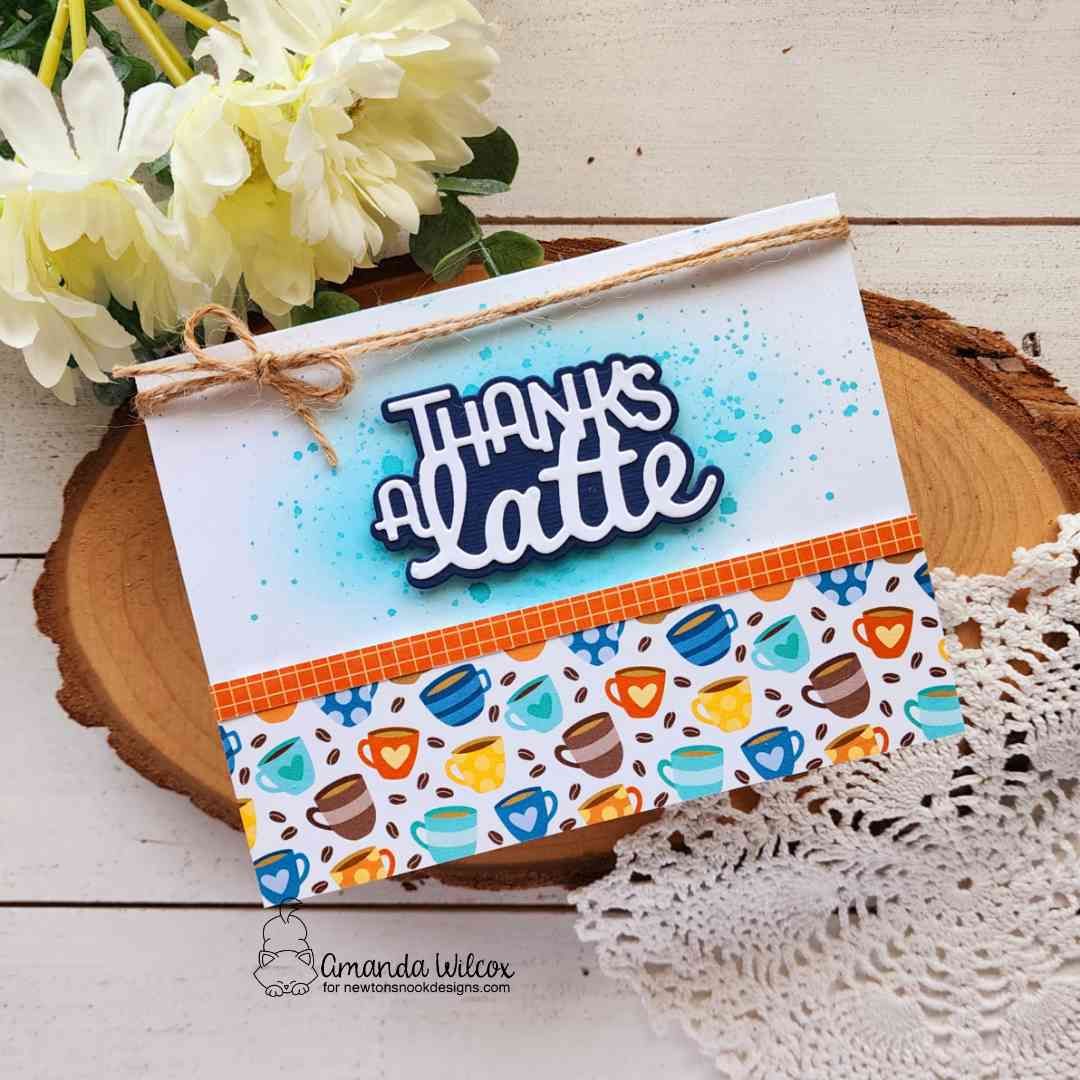
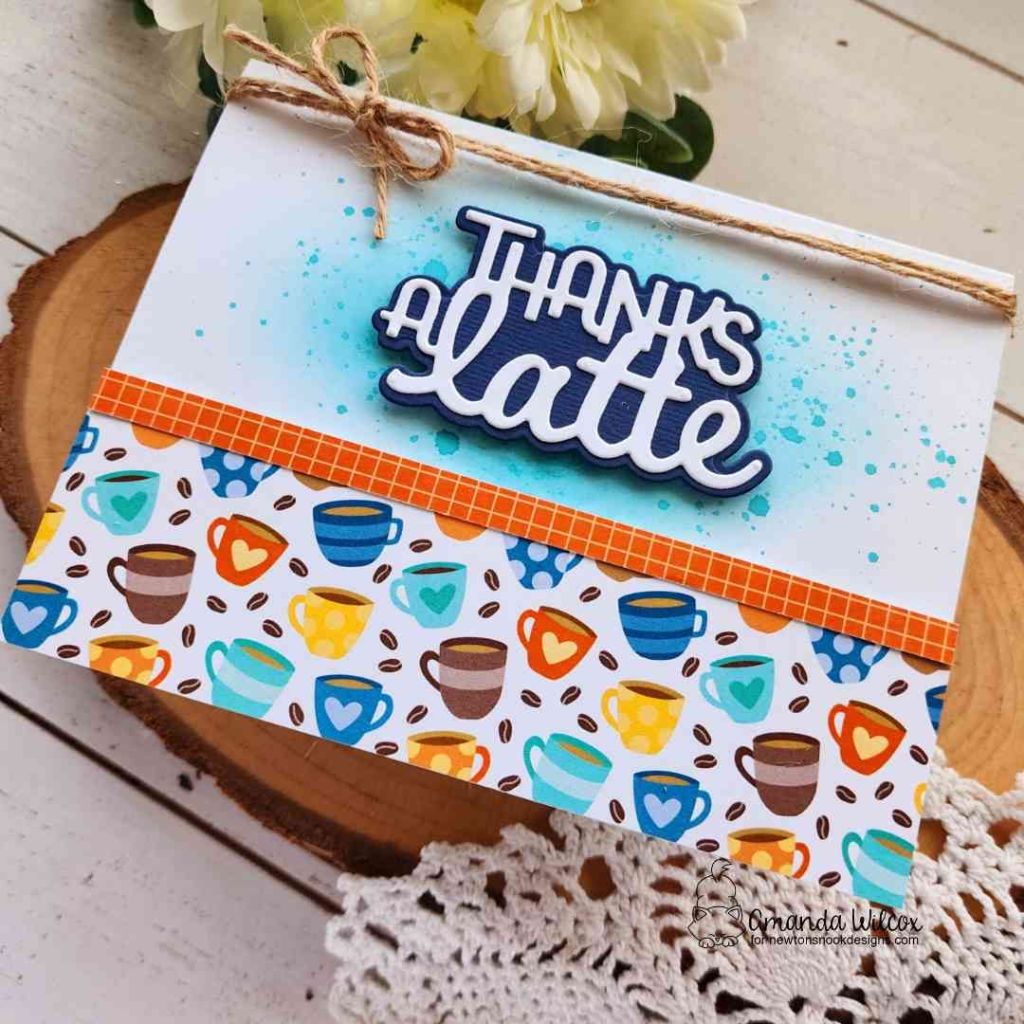
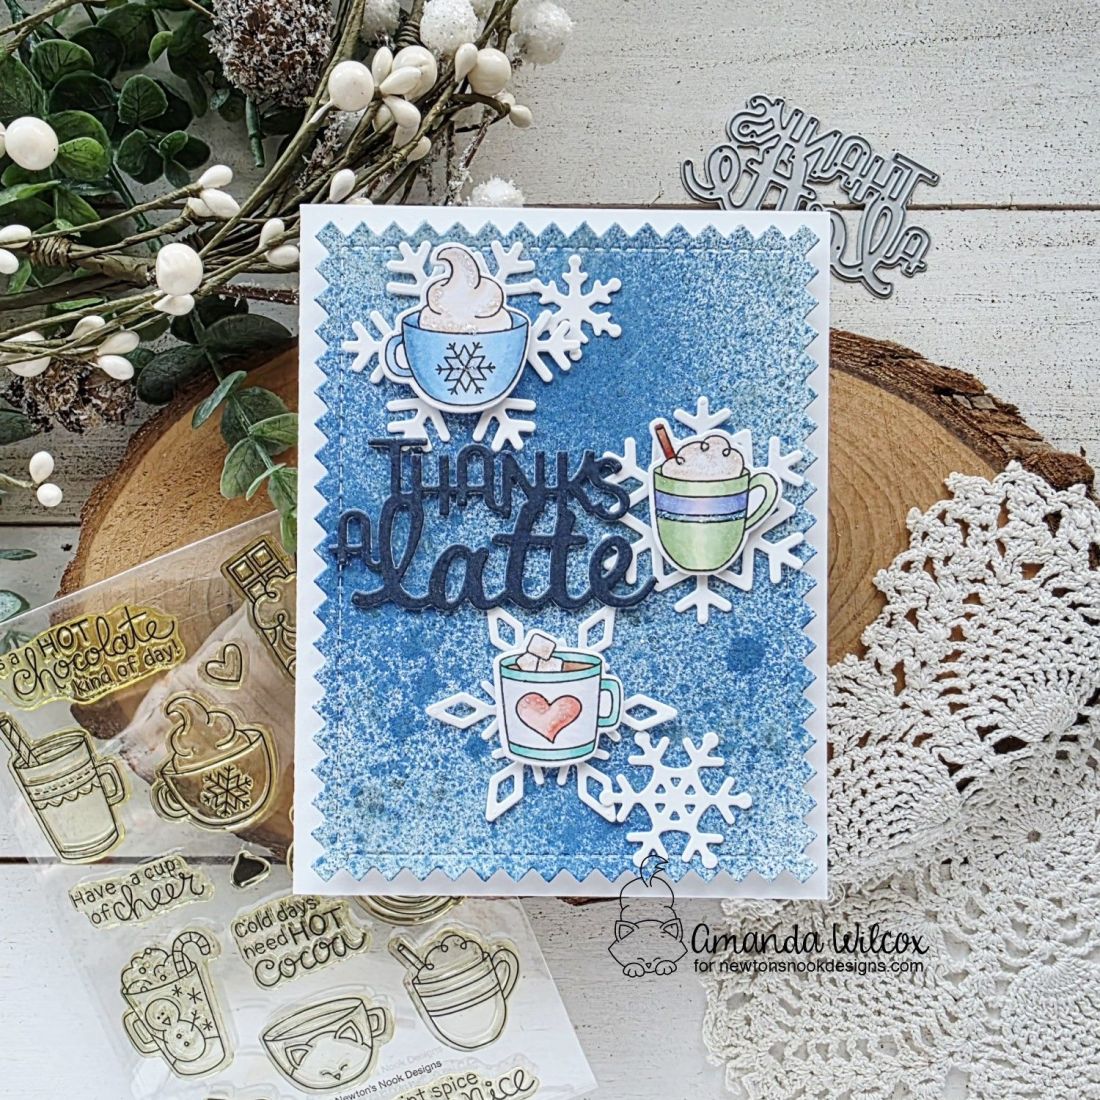
Today I’m on the Newton’s Nook blog with a little winter thank you, which I find great to have in my stash after the holiday gift giving.

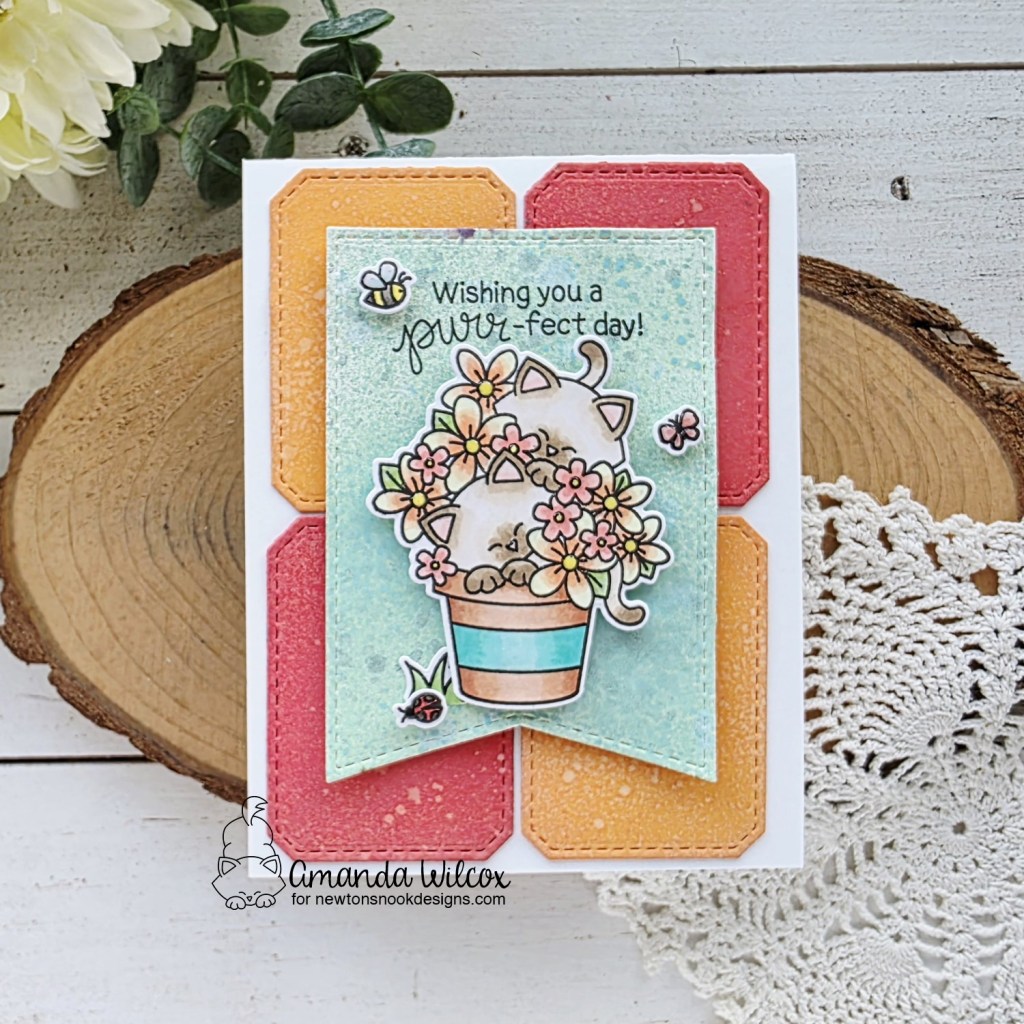
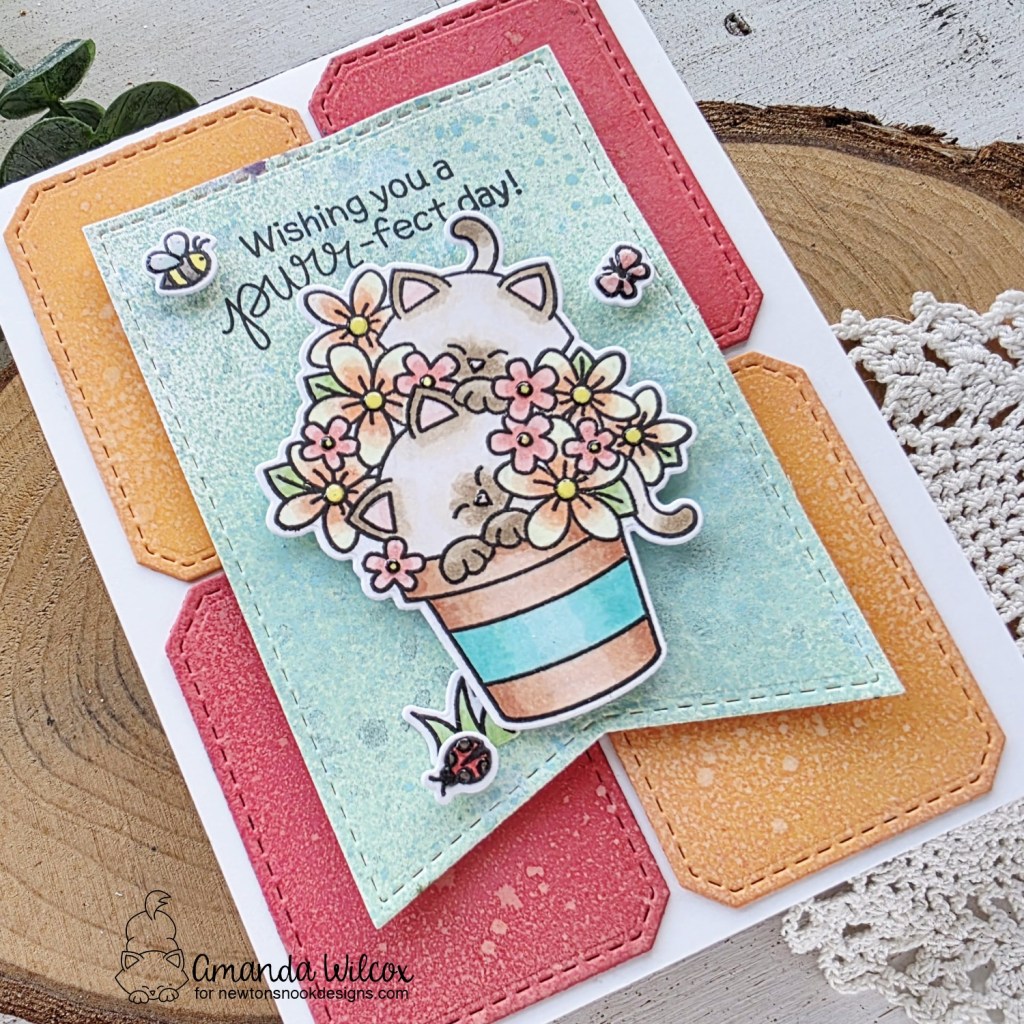
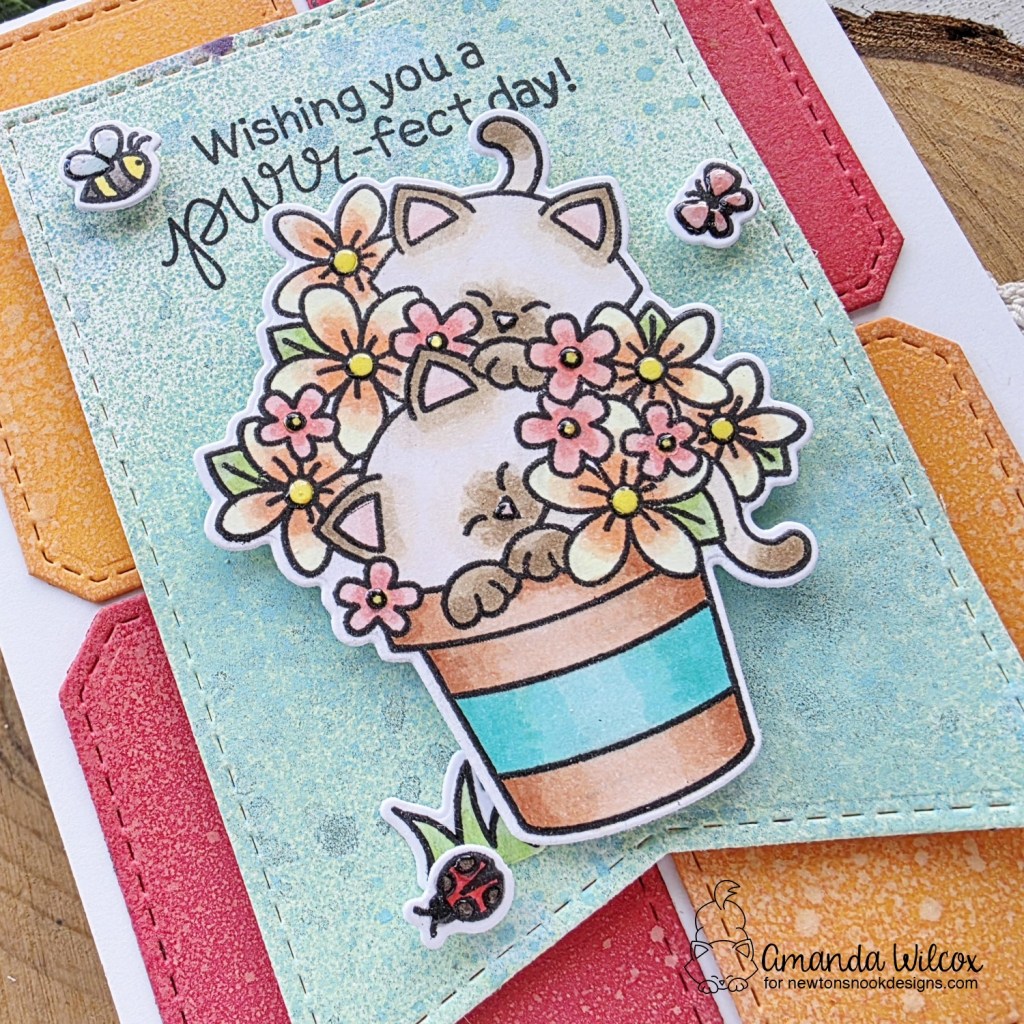
I created this background with white cardstock and a few different distress oxide sprays and distress spritz sprays. The oxides give great base color and the spritz give that perfect shimmer and shine in the light. Once the panel was dry I used the largest Newton’s Nook Frames & Tags die to cut the panel down.
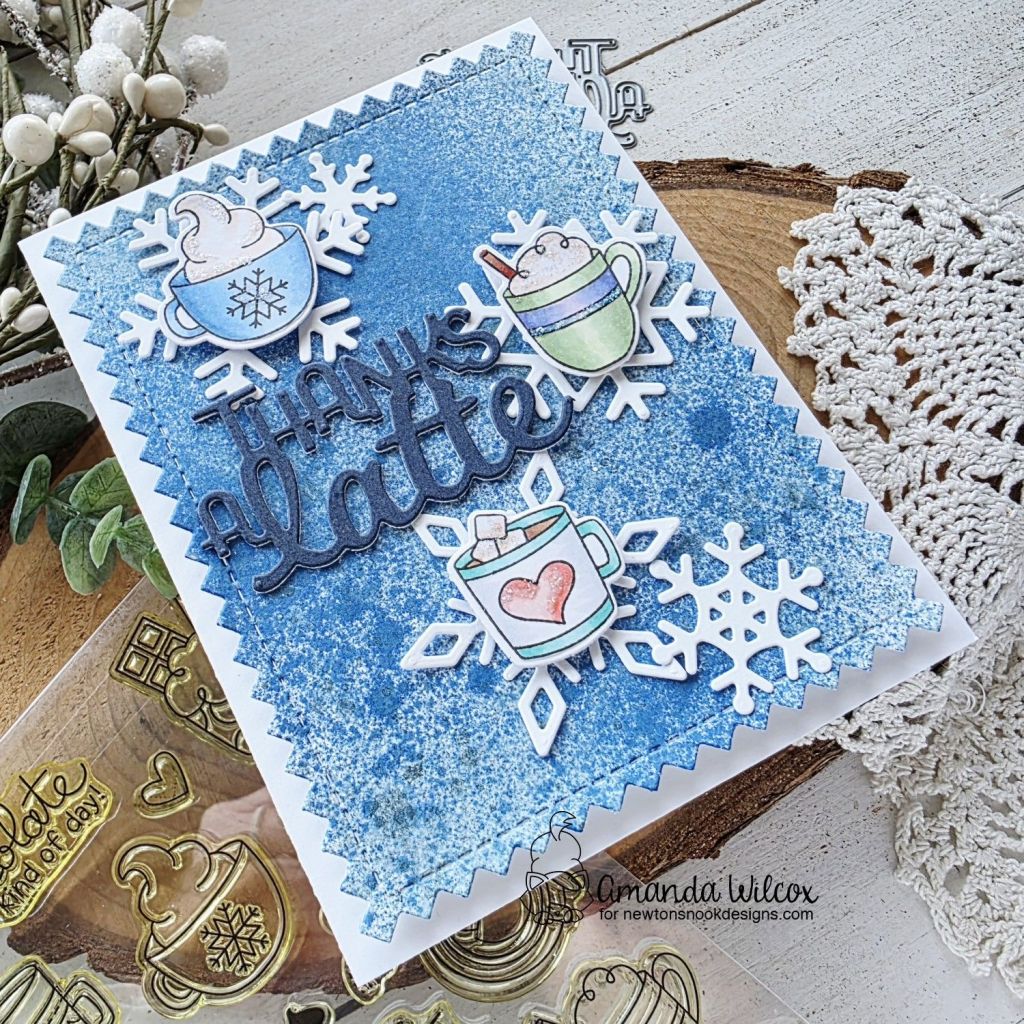
Next, I die cut some of the Snowfall snowflakes and chose cute mugs from the Cup of Cocoa set to go in the center of each one. I stamped and colored those with copic markers before using the coordinating dies to cut each one out.
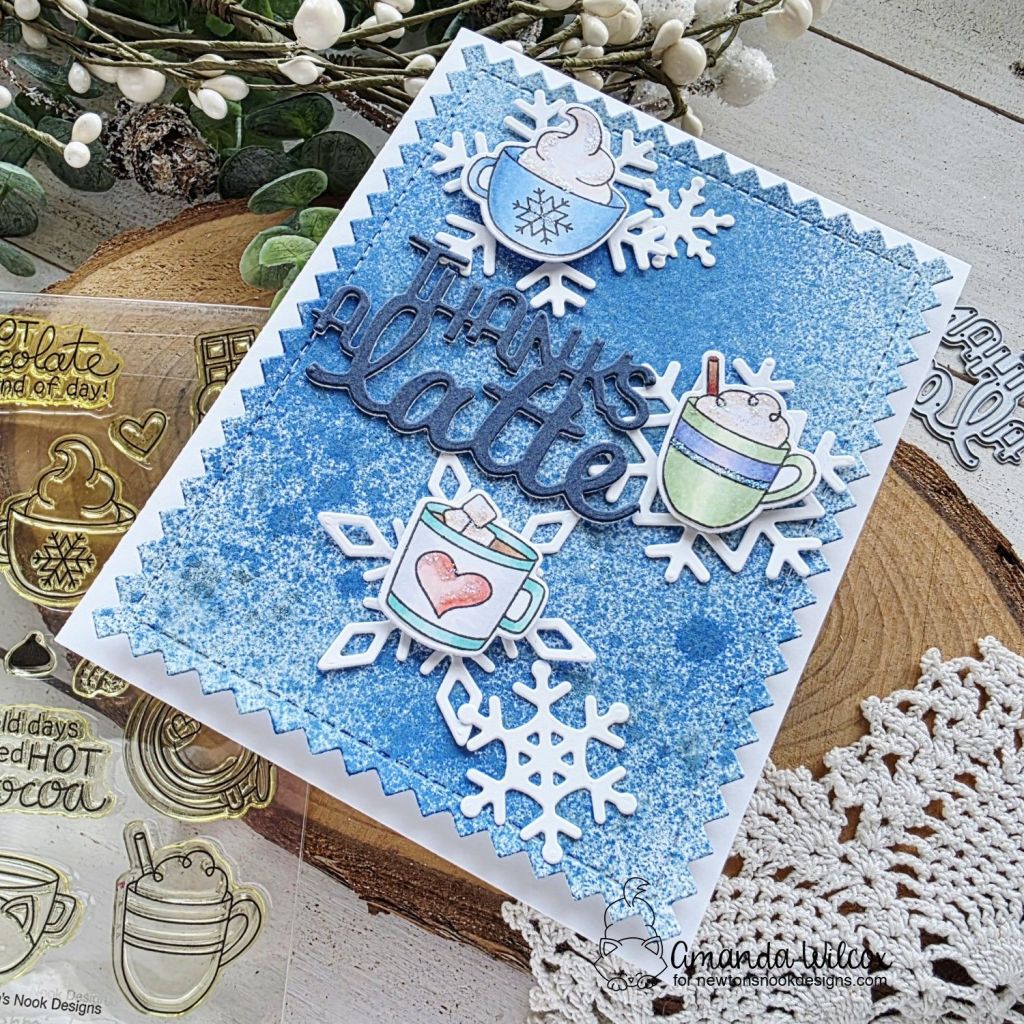
I adhered the mugs to the snowflakes with a foam square and arranged them scattered on the distressed background panel. Then I cut the sentiment “thanks a latte” from white cardstock three times and blue cardstock once, using liquid glue to adhere all the layers together.
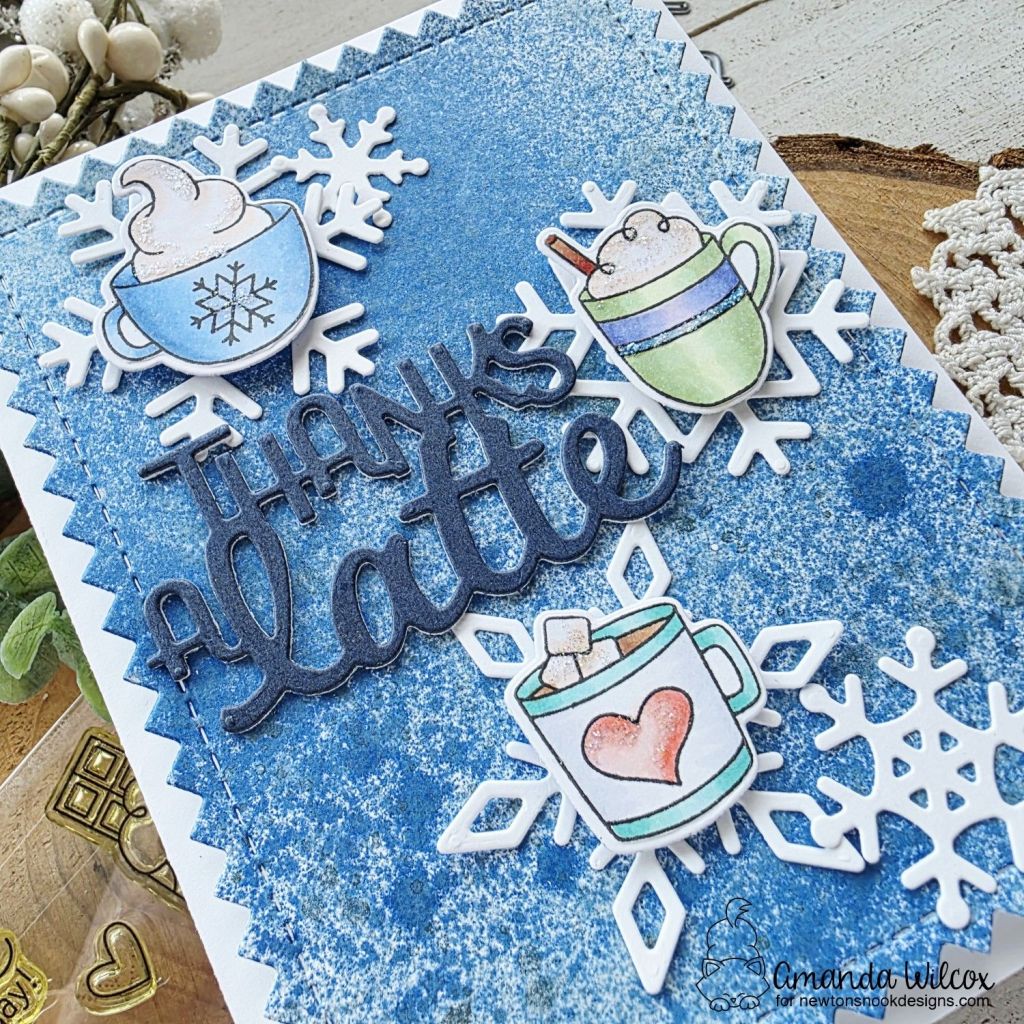
Last, I added the whole panel to a white card base with foam tape before finishing the design off with stardust Stickles on various parts of each mug. I love a little sparkle!
Products used:
Frames & Tags dies
Snowfall dies
Thanks a Latte dies
Cup of Cocoa stamps and dies
Distress Oxide Sprays – prize ribbon and speckled egg
Distress Spritz Spray – broken china
Stickles – stardust
Liquid glue
Foam squares and tape
I appreciate you sharing your time with me. Have a fabulous day!