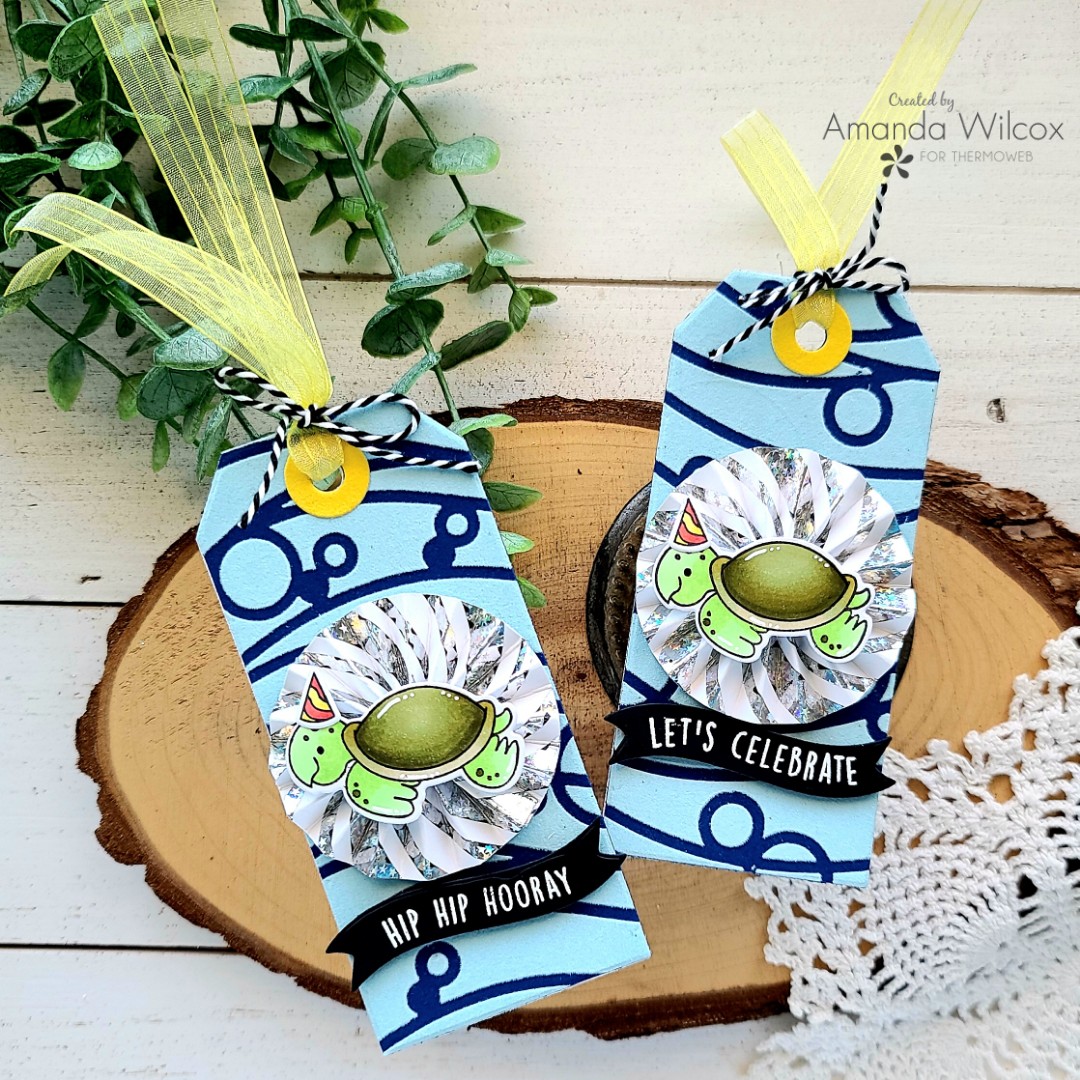
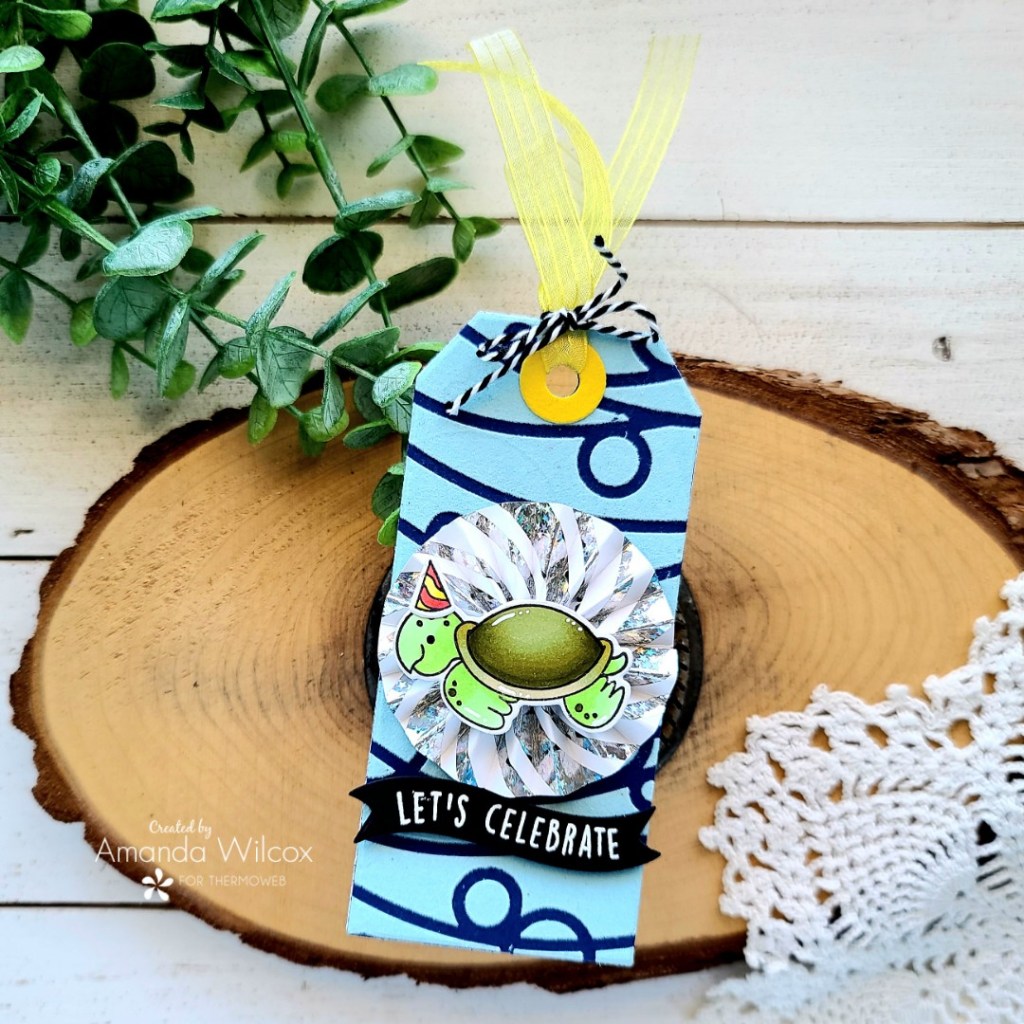
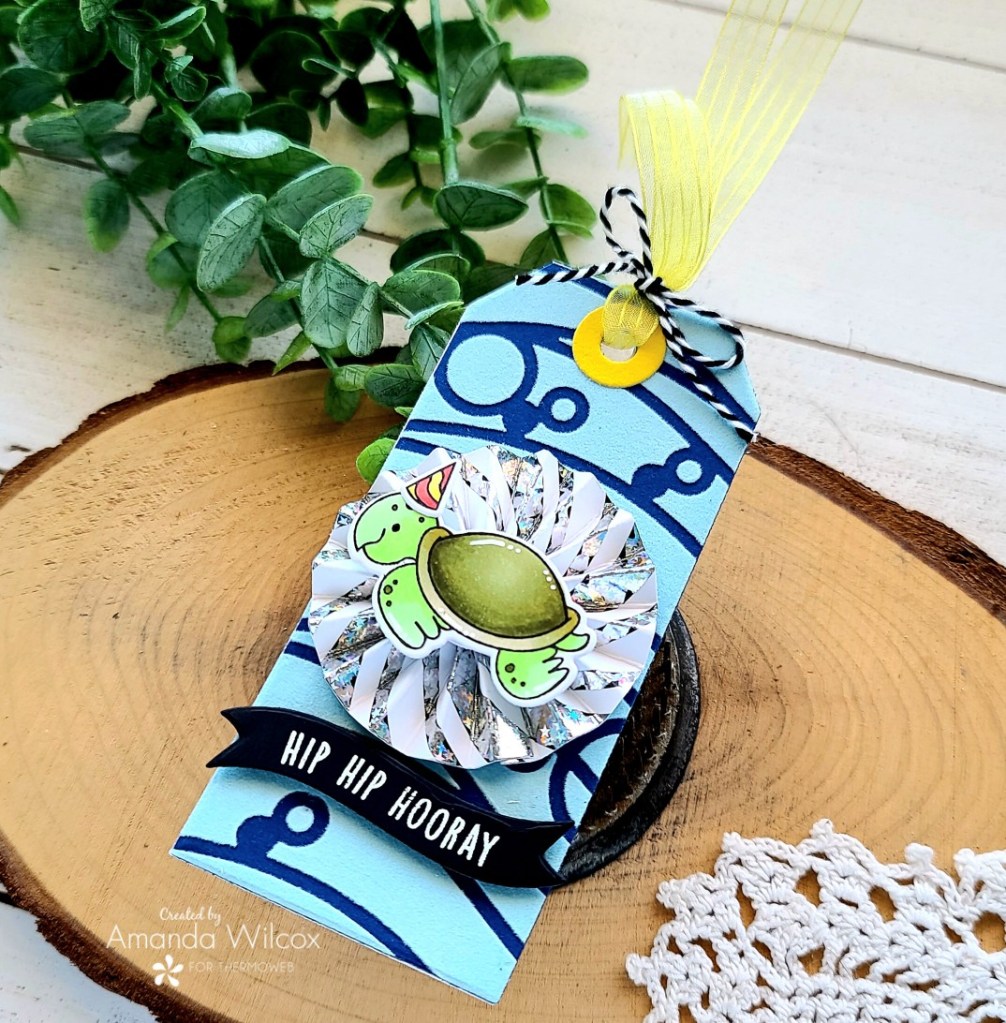
Hey crafty friends! I’m over on the Thermoweb blog today sharing a couple of fun gift tags featuring Deco Foil Flock transfer sheets and a new way to use your slimline toner sheets!
The panel I used for my flocking was perfect to die cut 2 of these Reverse Confetti tags out of so I just ran with it and made a set of fun tags for the next time I have gifts to give.
I absolutely LOVE that I was able to create these fun rosettes with the slimline toner card fronts too! Each card front will give you 4 rosettes!!! Such a fun addition to the design.
Be sure to head over to the Thermoweb blog for all the details and a list of products I used to create these awesome tags!
I appreciate you sharing your time with me. Have a fabulous day!
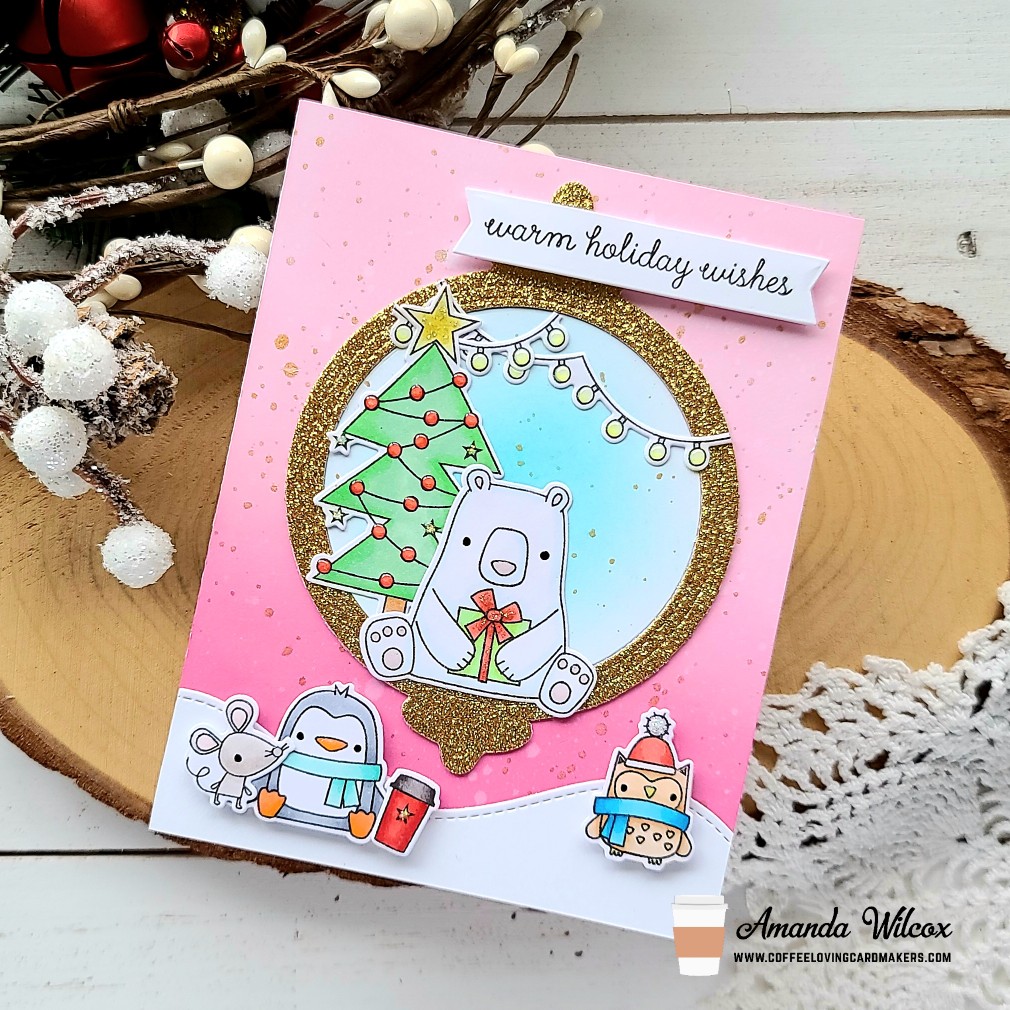
Hello everyone! I’m back with another entry into the Coffee Loving Cardmakers Fall | Winter Hop! This time I’m playing with super sponsor Reverse Confetti stamps and dies, paired with some fun distress oxide ink blending and that fabulous messy watercolor splatter! You know I love getting inky and making a mess! It’s so fun!
I started my card by stamping out images from Polar Party and Coffee and You from Reverse Confetti and colored them with my copic markers. I used the coordinating dies from each set to cut the images out and played around with different design ideas. Once I decided what I was doing…(In reality this went from a double-sided ornament to a card.) I cut a white panel down to A2 size and inked it up with spun sugar and picked raspberry distress oxide inks. I spritzed the panel with water and flicked gold watercolor on it as well.
Next, I die cut the Ornament Confetti Cut from gold glitter paper and white cardstock. I adhered the frame layers together and put the gold circle cutout away for another day. I took the white circle and inked the center up with Lawn Fawn peacock ink and splattered it with gold watercolor too. I also cut a little white snowy hill for my critters with a Lawn Fawn Stitched Hillside Border.
Moving on to assembly…I adhered the inked panel to a white card base and then added the snowy hill to the bottom of that. I adhered the ornament frame and inset circle above the snowy hill and then started adding my images. The ones in the ornament and adhered directly to the card front with liquid glue and the ones on the hill are popped up with foam squares.
Last, I stamped a sentiment from Polar Party and cut it out with a Pink & Main Large Sentiment Strip die and popped it up with foam squares too.
Moving on to finishing touches, I added glossy accents to all of the lights, beaks, noses and feet. Then I added black glaze pen to the critter’s eyes and some unicorn Stickles to the stars, hat pompom and ribbon on the package.
I’m so happy with how this card turned out! It’s so fun and happy! It will be perfect to share for the Christmas season!
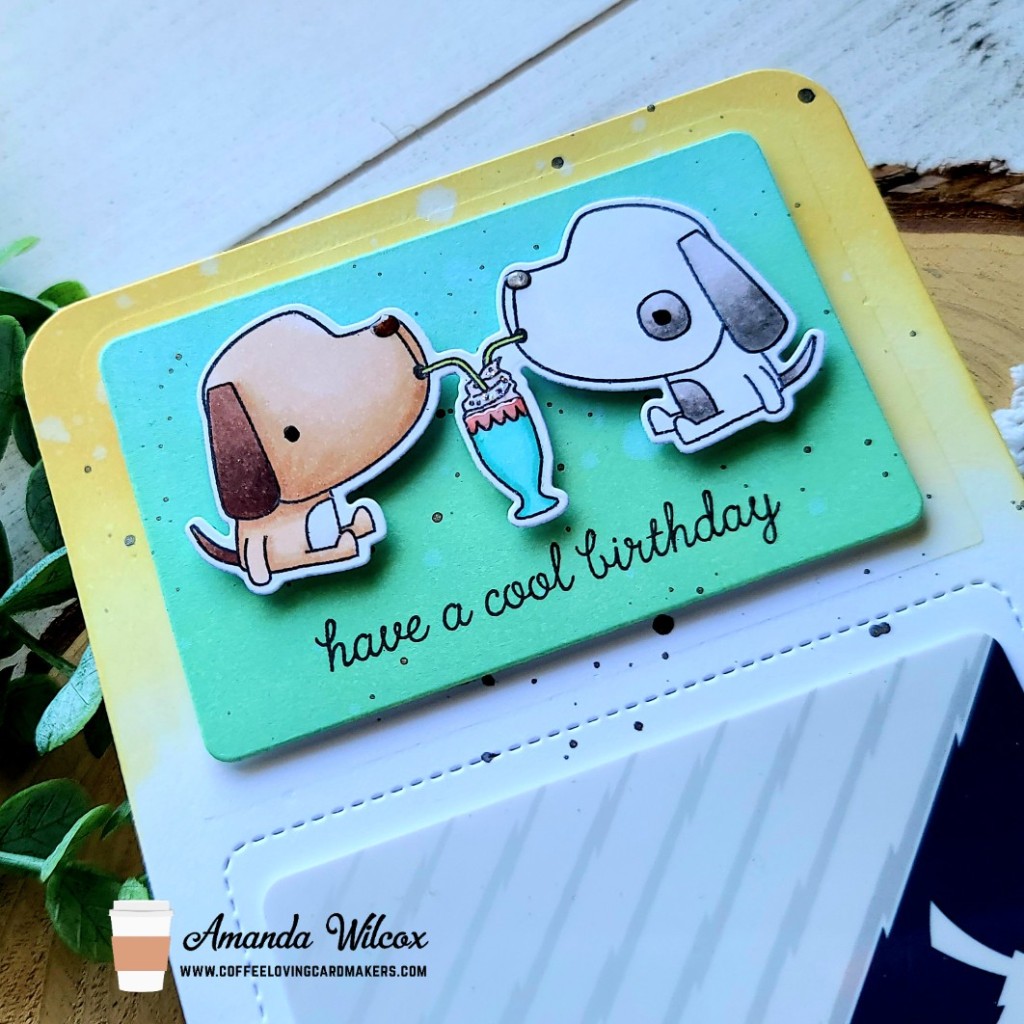
Hi there, it’s Tuesday Tea on the Coffee Loving Cardmakers blog today. I’m sharing a bit of a different card today that can be personalized and changed for so many themes and occasions. It features goodies from Reverse Confetti which I just adore!
For this card, I die cut the Reverse Confetti gift card holder from white cardstock. Then I inked up the top portion with scattered straw distress oxide ink. I also die cut the rectangle that comes in the die set from white cardstock and inked it with cracked pistachio and tumbled glass distress oxide inks. This additional die could be used as a scene setter like I have here or you could create a window with it as well! This card would be awesome as a shaker, don’t you think?
Anyway, back to this card…I spritzed the panels with water and flicked black paint on them for some added interest and texture. Once that was dry, I stamped a sentiment from Ice Cream Social on the smaller panel.
Next, I stamped and colored those cute pooches sharing a puppucino with my copic markers. I used the coordinating dies to cut them out and started assembling everything.
To start, I glued the gift card holder panel to a piece of white cardstock and used my scissors to trim off the corners. This way I can write my message on the back and it gives the whole thing more stability to hold the gift card. Then I added foam tape to the small panel and centered it in the top portion. I added foam squares to my image and placed them above the sentiment.
Finally, I moved on to finishing touches like black glaze pen on the eyes, glossy accents on the noses and cup and a little star dust Stickles on the whipped cream. I slid my Dutch Bros. gift card in the slots and this gift is ready to give!
What’s the go-to coffee place in your area? The kiddos seem to like Dutch here where I prefer a local place called Java Crew.
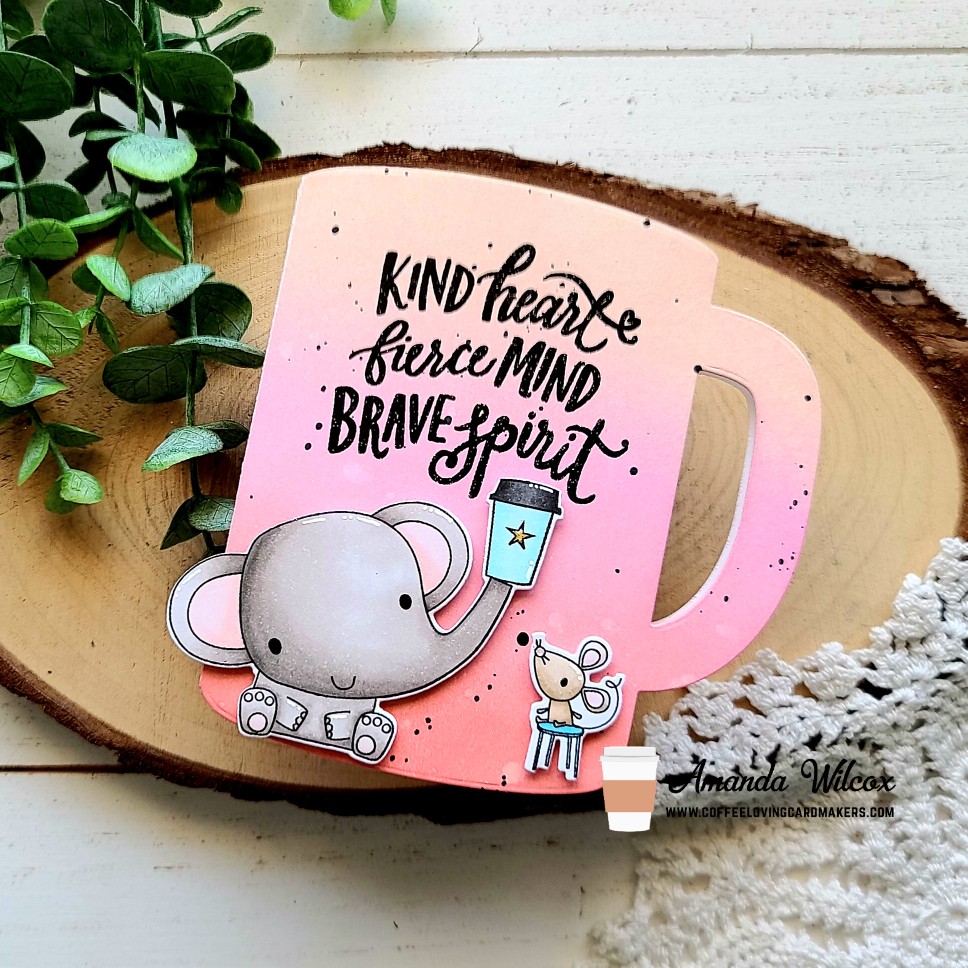
Hey friends! It’s Tuesday Tea with Twiddler’s Nook on the Coffee Loving Cardmakers blog today. I have a fun coffee mug shaped card to share with you featuring a new distress oxide ink blend combo that I LOVE paired with some Reverse Confetti cuties!
Most of the time I ink blend and then die cut but today I cut out my coffee mug first and blended distress oxide inks in abandoned coral, kitsch flamingo and tattered rose. Isn’t this mix just amazing?!? I love it! Then I splattered some black acrylic paint on the whole panel and set it aside to dry.
I stamped and colored images from the Reverse Confetti Coffee and You stamp set. I used the coordinating dies to cut them out and set them aside. Now that my panel was dry, I stamped and heat embossed a sentiment from My Tribe in black. I added foam squares to the elephant and mouse on the stool and added them to the front.
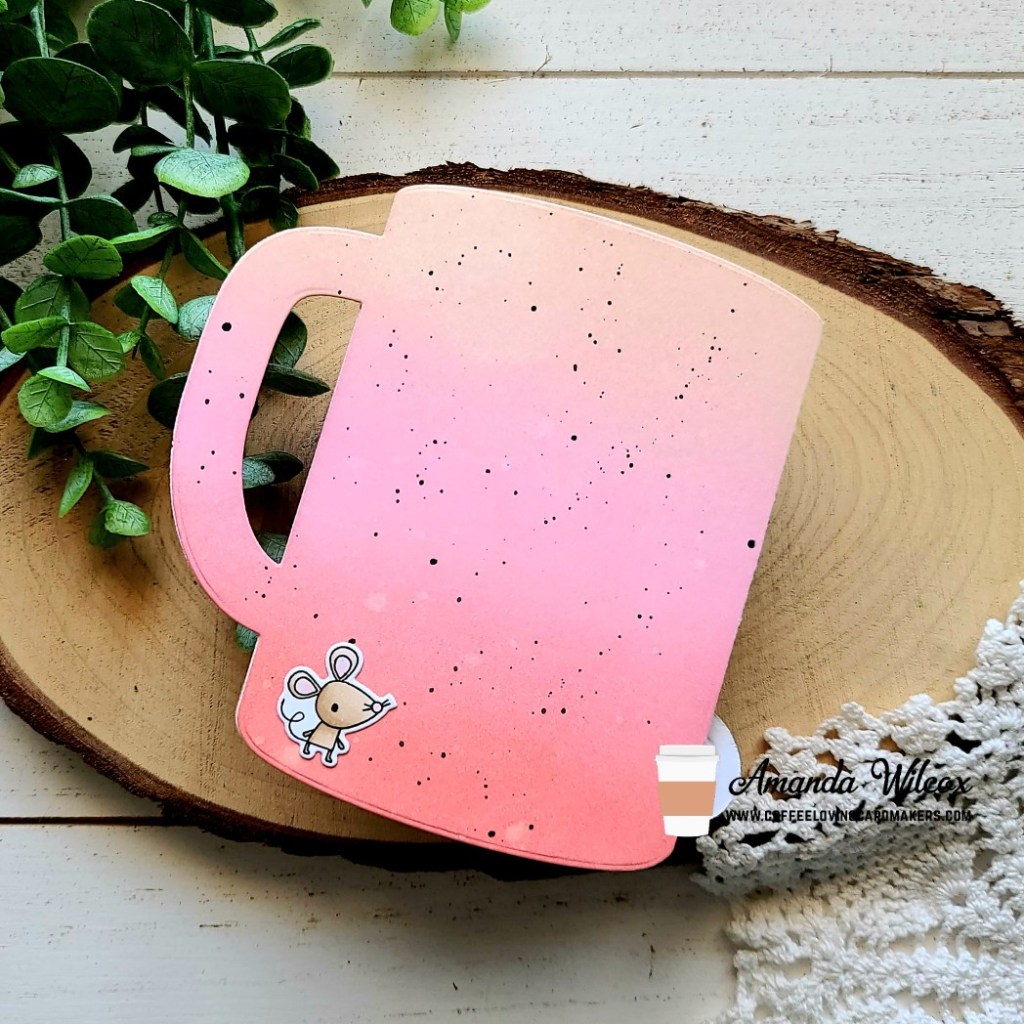
And then, for grins, I added the other mouse directly to the back of the card. It makes me giggle.
For finishing touches, I added white gel pen accents to the images, black glaze pen to their eyes and glossy accents to things like the mouse’s nose, elephants feet and the star on the coffee cup.
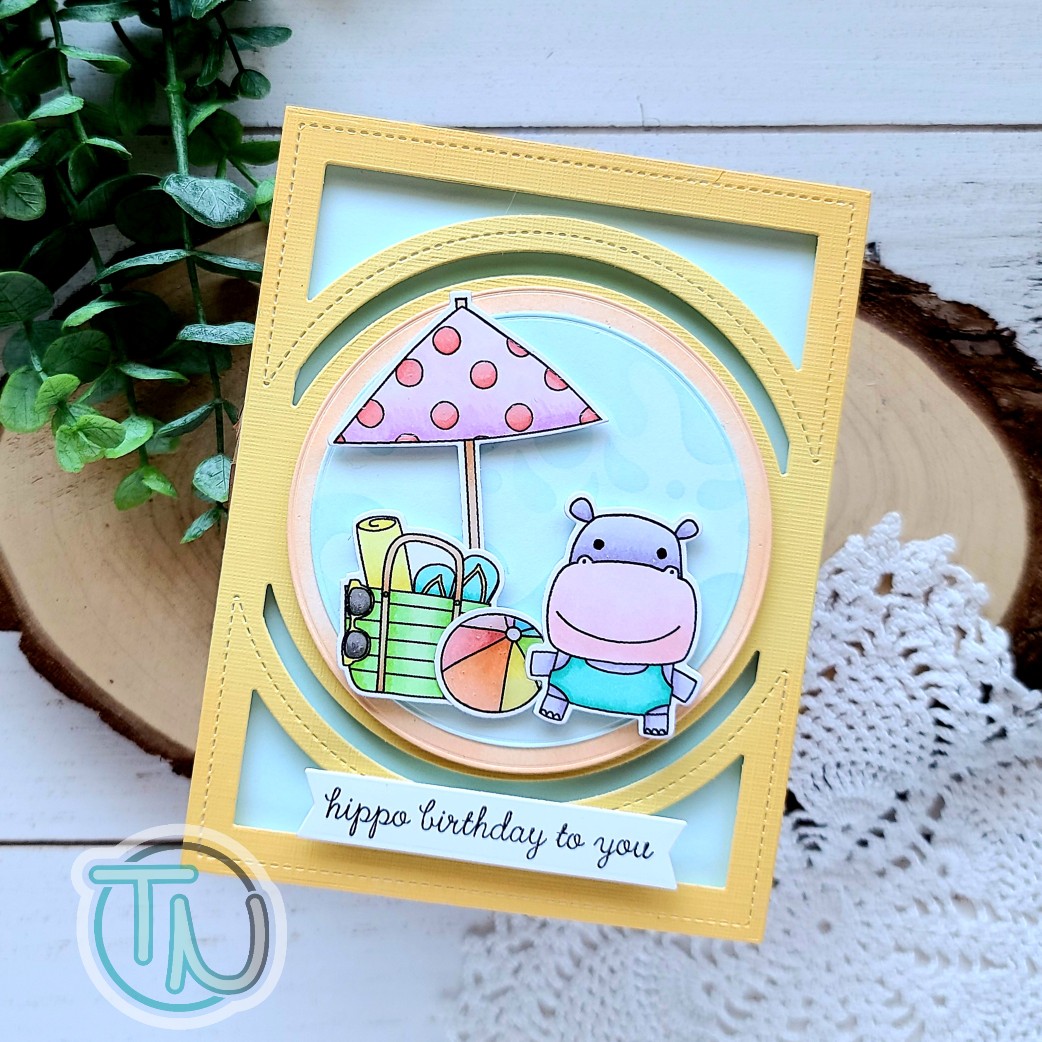
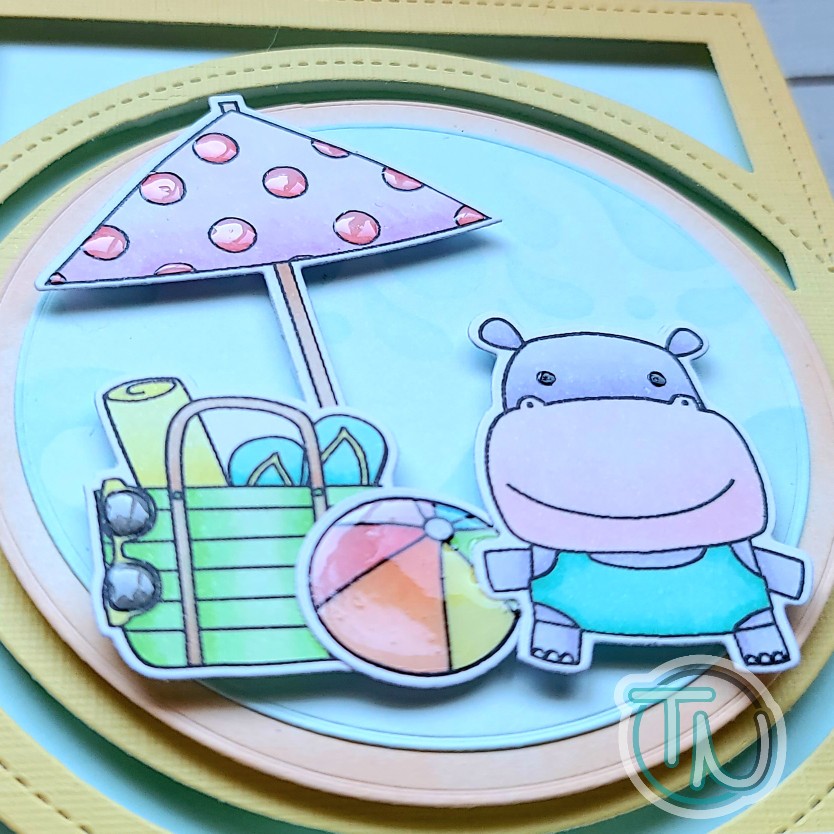
Hi again! I’m back today with a really fun Reverse Confetti birthday card celebrating all this sun we’ve been having where I’m at.
For today’s card, I started by stamping the images I knew I wanted to use from Hippo Pool Party and colored them with my copic markers. Then I used the coordinating dies to cut them out and switched gears to figure out my background.
I also knew that I really wanted to create a little scene in the middle of the Center Circle Cover Panel so I pulled that out and ultimately cut it from yellow cardstock. Then I used my Trinity Stamps embossed edge circle stack to cut a couple circles that fit inside. The larger one from white which I inked up orange, and another from light blue which I inked up with the Newton’s Nook waves & splashes stencil for a little texture.
Moving in to assembly, I cut another blue panel to cover my white card base that matches the blue waves circle. I popped the frame up with foam tape. Then I glued the circles together and added them to the frame with foam tape as well. Last, I added my images with a combination of foam squares and liquid glue. I stamped a wonderfully punny sentiment from the Hippo Pool Party set and cut it with a Pink & Main sentiment strip die and added it to the card front with foam squares.
I finished my card off with some glossy accents on all the necessary places, like the beach ball, glasses, umbrella dots and, last but not least, the hippo’s eyes.
This is such a fun card and just perfect for summer birthdays that you might have coming up very soon!
I appreciate you sharing your time with me. Have a fabulous day!
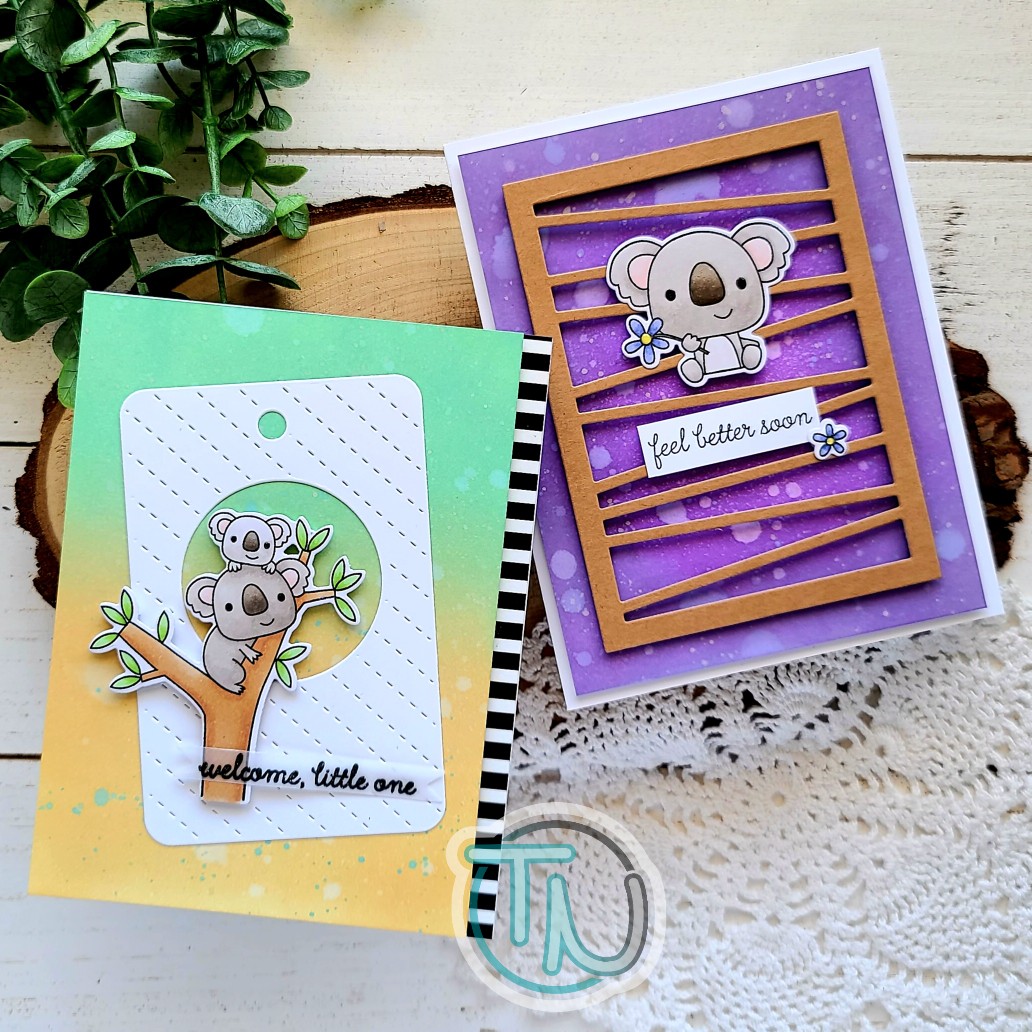
Happy Friday everyone!!! It’s super sunny here and we’re looking at fabulous weather all weekend. I hope most of you can relate and get to enjoy it! Today I’m sharing a couple of adorable cards I made to stock my stash for occasions that I don’t need often but sometimes don’t have time to make a card for either. This adorable Reverse Confetti set called Bear Hugs is super versatile with the sentiments included but the images are also great for just about any other sentiment you might want to pair with it too!
I had so much fun, once again, getting super inky to create these great backgrounds and am absolutely in love with all the cover plate background dies that Reverse Confetti has to offer. Today I used the Wonky Stripes Panel and See Through Tag to help ground my images. I love them both! So many options!
For this first card, I blended cracked pistacchio and scattered straw distress oxide inks on a panel and the spritzed it with water. Then I flicked watered down ink from both colors over the panel too. Setting it aside to dry, I die cut the see through tag from white card stock, stamped and colored my images, and then used the coordinating dies to cut them out.
I stamped and heat embossed my sentiment, then used a Trinity Stamps banner die to cut it out. Moving on to assembly, I added some black striped washi tape to the edge of a white card base. Then I trimmed the inked panel down to 4×5.5 inches and added foam tape to the back, adding it to the card base so the stripes showed on the right side. I used liquid glue to adhere the tag to the inked panel and popped my image up with foam squares. Last, I smeared a little liquid glue on the back of the vellum sentiment banner and adhered it to the tree trunk.
For finishing touches on this sweet card, I added glossy accents to the koala eyes and noses. I love that beautiful gender-neutral color palette for a baby card. Perfect for people not finding out what they are having or maybe a congratulations card for someone who just found out they are expecting.
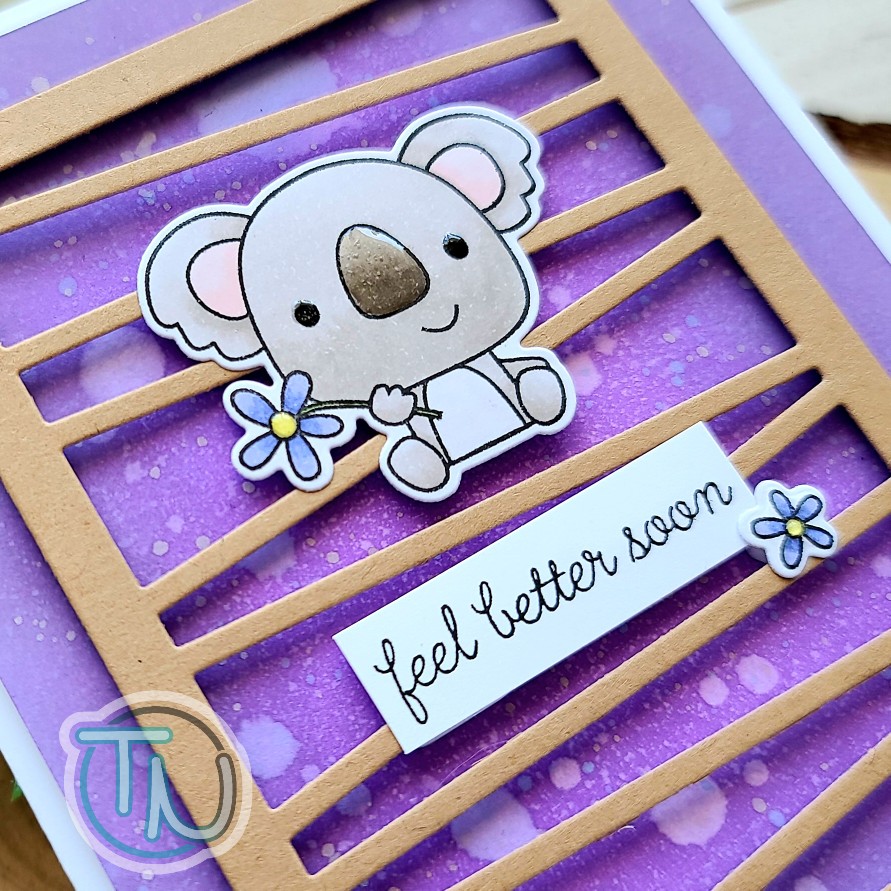
Get well cards are often the ones I don’t have time to make just when I need one so it’s wonderful to have something I love to share ready to go.
For this card, I blending wilted violet and seedless preserves distress oxides on a panel and spritzed it with water. Then I flicked some watered down milled lavender on the panel for a little color contrast in the speckles. I set the panel aside to dry and die cut the Wonky Stripes Panel from kraft cardstock and added foam strips to the back of it.
I stamped and colored my image with copic markers, then used the coordinating dies to cut it out. I stamped a sentiment from the set and trimmed it into a strip. Now, we can assemble everything. I trimmed the inked panel down to 4×5.25 inches, added foam tape to the back and popped it on a white card base. I used liquid glue to added my image and sentiment to the wonky stripes panel and then put more foam squares behind them for added stability. I removed the release paper and put it in place next.
Moving on to finishing touches for this card, I added glossy accents to the koala’s eyes and nose again, plus the flower centers this time.
This set is just too cute and I’m so glad that I finally snagged it after eyeing it for so long.
I appreciate you sharing your time with me. Have a fabulous day!
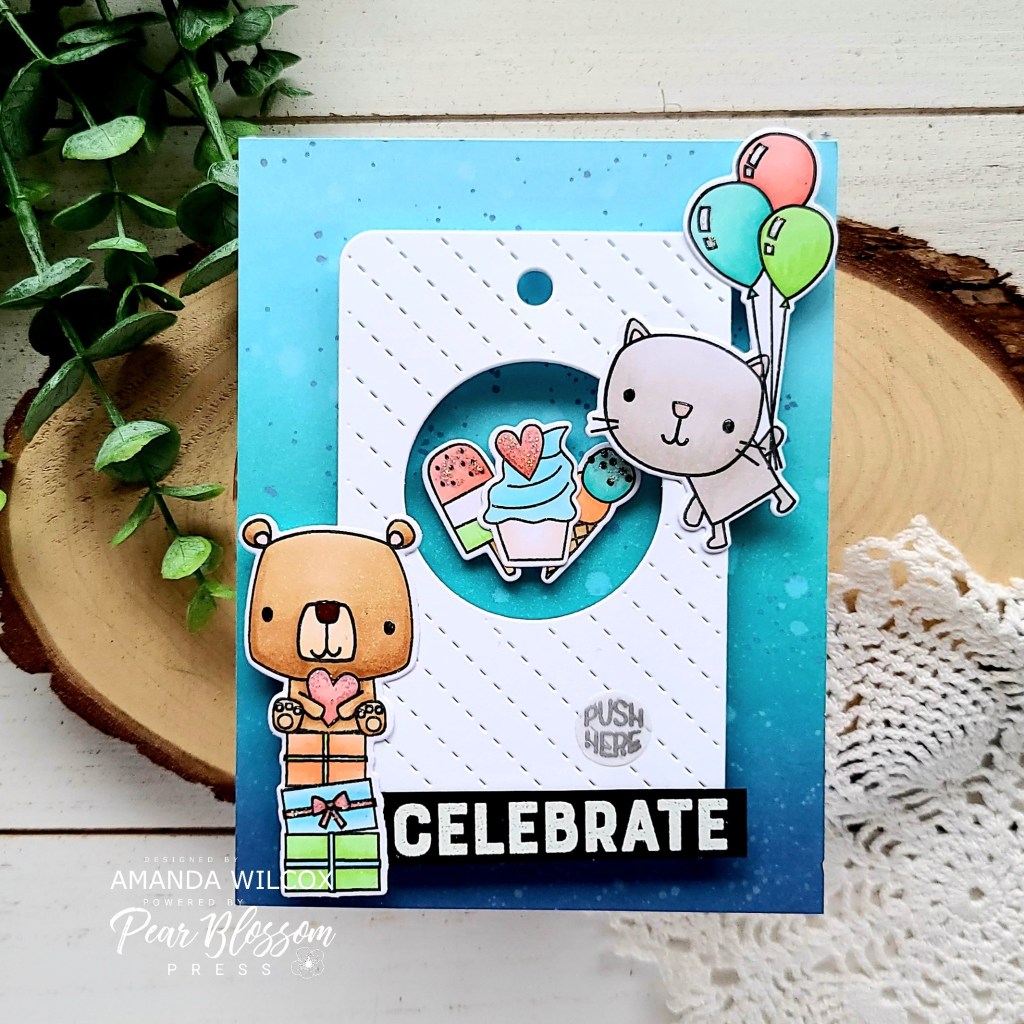
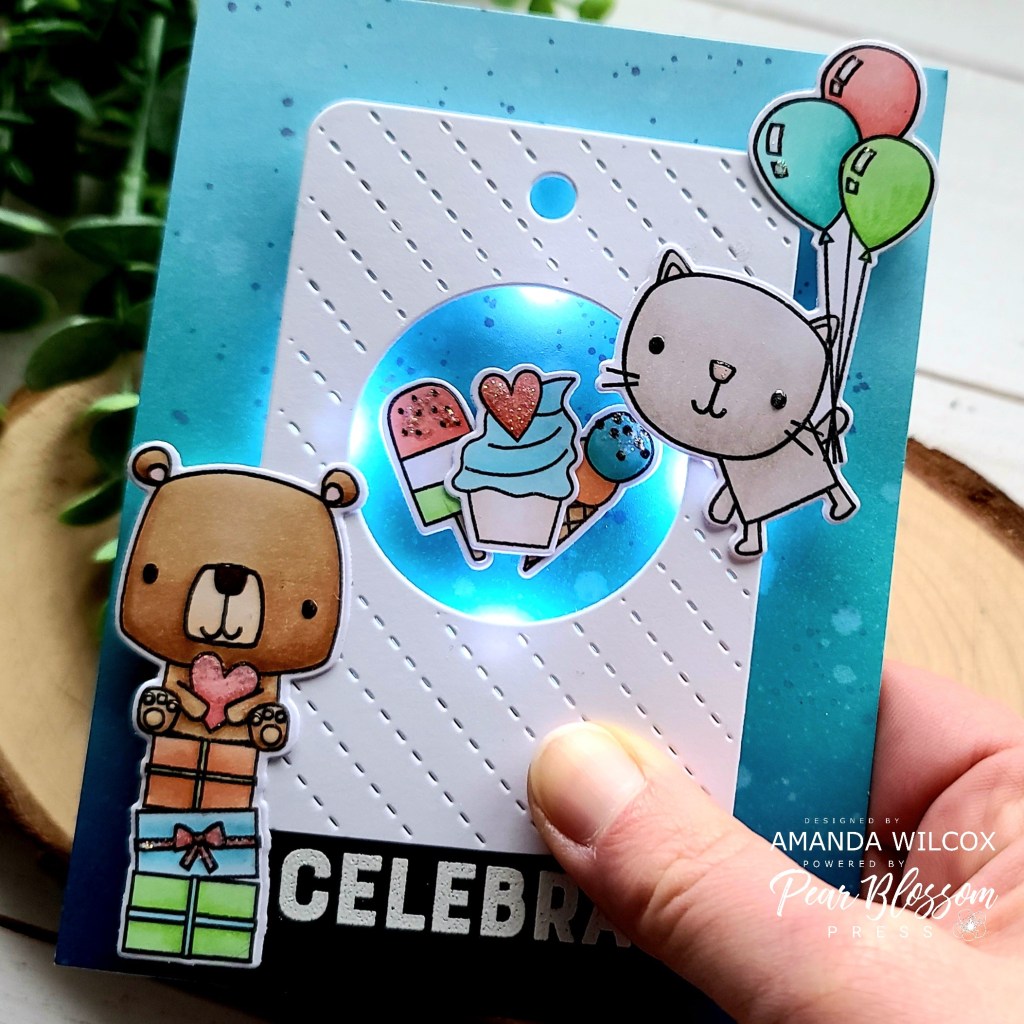
Hi everyone!!! I’m so excited to be featured as a guest designer for Pear Blossom Press today. I have always loved their products but they just keep getting better! Today I’m sharing a fun way to use the new halo lights.
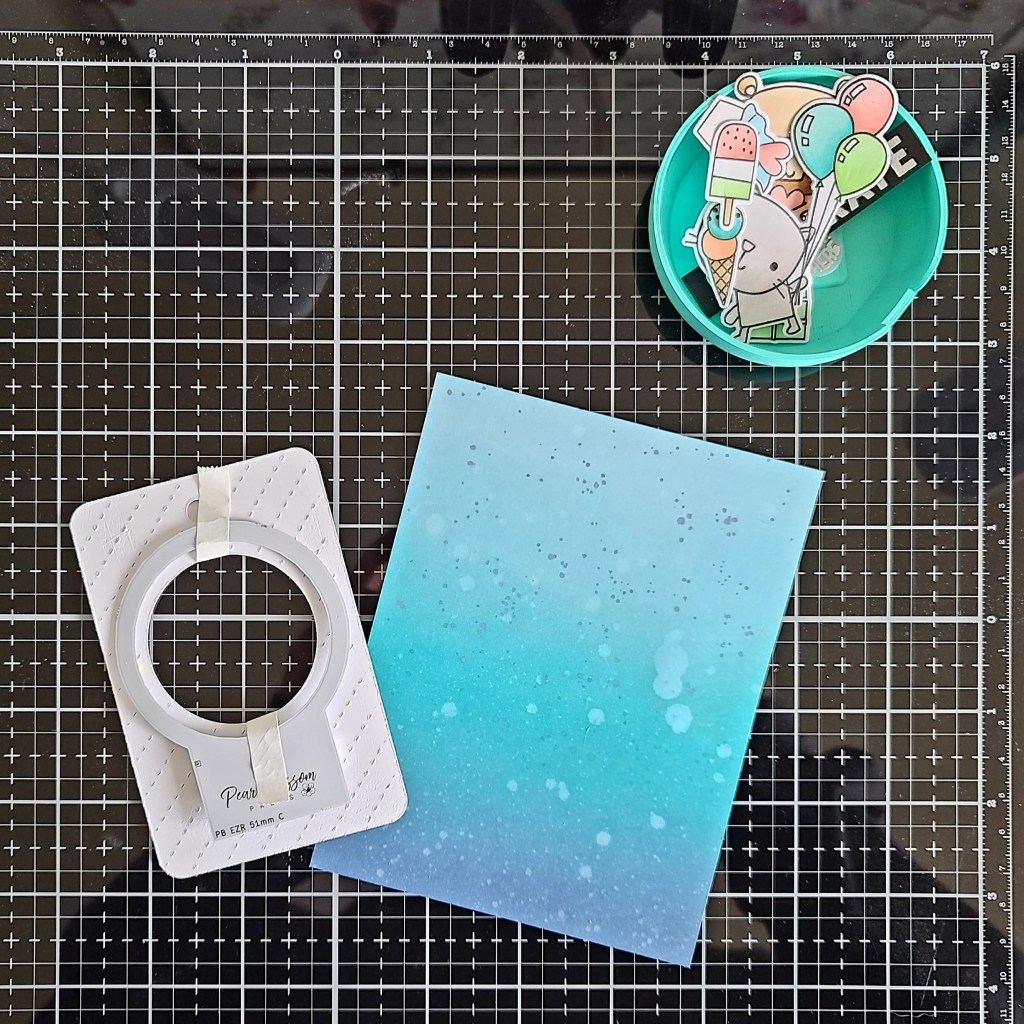
Here’s a look at my finished card. I have broken things down just a bit to show just how easy these lights are to use! Let’s get started!
I stamped and colored images from Reverse Confetti Ice Cream Social and Party Pals stamp sets. Then I used the coordinating dies to cut them out. I also stamped and heat embossed a sentiment from Party Pals and trimmed it into a strip.
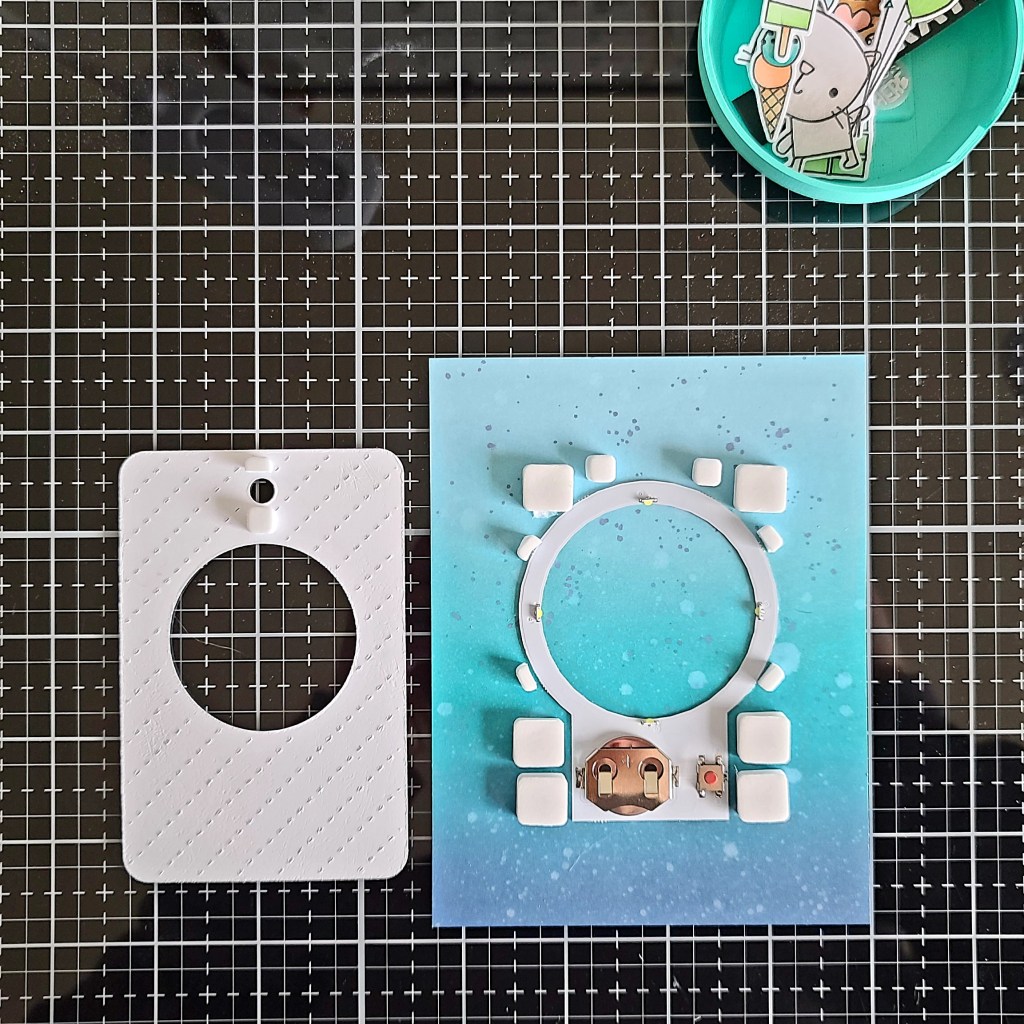
With my light in place, I added a double layer of foam squares all around it and then adhered my tag on top. Next, I used a combination of liquid glue and foam squares to adhere my images and sentiment strip.
Before moving on to my finishing touches, I stamped and heat embossed a push here sentiment from Lawn Fawn on vellum and die cut it with a small circle die. I added it with a dab of liquid glue.
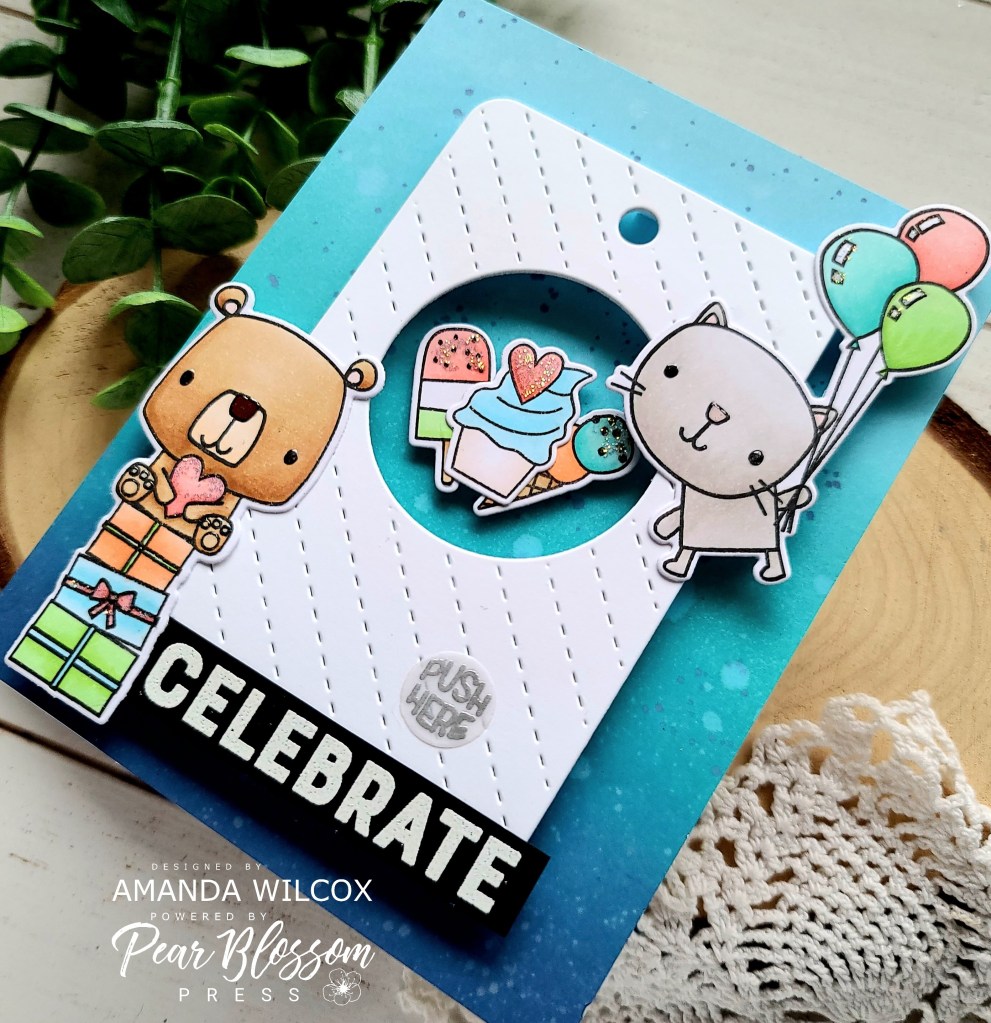
For finishing touches on my card, I added unicorn Stickles to the hearts, sprinkles, bow on the gift and balloons. Then I added glossy accents to the critter noses and eyes.
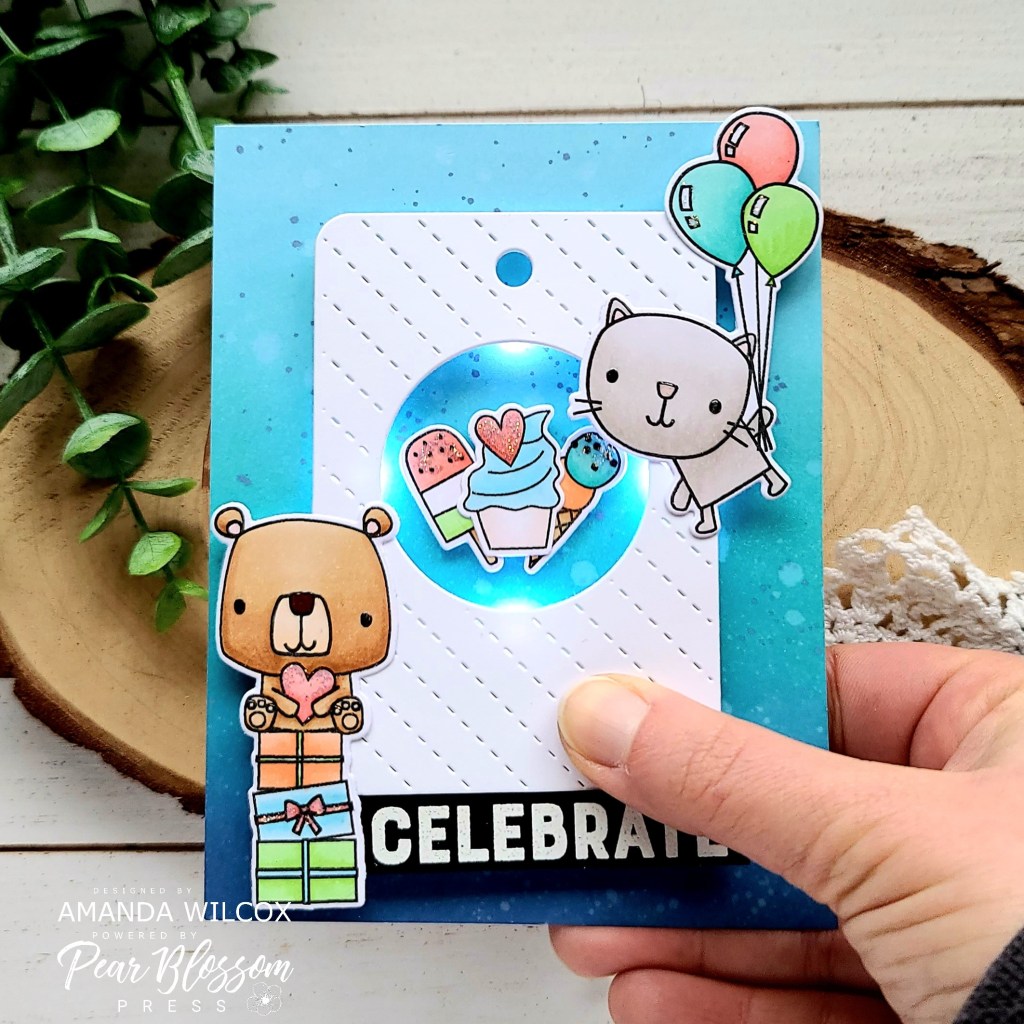
Check out how cute this little scene is and how much extra fun it is all lit up!!! These lights are absolutely the EASIEST product to use and add so much to your card! It’s just so much fun!
I can’t get over how simple this was to create! It was so much fun and I just love how perfect the Reverse Confetti see through tag worked with the size of the halo lights! They were practically meant to be together. Lol!
Pear Blossom Press has a variety of products available, regular lights for your cards along with the halo style, plus other things like awesome marker bags! Head over there and check things out for yourself!
I appreciate you sharing your time with me. Have a fabulous day!
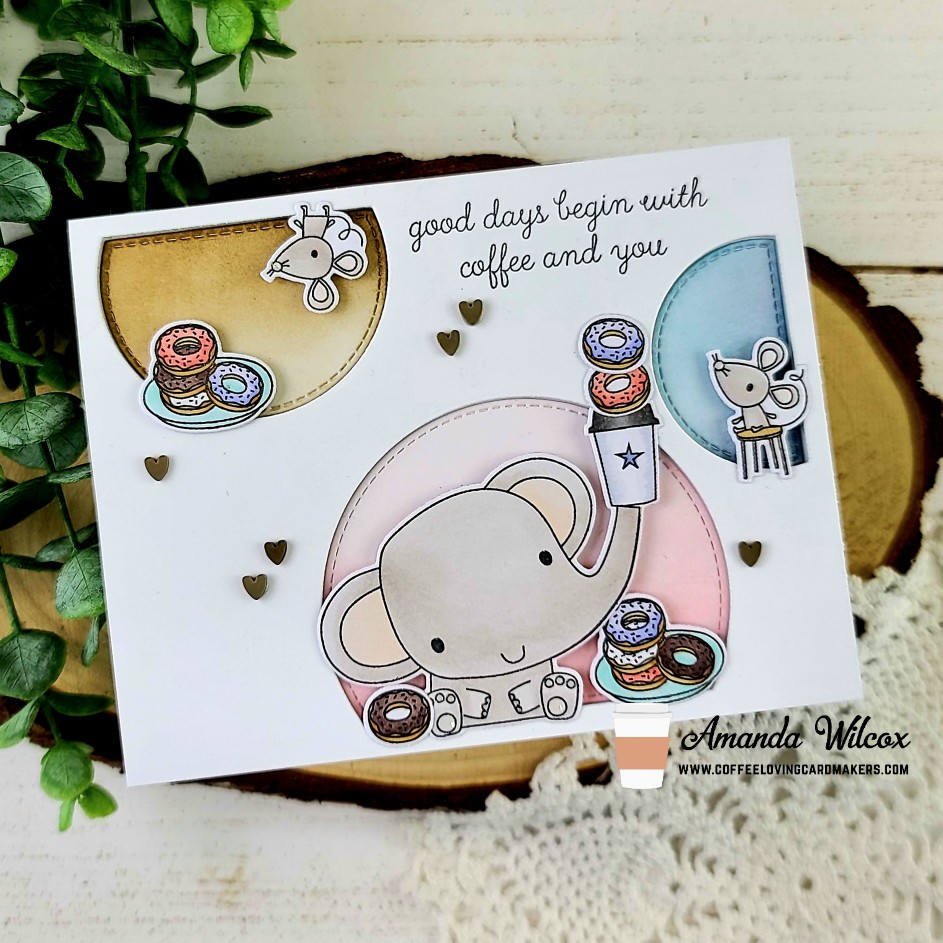
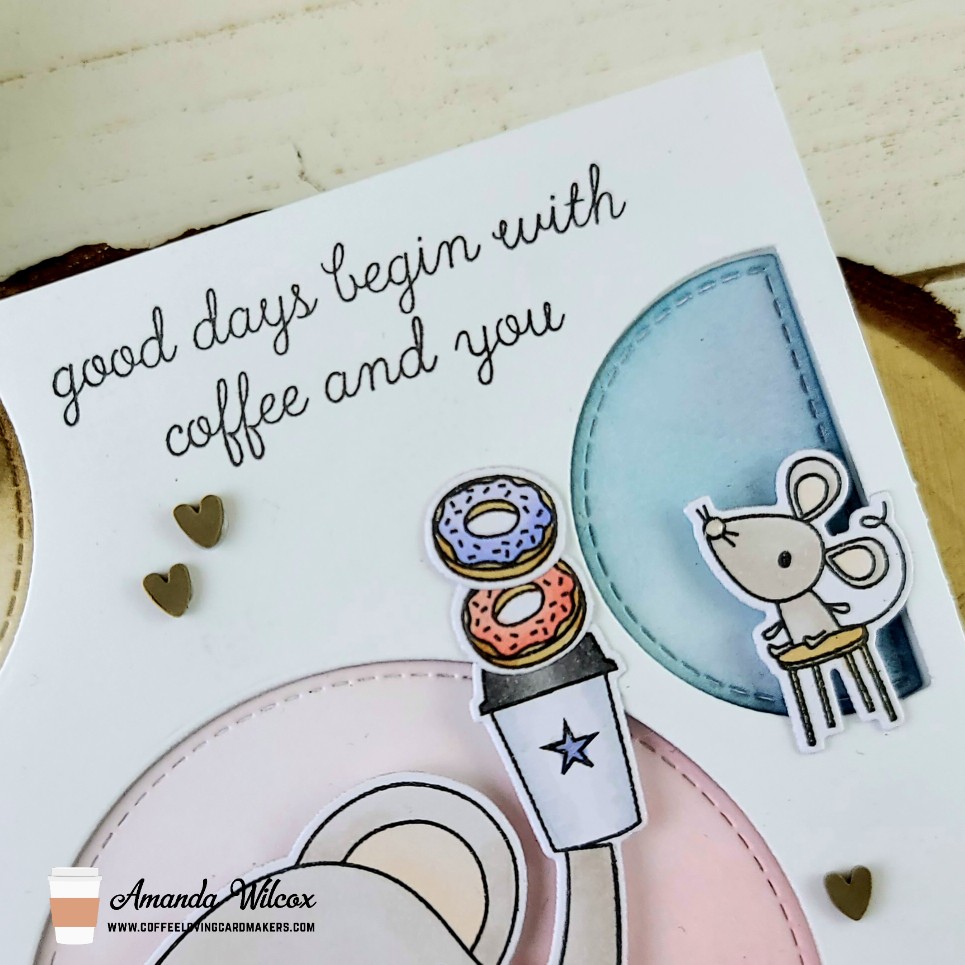
Good morning everyone! It’s Tuesday Tea on the Coffee Loving Cardmakers blog today, so grab your cuppa and settle in for some ultra cuteness to be shared!
I had an idea for a fun layout so my card came together a little backwards for my typical style. I started by arranging the dies from my MFT Stamps Stitched Arch STAX dies on my card to see how I could get them to fit. Once I liked it, I arranged my stamps to see if I could fill the windows how I wanted and it worked perfect! I sent the arch dies through my die cutter and then moved over to stamping and coloring like I usually do.
I wanted to play with the Coffee and You set from Reverse Confetti because I just got it a few weeks ago and hadn’t been able to play yet. So I stamped and colored my images with copics, then used the coordinating dies to cut them all out.
Next, playing off the colors of my images, I inked up the arches that were die cut from my panel. I left the front panel white and stamped my sentiment on it.
For assembly, I added foam tape to the back of the white panel and then used it as a guide to adhere the inked arches to the card front. Once those were in place I removed the release paper and put the white panel in place. I added my images with a combination of foam squares a liquid glue to fill in my windows.
For finishing touches, I added a scattering of coffee bean clay hearts from Trinity Stamps and some glossy accents to the elephant’s feet and mouse noses.
This is such a clean and simple card for me but I really love how sweet it turned out.
I appreciate you sharing your time with me. Have a fabulous day!
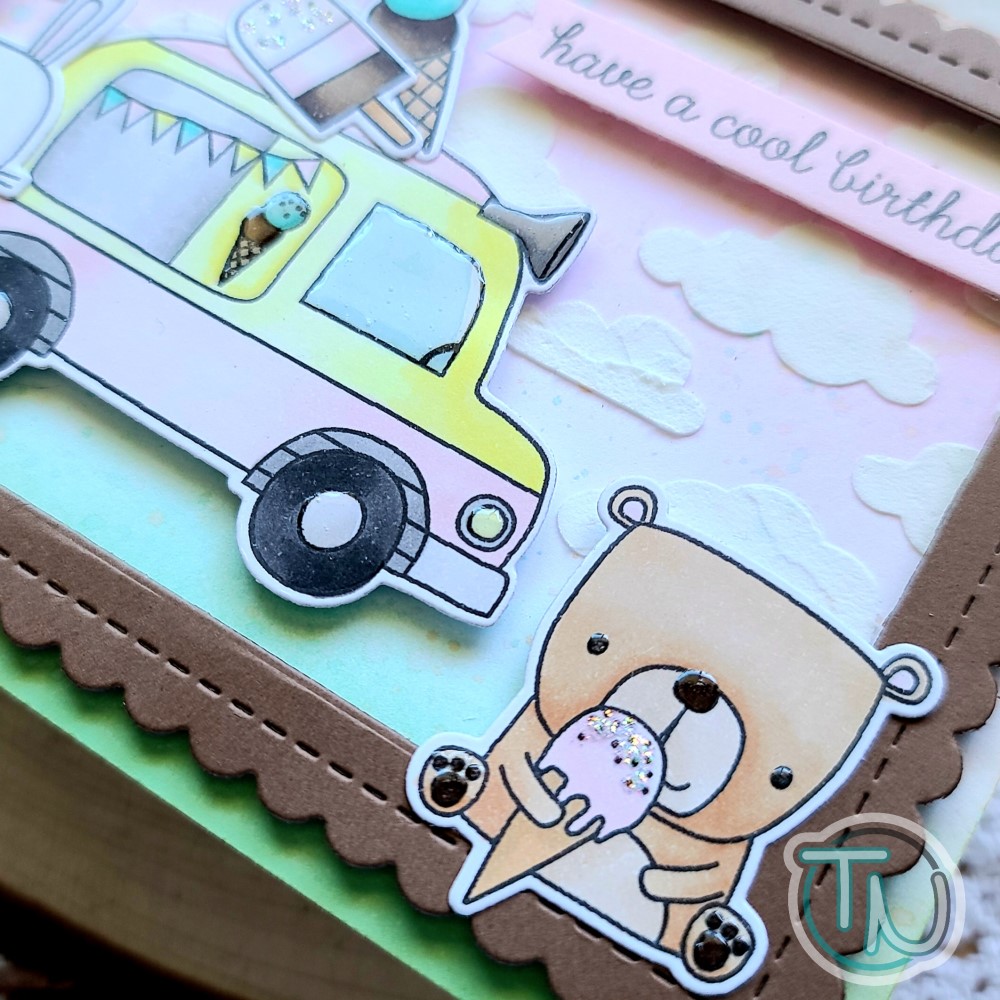
Happy weekend everyone! We’re having a heat wave here so this card is helping me cool off mentally. 😉 I was very excited to finally make my first order from Reverse Confetti. I love their unique critters and had a really hard time choosing just a couple.
As soon as they came in I couldn’t resist inking them up. Here’s the first card I made.
I knew that I wanted to try keeping my color palette limited and softer than typical so I pulled out some pink and mint and immediately thought brown would go great with it all. I mean, who doesn’t love chocolate ice cream???
I colored up my images from Ice Cream Social with my copic markers and used the coordinating dies to cut them all out. Then I set to ink blending my background with spun sugar and cracked pistachio distress inks. Then I flicked watered down color on the panel.
I used my Newton’s Nook cloudy sky stencil with some texture paste for fun dimensional clouds in the sky. Once this was dry I adhered my panel to a card base. Then I used Newton’s Nook Frames & Flags dies to make a frame and popped it up with foam strips. I used a combination of foam squares and liquid glue to adhere all of my images down next. I stamped my sentiment on a soft pink cardstock and cut it into a flag, then popped it up too.
For finishing touches on this sweet card, I used glossy accents on the critter noses, eyes and toe beans, the ice cream truck window, horn, light and decal on the side of the truck. Then I thought it would be fun to add some sparkly so I used unicorn Stickles on all the sprinkles of the ice creams.
I’m in love with this guys! Totally hooked and can’t wait to create more. I hope you find some inspiration to create something wonderful today!
I appreciate you sharing your time with me. Have a fabulous day!