Jane’s Doodles – Say YES to New Adventures

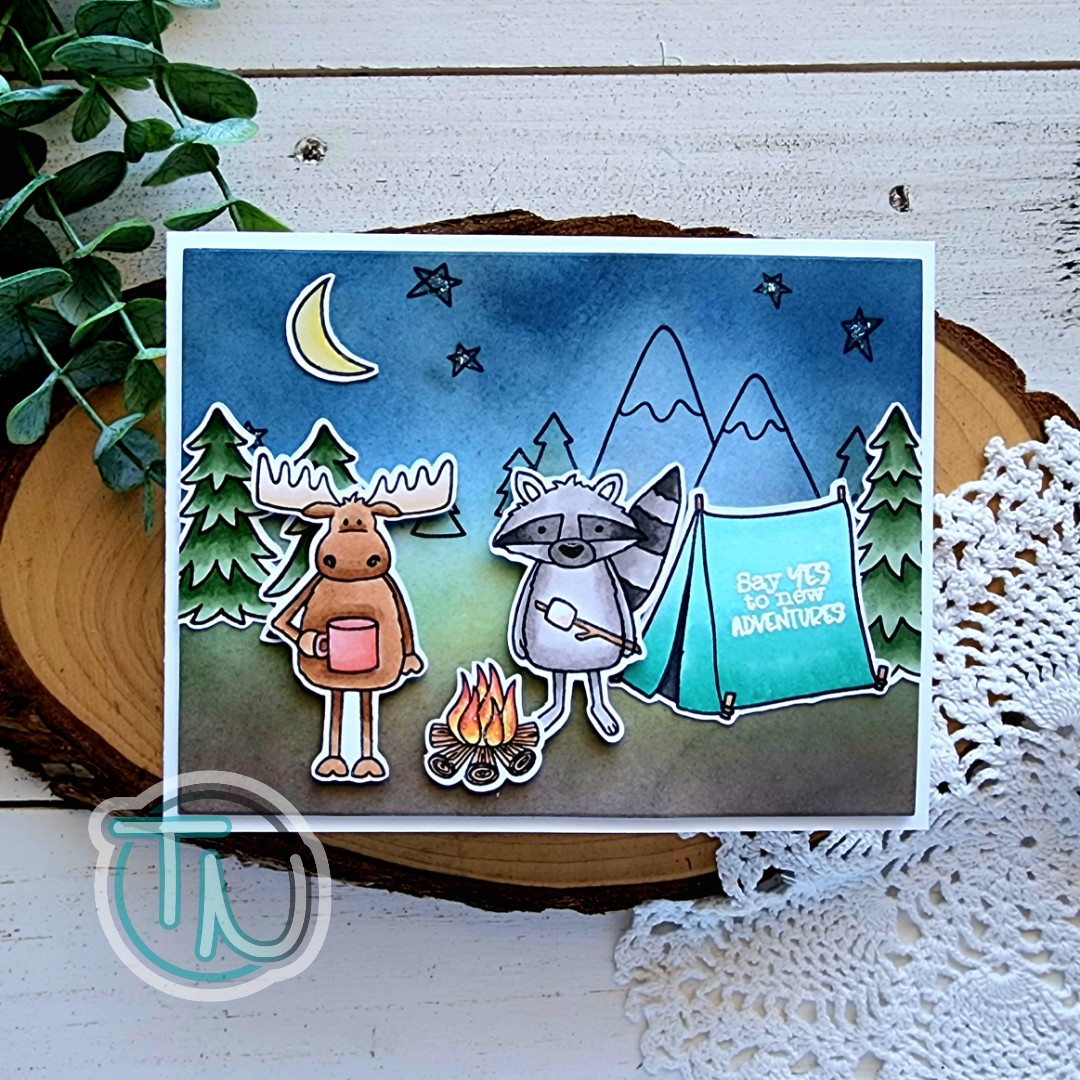
Hey crafty friends! Today we’re having a surprise hop over on Instagram to celebrate Jane from Jane’s Doodles and all that she does to bring light into our wonderful industry and world. I’m so honored to be apart of this because I truly enjoy Jane and all of her creations! Today I have a fun camping scene card to share.

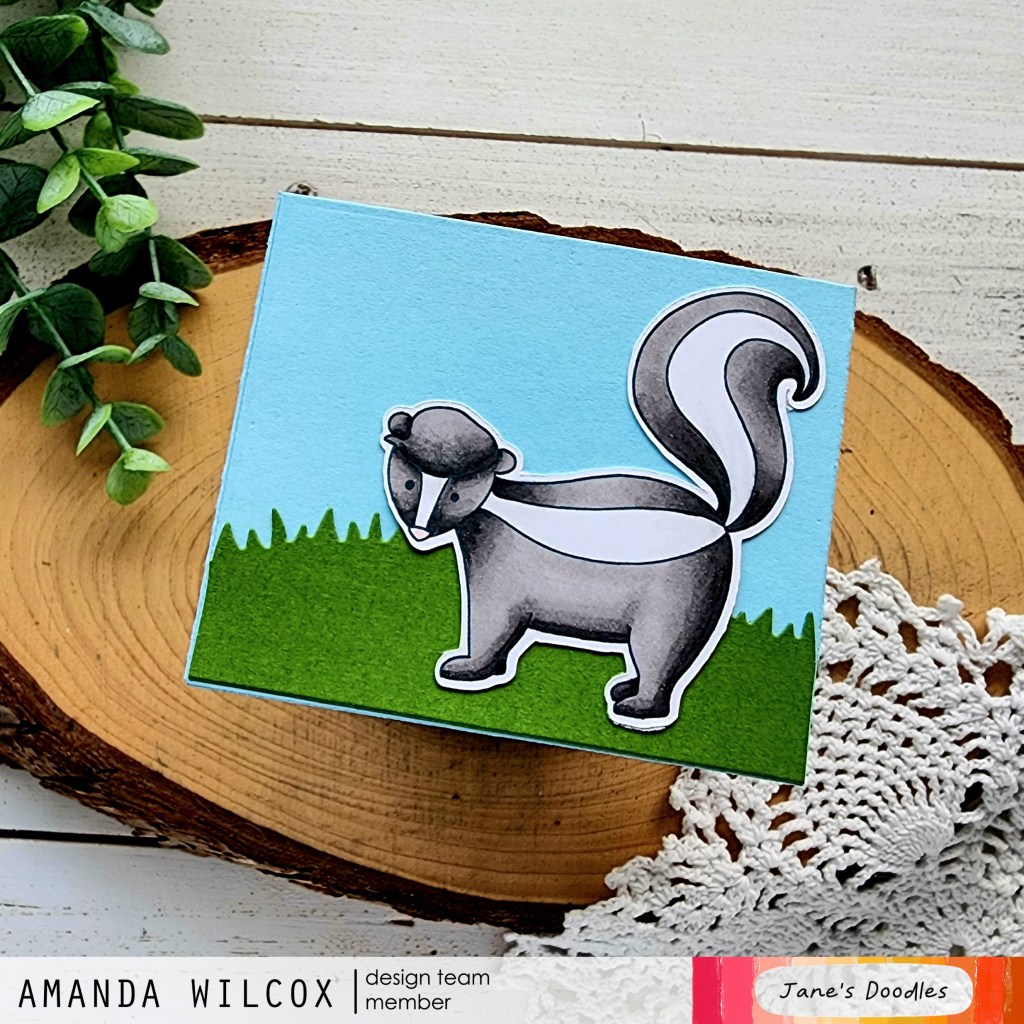
I used my stamps to plan out my scene and see what all I could fit. Then I stamped the images and colored them with my copic markers. I used the scan-n-cut to cut them out and set them all aside while I worked on my background.

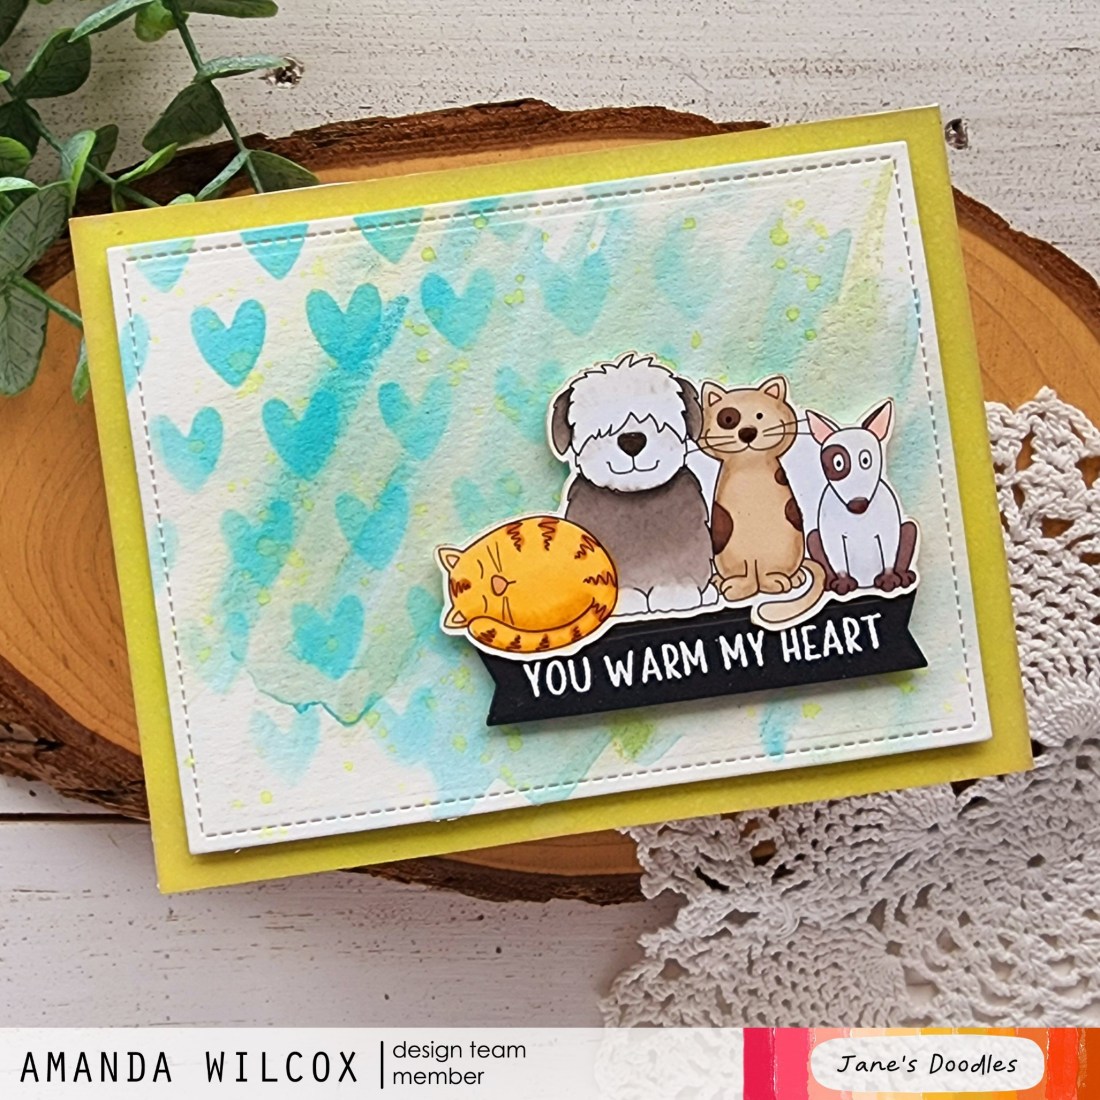
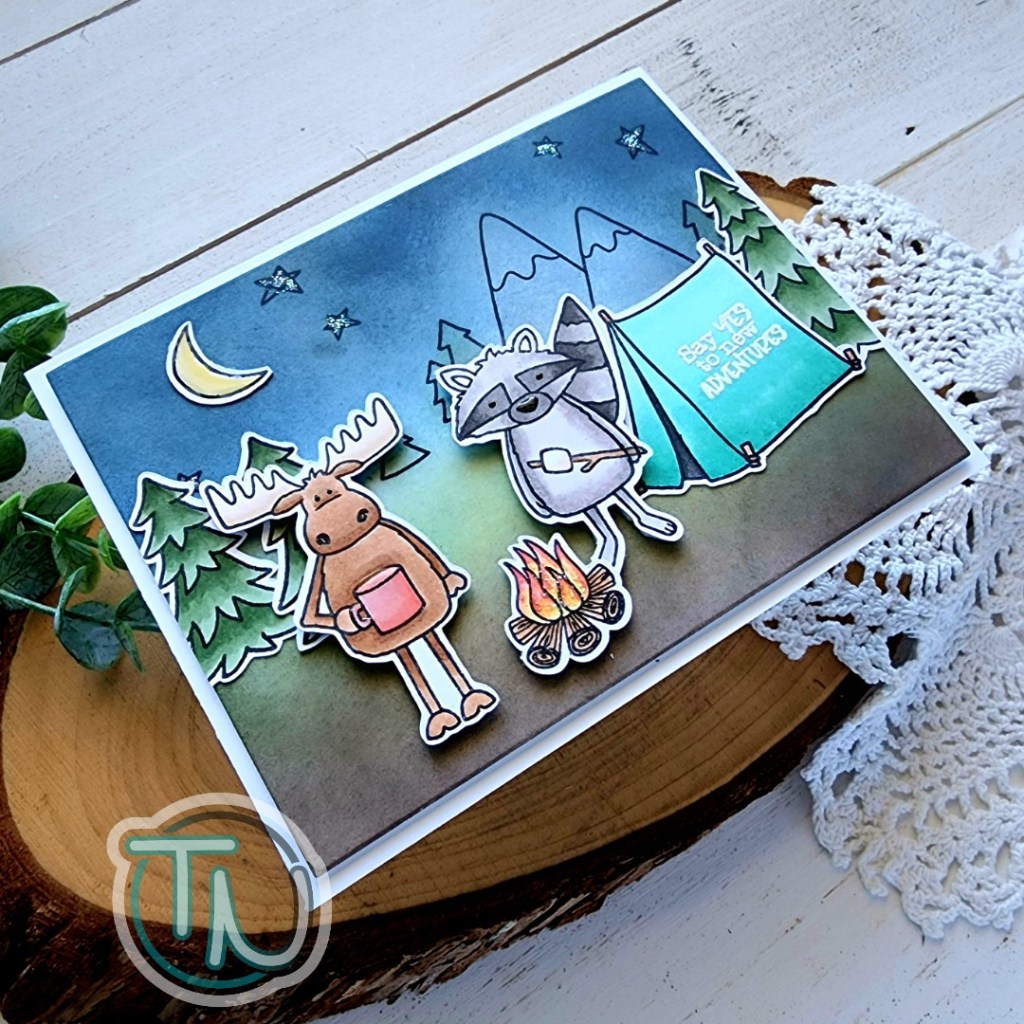
For that, I started with an A2 white piece of cardstock and stamped mountains and trees in the background. Then I used blending brushes to ink up the panel creating a nighttime scene. I die cut the panel with a layered rectangle so I would have a nice white border around my scene and popped it up on a white card base with foam tape. Next, I started adding images to the scene with liquid glue and foam squares.

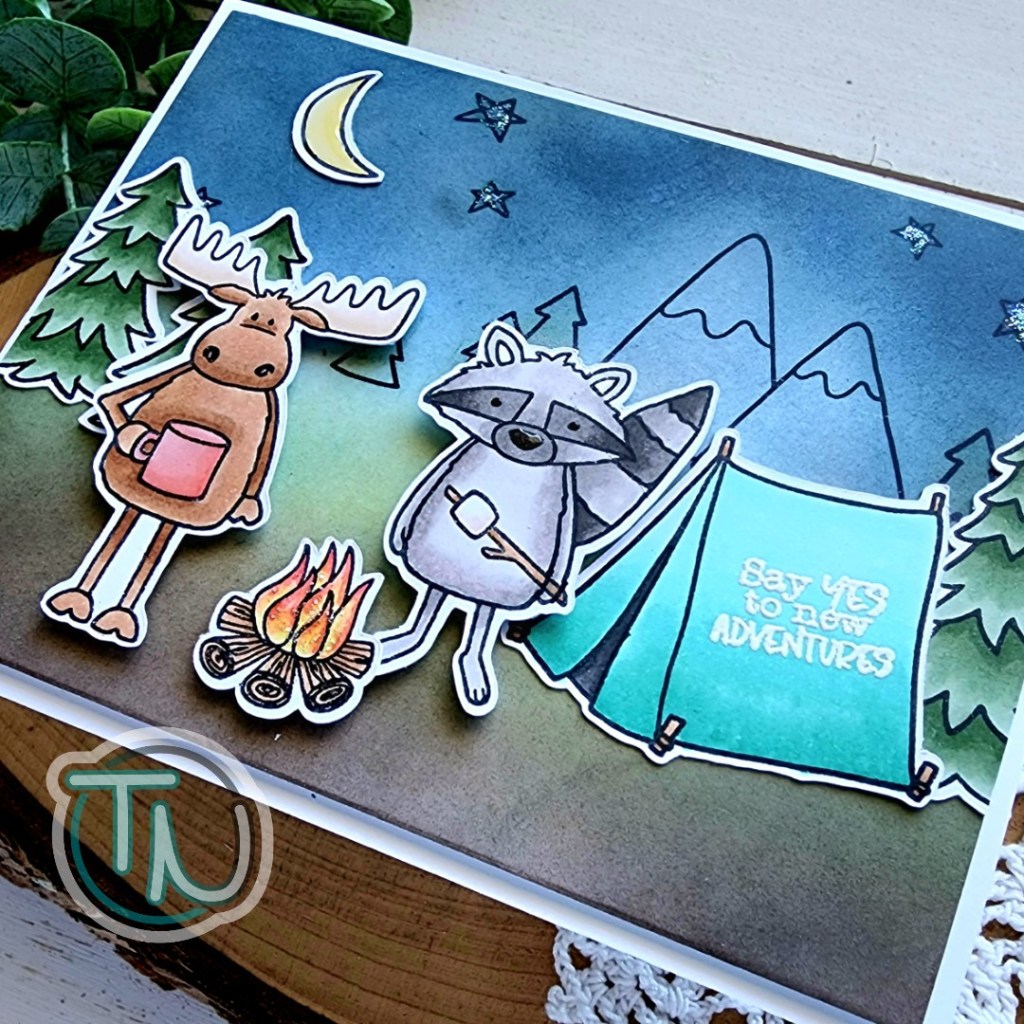
I couldn’t decide if I wanted my sentiment in the “dirt” or on the tent. I ended up choosing the tent because I thought it was a fun, unconventional place to put it and I really liked that. I used my MISTI to stamp it since my card was already put together. Then I sprinkled on white embossing powder and heated it up.

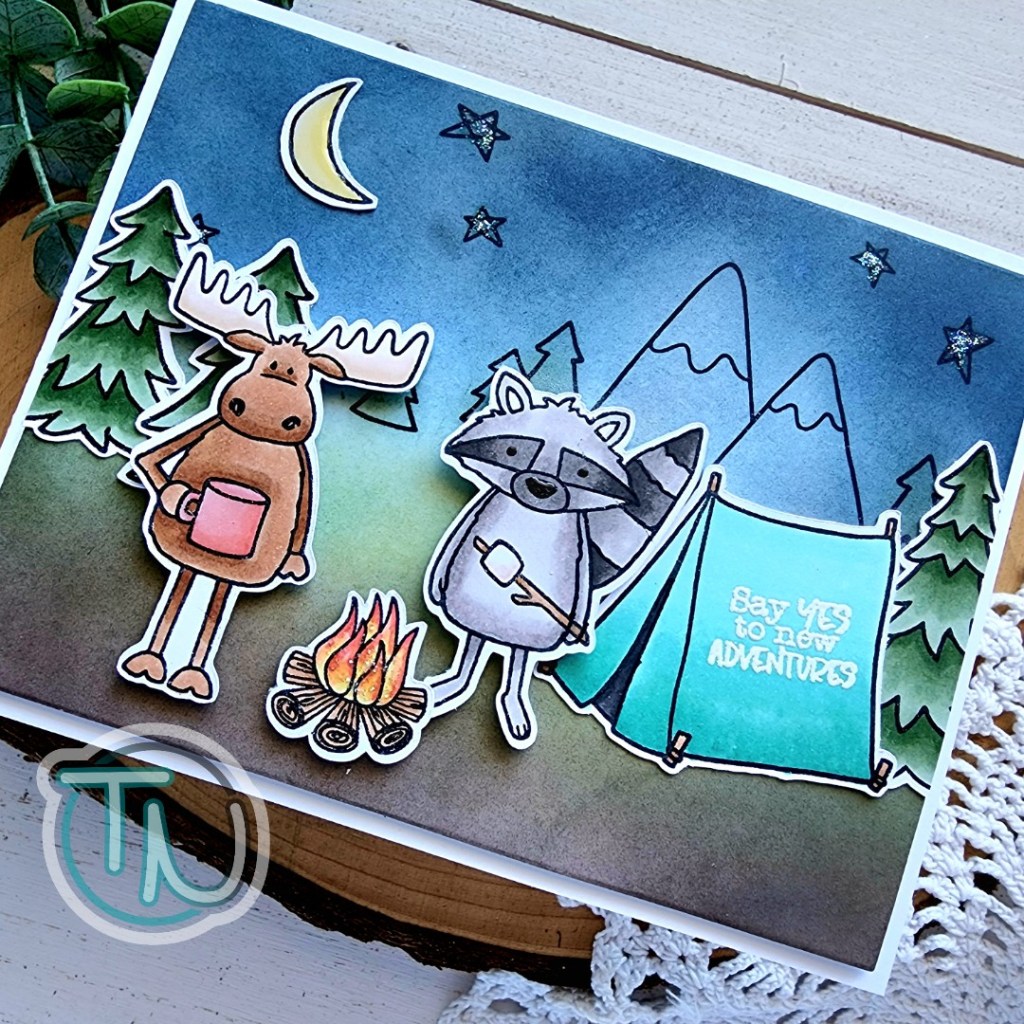
Then I came in with finishing touches to my images. I added black glaze pen to the critter eyes and stardust Stickles to the campfire and stars in the sky. Last, I added glossy accents to the racoon’s nose and moose’s coffee mug.

Please don’t forget to head to Instagram and hop with us to celebrate Jane and leave comments for a chance to win one of three gift cards to her shop!

Products used today:
Outdoors stamps
Happy Camper stamps
Layered Rectangle dies
Foam tape and squares
Bearly Art liquid glue
Glossy accents
Stickles – stardust
Watermark & Embossing ink
Magic Anti-Static Brush
Embossing powder – frosting

I appreciate you sharing your time with me. Have a fabulous day!

Jane’s Doodles – You Warm My Heart

Welcome friends! I have a sweet watercolor card to share with you today featuring Jane’s Doodles stamps and stencil, paired with my new LH Colors watercolors for some sparkle and texture in the background.

I knew I wanted to create a card with these sweet kitties and pups from the Jane’s Doodles Cats and Dogs digital stamp set, so I printed them out and colored them with my copic markers. I used the scan-n-cut to cut the image out and set it aside to play with a watercolor background.

I cut an oversized panel of watercolor paper and slopped some water on it with a big brush. Then I added limeade and pool party from the LH Colors Summer Fun collection randomly on the paper. I heat dried it a couple of times in the middle to get some layers but when I was finished I wanted it to have more texture. So, I pulled out the Hearts stencil and inked it with salvaged patina distress oxide ink. Then I splattered some watered down twisted citron distress oxide on the panel to bring in the limeade watercolor. Once the panel was dry I cut it down with the largest of the Lawn Fawn Small Stitched Rectangle Stackables dies.

Last, I inked a white panel with twisted citron distress oxide ink for my base panel but didn’t like how bright it was so I toned it down with tea dye distress oxide very lightly. I glued that panel to a card base and popped up the watercolor panel with foam tape. Before adding my critters, I stamped and heat embossed a sentiment from Love You and cut it out with a Pink & Main Large Sentiment Strip die.

Finally, I added the sentiment strip and critters with foam squares on the lower right corner of the card. To finish things off I just added glossy accents to all of their noses.

Products used today:
Jane’s Doodles Cats and Dogs digital stamps
Jane’s Doodles Hearts stencil
Jane’s Doodles Love You stamps
Pink & Main Large Sentiment Strips dies
Lawn Fawn Small Stitched Rectangle Stackables dies
LH Colors – limeade and pool party
Glossy Accents
Distress Oxide Ink – twisted citron and salvaged patina
Foam squares and tape

I appreciate you sharing your time with me. Have a fabulous day!

Jane’s Doodles – Have a Brew-Tea-Ful Day Outside the Box Card

Welcome, welcome! Thanks for stopping by today. I’m sharing a fun box card and a tag using the recently release Tea Time digital stamp set from Jane’s Doodles. This set is packed full of images so I printed everything and just started coloring for fun. In the end I had extra images after arranging my box card so I made a sweet little tag for the heck of it too!

After coloring the images, I went digging through my paper stash for cardstock or patterned paper that coordinated with the colors I had used. I landed on these fun prints from Pink & Main’s All Occasions Florals paper pad. I cut all of the elements for my Outside the Box card from white cardstock, including the cloud layers. I also cut the cloud layers from vellum and stacked them behind but in the end, that gets covered up so you could skip it.

After building the box and adding the decorative elements on the sides and back, I added all of my colored images to the different layers. In the end, I chose a sentiment from the Brew-Tea-Ful stamp set. I added the card folded up into my MISTI and stamped it down on the upper right side of the arch.

Then, for a little extra something, I took the hearts from the Tea Time set I had colored, added them to acetate picks and adhered them with glue dots. I love the look of the hearts floating in the air.

Now, in a completely different color palette, I have a simple little tag that will be perfect to attach to a tea themed gift. I used a craft knife to cut a slit in the teacup so I could slide the teabag inside of it. The sentiment stamped on the teapot is also from Brew-Tea-Ful.

I hope you enjoyed today’s projects!

Products used today:
Jane’s Doodles Tea Time digital stamps
Jane’s Doodles Brew-Tea-Ful stamps
MFT Stamps Outside the Box Level Up dies
MFT Stamps Outside the Box Clouds
Pink & Main Fancy Tag dies
Pink & Main All Occasion Florals paper pad
Bearly Arts liquid glue
Scrappy Tape – 1/4 inch

I appreciate you sharing your time with me. Have a fabulous day!

Jane’s Doodles – Scentsational Shadow Box Card

Hello everyone! Thanks for stopping by. Today I have a fun little shadow box featuring the Jane’s Doodles Stinks digital stamp set. These skunks are some of my favorites from Jane and I was all too happy to color them up for a spring themed card to share.

I printed my images and sentiment on white cardstock and colored them with my copic markers. I used a Pink & Main large sentiment banner die to cut out the sentiment and the scan-n-cut the cut out my images.

Then I used the Lawn Fawn shadow box die set along with the spring add on for the flower row in the back and park add on for the grass border and trees on the front. I used 1/8″ scrappy tape to adhere the box pieces and liquid glue for the images and details.

I always write my message on the back of these cards and thought it would be fun to continue the scene on the back this time too. I added another grass border by trimming off the tabs and that cute skunk!

I’m excited to share this card with someone for a fun, unexpected smile!

Products used:
Jane’s Doodles Stinks digital stamps
Pink & Main Large Sentiment Strip dies
Lawn Fawn Shadow Box Card dies
Lawn Fawn Shadow Box Card Spring Add-on dies
Lawn Fawn Shadow Box Card Park Add-on dies
Bearly Arts liquid glue
Scrappy Tape 1/8 inch

I appreciate you sharing your time with me. Have a fabulous day!

Jane’s Doodles – Cheers

Hello again! I’m over on the Jane’s Doodles blog today with a card featuring the Cheers digital stamp. It’s simple but I love the masculine color palette and how the whole thing came together.

I printed my image and colored it with my copic markers before using the scan-n-cut to cut it out. Instead of using one of the digital sentiments in the set, I just pulled out my Pink & Main alphabet dies and cut the word “cheers” from white cardstock three times and black once. I used liquid glue to adhere them together and set an acrylic block on top while I worked on my background layers.

First, I took a black scrap of cardstock and used the Pink & Main Sun Ray embossing folder on it. I splattered it with gold watercolor and set it aside to dry. Then I cut an A2 size piece of dark teal cardstock and cut a zig zag circle out of the top-center big enough to frame up my beer mugs. Next, I pulled out the Newton’s Nook Bubbly stencil and inked it up with a dark teal ink for a tone-on-tone texture.

I popped the teal panel up on the black panel with foam tape and adhered that to a white card base with liquid glue. Then I popped the image up in the middle of the window with foam squares. I added the “cheers” letters with liquid glue and tied some twine around the top for a little interest and balance.

For finishing touches I added glossy accents to the glass portion of the beer mugs and that’s all. I intended this to be a masculine card so I didn’t want to add too much sparkle but I like the shine of the glossy accents and watercolor in the light.

Products used:
Jane’s Doodles Cheers digital stamps
Pink & Main Zig Zag Circle dies
Pink & Main Sun Ray embossing folders
Newton’s Nook Bubbly stencil
Blending brush
Lawn Fawn Rainforest ink
Foam tape and squares
Glossy accents
Bearly Art liquid glue

I appreciate you sharing your time with me. Have a fabulous day!

Jane’s Doodles – Home Card | Ukraine Fundraiser

Hello everyone. Today I’m over on the Jane’s Doodles blog with a card featuring a new digital stamp called Home. This stamp is a fundraiser for relief efforts in Ukraine. This is one of two sets you can purchase from Jane’s Doodles to contribute. I purchased both sets and will be coloring images from the other one very soon.

I printed the image on white cardstock and colored it with my copic markers. Then I used a Pink & Main Zig Zag Circle die to cut it out. I used the next size up to cut a karft circle for a border. Next, I cut a white panel and embossed it with the Pink & Main Sunray embossing folder for some texture. I trimmed it down to 4×5.25 inches before splattering it and the kraft circle with gold watercolor.

Once the watercolor was dry, I adhere the white panel to a white card base with foam tape. Then I added the image circle to the kraft circle with foam tape as well. The kraft circle is adhered to the card front with liquid glue and I placed acrylic blocks on top to help it adhere to the texture while it dried.

I just love this image and had fun coloring it up. A fun aspect to digital stamps that I often forget is that you have control over the size of your images. I intentionally printed this one smaller to fit portrait on an A2 size card but I think it would be fun to make it larger to create a landscape scene with it.

Products used today:
Jane’s Doodles Home digital stamps
Pink & Main Zig Zag Circles dies
Pink & Main Sun Ray embossing folder
Foam tape
Copic markers

I appreciate you sharing your time with me. Have a fabulous day!

Jane’s Doodles – Warm and Fuzzy Circle Shaped Card

Hello again everyone! I’m over on the Jane’s Doodles blog today sharing a fun and sweet circle shaped card using the absolutely adorable digital stamp – Seamus.

I printed and colored Seamus with my copic markers. Then used the scan-n-cut to cut him out. The set comes with 4 sentiment choices, I went with one of the black box ones but die cut it with a banner die for a different look.

I die cut a white circle and inked it up using the heart stencil and Lawn Fawn guava ink. After removing the stencil I blended a little ink around the edges to soften the bright white. Last, I splattered some watered down ink across the panel before adding Seamus and the sentiment banner with foam squares.

I added foam tape to the back of the circle panel and switched to creating my card base. For shaped card bases, I like to cut 2 of the same shape, score the top or side of one about 1/4-1/2 inch in and glue the two layers together at that little flap. It works great and keeps down the bulk.

For finishing touches today, I just added black glaze pen to the eyes and a little glossy accents to the nose. I think he’s super adorable and this sentiment is just so fun too! The card measures 4 1/4 inches wide so it will fit in an A2 envelope and mail with a regular stamp just fine. That’s always a bonus for me when creating different shaped cards.

Products used today:
Seamus digital stamps
Pink & Main Layered Circles dies
Pink & Main Zig Zag Circle dies
Foam tape and squares
Glossy accents
Copic markers

I appreciate you sharing your time with me. Have a fabulous day!

Jane’s Doodles – Good Luck

Happy St. Patrick’s Day everyone! I’m like some minuscule amount of Irish and my husband is a bit more but, let’s be real, today we’re all Irish! Haha. We are a firm believer in wearing green, rainbows, pots of gold and all the luck today! So I really wanted to pop in a share a card from me to all of you to celebrate today!

I’ve used the Jane’s Doodles Good Luck digital stamp set and colored him with my copic markers. Then I took a blending brush and some light green ink and inked up a shadow all around him. I splattered the panel with gold watercolor and set it aside to dry.

I cut a rainbow of strips from cardstock and glued them to an A2 panel of white cardstock. I die cut the whole thing with the largest Newton’s Nook Framework die and decided to continue the gold watercolor so I splattered this too.

Once it was all dry, I added foam tape to both panels and adhered them to a white card base. For finishing touches I added unicorn Stickles to the entire balloon because I was all about the sparkly on this card today! Then I added black glaze pen to the mouse’s eyes and glossy accents to his nose.

Products used today:
Jane’s Doodles Good Luck digital stamps
Newton’s Nook Framework dies
Newton’s Nook Frames Squared dies
Glossy accents
Stickles – unicorn

Thanks so much for stopping by. I appreciate you sharing your time with me. Have a fabulous day!

Jane’s Doodles – Butterfly Shadow Box Card

Hello again everyone! I’m back with a bright, springy shadow box card featuring the Doodle Butterflies digital stamps from Jane’s Doodles. I have been on a huge interactive card kick lately so I knew I wanted to put these sweet butterflies in a shadow box card for sure. I love how they look flying around in there.

First, I printed my butterflies and chose a color palette from my copic markers. I randomly colored them all in and cut them out with the scan-n-cut. Then I attached each butterfly to an acetate pick (about 1/4″ wide) and set them aside while I created my shadow box.

Today’s shadow box is created using the Heffy Doodle Big Shadow Box die set. I cut all the elements from heavy white cardstock. Then I used my Newton’s Nook Clouds stencil and a blending brush to ink some clouds on all sides of my box, inside and out. Then I used the ink left in my brush to add a little texture to the inserts that the butterflies will be adhered to. I used scrappy tape to adhere the box together and zots glue dots to add my butterflies in place with the exception of 2 that I glued to the back of the box with liquid glue.

I cut the sentiment with a stitched banner from Newton’s Nook and adhered it to the front of the box and this card is all finished! Isn’t it just so bright and make you ready for spring? I personally am ready for summer and warm weather but I’ll take some spring sunshine when I can get it for now. Haha.

Products used:
Jane’s Doodles – Doodle Butterflies digital stamps
Heffy Doodle Big Shadow Box dies
Newton’s Nook Frames & Flags dies
Newton’s Nook Clouds stencil
Blending brush
Zots glue dots
Scrappy tape – 1/4 inch and 1/8 inch

I appreciate you sharing your time with me. Have a fabulous day!

Jane’s Doodles – You’re So Weird

Hey crafty friends! I’m back with a pair of super fun cards featuring the Weird digital stamp set from Jane’s Doodles. I just love these images and had so much fun getting inky creating scenes for them.

I started by printing out the whole set of images and sentiments from the Weird digital stamp set. I used my copic markes to color them and the scan-n-cut to cut them out. Then I cut 2 of the sentiments out with sentiment banner dies and set it all aside while I made a horrendously awesome inky mess!

For my first card, I inked up 2 strips of white cardstock with distress oxides in various green colors. One was crushed olive and mowed lawn while the other had those colors plus twisted citron for some bright areas. Then I took an A2 panel and inked it with salty ocean and tumbled glass distress oxide. I spritzed this panel with water and blotted it dry. Then I flicked some watered down blueprint sketch on the whole panel for added texture and interest.

I cut the green panels with the Lawn Fawn tropical vines and tropical leaves dies and arranged them on my blue panel. The vines were longer than my panel so I cut them and inserted the smaller sections in different areas to fill in the scene more. Once everything was where I liked it, I used liquid glue to adhere them all down.

Next, I popped up my sentiment and sloth image with foam squares and added a little glossy accents to his nose. To help the eyes pop a little I added black glaze pen to those and my card is all finished.

But we’re not done yet. Let’s get a whole new set of colors out and have some more inky fun!

This time I inked up white cardstock strips with twisted citron and and crushed olive distress oxide inks and spritzed them with water. I flicked watered down mowed lawn distress oxide ink and gold watercolor on those panels too. Once they were dry I die cut them with the Lawn Fawn tropical leaves border die and set them aside.

For my background panel, I inked up seedless preserves and wilted violet distress oxide ink on an A2 panel. I spritzed it with water and flicked more gold watercolor on it too. It seemed a bit brighter than I wanted so I added a little tea dye distress oxide around the edges after the watercolor was dry.

For assembly, I added the purple panel to a card base and glued one strip of leaves to the top. Then I cut a white cardstock strip 1.5 inches wide and popped it up with foam tape. I added a strip of washi tape before popping my image and sentiment banner up with foam tape as well.

For finishing touches on this card I added glossy accents to the sloth’s nose and flower centers. Then I glued down a few red clay hearts for a little extra something. I think they are so sweet and love the touch they add.

I hope you enjoyed today’s cards and found some inspiration to create something wonderful!

Products used:
Jane’s Doodles Weird digital stamp set
Pink & Main Large Sentiment Strip dies
Lawn Fawn Tropical Leaves dies
Lawn Fawn Tropical Leaves Border die
Lawn Fawn Tropical Vines Border dies
Distress Oxide Ink – salty ocean, tumbled glass, blueprint sketch, twisted citron, mowed lawn, crushed olive, wilted violet, seedless preserves, tea dye
Foam tape and squares
Glossy accents
Twiddler’s Nook Sweethearts clay embellishments

I appreciate you sharing your time with me. Have a fabulous day!