i-Crafter | Pear Blossom Press – A Haunting We Will Glow Collab Hop

Welcome to the A-Haunting We Will Glow Collab Hop with i-Crafter and Pear Blossom Press! We’re sharing spooky sweet projects for Halloween. Featuring interactive dies from i-Crafter, and with help from Pear Blossom Press, they all really light up! Be sure to hop along with us for lots of inspiration; we’ve come up with some brilliant cards. Let me show you mine…
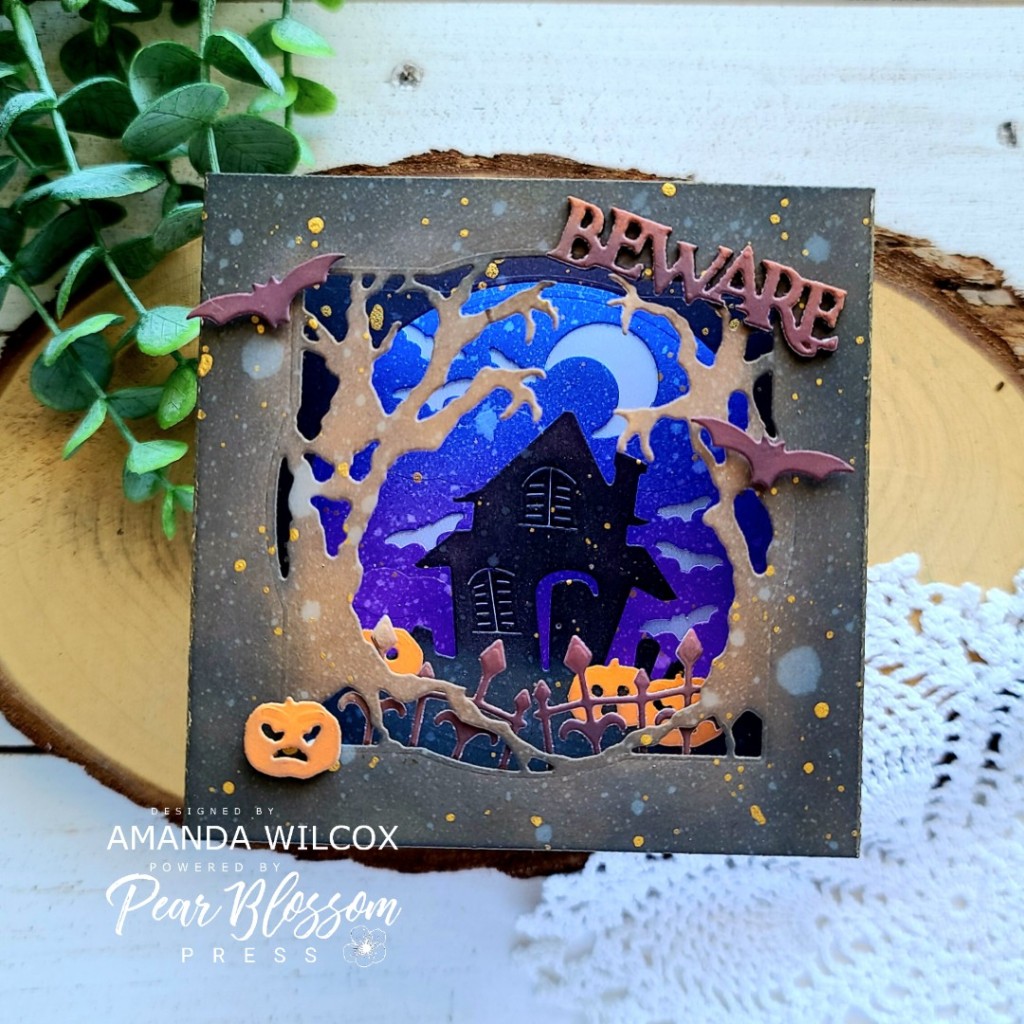
To create my card I die cut the base panel for the tunnel card from white cardstock 4 times. I ink blended one with distress oxide in blueprint sketch and seedless preserves and another with gathered twigs and black soot. The third panel was inked with distress ink in black soot. Then I used the haunted house add on dies to cut the windows from the 3 inked panels. I spritzed each with water and flicked gold watercolor on them too.
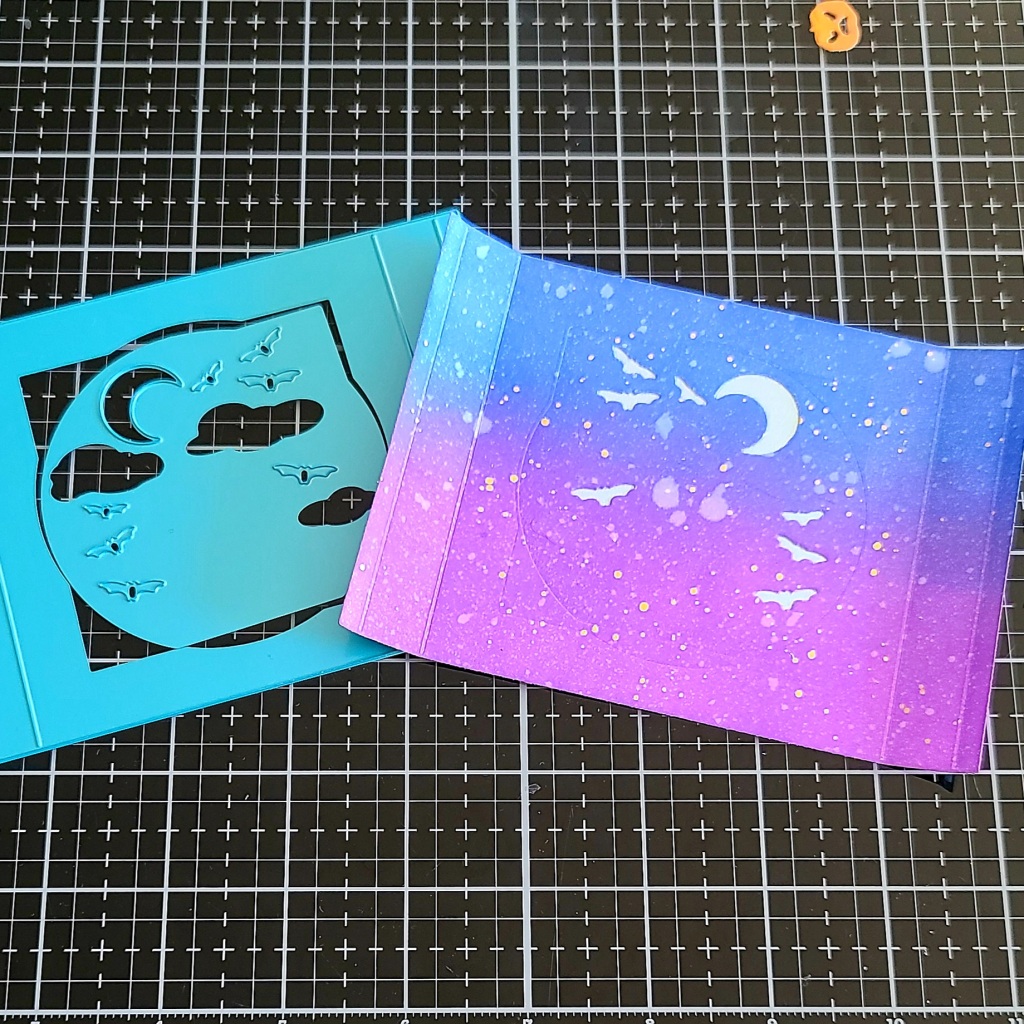
I completed my light up mechanism before assembling the card. This way if I mess up I only have to recreate 1 panel, not 3.

To do that I started with the back panel and adhered iridescent vellum to the back covering the bat and moon openings. I like how this diffuses the light.
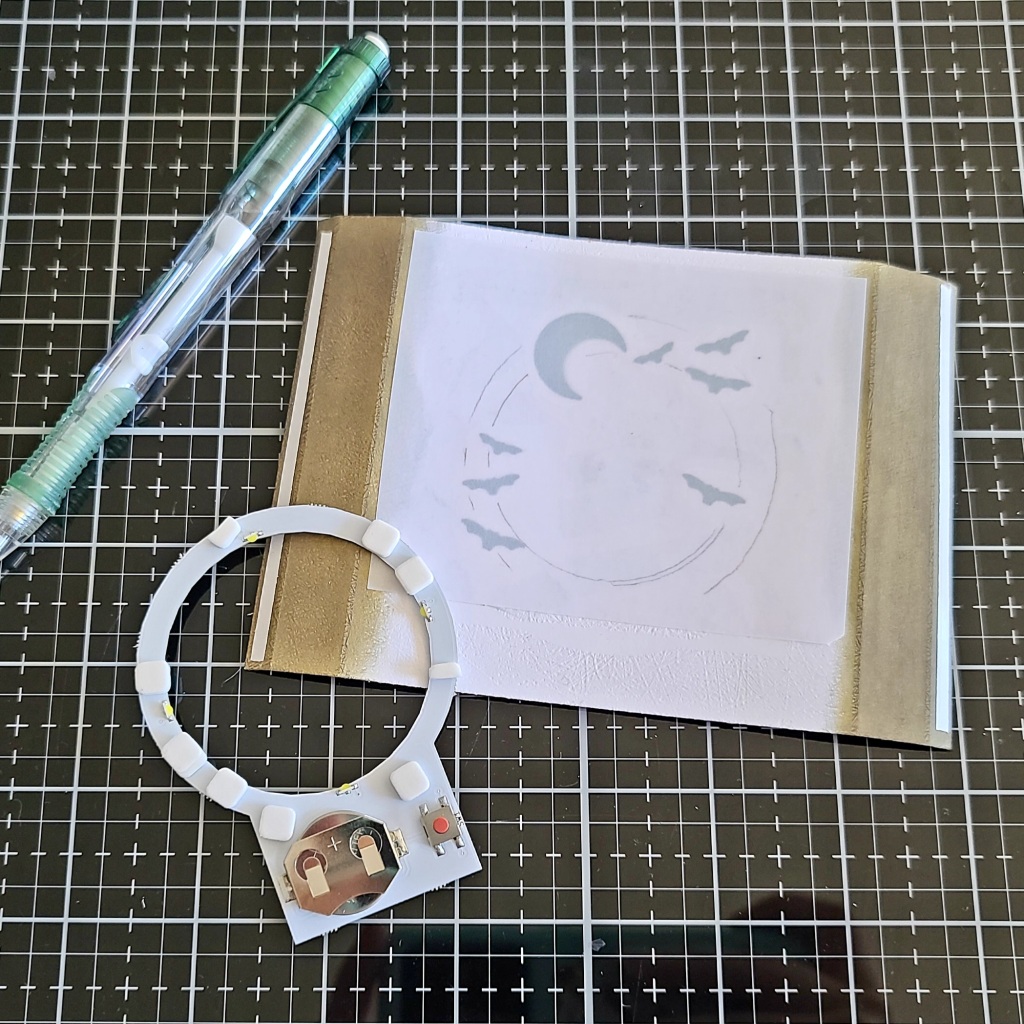
I took the halo light and traced the ring on the back of the panel so I could see where to add foam squares. I added those between the cut outs. I also marked where the button sits and stamped “push here” on the other side.

I adhered my light in place and framed the rest of the back with double thick foam tape. Then I took the last tunnel card base I had, trimmed off the edges and adhered it down, securing and hiding my light mechanism.
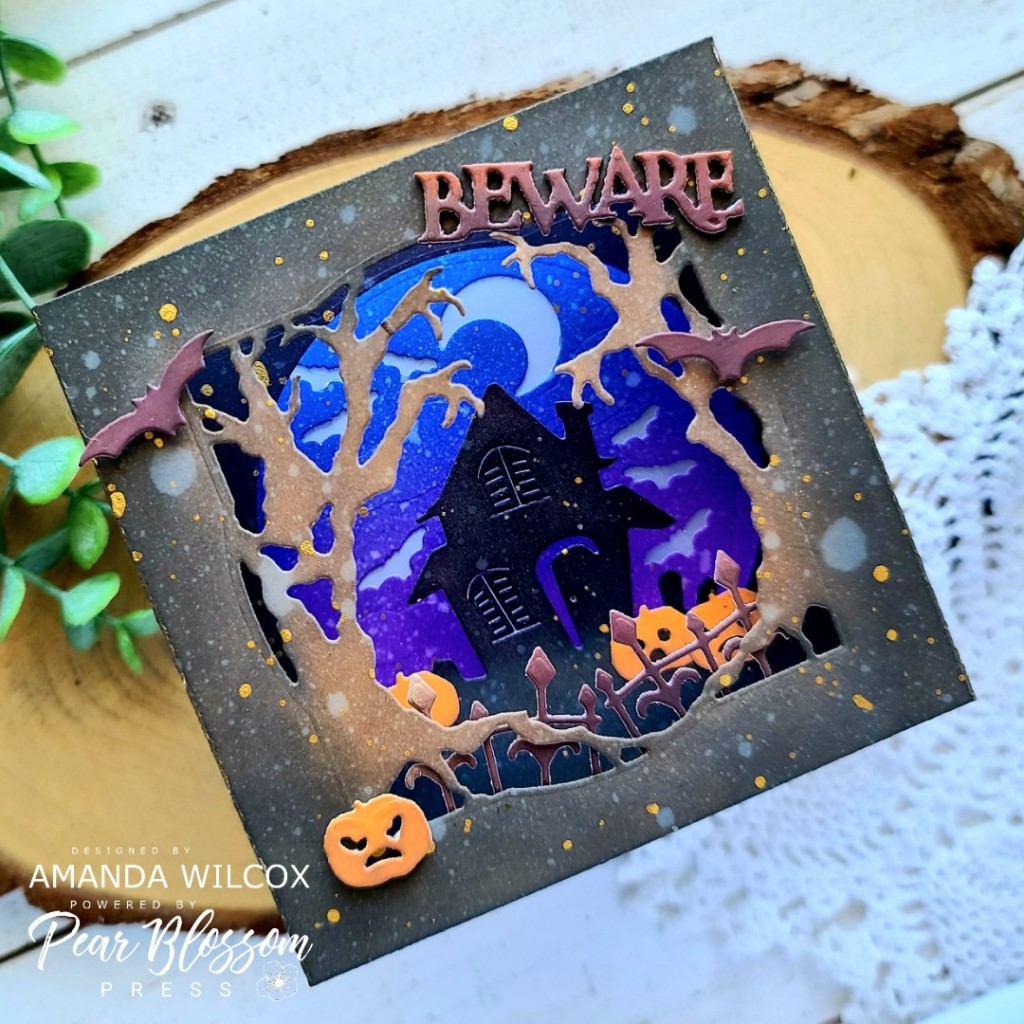
Next, I followed the general instructions and assembled my tunnel card. After that was done I used some of the smaller dies in the set to decorate my scene.

For the bats, beware and fence I inked up a scrap with carved pumpkin and seedless preserves layered together, then cut them out. For the pumpkins I used carved pumpkin and inked the edges with gathered twigs. Images on the front are adhered with foam squares and anything inside the tunnel is added with liquid glue.
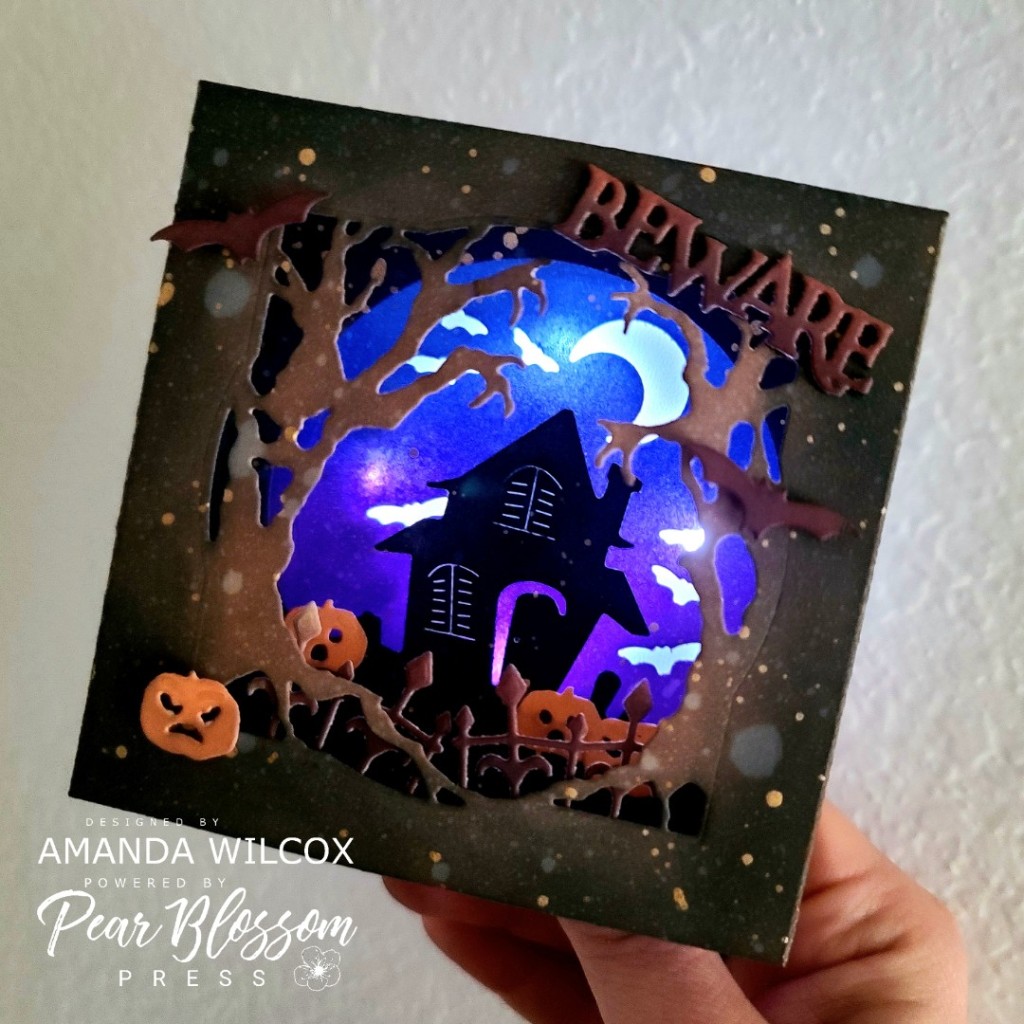
Here’s a look at it all lit up! Spooky and so much fun! I hope you enjoyed this card. I alleviate you sharing your time with me!

BLOG HOP

You should have started at the i-Crafter blog and the next inspirational stop on the hop for you is Niccole!

Every good hop has prizes, right? So i-crafter, and Pear Blossom Press are each giving away a $25 store credit! Comment on this post by October 4, 2021 to be entered to win. Winners will be announced on October 8th. Ready for more inspiration? Amanda from Pear Blossom Press will be live on YouTube today, and Lynda from i-Crafter will be live on Facebook today at 11:00am. Be sure to tune in!

Pear Blossom Press – Hope Your Day Glows

Hey friends! I’m super excited to be back with a second card guest designing for Pear Blossom Press! Today I have a card featuring some awesome Lawn Fawn products and the Pear Blossom Press EZ Lights!

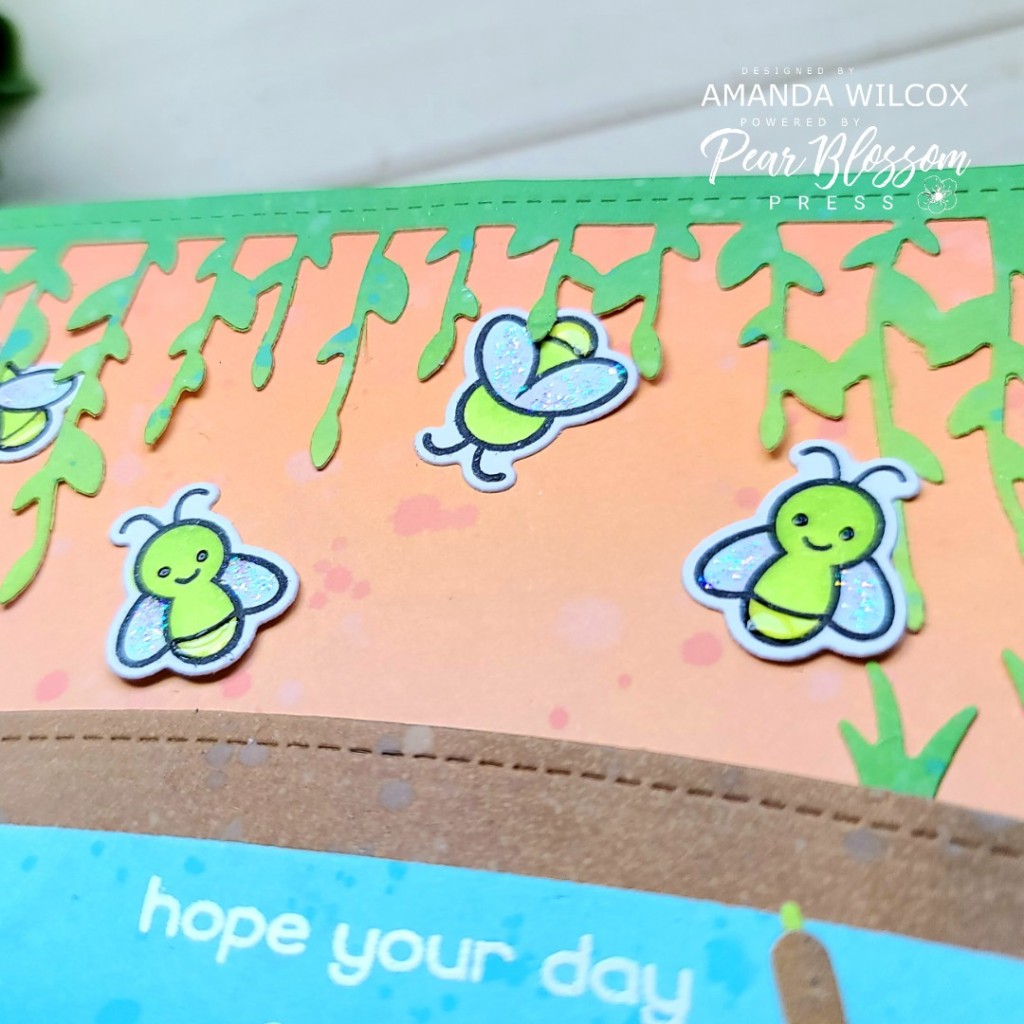
Here’s a look at the finished card before we dive into the process of creating it. Isn’t it just too cute! We don’t have fireflies where I live but I always thought it would be a really cool thing to be able to sit outside and watch them at night. So, I made a card thinking of that while I got inky. Let’s get started!

To make things simple, I inked up all my panels at once with my distress oxide inks. After each panel was inked I smooshed the ink pads on my glass mat, spritzed it with water and then flicked the watered down ink on the panel for extra texture. this is a new favorite technique that I do pretty much every time I pull out distress inks to play with.

Once the panels were dry, here are the dies I used to cut each panel. The green from the bayou backdrop die, saving that large portion in the center to come back and cut the grass and cattails from later on. The brown was cut from a hillside border first and the same stitched rectangle as the peach panel after so they layered nicely. And last, the little pond die comes from the bayou backdrop set.

Next, I stamped, colored and die cut some cute fireflies from the Lawn Fawn Little Fireflies set. I thought it would be fun to have front-facing and not so I did a combination of both images.

Next, I stamped and heat embossed the sentiment from Little Fireflies on the lake piece. Then, using the frame and lake as guides, I stamped and heat embossed “press me” on the dirt hill where I want my button to be. This word stamp comes from the Lawn Fawn Push Here stamp set. It’s great for lots of different types of interactive cards. Then I used liquid glue to adhere all of my layers together. Then I took a circle die that happens to come in the Little Fireflies set (for their glowing bottoms if you use that stamp) and cut 3 circles out of the background so the lights could shine through.

Next, using scrappy tape, I adhered the battery pack to the back of my card front so it lines up with the “press me” on the front. Then I used the same tape to adhere the lights in place over the holes. I flipped my card over, added the fireflies and then adjusted the lights a bit until they lit the fireflies up how I liked. Once there were perfect, I added a few more strips of tape to securely hold everything in place.

Finally, I added a double layer of foam tape to the back of my whole panel and added it to a white card base.

I know there is a lot going on but I just couldn’t leave things the way they were. For finishing touches, I added black glaze pen to the eyes, unicorn Stickles to the wings and glossy accents to their bums! I just think this is too funny and makes me smile!

Ta-da!!! Isn’t this just the cutest ever?!? I am so extremely happy with how this fun card turned out! It’s a good thing these batteries last a while because I keep playing with it on my craft desk.

I hope you found some inspiration to create something wonderful and don’t be afraid to try light up cards. They are so much fun and Pear Blossom Press has taken any difficulties away with their amazing products!

Here is a list of the products used on today’s project, using affiliate links at no additional cost to you:
Pear Blossom Press EZ Lights
Lawn Fawn Little Fireflies stamps and dies
Lawn Fawn Bayou Backdrop dies
Lawn Fawn Simple Stitched Hillside Borders
Lawn Fawn Large Stitched Rectangles
Lawn Fawn Press Here stamps
Distress Oxide Inks
Scrappy Tape 1/4 inch
Tombow Mono Multi Liquid Adhesive
Glossy Accents
Stickles – unicorn

I appreciate you sharing your time with me. Have a fabulous day!

Pear Blossom Press – Celebrate with Reverse Confetti

Hi everyone!!! I’m so excited to be featured as a guest designer for Pear Blossom Press today. I have always loved their products but they just keep getting better! Today I’m sharing a fun way to use the new halo lights.

Here’s a look at my finished card. I have broken things down just a bit to show just how easy these lights are to use! Let’s get started!

I inked up an A2 size panel with distress oxides in chipped sapphire, peacock feathers and tumbled glass. I spritzed it with water and flicked some watered down chipped sapphire on the whole panel. I die cut 2 of the Reverse Confetti see through tag die so it was thick and sturdy. I temporarily attached the halo light to the tag with post-it tape, added liquid glue to the back and adhered it to my ink blended panel.

I stamped and colored images from Reverse Confetti Ice Cream Social and Party Pals stamp sets. Then I used the coordinating dies to cut them out. I also stamped and heat embossed a sentiment from Party Pals and trimmed it into a strip.

With my light in place, I added a double layer of foam squares all around it and then adhered my tag on top. Next, I used a combination of liquid glue and foam squares to adhere my images and sentiment strip.

Before moving on to my finishing touches, I stamped and heat embossed a push here sentiment from Lawn Fawn on vellum and die cut it with a small circle die. I added it with a dab of liquid glue.

For finishing touches on my card, I added unicorn Stickles to the hearts, sprinkles, bow on the gift and balloons. Then I added glossy accents to the critter noses and eyes.

Check out how cute this little scene is and how much extra fun it is all lit up!!! These lights are absolutely the EASIEST product to use and add so much to your card! It’s just so much fun!

I can’t get over how simple this was to create! It was so much fun and I just love how perfect the Reverse Confetti see through tag worked with the size of the halo lights! They were practically meant to be together. Lol!  

Pear Blossom Press has a variety of products available, regular lights for your cards along with the halo style, plus other things like awesome marker bags! Head over there and check things out for yourself!

I appreciate you sharing your time with me. Have a fabulous day!

Pink & Main | Pear Blossom Press Collab – Let Your Light Shine

Thank you for hopping along with us for the Pink and Main & Pear Blossom Press Collab Hop! For more inspiration, check out all of the stops in the hop!

To create my card, I started by stamping and coloring my images from Happy Fall. Then I used the coordinating dies to cut them out and set them aside. I cut a piece of vellum to A2 size and used my leafy stencil with mini blending brushes and dye inks. This takes a bit to dry so I took a break and came back later.

Next, I inked up a panel with my blending brush and orange ink and die cut it with the largest Reverse Scallop Rectangles. I laid the images out and started adhering the tree trunks with liquid glue and the scalloped panel over it. Now it’s time to add the EZ light from Pear Blossom Press.

As you can see from the photo, I decided where I wanted my button to be, stamped a “push me” sentiment and then with the front panel as I guide, I traced the battery pack so I would know where to glue it down. I used tear tape to adhere it so it was really stuck in place without waiting for liquid glue to dry.

This is when I added my images with a combo of liquid glue and foam squares. Then I lined the panel with foam strips to allow room for the battery pack and wires.

With a lot of back and forth and some temporary tape, I placed the lights where I thought I wanted them and put my front panel over top, pushed the light to test it and moved them around until I liked it.

I didn’t like how the lights showed through the bear though. So, as you can see in the picture above, I die cut another bear from white cardstock and glued it directly behind the other for an added layer. Then I taped my lights in place with tear tape. I just didn’t remove the top release paper. It holds them really well.

Finally, I popped my panel in place on my card base and tested it all out. Then I found a fabulous sentiment in Sunny Greetings. I stamped and die cut it and popped it up with foam squares.

Last, for finishing touches, I added some glossy accents to the bear’s nose, owl’s glasses and mushroom dots. This card is so sweet and fun! These EZ-Lights make this process and complete snap and totally stress free! So much fun!

And here’s a fun side-by-side look at the card on its own and all lit up! Isn’t it sooo much fun??? I just love how it turned out!

Now for the hop line up so you can continue on and keep the inspiration flowing.

I appreciate you sharing your time with me. Have a fabulous day!