Poppystamps – Hello Again

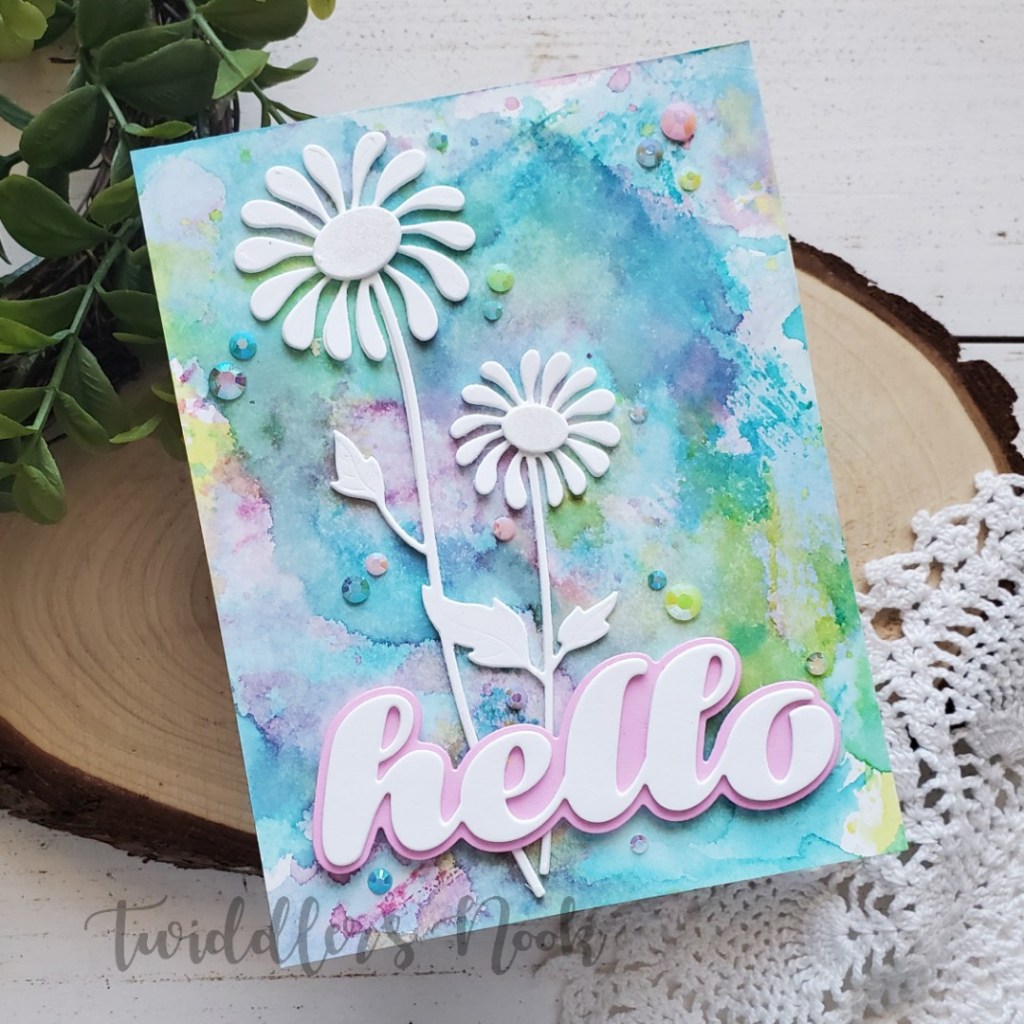
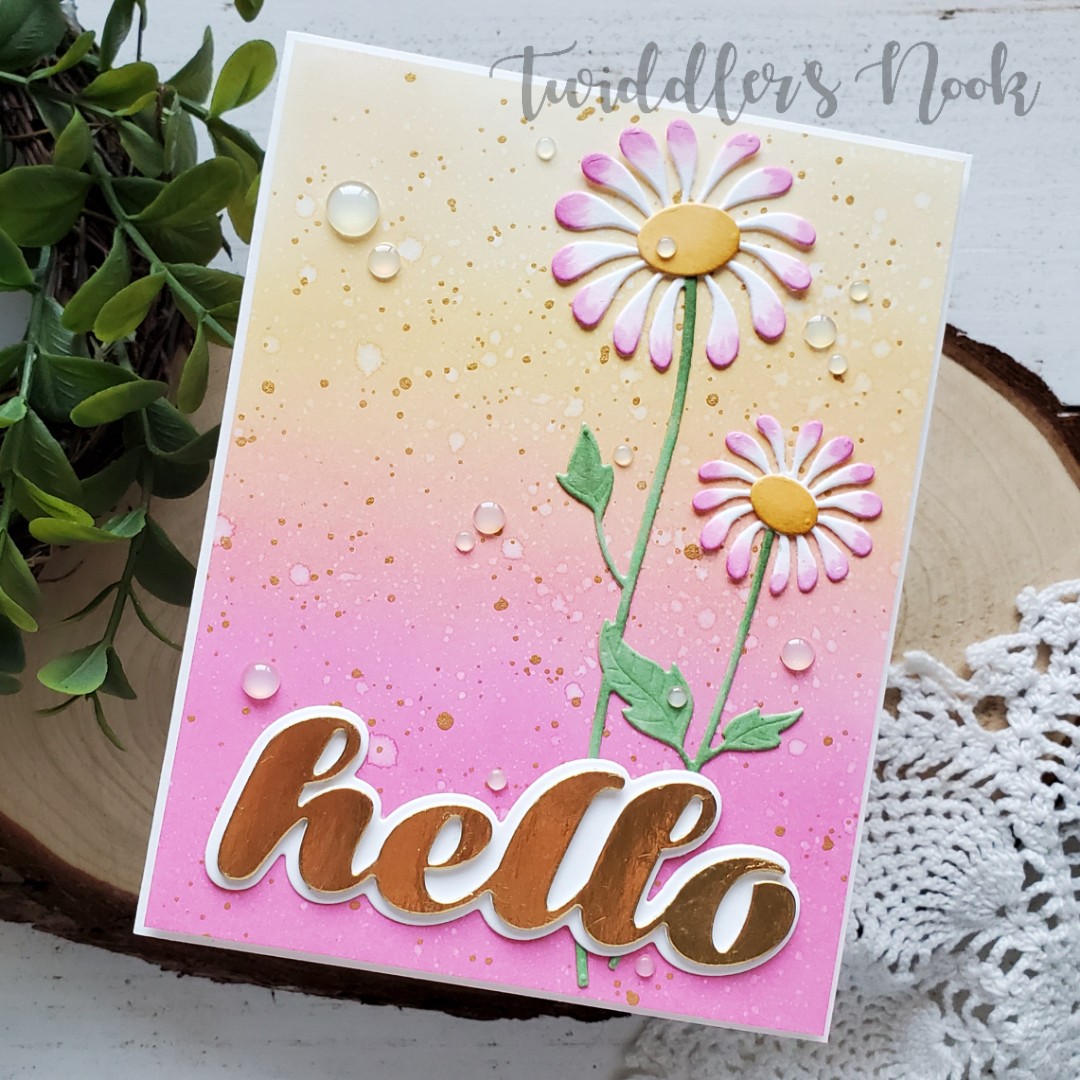
Well, hello there…again! 😉 Today I’m sharing yet another way I thought to use the Poppystamps Delightful Daisy dies paired with the Luscious Script Hello. I absolutely love this sentiment die! You’ll be seeing a lot of it, I can already tell!

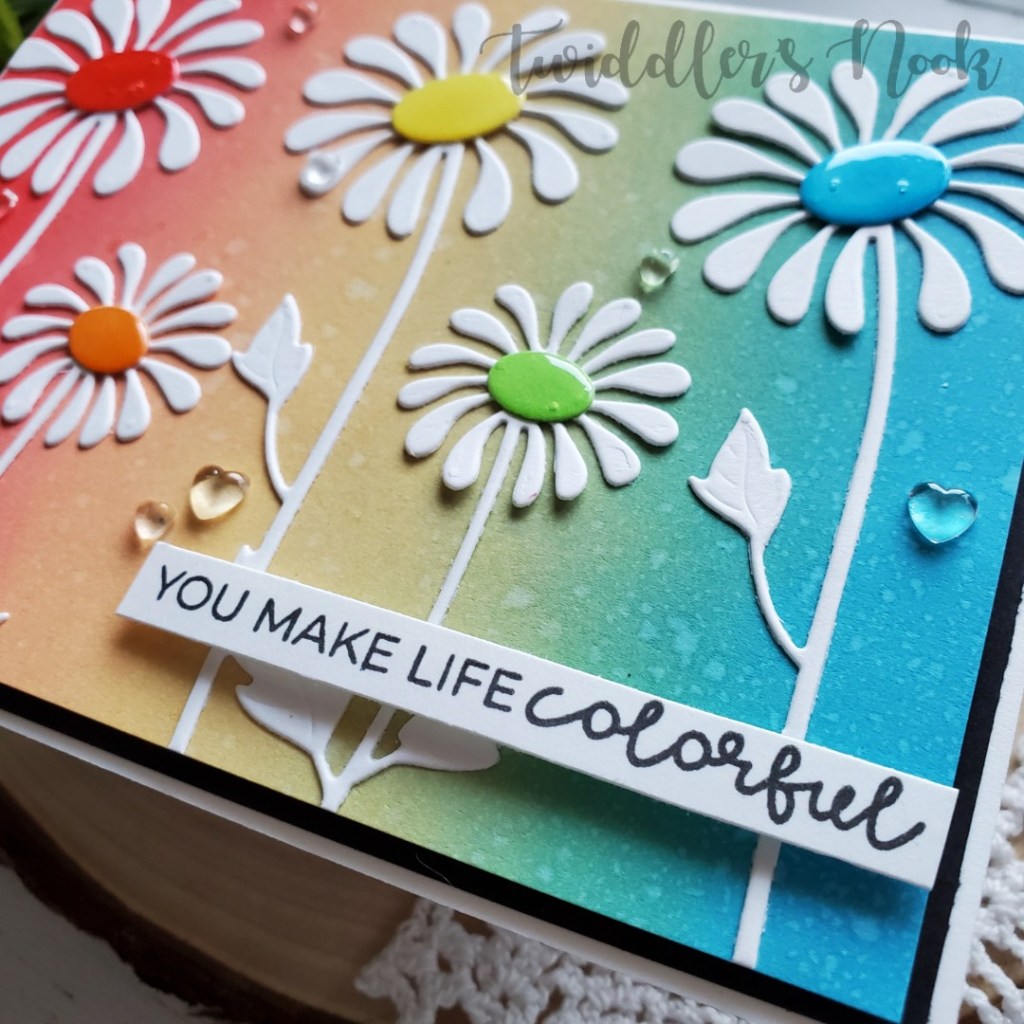
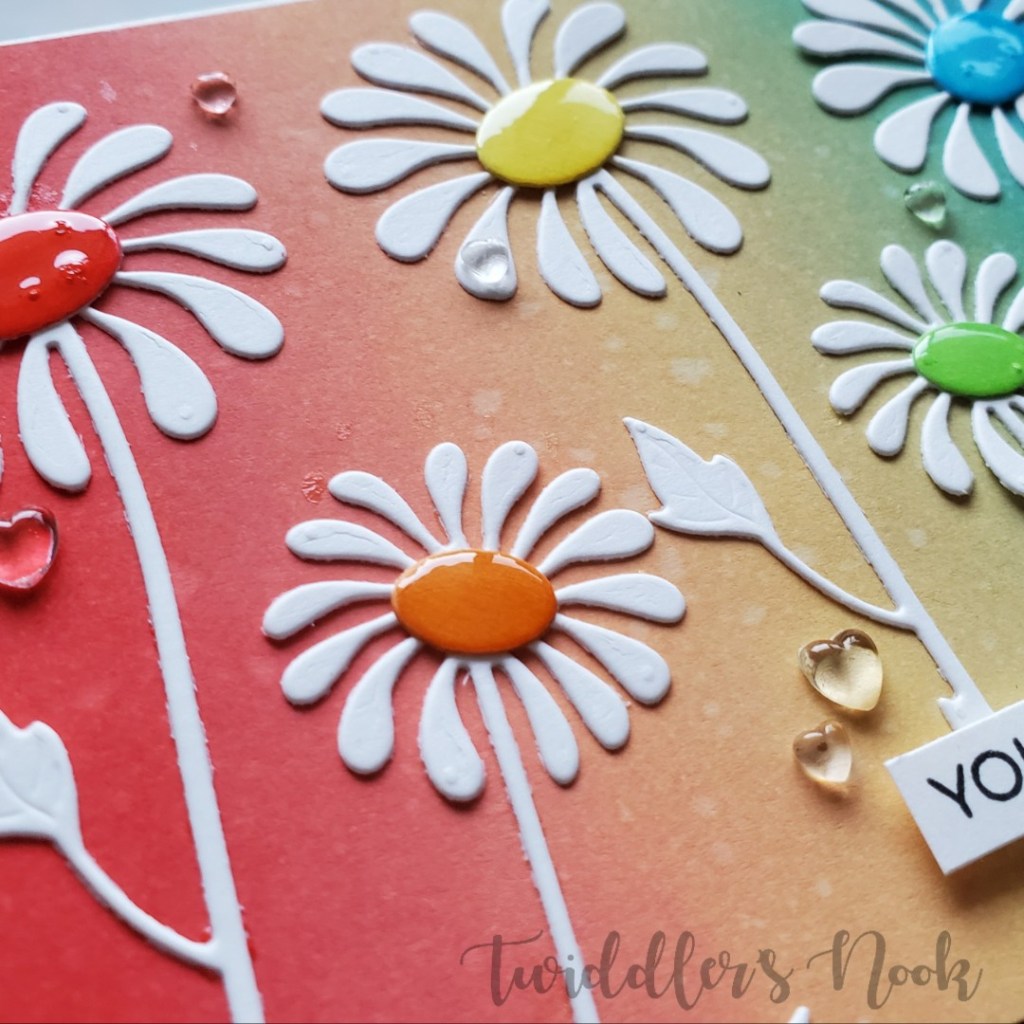
For today’s card, I started by die cutting my flowers from heavy weight cardstock and colored them with copic markers. Playing off the colors I chose for the flowers, I inked up a panel with distress oxide inks using picked raspberry and scattered straw. I spritzed the panel with water and then flicked gold watercolor on it. Once it was dry, I trimmed it down to 4 1/8 x 5 3/8 so there is just a teeny white border showing from the cardbase. The flowers are glued directly to the inked panel and that is popped up on the card base with foam tape.

Then I moved on to the sentiment. I die cut the word hello from gold cardstock once and white cardstsock three times. I adhered all of these together and then die cut the shadow from white as well and glued them together. The sentiment is glued directly to the card front and I moved on to finishing details.

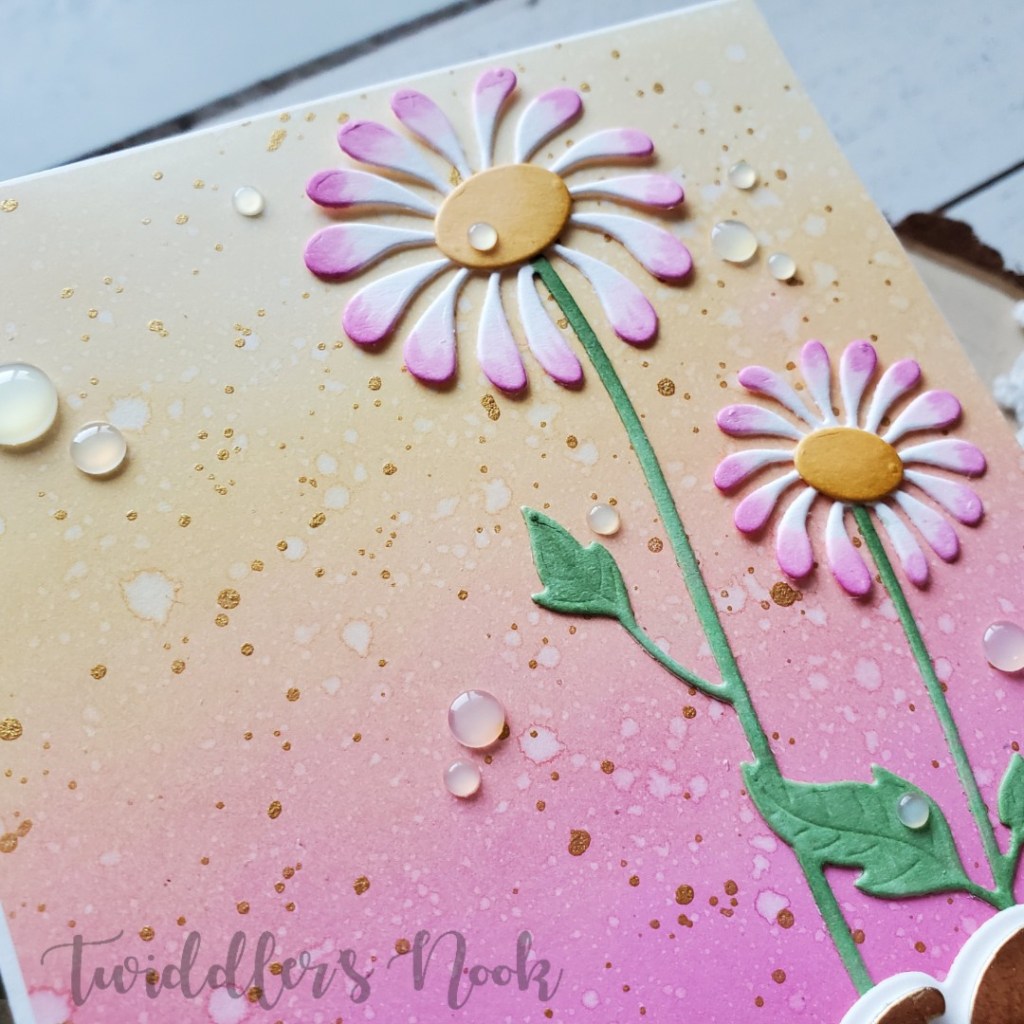
With the shimmer from the gold cardstock and the watercolor splatters, I didn’t think it needed a whole lot but was missing something. I reached for my stash of embellishments and landed on Trinity Stamps Fortune Teller embellishments. I love how these show a little of the color that is behind them but have an opalescent sheen. So pretty! I scattered them about the design and, voila, this card is finished.

This is my final entry into the Poppystamps challenge for this month. I hope you enjoyed these last few days, seeing different ways to use the same dies. It’s always great to get more mileage out of the products you have. I hope you’ve found some inspiration and enjoyed the cards I’ve made.

I appreciate you sharing your time with me. Have a fabulous day!

Poppystamps – Colorful Daisies

Hi there! I’m so excited to share another card using my new Poppystamps Delightful Daisy dies. While I was making yesterday’s card, this idea popped in my head and I had to try it out. It took a couple of tries but I really like how it turned out.

I started out trying Tombow markers on watercolor paper but it just wasn’t giving me the results I was hoping for, so I reached for my distress oxide inks and started blending. This is different than my original idea but I love it. After I was done blending, I spritzed it with water and set it aside to dry while I die cut my flowers. Then, I took copic markers and colored the flower centers and glued them on.

I adhered my flowers down to the inked panel and trimmed it down to 4×5.25. Then I cut a black mat to show about 1/8 of an inch around that. The black panel is adhered to the card front and the inked panel is popped up with foam tape. I stamped my sentiment from Trinity Stamps A Crafters Heart stamp set, trimmed it to a strip and popped it up as well.

For finishing touches I put glossy accents on the flower centers for a bit of shine and then glued Trinity Stamps boiled sugar jelly drop hearts around the design.

I absolutely adore this rainbow of flowers! This sentiment couldn’t be more perfect too! I’m excited to link this card up to the Poppystamps monthly challenge too.

I appreciate you sharing your time with me. Have a fabulous day!

Poppystamps – Hello

Happy Saturday everyone!!! Thanks for taking a minute to stop by. I received some happy mail a couple days ago and couldn’t wait to dig in and make a few cards with my new dies from Poppystamps. Here is the first one I finished. I’ll be entering it into their monthly challenge – floral.

I had an idea what I wanted to do with the dies so I started on my background. I cut a white panel down to A2 size and grabbed my Tombow markers for a little ink smooshing. After a few layers I liked what was going on and set it aside to dry. Then I die cut the delightful daisy 4 times from white cardstock and glued them together. I did the same with the flower centers as well. Then I die cut the luscious script hello 4 times from the same white cardstock and the shadow from a light purple and adhered them all together as well.

I finished things off with some Wink of Stella glitter brush pen to the flower centers and a scattering of Jellyfish Jewels from Trinity Stamps.

In light of things going on, I’ve been mailing out a lot of happy mail and thought this card would be a perfect addition to that stash.

I appreciate you sharing your time with me. Have a fabulous day!

Poppystamps Valentine – Day 2

Welcome back everyone! I’m so happy you’re joining me for another installment of super cute die cut Valentine cards featuring more Poppy Stamps dies!

Today I’m adding another critter in the mix and some great word dies too! I hope you enjoy them!

I just couldn’t let those backgrounds go to waste so I’m using 2 more of them on my cards today. Let’s start with this beautiful teal one!

I adhered the teal Confetti Heart panel to a card base and set to die cutting my elements. This time we’ve got the Whittle Giraffe and Love Outline dies. I used my copics to color the giraffe and then popped them both up with foam squares. Next I took the melon colored hearts and inlaid them above the giraffe like the love is just emanating from him. So sweet!

Finishing touches on this quick card are glossy accents on the inlaid hearts and Wink of Stella glitter brush pen on the Love Outline. I think the colors of this card are so fabulous together and it all just makes me smile!

For our second card today, I couldn’t go long without making more pandas so he’s back and hanging out with his new friend, giraffe.

After adhering my purple Confetti Heart background I inlaid purple, pink and white hearts in all the spaces this time. Then I die cut the Hugs Tags from white and kraft cardstock. I popped the white tags up and inlaid the kraft letters. Then I die cut my Whittle Panda, Whittle Giraffe and Whittle Mound and colored them all with copics. These are also popped up with foam squares. Voila! This simple card is finished too.

Both of today’s cards are actually versatile and don’t have to be Valentine cards, which I love. Sometimes you just need to spread a little love and hugs!

I appreciate you sharing your time with me. Have a fabulous day!

Poppy Stamps Valentines – Part 1

Hello again! I’m super excited to be back and share these fun die cut cards featuring the Valentine release from Poppy Stamps! If you know me at all, you understand that the second I saw this Whittle Panda, I absolutely had to have it! But there was no way I could just order that, so I found a few other fun things to add to my cart and have had a blast playing with it all.

As if that wasn’t wonderful enough, I won the Instagram giveaway from Poppy Stamps for a die that I already bought (because I’m impatient and couldn’t wait) and they were so gracious to let me choose different product which added to my Valentine fun! Today I’ve got 2 cards to share with you and tomorrow I’ll be back with 2 more. I hope you enjoy!

Squeee!!!! I’m so excited about this little panda! I seriously just want to put him on everything! As soon as I opened this awesome Confetti Heart Plate die I knew I had to cut it from all the colors!!! I held back a little though, just 5 colors this time. 🙂 Then I started playing around with different ideas and built a couple of backgrounds.

For this first card I took the white Confetti Heart outline the die gives you and inlaid all the colors randomly. Then I die cut my Whittle Panda and Heart Taglet. I colored the panda and heart with copics and then popped them both up with foam squares. I stamped a sentiment from Trinity Stamps Love and Stuff Sentiments, cut it into a strip and popped it up with foam tape as well.

For finishing touches on this first card I used my Wink of Stella glitter brush pen on the heart in the tag, glossy accents to the panda’s nose and covered random small hearts with Stickles throughout the panel.

Like I said, once I got started, there was no way I could stop. So we’ll just roll right into the second card for today and all it’s cuteness!

This time I took the melon Confetti Heart background and only inlaid melon and teal hearts. Then I took some random white hearts and popped them up with foam tape. I thought it gave a cute bit of interest to a simple card. I die cut my Whittle Panda again, pairing him with the Whittle Mound and colored them with copics. I popped them up with foam squares and then took one of the small hearts and added it to the panda’s tummy. So much cuteness!

For finishing touches on this card I added glossy accents to the panda’s nose and heart and then snagged a tiny sentiment from Trinity Stamps Monster Love set and stamped it in the white heart opening closest to the panda.

I had so much fun making these cards. I hope you enjoyed them and find a little inspiration to be creative!

I appreciate you sharing your time with me. Have a fabulous day!

Poppystamps Dies meets Trinity Stamps Sentiments

Hello again! Today I’m sharing a set of three clean and simple (CAS) cards featuring a recent prize I won during the Coffee Loving Cardmakers blog hop – a gift certificate for Poppystamps. I chose a handful of dies from their “whittle” collection. These really caught my eye and I was excited to play with them. I decided to pair them with a Trinity Stamps new sentiment set called Merry Christmas Senti-mini.

For each of these cards I die cut the elements from white cardstock and custom colored them with my copic markers. Then adhered some with liquid glue and others with foam squares.

I chose a sentiment and stamped it either directly to the card front or, like the one above, die cut and glued on.

And then for finishing touches on each I glued embellishments to the background to go with the scene I had created.

The embellishments I used were also from Trinity Stampssnowflake soup mix, cinnamon red hots jelly drop hearts and frosty snowflakes sprinkles.

These cards came together quickly and would be wonderful if you’re making a mass amount for the holidays. I love the earthy feel that they give, completely different from anything I typically gravitate toward.

I appreciate you sharing your time with me. Have a fabulous day!