Heffy Doodle – Hugs, You Are Awesome Tag Layering

Hello there everyone! So glad you’re here today. It’s #tagtimesaturday and today I’m playing with a variety of fun products from Heffy Doodle and layering some tags together for a fun and full look. I’m beyond happy with how today’s project turned out and hope my daughter loves it too!

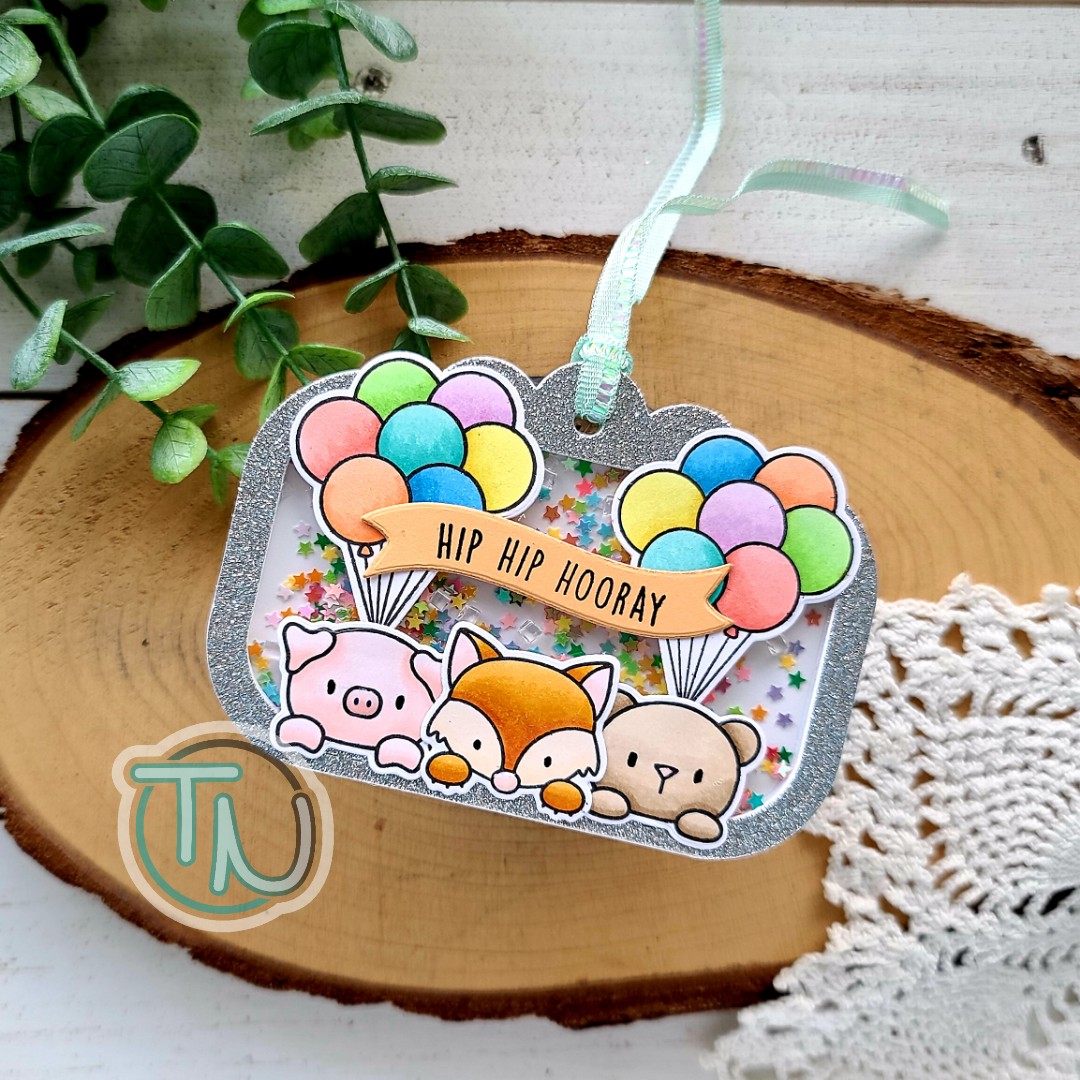
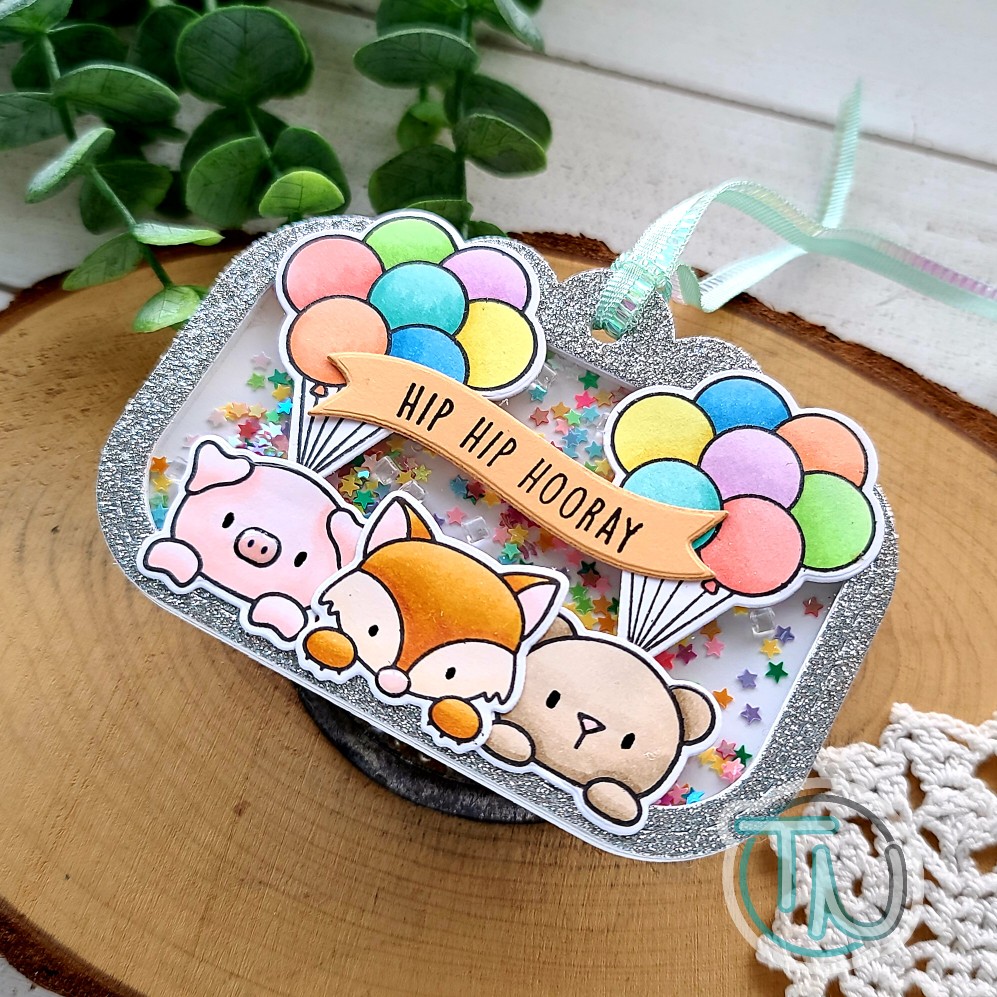
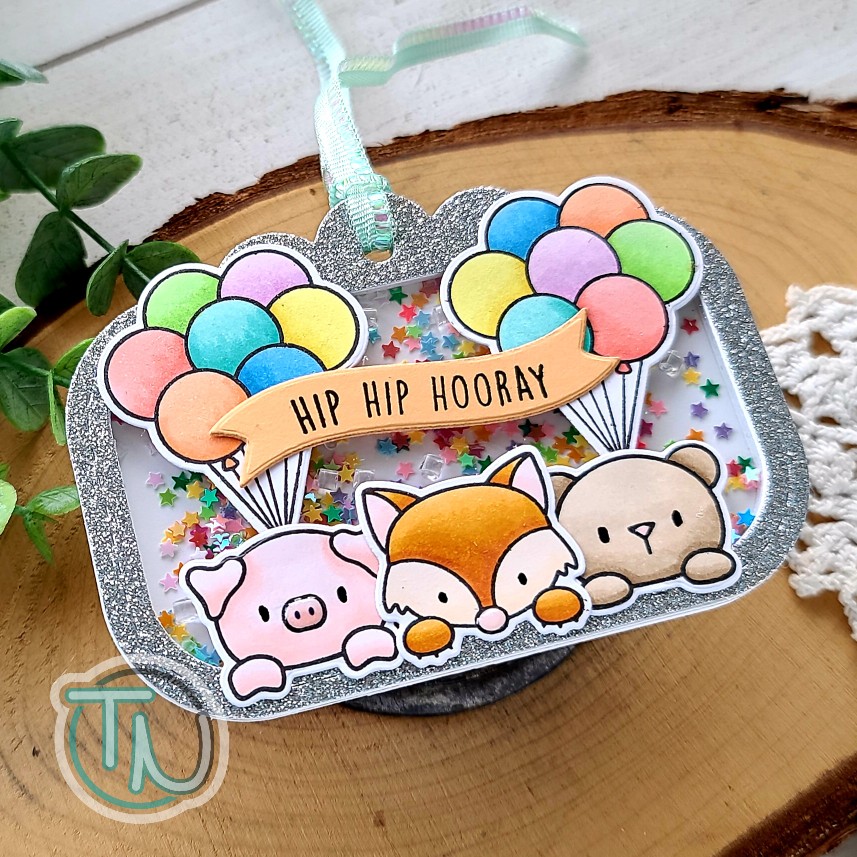
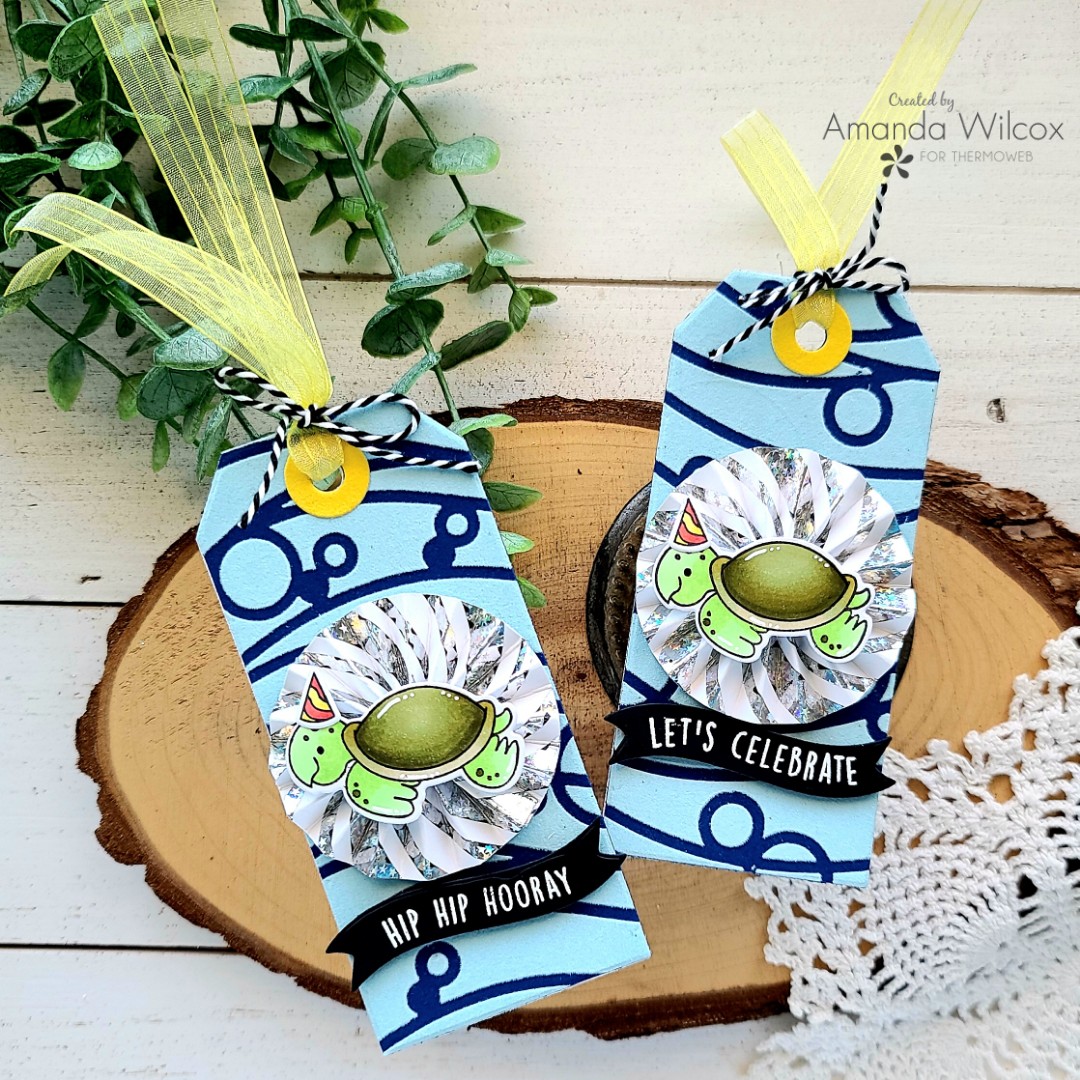
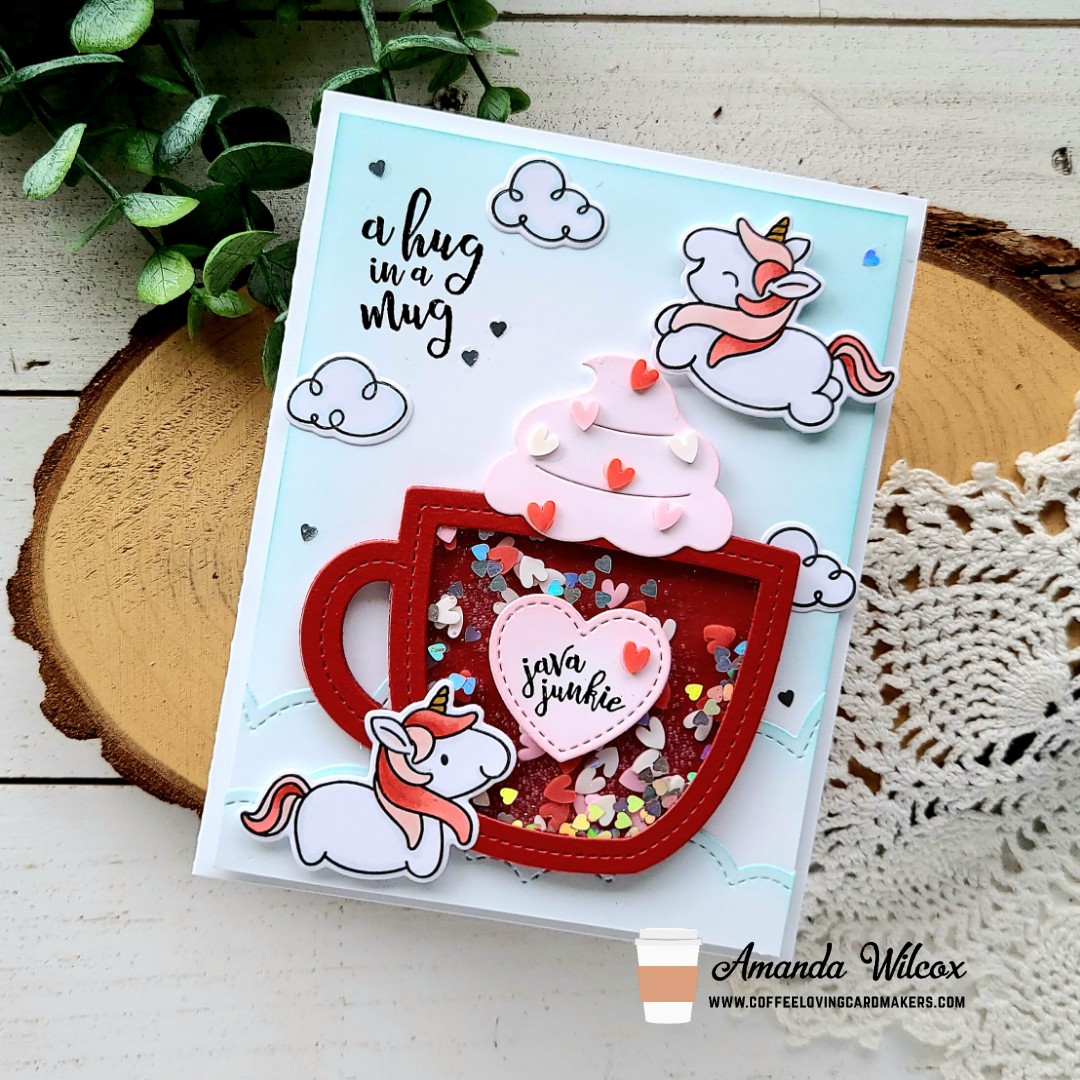
I started this project by choosing a tag shape from the Tiny Tag Trio dies. I cut one from white cardstock knowing I would use it for a backer but could use it for layout in the mean time. Then I chose a sentiment from Very Vertical Greetings stamps and eventually landed on the absolutely adorable chubby unicorn and clouds from Fluffy Puffy Unicorns.

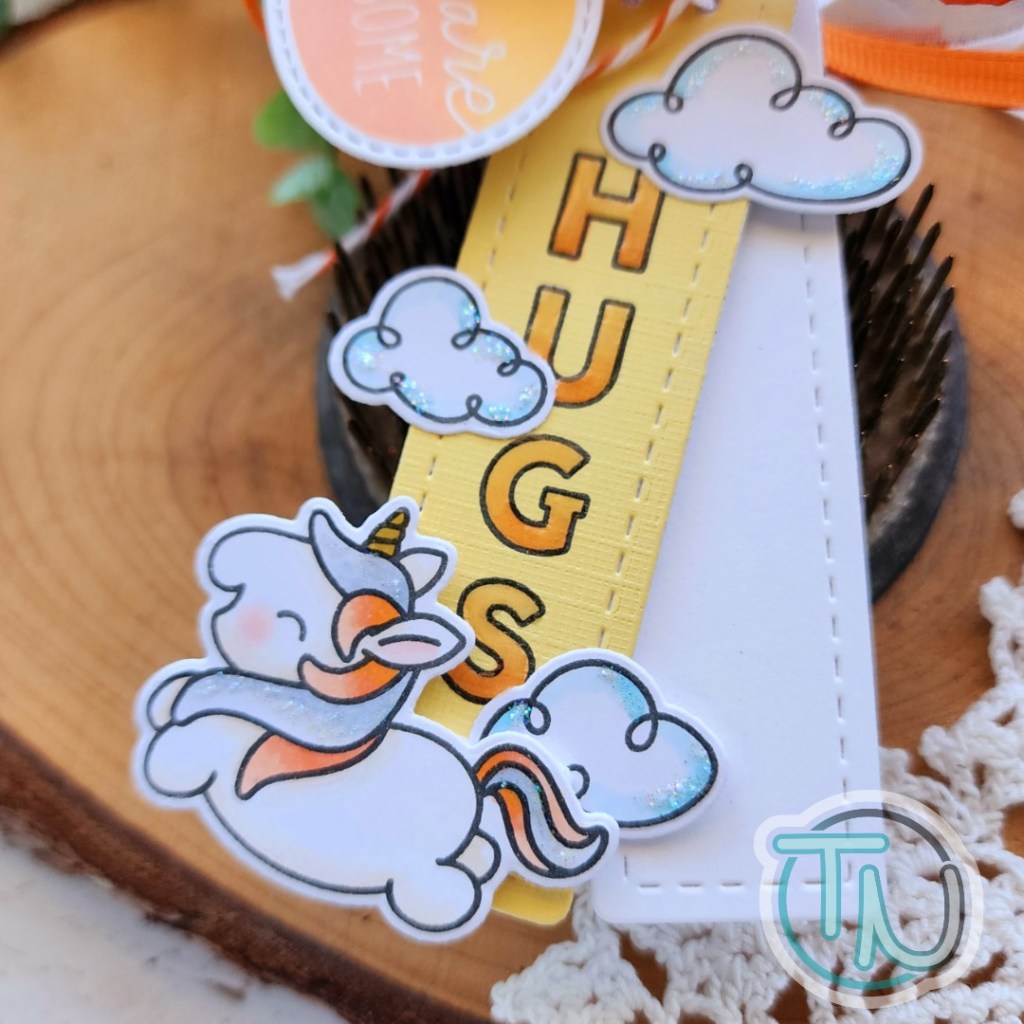
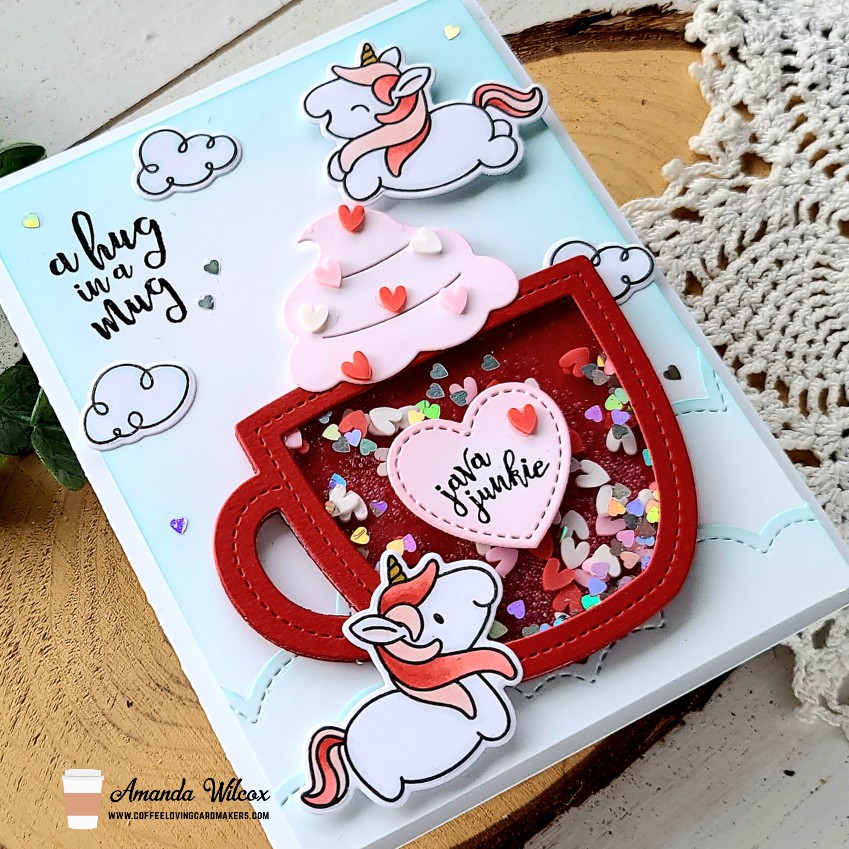
With all of the elements chosen, I narrowed my color palette down to my daughter’s school colors and an accent – yellow. I stamped and colored everything with copic markers, using the coordinating dies to cut the appropriate things out. I glued the clouds to the tag and popped the unicorn up with foam squares.

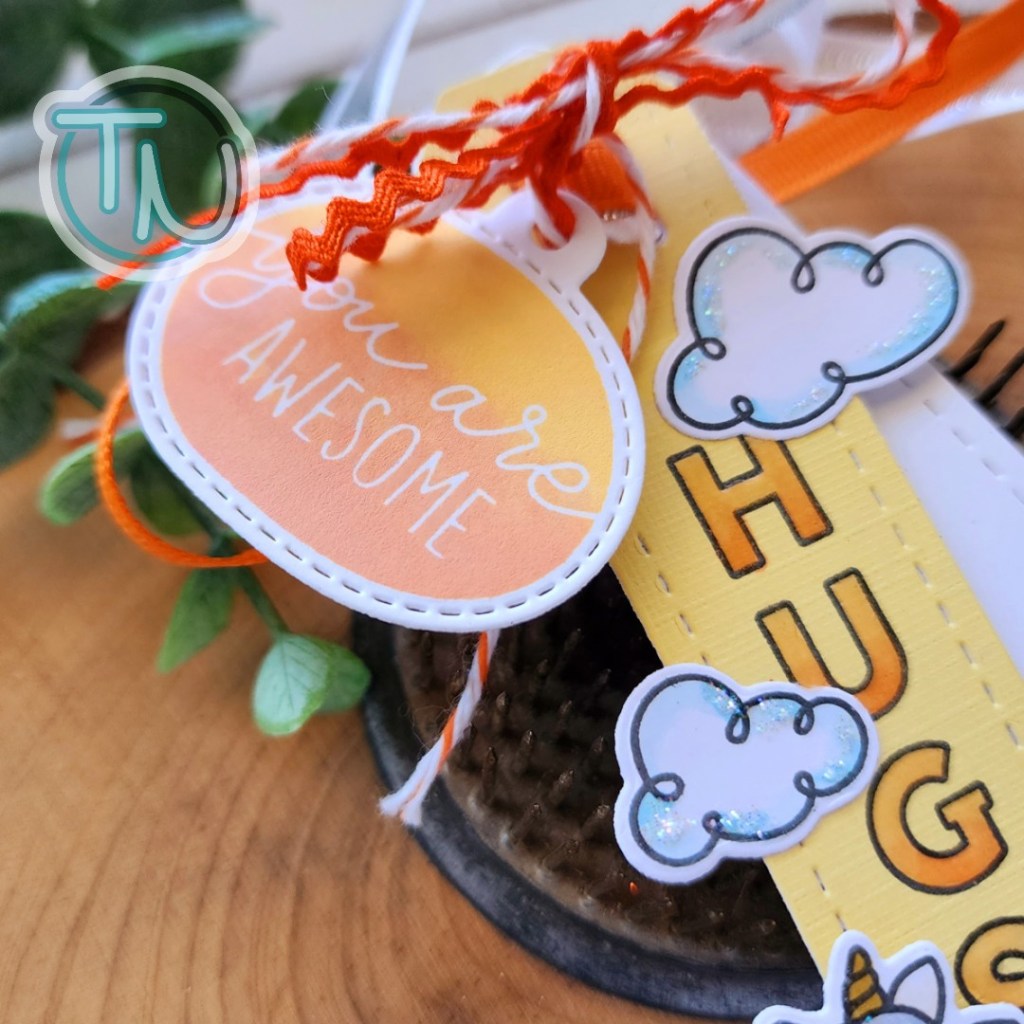
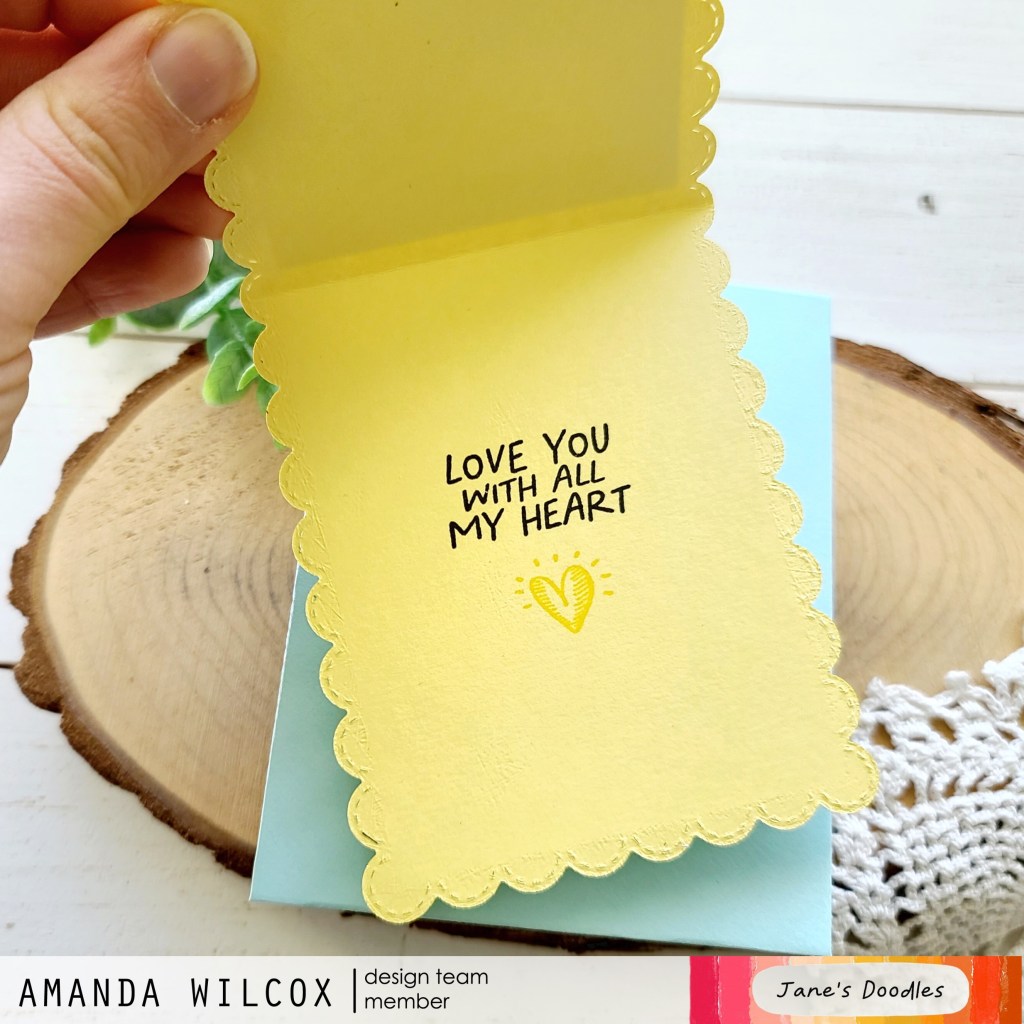
I thought the hugs sentiment was lacking so I went back for more. I love these fun Pebble Sentiment stamps but there wasn’t room on the tag to add it. When I was looking at the dies for these I remembered there is one that turns them into a tag. I thought an awesome way to incorporate more to my tag is to layer them together with fun twine and ribbon.

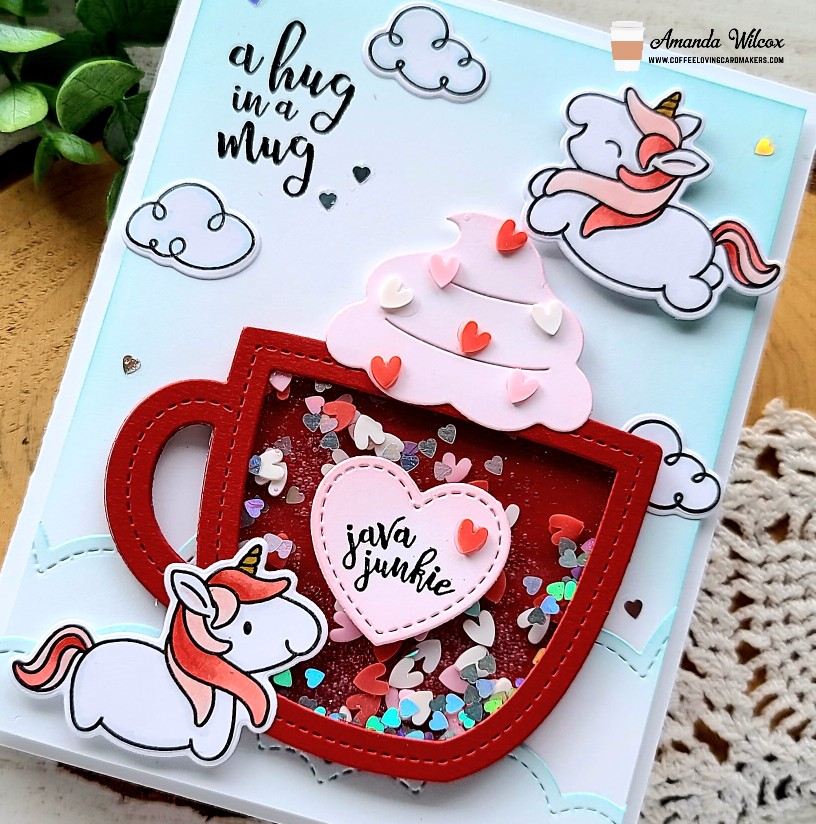
When I stamped my pebble sentiment, I chose a light yellow/orange ink and then went over it a second time with a slightly darker ink only on the bottom. I used my finger to blend out the seam before stamping it so it’s not a harsh line.

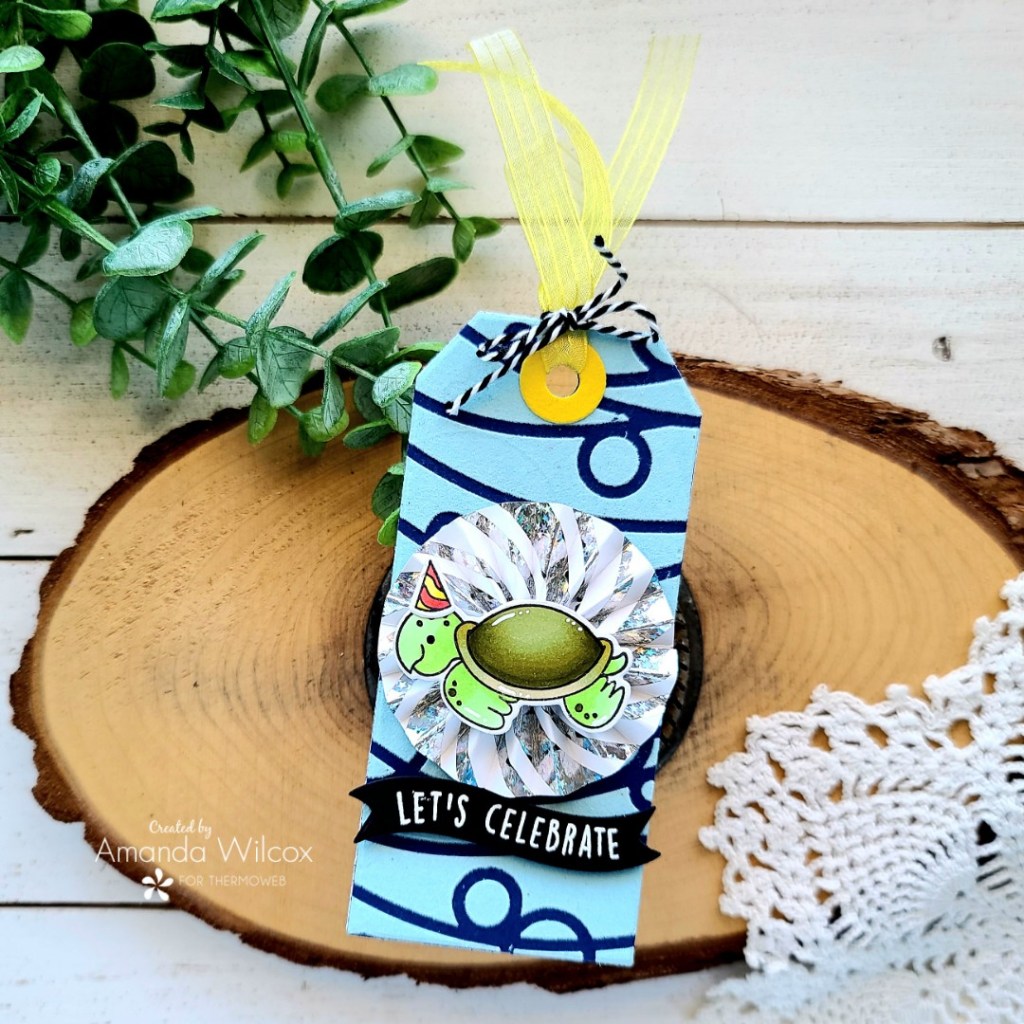
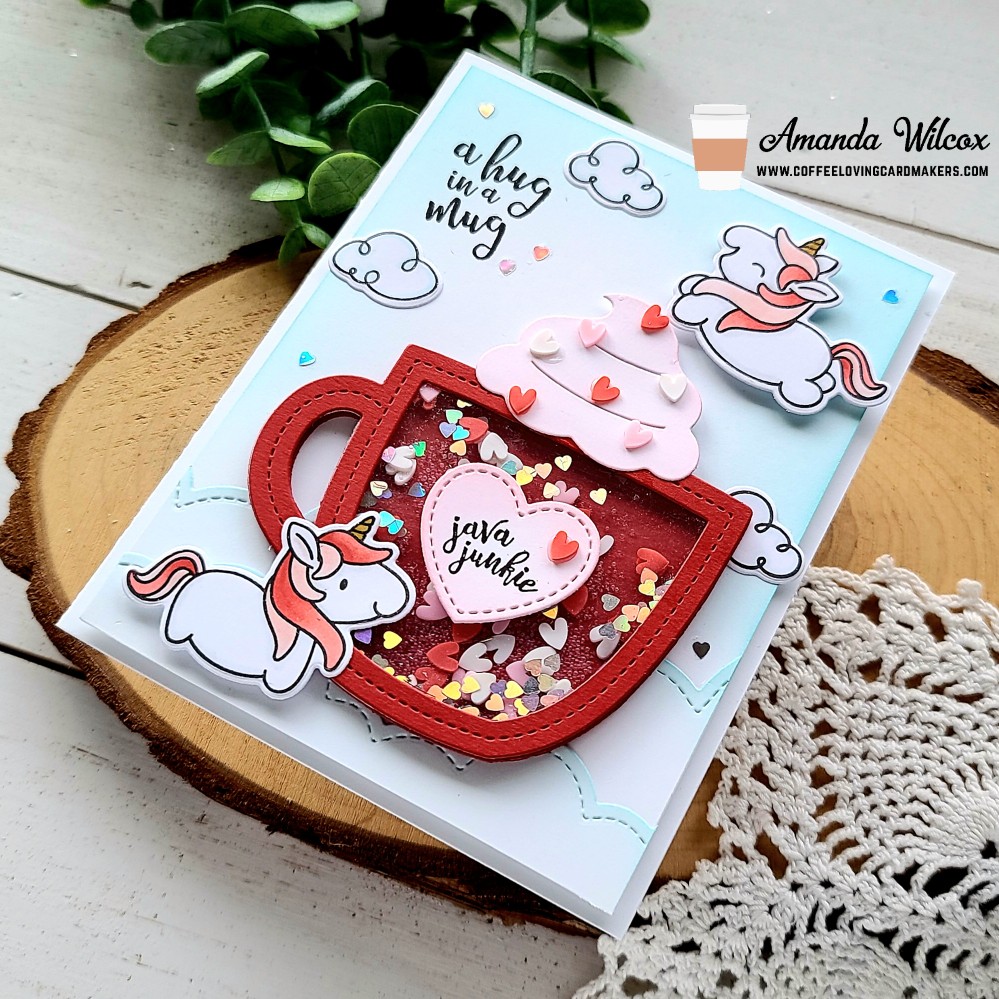
Finally, I threaded all the layers together with different kinds of ribbon from my stash and then decided to add some finishing touches after all.

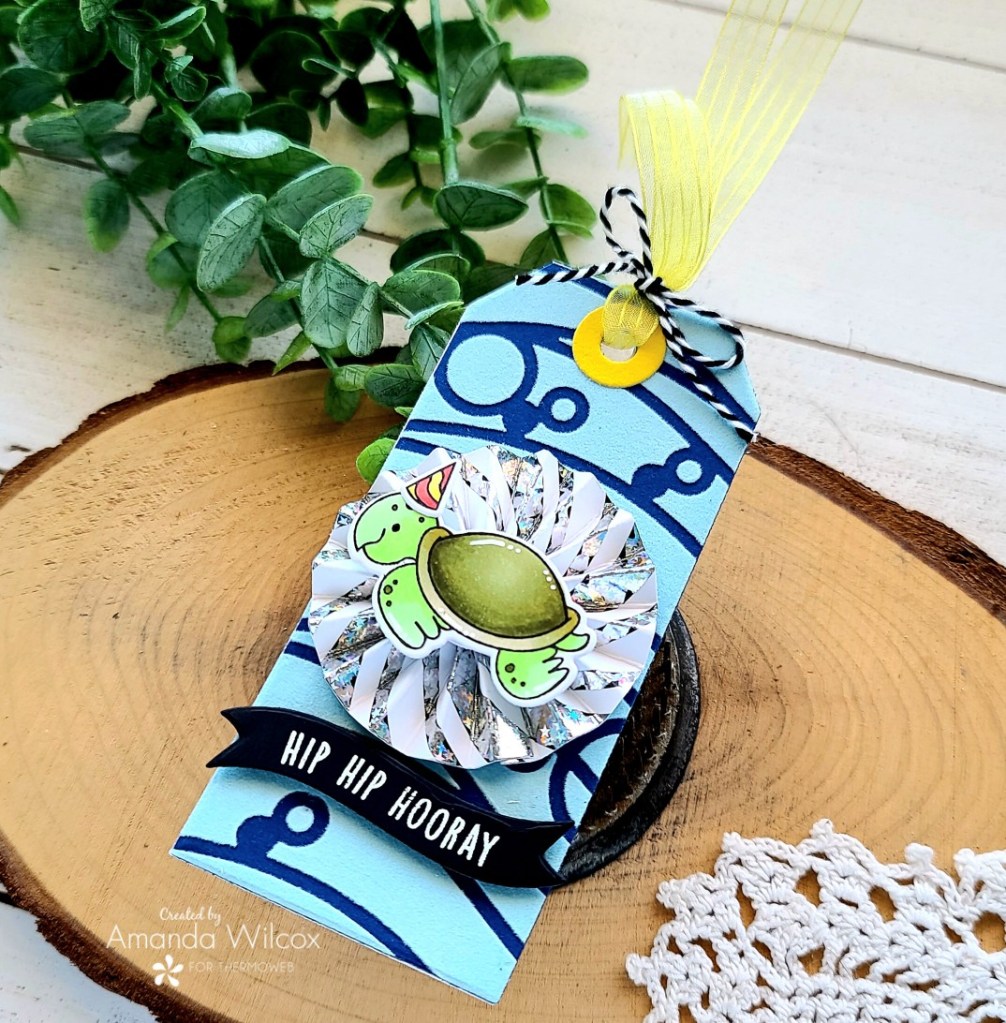
I started with stardust Stickles on the clouds and gray parts of the unicorn hair. Then I added glossy accents to the “hugs” sentiment and unicorn’s horn.

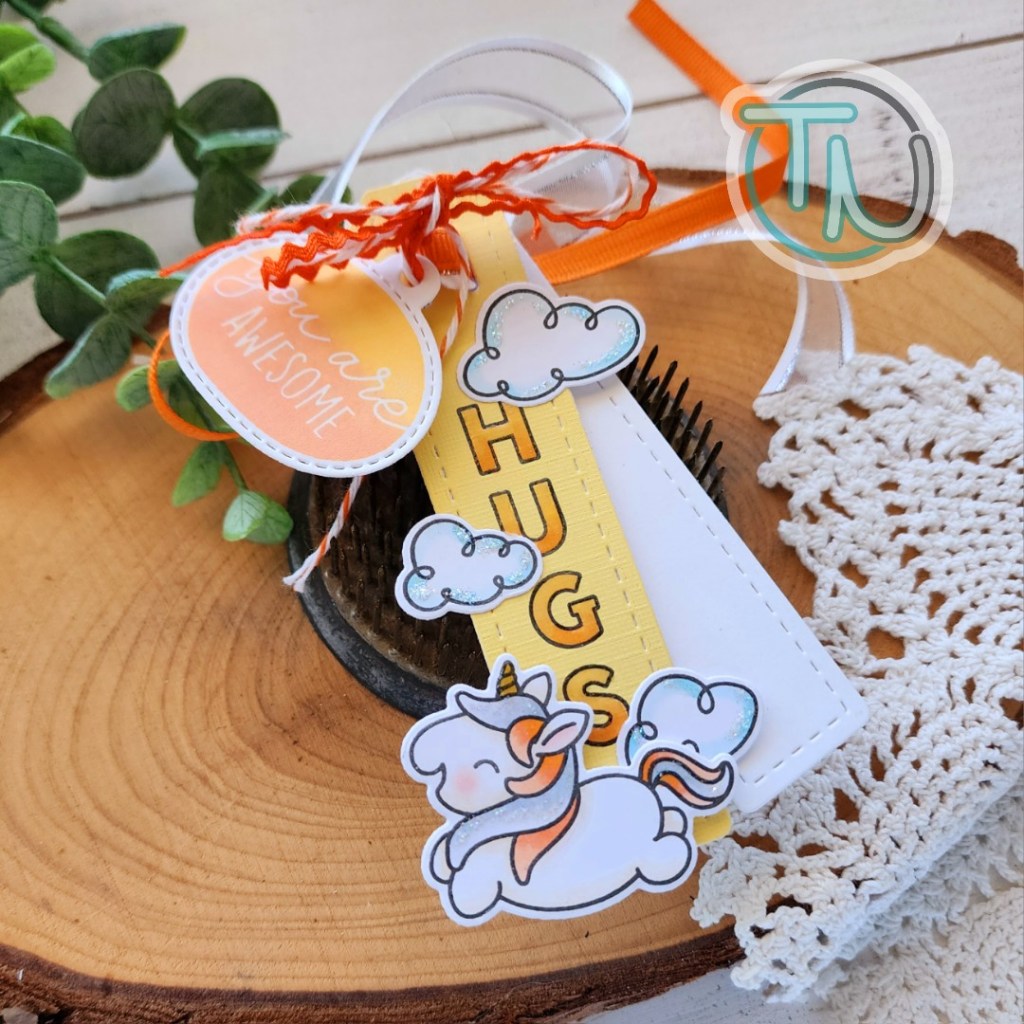
There’s just enough room to write a small message on the white tag and my daughter’s name and school is already written on the back of that one so they know where to deliver her package.

I hope you enjoyed today’s project as much as I did creating it! I get happier every time I look at it.

Products used:
Tiny Trio Tags dies
Pebble Sentiments stamps
Pebble Add On dies
Very Vertical Sentiment stamps
Fluffy Puffy Unicorn stamps and dies

Foam squares
Liquid glue
Glossy accents
Stickles – stardust

I appreciate you sharing your time with me. Have a fabulous day!

Miss Ink Stamps – No Tricks, Just Treats

Happy Thursday everyone! I’m popping in this afternoon with a fun shaker tag featuring more amazing Halloween goodness from Miss Ink Stamps. Today, no coloring though! So fun and super quick to create in case you want to make more than one.

For this tag, I took a scrap of white cardstock and ink blended randomly with distress oxide in spiced marmalade and speckled egg. Then I took the Slimline Scene Builder Clouds stencil and ground espresso distress oxide ink to add the cloud texture. Isn’t this color combo so fun!?! I love how different it is. Then I used the Heffy Doodle frame tag die to cut the panel, keeping both inside and frame pieces. Next, I die cut the frame 6 more times from black cardstock, along with 2 solid tags – one from white cardstock for a backer and another from acetate for my window.

I glued one black frame to the white solid tag and then glued the inked center inside that. Next, I kept adding all of the other black frames with liquid glue. I sprinkled in some champagne stardust glitter, adhered the acetate window over top and finally added the stenciled frame on that. I placed acrylic blocks on top and switched to my ghosts and sentiment.

I stamped and heat embossed both ghosts on iridescent vellum and fussy cut them out. These are super easy to cut and didn’t take any time at all. Next, I stamped and heat embossed a sentiment from the Halloween Sentiments stamps that I thought was perfect for a Halloween treat bag! I used the banner die in the tag die set to cut it out.

For assembly today, I used a foam strip to add the sentiment but I hid mini glue dots behind the ghost eyes to adhere them to my tag. It lets the bottom curl up a little and give that spooky feel. It’s so fun and makes “hiding” the adhesive super easy!

I’m excited to add this to a bag of treats for a special someone at Halloween! It’s going to be great!

Products used today:
Boo Sheet stamps
Halloween Sentiments stamps
Scene Builder: Clouds stencil
Champagne Stardust glitter
Heffy Doodle Tag Along dies
Distress Oxide – ground espresso, spiced marmalade, speckled egg
Bearly Art liquid glue
Glue dots – mini
Foam strips

I appreciate you sharing your time with me. Have a fabulous day!

Miss Ink Stamps – I’m Bacon You a Cake Slider Pop Up Card

Hello everyone. Thanks for stopping by today. This project was an absolute blast to create and by the time I was adding sentiments, I was cracking up. It was so great! I hope you enjoy it too.

Here’s a look at the card all folded up flat like it would come out of the envelope. For the front I used the Punny Farm Pigs stamps and dies from Miss Ink Stamps. I colored everything with my copic markers and cut it all out. Then I took an A2 panel and inked up the Scene Builder: Clouds stencil on it plus an extra for underneath. I layered the Sparkles stencil over the top and chose a peach ink for that to tie in the color palette I used in my coloring.

Next, I cut the main front panel with the Heffy Doodle Slider Card die and also created a peach card for the pull out portion. Using all the pieces as my guides, I stamped sentiments on the inside panel and the pull out one as well. I added some confetti around “Happig Birthday” and a cupcake below “I’m Bacon You a Cake” for fun.

Here’s a little look at the pull out panel. I just think all the puns are so fun!

I used scrappy tape to adhere my pieces together and added it all to a white card base. Then I trimmed the stamped strings off the balloons and added string to them instead. I pulled them taut and adhered them to the back of the piggy. I connected the two with a strip of acetate and glued the pig to the card panel below the fold line only. Be careful here or your mechanism won’t work.

I adhered the other piggy, cake and gift with foam squares only on the bottom portion so the slider still moves but they stay put. Then I finished everything off with a scattering of fun sequins.

Products used today:
Punny Farm Pigs stamps and dies
Scene Builder: Clouds stencil
Sparkles stencil
Heffy Doodle Slider Pop Up dies
Pawsome Stamps campfire sequins
Scrappy Tape 1/4″
Foam squares

I appreciate you sharing your time with me. Have a fabulous day!

MFT Stamps – Wishing You Sunnier Days Ahead Shadow Box Card

Happy Saturday crafty friends! I have been wanting to create more shadow box cards lately. I keep searching them on Pinterest and watching videos for inspiration and I finally set a night aside to just create one. It was so fun! I totally fussed with it for hours and kept coming back and changing my mind, but I love how it turned out!

I used the Heffy Doodle Big Shadow Box Card die set for my card base and hills. Then I pulled out the Weather With You and Sprinkling You With Love stamp sets from MFT Stamps to decorate it all. I feel like these sets have similar artwork so even though the critters are different, they play well together.

Once I created the box card itself, I started by filling in the inside and front with all of my critters. Then I knew I wanted to decorate the sides so I had colored extra images so I started filling those in too.

After the inside and sides were finished, I didn’t like something about the inside, so I kept fussing and then it hit me that the bear sprinkling water was not working well. So I carefully removed him and added the sunshine instead. Then, I didn’t want to waste this cute bear so I added him to the back panel where I will write my little message. Isn’t that so cute?!?

I almost forgot, the sentiment on the top front is from Weather With You and it’s cut from a Pink & Main Large Sentiment Strip die.

Products used today:
Heffy Doodle Big Shadow Box Card dies
MFT Stamps Weather With You stamps and dies
MFT Stamps Sprinkling You With Love stamps and dies
Pink & Main Large Sentiment Strip dies
Scrappy Tape – 1/8″ and 1/4″
Bearly Art liquid glue

I appreciate you sharing your time with me. Have a fabulous day!

Heffy Doodle – Hip Hip Hooray Shaker Tag

Well, hello again! Today I’m back with a super fun and snazzy shaker tag to share with you. I’ve been creating a fun, usually punny, tag for my daughter for each dance team competition she’s performed at. Today is State Championships and the last tag for this season.

For this one, I chose images from Bed Heads and Popping By from Heffy Doodle, along with their Tag Along die set. My sentiment is from the Wavy Banner Sentiments and coordinating dies.

To create my tag, I started by laying the images on the tag frame die to see what I could get to fit. I decided that the three cute critters and a couple of balloon bundles would be just perfect. So, I stamped everything out and colored them with my copic markers. Then, I used the coordinating dies to cut everything out and used liquid glue to adhere them together.

Next, I created my shaker tag using the solid die to cut 2 backing pieces from white cardstock and one more from acetate for my window. Then I cut the frame from silver glitter cardstock once and white cardstock six times. I added the silver frame to the acetate and the other white frames to one of the white solid backing pieces. I filled the shaker well with embellishments from my shop called Wishing on Rainbow Stars and sealed it up.

I added my images to the front of the tag with liquid glue. Then stamped and die cut a sentiment and banner from the Wavy Banner Sentiments set. I also added this with liquid glue.

For finishing touches I added black glaze pen to all of their eyes and glossy accents to all of their noses. Then I added a little sparkle to the balloons with Wink of Stella glitter brush pen, tied a ribbon through the hole and it’s ready for our message on the back and to be delivered to her with a small gift.

Products used today:
Popping By stamps and dies
Bed Heads stamps and dies
Wavy Banner Sentiments stamps and dies
Tag Along dies
Wishing on Rainbow Stars embellishments
Bearly Art liquid glue
Wink of Stella glitter brush pen

I appreciate you sharing your time with me. Have a fabulous day!

Jane’s Doodles – Butterfly Shadow Box Card

Hello again everyone! I’m back with a bright, springy shadow box card featuring the Doodle Butterflies digital stamps from Jane’s Doodles. I have been on a huge interactive card kick lately so I knew I wanted to put these sweet butterflies in a shadow box card for sure. I love how they look flying around in there.

First, I printed my butterflies and chose a color palette from my copic markers. I randomly colored them all in and cut them out with the scan-n-cut. Then I attached each butterfly to an acetate pick (about 1/4″ wide) and set them aside while I created my shadow box.

Today’s shadow box is created using the Heffy Doodle Big Shadow Box die set. I cut all the elements from heavy white cardstock. Then I used my Newton’s Nook Clouds stencil and a blending brush to ink some clouds on all sides of my box, inside and out. Then I used the ink left in my brush to add a little texture to the inserts that the butterflies will be adhered to. I used scrappy tape to adhere the box together and zots glue dots to add my butterflies in place with the exception of 2 that I glued to the back of the box with liquid glue.

I cut the sentiment with a stitched banner from Newton’s Nook and adhered it to the front of the box and this card is all finished! Isn’t it just so bright and make you ready for spring? I personally am ready for summer and warm weather but I’ll take some spring sunshine when I can get it for now. Haha.

Products used:
Jane’s Doodles – Doodle Butterflies digital stamps
Heffy Doodle Big Shadow Box dies
Newton’s Nook Frames & Flags dies
Newton’s Nook Clouds stencil
Blending brush
Zots glue dots
Scrappy tape – 1/4 inch and 1/8 inch

I appreciate you sharing your time with me. Have a fabulous day!

Jane’s Doodles – Hugs and Kisses

Happy Valentine’s Day everyone!!! I hope you had a wonderful weekend and today is starting off your week wonderfully. I’m over on the Jane’s Doodles blog today and wanted to squeeze in one more fun Valentine that I created but the design could be adapted easily for year round inspiration and fun.

I started with the mouse digital stamp from Jane’s Doodles – printed and colored him with my copics and then used the scan-n-cut to cut him out. However, this left a big blank white space between his tail and the balloon that bugged me so I took the craft knife and cut it out.

Then I cut the slimline scalloped panel from the Heffy Doodle Slimline Pull Tab die set and folded it in half to create my card base. Next, I used the Pink & Main Layered Slimline dies to cut a white panel that would fit inside. After cutting it out, I realigned the die and cut the other end to create a custom sized panel to fit my mini card front.

I stenciled the panel with the Jane’s Doodles Hearts stencil to create a scene background – green fading up to yellow. Then I came in with a small heart from the Jane’s Doodles Love You stamp set for some tone-on-tone heart accents in the background. I adhered the stenciled background to my card base and popped up the mouse image.

Next, I used a banner die from the Newton’s Nook A7 Frames & Banners die set and cut out a sentiment that printed with my mouse image and popped it up with foam strips.

Last, I opened up my card and stamped a sentiment inside from Love You along with another heart from the same set.

Oh, and there were a couple of small finishing details today too. I added black glaze pen to the mouse’s eyes, Wink of Stella glitter brush pen to the highlight in the balloon and a teeny big of glossy accents on the mouse’s nose too.

Remember, valentines don’t have to be pink and red all the time. When your daughter’s favorite color is yellow…sometimes they’re yellow.

Products used today:
Jane’s Doodles Mouse digital stamp
Jane’s Doodles Hearts stencil
Jane’s Doodles Love You stamps
Heffy Doodle Slimline Pull Tab dies
Newton’s Nook A7 Frames & Banners dies
Pink & Main Layered Slimline dies
Foam squares
Wink of Stella glitter brush pen
Glossy accents

I appreciate you sharing your time with me. Have a fabulous day!

Thermoweb – Gift Tags with Flocking

Hey crafty friends! I’m over on the Thermoweb blog today sharing a couple of fun gift tags featuring Deco Foil Flock transfer sheets and a new way to use your slimline toner sheets!

The panel I used for my flocking was perfect to die cut 2 of these Reverse Confetti tags out of so I just ran with it and made a set of fun tags for the next time I have gifts to give.

I absolutely LOVE that I was able to create these fun rosettes with the slimline toner card fronts too! Each card front will give you 4 rosettes!!! Such a fun addition to the design.

Be sure to head over to the Thermoweb blog for all the details and a list of products I used to create these awesome tags!

I appreciate you sharing your time with me. Have a fabulous day!

Coffee Loving Cardmakers – Java Junkie Shaker

Hello there! Today I’m over on the Coffee Loving Cardmakers for the first Tuesday Tea of 2022!!! Can you even believe it?!? Time just flies by too fast. I hope you all had a wonderful New Year holiday and are ready to jump into fun crafting! I’ve got a shaker card today featuring so many companies and highlighting embellishments from the Twiddler’s Nook shop. We just had our mini Valentine release yesterday and I couldn’t wait to start creating with it!

I recently picked up these adorable unicorns from Heffy Doodle that I’ve been eyeing for an eternity and I’m so happy to color them up in Valentine colors! Aren’t they adorable!?! Then I used the Lawn Fawn stitched mug die sets to create a shaker and filled it with three embellishments from Twiddler’s Nook – sweethearts clay hearts, holographic hearts confetti and rosetta pixie dust micro beads. The whipped cream on my mug is from the Lawn Fawn cupcake die set.

To create the background for my card, I cut a white panel to 4×5.25 inches and inked the top and side edges with Lawn Fawn mermaid ink and a blending brush. Then I cut two layers of clouds used the Lawn Fawn cloudy border dies and inked the tops of those with the same color before adhering all the layers with liquid glue.

Next, I used my images as guides before stamping my sentiment in the top left sky area. Then I started adding everything with either foam squares or liquid glue, or a combo.

For finishing touches today, I added Wink of Stella glitter brush pen to the unicorn horns, sweetheart clay embellishments to the whipped cream and heart on the mug and a scattering of holographic hearts around the sky.

I probably had way too much fun creating this card but I’m just so happy with how it turned out and think it would make anyone smile when they opened it! Don’t you?!?

Products used today:
Heffy Doodle Fluffy Puffy Unicorn stamps and dies
Lawn Fawn Outside In Stitched Mug dies
Lawn Fawn Stitched Mug Frame dies
Lawn Fawn Puffy Cloud Border dies
Lawn Fawn mermaid ink
Trinity Stamps blending buddy brushes
Hero Arts 2018 My Monthly Hero Kit stamp set
Twiddler’s Nook Pixie Dust Micro Beads – rosetta
Twiddler’s Nook Sweethearts Clay Heart embellishments
Twiddler’s Nook Holographic Hearts embellishments
Wink of Stella glitter brush pen
Foam squares
Liquid glue

I appreciate you sharing your time with me. Have a fabulous day!

Heffy Doodle – Hey Gull Friend!

Thanks so much for stopping in today! I’m sharing a super bright and fun slimline card featuring some of the goodies from my most recent Heffy Doodle order! Right after I orderd these fun seagulls I kept seeing inspiration all over and it was killing me to wait for them to arrive. Needless to say, I had these cuties inked up and colored within minutes of finding the package in my mailbox!

I had a general layout in my head so I did stamp and color the images straight away. I used the coordinating dies to cut them all out and set them aside. Then I took a white panel and used different dies from the Slimline Scenery die set to cut sections. The one thing I love about these dies is how they give the stitched detail on both sides of the cut line so you could use either! It’s great!

After I cut the sections apart, I pulled out distress oxide inks and inked up each panel, except the clouds. From top to bottom I used squeezed lemonade and mustard seed, peacock feathers, mermaid lagoon, blueprint sketch, antique linen and gathered twigs. Then I spritzed it all with water and let it dry.

Next, I cut a slimline card base measuring 3.5×8.5 inches and adhered the layers one at a time working from top to bottom to make sure everything fit together properly. Then I used liquid glue to adhered my images and popped the card in my MISTI to add the fun sentiment at the bottom.

For finishing touches, I added glossy accents to the bird beaks and feet and black glaze pen to their eyes. Then I pulled a couple of seashells from the Twiddler’s Nook Glass Beach embellishment mix and glued them on either side of the sentiment at the bottom.

I just love how fun and bright this card turned out! Originally I was going to use all blue for the background but I’m just loving that yellow panel for the bright sunshine coming from behind the clouds.

Each month the Heffy Doodlers Facebook group has challenge you can enter. This month’s theme is adventure so I’m going to link this fun card up there!

Products used on today’s card:
Heffy Doodle You Go, Gull stamps and dies
Heffy Doodle Slimline Scenery dies
Twiddler’s Nook Glass Beach embellishments
Glossy accents
Distress Oxide inks
Tombow Mono Multi liquid adhesive
Copic markers

I appreciate you sharing your time with me. Have a fabulous day!