Birch Press Design – Fall is in the Air

Happy weekend again my friends! I hope your day is starting off wonderfully! I’m over on the Birch Press Design blog today with a fall-themed card that just makes my heart so happy! I’m really ready for the season change and all the things that come with it like pumpkin spice, chai lattes, crisp mornings and pumpkin patch fun! Hence, today’s card theme!!!

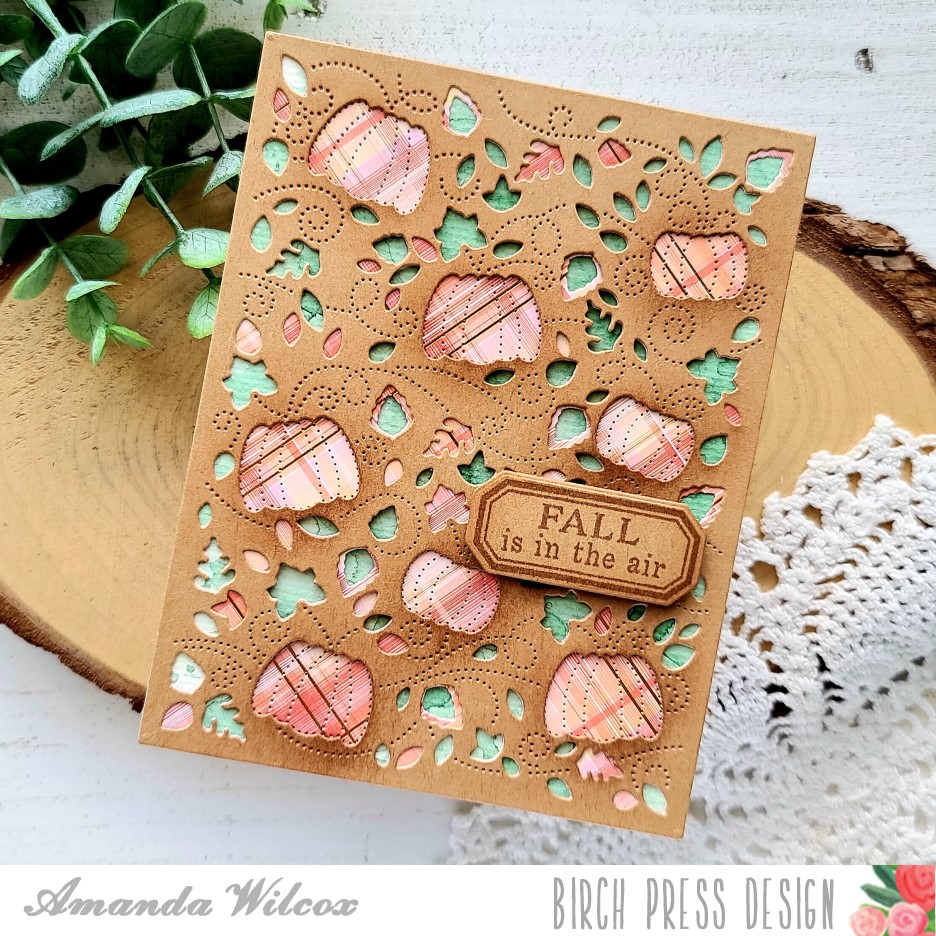
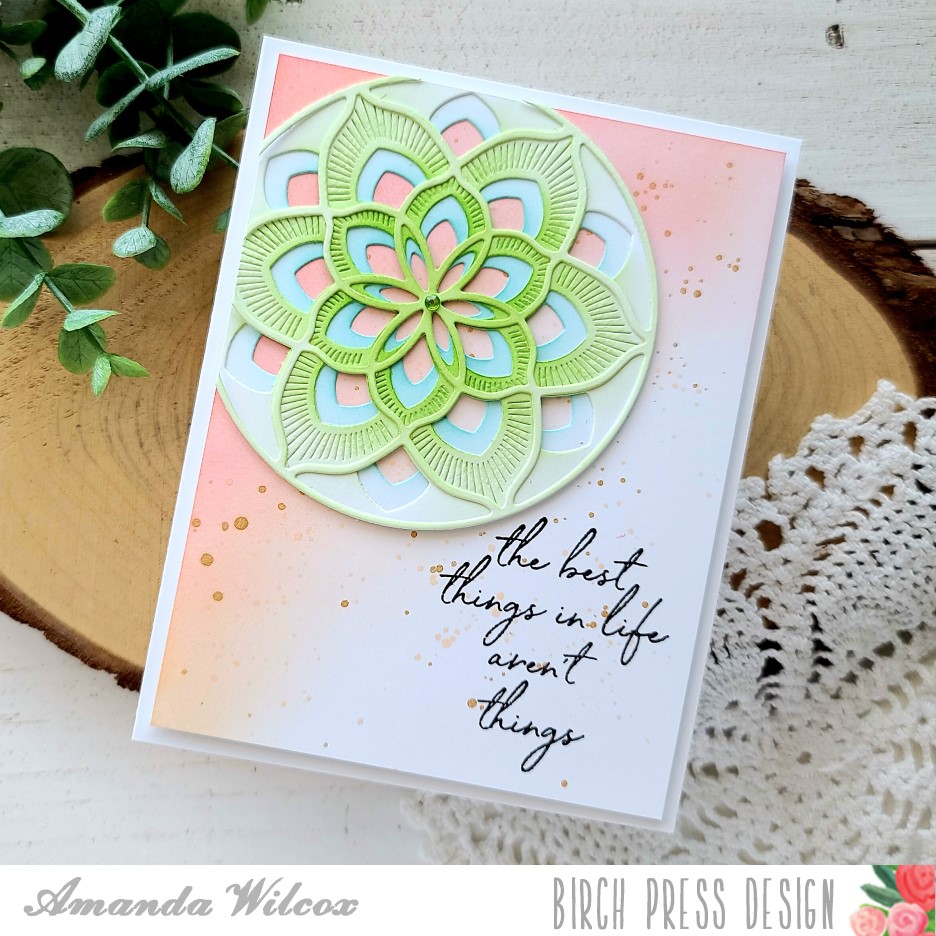
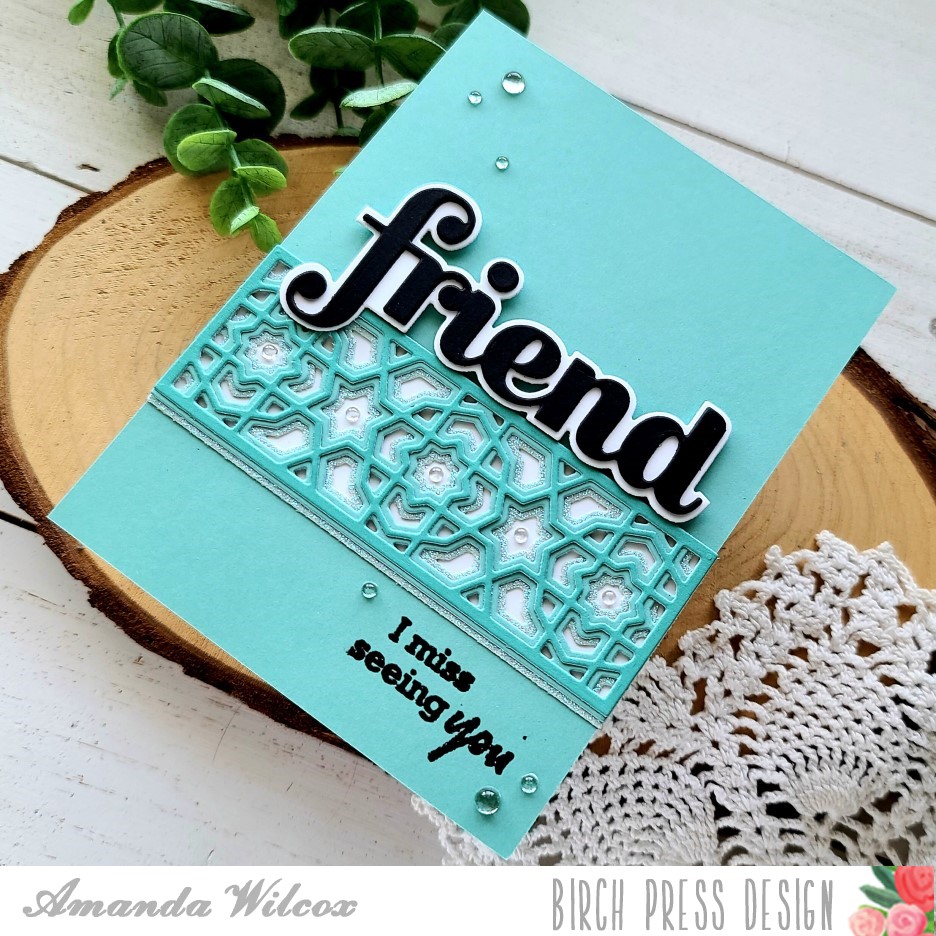
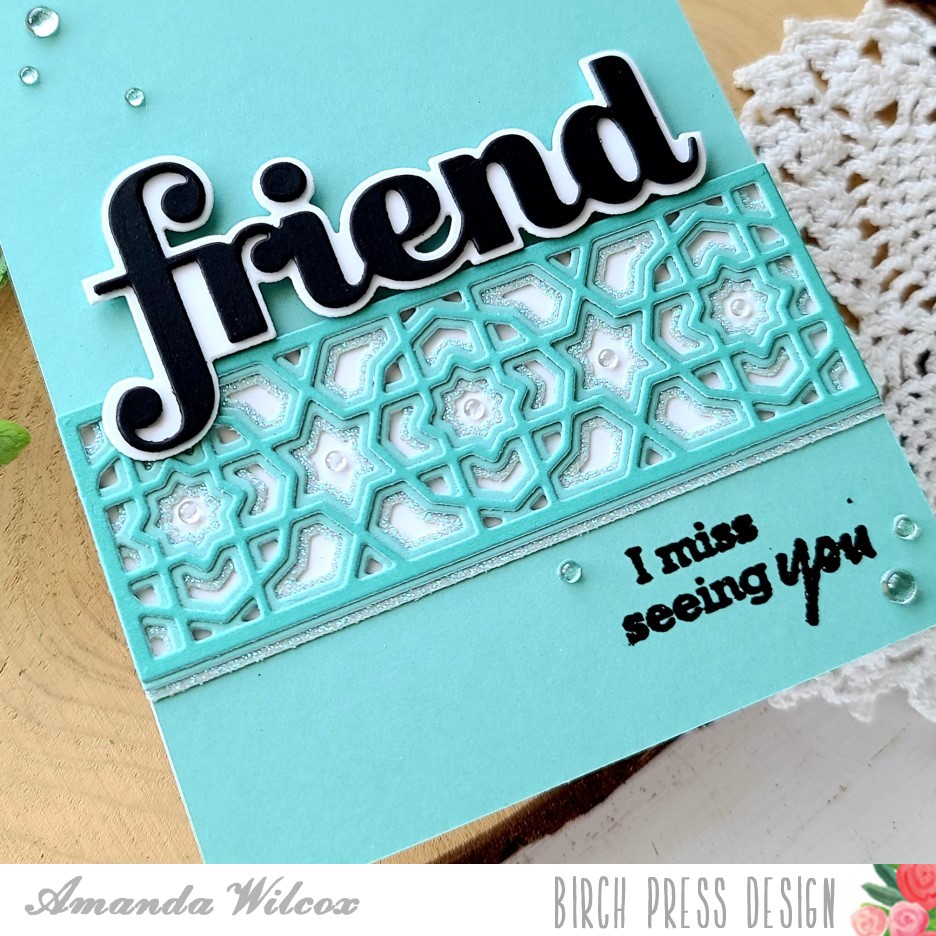
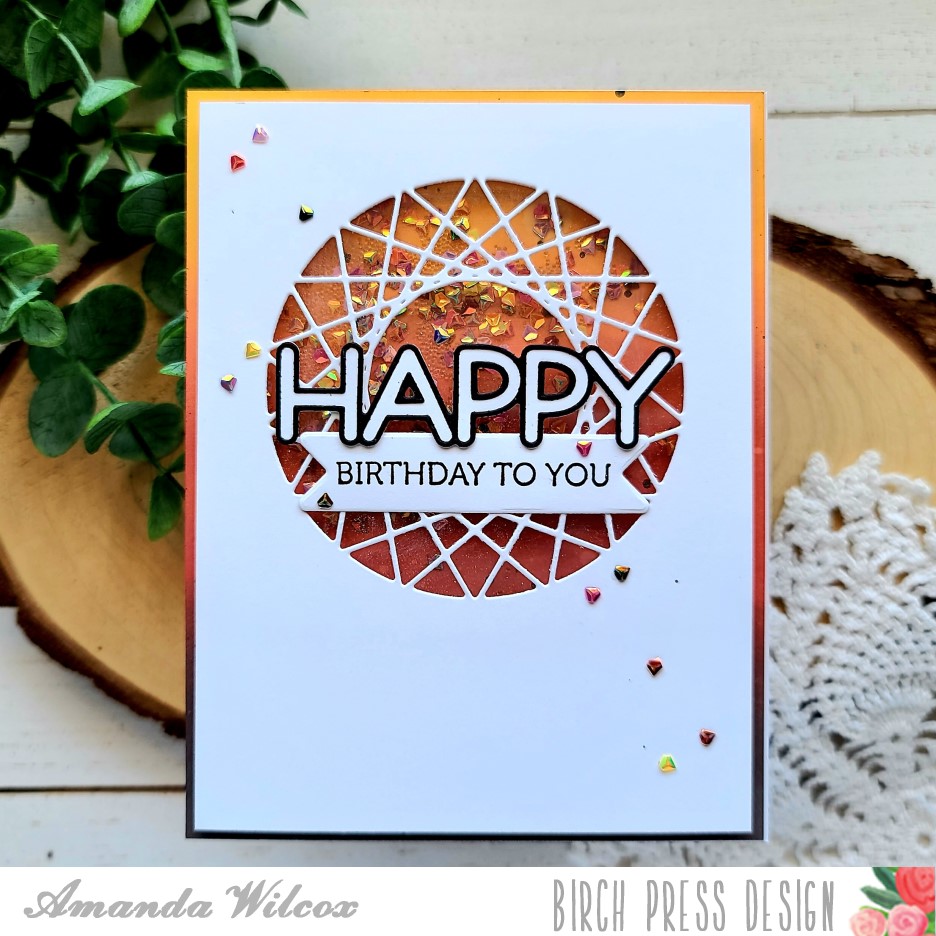
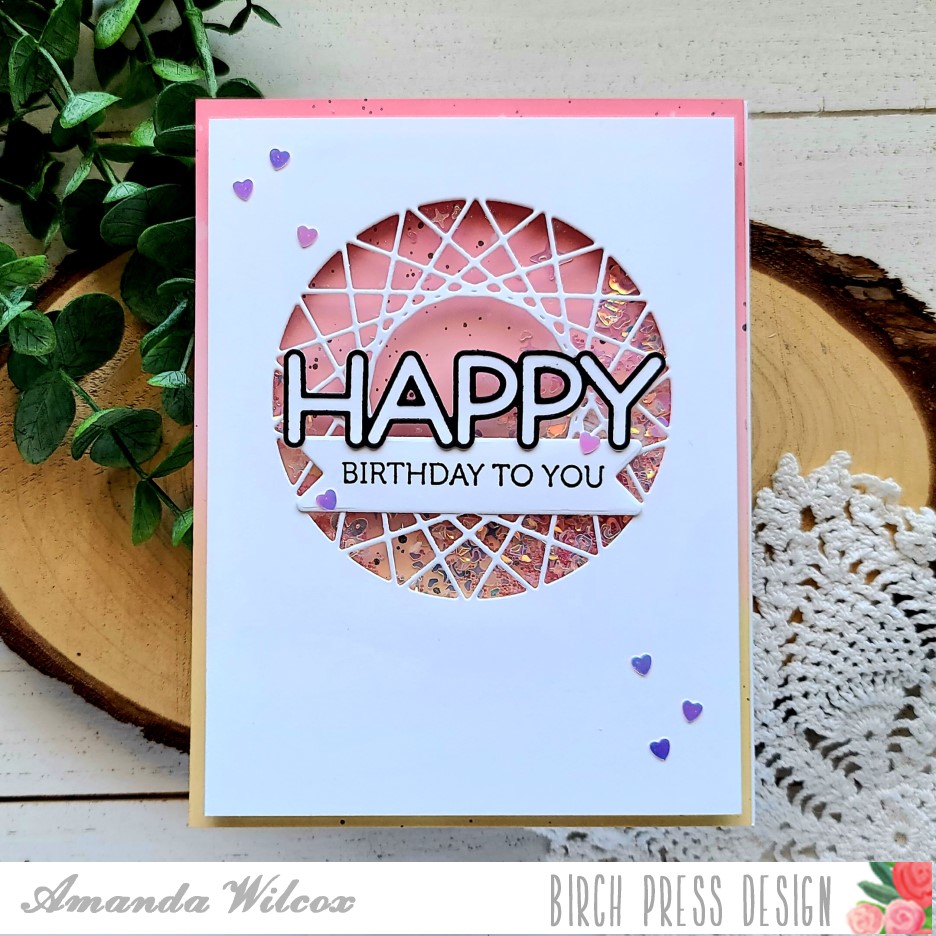
For my layers, I did some ink smooshing on watercolor paper for the green layer. Then a fabulous foiled plaid paper for the middle. And finally, I ended with ink blending over the die cut panel on kraft cardstock for the top.

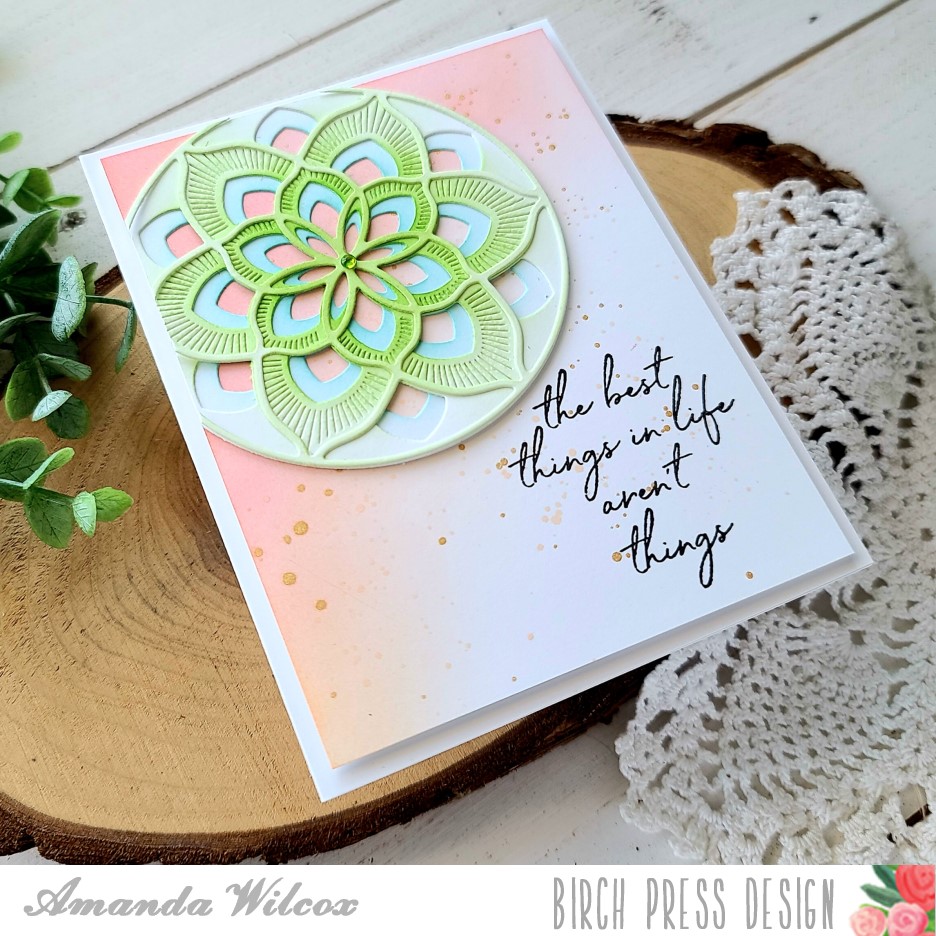
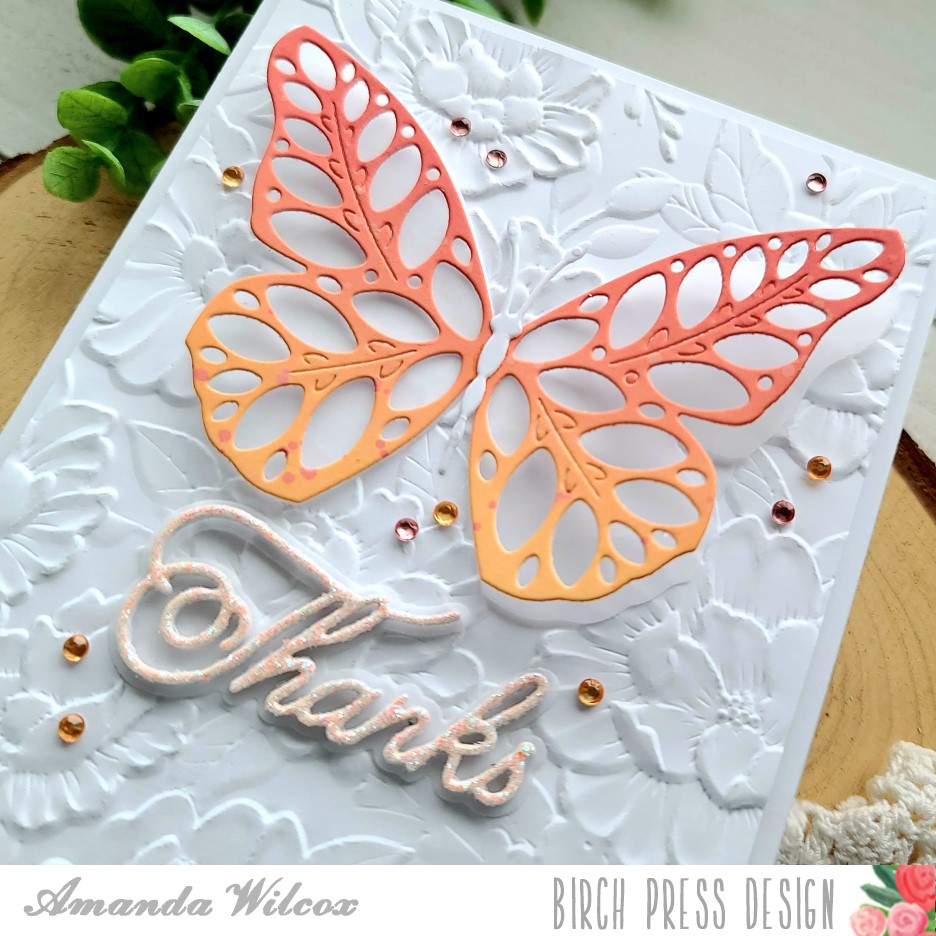
Keeping things muted, with no harsh black lines, I chose to stamp my sentiment in brown ink as well. I love the overall look of this fun card! Lots of visual texture and fabulous fall colors!

If you’d like the full step-by-step tutorial, please head over to the Birch Press Design blog HERE and check it all out!

I appreciate you sharing your time with me. Have a fabulous day!

Birch Press Design – Sending Rainbow Wishes

Happy weekend friends!!! I’m up on the Birch Press Design blog today with some bright and happy watercolor fun! Be sure to head there for the step-by-step, but here’s a look at the card and the general gist.

I stamped and heat embossed images from the Rainbow Lingo Notes and Happy Lingo stamp sets with clear embossing powder on Bristol Smooth Cardstock. Then I watercolored them with Zig Clean Color Real Brush markers.

Then I inked blended a background with distress oxide inks in mermaid lagoon and tumbled glass. I spritzed the panel with water and flicked some pearl watercolor on it too.

Next, I adhered the images with a combination of foam squares and liquid glue. After the watercolor portion was adhered I thought it was lacking something. That’s when I discovered the fun “sending rainbow wishes” sentiment in the Rainbow Lingo Notes set and had to use it. I stamped and heat embossed it on black cardstock and popped it in place with a foam strip.

Voila! So bright and happy! I just love how this turned out! I also think it would be fun to color the rainbow in non-traditional, out-of-order colors, maybe with a color theme in mind too! I tend to stick to reality but sometimes it’s just more fun not to! Don’t you think?

I hope you enjoyed today’s card and found some inspiration to create something wonderful.

I appreciate you sharing your time with me. Have a fabulous day!

Birch Press Design – The Best Things In Life…

Welcome friends! Thanks for stopping by! Today’ I’m over on the Birch Press Design blog sharing how to create this beautiful card featuring the Arista layering die set and a sentiment from the Classic Sentimental Wreath stamp set.

I cut everything from white cardstock this time and used my blending brushes with some dye inks to color everything in. It’s a simple way to have control over how much color your pieces have.

If you’d like to see the step-by-step for this card, head over to the Birch Press Design blog HERE and I’ll walk you through it all.

I appreciate you sharing your time with me. Have a fabulous day!

Birch Press Design – You Are Something Special

Hi there! Today I’m over on the Birch Press Design blog with a pair of just because cards that feature layering dies and some heat embossed stamps with coloring on vellum. Have you ever done that? It’s really simple and kind of looks like stained glass when you’re finished.

I chose similar color palettes – a lemony yellow with light teal and a peachy orange with light blue. I like how these colors work together and play off of each other. Almost like suns in the sky with this circular design.

I used the pinpoint radial plate for the background panel on both of these cards and the roundabout layering dies for that cool spiral in the middle.

The sentiment stamp is from brush sentiments while the butterflies set is called lovely butterflies. After I stamped and heat embossed the butterflies on vellum, I used copic markers to color the backside in. It just gives them a little something extra and I really love it.

I finished things off with a scattering of fairy jewels on both cards.

For the detailed step-by-step, head over to the Birch Press Design blog HERE and get all the details.

I appreciate you sharing your time with me. Have a fabulous day!

Birch Press Design – Friend

Happy weekend everyone! We’re having a huge heat wave where I’m at so I hope you’re all staying cool and having a fabulous day! I’ll be hibernating in the craft room with the air conditioner blasting!

But first, I’m over on the Birch Press Design blog today with a simple thinking of you friend card.

I’m so partial to teal colors so I pulled out some teal cardstock in two shades and a light teal glitter cardstock and die cut the layers for the Mini Grandiose Bevel Layers. Then I cut strips of the mid-tone cardstock for above and below my layered strip.

I stamped and heat embossed a sentiment from the Brushed Sentiments set on the bottom strip. Then I used liquid glue to adhere everything to a white card base.

I die cut the Big Friend Sugar Script letters from black cardstock three times and the shadow from white once. I used liquid glue to adhere the layers and added foam squares to the back with the except of where it will overlap the layered strip. I removed the release paper and placed it down.

For finishing touches on this card, I added small fairy jewels to the inside of the layered strip and a scattering of varying sizes across the design for added interest.

If you’d like a more detailed tutorial of this card, head over to the Birch Press Design blog and check it out.

I appreciate you sharing your time with me. Have a fabulous day!

Birch Press Design – Sending Thanks

Welcome everyone! Today I’m over on the Birch Press Design blog with a process post on how I created this beautiful butterfly and floral thank you card. Be sure to head over there if photo process helps you out!

I started this card by just deciding to play around with the embossing folders I have from Memory Box. I had tried them before but had a hard time with the right paper and sandwich so they would emboss without tearing. I finally figured it out…totally worth the effort! The dimension is incredible!

I ink blended a panel with distress oxide inks in abandoned coral and dried marigold and die cut the eloquent butterfly layer A plate from it. I also die cut the butterfly basics solid image from vellum and happened to have a spare white body in my stash from last time. I used liquid glue to adhere the pieces. Then I trimmed my embossed panel down to 4×5.25 inches and switched to a sentiment.

I just love the handwritten thanks die set so I dug in my glitter paper stash and found a fun peachy-orange one to use. I stacked it on 4 white die cuts and then cut the shadow from vellum as well. I used liquid glue to adhere all the layers and moved on to assembly.

I popped the embossed panel up with foam tape and used liquid glue to adhere just the center of my butterfly. Then I also used liquid glue to adhere the sentiment and finished things off with a scattering of fairy jewels in the same colors as my ink blending.

So elegant and pretty! I love how this turned out! Do you like butterflies?

I appreciate you sharing your time with me. Have a fabulous day!

Birch Press Design – Striped Thinking of You Cards

Hello everyone! I’m over on the Birch Press Design blog today with another pair of cards to share because I couldn’t just stop at one of these. They were really fun to create! I highly recommend trying today’s technique.

For these cards, I chose the layer A plate for a couple of layering die sets and cut them from white cardstock. I like thick layers for this so I cut them 4 times and glued them together.

Then I chose a couple of fun color palettes and cut 1/4 inch strips. I glued them together on another piece of cardstock and trimmed them down to fit behind the frames.

For this card, I chose a sentiment and heat embossed it on a long vellum strip. I used liquid glue to adhere the striped frame to a white piece of cardstock measuring 4×5.25 inches and wrapped the vellum around it, gluing it down with tape runner. I added foam tape to the back and popped it on a white card base. Then I finished it off with some fairy jewels from Birch Press.

For this card, I trimmed a white panel to 4×5.25 inches again, glued my striped frame down and stamped a sentiment on the bottom right corner. I added foam tape to the back and added it to a white card base as well. I couldn’t resist those fairy jewels so I used them again on this card.

For a more details walk through of these cards, head over to the Birch Press Design blog.

I appreciate you sharing your time with me. Have a fabulous day!

Birch Press Design – Butterfly Thanks

Happy weekend everyone! I’m over on the Birch Press Design blog today with a card featuring a bunch of the brand new products that just hit the shop! Let me start by saying…I’m hooked! I could make butterflies for DAYS!!! Here’s a look at today’s card.

The new butterfly basics die set is absolutely amazing! That’s what I used to create today’s butterfly but there are 4 other layering butterfly sets available too!

I layered todays butterfly over the new starburst layering dies and the awesome radial pinpoint coverplate that is so versatile! I just love it!

I finished things off with a new handwritten thanks sentiment and some cool fairy drops that are new to the shop too!

I appreciate you sharing your time with me. Have a fabulous weekend!!!

Birch Press Design – Birthday Shaker Bundle

Hey friends! It’s been a while but I’m back on the Birch Press Design blog today featuring a fun set of birthday shaker cards. All of a sudden I needed multiple and I thought this was a fun way to get them done.

For these cards, I did some fun ink blending combos with distress oxides on each panel. Then chose a different embellishment mix from the Twiddler’s Nook shop to go with each. I cut the same front panel and sentiment set for each one.

I doubled up the foam tape on the back, added the shaker bits and closed them up. Then I glued some of the shaker bits on the front of the card design to round things out at the end.

This first one is a mix of walnut stain, crackling campfire and wild honey distress oxide inks and Burning Embers embellishment mix.

This one is so sweet. It has antique linen, spun sugar and worn lipstick distress oxide colors and the embellishment mix is Mermaid Wishes.

And this one might be my favorite with those bold colors and the fun stars! The distress oxide colors here are chipped sapphire, seedless preserves and milled lavender. The embellishments are called Wishing on Rainbow Stars.

Then, for the final card we have scattered straw, cracked pistachio and peacock feathers distress oxide inks with Princess Rings embellishments in the Tiana color choice.

I had fun getting super inky and trying out new color blends. If you’d like to see a step-by-step head over to the Birch Press Design blog and I’ll walk you through the steps.

I appreciate you sharing your time with me. Have a fabulous day!

Birch Press Design – Hello Tulips

Hi there everyone! Happy Sunday! I hope your weekend is going splendid. I am over on the Birch Press Design blog today sharing a happy, springy tulip card featuring the field of blooms layering dies and the hello topper.

I pulled out some fun green foiled paper for the leaves and did a little ink smooshing for one of the flower layers. It was inky, messy fun. Just how I like it.

Here’s a better angle of the cool green foiled paper. And isn’t that hello topper die at the bottom a neat touch for a sentiment. I love it.

If you’d like to see a tutorial how I created this card, head over to the Birch Press Design blog and check it out.

I appreciate you sharing your time with me. Have a fabulous day!