Welcome everyone! Today I’m over on the Birch Press Design blog with a process post on how I created this beautiful butterfly and floral thank you card. Be sure to head over there if photo process helps you out!
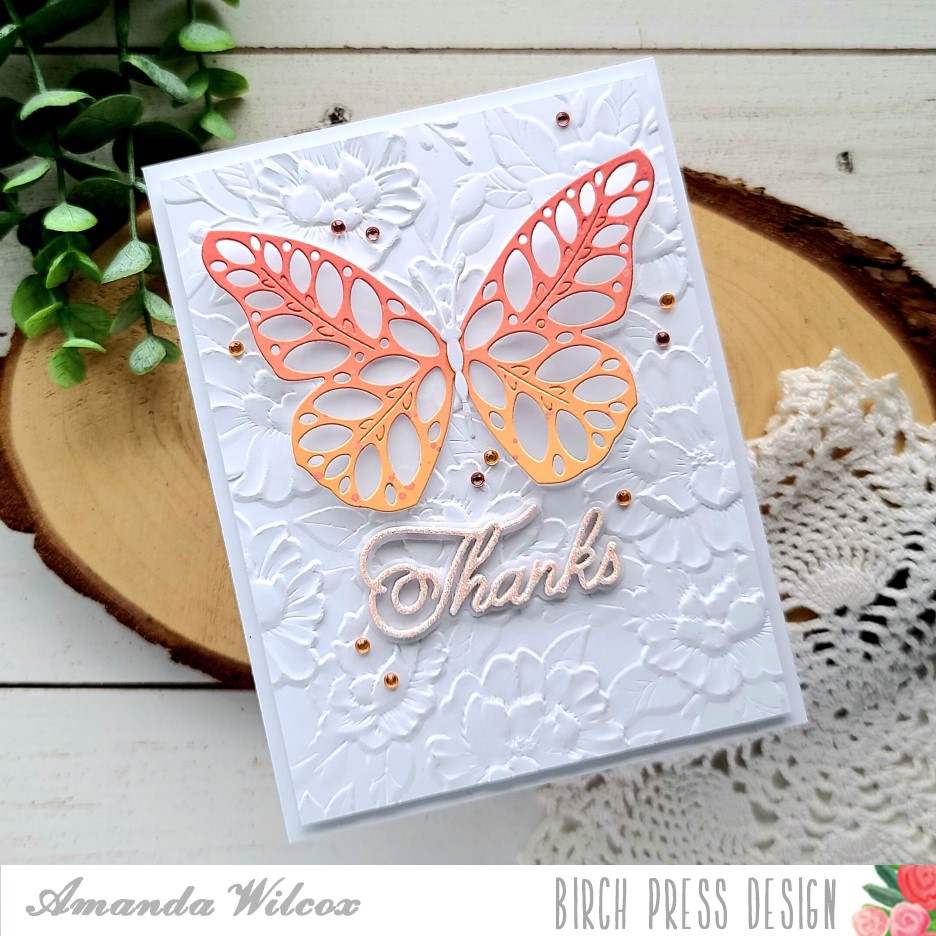
I started this card by just deciding to play around with the embossing folders I have from Memory Box. I had tried them before but had a hard time with the right paper and sandwich so they would emboss without tearing. I finally figured it out…totally worth the effort! The dimension is incredible!
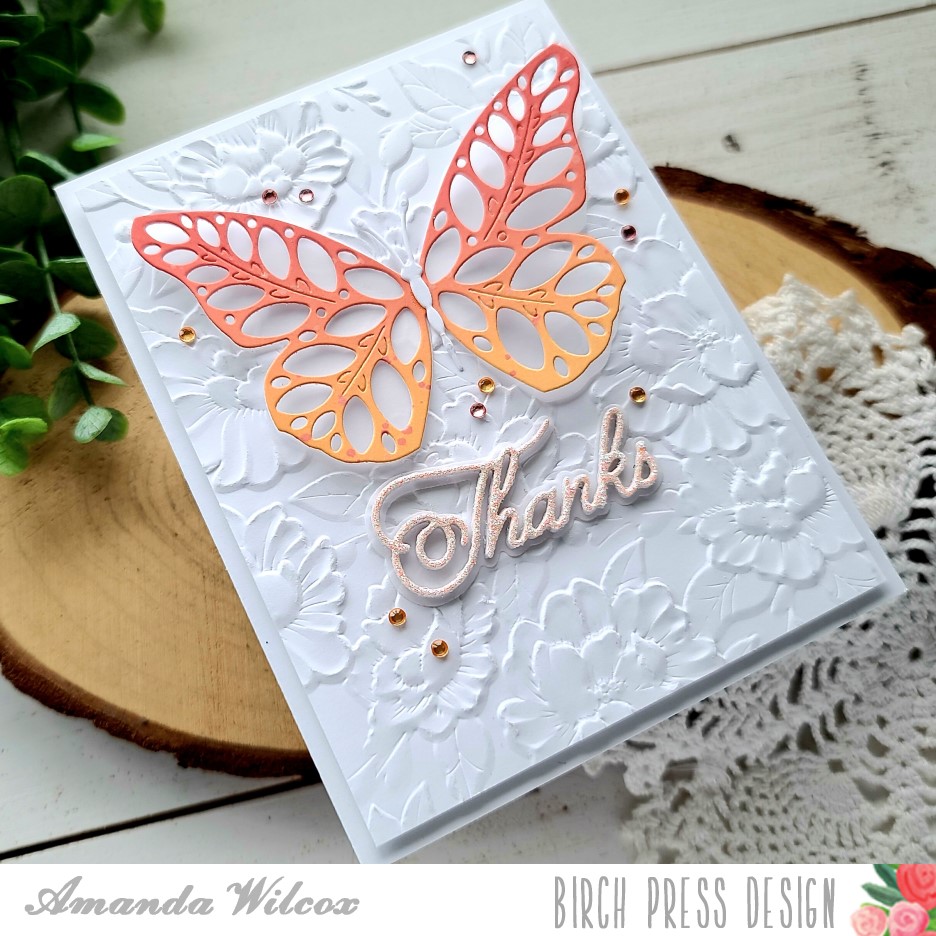
I ink blended a panel with distress oxide inks in abandoned coral and dried marigold and die cut the eloquent butterfly layer A plate from it. I also die cut the butterfly basics solid image from vellum and happened to have a spare white body in my stash from last time. I used liquid glue to adhere the pieces. Then I trimmed my embossed panel down to 4×5.25 inches and switched to a sentiment.
I just love the handwritten thanks die set so I dug in my glitter paper stash and found a fun peachy-orange one to use. I stacked it on 4 white die cuts and then cut the shadow from vellum as well. I used liquid glue to adhere all the layers and moved on to assembly.
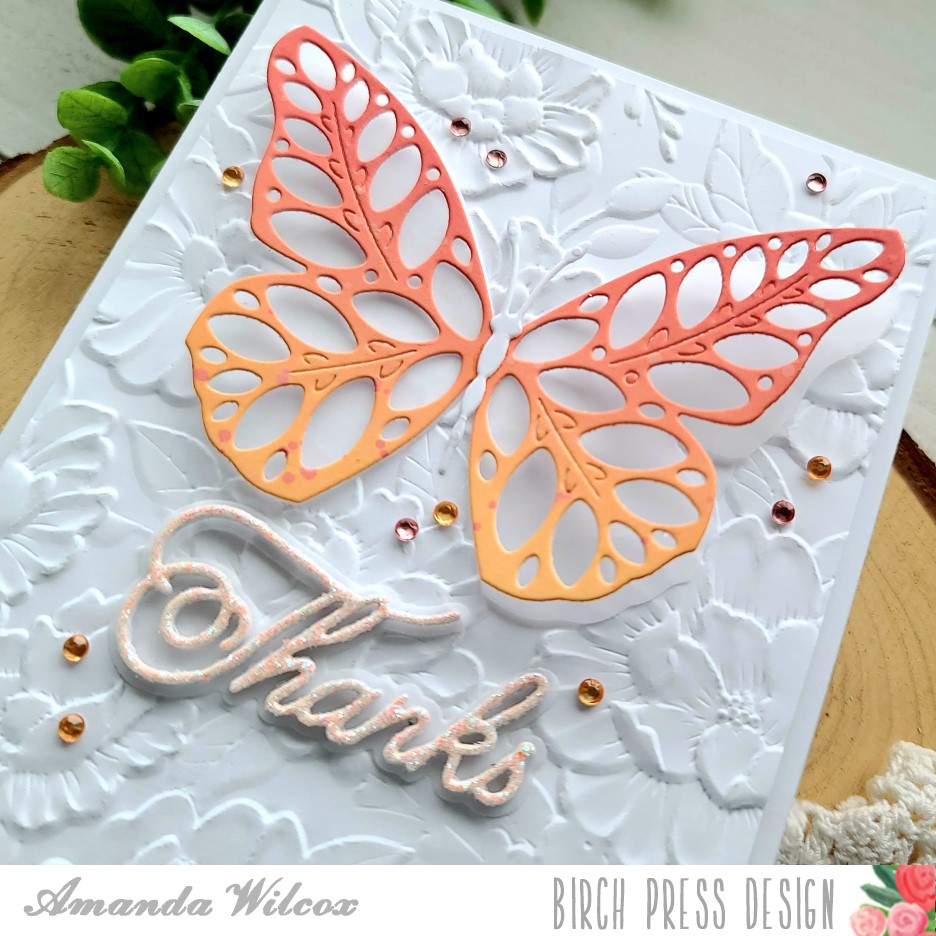
I popped the embossed panel up with foam tape and used liquid glue to adhere just the center of my butterfly. Then I also used liquid glue to adhere the sentiment and finished things off with a scattering of fairy jewels in the same colors as my ink blending.
So elegant and pretty! I love how this turned out! Do you like butterflies?
I appreciate you sharing your time with me. Have a fabulous day!
