
Hey friends! We’ve got a super adorable mini-release from Newton’s Nook today! Let’s take a look at all the products and then a few inspiration projects too!
Newton’s Lucky Clover stamps and dies

Lucky Dog stamps and dies

Shamrocks hot foil plate

Aren’t these new goodies so much fun!?! I have a few projects to share with you so let’s dive right in! We’re starting with Newton’s Lucky Clover with a side of the Shamrocks hot foil plate.

When I received these release products, I heated up my glimmer machine and started playing with the Shamrocks hot foil plate first. I foiled some scraps and some full size card front pieces as well.
For this card, I took a scrap and perfectly die cut it with the Fancy Edges Tag die. After inking up my foiled tag with green dye ink and a blending brush, I cut a second tag from white and a hole reinforcer from gold glitter, then used liquid glue to adhere them all together.

I cut rainbow strips of cardstock and glued them to a white panel before die cutting it with the largest Framework die. I stamped my sentiment across the bottom of that and set it aside to stamp and color my Newton’s Lucky Clover images. I colored those with copic markers and used the coordinating dies to cut them out.

I added foam tape and squares to the back of everything. But before assembling it all, I took a green ink pad and drug it across the front of my card base. It gives a cool texture while quickly adding color to my background.
After assembling all the layers, I added glossy accents to Newton’s nose, toe beans and the buckle on his hat. Then I couldn’t resist a little stardust Stickles on the horseshoe and floating heart too.
Now, let’s get a little Lucky Dog action going on!!!

For this card, I took a panel I had hot foiled with the new Shamrocks plate and ink blended distress oxide inks across part of it. I faded from mowed lawn to twisted citron and then splattered it with water. I die cut the panel with the rounded rectangle in the Frames & Flags die set. To break up the line where I masked the panel, I added a strip of gold glitter cardstock next.

After stamping and coloring my puppy with copic markers, I used the coordinating die to cut him out. Then stamped and heat embossed my sentiment on a speech bubble. Now we can assemble this card too.
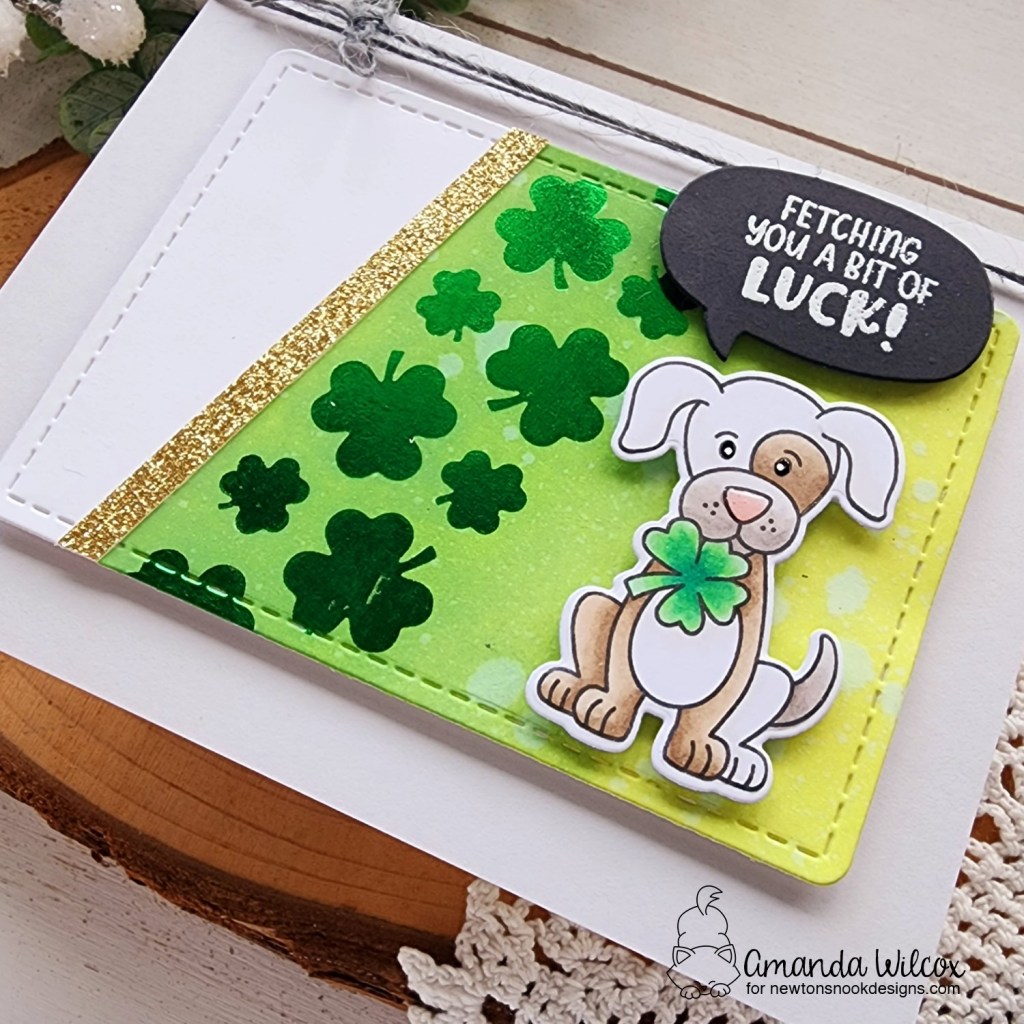
I cut a piece of light gray cardstock and glued it to a card base, then popped the foiled panel up with foam tape. Next, I added the puppy and speech bubble to that with foam squares.
To finish things off I tied twine around the top of the card and added glossy accents to the puppy’s nose. Last, I added black glaze pen to the puppy’s eyes, let it dry and added a white highlight back in.

Remember, these new products are all available in the Newton’s Nook shop right now! Treat yourself to a bit of luck and get them while they’re hot!
I appreciate you sharing your time with me. Have a fabulous day!
