Hello friends. Today I’m on the Newton’s Nook blog with a simple spring thinking of you card. I used a technique of heat embossing my image on vellum and coloring it for a stained glass look. It’s a fun and different way to use all of your detailed images.

You may notice that my background is similar to one from the April release with the new Cherry Blossom set. I inked the same Trailing Leaves stencil but instead of the frame from the A2 Card Layout die, I saved the stitched rectangles, used another frame for a guide and popped them up in the same arrangement. I did do a little ink blending on the rectangles before popping them up for some depth and interest.
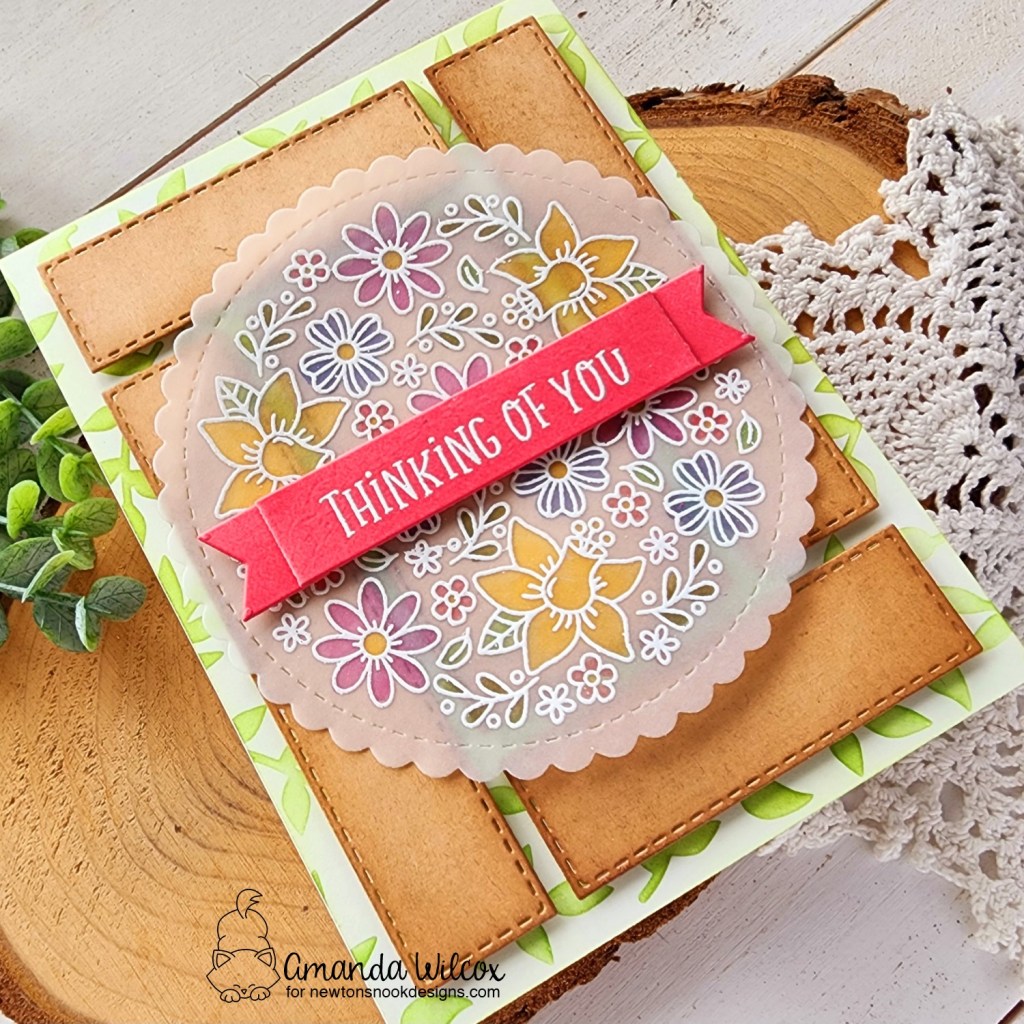
Like I mentioned at the beginning, I heat embossed the Floral Roundabout image on vellum and then colored it with my copic markers on the back side. This gives a faux stained glass look. Just remember you’ll need to choose much deeper and darker colors than usual to show through.
Next, I die cut a banner using one of the banner trio dies and heat embossed it with a sentiment from the Floral Roundabout stamp set. I used liquid glue and reverse tweezers to glue my banner flags down and then popped it up on the vellum with foam squares. I hid tape runner behind that to adhere the vellum to my card front next.

Here’s a close up look at the vellum coloring so you can see how pretty it looks. I used colors like B66, RV29, G16 and Y17 for this project. Notice that the saturation number (the second digit) is all above 5, where in my regular coloring I barely touch these dark colors except for deep shading.
Products used:
Floral Roundabout stamps
Circle Frames dies
Banner Trio dies
A2 Card Layout die
Trailing Leaves stencil
Blending brush
Lawn Fawn ink – cilantro
Embossing & Watermark ink
Embossing powder – frosting
Magic anti-static brush
Tape runner
Foam squares and tape
Liquid glue
I appreciate you sharing your time with me. Have a fabulous day!
