Coffee Loving Cardmakers – Coffee Love Monster

Welcome everyone! Today is the first Tuesday Tea with Twiddler’s Nook over on the Coffee Loving Cardmakers blog. I had sooooo much fun playing with a bunch of different products from Trinity Stamps to create a coffee love monster. I hope you like her too!

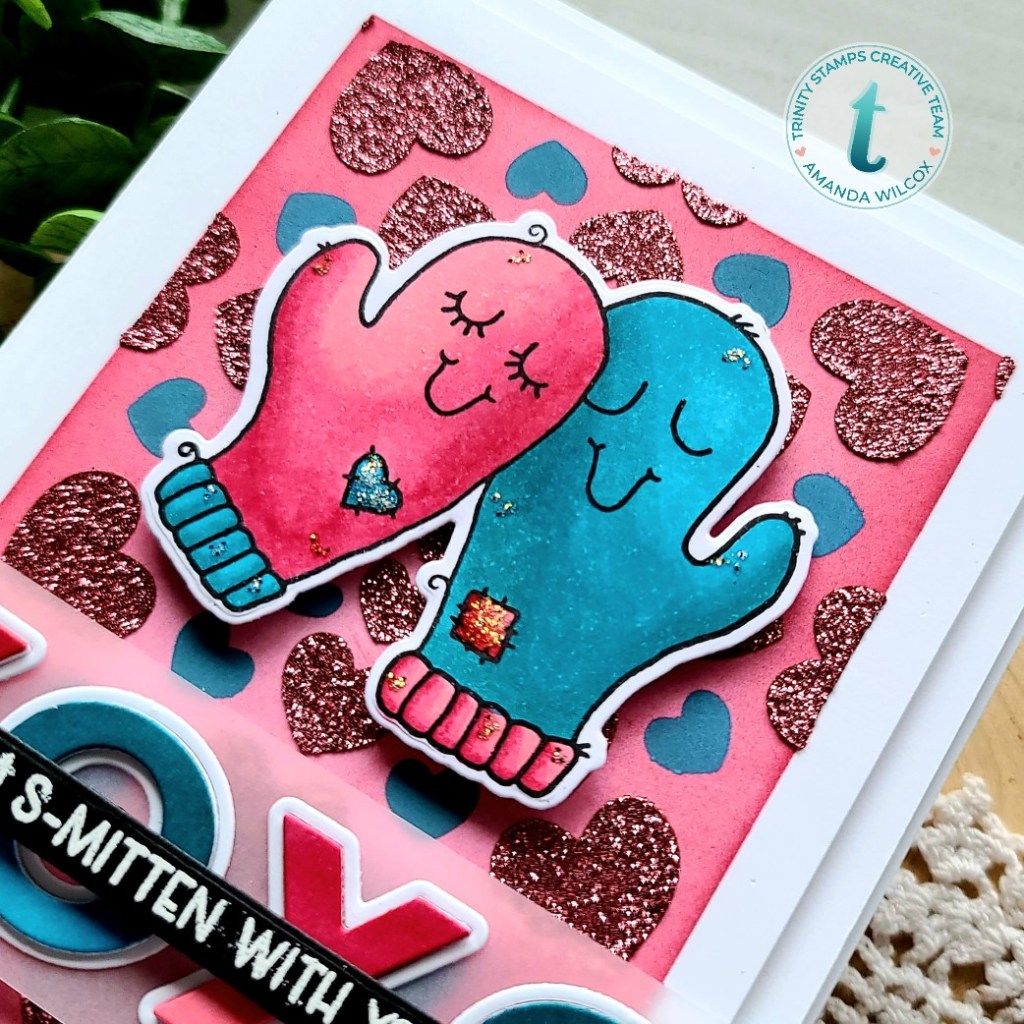
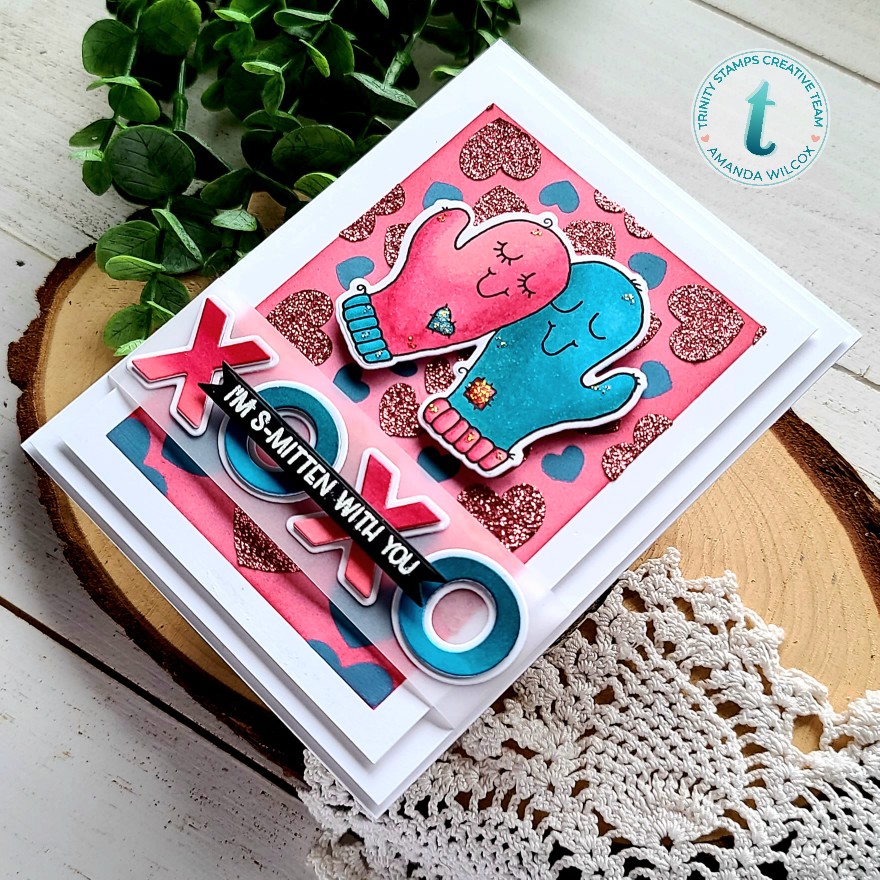
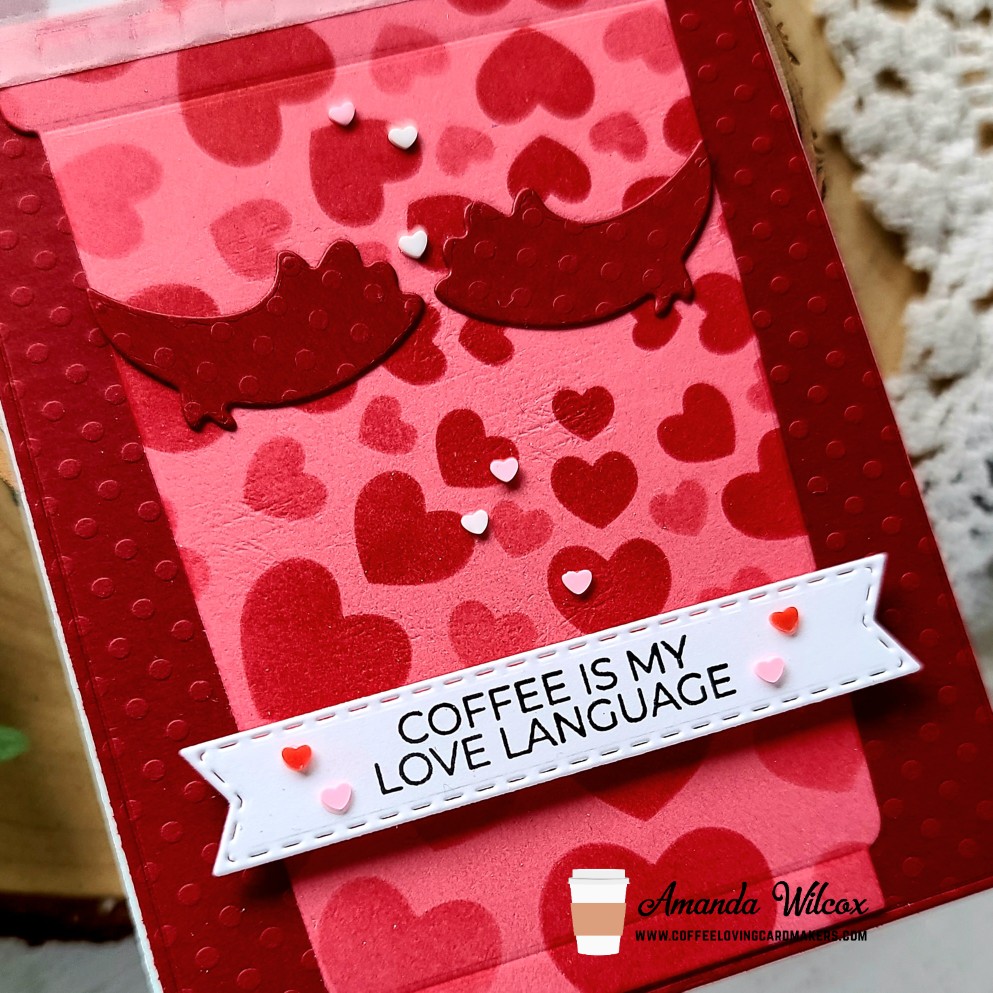
I started this card by die cutting the pieces to my monster using the Make-a-Monster dies. Then I cut the pieces to that yummy frap with the Summertime Sips dies. I took the Heartburst stencil and inked red and dark pink hearts on the cup for a little interest. I die cut the largest Slimline Modern Embossed Panel from light blue and the same red as the monster arms. Then with the red panel I took the cloud die from Slimline Scenic Borders and cut the top off creating some monster hair.

Now for assembly…I did this in steps. I glued all of the frap cup pieces together and then used it as a guide where to glue the monster face on. I glued the monster panel to the blue background panel and moved on to deciding where to add my sentiment. I tried up in the sky but I didn’t like it so I die cut a banner from the Mini Slimline Card and Envelope die set and stamped a sentiment from Love and Stuff on that. This is popped up with foam squares.

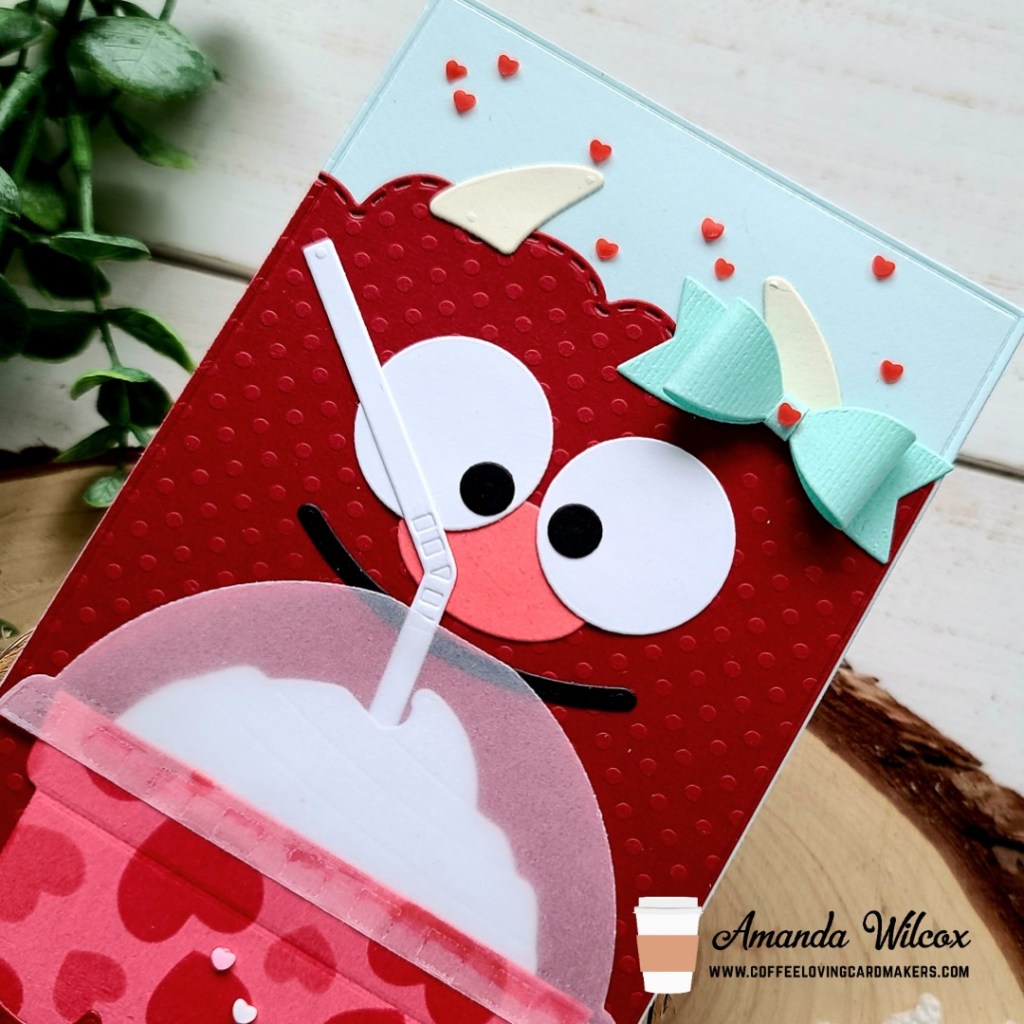
Moving on to finishing touches, I decided that my monster was a girl and she needed a bow so I die cut the smallest from the Bunch of Bows set and put it together. I used liquid glue and my tweezers to attach it to the top right side of the monster. Then I pulled out some adorable clay hearts from the Craft Hugs embellishment mix which was an exclusive Trinity handed out at Creativation last year. These tiny hearts were just the ticket to finish off my card.

Phew, that was a lot of steps. I hope you enjoyed it as much as I did creating it!

I appreciate you sharing your time with me. Have a fabulous day!

Newton’s Nook – January Release Day 1

Welcome to Newton’s Nook’s first release of the new year! I’m super excited to share everything with you. You’re just going to love it all!!! I really did! Let’s jump in today with two stamp sets and a new die set that works with them both!

Heartfelt Love + Heart Frames coordinate perfectly with the already released Banner Trio dies

Heartfelt Roses + Heart Frames coordinate perfectly with the already release Banner Trio dies

Now that this is out of the bag, I’m super excited to share my card with you today. I used both of these fabulous stamps along with the new heart frame dies and banner trio dies to create a fun interactive card.

For the front, I stamped and heat embossed heartfelt love on a piece of iridescent vellum and die cut it with the largest scalloped heart. Then I die cut the largest heart from red cardstock. I die cut a banner and stamped my sentiment on it and adhered all my layers together.

Then I stamped the heartfelt love image on copic paper and colored it like a box of chocolates! I did the same layering here and moved on to assembling my box. I cut 2 – 1/2 inch strips of red cardstock and glued them to each red heart. I didn’t like seeing the hinges on the inside so I cut a third red heart and added it to the inside of the lid.

For my actual card assembly, I cut a pink card base that measures 5×5 and used a corner rounder punch on all 4 corners. Then I cut a square from white cardstock using one of the square frames dies and wrapped some gold cording around it and tied it with a bow. I added foam tape to the back and popped it on the card base. Then I added foam tape to the back of my box of chocolates and added it to the card front as well.

Would you like to win the “Heartfelt Love” or the “Heartfelt Roses” Stamp Set?We will choose ONE lucky winner for each stamp set! 

Here’s how to win: Comment on the NND blog and Design Team blogs (see list below)! Thewinner will be chosen at random from the collective reveal posts. Make sure to check out each of their blogs and comment for your chance to win. You will not know which blog has been chosen so the more you comment on the better your chances are of winning! You have until Thursday January 21st at 9pm EST to comment  — winners will be announced on the blog post on Friday, January 22nd. 

Check out all the awesome Design Team Blogs below to enter:

Newton’s Nook Designs
Ellen Haxelmans
Tina Herbeck
Larissa Heskett
Samantha Mann
Zsofia Molnar
Maria Russell
Farhana Sarker
Tatiana Trafimovich
Samantha VanArnhem
Amanda Wilcox

Birch Press Design – Hearts and Hugs

Happy weekend everyone! I hope your day is starting off wonderfully and you are able to enjoy it! I’m over on the Birch Press Design blog today sharing a step-by-step how I created this pair of slimline heart filled hug cards.

I started by choosing colors and die cutting the layers to my hearts. After gluing them together, I went with an ink smooshing technique for the background so I pulled out my Tombow waterbrush pens and made an inky mess. I love doing this!

I adhered the panels to card bases, then the hearts on there. I chose a sentiment and cut the layers. The shadow is cut once and the word is cut 4 times for each color. I used liquid glue to adhere them together and to the card front.

Then I finished things off with some Nuvo Crystal Drops in coordinating colors…just in the background for the red and blue but I added them to the hearts of the purple card just to try something new.

I appreciate you sharing your time with me. Have a fabulous day!

Twiddler’s Nook – New Products

Oh! My! Word! I am SUPER EXCITED to share with all of you that we now have craft embellishment wands and replacement wax tips for sale in the Twiddler’s Nook shop! Like, right now! We have 5 colors to choose from and they are so awesome!!!

Don’t you love them? Blue, green, pink, purple and white! Which color is your favorite? I’d love to know! I don’t think I can choose. And I’m also really excited about the replacement tips too.

I think it would be super fun to get one color of embellishment wand and swap out the tip color to have a combo.

Here are links to the new listings so you can pop over and get yours ordered right away!

Embellishment Wand

Embellishment Wand Replacement Tip

Thank you so much for stopping by! Have a wonderful day and happy crafting!!!

Pink & Main – January Release Sneak Peek

Squeeeee!!!! I’m super excited to be able to share today’s card with you! It sneaks a few products coming up in the next Pink & Main release! And anyone who knows me…knows that I had to get my hands on this dino! Then pairing dinos with Valentines??? I’m so giddy about this!

Isn’t he seriously the cutest thing you’ve ever seen? Yeah, he totally is! I had a blast coloring him up along with the other images with my copic markers and then used the coordinating dies to cut them all out.

I pulled out that awesome Best Friends paper pad and chose 2 patterns. I cut standard A2 rectangles using the layered rectangles dies. From the heart paper I used…what’s this? A new oval die to cut a window. 😉 And then I added foam to the back of the panel and attached it to the gray dots. I added foam squares to the back of my images and put those down next.

For finishing touches, I simply added some Unicorn Stickles on various parts of the images like the dino cheeks, balloons and hearts.

Stay tuned for the next few days on the Pink & Main blog to see more sneak peeks from the rest of the design team. The release does live for purchase on Wednesday, Jan. 20.

I appreciate you sharing your time with me. Have a fabulous day!

Miss Ink Stamps – You’ve Goat Mail

Welcome back! I’ve got another sweet card featuring some Miss Ink Stamps products to share with you today. You know how I love my critters so now that I own these adorable Punny Farm Goats, I want to put them everywhere! They are just so happy!

To create my card, I started with an A2 panel and used some blending brushes, dye inks and the Mouse Flower stencil. I used a light yellow ink on the bigger flowers first and then went over the rest of the stencil with light green, filling in all the space. Then I stamped, colored and cut out the envelope and one goat from Punny Farm Goats. I took a second white panel and used my images as a guide to cut the edge with a stitched hillside border. Then I stamped a sentiment and the grass border, also from Punny Farm Goats and colored the grass with some copic markers too.

I adhered my stenciled panel to a white card base. Then I used a craft knife to cut the goat’s mouth open and inserted the letter, adhering it with a dab of liquid glue. I put foam tape on the back of the grass panel and foam squares on the back of my goat and adhered everything down.

For finishing touches, I added glossy accents to the goat’s eyes and nose, and the heart on the envelope. Last, I glued a scattering of Dazzle Butterflies for some added glimmer and shine. These are so cool because they change color in the light.

I appreciate you sharing your time with me. Have a fabulous day!

Trinity Stamps – S-mitten With You

Hello everyone! I’ve got a second card to share with you today. I dug through my Trinity Stamps goodies to find something that hasn’t gotten enough love and came across this S-mitten stamp from last Christmas. It’s adorable and punny too, which I love!

For this card, I got all the products out that I wanted to use and arranged them to see if things would fit how I was thinking. It seemed to work so I started on my background first. I used the A-2 Foundation Rectangle Stencil, next to largest, with a blending buddy brush and some red ink. Then I put the Heartburst Stencil over it using mermaid lagoon in distress oxide for one layer and pink glitz gel for the other layer.

Once that was done, I set it aside to dry while I stamped the image from S-mitten and colored it with my copics. Then I used the coordinating dies to cut it out and moved on to my sentiment. For that I stamped and heat embossed the one included in white on black cardstock. I used a banner from the 4-Bar Card Die Set to cut it out. Then I pulled out the Bold Love dies and cut the XOXO from white cardstock 4 times. I colored 2 Xs and 2 Os to match the mittens and glued the layers together. Then I trimmed down a strip of vellum and adhered them to it, including just one white frame layer for each letter.

Moving on to assembly now, I trimmed a white panel down to 4 1/8x 5 3/8 and added foam tape to the back, adhereing it to a white card base. Then I added foam tape to the back of the stenciled panel and wrapped the vellum strip around it. Then I adhered it to the card front as well. I added foam squares to the back of my image and popped it in place and finished things off with a foam strip on the back of the banner sentiment and added it on top of the XOXO.

For finishing touches, I added some unicorn Stickles on the mitten patches and all the little dot detail areas too.

Isn’t this just adorable?!? I seriously, love the colors and texture, and all that dimension! Oh, it’s just fabulous in the light with all that glitter!

I appreciate you sharing your time with me. Have a fabulous day!

Newton’s Nook – Puppy Birthday Wishes

Hey friends! I’m over on the Newton’s Nook blog today with a really fun birthday card that I actually made for my dad this year. I had so much fun building all the layers to this card. I hope you enjoy it too!

I started by stamping and coloring the puppies from Puppy Playtime with my copic markers. Once I colored one, I knew I wanted to do a whole set in the same color combo. I just love it for some reason. Then I used the coordinating dies to cut them all out, including a bunch of the bones too.

Then I die cut the frame and also a panel to go behind it. On that panel I used blending brushes and dye inks over the Confetti stencil. I used liquid glue to adhere the frame and moved on to grounding the puppies. I pulled the windows that die cut with the frame out of the recycle bin (silly me) and used the Sea Borders die to cut them down. Then I blended some green dye ink on those and adhered them down as well.

At this point I was deciding on my sentiment and thought it would be fun to have the big Balloon Shaker in the middle of the party. I die cut all the elements and heat embossed my sentiment from Uplifting Wishes on the acetate and liquid glue to adhere it all together. The shaker bits are Princess Rings embellishment mix from the Twiddler’s Nook store in the Tiana color.

I popped all the puppies up with foam squares and used liquid glue to adhere the balloon and bones down in place. For finishing touches I added glossy accents to the puppy noses and scarves, and black and white glaze pen to their eyes.

I appreciate you sharing your time with me. Have a fabulous day!

Miss Ink Stamps – How You Dodoing?

Hey friends! I’m over on the Miss Ink Stamps blog today with an epic Alice in Wonderland card. I’m so happy with how this card ended up. Taking a simple idea from my head, adding, twisting and turning and ending up with a final product that I just love. I hope you love it too!

To create it I started by blending distress oxide inks on a panel and then heat embossed the Woodgrain Background with gold embossing powder. Then I stamped images from Alice and Dodo and colored them with my copics. Once they were cut out with my scan-n-cut I realized I needed something else. I die cut a rust colored frame and then took it one step further and stamped and colored a mushroom image from Smokin’ Caterpillars. I also used the scan-n-cut to cut this out and then moved on to assembling my card.

I used liquid glue to adhere the mushroom image to the embossed panel. Then, I added foam strips to the back of the frame and stuck it down. Last, I added a combination of foam squares and liquid glue to my images and adhered them in place as well. I decided to heat emboss sentiments from Dodo in the same gold embossing powder as the woodgrain and cut them into blocks. Then I added foam squares to the back and put them in place.

Moving on to finishing touches, I just added a few spots of glossy accents to Alice’s shoes and headband; the dodo’s hat, beak and feet; and the rabbit’s glasses, nose and buttons.

This was such a fun card to build. I hope you have found some fun inspiration to create something wonderful.

I appreciate you sharing your time with me. Have a fabulous day!

Trinity Stamps, Newton’s Nook and Lawn Fawn – Cheers!

Hey friends! We had a VERY special birthday in our family last week and I wanted to pop in to share one of the birthday cards I made to celebrate. My sister-in-law turned the big 21 and we couldn’t let it fall by the waist side.

I was able to pull from some of my favorite companies and create this super fabulous birthday card/gift certificate for her brother to give her. I started things off by stamping and coloring the Trinity Stamps Happy Hour set that came out last year. I used the coordinating dies to cut the images out. Next I began working on the background with the Newton’s Nook plaid stencil, some olive green and red ink and then I went over it a second time with Thermoweb transfer gel, and then gold decofoil. Pulling from all of those colors, I used the Newton’s Nook circle frames dies to cut a stitched circle from red glitter paper. Then I used a smaller Spellbinders circle die to cut an olive green one to layer.

I heat embossed Happy from Happy Hour on the green circle and die cut 21st from Trinity Stamps Marshmallow Number dies. I used the same ink from the stenciling to go over the top layer of the 21st so it coordinates. At this point I started layering things together and realized that the top of my card was sparse. I dug around and found the scripty cheers die from Lawn Fawn and thought it was the perfect match! I cut it from white cardstock and inked it up with the red and green from the background.

I am so excited about how awesome this card turned out! So much texture and depth with the different cardstocks, layers, heat embossing and decofoil. It’s exactly what I was hoping for.

I appreciate you sharing your time with me. Have a fabulous day!