Doodlebugs – Joy & Cheer with Cover Dies

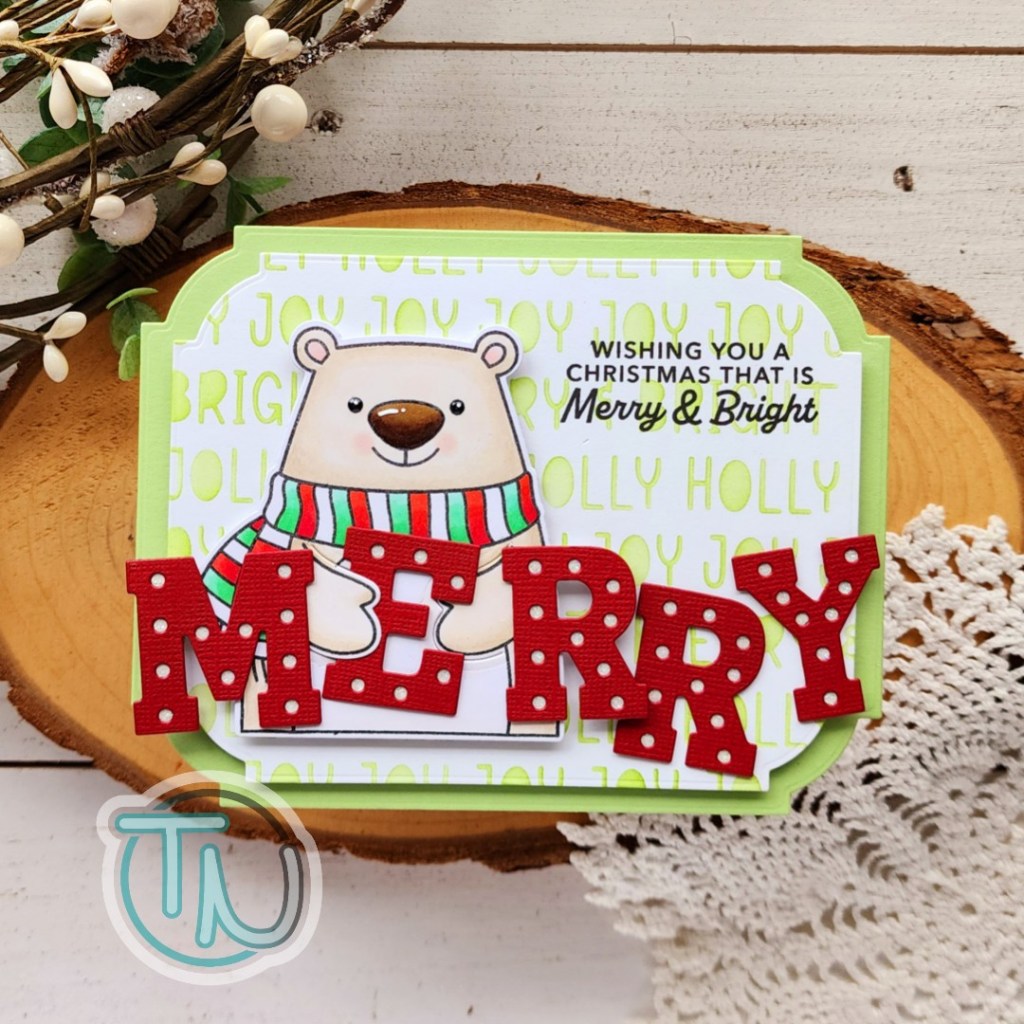
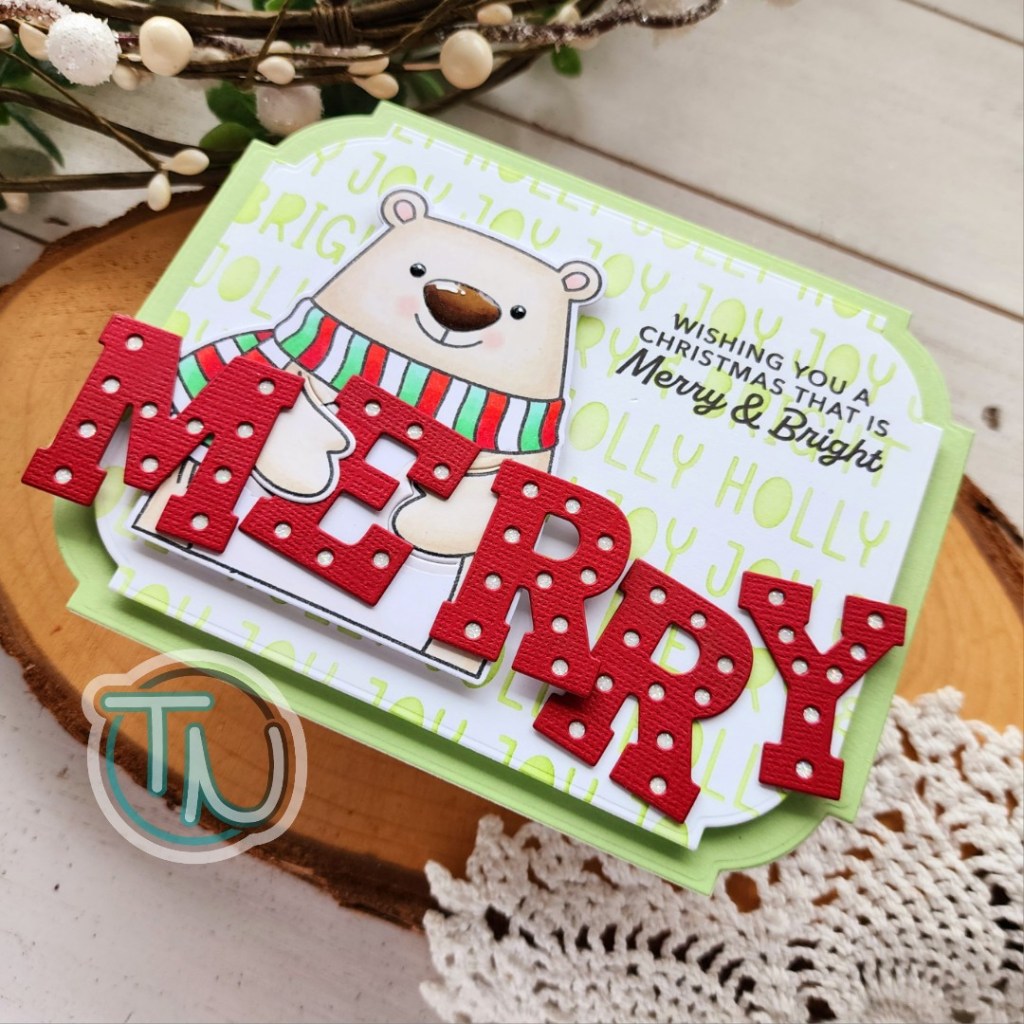
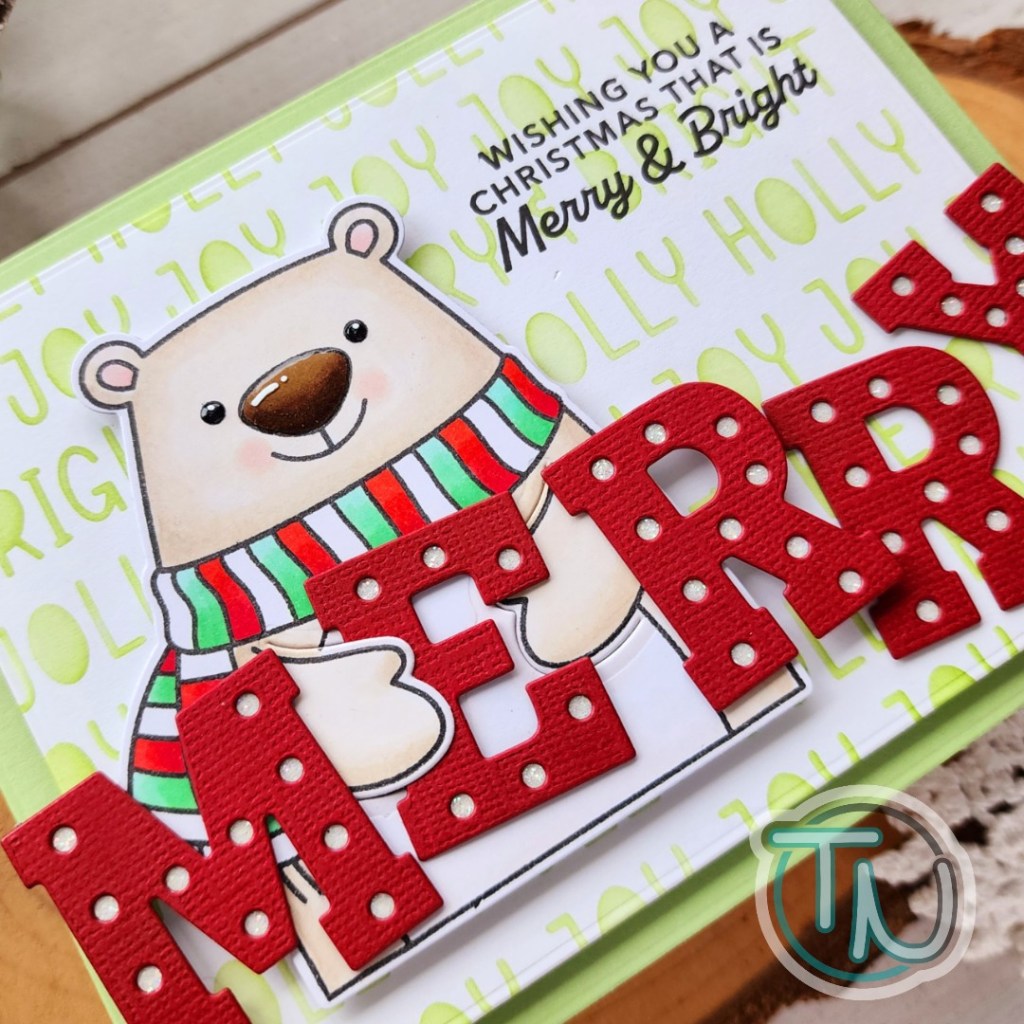
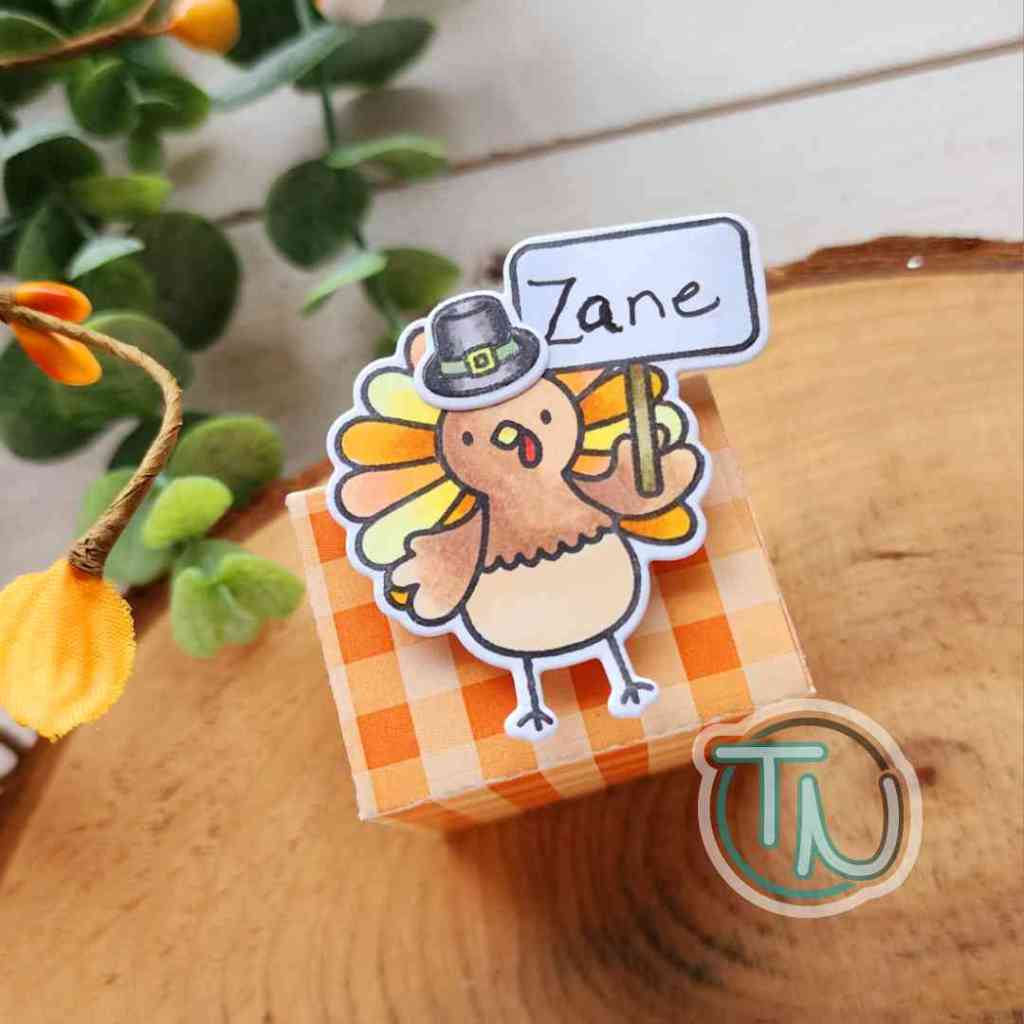
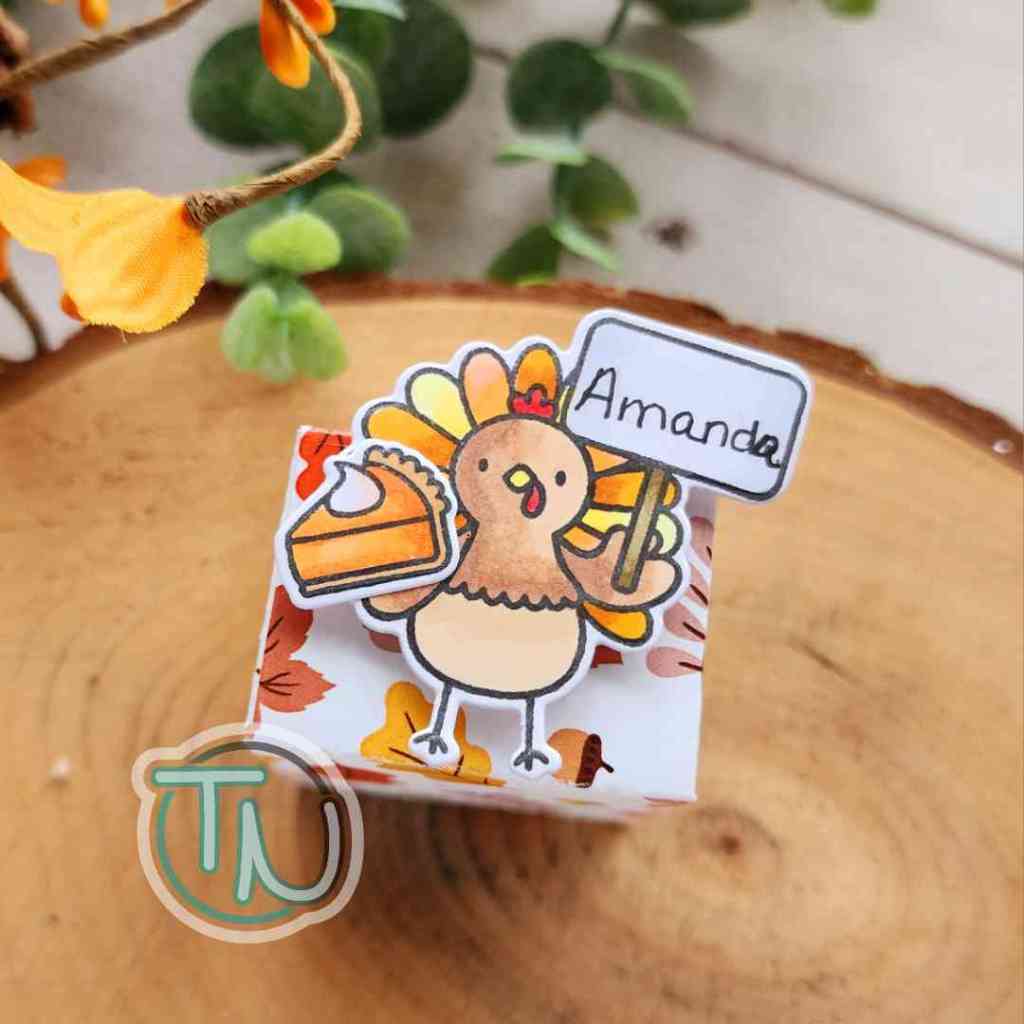
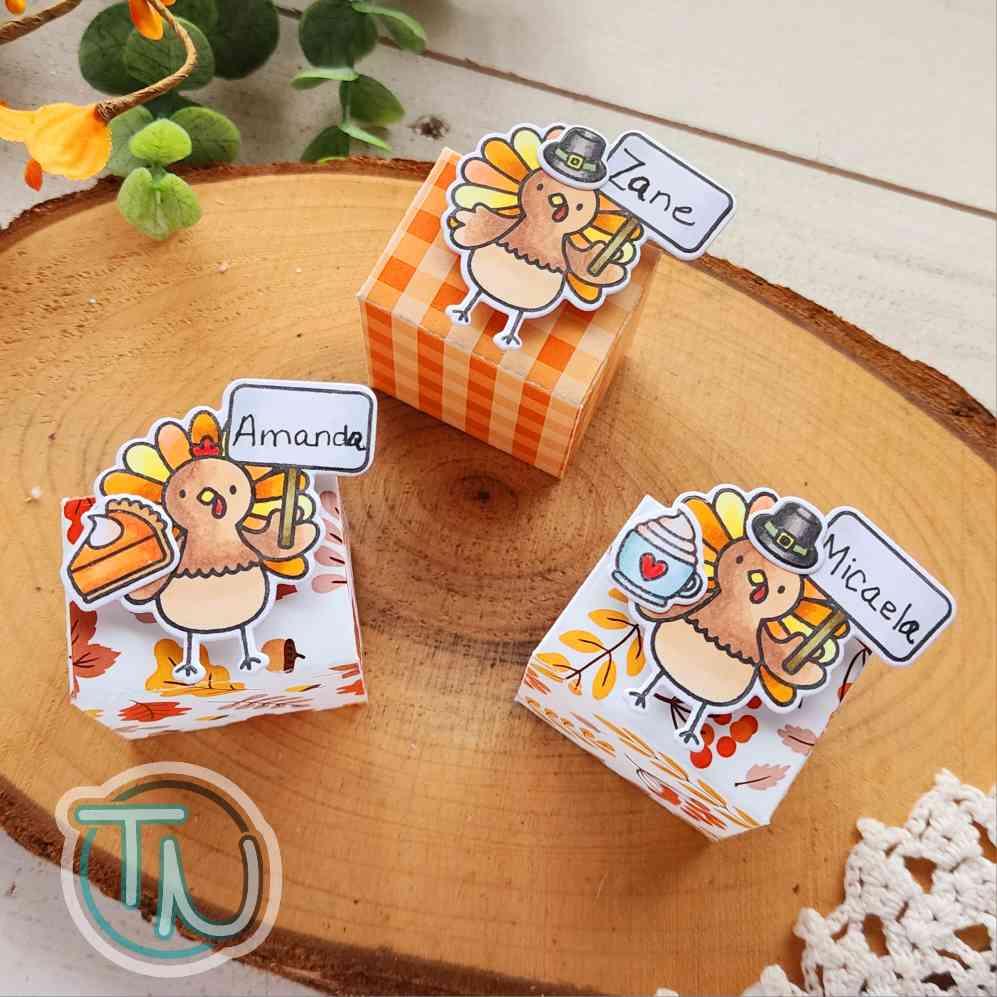
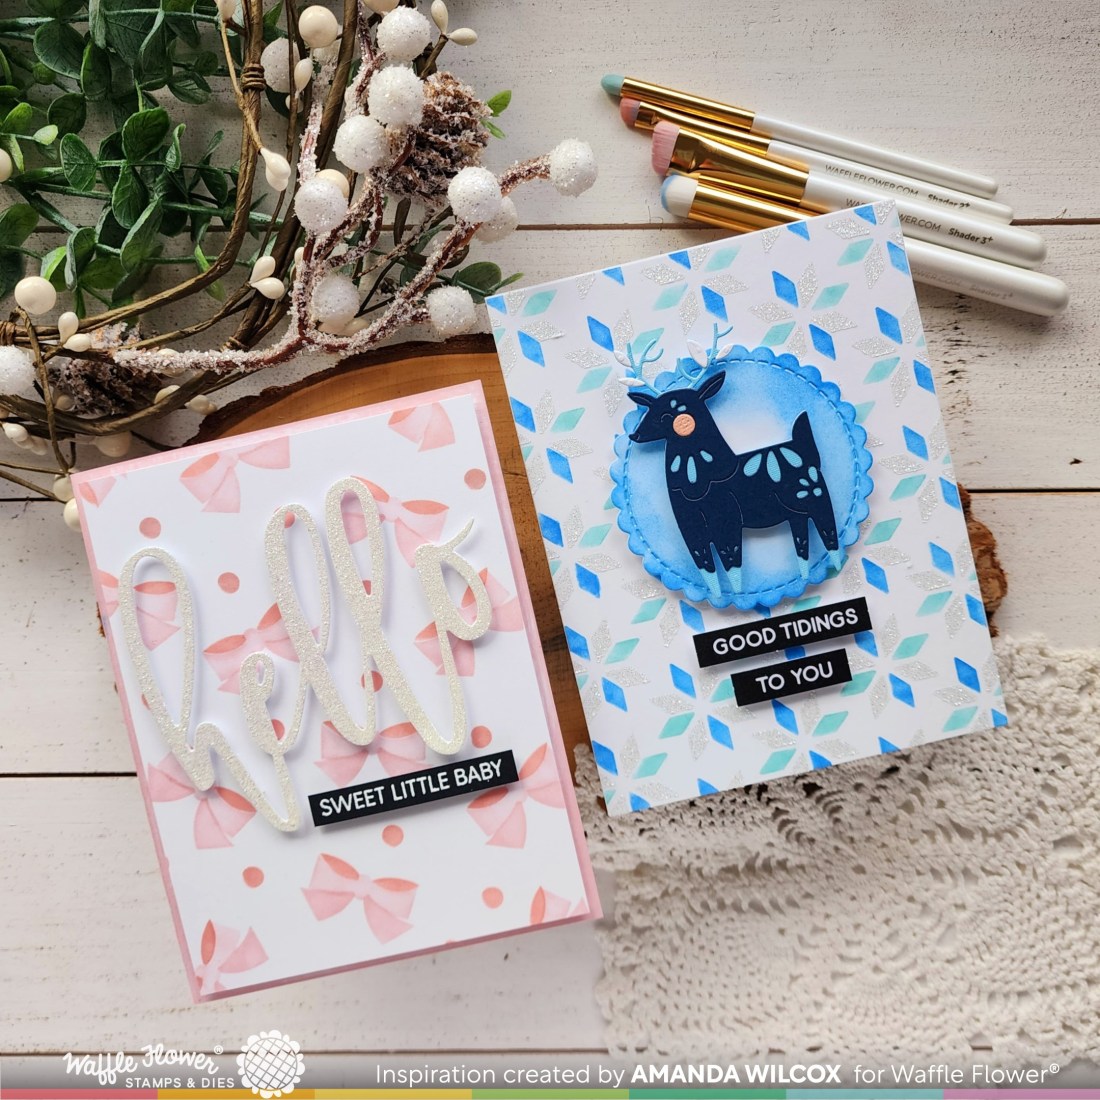
Hi friends! Today I have more Christmas inspiration for you combining some sweet Pretty Pink Posh images with a fabulous Mama Elephant cover die. Don’t forget when you have these awesome dies in your stash because they’re often perfect to mix with images from any company. I love the Mama Elephant covers that are designed for the little agenda series. The repeat shapes are a great base and often give you a two-for-one by keeping the windows that cut out for another card.

Today I cut the Mama Elephant Ornament Grid cover die from white cardstock and the toppers from gold glitter. I used liquid glue to adhere all the pieces and set the panel aside. I inked up another panel with Lawn Fawn peacock ink and splattered it with gold watercolor.

While that was drying I pulled out the Pretty Pink Posh Reindeer Friends stamp set to choose my images. I stamped and colored everything with copic markers and used the coordinating dies to cut them all out. Then I stamped and heat embossed a sentiment from Pretty Pink Posh Sentiment Strips: Christmas and used a sentiment strip die to cut it out.

I used liquid glue to adhere my background panel elements together and to a card base. Then I popped everything else up with foam squares and strips. For finishing touches I just added glossy accents to both reindeer noses.

Products used:
Mama Elephant Ornament Grid cover die
Pretty Pink Posh Reindeer Friends stamps and dies
Pretty Pink Posh Sentiment Strips dies
Pretty Pink Posh Sentiment Strips | Christmas stamps
Lawn Fawn peacock ink
Blending brush
Foam squares and strips
Glossy accents
Liquid glue
Anti-static powder tool
Embossing powder
VersaMark ink
LH Colors gold watercolor

I appreciate you sharing your time with me. Have a fabulous day!

Merry, Merry – Shop Your Stash

Hello everyone! It’s officially Christmas season and I’m not mad about it one bit! I know we’ve all been holiday crafting for a while in order to get things done by Christmas but there’s something different about feeling no judgement for blasting that holiday music and watching those fabulous movies on repeat that makes things a bit more magical. I wanted to start this season off with a really fun card that came together in my head and uses a bunch of great goodies that were in my stash.

I stamped and colored up that adorable Sunny Studios bear and cut him out with the coordinating dies, then used the extra die in the set so his hands can hold things too! Next, I cut the letters for MERRY with the Mama Elephant Marquee Letters dies. I lined the back with white glitter paper so the holes are sparkly.

Next I cut three Spellbinders Notched Rectangles – 2 of the largest white and green, 1 next size down white. I inked up the smaller one with the Pretty Pink Posh Winter Words stencil. Using my letters and bear as a guide, I stamped a sentiment from the Spellbinders Santa’s Sippin’ Sayings stamp set in the upper right corner of the panel.

I popped the stenciled panel up on the green notched rectangle with foam tape. Then I added my bear with foam squares and the letters with a combination of foam squares and liquid glue depending where they fell.

To create my shaped card, I took the white notched rectangle and scored it 3/8″ on one long side. I creased the fold and added it to the green one with double-sided tape. For finishing touches I added glossy accents to the bear’s nose and eyes. Once that was dry I went over the top and added a white gel pen highlight on them too.

I hope you have a wonderful holiday season and find lots of time to do all the things that make you happy!

Products used today:
Sunny Studio Holiday Hugs stamps and dies
Spellbinders Notched Corners dies
Spellbinders Santa’s Sippin’ Sayings stamps

Pretty Pink Posh Winter Words stencil
Mama Elephant Marquee Letters dies
Liquid glue
Foam squares and tape
Glossy accents
Sakura gelly roll pen

I appreciate you sharing your time with me. Have a fabulous day!

Sunny Studios – Turkey Treat Boxes

Happy Thanksgiving everyone! I hope you know how thankful I am for each and every one of you! The love and support I’ve seen since starting my blog, and since my business, is incredible and I appreciate every bit of it!

Today I wanted to pop in and share some fun treat boxes I created for our Thanksgiving table this year. They’re really simple but adorable and add a bit of fun to the table.

I stamped the cute turkey holding the sign from Sunny Studio plus some of the little extras in the set and colored them all with my copics. Then I used the coordinating dies to cut them all out. I used liquid glue to add the hats and parts the turkey can hold.

Next, I pulled out the Lawn Fawn tiny gift box dies and cut the box shape from some digital paper I purchased on Etsy. It’s printed on cardstock so it’s sturdy enough for the boxes but I also printed the designs on regular paper for a festive paper chain too.

After assembling the boxes, I hand wrote everyone’s name in the sign the turkey is holding and added them to the front of each box with a foam square. Then, the turkey’s that weren’t holding anything had some leaves added around their feet for something extra.

Products used today:
Sunny Studio Stamps Turkey Day stamps and dies
Lawn Fawn Tiny Gift Box dies
Foam squares
Scrappy tape – 1/4″
Liquid glue
Pumpkin Spice digital paper from The DigiRainbow

Preview of coming attractions too…

I appreciate you sharing your time with me. Have a fabulous day!

Pink & Main – Watercolor Christmas Wishes

Hello everyone! I’m on the Pink & Main blog today with a pearly slimline card wishing a Merry Christmas. I played with the gorgeous Water Gems powdered watercolors and the new Snowflakes Emboss and Cut Folder.

I did things a little backwards because I was just playing around so I will be transparent with my process but suggest you do the opposite. Lol. I used the Snowflakes Emboss and Cut Folder on two sheets of white cardstock giving me 8 snowflakes to play with. Then I sprayed them with water and sprinkled water gems powder on each. I sprayed more water to move the powder around and let them dry.

Let me suggest that you watercolor your paper, let it dry and then cut your snowflakes. I feel like the impression from the embossing folder will be better and make your snowflakes that much more vibrant.

Next, I cut the Christmas Greetings shadow from black once and words from white 4 times, using liquid glue to adhere everything together. While they sat with an acrylic block on top to dry, I moved on to my background.

I blended Dress Shop ink on a slimline card base fading from the top down. Then I die cut the Plaid Slimline die from white cardstock and glued it on top. I finally glued my snowflakes on the card front and trimmed off the excess. Some of the pieces were large so I glued them back on in different spots to fill in spaces. Last, I added my sentiment to the center with liquid glue as well.

The watercolor snowflakes are pearly and gorgeous in the light! And I’m so happy with the look of the blue/teal/pink color combo too! It’s so pretty!

Products used:
Snowflakes Emboss and Cut Folder
Plaid Slimline die
Christmas Greetings dies
Water Gems
EZ Squeeze liquid glue
Dress Shop ink
Ergonomic blending brush

I appreciate you sharing your time with me. Have a fabulous day!

Waffle Flower – Shader Brush GIVEAWAY

Hey friends!!! I’m so excited to be hosting a giveaway for a Waffle Flower Shader Brush Sampler Pack! Today I have two cards that I created testing out all of the shapes and sizes of the new brushes.

They are awesome and so useful, but I think I definitely have a couple favorites. I feel like this is an amazing reason to have the sampler pack available. This way you can play and test, decide what you will really use and buy the big pack for all your different ink colors of just what you need.

I created both of these backgrounds, back-to-back, and then while the messy one was drying, created the pink card and came back to my blue card. It worked out pretty well and they were really fun to create.

I’m mildly obsessed with this adorable Folk Art Reindeer and have made about a dozen of them in different colorways. Since I have so many on hand already, I created my background with the thought of adding this beauty to my card front.

Using the two smaller shader brushes, I added teal and blue inks to one layer of the Folk Art stencil. Then I added glitter paste through the second layer. The small brushes allowed me to do this without contamination or cleaning my stencil in between colors. It was great.

Then I cut a scalloped circle and used a bigger shader brush to add color around the edge and added everything to my card front with foam tape.

For this second card, I used the wider shader brush to fill in the long, larger areas of the bow and a small shader brush for the small spots. Again, it made the whole process easy and kept ink contamination to zero in the different areas.

I went direct-to-paper with the pink ink pad on my card front to make the border match the bows. Then popped the panel and sentiments up with foam tape.

***For speedy process clips, head to my Instagram and check out my reels.***
For regular followers, you know that’s not my regular jam so be kind, I’m trying and I hope it helps.

GIVEAWAY DETAILS

Comment here for a chance to win a Waffle Flower Shader Brush PLUS pack.

Open internationally, 18+ and older, giveaway closes on 11/30/2023. If your shipping address is outside of United States, you will receive a $20 gift certificate to waffleflower.com instead. Winner will be contacted via email by me.

Products used today:
Shader Brush PLUS pack
Folk Art Reindeer dies
Folk Art Background stencils
Layered Bows stencils
Oversized Hello stamps and dies
Subsentiments Christmas Tree diecut sheet
Liquid glue
Foam strips

I appreciate you sharing your time with me. Have a fabulous day!

Doodlebugs – Mix It Up Monday Birthday Fun

Hi friends! Today I’m mixing things up on the Doodlebugs blog birthday style. My daughter turned 17 a couple weeks ago and this was the birthday card I created for her. The fun part is, you can create this same card for any year because of the awesome Mama Elephant Birthday Candles stamp set!

I chose images from Mama Elephant Birthday Candles and Delivery By Truck to stamp and color with my copic markers. Then I used the coordinating dies from both sets to cut them out.

Next, I cut a white panel with the largest Pretty Pink Posh Eyelet Rectangle die and inked it up from the center fading out with Lawn Fawn celery stick ink and a blending brush. Then, I taped the Pretty Pink Posh Starburst stencil to the panel and went over it with the same ink. I didn’t want my card front white but I also didn’t want it dark to distract from the images either. So I took a Lawn Fawn kiddie pool ink pad and drug it across all four edges to give it a light teal color.

I stamped a sentiment on the lower center of the eyelet panel from Mama Elephant Deliver Lots of Cheer before adding foam tape and popping it up on my card base. Then I added the images with foam squares. For finishing touches I added glossy accents to all the noses and balloons. Then I added stardust Stickles to the banner and stars on the hats.

Most of the time I don’t know who is getting my card or when so I leave the inside blank but this time it was very specific so I pulled the cute sloth from Mama Elephant Birthday Candles and stamped him in pizza dough ink, along with a second sentiment from Mama Elephant Mixed Wishes Greetings.

Product used today:
Mama Elephant Birthday Candles stamps and dies
Mama Elephant Delivery By Truck stamps and dies
Mama Elephant Mixed Wishes Greetings stamps
Mama Elephant Deliver Lots of Cheer stamps
Pretty Pink Posh Eyelet Rectangle dies
Pretty Pink Posh Starburst stencil
Blending brushes
Lawn Fawn Ink – pizza dough, kiddie pool and celery stick
Foam squares and tape
Glossy accents
Stickles – stardust

I appreciate you sharing your time with me. Have a fabulous day!

Pink & Main – Release Day IG Hop

Hey everyone! It’s release day for Pink & Main and we’re having a fun hop over on Instagram to celebrate. It’s packed with inspiration and you’ve got a chance at a $50 gift card to the Pink & Main shop too!

I wanted to share the details for my card that’s part of the hop and then I’ll link to my Instagram at the bottom so you can get started!

It’s been a while since I created many scene cards so I jumped at the chance when I saw this new Winter Joy stamp set. I chose a tree and the sweet fox to stamp and color first. Then I used the coordinating dies to cut them out, along with a sentiment as well.

Pink & Main has a product called Stickies that are adhesive transfer shapes. This release has snowflakes in it. I cut those apart and layered them on in two groups – first I heat embossed with frosting and the second I used lavender. I did some ink smooshing with barbershop ink for my background and finished that panel off by splattering silver watercolor all over it.

I cut a snow hill and glued it to my background panel. Then I spread glue along the edge and sprinkled it with cracked glass chunky glitter. I also added glue and glitter to my tree. Once the glue was dry, I cut my background panel with the largest Notched Corner die. I wanted a coordinated red edge on my card so I used the darkest marker from my fox and colored the edge of an A2 cardstock panel.

I glued the red panel to a card base and popped everything else up with foam tape and squares. Then I added Touch of Gloss to the fox cheeks, mittens and pompom.

Products used:
Winter Joy stamps and dies
Notched Corners dies
Stickies – snowflakes
Embossing powder – frosting and lavender
Barbershop ink
Touch of gloss
Foam tape
Cracked Glass chunky glitter
EZ Squeeze liquid glue
LH Colors silver watercolor

Remember the Instagram hop – click HERE to get started.

I appreciate you sharing your time with me. Have a fabulous day!

Miss Ink Stamps – Wildflowers

Happy Thursday friends! The week is chugging along and I’m so happy about it. We have fun plans Friday night, a relaxing Saturday and more fun on Sunday this weekend. Yay!

Today I’m sharing some inspiration from the most recent addition to the Miss Ink Stamps Alice Collection. This set is called Wildflowers and it’s amazing! The florals would be perfect on their own or with any of the fun characters from Alice.

Today I chose a few images from the set to stamp and color with copic markers. Then I used the coordinating dies to cut everything out. I also stamped and cut out a sentiment with a banner die.

For my background, I inked up the Heirloom Blooms stencil with yellow ink. I faded it from the top left corner to nothing diagonally. Then I splattered the panel with gold watercolor.

I trimmed 1/4″ off the right edge of the panel and added foam tape to the back. Then I tore some gold striped washi tape and placed it on the right edge of my card base before adding the background panel to it. Then I added my images and sentiment banner with foam squares.

The only finished touches I did were glossy accents. I added them to bands on Alice’s dress, flower centers and all of the “butter” on my butterflies. This little bit of shine goes a long way in person.

Products used:
Wildflowers stamps and dies
Heirloom Blooms stencil

Blending brush
Lawn Fawn No. 2 Pencil ink
Foam squares and tape
LH Colors gold watercolor
Touch of gloss

I appreciate you sharing your time with me. Have a fabulous day!

Pink & Main – Sneak Peek Winter Foiling Fun

Welcome friends! I’m on the Pink & Main blog today sharing a sneak peek of Friday’s release. There are lots of fun products coming your way – new foiling fun, cute critters and fun dies too! Today I’m using a new die and Foilables too!

I did the two-for-one technique with my foiling today. The card on the right is the new Funky Flakes Foilables using an upcoming foil too. Next I took the negative foil and ran it through on one of the Bright Ombre Foilable sheets. Now we’ve got two foiled panels to create cards with.

I ink blended barbershop ink on the first one darker at the top, fading as I went down. Then I took this new Happy New Year die and cut my sentiment from the other foiled panel, right in the center. I glued the letters to a white shadow die cut and popped it up with foam tape on the original foiled panel.

I took my barbershop ink pad direct to a piece of cardstock to create matching blue paper and glued it to a card base. Then I popped the snowflake panel up with foam tape and wrapped silver wire ribbon around the whole thing for added interest.

Next, we have the second panel with words cut right out of the center of it. Easy to cover up with the shadow die from that set. So I cut another set of words from blue glitter paper and glued it all together. I cut the foiled panel with a large fishtail banner die and repeated the same process as the first card.

Foam tape layers between everything and I drug my ink pad along another piece of white cardstock for that same rich blue background. I also added the same wire ribbon because I really like how it looks.

New Years is always a blingy, flashy holiday to me so all this bright and happy foiling is perfect for the occasion!

Products used:
Happy New Year dies
Large Fishtail dies
CheerFoil
Funky Flakes Foilables
Bright Ombre Foilables

Mini Minc Machine
Winter Glitter paper pack
Foam tape
EZ Squeeze liquid glue
Barbershop ink
Blending brush

I appreciate you sharing your time with me. Have a fabulous day!

Newton’s Nook – November Release Reveals Day 3

This is actually the final day of release reveals for this month’s Newton’s Nook release. It’s bitter sweet but I hope you’re ready for so much cuteness and are prepared to shop your hearts out tomorrow!!!

Newton’s Reading List stamps and dies

Puppy’s Reading List stamps and dies

I had a blast coloring these images and then had the whole family weigh in on the book titles because #1 it was way too hard to choose and #2 they were cracking me up so I had to share the joy!

For Newton’s Reading List, I cut another Fancy Edges Tag and inked it up with the Petite Paw Prints stencil before popping Newton up with foam squares. Then I inked a white panel with the Meow stencil using orange ink. After I removed the stencil I added a light layer of the same ink all around the edges. I cut this panel from the largest Framework die.

I didn’t like the white card base around the edges so I added a layer of gray cardstock before popping the orange panel up with foam tape. Then I added my tag with another layer of foam tape. You know I love dimension. Then I finished things off with glossy accents here and there.

For Puppy’s Reading List, I pulled out A Dog’s Life paper pad to add layers to my background. I cut strips about 1 3/4″ and 2 1/2″, then covered the seam with a 1/4″ red strip. Next, my image is popped up on a scalloped circle from the Circle Frames die set.

I finished this card off the same way with glossy accents all around on the glasses, collar tag and book spines. Last, I added baker’s twine around the top, tied in a bow.

Enter to Win a $25 Prize!

We will be choosing two lucky winners to win a $25 store credit for Newton’s Nook Designs online shop! The winners will be chosen at random from the collective blog posts featuring our new products this week. For a chance to win, leave comments on the Design Team Member Blog Posts (see list below) from Monday November 13 through Wednesday November 15. You will not know which blog has been chosen so the more you comment on the better your chances are of winning! You have until Wednesday, November 15th  at 9 pm ET to comment — winners will be announced on the NND blog on Friday, November 17th.

Check out all the awesome Design Team Blogs below to enter:

Newton’s Nook Designs
Donna Idlet
Ellen Haxelmans
Larissa Heskett
Samantha Mann
Zsofia Molnar
Diane Morales
Farhana Sarker
Tatiana Trafimovich
Amanda Wilcox