Newton’s Nook – August Release Day 3

Things are chugging along and we’re already to day 3 of the Newton’s Nook August Release reveals. Let’s check it out!

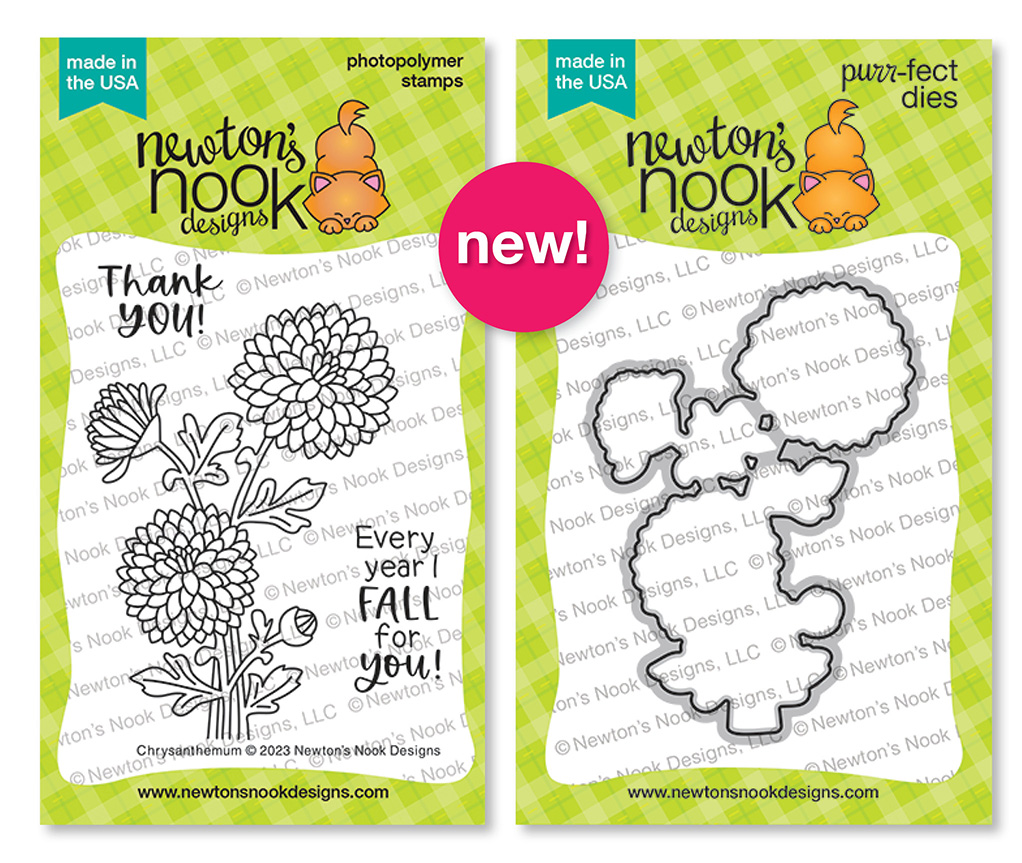
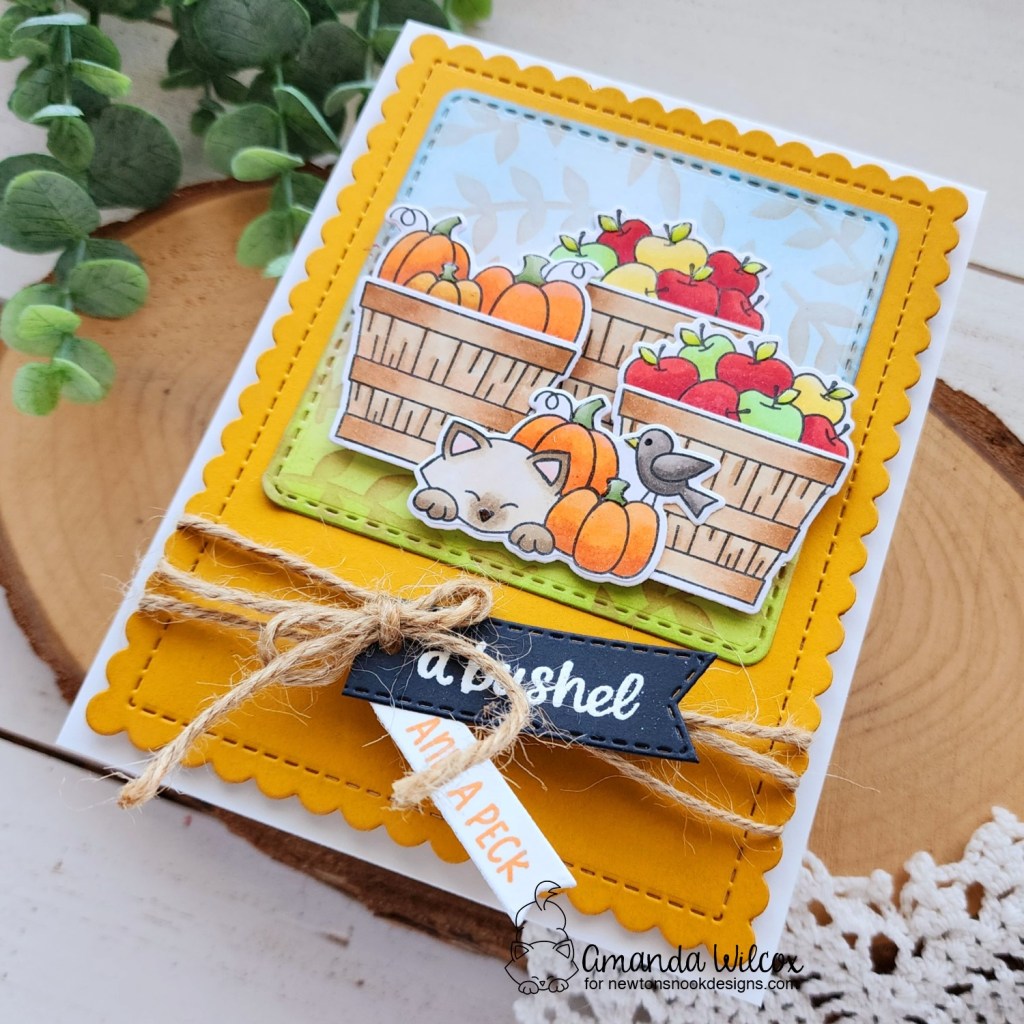
Autumn Apples stamps and dies

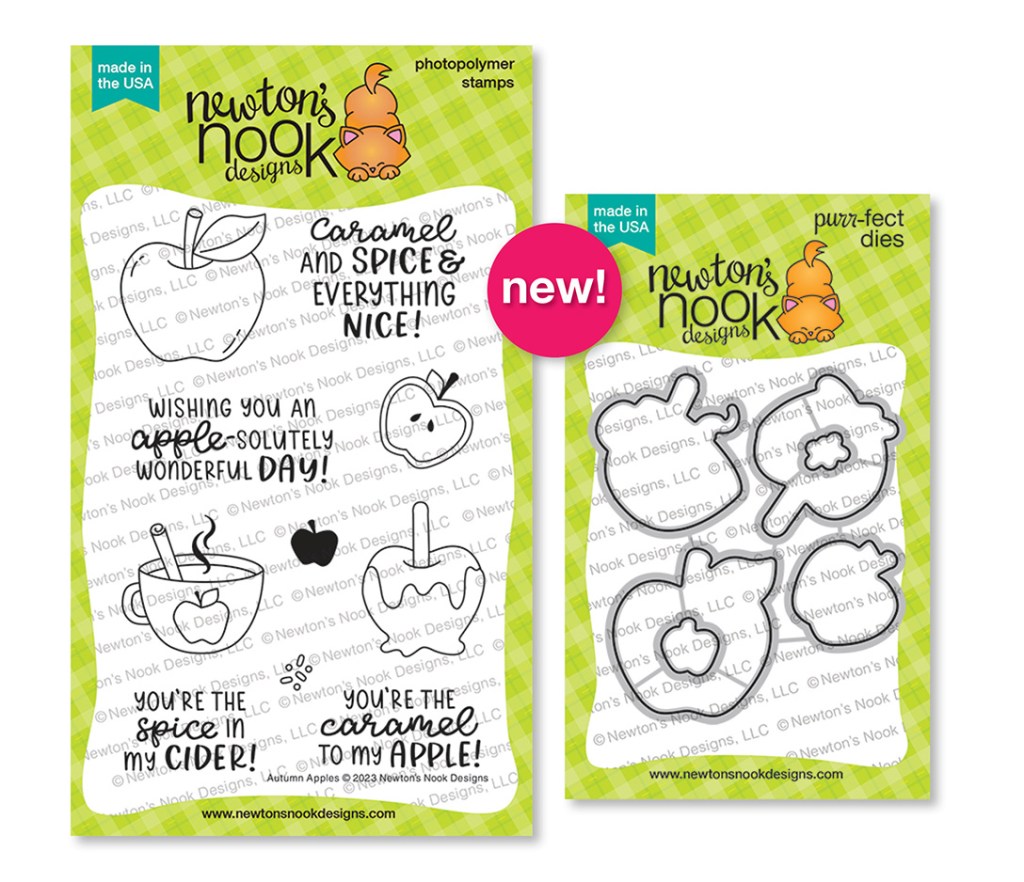
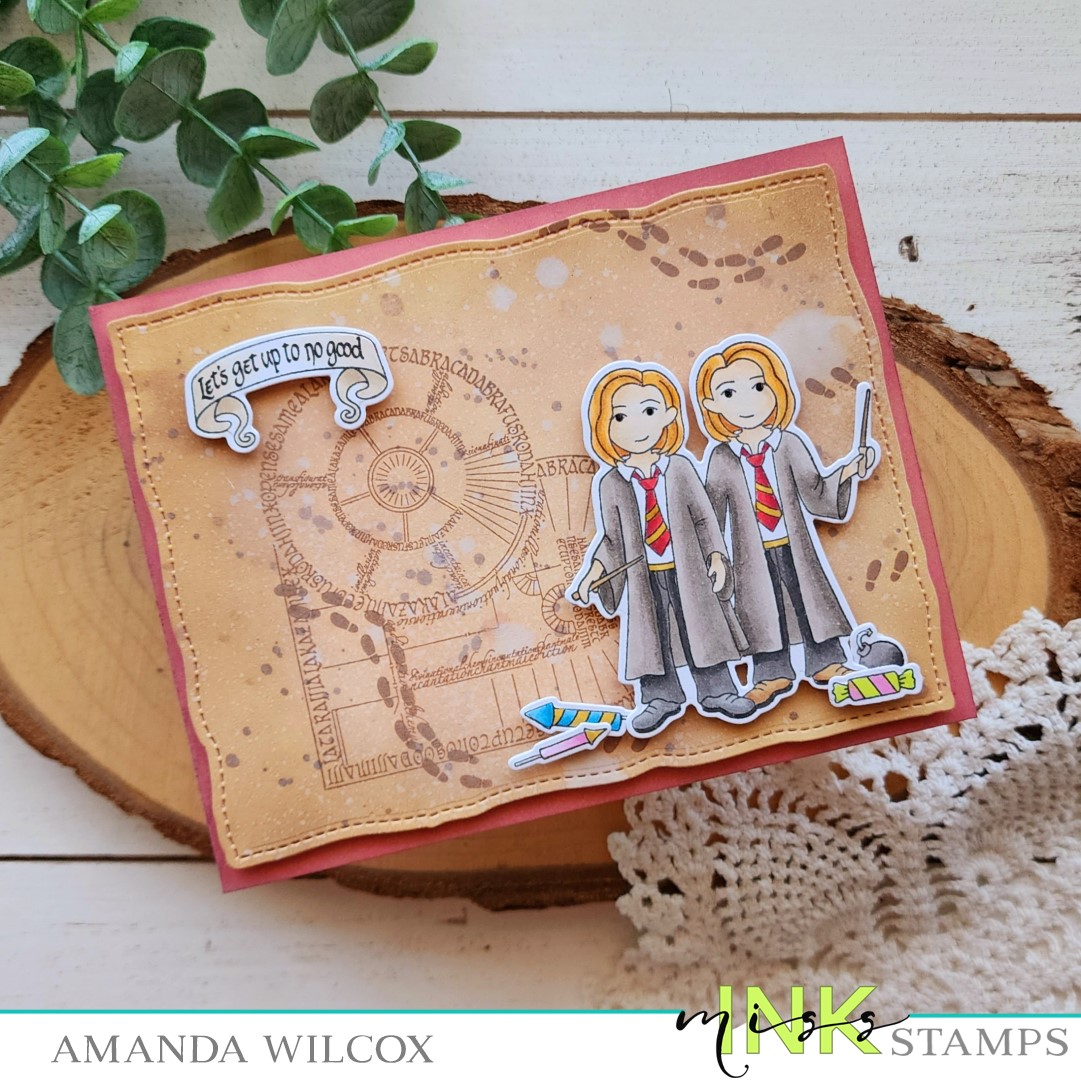
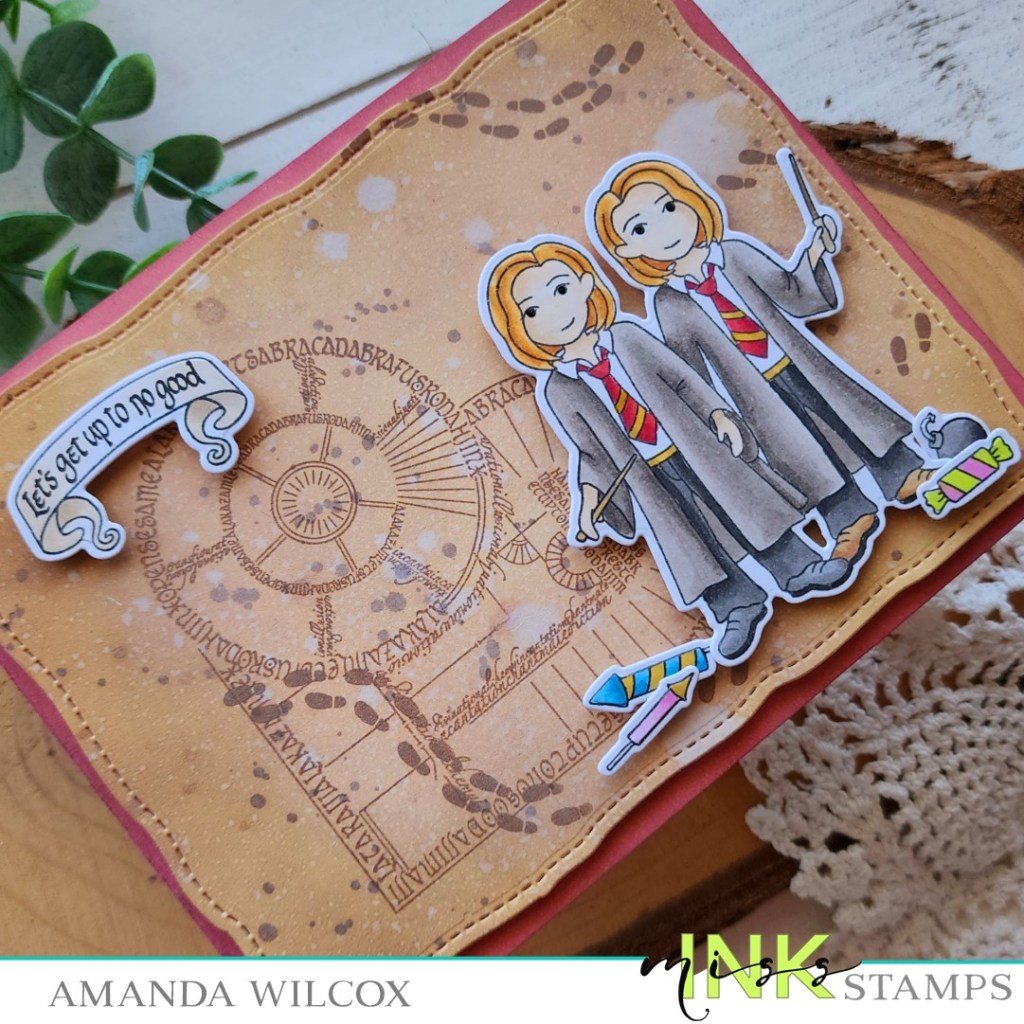
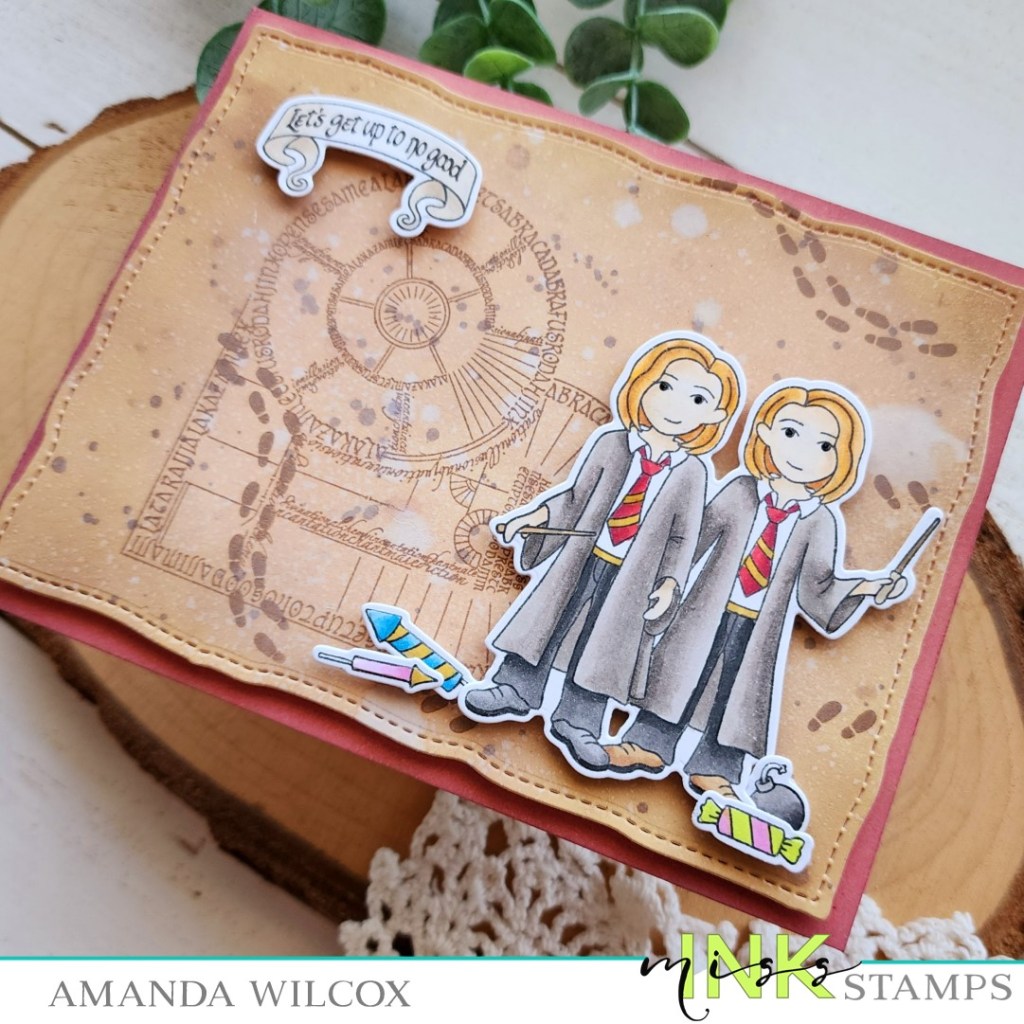
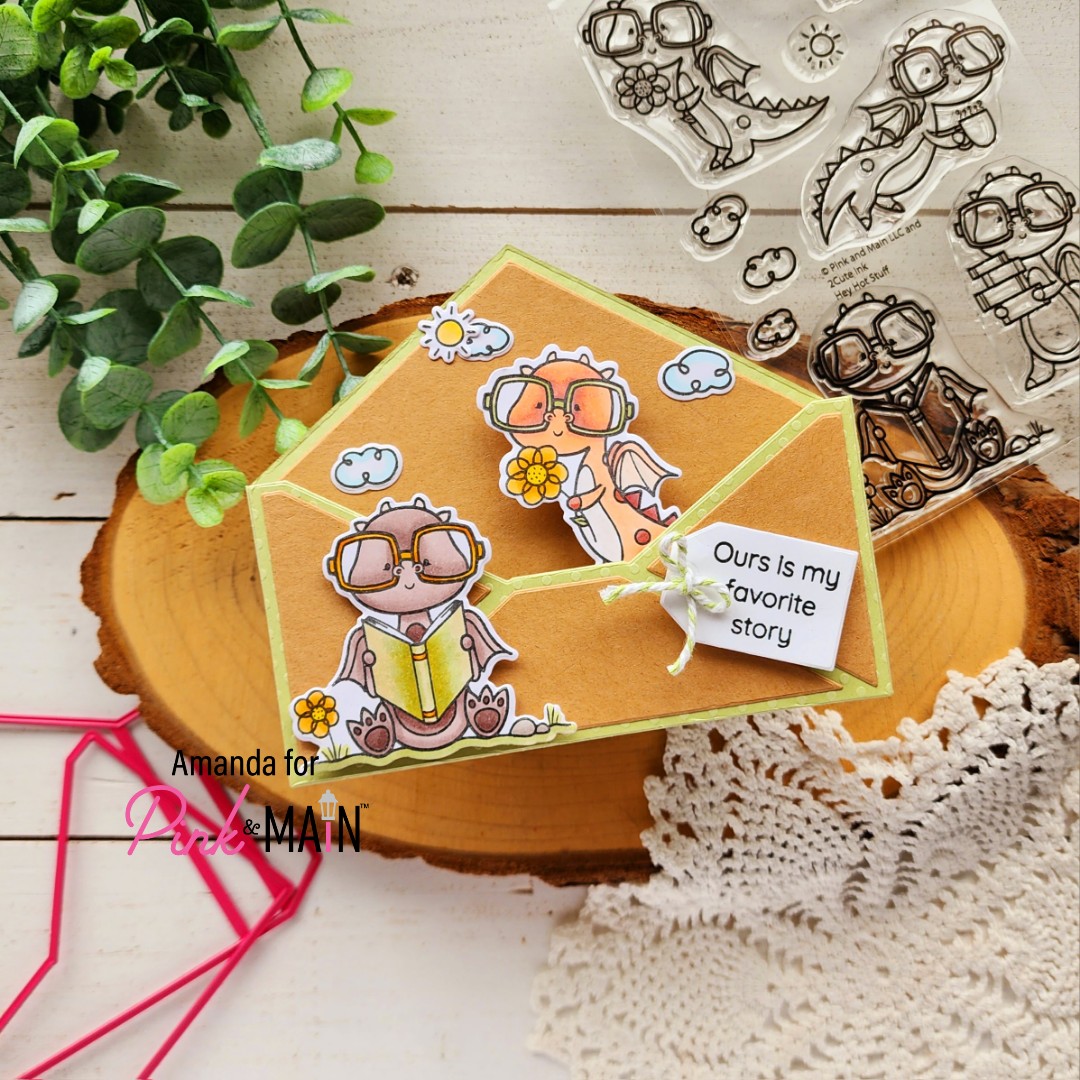
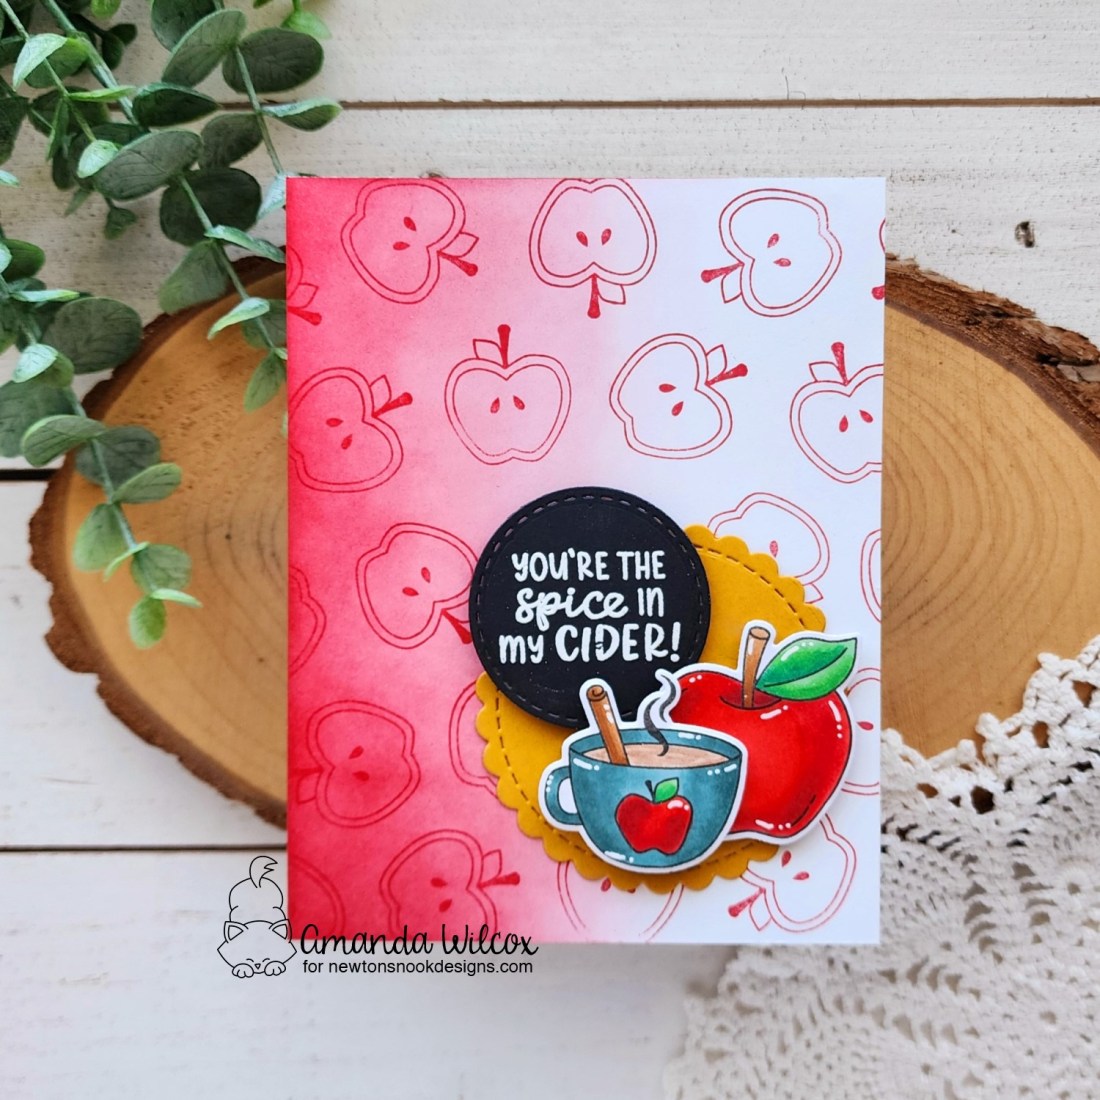
Seriously, are these not the cutest images with the most fun sentiments ever!?! I love them! Also, have so many ideas to get going on too!

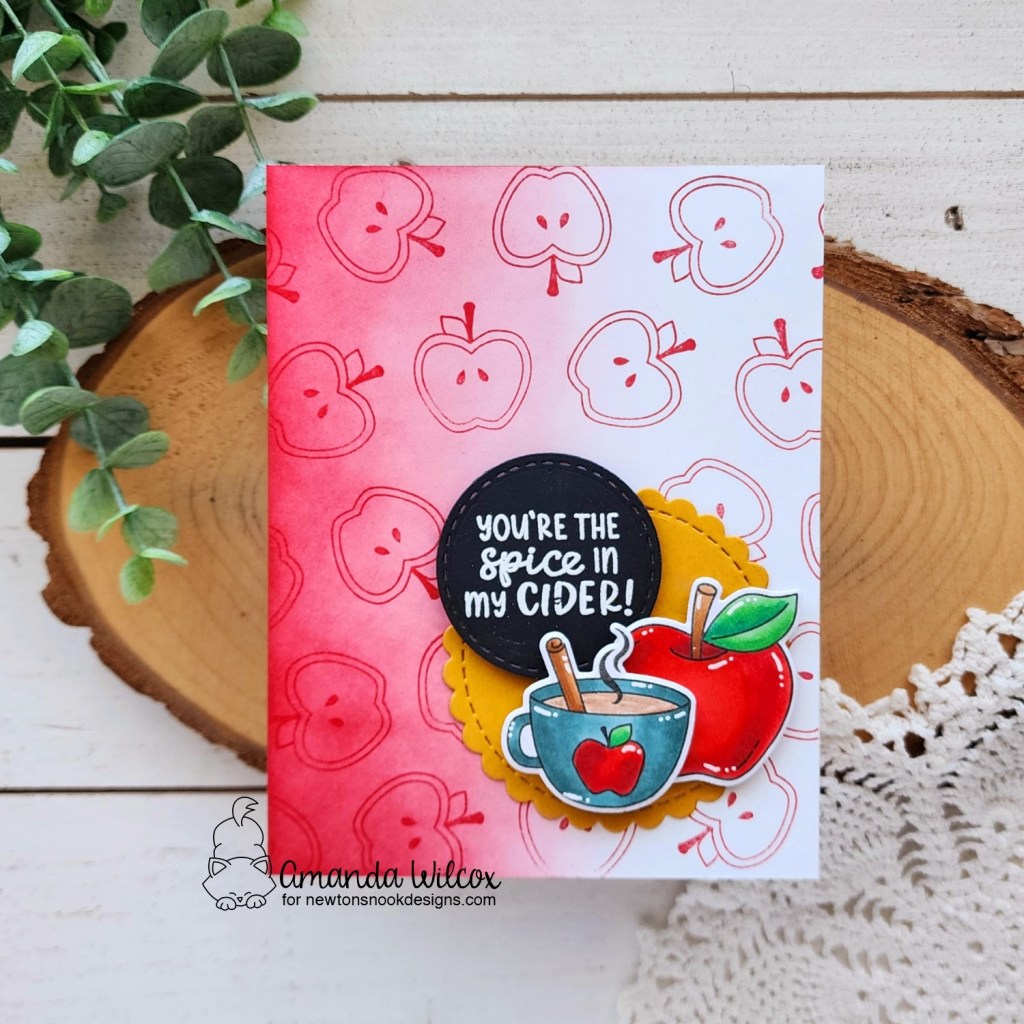
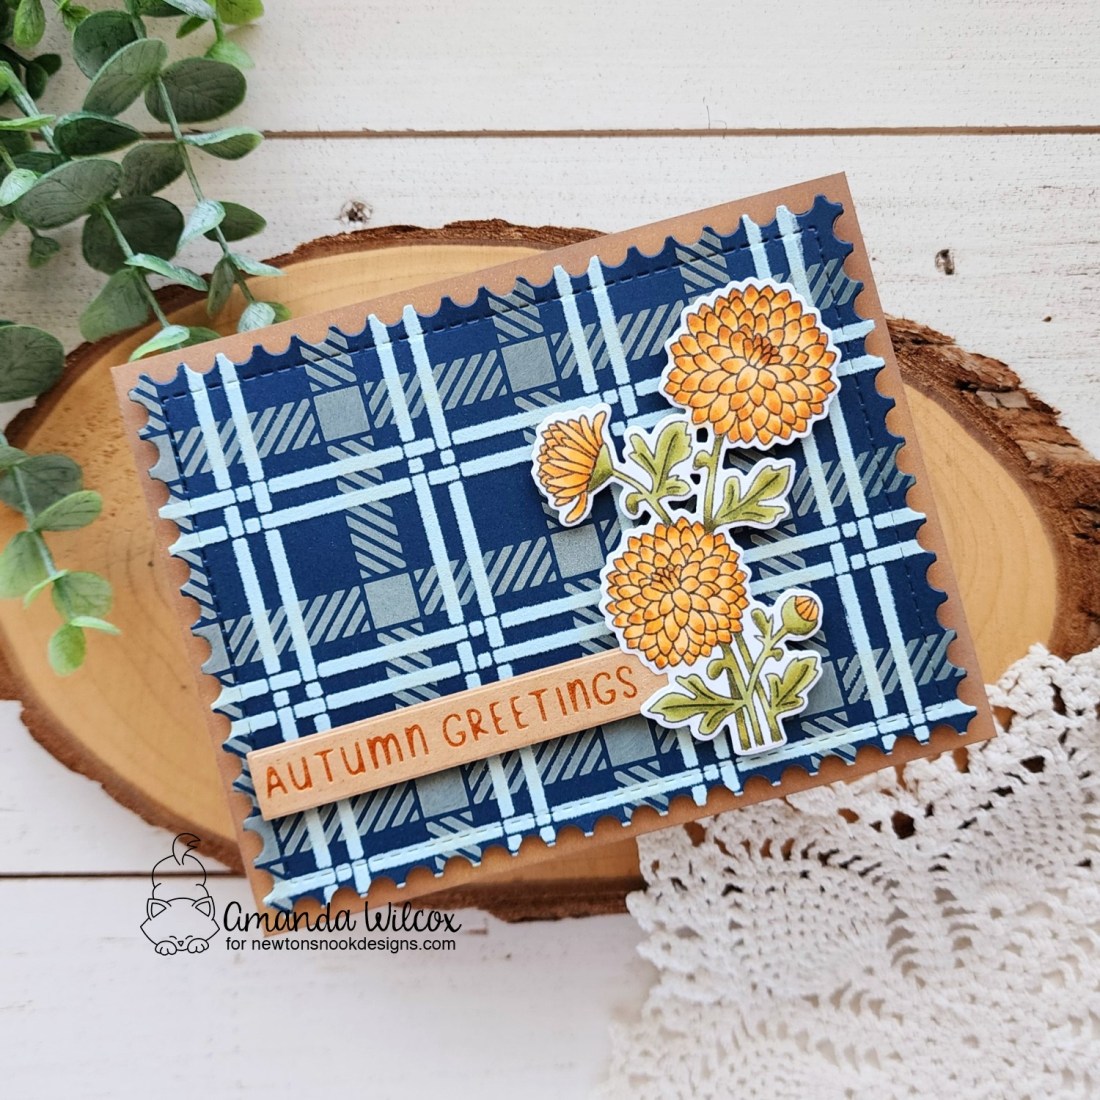
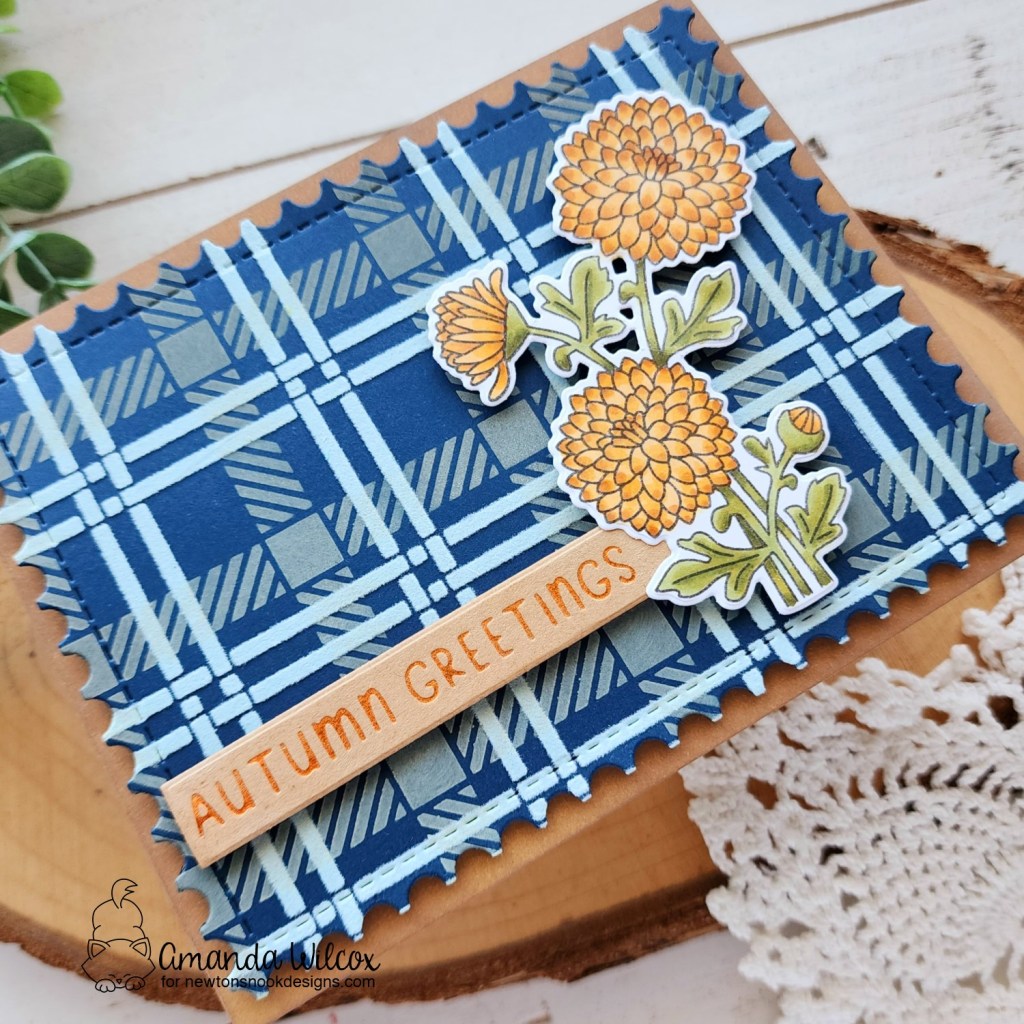
Today I chose a couple of images from the set to stamp and color with my copic markers. Then I took another images and repeat stamped it all over a piece of white cardstock for a custom background.

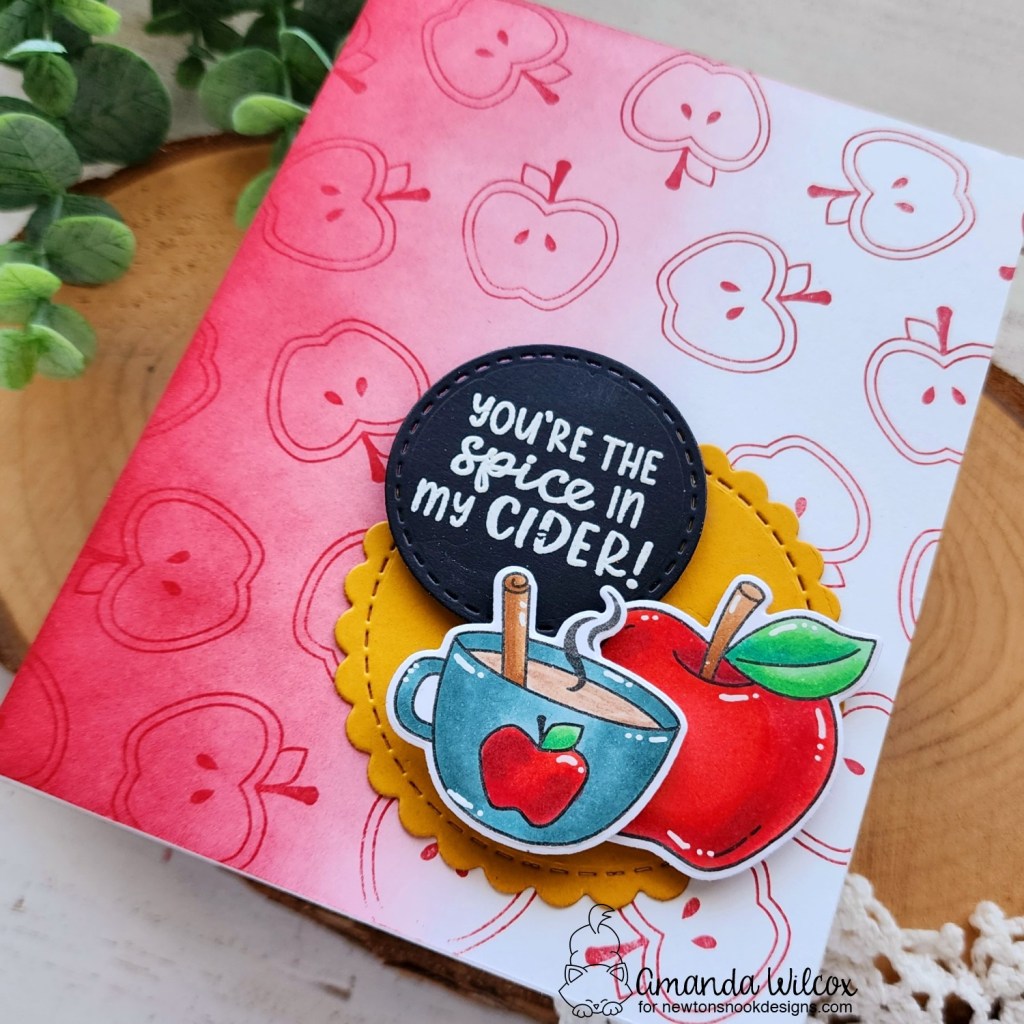
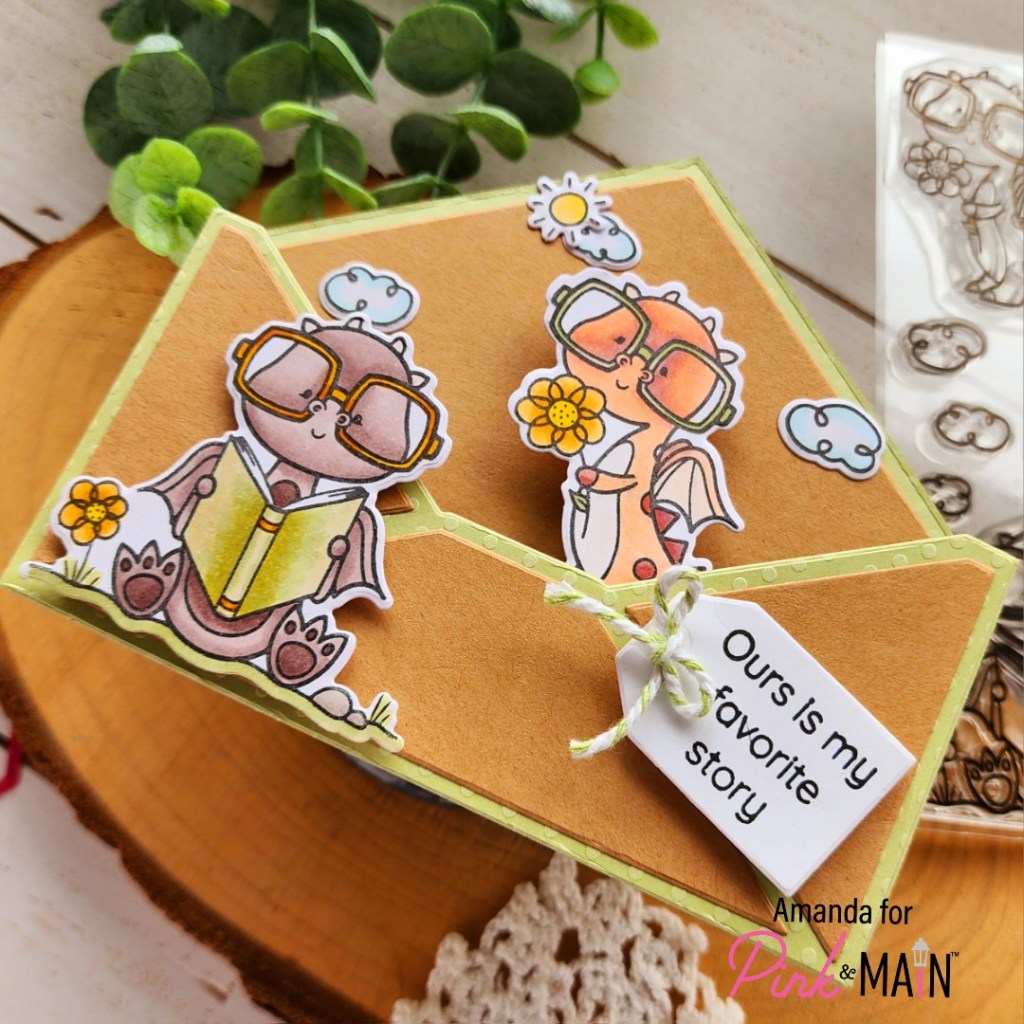
After stamping, I took a blending brush with the same color ink and blended from left to right, rading out as I went. Then I pulled out the Circle Frames and Frames Squared dies to find the right size circles for my background focal point and sentiment.

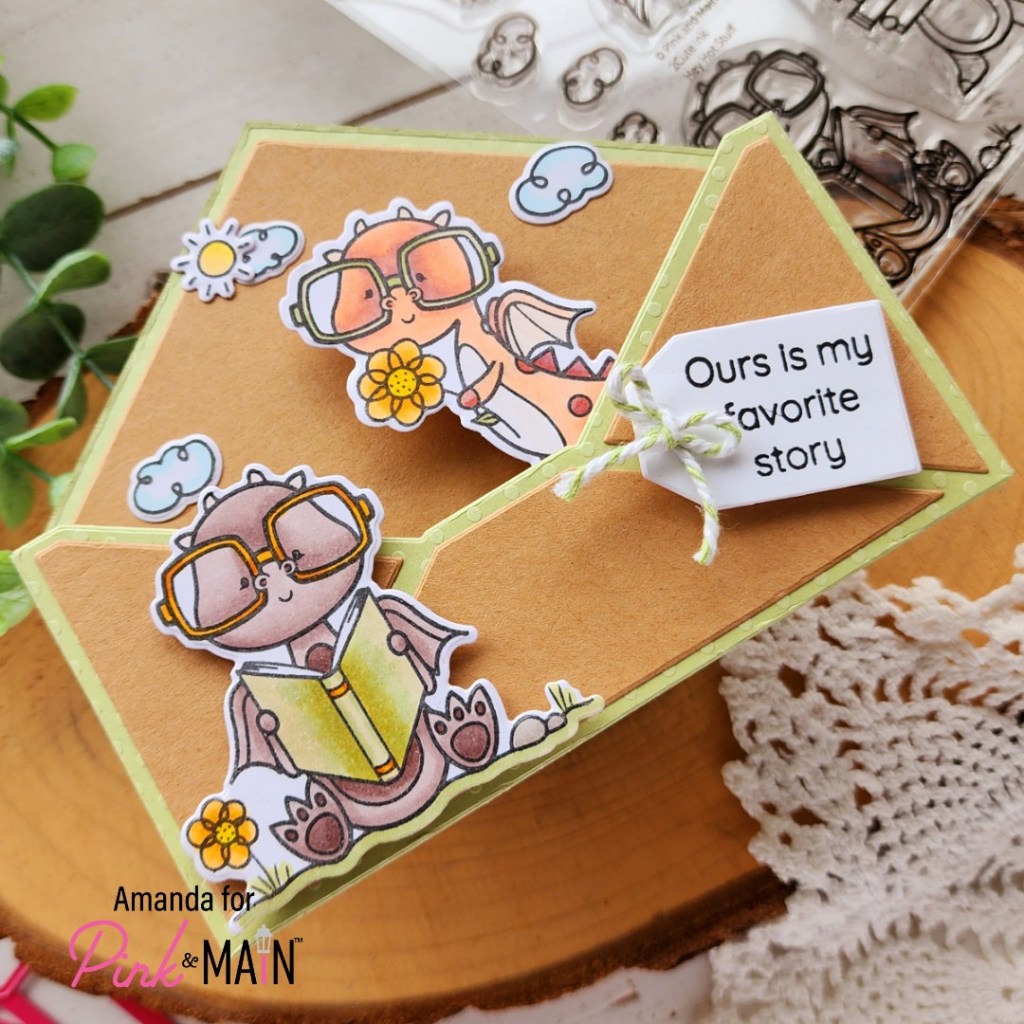
I heat embossed my sentiment on one of the circles and then added everything to the stamped panel with a combination of liquid glue and foam squares. For finishing touches I added white gel pen highlights all over the images.

Would you like to win the “Autumn Apples” Stamp Set? This stamp set will be given away to ONE lucky winner!

Here’s how to win: Comment on the NND blog and Design Team blogs (see list below)! The winner will be chosen at random from the collective reveal posts. Make sure to check out each of their blogs and comment for your chance to win. You will not know which blog has been chosen so the more you comment on the better your chances are of winning! You have until Thursday August 17th at 9pm ET to comment  — winners will be announced on the blog post on Friday, August 18th. 

Check out all the awesome Design Team Blogs below to enter:

Newton’s Nook Designs
Donna Idlet
Ellen Haxelmans
Tina Herbeck
Larissa Heskett
Samantha Mann
Diane Morales
Farhana Sarker
Amanda Wilcox

Pink & Main – Sneak Peek Week

Hello again! I’m on the Pink & Main blog today for sneak peek week using the August release which will be available on Friday! For all my coffee loving friends and those of us dying for fall, get ready!!!

There’s a new stamp and die set comping on Friday called Thanks a Latte and I’m completely smitten with it! Adorable images and some fun sentiments to go with it. Today I’m pairing a couple of those with a new Crosshatch die that gives great texture to your backgrounds!

To step up the fall feel of my card, I used the Leaves embossing folder on my panel and some Sunny Water Gems watercolor before gluing the crosshatch down. I popped my images and sentiment up on that. Then, I added the whole panel to a white card base with foam tape.

For finishing touches I added black glaze pen to the eyes on the cups and touch of gloss to the stripes and leaves too.

It’s been over 100 degrees here for too many days in a row and this Oregon girl was not built for the heat. Playing with fall is quite a welcome distraction.

Products used:
Thanks a Latte stamps and dies
Crosshatch die
Leave embossing folder
Water Gems watercolor
Foam tape
Touch of Gloss

I appreciate you sharing your time with me. Have a fabulous day!

Newton’s Nook – August Release Day 2

Welcome to day 2 of the Newton’s Nook August Release reveals! I hope you loved yesterday’s reveals and are excited for more fall fun today.

Chrysanthemum stamps and dies

We’re adding another gorgeous floral to the collection and it happens to be one of my favorite flowers. When I start seeing the big pots of these in front of the stores I know it’s really fall and I get so excited! Also, it’s the flower for November when my birthday is so that probably plays a part too.

I stamped and colored the image with copic markers in my very favorite shade that these flowers come in. Then I used the coordinating die to cut it out. I also hot foiled an Autumn Greetings sentiment and die cut it with one of the Banner Duo dies.

For my background panel, I cut a dark blue piece of cardstock and paired it with the Plaid stencil. The first layer I inked with gathered twigs distress oxide ink, hoping the ink would sit on top of the cardstock with a brown tone. It didn’t as much as I hoped but it still looks great. For the second layer I spread Thermoweb transfer gel blanco through it and let that dry. Then I ran the panel through my mini Minc machine with light blue deco foil flock.

For my card base, I inked the edges with gathered twigs distress oxide ink before popping the flocked panel up with foam tape. Then I added the florals with foam squares and tucked the end of my sentiment banner underneath them, also using foam squares on that.

Would you like to win the “Chrysanthemum” Stamp Set? This stamp set will be given away to ONE lucky winner!

Here’s how to win: Comment on the NND blog and Design Team blogs (see list below)! The winner will be chosen at random from the collective reveal posts. Make sure to check out each of their blogs and comment for your chance to win. You will not know which blog has been chosen so the more you comment on the better your chances are of winning! You have until Thursday August 17th at 9pm ET to comment  — winners will be announced on the blog post on Friday, August 18th. 

Check out all the awesome Design Team Blogs below to enter:

Newton’s Nook Designs
Donna Idlet
Ellen Haxelmans
Tina Herbeck
Larissa Heskett
Samantha Mann
Diane Morales
Farhana Sarker
Amanda Wilcox

Newton’s Nook – August Release Day 1

Hey there! So happy you’re here because it’s the start of the Newton’s Nook August Release reveals and it’s SO MUCH FUN!!! Y’all know I’m an out and out fall girl. If I could do fall all year long, I would! So this release has my heart in every way!!! Here we go!

Autumn Leaves Hot Foil Plate

Autumn Greetings Hot Foil Plates (coordinated with Banner Duo dies)

Fall Harvest stamps and dies

Today I have a card to share with you featuring Fall Harvest stamps and dies but throughout the week I’ll be sharing projects including all of the hot foil plates too! They’re soooo good!

These little bushels for the basket are just adorable and so fun to mix and match…but I also thought the ones especially with the kitty and puppy worked perfectly on their own too!

After stamping and coloring all the elements with copic markers, I used the coordinating dies to cut them out and liquid glue to adhere the bushels to the baskets. Then I cut a rounded square from the Frames Squared die set and ink blended it. After adding sky and grass, I went over the whole thing lightly using brown ink and the Trailing Leaves stencil. I thought it added an extra touch of interest. Then I glued one basket down with liquid glue and popped the other images up with foam tape.

Using the largest Frames & Flags die I cut a background panel and adhered my mini scene to that with liquid glue. Next, I chose some banners from Banner Trio and A7 Frames die sets to stamp my sentiments. I punched holes in them and strung them on my background panel.

I added foam tape to the back, avoiding the twine area so it lays flat, and popped it on a white card base. Then for finishing touches I added glossy accents to the pumpkin stems, apple leaves, bird beak and kitty nose.

Would you like to win the “Fall Harvest” Stamp Set? This stamp set will be given away to ONE lucky winner!

Here’s how to win: Comment on the NND blog and Design Team blogs (see list below)! The winner will be chosen at random from the collective reveal posts. Make sure to check out each of their blogs and comment for your chance to win. You will not know which blog has been chosen so the more you comment on the better your chances are of winning! You have until Thursday August 17th at 9pm ET to comment  — winners will be announced on the blog post on Friday, August 18th. 

Check out all the awesome Design Team Blogs below to enter:

Newton’s Nook Designs
Donna Idlet
Ellen Haxelmans
Tina Herbeck
Larissa Heskett
Samantha Mann
Diane Morales
Farhana Sarker
Amanda Wilcox

Doodlebugs – Happy Birthday with Hot Foil and Stenciled Background

Welcome to another Monday where I’m over on the Doodlebugs blog sharing how to mix and match your companies! Today I have Mama Elephant stamps and dies with Spellbinders hot foil plates and coordinating stencil set! This card was super fun to create!

I started by hot foiling the Spellbinders Geometric Diamond plate with silver foil on white cardstock. Then I went to town with Lawn Fawn dye inks and blending brushes, using the coordinating stencil set to ink up the whole panel. I chose warm, summery colors today. Aren’t they pretty?!? Then I trimmed the panel down to 4×5.25 inches.

Next, I die cut the Mama Elephant Big Happy Birthday from white cardstock 3 times and used liquid glue to adhere the layers. Then, I chose 3 different kitties from the Mama Elephant Little Agenda Cat and colored them with my copic markers. I used the coordinating dies to cut them out.

To put it all together, I added the foiled panel with foam tape to a white card base. Then liquid glue to adhere the sentiment die cuts and finally foam squares for those cute kitties!

For finishing touches I simply added stardust Stickles to the pink parts of each kitty – the balloon, shirt and party hat.

Products used:
Spellbinders Geometric Diamond hot foil plate
Spellbinders Geometric Diamond stencil set
Spellbinders Hot Foil – silver
Mama Elephant Big Happy Birthday die
Mama Elephant Little Agenda Cat stamps and dies
Foam squares and tape
Liquid glue
Stickles – stardust
Lawn Fawn Ink – ballet slippers, lemonade, peach fuzz and peachy keen
Blending brushes

I appreciate you sharing your time with me. Have a fabulous day!

Spellbinders – The Snow Garden Release Day

Hey friends! I’m popping in this afternoon to remind you that it’s release day for Spellbinders. I was fortunate enough to get to play with one of the new Susan Tierney Snow Garden dies – Crocus with Ladybugs. It was probably the easiest to create with so far and turned out so pretty.

I chose to die cut all of the crocus elements from white cardstock and used copic markers to add my color. Then I used liquid glue and reverse tweezers to assemble the flowers.

For my background, I embossed a piece of white cardstock with the Loops embossing folder and then trimmed it down to 3.25×5 inches. I ink blended red dye ink from one corner fading to nothing, then splattered it with white paint. I popped the panel up on a white card base with foam tape and used liquid glue to adhere all my flowers across the panel.

I snagged the banner die from the new Pop-up Snowflake die set and tucked it under the edge of the bottom flower.

There are a number of gorgeous blooms available in the new Snow Garden collection so be sure to check them all out.

Products used today:
Crocus and Ladybugs dies
Pop-up Snowflake dies
Loops embossing folder
Foam tape
Blending brush
Lawn Fawn Ink – chili pepper
Liquid glue

I appreciate you sharing your time with me. Have a fabulous day!

Pink & Main – Hello Beautiful with Foiling and Ink Blending Background

Happy Wednesday everyone! Considering I thought Monday was Tuesday, I’m grateful the week is finally moving along. Today I’m on the Pink & Main blog sharing this gorgeous tropical vibe card using Foilables with some ink blending for a stunning background.

To start things off, I heated up my Minc machine and foiled one of the Cloudy Day Foilables with Waterfall CheerFoil. I am over the moon for the effect this foil gives! It’s incredible! After foiling I pulled out distress oxide inks – lemonade, carved pumpkin and abandoned coral – and blended a sunset sky. I spritzed it with water and blotted that off with a paper towel. Then, I used a clean microfiber cloth to buff the ink off the foiling. This really does make a huge difference in the vibrancy of your foiling when ink blending.

Next, I stamped an image from Aloha Flowers and colored it with copic markers. Then I used the coordinating die to cut it out. I also chose a sentiment from that set to heat emboss and die cut. I added foam to the back of each and popped them up on my foiled background.

I ran out of black cardstock so I blended the edges of my card base with black soot distress oxide ink and then popped the whole panel up with foam tape on that.

For finishing touches I just added Touch of Gloss to all of the flower centers. I like that little bit of shine to go with the beautiful foiling.

Products used:
Aloha Flowers stamps and dies
Cloudy Day Foilables
Waterfall CheerFoil
Mini Minc Machine
Distress Oxide Ink – lemonade, carved pumpkin, abandoned coral, black soot
Foam tape
Touch of Gloss

Magic Anti Static Brush
Watermark & Embossing Ink
Embossing Powder – icicle

I appreciate you sharing your time with me. Have a fabulous day!

Doodlebugs – Mini Note Card Two Ways, Blingy or Simple

Welcome back everyone! I’m so glad you stopped by today. I’m on the Doodlebugs blog with a pair of mini note cards in two variations. Both are super cute but maybe one is more comfortable or to your bling level liking. Enjoy!

First up, I went all things extra and hot foiled my sentiment, plus glitz gelled my stencil! Shiny and glittery and fabulous! This Pretty Pink Posh mini note die set is super fun and I’m going to be making a ton of these over time. They’re fun for purses, lunch boxes and RAKs at the store too!

I used the adorable Spellbinders Sweet Birdie die to adorn my card front and I love it! I used fun colored cardstock from my stash and liquid glue to assemble him. Then, after hot foiling my Pretty Pink Posh Smile sentiment, I die cut it, gluing and additional two layers to the back so it had a little dimension. The bird is popped up with a foam square so it stands out too.

After creating that first card, I thought about people who don’t hot foil or like to get messy like I do and wanted to create and equally adorable, but simpler version of the same card. So here we are! I used a blending brush and darker teal ink for my stenciling this time.

Plus I used the regular die and shadow for my sentiment instead of the hot foil plate and shadow die. I did add two extra layers to the shadow on this sentiment just like the first one and popped my birdie up with a foam square again too.

A little side-by-side action for you to see the differences at the same time. The impact is definitely more in person, with the light hitting the glitz gel and foiling but I really love both cards!

What’s your vote?

Products used today:
Spellbinders Sweet Birdie dies
Spellbinders Hot Foil – moondust
Pretty Pink Posh Mini Scallop Card dies
Pretty Pink Posh Large Smile hot foil plate and dies
Pretty Pink Posh Starburst stencil
Liquid glue
Foam squares
Blending brush
Lawn Fawn ink – mermaid
Thermoweb Glitz Gel – iridescent

I appreciate you sharing your time with me. Have a fabulous day!

Miss Ink Stamps – Up to No Good

Happy Thursday friends! We’re one day closer to the weekend and I’m really looking forward to it! Today I have a fun magical card to share featuring a couple of stamp and die sets from Miss Ink Stamps. I’ve been itching to use these products and finally made it a priority to get them inked up!

I started by stamping some different images from Mischief Makers, plus the banner from Up to No good, and colored them with copic markers. After coloring the banner I went back and stamped the sentiment. Then, I used the coordinating dies to cut everything out.

To create my background I inked up a white piece of cardstock with distress oxide ink in tea dye and gathered twigs. I flicked water on the panel and blotted it dry. Then I splattered ground espresso distress oxide ink on it for darker contrast. Then I stamped images from Up to No Good on various parts of the panel, trying my hardest to be “random.” Then I die cut the panel for the fun jagged map look.

I inked the edge of my card base with aged mahogany distress oxide ink and popped the background panel up with foam tape. Then I added the images and sentiment banner with foam squares.

I really liked the muted look of this card so I only went over the eyes with black glaze pen for a finishing touch. No sparkly or shiny today.

Products used:
Mischief Makers stamps and dies
Up to No Good stamps and dies
Foam tape
Distress Oxide Ink – aged mahogany, tea dye, gathered twigs, ground espresso
Mama Elephant Mod Heart dies

I appreciate you sharing your time with me. Have a fabulous day!

Pink & Main – Ours is My Favorite Story Box Card

Hello again everyone! I’m over on the Pink & Main blog with a sweet envelope box card to share with you. I love the fun shape of this die set and have been wanting to try different images with it for a while now.

Today I cut the elements for my envelope box card from light green and kraft cardstock, with a white tag so it didn’t blend in. I used EZ tear tape to adhere all of the pieces – 1/4″ and 1/8″ depending on the size of the tab and liquid glue to add the kraft details.

I stamped and colored images from Hey Hot Stuff with copic markers, then used the coordinating dies to cut them all out. To get my sentiment to fit on the tag, I used tape to mask off portions and make sure to clean the stamp really good between each line so there wasn’t anything left on the section prior.

I added the front drag and tag with foam squares, the second dragon inside with liquid glue, along with the sky pieces in the back.

It all folds perfectly flat and mails in a regular envelope. There’s just enough depth for it to stand for display and give fun dimension to whatever you have spilling out of your envelope too.

Products used:
Hey Hot Stuff stamps and dies
Envelope Pop Up Card dies
EZ Tear Tape – 1/4″ and 1/8″
EZ Squeeze liquid glue
Foam squares

I appreciate you sharing your time with me. Have a fabulous day!