Newton’s Nook – Cat-purr-ccino

Hello everyone. I’m so happy to be on the Newton’s Nook blog again. This time I’ve been in the mood for coffee themed cuteness so I pulled out Newton’s Mug and decided to play around with it.

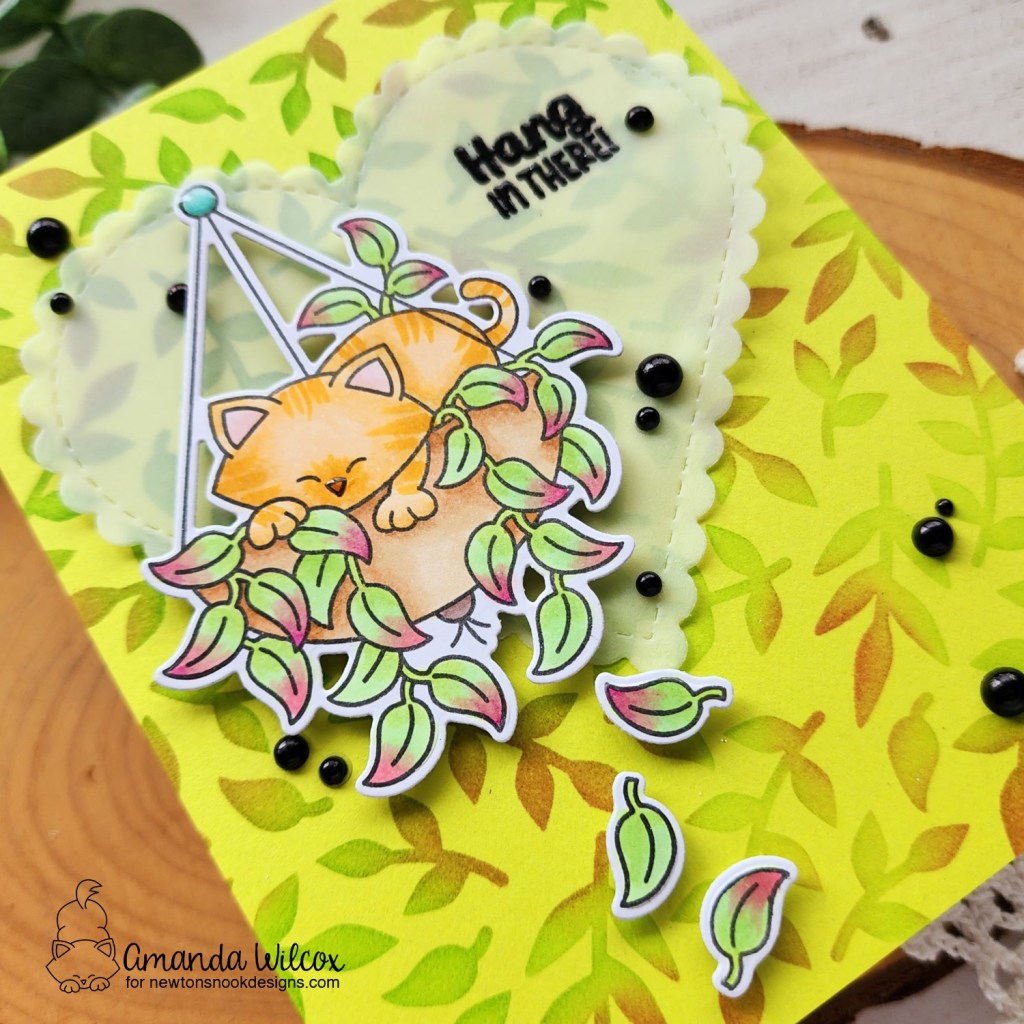
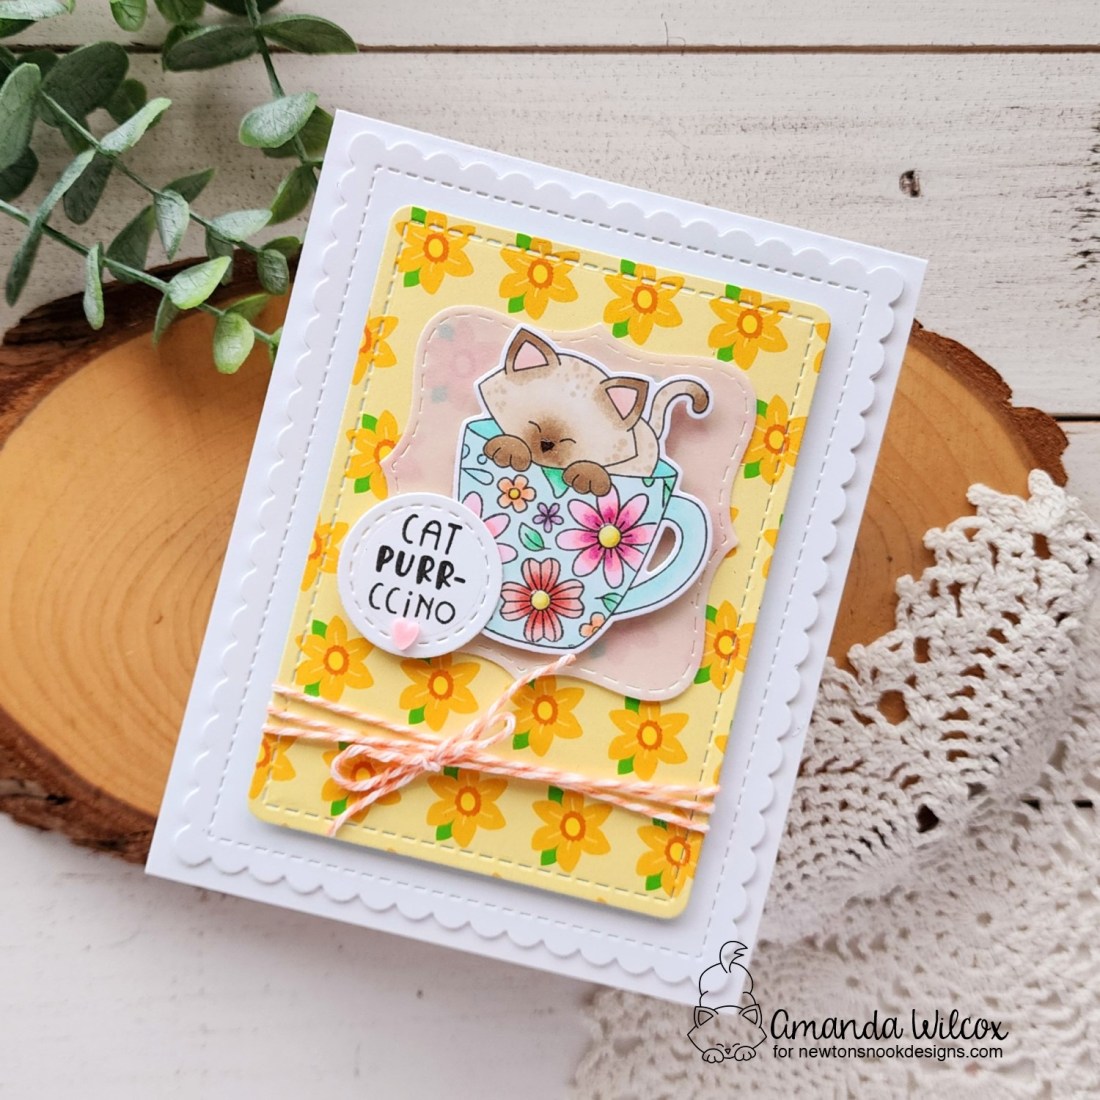
I started by stamping the main image from Newton’s Mug. Then I used masking paper to mask off everything except the main part of the mug. Then I stamped the Floral Roundabout on that to create a gorgeous floral coffee mug. Wouldn’t you just love to have this in your cupboard?!? I would! Next, I used my copic markers to color everything in before cutting it out with the coordinating die.

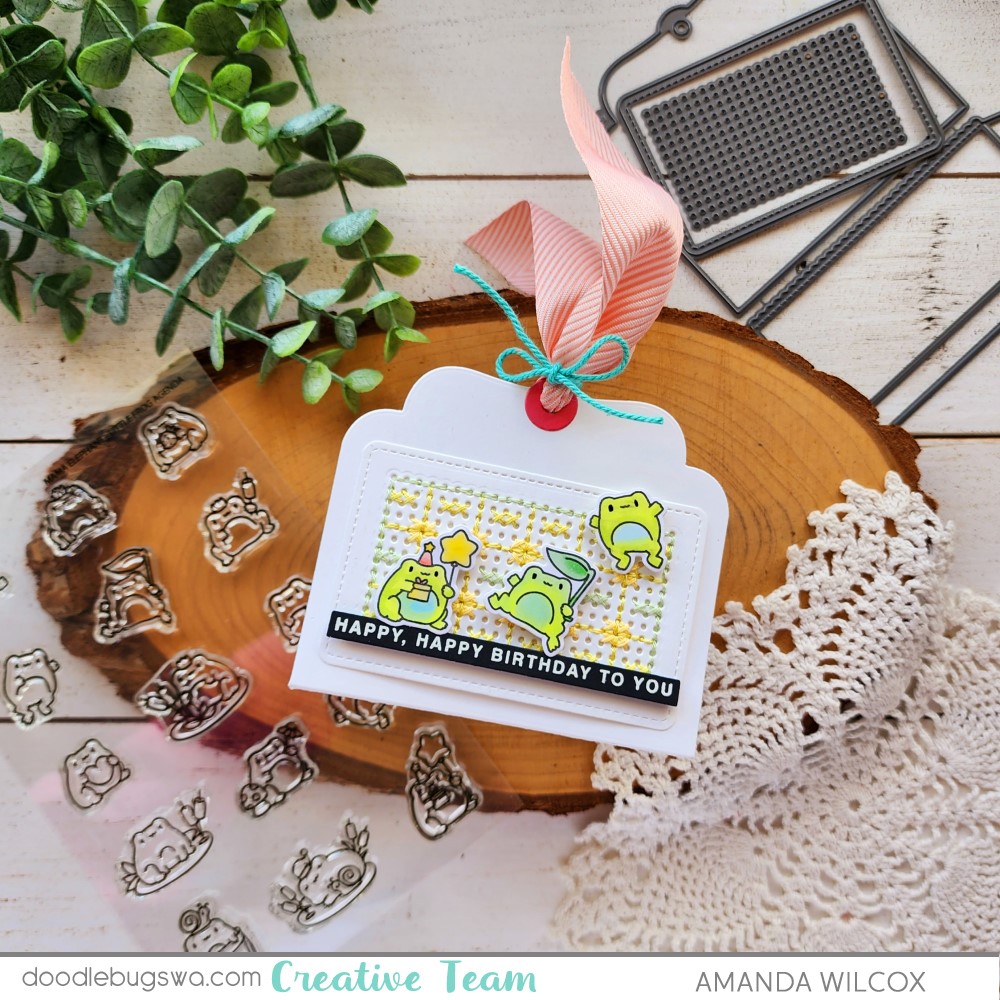
I used the smallest circle die in the Frames Squared set for my sentiment and then the cool label shape from iridescent vellum for a base under my Newton image. Next, I pulled out the Frames & Flags dies to cut the rounded rectangle from a piece of paper in the Spring Blooms paper pad and a white scalloped rectangle to go under that.

Assembling my layers was simple. I worked top down. Foam squares attach the sentiment and Newton to the vellum label. Then I knew where I could hide tape runner to attach that to the floral panel. I tied peach twine around the bottom part of that and tied it in a bow before adding foam tape to the back, avoiding the twine area so it lays flat. That is attached to the white scalloped rectangle with the foam tape and the whole thing is glued to a white card base with liquid glue.

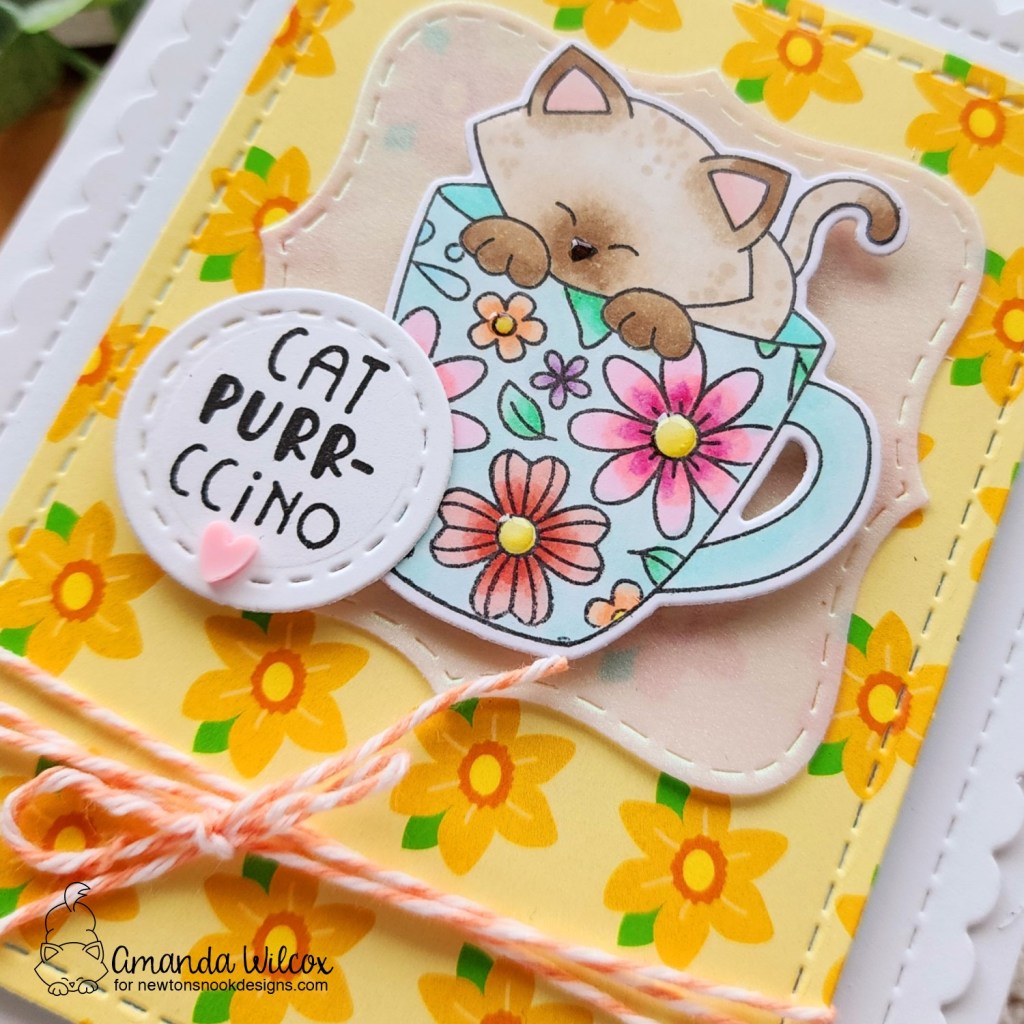
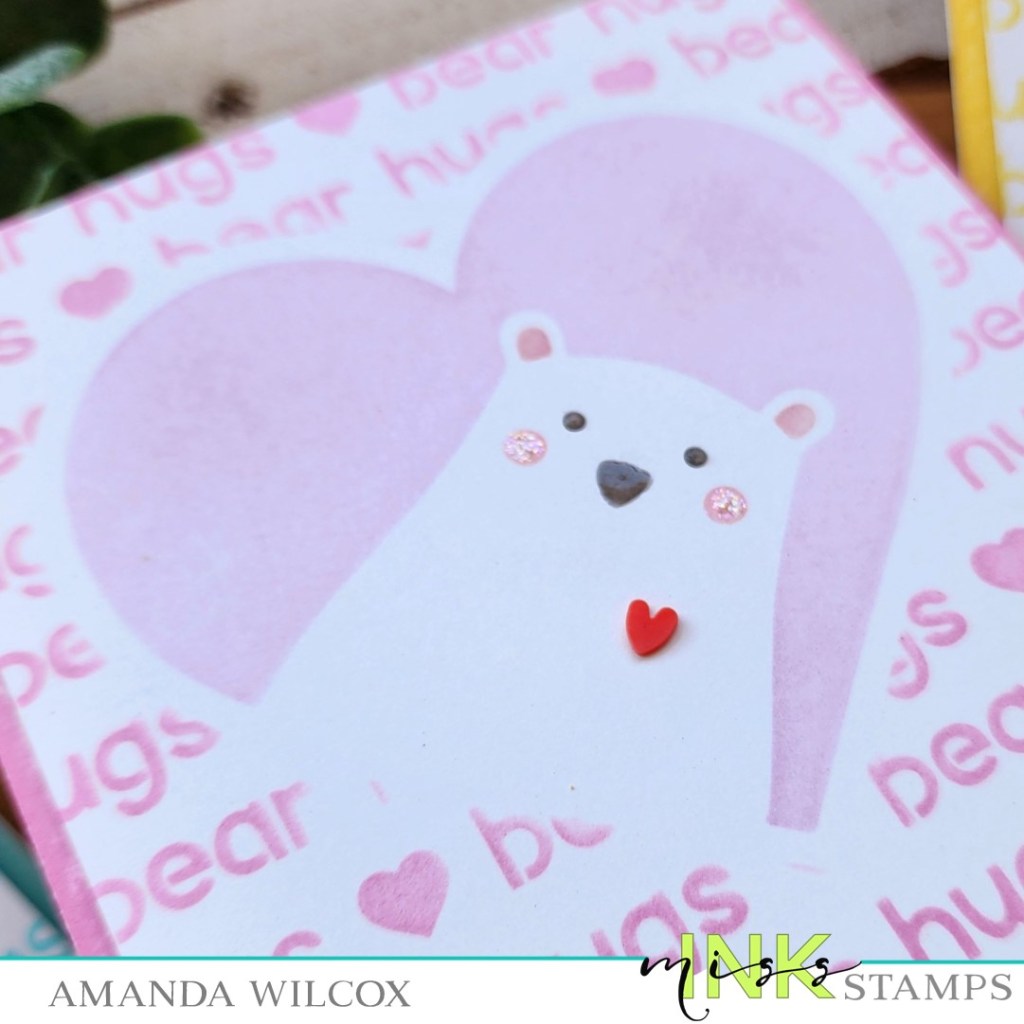
For finishing touches I used Touch of Gloss on the flower centers and Newton’s nose. Then I glued one pink clay heart under the sentiment from the Twiddler’s Nook sweethearts mix.

I would love to know what you think about the masking on the mug and if you’ve ever tried anything like that before. Share your ideas below!

Products used:
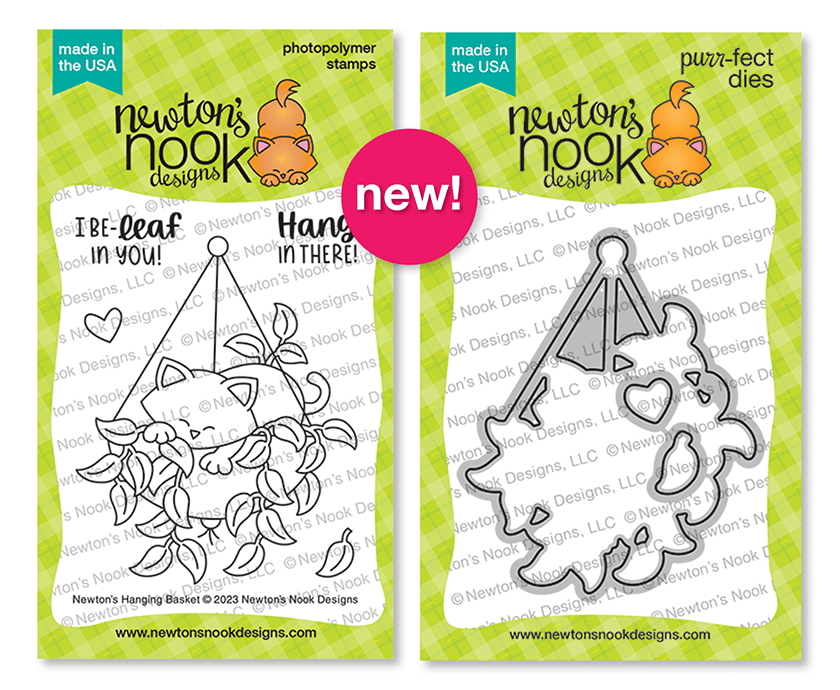
Newton’s Mug stamps and dies
Floral Roundabout stamps
Frames & Flags dies
Frames Squared dies
Spring Blooms paper pad
Liquid glue
Foam tape
Touch of Gloss

Sweethearts embellishment mix

I appreciate you sharing your time with me. Have a fabulous day!

Doodlebugs – Mama Elephant | Froggy Gift Pocket Tag with Stitching

Hello everyone! I’m excited to share but sad at the same time that this is my last week guest designing for Doodlebugs. It’s been really fun creating with Mama Elephant goodies to share with you and I always love shopping at Doodlebugs, so I’d say that’s a win!

Today I’m sharing a fun gift card holder featuring the Little Agenda Froggy, Gift Pocket Tag dies and Easy Sentiments. I love that the gift pocket tag has a panel you can optionally add stitching holes to if that’s your thing. I love stitching on these small areas for a bit of relaxation in front of the TV.

The first thing I did was die cut the card and stitching holes, then chose some embroidery floss and started playing. After having to undo what I stitched because the math wasn’t right, I drew out a grid and started playing to make sure my pattern would work. Once that was decided, I stitched the panel up and glued it to my gift card holder tag.

Then I stamped and colored a few frogs from the Little Agenda Froggy stamp set and used the coordinating dies to cut them out. Next, I stamped and heat embossed a set of sentiments from Easy Sentiments and used the coordinating die to cut them out. This set is fun because you stamp and cut three sentiments at once.

I added everything with foam squares and flipped my project over to decorate the other side next!

On this side, I inked the white panel with yellow ink and a blending brush before popping more cute froggies up with foam squares. Then I glued another sentiment down with liquid glue. I did this so the card won’t get caught going in and out of the slot.

Next, I cut a hole reinforcer for both sides and glued them in place. I threaded ribbon through the hole and tied it with twine.

For finishing touches, I added black glaze pen to all the frog’s eyes and glossy accents to parts of the images like the heart, flower center, strawberry and balloon.

In case you like the idea of stitching on this panel but aren’t sure where to start, I created an idea sheet with six different patterns that are sized perfectly for this Gift Pocket Tag die set. Click HERE to download it.

Products used today:
Mama Elephant Little Agenda Froggy stamps and dies
Mama Elephant Gift Pocket Tag dies
Mama Elephant Simple Sentiments stamps and dies
Lawn Fawn butter ink
Blending brush
Foam squares
Double-sided adhesive – 1/4″
Sakura black glaze pen
Glossy accents
Copic markers

I hope you enjoyed these projects and found some inspiration to create something wonderful to share with someone! I appreciate you sharing your time with me. Have a fabulous day!

Spellbinders – Love You So Much

Hello everyone. I’m back with another card featuring products from the Spellbinders Photosynthesis Collection from Simon Hurley. The products are so different but work amazing together. Today I used a background die, floral dies and a hot foil sentiment. I even made it a flat shaker with super fine glitter that moves around behind the chevrons.

I started by inking up an A2 piece of white cardstock with light purple ink around the edges. Then I cut it with the Zig Zag Chevron cover plate. I added a piece of acetate to the back with liquid glue. Then I inked another piece of cardstock with seedless preserves and milled lavender distress oxide ink. I spritzed the panel with water and blotted it dry. Next, I sprinkled some super fine glitter on the panel and sealed it up with liquid glue adhering the chevron panel on top.

I chose some colors and started die cutting florals from the Floral Stems die set and used liquid glue to adhere the layers together, and then added them to stems with leaves. I gathered them together in an arrangement so you could see them all and glued them to the card front.

Finally, I added a hot foiled sentiment from the Must-Have Sentiments glimmer hot foil plate and die set. This set is top on my favorites because it hot foils and die cuts multiple fantastic sentiments all at once. I love having a stash to choose from when I’m running out of time and need something extra to add to my card.

Products used today:
Zig Zag Chevron dies
Floral Stems dies
Must-Have Sentiments glimmer plate

Liquid glue
Foam squares
Silver hot foil
Pink & Main Super Fine Glitter – icicle
Distress Oxide Ink – seedless preserves and milled lavender
Blending brush

I appreciate you sharing your time with me. Have a fabulous day!

Pixi Dust Designs – Bee Happy Release Day

Hey there crafty friends!!! It’s release day for Pixi Dust Designs and I have a SUPER fun slimline card to share with you today using the new Bee Happy die set. These guys are so fun and this die set is packed with lots of options to play around with too.

I started by cutting out all the pieces to my rainbow bees. The wings are cut from vellum and everything else from cardstock. Then I used liquid glue to adhere the cardstock pieces together. I added the wings with glue dots and then covered the glue dot up with a color coordinating gem. I absolutely LOVE how these turned out!

For my background, I cut a slimline stitched panel using the next-to-largest die in the Stitched Rectangle Slimline die set. Then I cut the honeycomb piece in Bee Happy three times. I arranged them different ways and glued them together where they overlapped. This way I had one long piece of honeycomb for my background. I glued that down with liquid glue and then added some of the hexagon pieces that pop out of the frame inside random openings. Next, I splattered the panel with gold watercolor.

While I was doing that I thought it would be cool to paint some of the leftover hexagons with the same paint and insert those too. This turned out so cool. I couldn’t love it more!

The die set also comes with a “Bee Happy” sentiment that is so punny and fun. I cut it from black cardstock three times and glued the layers together with liquid glue. I set it where I thought I wanted it to go while I decided final placement of the bees. Once it was laid out, I glued the sentiment down with liquid glue.

Then I added my cute bees with foam squares one at a time…enjoying that sweet bee rainbow so much! Last, I added the stitched panel to a white card base with foam tape for even more dimension and interest.

Bee sure to check out the whole May release at Pixi Dust Designs!

Products used today:
Bee Happy dies
Stitched Rectangle Slimline dies
Foam squares
Liquid glue

Rainbow gems
LH Colors watercolor – gold

I appreciate you sharing your time with me. Have a fabulous day!

Miss Ink Stamps – Rain or Shine

Welcome everyone! I’m back with some Miss Ink Stamps inspiration using products from the brand new release! I have a sweet card featuring Rain or Shine and then a set of quick and easy stencil only cards at the end.

I was feeling a little watercolor mood this time so I cut a piece of watercolor paper and stamped my image on that. Then I used Zig Clean Color Real Brush markers and a water brush pen to color them in.

Next, I cut an A2 size piece of teal cardstock and inked it up with the Rattan stencil for texture. Then I used a circle die to cut a window from the upper center of it. I added foam tape to the back and attached it to my image panel. That’s when I decided to add more texture, so I inserted the circle cutout to protect the image and flicked teal ink and gold watercolor on the panel.

Next, I stamped my sentiment and cut it out with a banner die before popping it up on the front of the stenciled panel. I used liquid glue and adhered the whole thing to a card base before adding Touch of Gloss to all the raindrops in the picture. Then I went over the critters’ eyes and noses with a black glaze pen so they shine too.

I just think these new bear and rabbit images are adorable and so very sweet! I look forward to coloring them up in different combos.

Next, I have a trio of cards to share using the Bear Hugs stencil set. It’s an adorable set and makes it really simple to create lots of cards in a flash.

I chose a few different colors and inked up the layers on white cardstock. Then I trimmed the panels down to 4×5.25 inches. I used a simple method to add the same color to the card bases – direct-to-paper with the ink pad I used on the stencil. This way it all matches. You just run your ink pad alone the edge of your paper. Yes, just drag it. If you’re nervous, test it out on a scrap.

After the card bases matched my stenciled panels, I popped the bear panels up with foam tape. For finishing touches I added Touch of Gloss to the bear noses and eyes, stardust Stickles to the cheeks and a little red heart on their chest for good measure.

Aren’t they the cutest?!?

Products used today:
Rain or Shine stamps
Rattan stencil
Bear Hugs stencils
Foam tape
Touch of Gloss
Stickles – stardust
Sweethearts embellishment mix (red hearts)
LH Colors – gold watercolor
Blending brushes
Lawn Fawn dye inks

I appreciate you sharing your time with me. Have a fabulous day!

Newton’s Nook – May Release Day 4

The week is winding down and we’re here with one more day of release reveals for the Newton’s Nook May release! Get your checklists ready because the release is available tomorrow! But first!!! We have one more adorable stamp and die set to share with you.

Newton’s Hanging Basket stamps and dies

I immediately fell in love with this the moment I saw it. This trouble-making kitty just makes me smile and I couldn’t wait to color him up!

I started my card by stamping and coloring the image with copic markers. I stamped a few extra leaves knowing straight away that we were going to need some trailing down. Then I used the coordinating dies to cut them all out.

Next, I inked up the background panel with the new Trailing Leaves stencil, adding some reddish-pink areas to mimic the way I colored the image.

I die cut a vellum heart using the next-to-largest Heart Frames die. Then stamped and heat embossed my sentiment on the upper right of the heart.

I added Newton to the heart with foam squares and hid tape runner behind him to add the heart to the stenciled panel. I prefer dry adhesive with vellum whenever possible to help it not wrinkle.

Next, I added my trailing leaves with foam squares as well. For finishing touches I added Touch of Gloss to Newton’s nose and a scattering of black baubles to the design. I absolutely LOVE how bright and bold this card turned out.

Would you like to win the “Newton’s Hanging Basket” Stamp Set? This stamp set will be given away to ONE lucky winner!

Here’s how to win: Comment on the NND blog and Design Team blogs (see list below)! Thewinner will be chosen at random from the collective reveal posts. Make sure to check out each of their blogs and comment for your chance to win. You will not know which blog has been chosen so the more you comment on the better your chances are of winning! You have until Thursday May 18th at 9pm ET to comment  — winners will be announced on the blog post on Friday, May 19th. 

Check out all the awesome Design Team Blogs below to enter:

Newton’s Nook Designs

Donna Idlet

Ellen Haxelmans

Tina Herbeck

Larissa Heskett

Samantha Mann

Zsofia Molnar

Maria Russell

Tatiana Trafimovich

Amanda Wilcox

Pink & Main – May Sneak Peek Sprinkles of Joy

Hi again! I’m over on the Pink & Main blog today with a sneak peek of the upcoming May release. Who doesn’t love ice cream? Seriously, it’s probably my most desired sweet treat so I just had to color this cutie up when I saw her!

I also don’t love choosing a flavor so multiple scoops, means multiple flavors of ice cream! I stamped my sweet girl and her giant ice cream cone, plus the cherry for the top and colored everything with copic markers. Then I used the coordinating dies to cut them out. I used liquid glue to attach the cherry and set them aside.

I ran a piece of brown cardstock through my die cut machine in the Grid embossing folder, then I used the largest Concave Rectangle die to cut it out. I love how this looks like the ice cream cone! Isn’t that fun!?! I added this panel to a white card base with foam tape. Then switched gears to my sentiments.

First, I took white cardstock scraps and colored parts of them with the same copic markers as the ice cream scoops. Then I stamped my sentiment on one and cut it out and used the upcoming Simple Sentiments dies to cut out the shadow for HI so they coordinate with the image. I also cut HI from white cardstock three times and glued them together before gluing them to the shadow.

Next, I added my image and sentiments to the card front with foam squares and tape. I added Touch of Gloss to the cherry on the ice cream, highlights of the ice cream scoops and the little girl’s shoes. Last, I scattered glitter enamel dots from the Blessings pack across the design.

Products used today:
Sprinkles of Joy stamps and dies
Simple Sentiments dies
Concave Rectangles dies
Grid embossing folder
Foam tape
EZ Squeeze liquid glue
Touch of Gloss
Glitter Enamel Dots – blessings

I appreciate you sharing your time with me! Stay tuned for release day on Friday where you can see it all and snag your next round of crafty goodness!

Newton’s Nook – May Release Day 3

Welcome friends! We’re already to day 3 of the release reveals for Newton’s Nook May release! I hope you’re loving it all and excited for more!!! Today we have more stamps, dies and stencils to share. Yay!

Birdhouse Greetings stamps and dies

Birdhouse Line stencil

Although these stamps and the stencil would go AMAZING together for a fun card, I had immediate ideas that I wanted to try so I have two cards to share with you today.

This first one is so cute and came together really quick because the coloring is all the stencils. I just inked up the different layers of the Birdhouse Line stencil with a blending brush and dye inks. Then I placed the Petite Clouds stencil on the panel and selectively inks clouds in the sky.

Next, I cut some grass using gingham paper in the Spring Blooms paper pad and a fence using the Fence die. I adhered the layers together with liquid glue and used the largest Framework die to cut it all out. Last, I stamped my sentiment in the bottom corner and popped the whole thing up on a white card base with foam tape.

I chose to leave the inside of this card blank so I can choose what occasion I want to use it for later. I love having that flexibility sometimes.

Next, I stamped the images from Birdhouse Greetings and colored them with my copic markers. I made sure to stamp some extra birds and butterflies to fill in my scene. Then I used the coordinating die to cut them out.

For the background I inked a panel with light yellow ink, then placed the Raindrops stencil over top and used a blending brush with light pink ink for those. I cut a scrap of cardstock with the Land Borders die and inked it with green, then layered the grass stencil over top and added a layer of grass in the front to.

I adhered the layers together and used the largest die from Frames & Flags to cut it out. I added it to a white card base with foam tape and then added all my sweet images with foam squares. I was so pleased with the serene look of my card front that I decided it was okay to skip a sentiment on it.

But this time I wanted to have some punny fun and stamped sentiments on the inside, along with a little birdie hanging out.

One note, for finishing touches on the front of the card, I did add black glaze pen to birdie eyes, Touch of Gloss to their beaks and stardust Stickles to butterfly wings.

Would you like to win the “Birdhouse Greetings” Stamp Set? This stamp set will be given away to ONE lucky winner!

Here’s how to win: Comment on the NND blog and Design Team blogs (see list below)! Thewinner will be chosen at random from the collective reveal posts. Make sure to check out each of their blogs and comment for your chance to win. You will not know which blog has been chosen so the more you comment on the better your chances are of winning! You have until Thursday May 18th at 9pm ET to comment  — winners will be announced on the blog post on Friday, May 19th. 

Check out all the awesome Design Team Blogs below to enter:

Newton’s Nook Designs

Donna Idlet

Ellen Haxelmans

Tina Herbeck

Larissa Heskett

Samantha Mann

Zsofia Molnar

Maria Russell

Tatiana Trafimovich

Amanda Wilcox

Doodlebugs | Mama Elephant – Sending Lots of Love

Hello everyone! I’m over on the Doodlebugs blog again today with some more fun Mama Elephant inspiration. I adore the striped heart in the Mod Heart die set and wanted to pair it with one of the To My Dearest critters for a while. Well, I finally just got everything out and played! It turned out so sweet too!

I used the dies and stamps to be sure everything was going to fit the way I wanted it to. Then I started ink blending, stamping and coloring. First, I did a little trick to get my ink blending to show up on the heart with the whole rainbow. Super simple but does take a moment of thinking ahead.

I simply took a white cardstock panel, flipped the die over on it and traced the outline. We know the pencil won’t show because it’s outside the cutting area of the die and this way I can plan my rainbow blending a little easier.

Once the blending was done, I ran the panel through my die cutter with the die, flipped it over to keep the pieces in the die and used washi tape to adhere them together before removing them from the die. You can’t see the washi at all because I used a mostly white/transparent one so I could also just add my foam tape strips at the same time.

Next, I chose the cute Hammy from To My Dearest to stamp and color. After I colored, I stamped a sentiment on the paper and then used the coordinating die to cut him out. I also stamped some small hearts and used the dies to cut them out too.

Finally, I cut the ragged edge rectangle from Mod Heart out of kraft cardstock. Then I inked it up with distress oxide ink in gathered twigs and ground espresso for a worn paper look. I spritzed the panel with water and blotted it dry before adding foam tape to the back and popping it up on a white card base.

Next, I added the rainbow heart and finally Hammy and the tiny hearts floating away. For finishing touches I added black glaze pen to his eyes and glossy accents to his nose. Then, I used stardust Stickles for all of the small hearts.

Simple card but so sweet and sure to make someone’s day.

Products used:
Mama Elephant To My Dearest stamps and dies
Mama Elephant Mod Heart dies
Distress Oxide Ink – gathered twigs, ground espresso
Glossy accents
Stickles – stardust
Foam tape
Foam squares
Sakura black glaze pen
Bearly Art liquid glue
Copic markers

I appreciate you sharing your time with me. Have a fabulous day!

Newton’s Nook – May Release Day 2

Hi again. It’s day 2 of release reveals for Newton’s Nook’s May Release. Today we’re back to fantastic stamps, dies and stencils to share with you! I personally had a blast creating today’s card and I hope you love it.

Succulent Garden stamps and dies

Trailing Leaves stencil

I created today’s card with one of those living walls in mind. The kind that are dirt and moss holding everything together with plants coming out of them. If you haven’t seen them, google it. It’s so cool!

I started my card by inking a piece of white cardstock with distress oxide inks in an ombre green. I chose mowed lawn, twisted citron and peeled paint to start. Then I added a little rustic wilderness to the top to darken it just a bit. I splattered it with water and blotted it dry before using the wavy die in the Sea Borders die set to cut it into strips.

I used washi tape to hold the strips back together and laid my stamps out to see how I wanted to fill it in. With an idea of how many of each thing I need to stamp, I started inking everything up. I used copic markers to color the images and the coordinating dies to cut them all out. Next, I used liquid glue to adhere my strips to a card front and stamped my sentiment in the lower right corner.

Finally, I added my images with liquid glue and foam squares, tucking some in the layers and placing others on top. Then I finished things off with Touch of Gloss on just the flower centers.

Would you like to win the “Succulent Garden” Stamp Set ?This stamp set will be given away to ONE lucky winner!

Here’s how to win: Comment on the NND blog and Design Team blogs (see list below)! Thewinner will be chosen at random from the collective reveal posts. Make sure to check out each of their blogs and comment for your chance to win. You will not know which blog has been chosen so the more you comment on the better your chances are of winning! You have until Thursday May 18th at 9pm ET to comment  — winners will be announced on the blog post on Friday, May 19th. 

Check out all the awesome Design Team Blogs below to enter:

Newton’s Nook Designs

Donna Idlet

Ellen Haxelmans

Tina Herbeck

Larissa Heskett

Samantha Mann

Zsofia Molnar

Maria Russell

Tatiana Trafimovich

Amanda Wilcox