I'm a wife, mom, craft blogger and designer for Newton's Nook, Pink & Main, Miss Ink Stamps and Pixi Dust Designs. I also create as an affiliate for Spellbinders and guest design for other companies. Welcome to my crafty place. I hope you enjoy looking around.
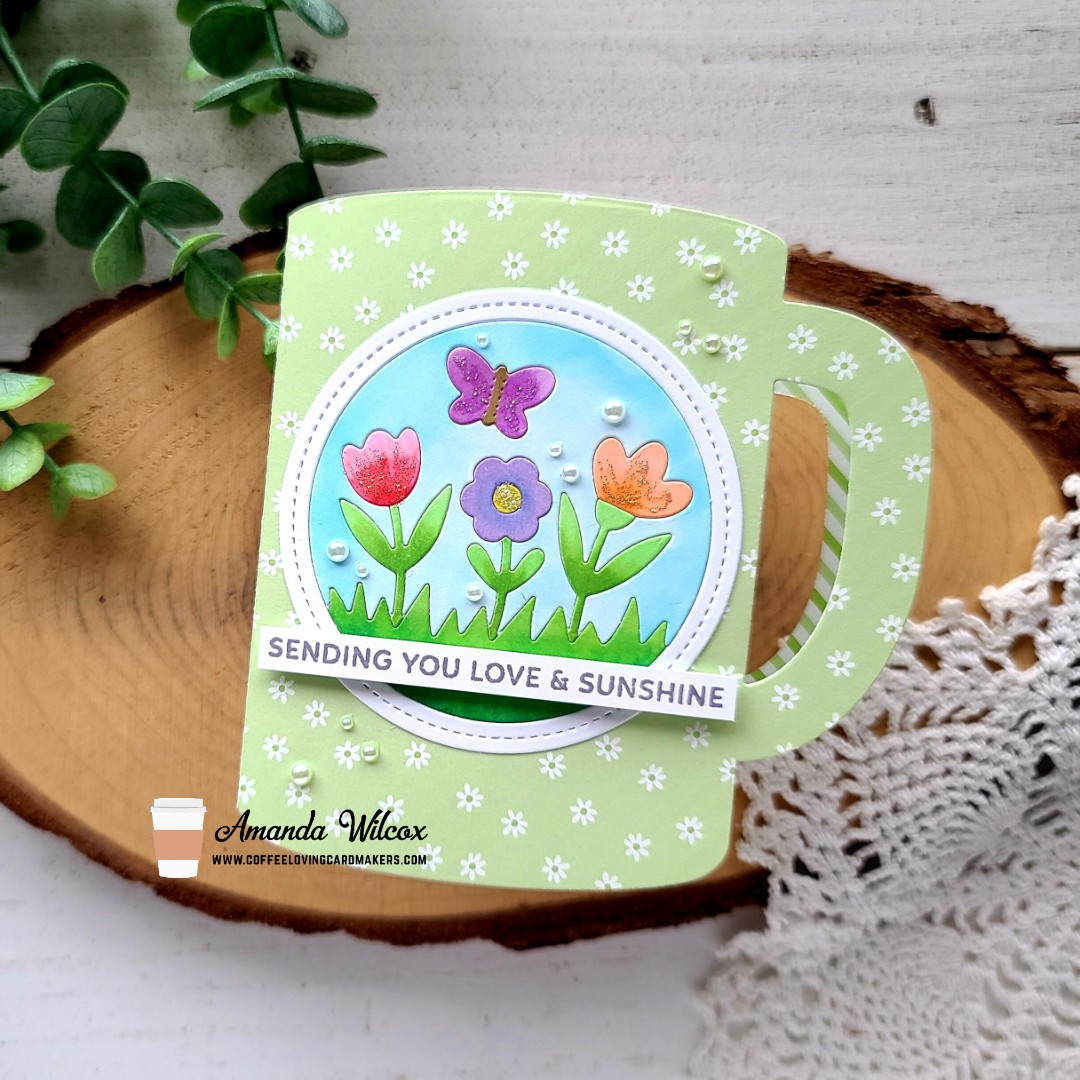
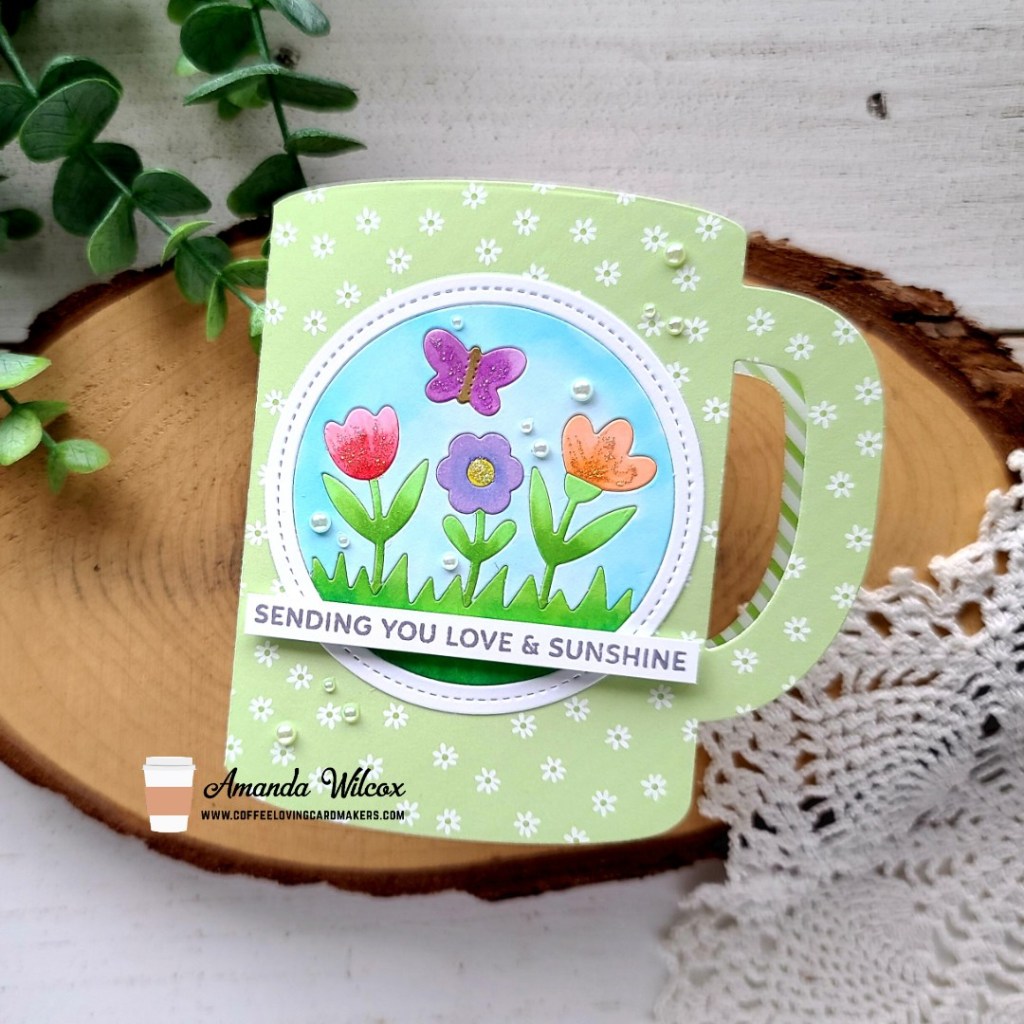
Happy Tuesday everyone! Grab a cuppa and head over to the Coffee Loving Cardmakers for Tuesday Tea with Twiddler’s Nook and a how-to on this adorable spring-themed coffee mug card I created!
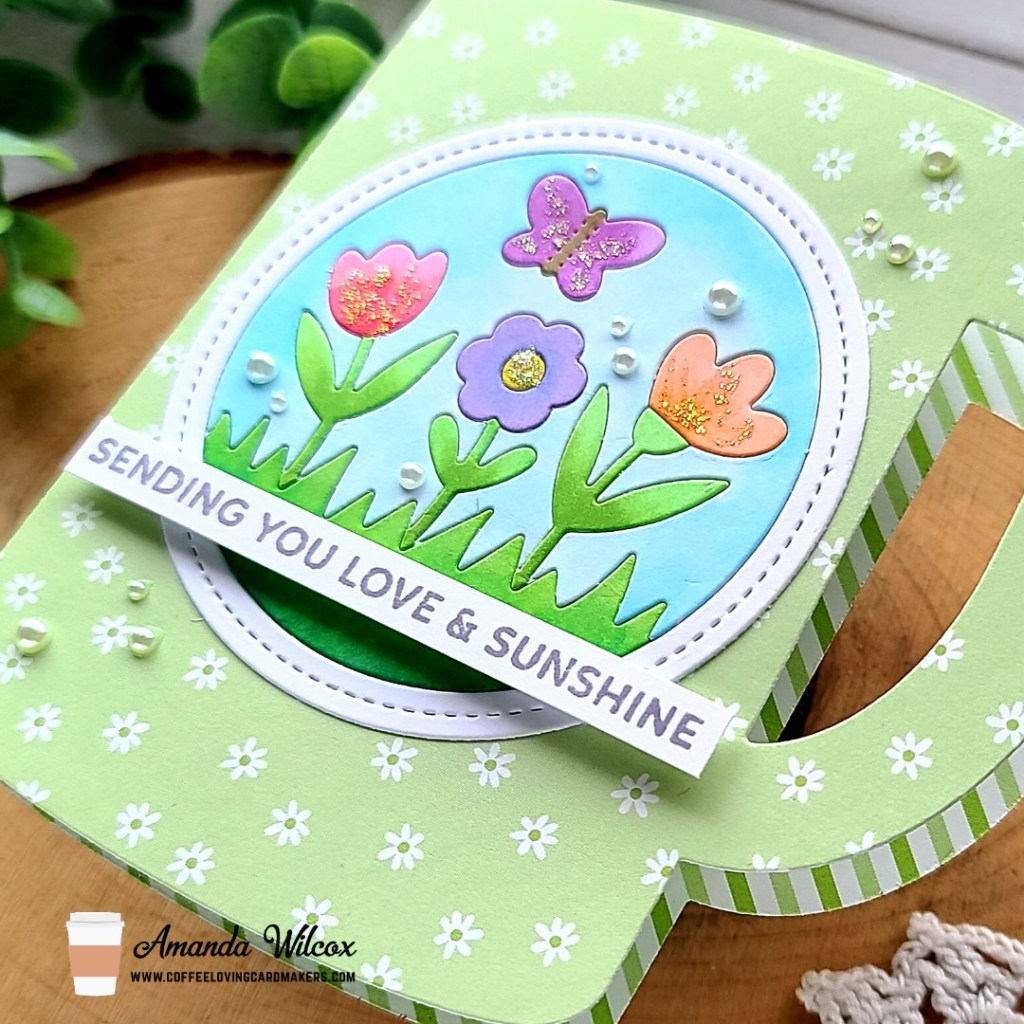
The stamps and dies are from Pretty Pink Posh with the coffee mug die being an oldie but goodie from Trinity Stamps!
This spring die is just adorable and I’m so happy it fits so well on this coffee mug because I have a summer and winter version, that you can bet your bottom dollar I’m going to be recreating this card with!
Click HERE to head to the Coffee Lovers blog for all the deets and links to products used.
I appreciate you sharing your time with me. Have a fabulous day!
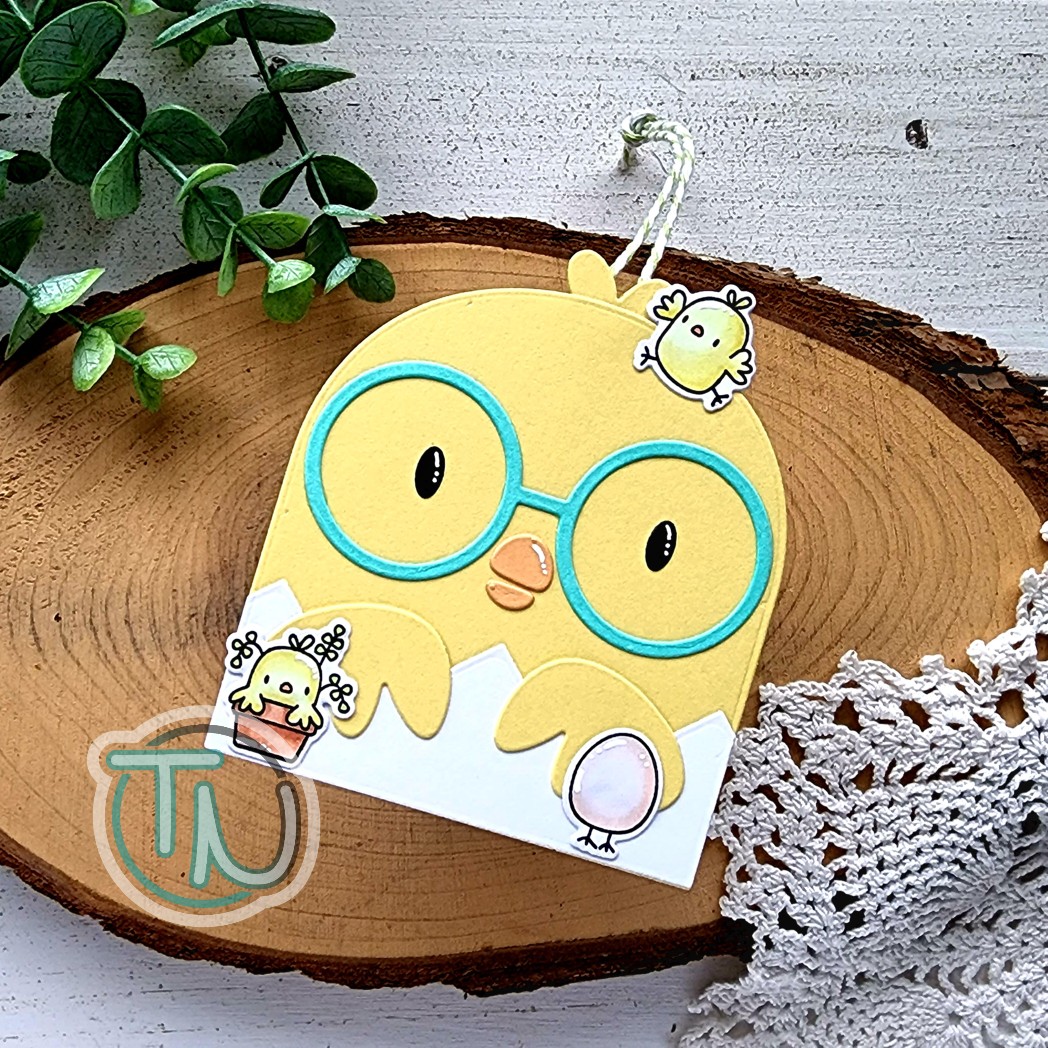
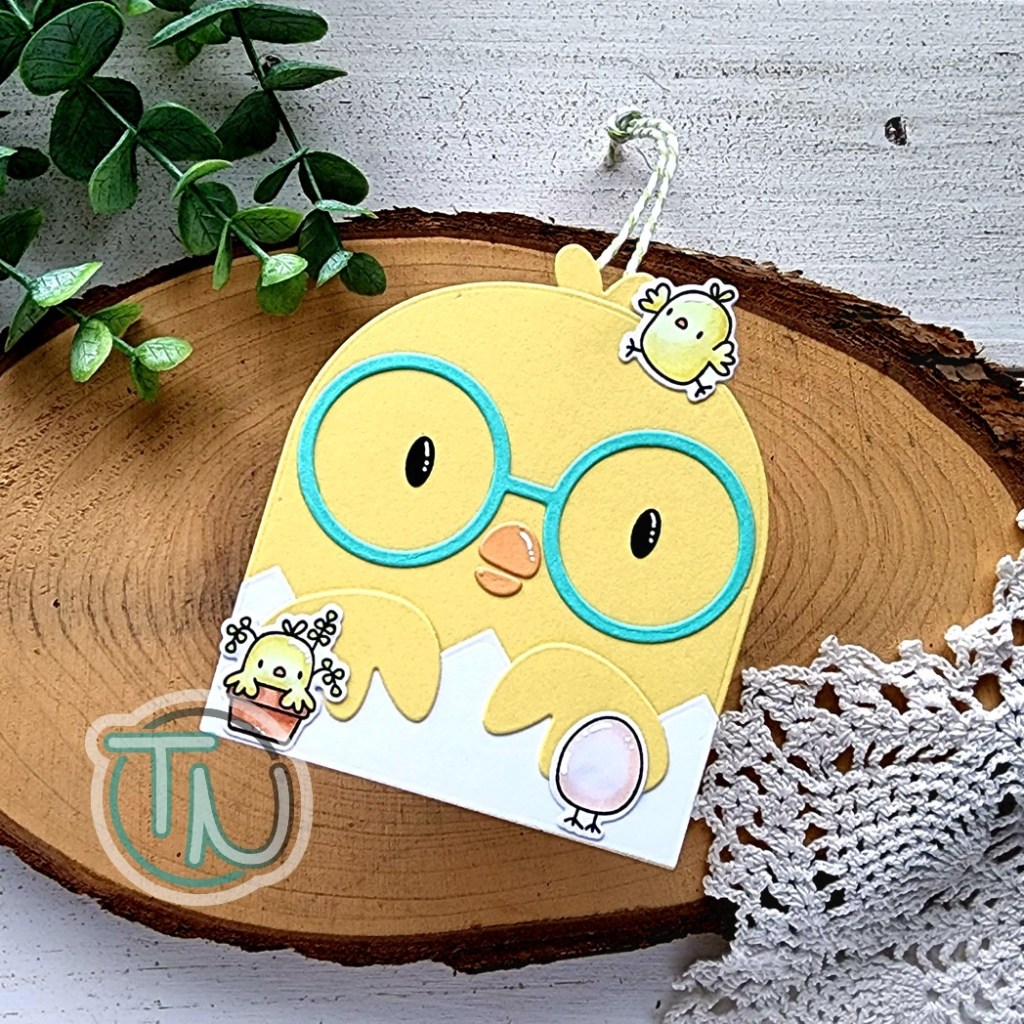
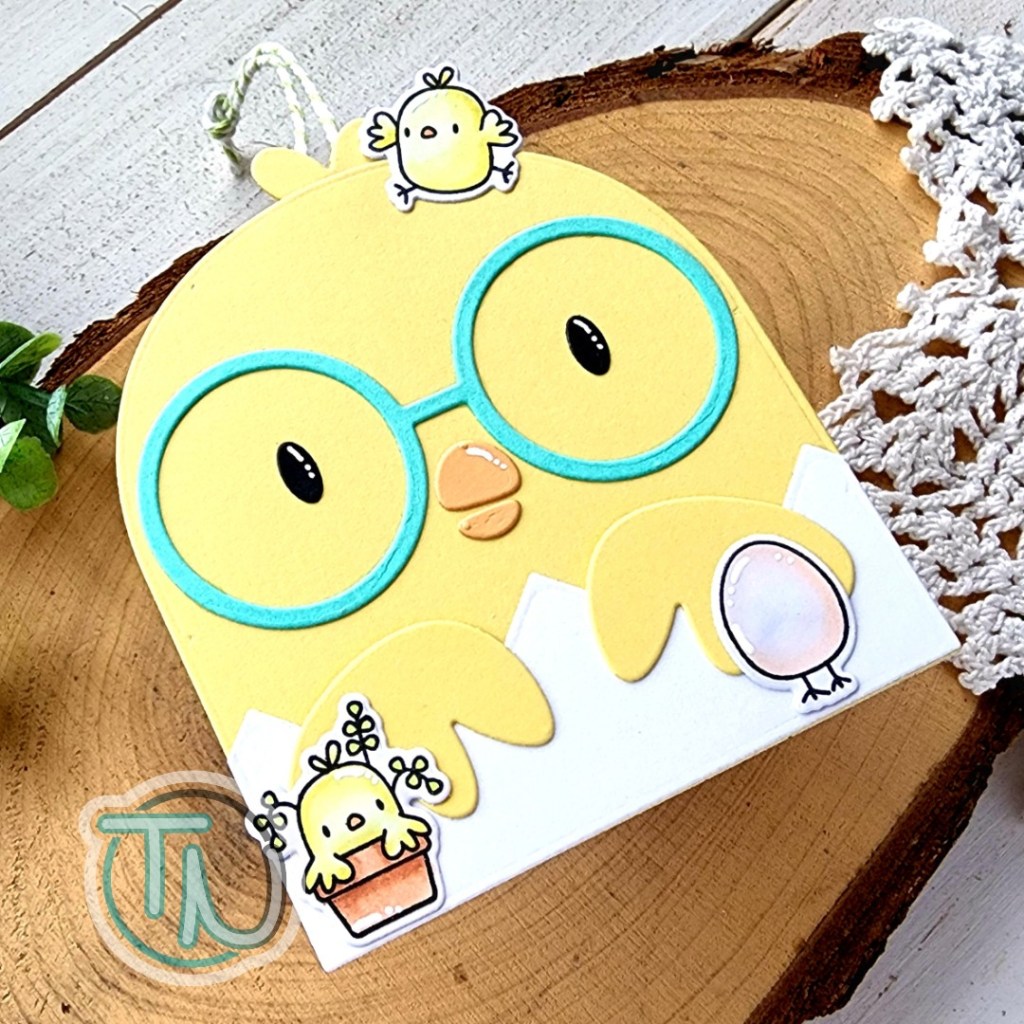
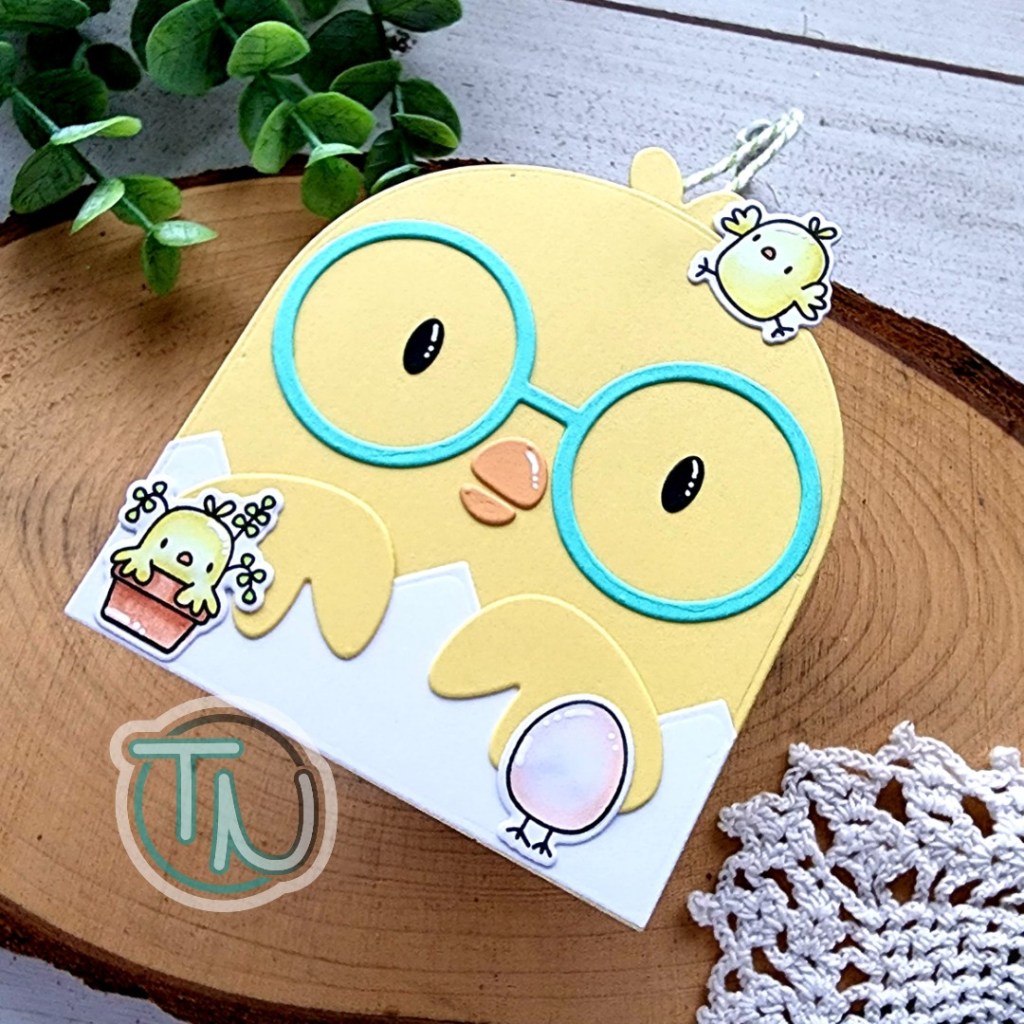
Hey everyone! I’ve started making tags for Easter baskets this weekend and wanted to pop in to share one that I had too much fun creating!
For this tag, I cut all the pieces for the Chickie Favor Bag Accessory from cardstock and adhered the pieces together with liquid glue. Then I cut a second “body” piece from white cardstock and adhered it to the back.
Next, I pulled out the Little Chickie Agenda stamps and chose a few to decorate my big chickie with. I stamped them out and colored them with copic markers before using the coordinating dies to cut them out.
I adhered them with liquid glue and kept finishing touches simple with white gel pen highlights to all of the images.
Last, I added some baker’s twine to the back with washi tape so it could be removed later on. There is lots of space to write the recipient’s name plus a message or maybe stamp a sentiment too.
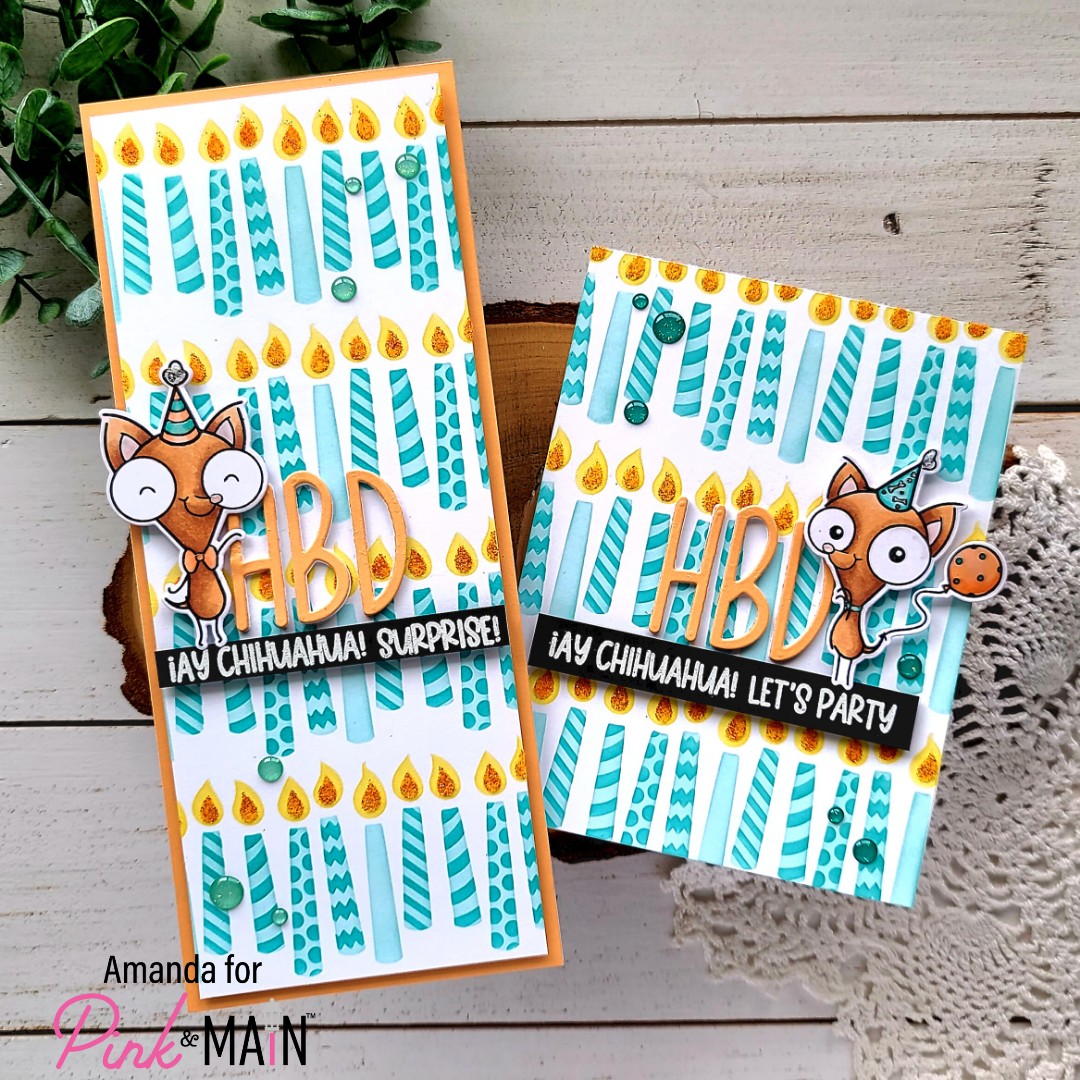
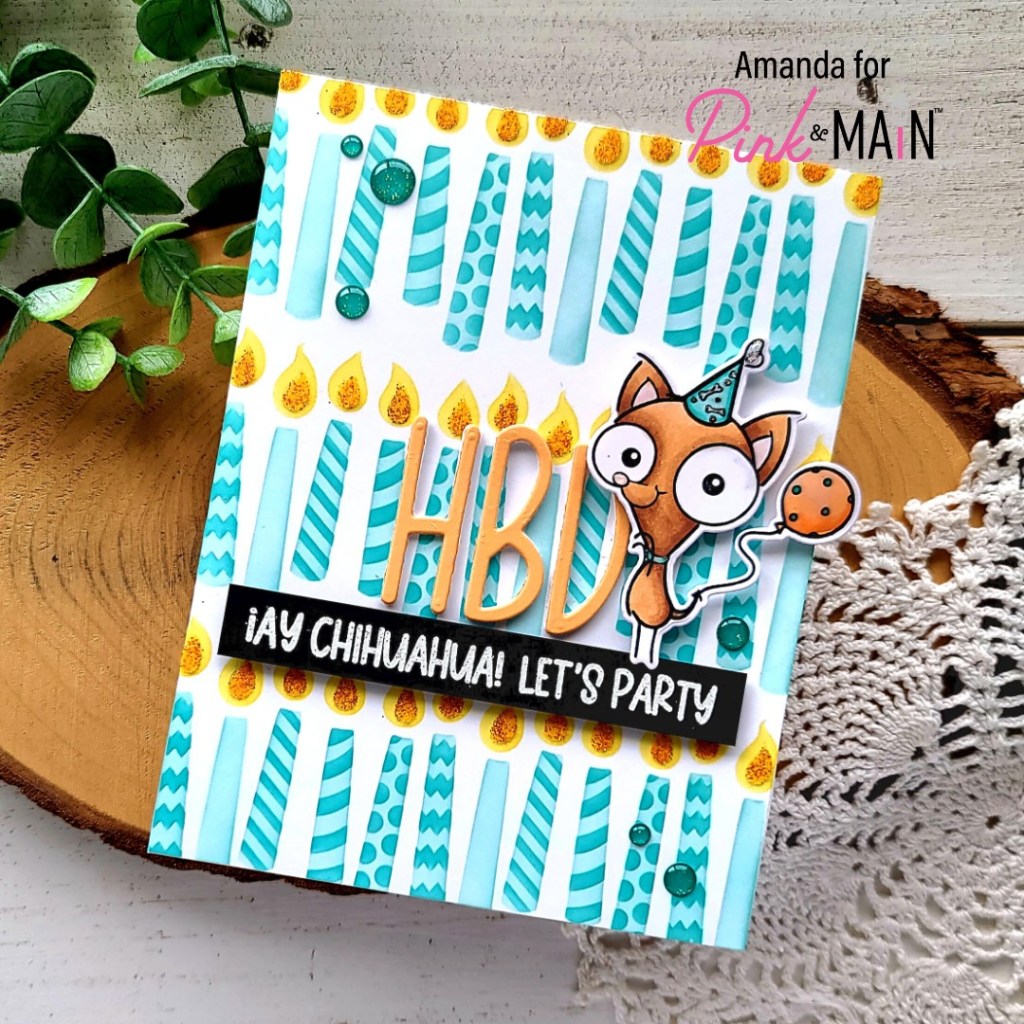
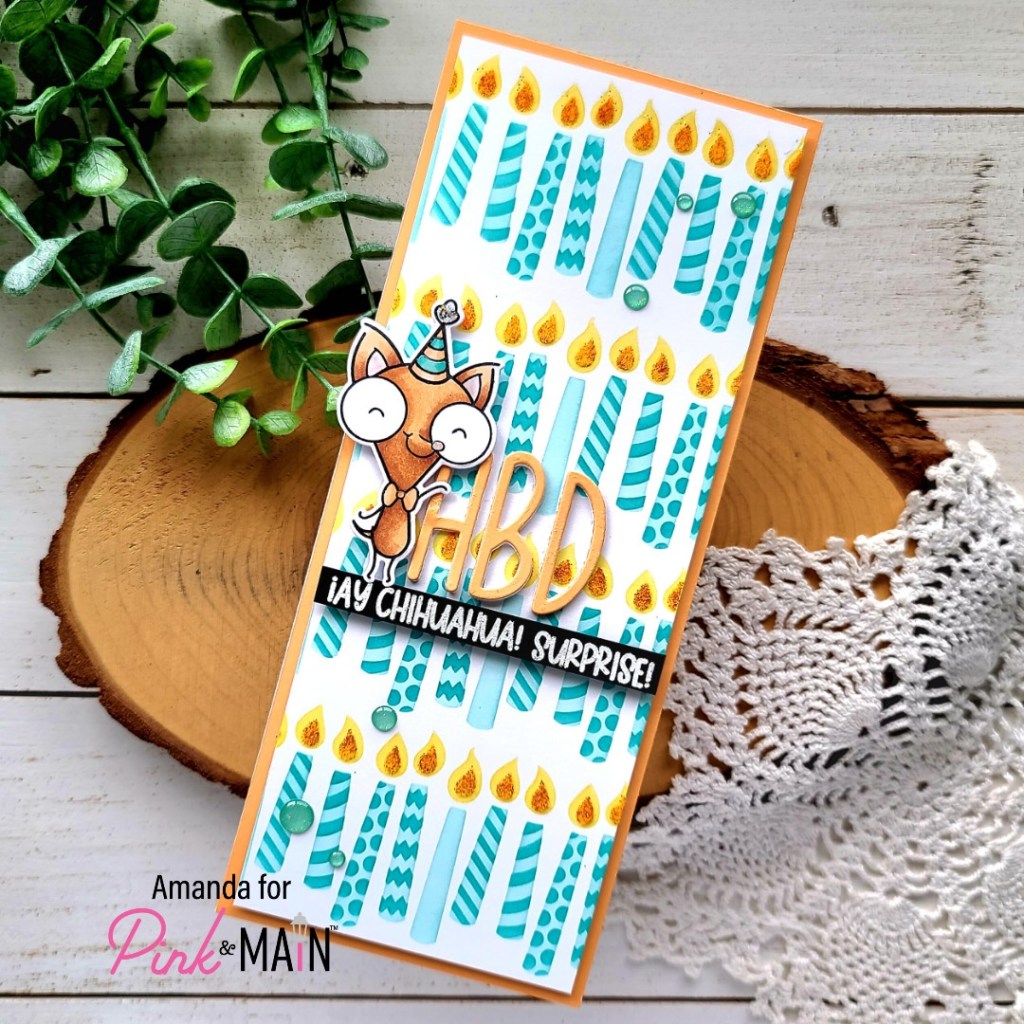
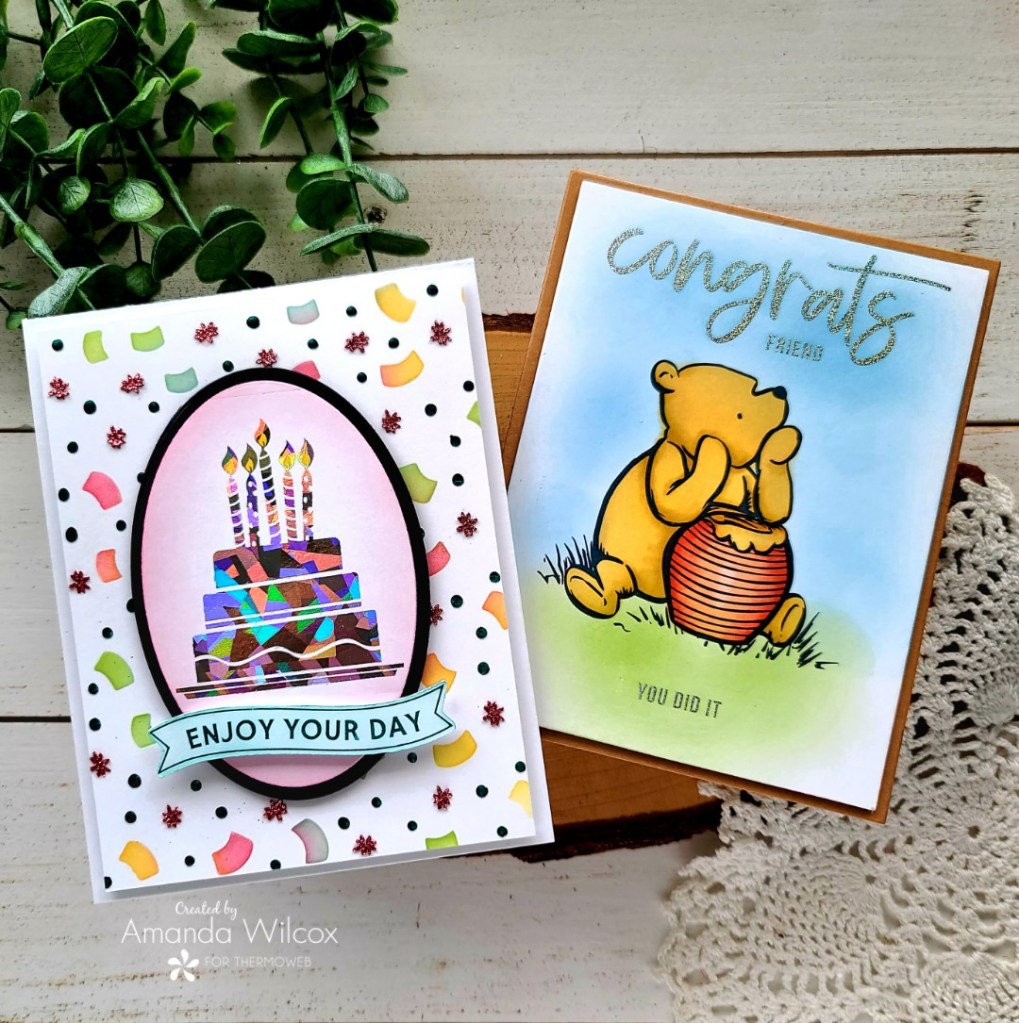
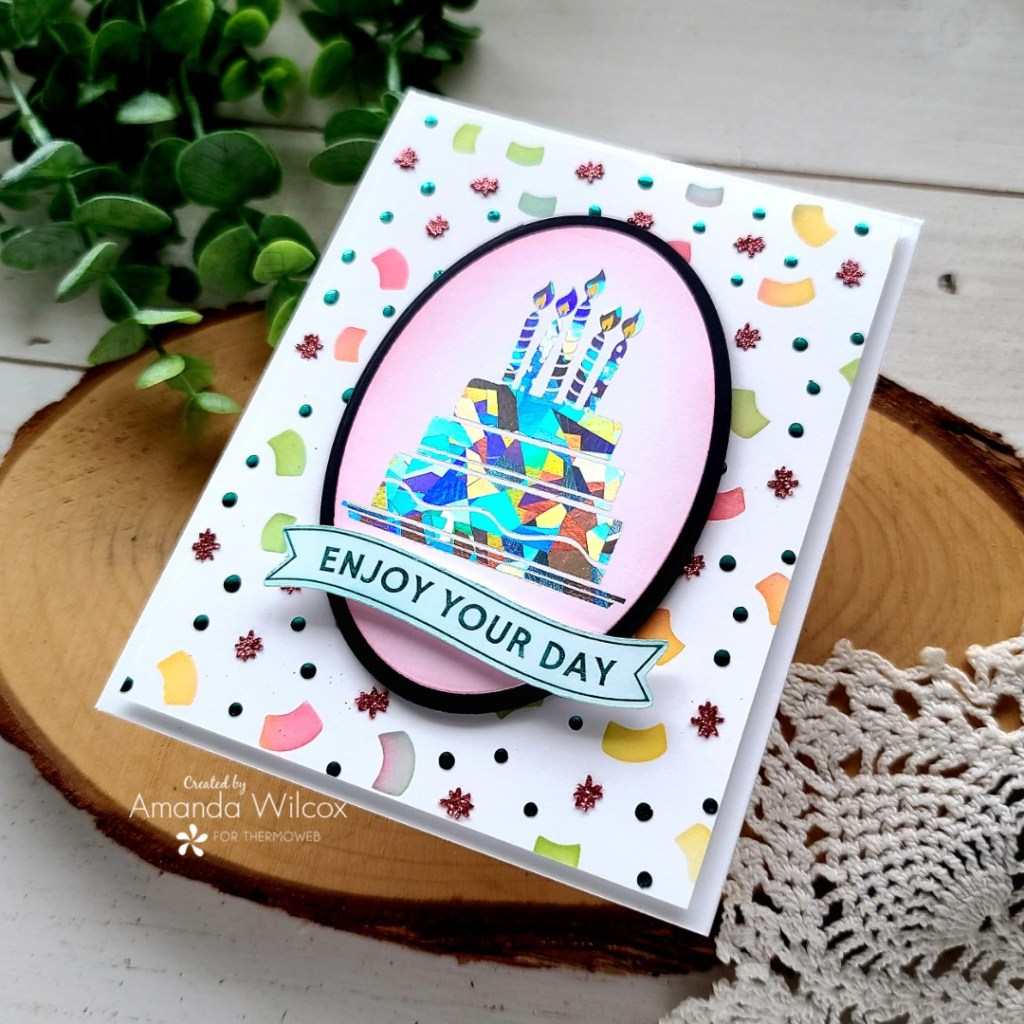
Hello again! Today I’m over on the Pink & Main blog sharing this pair of cards I made with the March release of birthday amazingness! The new version of stencils from Pink & Main are wonderful for all sizes of cards – A2, A7 and slimline alike! So today I took a fun design and made it in A2 and slimline versions to show you.
I started by creating the backgrounds just to play with the new Birthday Candles layering stencils. They are so fun and I just had to play. After creating the A2 version, I tested the size of a slimline and was SO HAPPY to realize it fits perfectly there too! So I made a second one the exact same way.
The candles are just light and dark teal ink for the candle, yellow ink for the flame and glossy gel through the inner flame. After I removed the stencil from the glossy gel, I poured on sparkling monarch flock and tapped it into each flame. I flicked off the excess and set the panels aside to dry.
While the panels were drying, I stamped images from Yappy Birthday and colored them with my copic markers. I used the coordinating dies to cut them out and set them aside. Next, I die cut “HBD” letters from peach cardstock once for each card and white cardstock 3 more times for each card. I used my EZ Squeeze liquid glue to adhere the letters together and put acrylic blocks on top while they dried.
I chose sentiments for each card from Yappy Birthday and heat embossed them in white on black cardstock before cutting them into strips. Then I glued the letters down with liquid glue and popped the image and sentiment strip up with foam squares.
I absolutely made these cards simultaneously and the process was the same on both. I just used different pups for each card because it was a fun excuse to color different cuties!
For finishing touches on both cards, I added a scattering of enamel dots across the designs and unicorn Stickles on tops of the party hats. Then, last I added glossy accents to both images on the party hats, puppy noses and bowtie/collar.
I hope you liked seeing this card design and how you can do similar designs on different size cards depending on your need or mood.
Happy Friday everyone! As promised, I’m back today with the winners from the giveaway earlier in the week.
Originally I was just going to choose one winner but thought it would be fun to choose a winner who asked for a mystery prize and another winner who asked for a gift certificate to the store! So that’s what I did.
Drum roll please…
Winner #1 – Sharon won a mystery prize pack.
And Winner #2 – Sherry won a $20 gift certificate to the Twiddler’s Nook shop.
If you both could please email me at twiddlersnook(AT)gmail(DOT)com to claim your prize. You have until next Friday, April 8, to do so or I’ll choose another winner.
Thank you so much to everyone who participated! I truly appreciate your time and support. Have a fabulous day!
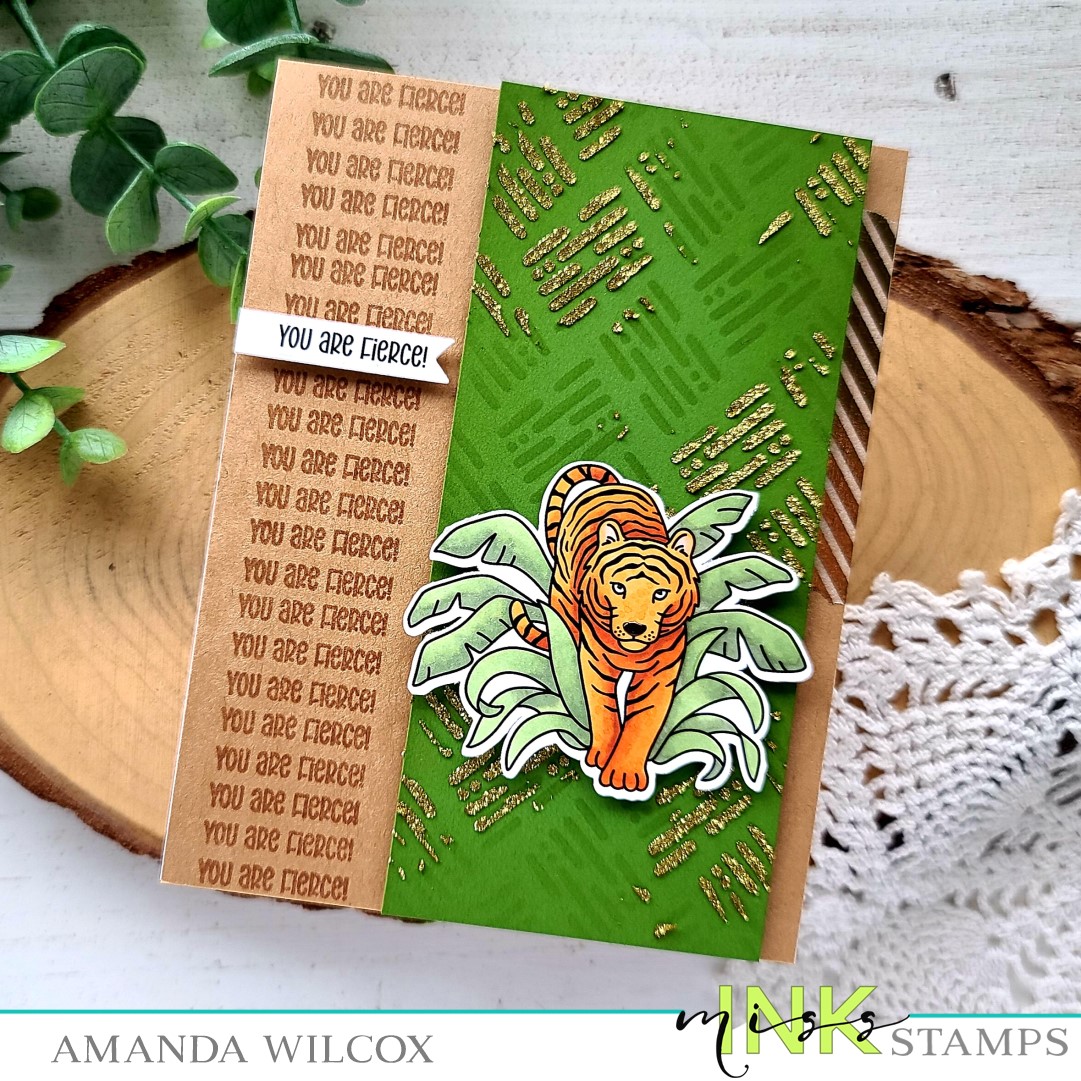
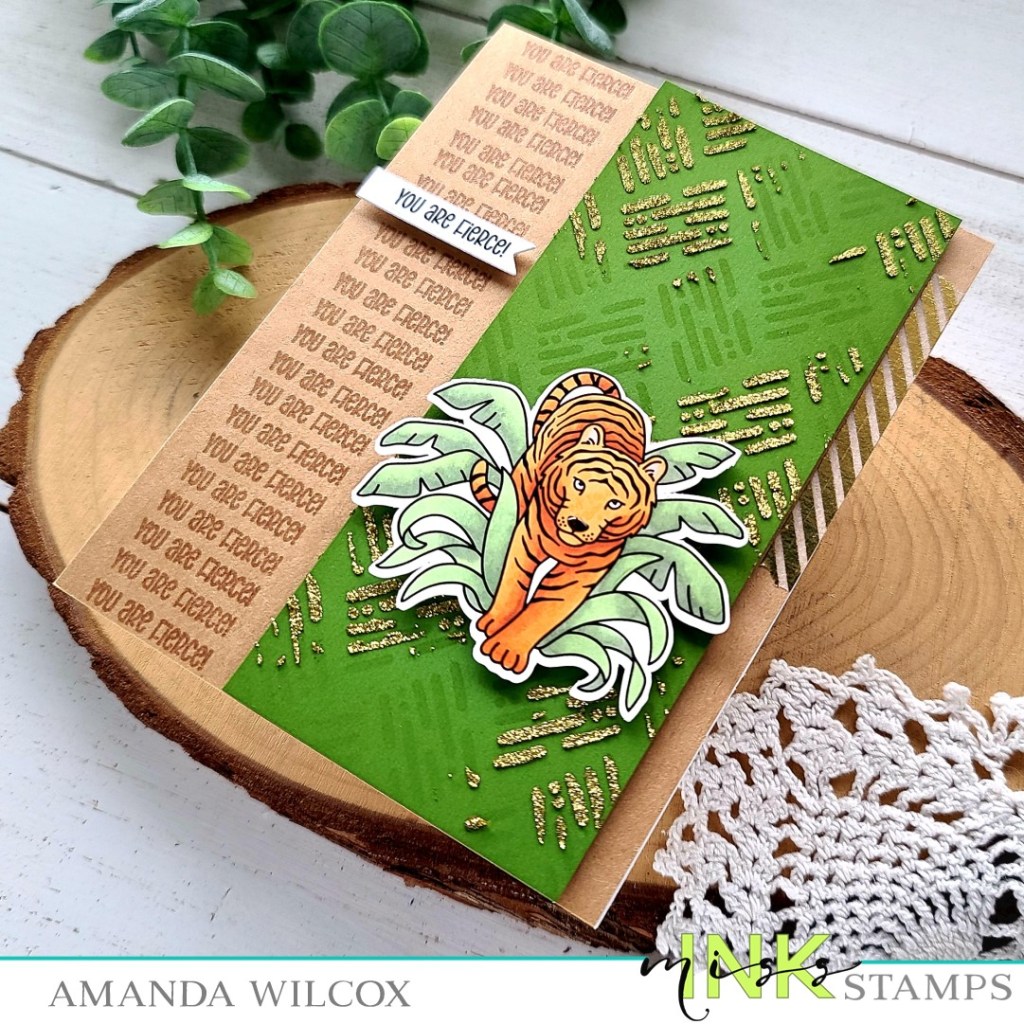
Hello friends! Today I have a little inspiration featuring that fabulous tiger from the new Miss Ink Stamps Jungle Friends stamp set. I finally had a moment to play with one of the new stencils too and tried a new idea for extra texture.
I started by stamping and coloring my image with copic markers. Then I cut a strip of green cardstock and inked up the new Boho Blocks stencil with a darker green ink. For a little bling and texture I took gold glitz glitter gel and randomly spread it through the stencil in various areas. I cleaned up and set this panel aside to dry while I worked on some more stamping.
Next, I cut an A2 piece of kraft cardstock and chose my sentiment. I positioned it in the middle left of the panel and stamped it with brown ink, using my MISTI. I just shifted my cardstock 1/4 inch and kept stamping until the whole line was complete. Then I took a piece of white cardstock and stamped it in black once. I cut this out with a banner from Trinity Stamps 4-Bar Card dies and added a foam strip to the back.
I found some fun gold striped washi tape in my stash so I added it to the right side of the kraft panel before popping the green stenciled panel up with foam tape. Then I added foam squares to the back of the tiger and popped him in place. For the sentiment I just lined the banner up with one of the lines I already stamped so it flows perfectly and trimmed off the excess.
For finishing touches I just added black glaze pen to the tiger’s eyes and glossy accents to his nose. I glued the whole panel to a white card base and it’s all finished.
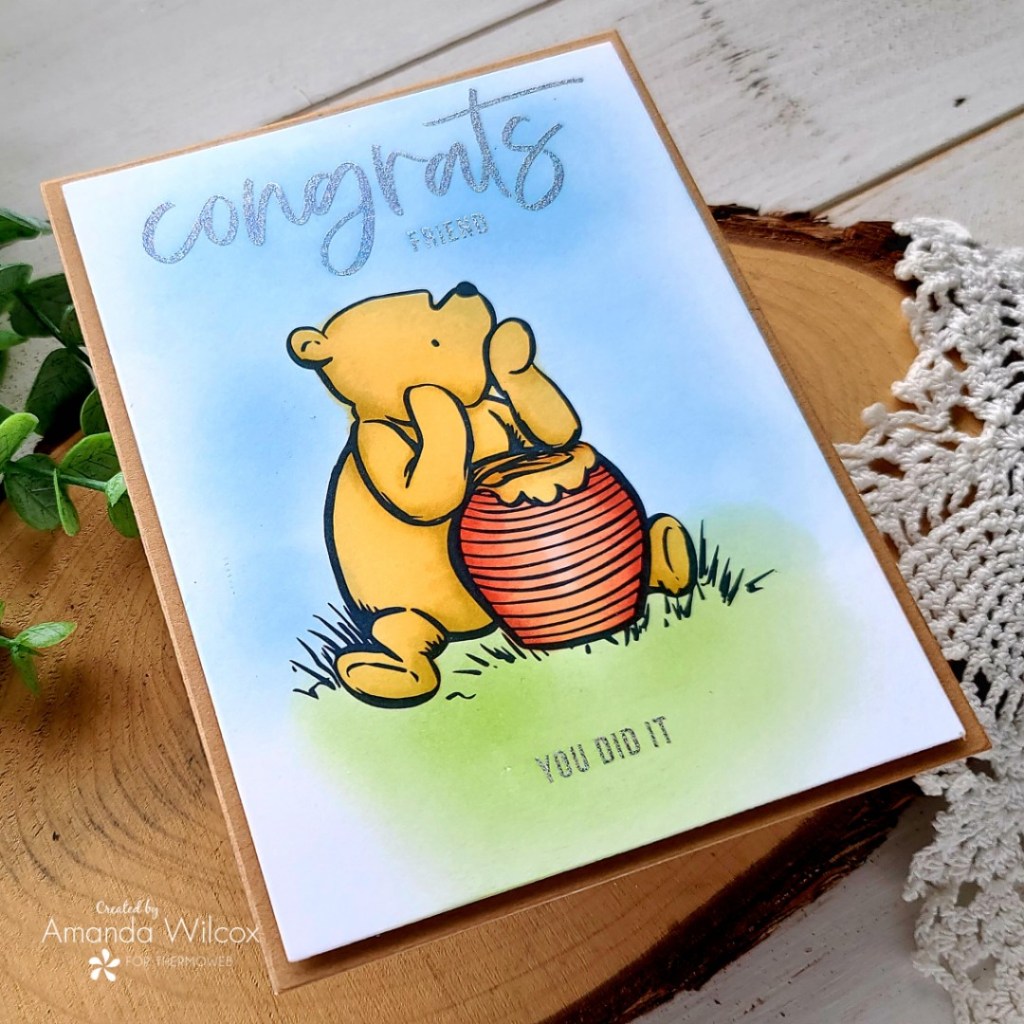
Holy wow friends! Thermoweb has a release of brand new products today and I can’t express enough how much I love them!!! They are deco foil adhesive transfer sheets and new craft & carrier sheets for foiling and other things.
I’m up on the blog today with this pair of cards using both versions of the new adhesive transfers! Gina K Designs has 3 new sheets that have images and sentiments together, while Unity Stamp Co is releasing 2 new sheets with combo sentiments. They’re all incredible!
For this card I did some glitz gel and foiling with stencils for my background and let the images and banner sentiment shine from the new adhesive transfers in the foreground.
And this card was so fun to ink blend and copic color while leaving the sentiments to shine with their fabulous foiling! I really love the combo of the large brush words with the sans serif simple secondary sentiments on these sheets. So good!!!
Head to the blog for all the details on these cards and then to Instagram for a hop! Remember to comment everywhere for chances to win all the fun things too!
I appreciate you sharing your time with me. Have a fabulous day!
Hey friends! I’ve been meaning to take a moment and put together a giveaway for some time now and it keeps getting put on the back burner. But no more waiting, I say! Let’s do this!
Here’s what I’m thinking…
Let’s give away some super fun crafty things from the shop. In the comments below, tell me if you’d prefer a surprise package or a gift certificate to the shop to choose what you want.
Then, for additional entries, follow the Instagram account and Facebook page and leave a separate comment for each letting me know you did.
Want more entries? Share an idea for a crafty tool that we should create. Bonus, if we choose your idea, you’ll even get one for free too!
Leave your comments by Friday, April 1, 12 p.m. PDT. Winner will be announced in a new blog post shortly after.
As always, I truly appreciate you sharing your time with me, your support and comments! Have a fabulous day!
Welcome! Thanks for stopping by today. I have been making lots of Easter cards lately and had an interactive idea pop in my head that I was very excited to try. I have a bunch of Pretty Pink Posh Easter themed products that I hadn’t inked up yet and this was the perfect opportunity to play with them.
I wanted to take this adorable basket die and turn it into a pop up card full of Easter eggs and goodies! To start, I stamped and colored images from Spring Eggs and Bunny Friends with my copic markers. Then I used the coordinating dies to cut everything out and set the images aside.
Here’s an aerial view of the card standing up so you can see what I did. I cut 2 sets of basket pieces from kraft cardstock and the trim from white. I ink blended the pieces for some dimension and interest, and then assembled those with liquid glue. Next, I took I strip of kraft cardstock and cut it to 1×5 1/2 inches and scored it at a 1/4, 2 1/4, 3 1/4, and 5 1/4 inches. I adhered the 1/4 inch flaps together to create a box. Next, I took a 2 1/2 inch strip and scored it at 1/4 inch from each side and inserted it in the middle of the box, adhering the flaps to the box sides. Then I glued one basket on each side of the box.
Next, I arranged the eggs in a trio and glued them together. I took another three eggs and arranged them the same way and glued them to the back of the first three, only at the top half. So things didn’t shift while I was manipulating them, I let the eggs dry a few minutes before adding glue inside the bottom half of them and sliding them onto the center of the box we created in the last step.
The Spring Eggs set has eight eggs so I had two left which I glued to the front of each side of the basket with a bunny on each side too. To finish things off I added a bow to the top of each side.
This card folds flat to fit in an envelope to mail and pops up to stand perfectly when it comes out! And because it’s symmetrical, both sides are decorated and pretty so it can sit out as a decoration. I think they would be super cute on the dinner table at each place setting or on a mantle of decorations too!
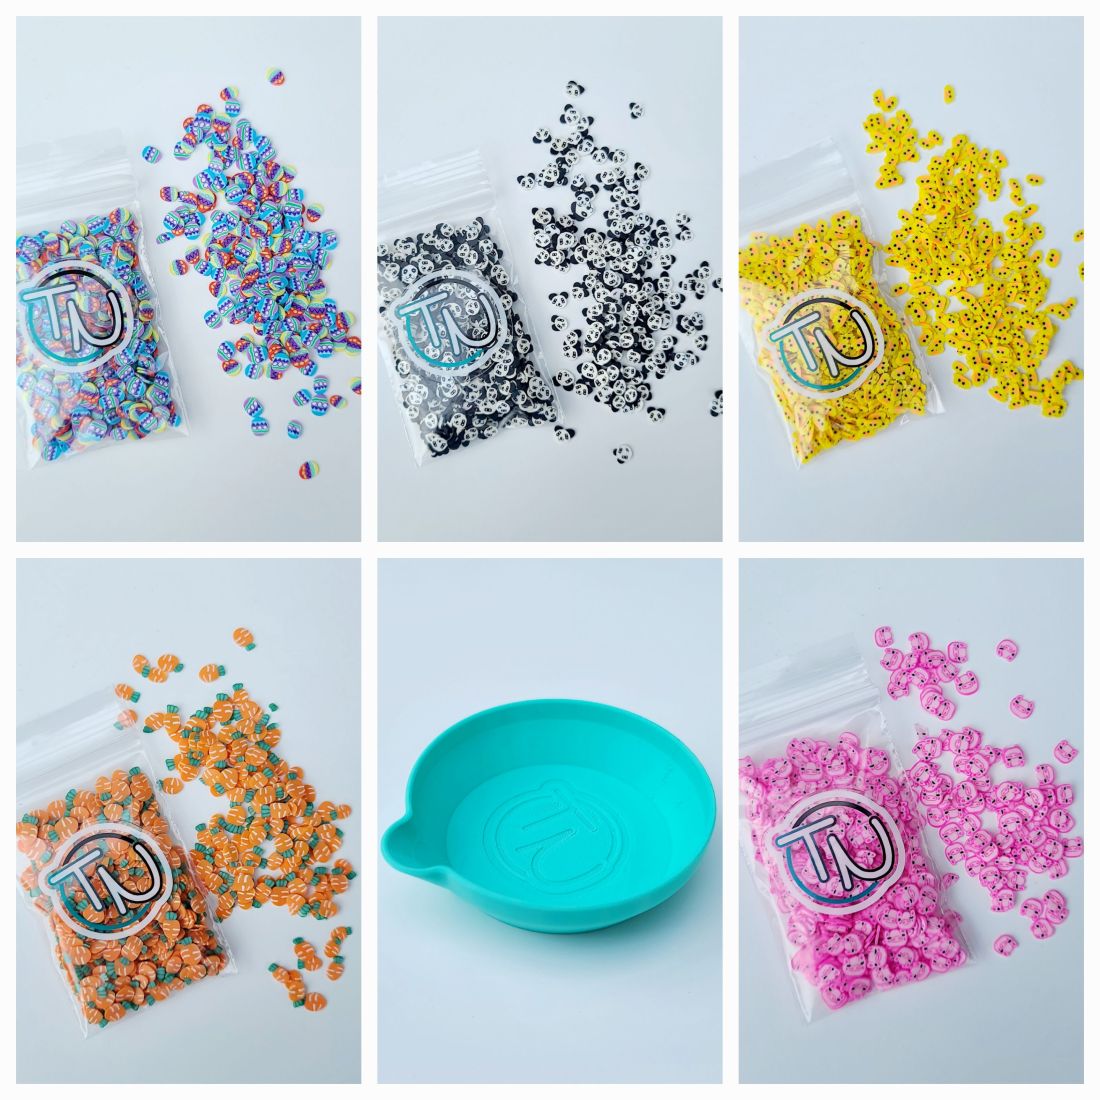
Hello everyone! I hope your weekend was wonderful. I wanted to pop in tonight to let you know that we just had a new mini release into the shop. We’ve got 5 new embellishments – some great for Easter and spring, and a few because they’re too cute! Plus we also have a new embellishment tray with a pour spout instead of just an opening.
Here’s a little at-a-glace of everything new. You can click HERE to head to the shop and have a look at everything we’ve got to offer.
Thanks for sharing your time with me. I truly appreciate it! Have a fabulous day!
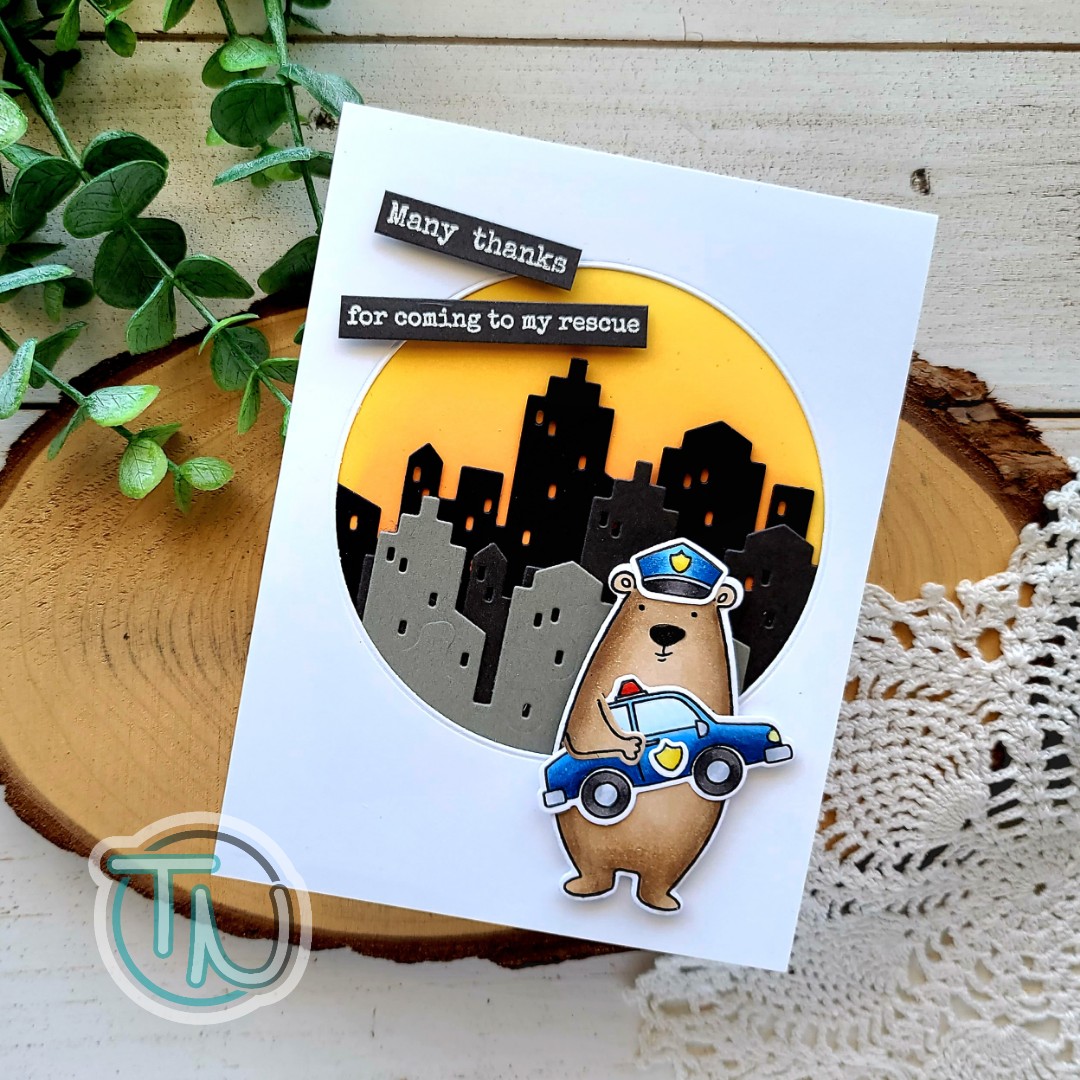
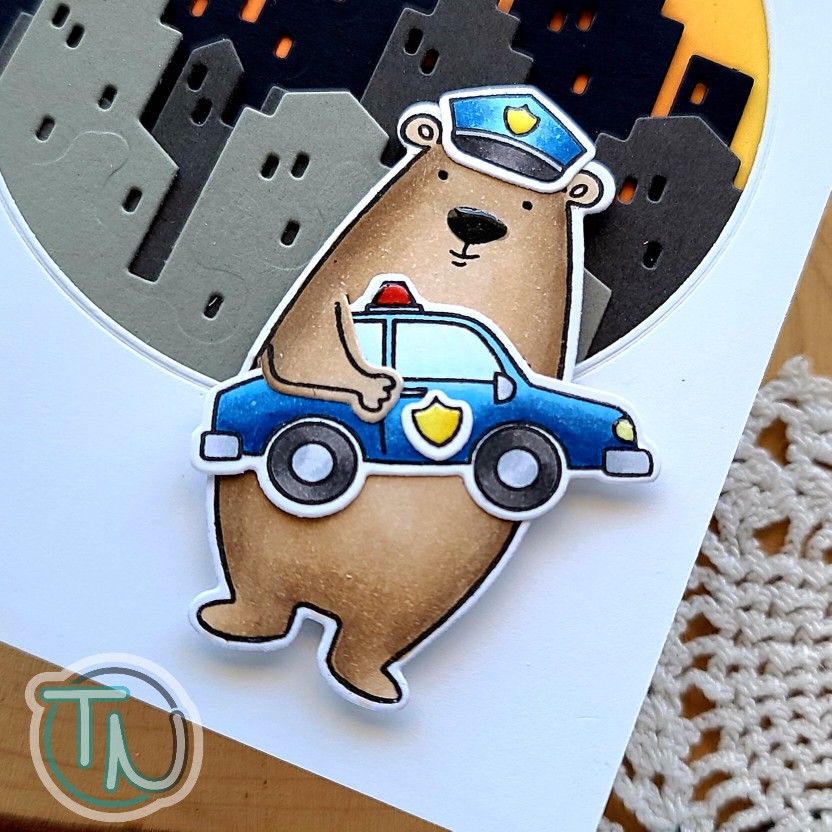
Hello friends! Today I have the awesome opportunity to guest design for Ellen Hutson and play with that adorable bear and all his dress up accessories again! I had a hard time choosing but thought it would be fun to add to the thank you card stash with a police bear in the city.
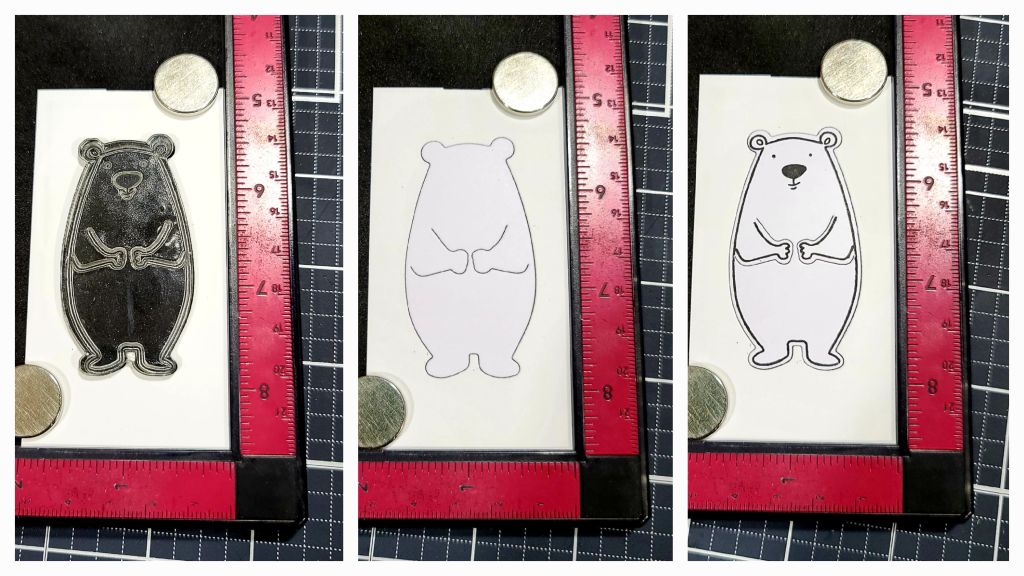
I started my card by choosing and stamping my images. Then I colored them all with copic markers and cut them out with the coordinating dies. That is, except for Mr. Bear. His die is solid so it’s practically impossible to line it up after you’ve stamped. So today, I have a little trick to how I stamp this guy whenever I’m creating with him.
Once upon a time, at the beginning of getting this stamp set, I cut the bear shape from a scrap of cardstock and kept the negative piece in my die packaging for future use. Whenever I stamp this image, I place the negative scrap in my MISTI. Then line the stamp up in that area, use the lid to pick up the stamp and place my blank die cut shape in the void. I ink up the stamp and stamp it down. This also works to re-stamp if you didn’t get a good impression because the space holding your bear didn’t move. It works great! The image you see on the right has been double stamped because his nose didn’t cooperate and was blotchy the first time.
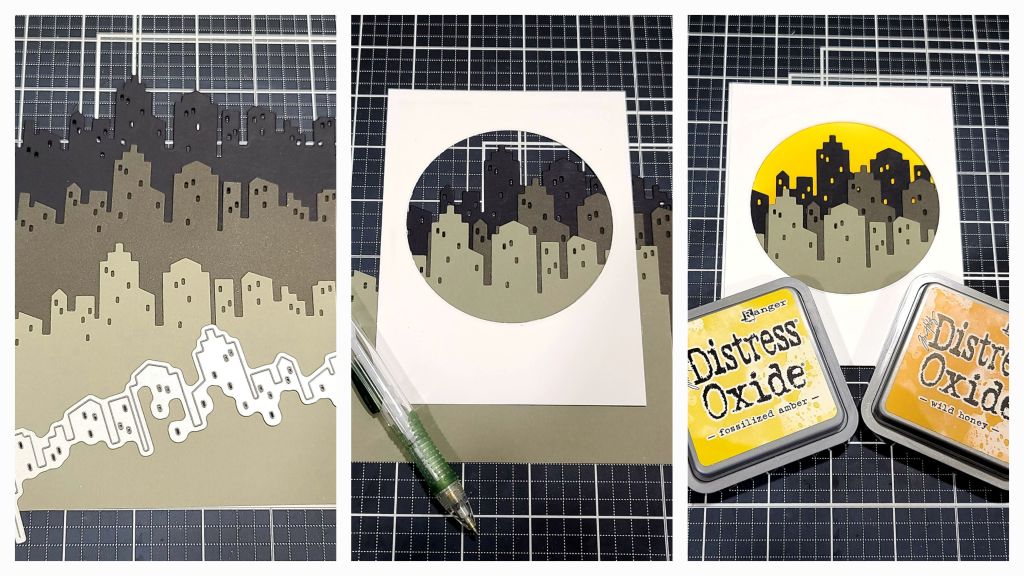
With my images all taken care of, I switched over to my background where I had a fun idea to create a little cityscape. I used the Essentials By Ellen Big City die to cut a border from 2 different gray cardstocks and also black cardstock. I took a white A2 panel and used a Trinity Stamps embossed edge circle stack die to cut a window. Using this window as a guide I adhered the layers of city buildings together and a pencil to mark where I needed to trim off the excess.
Next, I took a white card base and inked up my sky using distress oxide ink in fossilized amber and wild honey. Finally, I used liquid glue to adhere everything together.
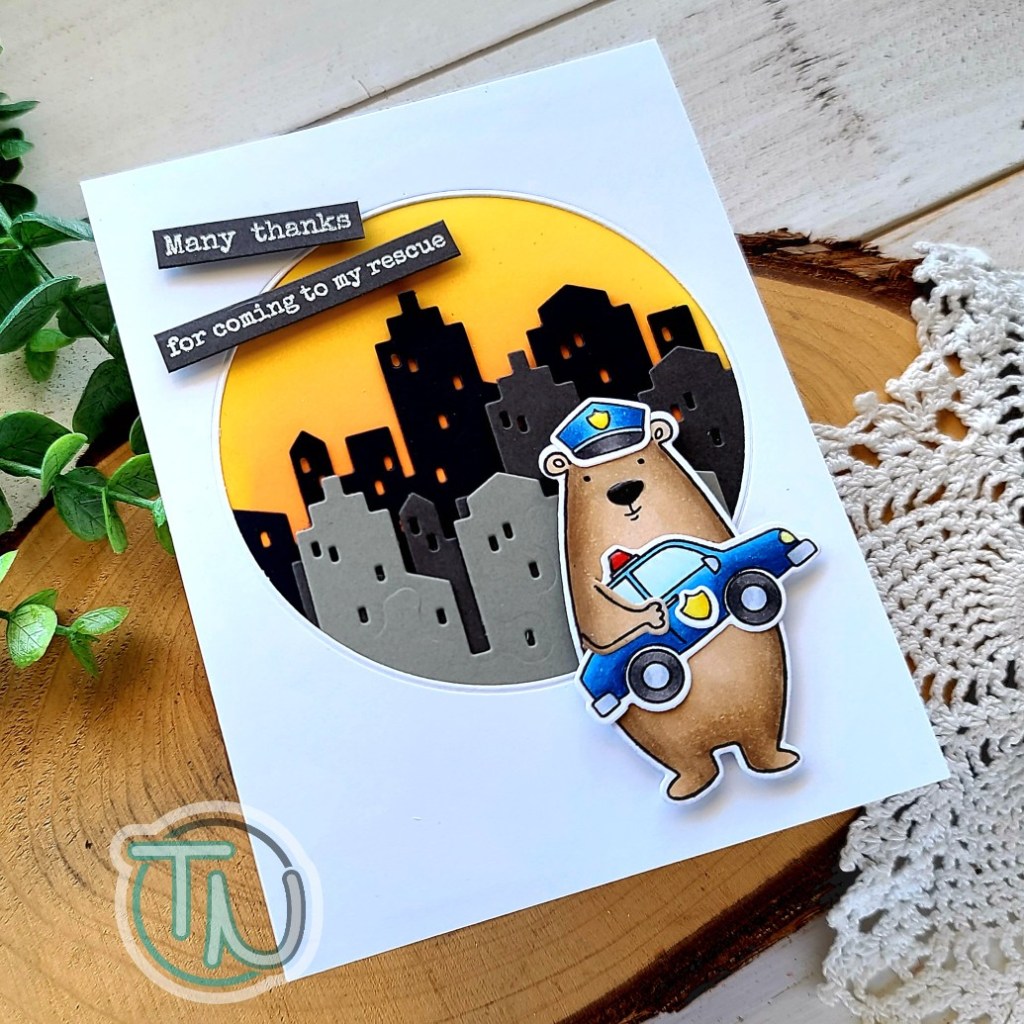
I stamped and heat embossed a sentiment from Bear Ware Dress Up sentiments on the darker gray cardstock used in my buildings. I added foam strips to these and foam squares to my dressed up bear before popping them all in place on my card front.
For finishing touches I added black glaze pen to Bear’s eyes and glossy accents to his nose, the shield on his hat and car, and the car’s lights too.
Isn’t this such a fun card!?! I’m so happy with how it turned out and had a blast playing with this bear and all of his accessories.