Blog

Pretty Pink Posh – Happy 4th of July!

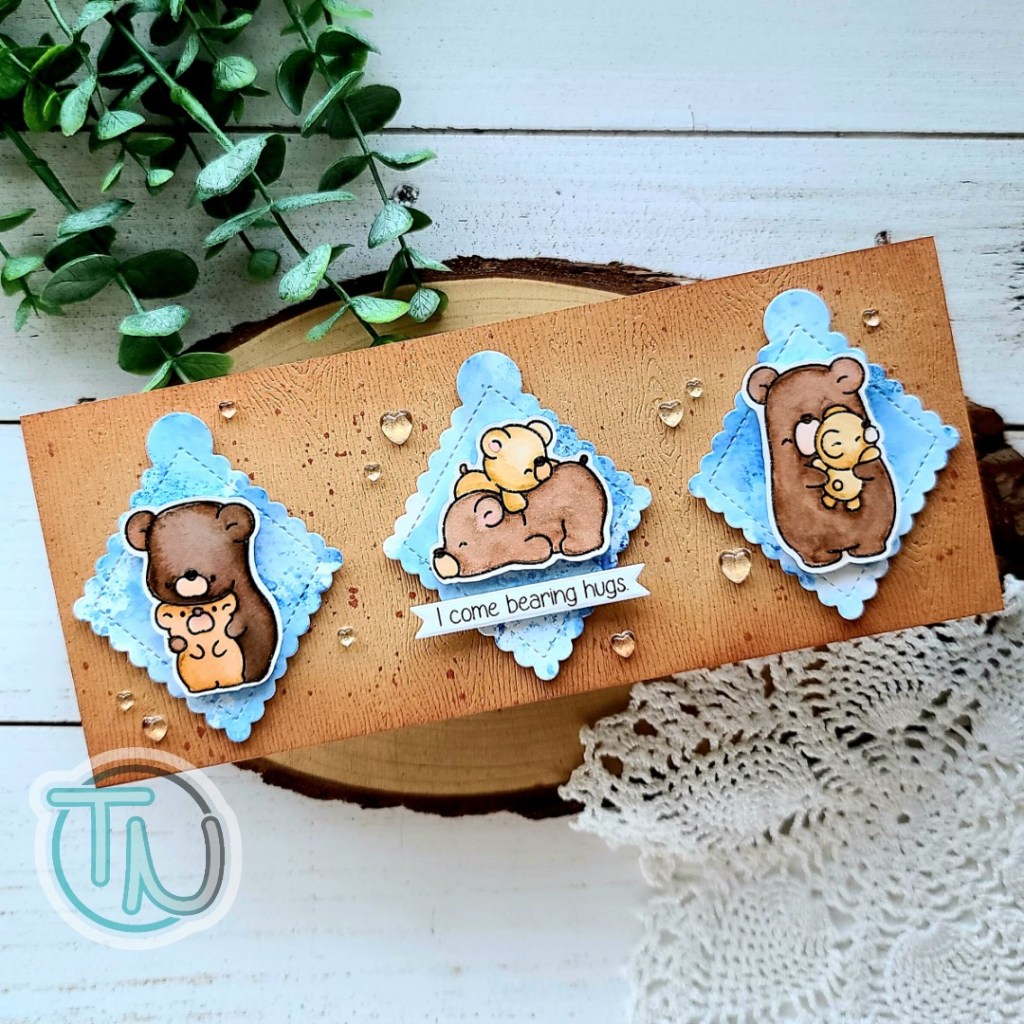
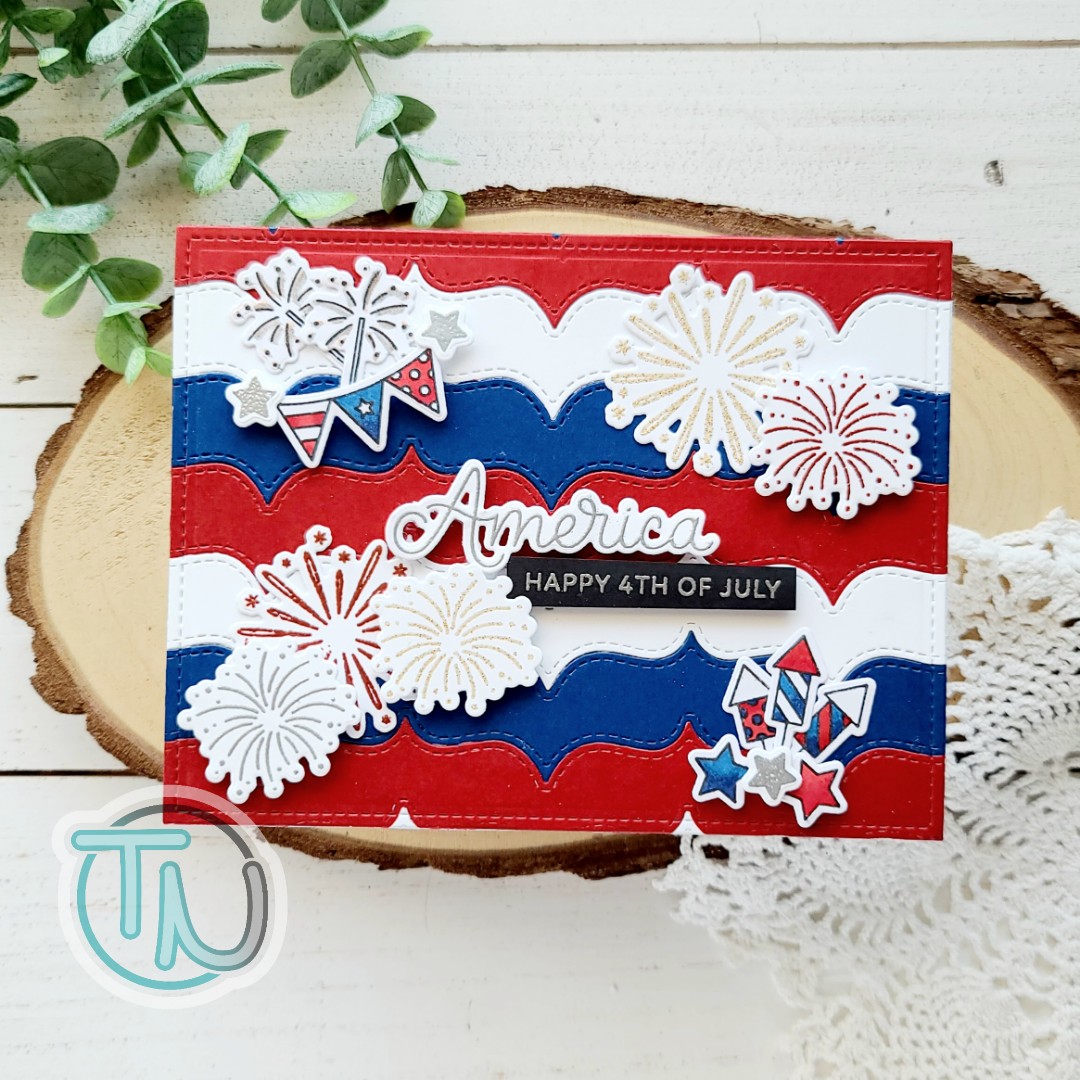
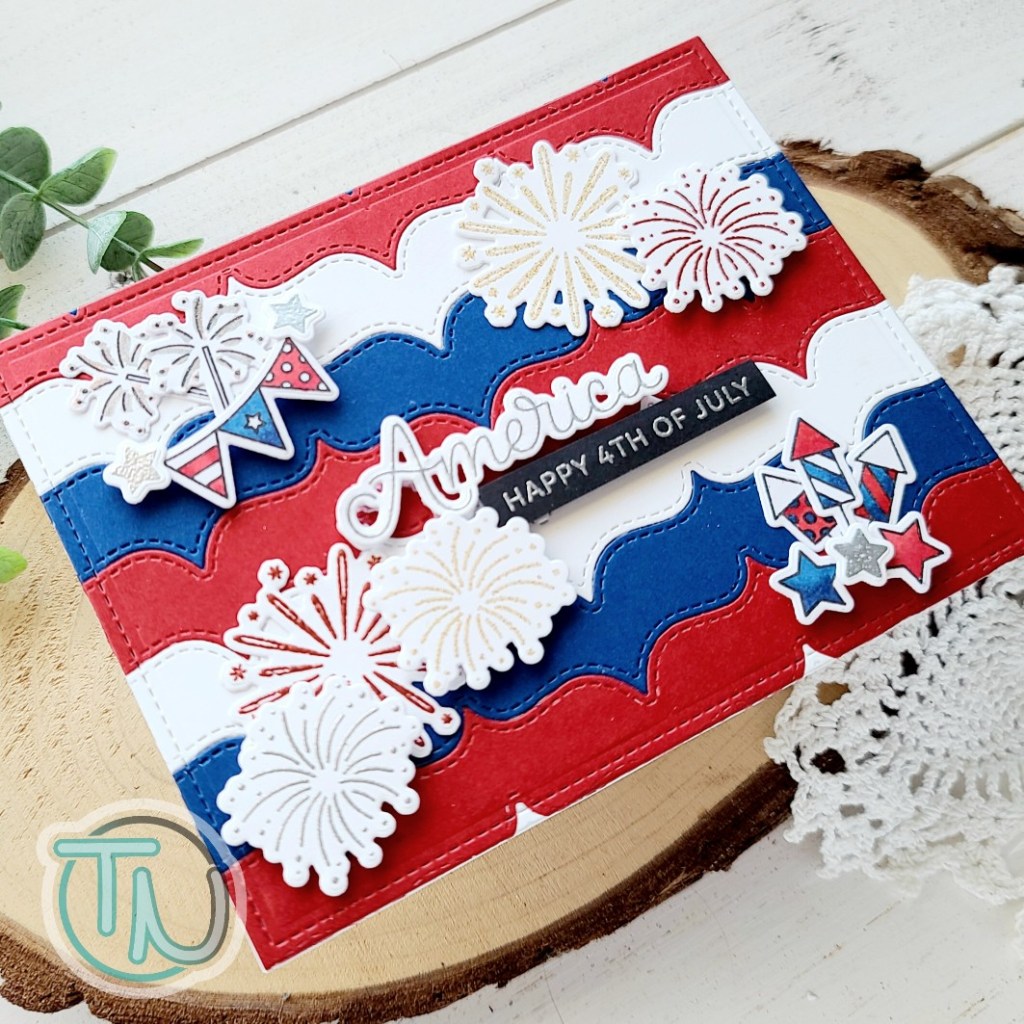
Happy 4th of July to all of my American friends! I have a really fun themed card to share with you featuring stamps and dies from Pretty Pink Posh. I baked some blueberry muffins and delivered them to my parents with this card just for fun.

To create the card, I die cut one of the Stacked Edges 3 dies from red, white and blue cardstock and handful of times. Then I used liquid glue to adhere them to a white scrap of cardstock. Then I die cut the panel with the a Large Stitched Rectangle from Lawn Fawn. I adhered it to a card base and moved on to stamping and heat embossing.

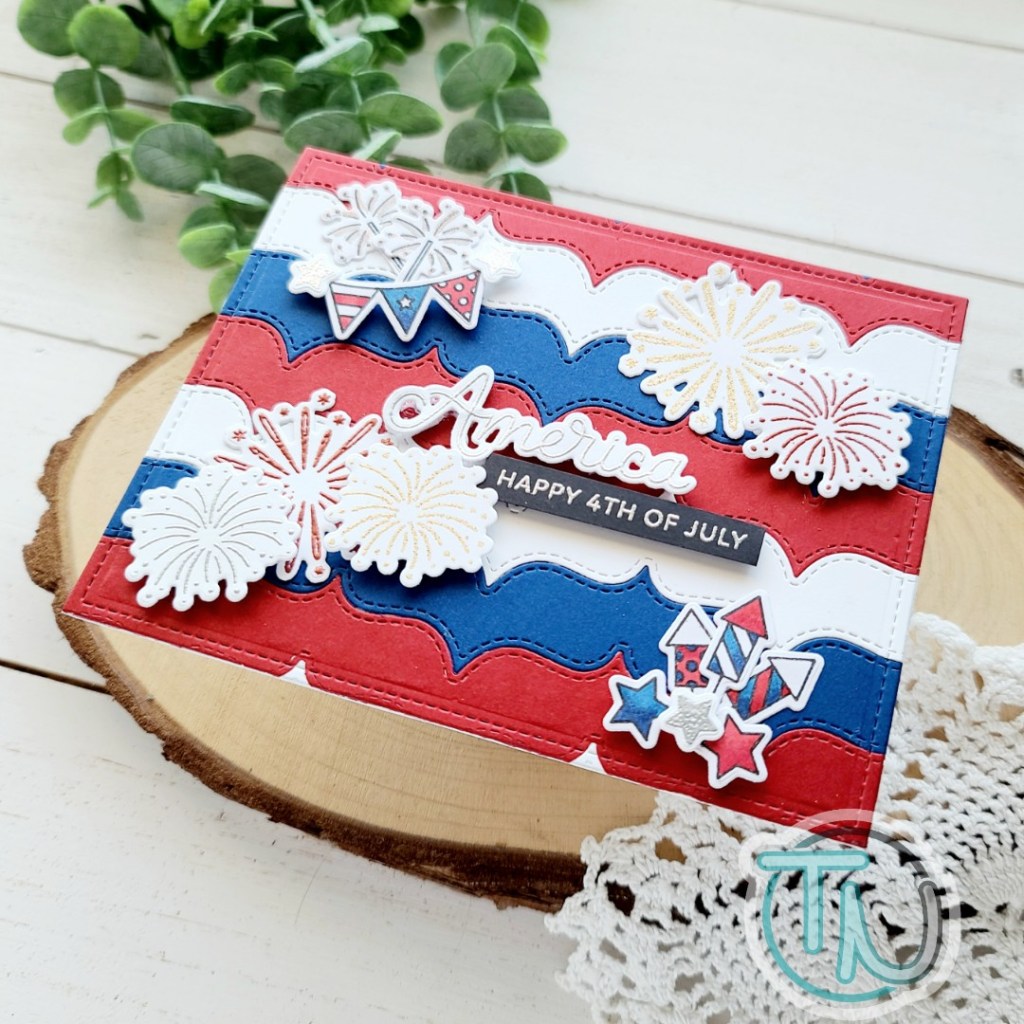
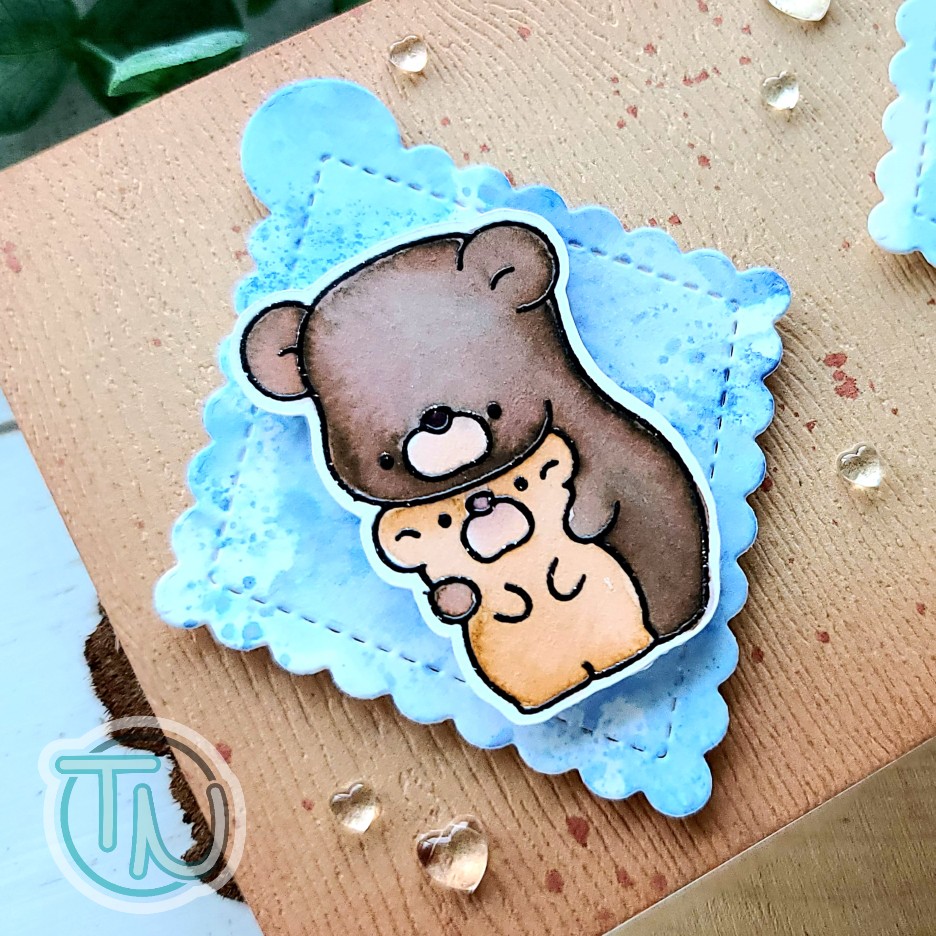
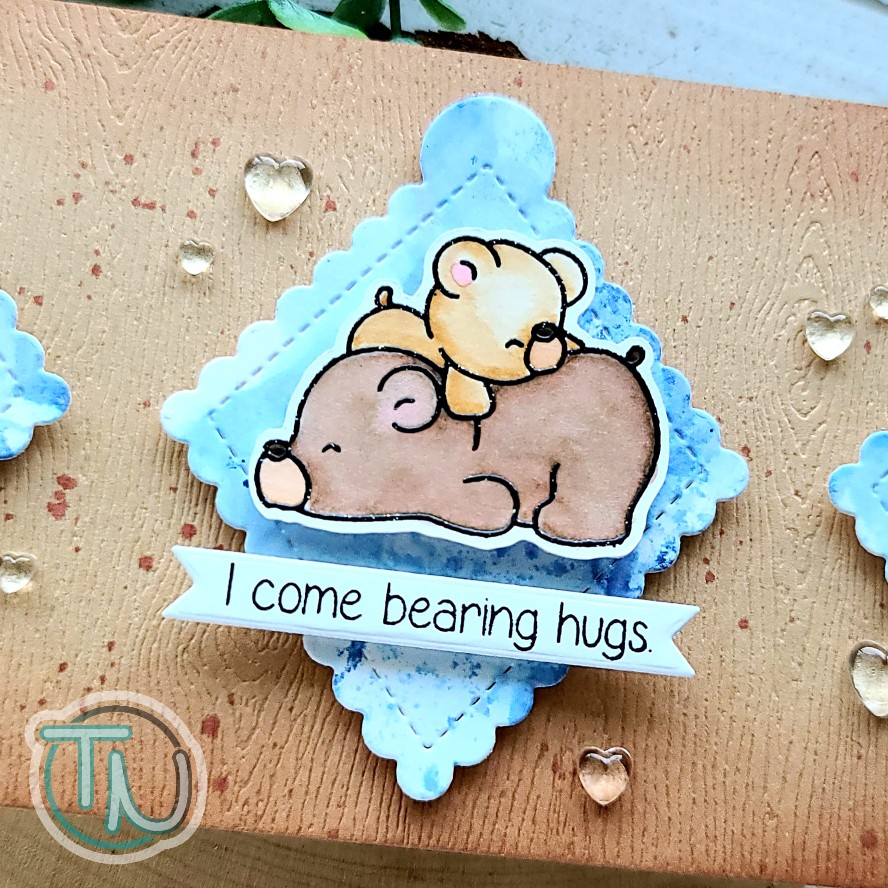
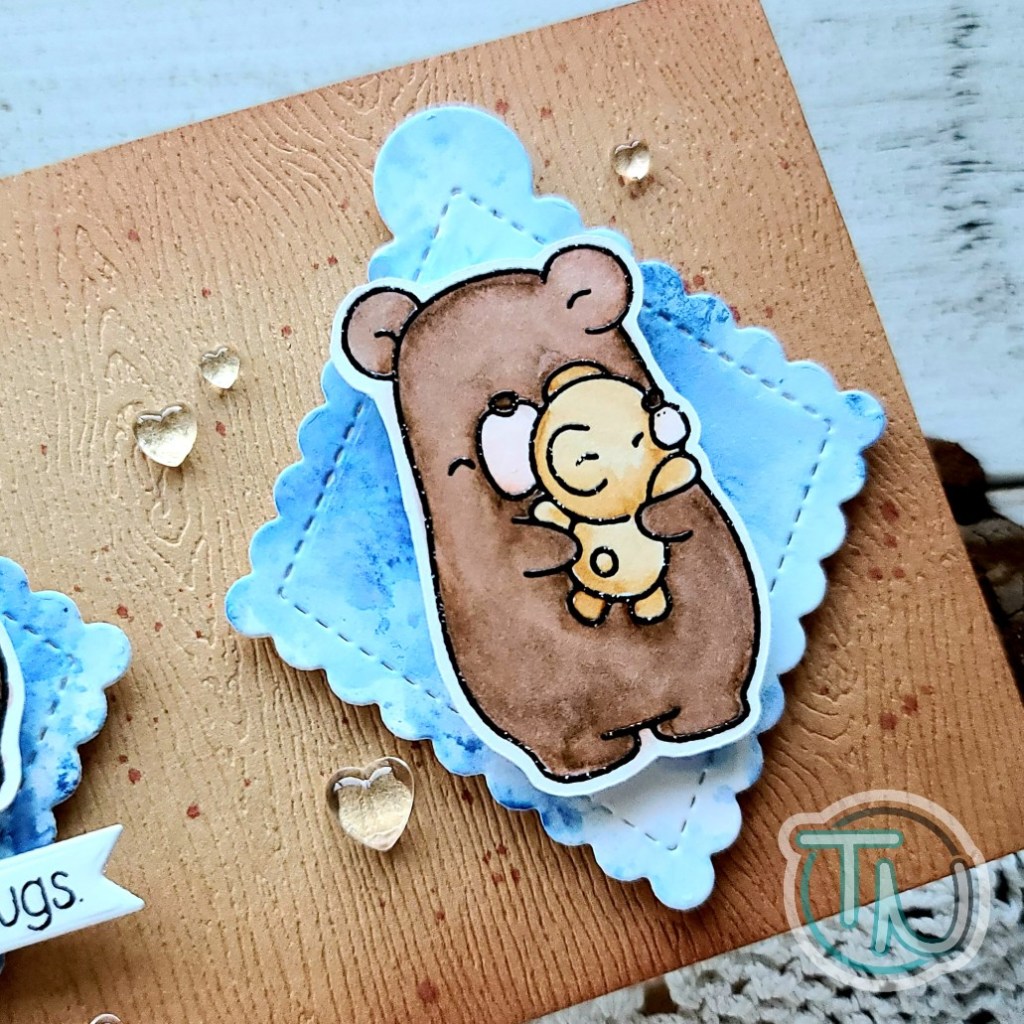
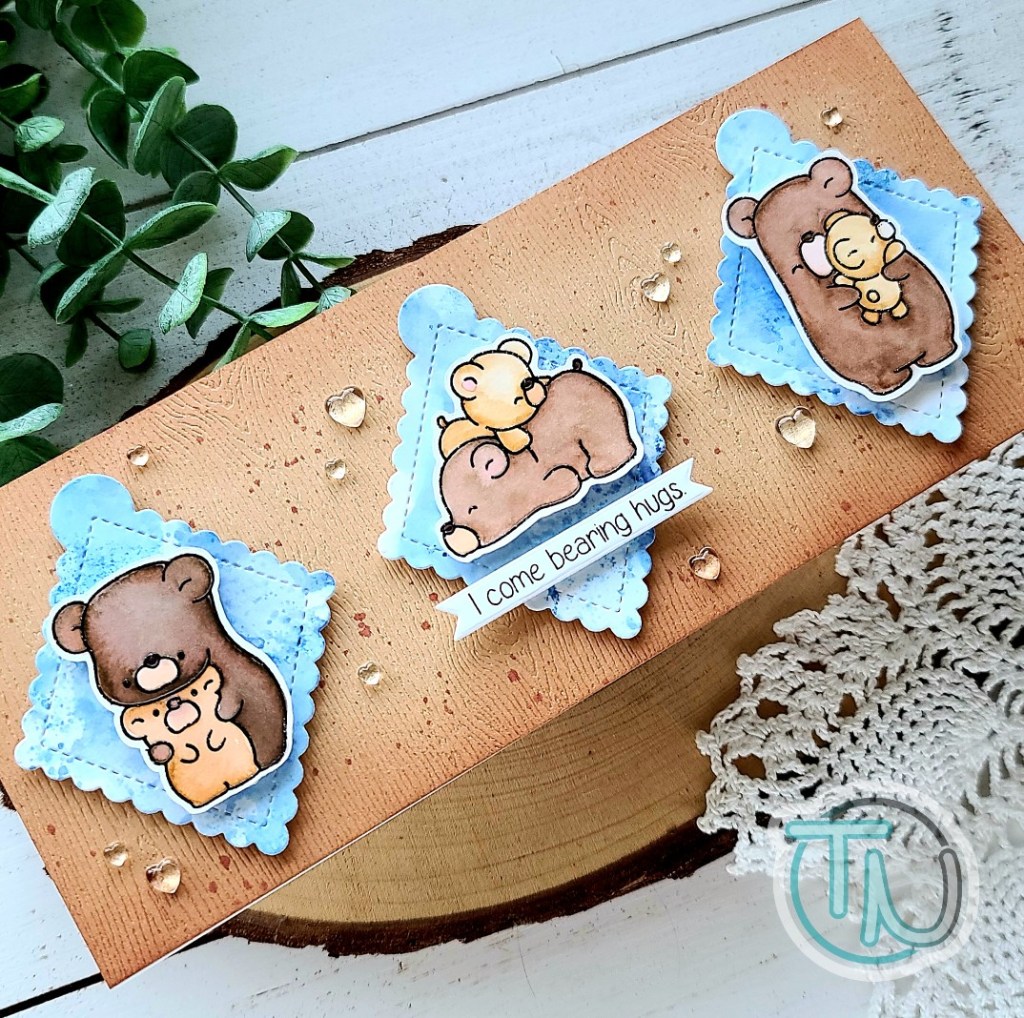
The images for this card are all from the Pretty Pink Posh 4th of July set. I stamped and colored some with my copic markers and heat embossed others. Once I was finished, I used the coordinating dies to cut everything out.

Copic Color Map for this card:

Reds – R27, R29 (stars, banner and fireworks)

Blues – B37, B39 (stars, banner and fireworks)

Grays – C00, C3 (sparkler stick and slight shading on white areas

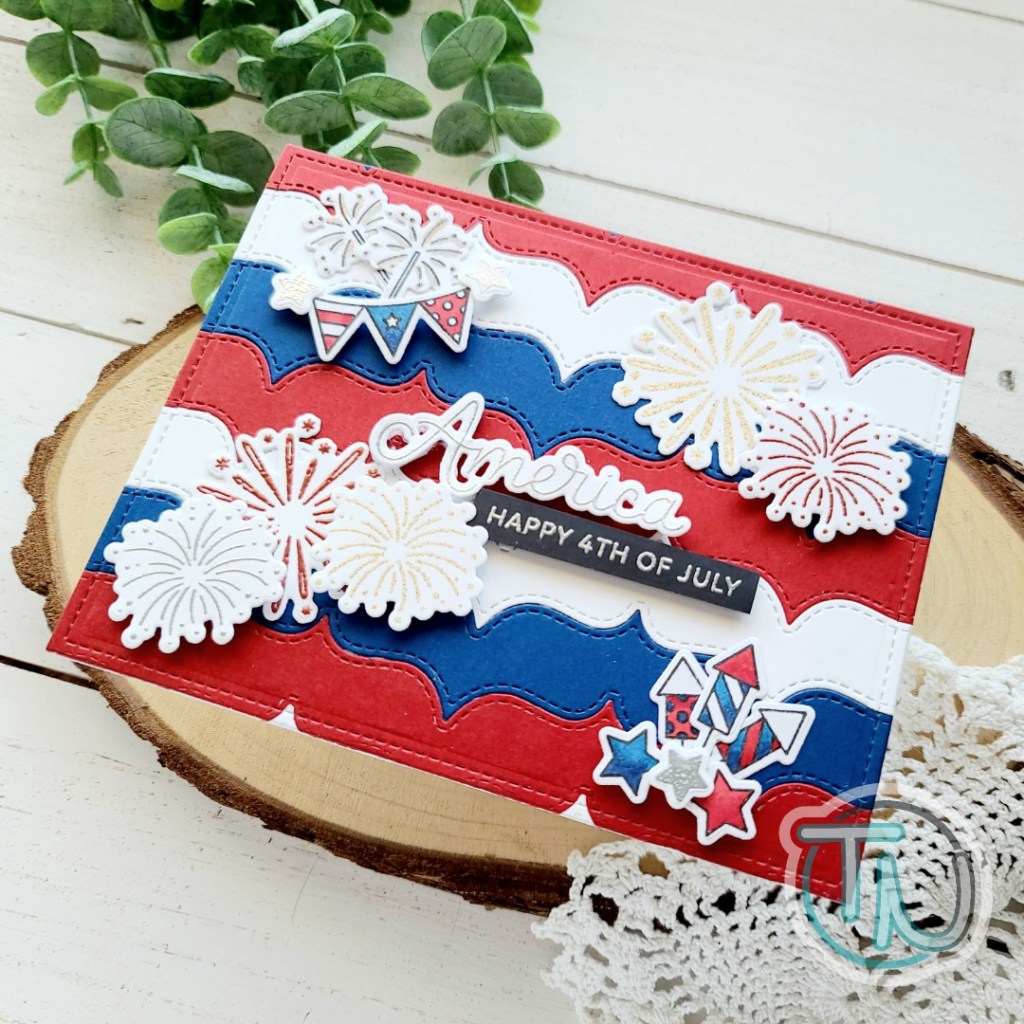
Once everything was cut out, I used a combination of foam squares and liquid adhesive to adhere all of my images in place. For finishing touches I just added a little silver Wink of Stella glitter brush pen to the sparklers.

Isn’t this a totally fun and festive card?!? I just love it!

Products used on today’s card:
Pretty Pink Posh 4th of July stamps and dies
Pretty Pink Posh Stacked Edges 3 dies
Lawn Fawn Large Stitched Rectangles
Wink of Stella – silver
Tombow Multi Mono liquid adhesive
Scrapbook Adhesives foam squares and strips
Copic markers

I appreciate you sharing your time with me! Have a fabulous and safe holiday!

MFT Stamps – No One Stacks Up To You

Hello again! I’m stopping by today with a super fun and adorable mini slimline card featuring an MFT Stamps set called Weather With You. I absolutely love these critters and had so much fun coloring and stacking them sky high!

I started by stacking my stamps up to see how many I could fit on a mini slimline card front. Then I stamped them out and colored them with my copic markers. I used the coordinating dies to cut them out and set them aside.

Next, I pulled out two Trinity Stamps die sets – mini slimline card and envelope set and mini slimline stitched layers stack. I cut the second-to-largest stitched panel from a light blue cardstock and stamped it with MFT Stamps Diagonal Stripes Background stamp in Lawn Fawn mermaid ink. Then I used the scalloped panel die from the mini slimline card dies set and cut it from yellow cardstock.

I created a mini slimline card base by folding a 6×6 white cardstock panel in half to create a 3×6 card. I used liquid adhesive to adhere the yellow scalloped panel to the front. Then foam tape to the back of the striped panel and adhered it in place. Then I used liquid glue to adhere all my critters together and lined the back of them with foam tape as well.

I stamped a sentiment and die cut it with a banner die from the mini slimline card and envelope set and added foam strips to the back of that. I adhered the sentiment banner and critters at the same time to help with placement.

For finishing touches, I added black glaze pen to the critter’s eyes. Then glossy accents to their noses and the fish bowl. Finally, I glued a scattering of red clay hearts across the design and also put one in the panda’s hand because it was just too perfect!

Aren’t these guys just the sweetest?!? I absolutely adore them and can’t wait to play again soon!

Products on today’s card:
MFT Stamps Weather With You stamps and dies
MFT Stamps Diagonal Stripes background stamp
Trinity Stamps Mini Slimline Card and Envelope dies
Trinity Stamps Mini Slimline Stitched Layers dies
Trinity Stamps Candy Apple Heart clay embellishments

I appreciate you sharing your time with me. Have a fabulous day!

Pink & Main – Hello Sunshine

Welcome back everyone and thanks for stopping by! Today I have another beachy awesome Pink & Main card to share with you! This one is all die cut but I did color some of it so it’s not technically no coloring…although you could totally alter it to that if you’re not feeling the coloring thing at the moment.

For this card, I die cut the scalloped circle die from the Aloha die set from white cardstock. Then I used copic markers to color all of the pieces in. This is where I’m talking that you could die cut the whole thing multiple times and paper piece if you’re not in the mood to color. However, I find this kind of copic coloring relaxing and very forgiving because there are no lines to go outside of.

Once everything was colored, I die cut a circle from copy paper and adhered all my pieces to it. Then I used the new Catch a Wave embossing folder with some teal cardstock for my background. After that panel was embossed, I trimmed it to A2 size and adhered it to a white card base with EZ Squeeze liquid adhesive. Then, I popped my hibiscus circle up with foam tape.

I stamped and heat embossed a sentiment from the new Sunkissed stamp set in white on black cardstock. Then I used a large sentiment banner die to cut it out. I popped it up with foam tape as well.

For finishing touches, I added a scattering of the halftone green/teal pearls from the Unicorn Pearls set across the design. Then I took my Wink of Stella glitter brush pen to just the stamen on the flower for a little added shimmer in the light.

Products used on today’s card:
Aloha dies
Catch a Wave embossing folder
Sunkissed stamps
Large Sentiment Strip dies
Layered Circle dies
Unicorn Pearls
Wink of Stella glitter brush pen
EZ Squeeze Liquid Adhesive

I hope you enjoyed today’s card and found some inspiration to create something wonderful and share it with someone!

I appreciate you sharing your time with me. Have a fabulous day!

Miss Ink Stamps | Thermoweb Collaboration – Bubbles and Foiling

Hey friends! The super fun collaboration between Miss Ink Stamps and Thermoweb continues today! I’m over on the Miss Ink Stamps blog with this adorable card featuring Bubbles and the coordinating dies with Thermoweb toner card fronts and decofoil for some awesome shine!

I started this card by choosing a toner card front from the Love Blooms toner card front pack. I foiled it with glass slipper decofoil and then ink blended tumbled glass and mermaid lagoon distress oxide over the top. I used a clean microfiber cloth to wipe the ink off the foiling and splattered the background with watered down black paint.

Next, I stamped and colored images from Bubbles with my copic markers. Then I used the coordinating dies to cut them out and set them aside. I die cut a vellum heart from the Trinity Stamps Nested Hearts dies, then cut the bottom tip again from white cardstock. I inked that up with mowed lawn and twisted citron distress oxide and cut the top with the grass border from Trinity Stamps Great Outdoor Borders die set. I used tape runner to adhere them together. Using my images as a guide, I stamped and heat embossed some bubbles on the “sky” portion of the heart for a little added interest.

I stamped a sentiment from Bubbles and cut it out with a banner die from the Trinity Stamps 4-Bar Card die set. Next, I added foam squares and strips to the images and sentiment strip and adhered them to the heart.

I trimmed the foiled panel down to 4×5.25 inches and added foam tape to the back, adhering it to a white card base. Then, hiding adhesive behind the grass and images, I adhered the heart to the front of the card and moved on to finishing touches.

For those, I just added glossy accents to the bubble bottle on the snail and the whole bubble that the mouse is floating in. The background on this card is so eye catching and beautiful that I didn’t really need to add anything.

There are giveaways going on over on Instagram, the Miss Ink Stamps blog and Thermoweb’s blog too! So head to those places and check out the posts this week for sure!

Products used on today’s card:
Miss Ink Stamps Bubbles stamps and dies
Thermoweb Love Blooms Toner Card Front
Thermoweb Glass Slipper decofoil
iCraft XL Tape Runner
iCraft foam tape roll
iCraft foam squares
Trinity Stamps Nested Heart dies
Trinity Stamps Great Outdoor Border dies
Trinity Stamps 4-Bar Card dies
Distress Oxide Inks – mermaid lagoon, tumbled glass, twisted citron, mowed lawn
Glossy accents

I appreciate you sharing your time with me. Have a fabulous day!

Thermoweb | Miss Ink Stamps Collaboration – Stenciling with Decofoil and Glitter Glitz Gel

Hello everyone! Today I’m over on the Thermoweb blog for the collaboration with Miss Ink Stamps! This time I have a pair of cards I made using one inked background, cut in half and then stenciled completely different. It was super fun to play around with everything!

Here’s a look at both of the cards I created. One with the Dee and Dum stamp set paired with the Diamond Fade stencil. The other with my favorite pup from Rub-a-Dub Doggies stamp set paired with the Large Random Dot and Random Dot stencils. Those stencils are sold separately if you only want one but they work really awesome together too! (Here’s a pro-tip though…if you only have one you can ink it up and then rotate it to get a second layer of dots in different spots!)

I used Pink & Main Large Sentiment Strip dies to cut out the sentiments for both cards. This one has a scattering of Trinity Stamps Black Eyed Baubles for embellishments along with glossy accents on Tweedle Dee and Dum.

The embellishments on this one include glossy accents for the rubber ducky and dog’s nose. Then unicorn Stickles on the bubbles to help them time in with the background. Last I scattered Twiddler’s Nook half-tone pearls across the design.

Be sure to head over to the Thermoweb blog for all the details on these cards, links to the products and a chance to win prizes from Thermoweb and Miss Ink Stamps! Totally worth the click!

I appreciate you sharing your time with me. Have a fabulous day!

Trinity Stamps – Sending Sunshine

Hey friends! I am back with another fantastic rainbow card featuring brand new and previously released goodies from Trinity Stamps!

Isn’t this new image from Love Dani Studio just perfection?!? I absolutely love it and could wait to ink it up! I stamped and heat embossed it on Bristol Smooth Cardstock, then colored it with my Zig Clean Color Real Brush markers. I’ve definitely been in a watercoloring mood lately. I used the coordinating die to cut it out and set it aside to work on my background.

To keep with the watercolor feel, I die cut the Rainbow Funshine and clouds from Bristol Smooth cardstock and colored them with my Zigs as well. Then I inked up a full panel with the puffy cloud stencil and some Lawn Fawn mermaid ink using my blending brushes. I die cut the panel with the largest embossed edge rectangle and adhered it to a white card base.

Using liquid glue I adhered the rainbow and clouds down next, then trimmed off any excess from the sides. I added foam squares to the back of my image and placed it in the lower center of my card front.

For finishing touches, I glued a scattering of Lemon Drop Dream Jelly Drop Heart embellishments around the design. Then I added a little star dust Stickles to the rainbow clouds in the background.

Isn’t this just the sweetest?!? I love taking my Zigs to color on the go and could see making a whole stack of these cards to share with everyone! I just love it!

Products used on today’s card:
Sending Sunshine stamps and dies
Rainbow Funshine dies
Embossed Edge Rectangle Stack dies
Puffy Cloud stencil
Lemon Drop Dream Jelly Drop Hearts embellishments
Lawn Fawn mermaid ink
Stickles – star dust

I hope you found some inspiration today to create something wonderful and share it with someone!

I appreciate you sharing your time with me. Have a fabulous day!

Miss Ink Stamps | Thermoweb Collaboration – Thanks a Bunch

Hey friends! Just popping in with a super quick showing of my card and redirecting you over to Instagram today to check out the super fun inspiration collaboration hop we’re having with Miss Ink Stamps and Thermoweb!

I used the fall bouquet stamps and tried to color them more bright and cheerful to lean toward a more summery bouquet of flowers. I also paired the Ins and Outs Marquis stencil with the Kaleidescope stencil and threw in some awesome iridescent glitter glitz gel over my ink blending for fabulous shimmer and texture in the background!

I heat embossed my sentiment on a die cut circle, and you know how I love dimension so everything is popped up with foam tape.

Then I finished things off with some glossy accents on the stamen of the poppy flower and berries in the bouquet too.

Products used on today’s card:
Miss Ink Stamps Fall Bouquet stamps
Miss Inks Stamps Ins and Outs Marquis stencil
Miss Ink Stamps Kaleidescope stencil
Thermoweb Iridescent Glitter Glitz Gel
Thermoweb Stencil Pal
Trinity Stamps Embossed Edge Circle Stack dies
Trinity Stamps Blending Buddy brush
Lawn Fawn sunflower and mermaid inks
Glossy accents

Click HERE to head to Instagram and check out the hop! There are gift cards for both companies up for grabs if you hop and comment too!

I appreciate you sharing your time with me. Have a fabuous day!

Paperie Ink – Bearing Hugs

Hello friends! I hope your week is starting off splendid and that you’re not melting like we are in the PNW. Today I am stopping by to share the card that I made my dad for Father’s Day. That weekend was cram packed with end of school, dance auditions and dance recital so we didn’t get to see my dad to celebrate. Well, I finally saw him yesterday to give him his card and gift so I can finally share the fun card that I made for him.

I started off by heat embossing those sweet bears from Paperie Ink’s Bear Hugs and watercoloring them with my Zig Clean Color Real Brush markers. I used the scan-n-cut to cut them out and then switched gears to the background.

For that I ink smooshed Lawn Fawn kiddie pool and blue jay inks on a white panel. Once the panel was dry, I ran it through my laminator to really flatten it out and die cut 3 Pretty Pink Posh diamond tags from it.

Then I took a piece of woodgrain cardstock from my stash and trimmed it to slimline size. I used Lawn Fawn walnut ink and a blending brush around the edges for a little depth. Then I smooshed the ink pad on my glass mat, spritzed it with water and flicked it all over the panel.

I used liquid adhesive to adhere the panel to a white slimline card base and then added foam tape and squares to the back of the tags and images. I equally spaced out the tags and adhered them down. Then I added the bear images on top of those. I stamped a sentiment from Bear Hugs and used the Trinity Stamps 4-Bar Card die set to cut it into a banner. I used a foam strip to adhere it underneath the middle bears.

For finishing touches on my card, I added a scattering of Trinity Stamps Boiled Sugar Jelly Drop Hearts across the design. Then I took the Newton’s Nook Mom and Dad stamp set and stamped Happy Father’s Day on the inside where I would write my message.

I am so happy with how this card turned out and was excited to give it to my dad. He really seemed to enjoy it too!

Products used on today’s project:
Paperie Ink Bear Hugs
Pretty Pink Posh Scallop Diamond Tag dies
Trinity Stamps 4-Bar Card dies
Trinity Stamps Boiled Sugar Jelly Drop Hearts
Trinity Stamps Blending Buddy brush
Lawn Fawn inks – walnut, blue jay, kiddie pool

I appreciate you sharing your time with me. Have a fabulous day!

Pretty Pink Posh – Sending Good Vibes

Hello everyone! Today I have a super bright and fun card featuring some of the newest release from Pretty Pink Posh. I absolutely adore everything in this release and couldn’t wait for my orders to arrive!

For today’s card, I started by playing around with Color Burst watercolor powders on watercolor paper and a spray bottle. Oh boy did I make a huge mess! But it was loads of fun! I highly recommend it.

I sprayed my paper with water and shook a little chartreuse powder on it, then sprayed it some more and used my heat gun to push the water around. Once that was dry I shook a teeny bit of fuchsia powder and sprayed it with water, repeating the same thing with the heat gun until my panel was dry. Even when I used watercolor paper, my paper warps when I do things like this so I always run it through the laminator a couple of times to flatten it back out.

Next, I taped my panel down on my glass mat, sprayed the squiggles stencil with pixie spray and adhered it over top. Then I spread iridescent glitter glitz gel through the stencil. I removed it and set the panel aside to dry while I cleaned up.

Then I stamped and heat embossed the summer wreath image in white on vellum and used the coordinating dies to cut it out. Finally I stamped that cute lion from Summer Fun and colored him with my copics. I used the coordinating dies to cut him out and started assembling my card.

I used liquid glue to adhere the stenciled panel to a white card base. Then smeared a thin layer of liquid adhesive behind the wreath and put it in place as well. At this point, I put a stack of acrylic blocks on top of the whole card front while the liquid glue dried. Then I added foam squares behind my lion and popped him in place.

I finished things off with some white pearls from Pink & Main and some glossy accents on the lion’s glasses and nose.

Such a messy fun card to create and I love how everything turned out too!!!

Products used on today’s card:
PPP Summer Fun stamps and dies
PPP Summer Wreath stamps and dies
PPP Squiggles stencil
Pink & Main Essential Pearls
Thermoweb Pixie Spray
Thermoweb Iridescent Glitter Glitz Gel
Glossy Accents

I appreciate you sharing your time with me. Have a fabulous day!

Birch Press Design – Friend

Happy weekend everyone! We’re having a huge heat wave where I’m at so I hope you’re all staying cool and having a fabulous day! I’ll be hibernating in the craft room with the air conditioner blasting!

But first, I’m over on the Birch Press Design blog today with a simple thinking of you friend card.

I’m so partial to teal colors so I pulled out some teal cardstock in two shades and a light teal glitter cardstock and die cut the layers for the Mini Grandiose Bevel Layers. Then I cut strips of the mid-tone cardstock for above and below my layered strip.

I stamped and heat embossed a sentiment from the Brushed Sentiments set on the bottom strip. Then I used liquid glue to adhere everything to a white card base.

I die cut the Big Friend Sugar Script letters from black cardstock three times and the shadow from white once. I used liquid glue to adhere the layers and added foam squares to the back with the except of where it will overlap the layered strip. I removed the release paper and placed it down.

For finishing touches on this card, I added small fairy jewels to the inside of the layered strip and a scattering of varying sizes across the design for added interest.

If you’d like a more detailed tutorial of this card, head over to the Birch Press Design blog and check it out.

I appreciate you sharing your time with me. Have a fabulous day!