Happy Mix it up Monday friends! I’m here with a lighter and brighter take on outer space than I typically choose. It’s been hot so I’ve had watercolors out to play with and had the urge to try some lighter galaxy vibes. I had fun and the outcome is really pretty!
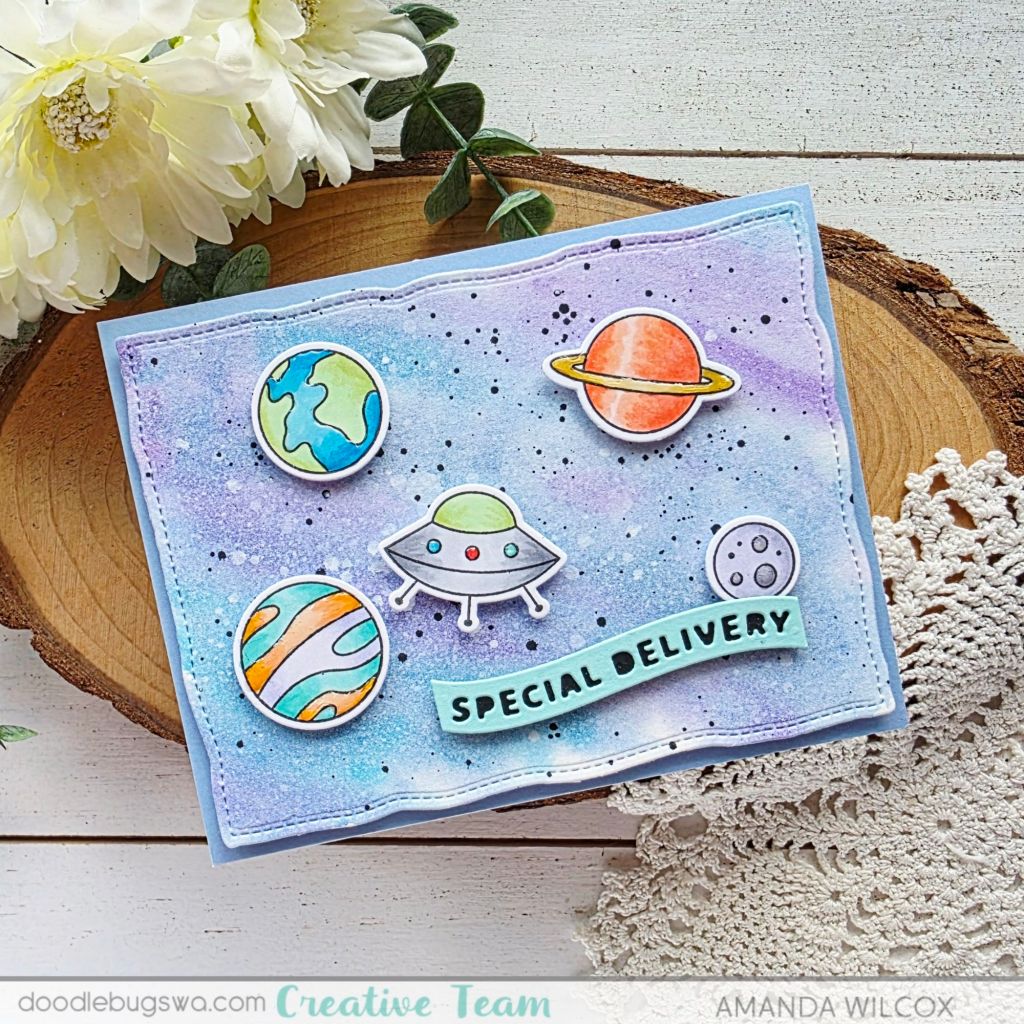
To create my card, I played with watercoloring the background one evening and then chose some images from the Pretty Pink Posh Outer Space set to stamp. The next morning, I splattered the watercolor panel with white and black paint and colored my images with copic markers before it heated up.
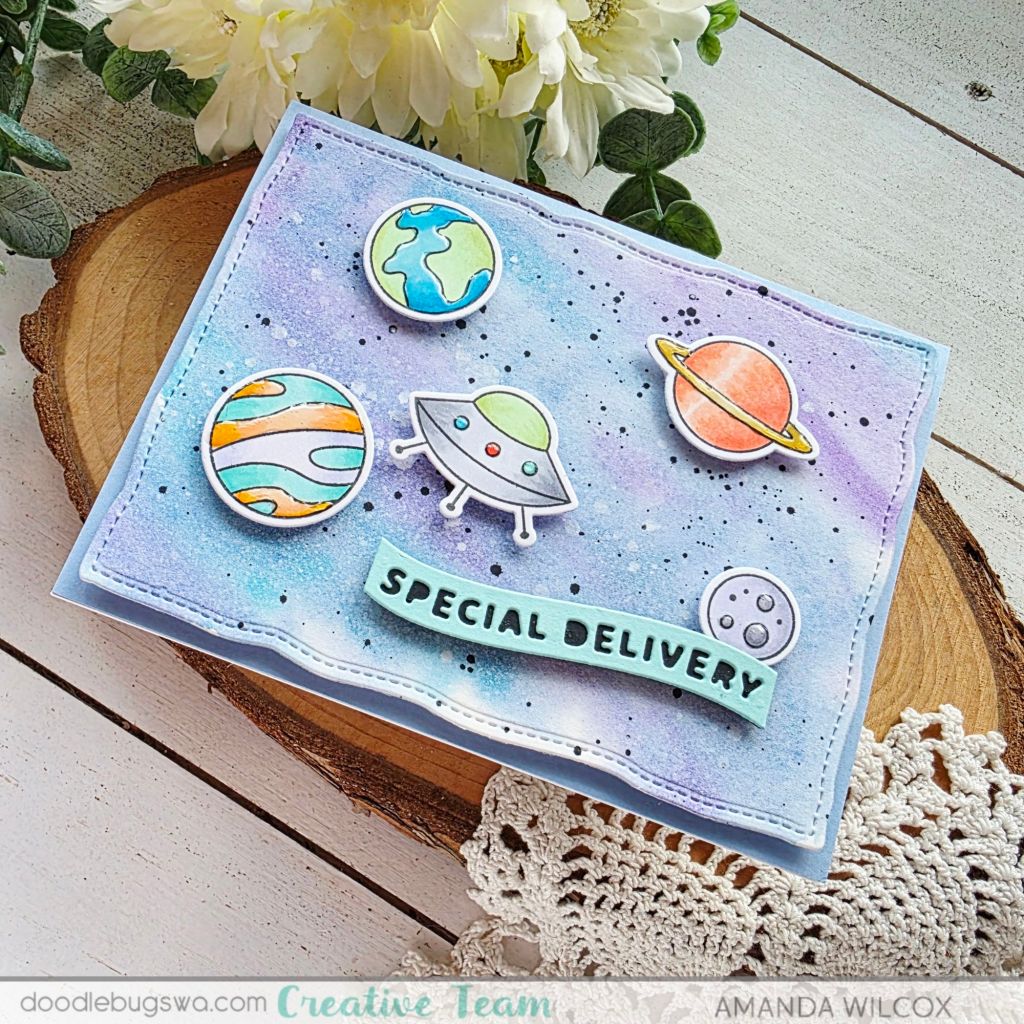
That evening I die cut the background panel with one of the Mama Elephant Mod Heart dies. Then I used coordinating dies to cut the images out as well. For my sentiment I chose a Banner Greeting from Mama Elephant. I added foam to the back of everything because you know I love my dimension!
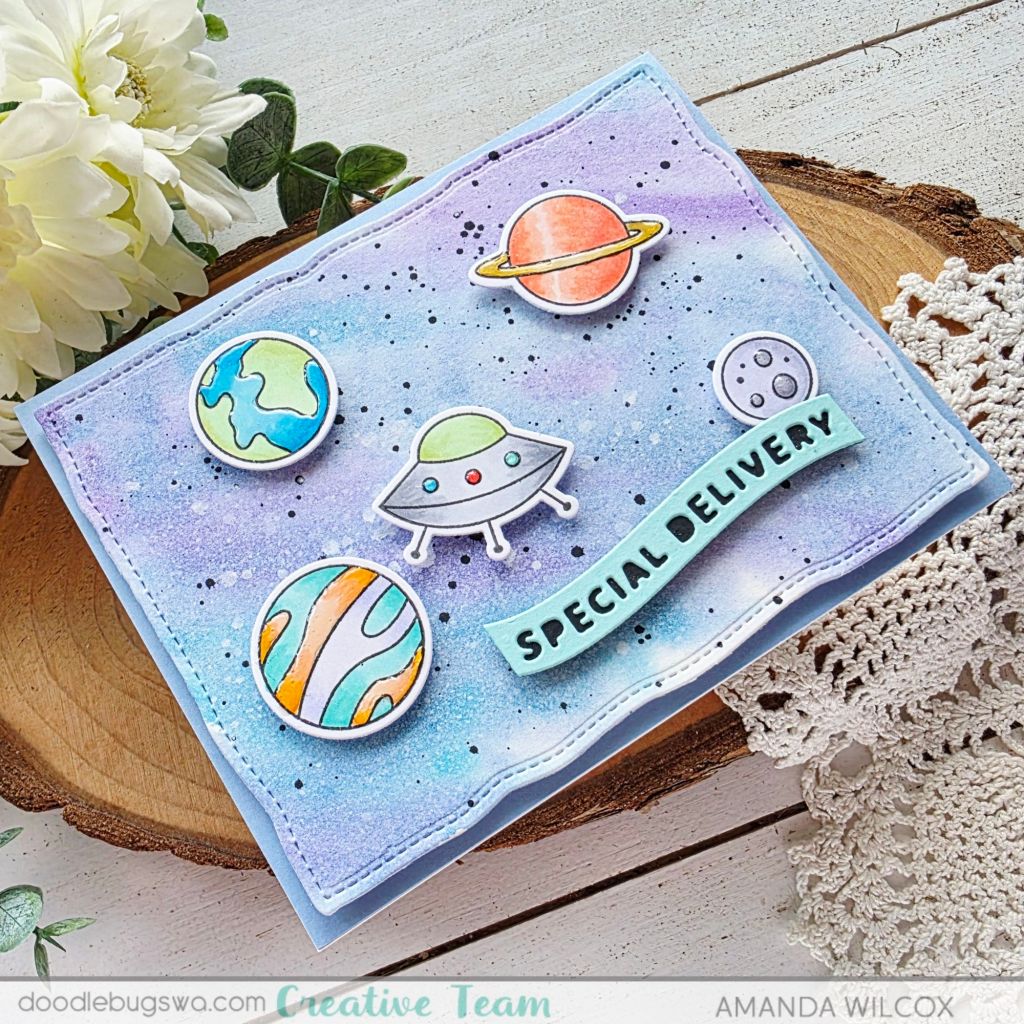
Before assembling it all I chose a light periwinkle blue cardstock to adhere to my card base, then I removed the release paper and adhered things one layer at a time. Then for finishing touches I added glossy accents to bits of each image.
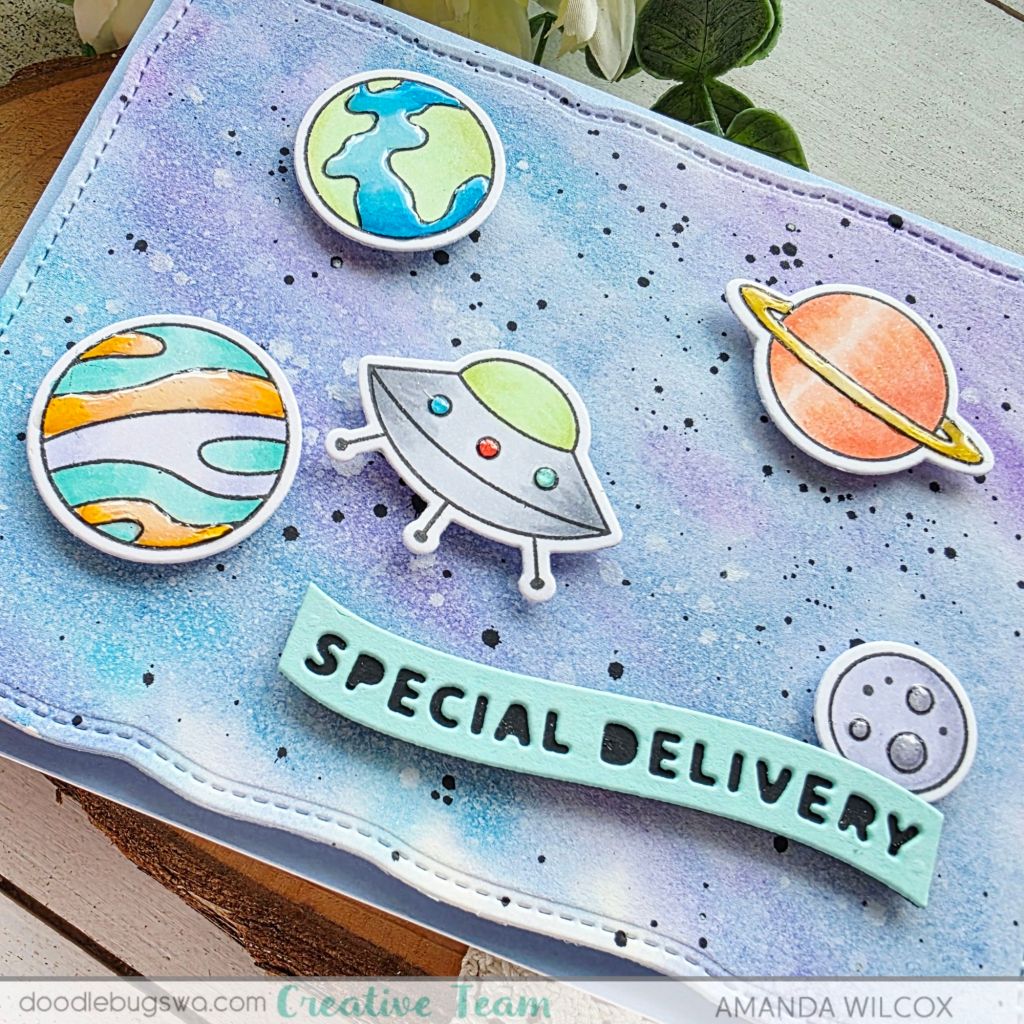
Isn’t this a fun card!?! The sentiment is generic enough that it could be used for any number of occasions from new baby boy to just sending love. These kind of cards are my favorite to make and have on hand because that right occasion is just around the corner every single time.
I appreciate you sharing your time with me. Have a fabulous day!