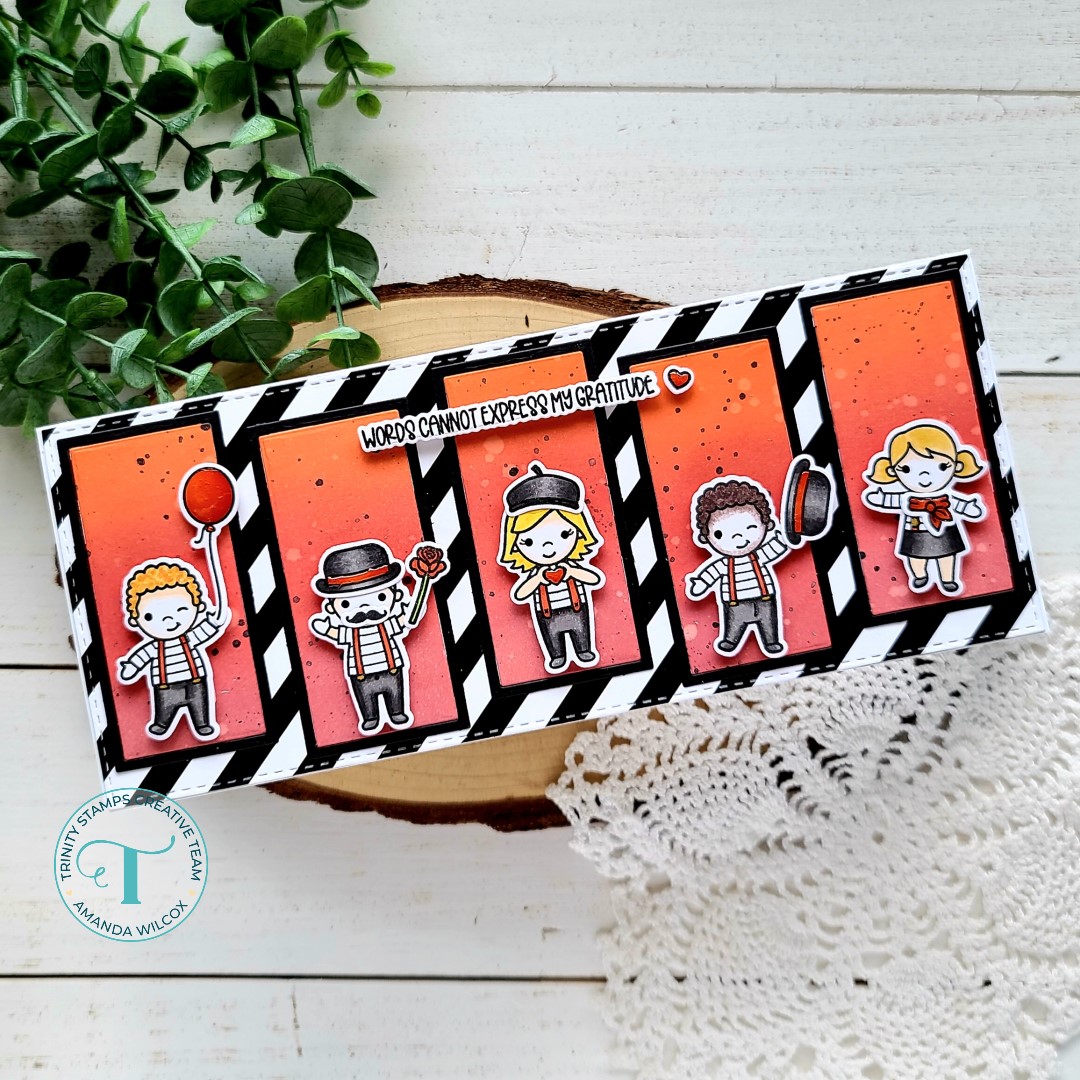
Welcome back again! I’m over on the Trinity Stamps blog today with this super adorable mime card featuring stamps from the newest release paired with older products that might already be in your stash!
Here’s a little walk through of how I created today’s card. And of course, it starts with getting messy!
I inked up a panel with distress oxide inks in ripe persimmon, candied apple and fired brick. I’ve been having fun trying new combinations with my inks lately and definitely like how bold and vibrant this one is.
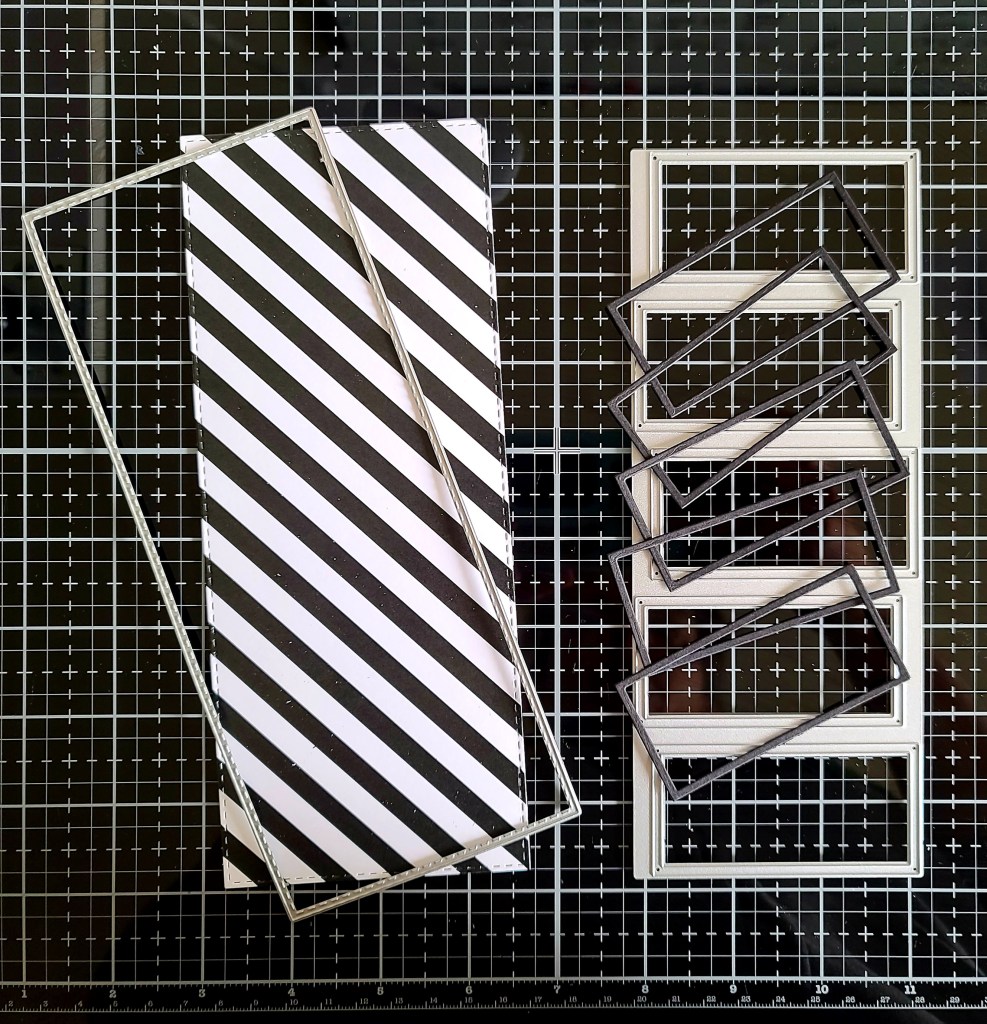
Next, I splattered it with water and black acrylic paint. Once that was dry, I die cut it with the staggered rectangles die and kept only the inner rectangles from the windows seen here.
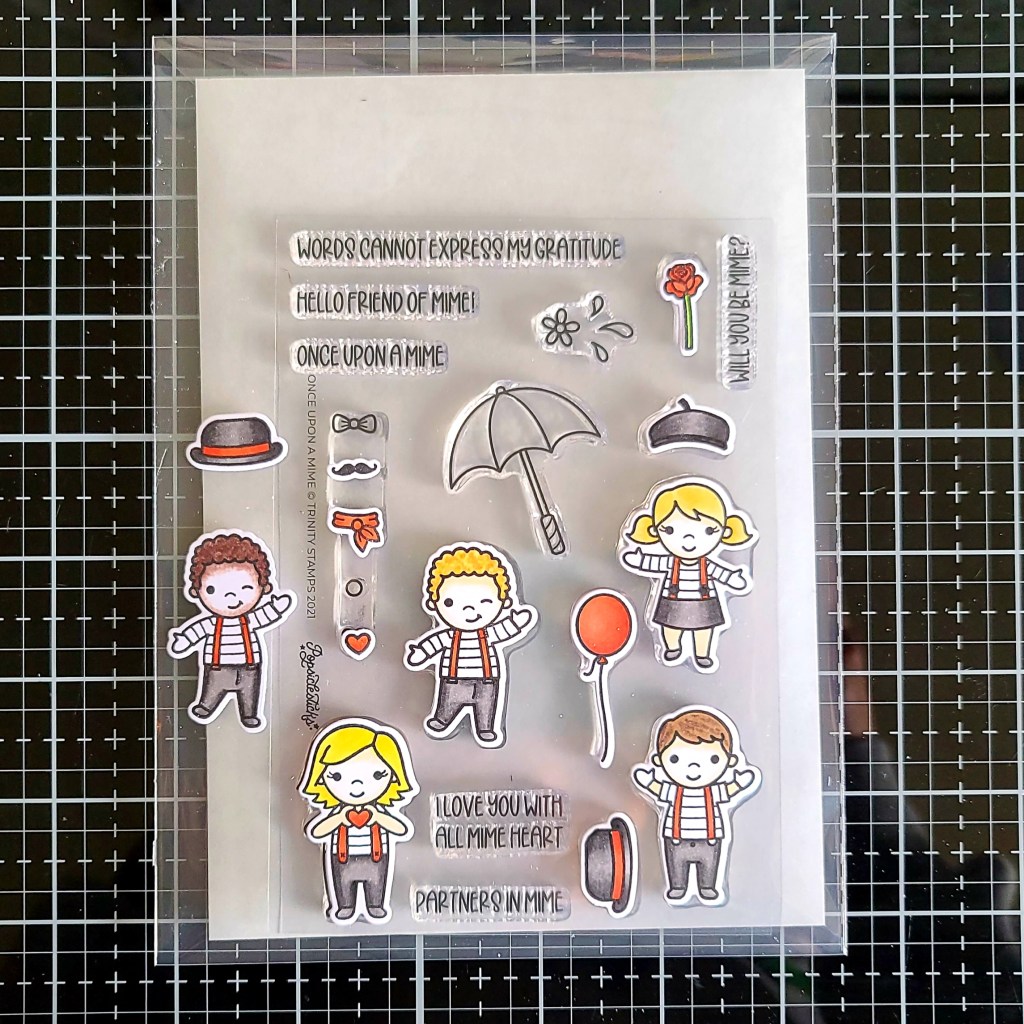
Finally, I stamped and colored the super cute images from Once Upon a Mime and used the coordinating dies to cut them out. Since there are 4 kiddos in this set, I stamped a duplicate one and colored him different to help set them apart.
Moving on to assembly, I added the striped panel to a white card base with liquid glue. Then I carefully spaced the rectangle frames, adhering them with liquid glue as well. Once those were in place it was easy to glue down the red panels inside and pop up all my kiddos with foam squares. I added the “extras” to the mimes with liquid glue as well.
Last, I finally chose a sentiment, stamped it and die cut it out. Then I popped it up, along with an extra heart and moved on to finishing touches. For those, I added black glaze pen to all the mime’s eyes and glossy accents to various things like hearts, the balloon and parts of the hats. Then I pulled out some gold watercolor and carefully painted the suspender buckles on everyone.
Isn’t this set just adorable!?! The sentiments are adorably punny and it’s all so much fun to create with!
I appreciate you sharing your time with me. Have a fabulous day!
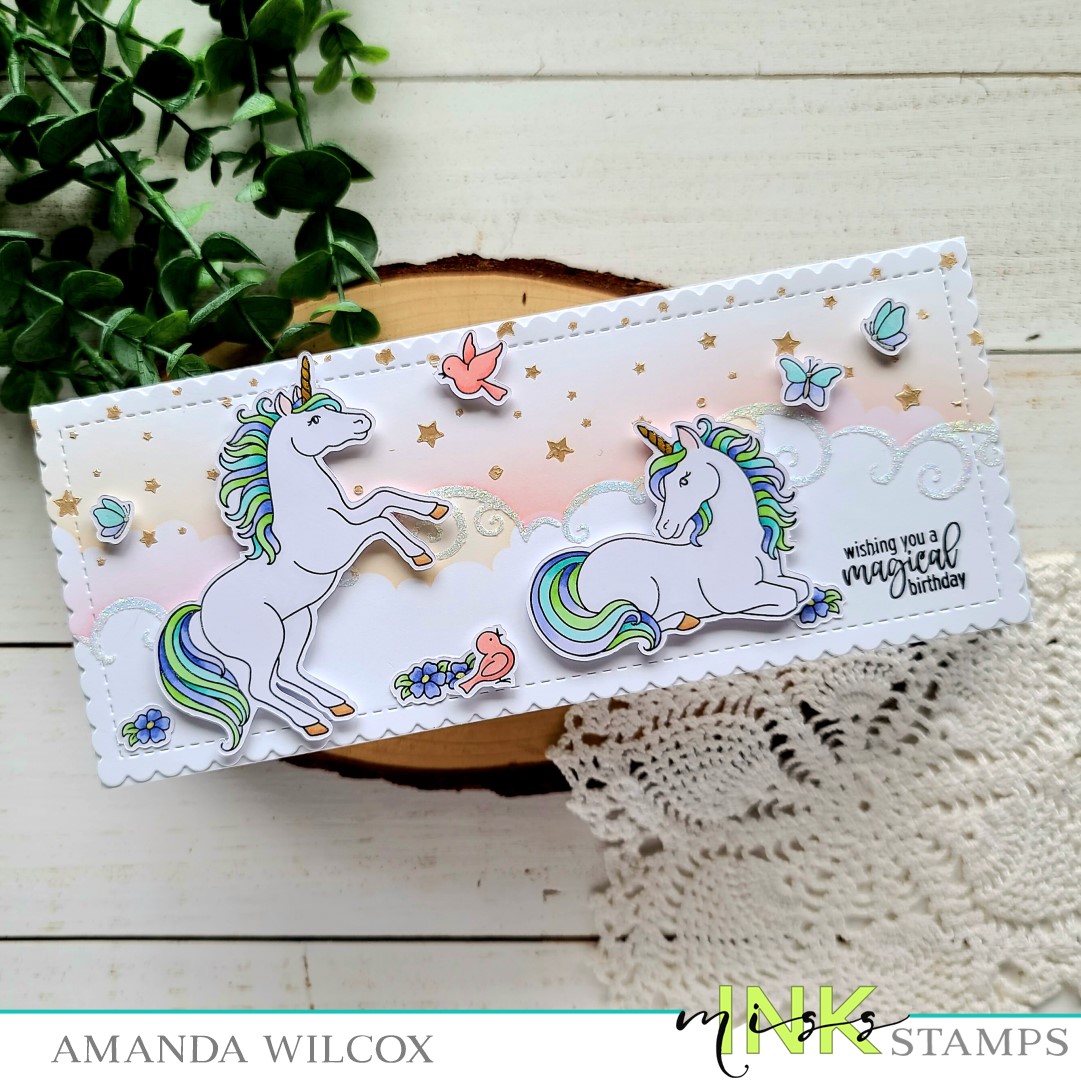
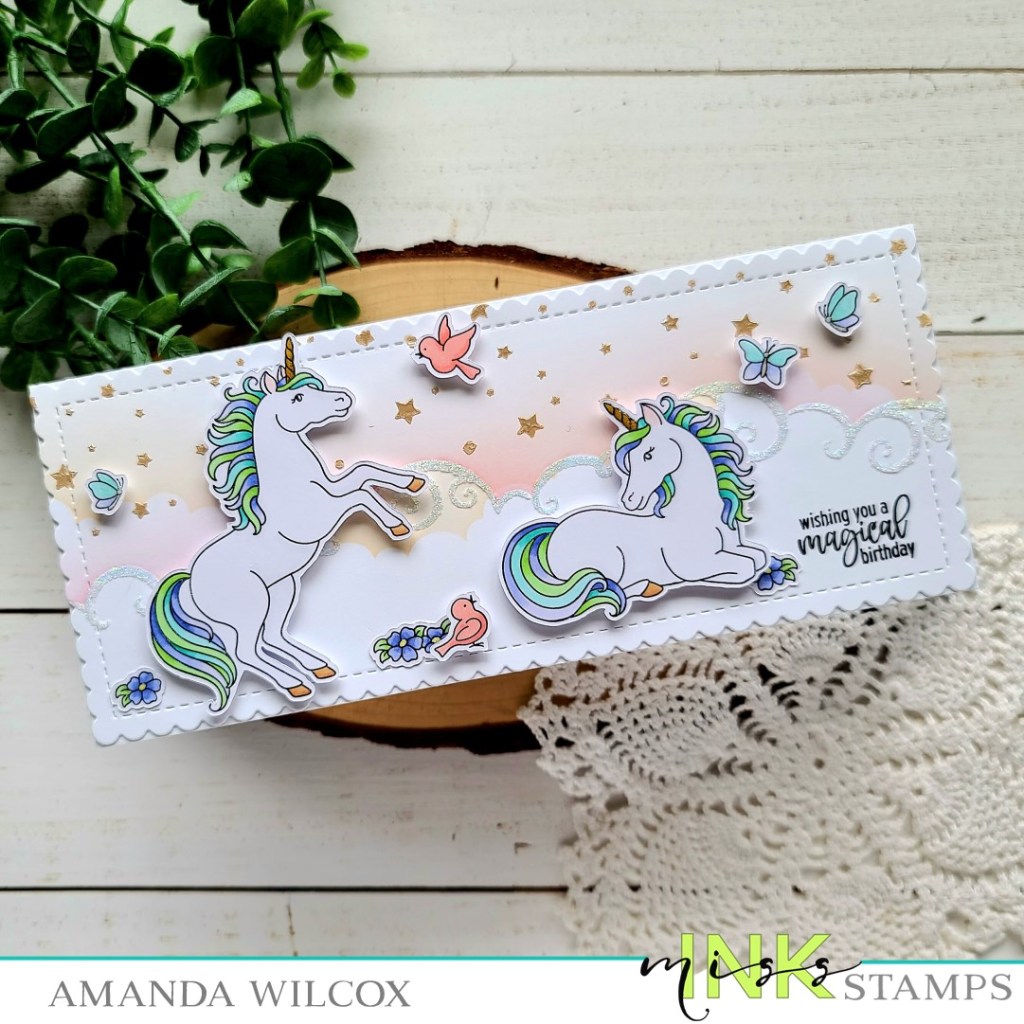
Welcome everyone! Today I’m over on the Miss Ink Stamps blog featuring this beautiful slimline unicorn card. It features some products from the recent release like Lovely Unicorns stamps and the scene builder: clouds and starry night stencils.
Since my blog is so packed today. I’m just going to show you the card and link you over to the Miss Ink Stamps blog HERE if you’d like to check out the details further.
I had a lot of fun getting inky and messy to create the background for this card. Be sure to check out the blog post if you’d like to see more process photos how I created it all.
I appreciate you sharing your time with me. Have a fabulous day!
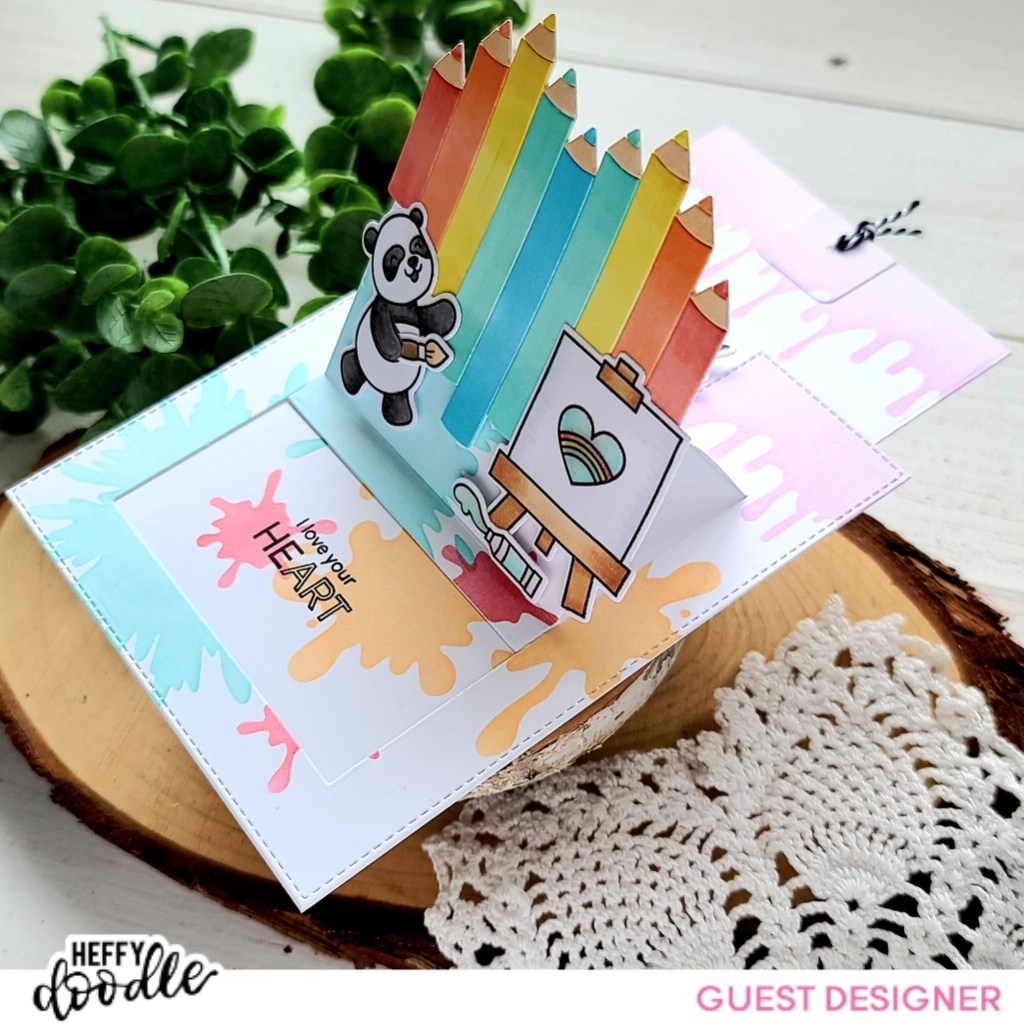
Hello my wonderful friends! I am over the moon to announce that I’m guest designing for Heffy Doodle this month and today is my first post! I couldn’t resist their new release and had to order almost all of it…and I’m already wishing I had the rest. So, I’m sure I’ll be back for more soon. Head over and check it out if you haven’t already.
I just knew that I wanted my first card to feature these amazing pandas from the Pandtastic Painters set, the Messy Desk stencil and the new Slider Pop Up die set. So the first thing I did was pull those items out and start deciding on my design so I could stamp and color images. I colored everything with copic markers and used the coordinating dies to cut the images out.
After I had the images cut out, I inked up a panel with the Messy Desk stencil and cut it out with the Slider Pop Up die. Laying my images on the panel gave me the great idea to cut out the Heart Pencil from white cardstock and color those in with my copics too, as part of the background.
Now that I have the front of the card figured out, I went back and cut the piece of the Slider Pop Up that pulls out and makes the card move. I inked the top of it up to match the rest of my card front so it was seamless. Then I took a white card base and inked up the Messy Desk stencil where the slider would show when the tab is pulled. I also stamped a sentiment here for added fun!
Now that I have all of my pieces, it’s time to assemble my card. I added double sided tape to the bottom of the slider mechanism and attached the card that you use to pull out. Next, I added more double sided tape to the back of the front panel on the sides and bottom, staying away from the sliding card, and adhered it to my card base.
Then for the front of the card, I adhered the Pandtastic images to the Heart Pencil with liquid glue. I carefully added foam squares to the bottom portion of the images that will be sticking to the moving mechanism. Remember to keep adhesive only below the crease line. I popped the images in place softly and tested it out just to make sure. When everything moved correctly I pressed down firmly.
For finishing touches, I added glossy accents to the panda’s nose, paint coming out of the tube and heart on the canvas. Then, I decided to stamp and cut out a sentiment banner from the Wavy Banner Sentiments and add it to the top left. The very last thing I did for this card was pull the slider mechanism out, punch a hole in it and add some baker’s twine to make it easier to use. Another tip here is to add your slider mechanism with foam so there is a larger gap to grab the tab.
I had so much fun creating this card. I really hope you liked it and find some inspiration to create something wonderful! I appreciate you sharing your time with me. Have a fabulous day!
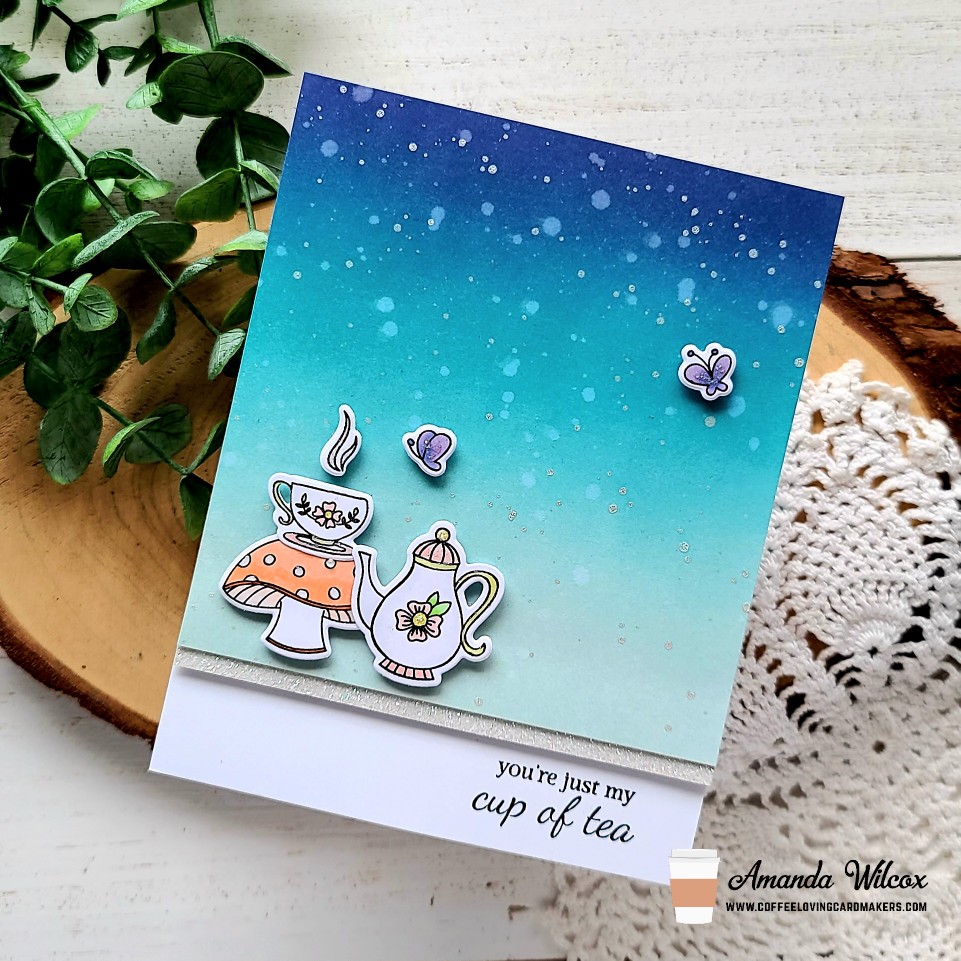
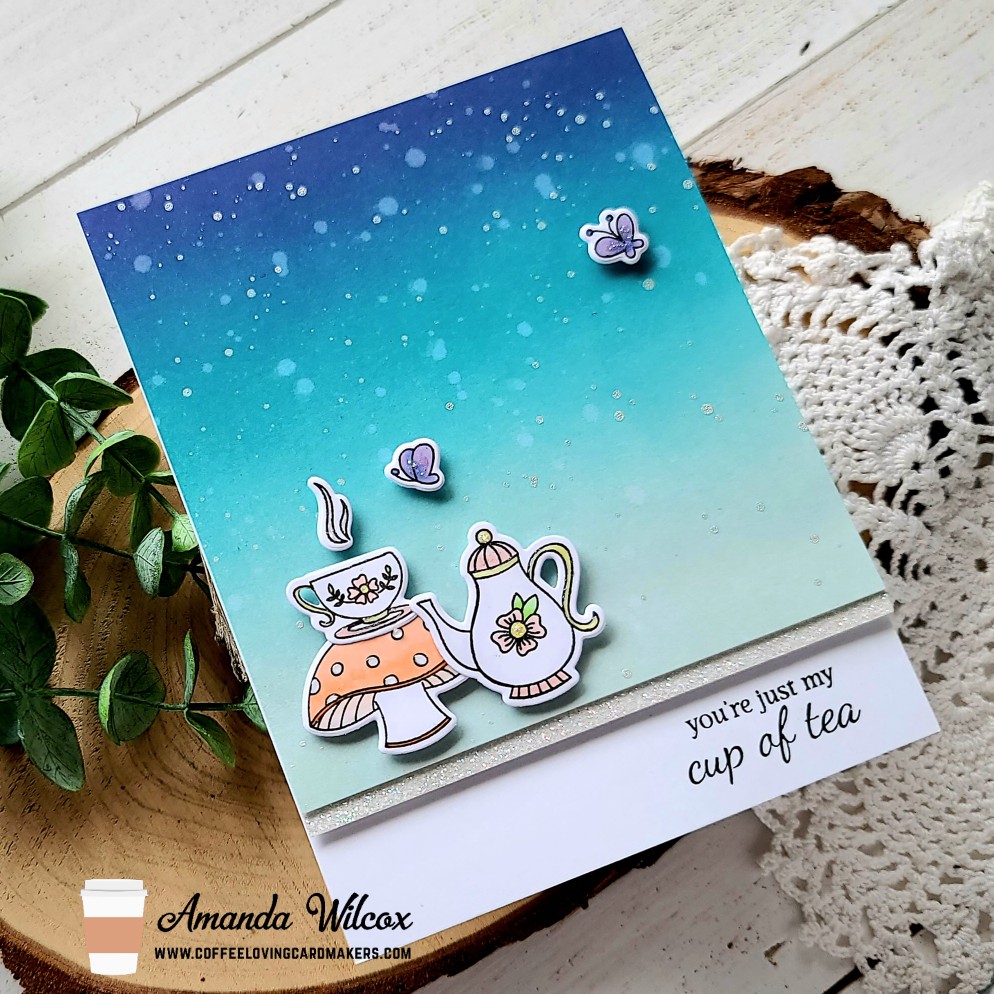
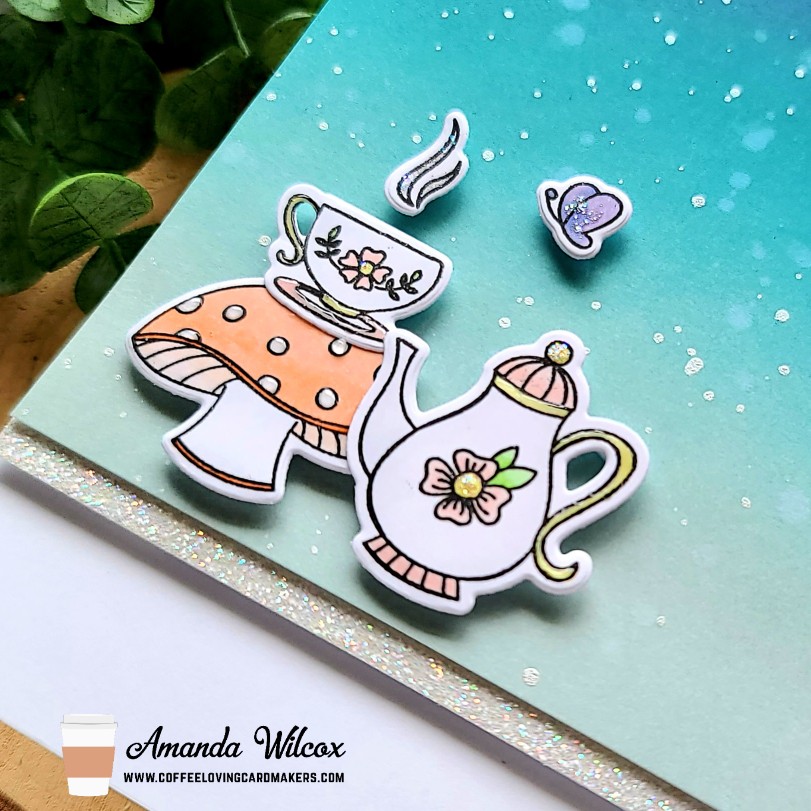
Hi everyone! It’s time for another Tuesday Tea over on the Coffee Loving Cardmakers blog today. I had some fun playing with the secondary images in a new-to-me set from Hero Arts called Mouse Tea Party. There are some adorably cute mice in this set ready for a tea party, along with great sentiments and other fun images too.
I stamped and colored images from the set with my copic markers, keeping to pinks and oranges because I knew I wanted a blue/teal background so they would pop and not get lost. I used the coordinating dies to cut them out and moved on to getting inky.
I blended chipped sapphire, peacock feathers and speckled egg distress oxide inks on a while panel, then splattered it with water and pearl watercolor. Then I trimmed the panel down to 4.5×4.25 inches and added a strip of white glitter paper to the bottom. I added foam tape to the back and popped it on a white card base. Then I stuck that in my MISTI and stamped a sentiment on the bottom right side.
Next, I added foam squares to the back of my images and popped them in place. Moving on to finishing touches, I added glossy accents to the mushroom dots, and parts of the teacup and teapot. Then I went ahead with a little more sparkle by adding stardust Stickles to the steam, butterflies and flower centers.
I appreciate you sharing your time with me. I hope you’ve found some inspiration to create something wonderful and share it with someone too!
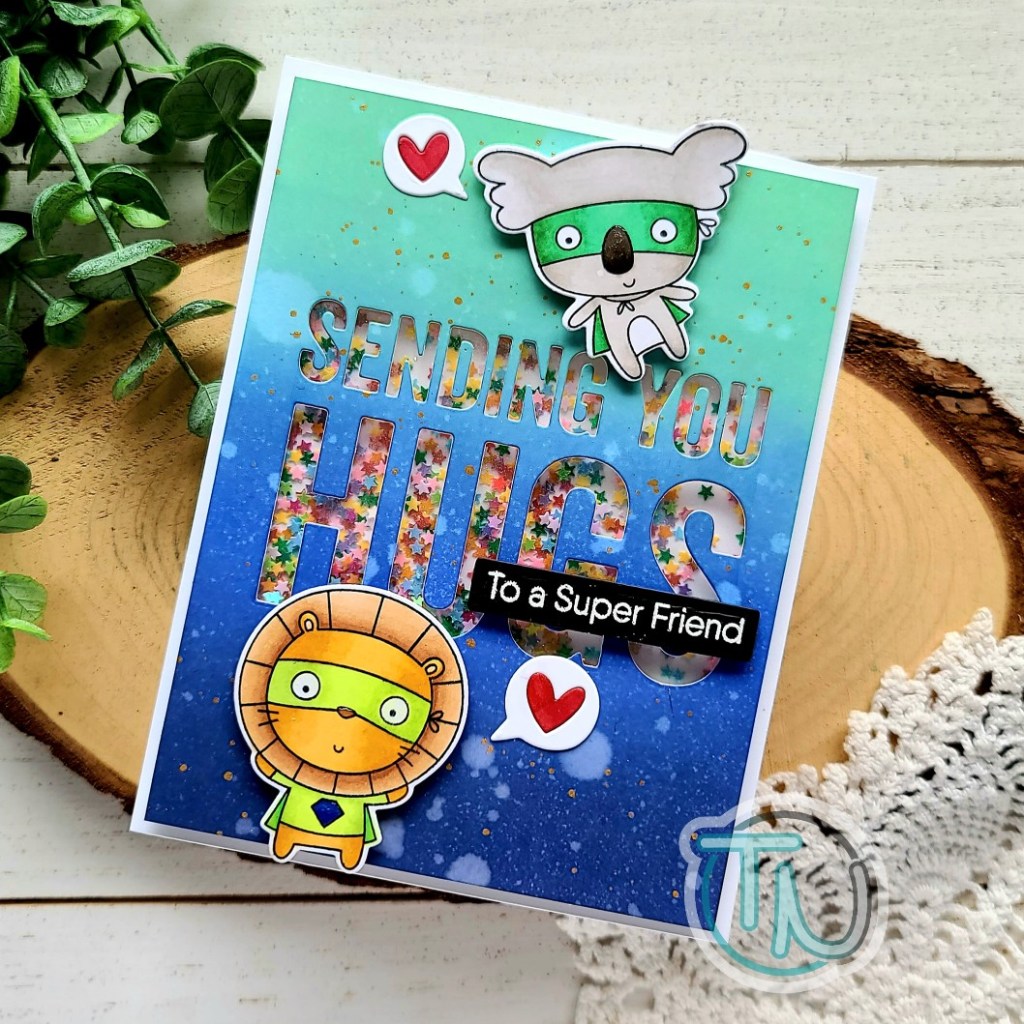
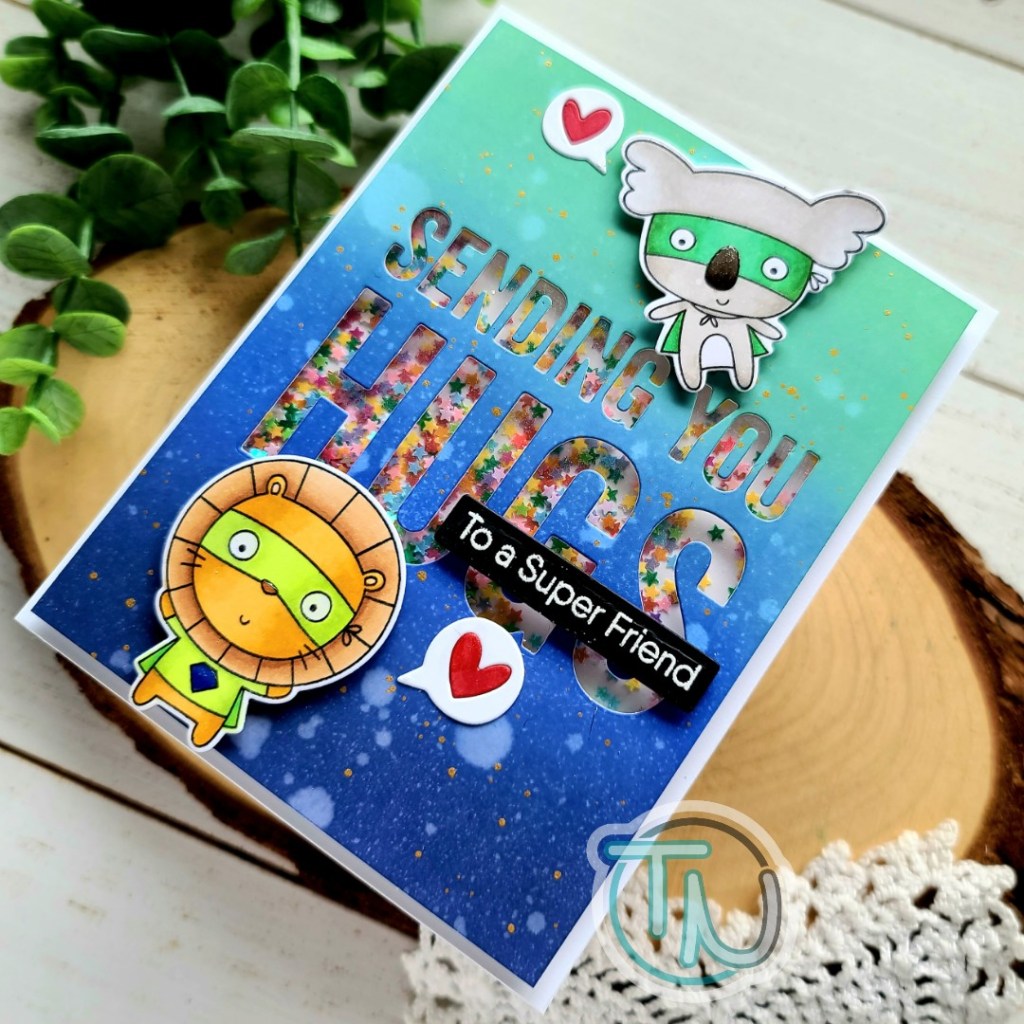
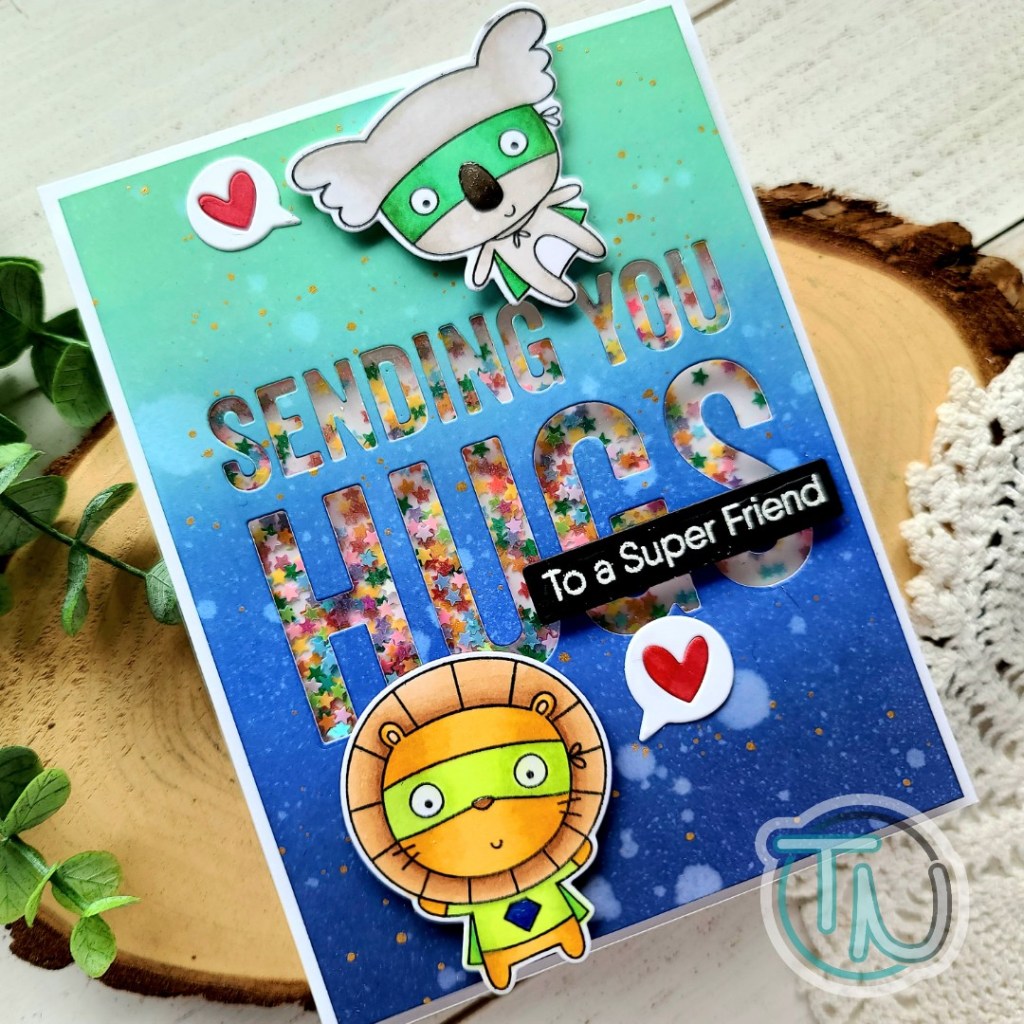
Hello everyone! I’m popping in today with a really fun card share featuring some MFT Stamps products that I just love! These Super Friend critters are just too cute and so fun to create with! I have had this Sending You Hugs die for a while and was excited to finally put it to use too!
To create this fun card, I started by inking up a panel with distress oxide inks in chipped sapphire, blueprint sketch and cracked pistachio. Once that was blended, I spritzed it with water. Then I came back and flicked some gold watercolor over the panel. I set it aside to dry before die cutting it with the sending you hugs die.
Next, I stamped a couple of the critters from Super Friends and colored them with my copic markers. I used the coordinating dies to cut them out and went back to my background panel to create the shaker mechanism. For that, I trimmed down some acetate and adhered it to the back of the die cut area with scrappy tape. Then I lined the panel with thick foam tape, creating a well in the center for my shaker bits. I piled some Twiddler’s Nook Wishing on Rainbow Stars confetti in the center of my white card base, removed the backing paper from the foam tape and adhered my panel to it. Voila! All sealed up and ready to shake, shake, shake!
I added foam squares to the back of the super friends and popped them in place. Then I took a sentiment from their set, stamped and heat embossed it in white. I trimmed that into a strip and popped it up with foam strips. This is when I remember those cute love speech bubbles that I had in my stash and thought they would be a great addition. So I die cut them from white cardstock, colored the hearts with red copics and glued them down with liquid glue.
Moving on to finishing touches, I simply added glossy accents to the koala’s nose and lion’s shirt emblem.
This card is so happy and so much fun too! Wouldn’t you just smile pulling it out of an envelope? I sure would!
I appreciate you sharing your time with me. Have a fabulous day!
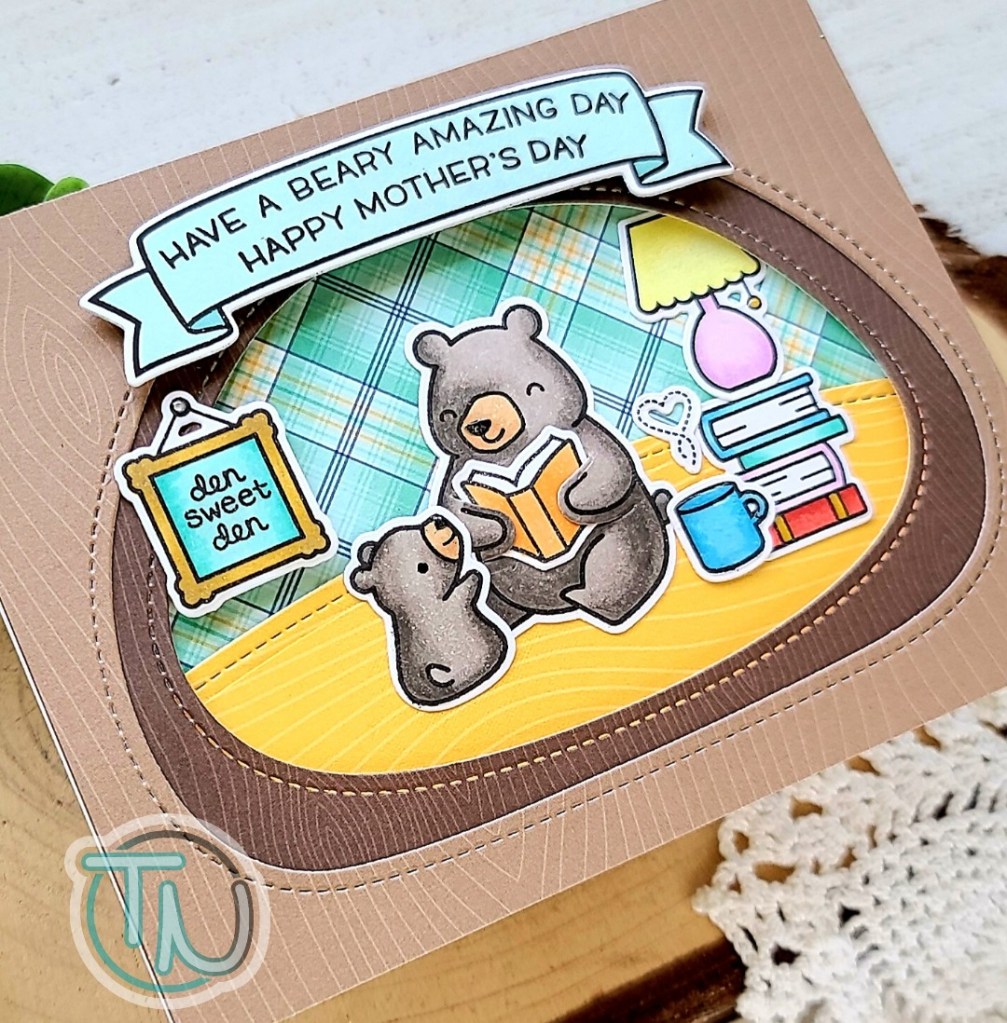
I pulled out the Den Sweet Den stamp set and chose some images to fill my scene. I stamped them and colored them in with my copic markers. Next, I used the coordinating dies to cut them out and started arranging things. Then I dug in my paper stash and pulled out some Lawn Fawn patterned paper to create the scene layers.
For the den I chose the light and dark brown Knock on Wood paper and die cut the two largest layers. For the inside of the den I used Perfectly Plaid Chill paper with yellow Knock on Wood for the floor. I die cut the top of the yellow wood grain paper with a stitched hillside border. Phew! With all of that finished, let’s start assembling.
I adhered the den layers together with liquid glue and added foam tape to the back of the panel. Then I glued the plaid paper to a white card base and added the floor as well. Next, I used my den layers as a guide to adhere the images in place so that nothing was too far to one side and covered up. Then I removed the backing paper and actually adhered the den layers down. I added some foam squares behind half of the sign and liquid glue on the other part and popped it in place next.
For my sentiment, I pulled out Bannertastic and stamped the outline. Then I pulled sentiments from Mom + Me and Dad + Me, curved them on my MISTI tool and stamped them inside the banner. Next, I used Lawn Fawn dye inks to fill in the banner with the coordinating stamps. Finally, I die cut it, added foam squares and popped it on the top of my card design.
For finishing touches on this sweet card, I added glossy accents to the nail hanging the sign, bear noses, coffee mug, book spine and lamp pull knob. I added a little black glaze pen to the baby bear’s eye and Wink of Stella glitter brush pen to the frame, coffee steam and lamp shade.
Isn’t this scene just adorable! I love how these “winter” products can really be used all year round for different themed cards. It’s so much fun!
I appreciate you sharing your time with me. Have a fabulous day!
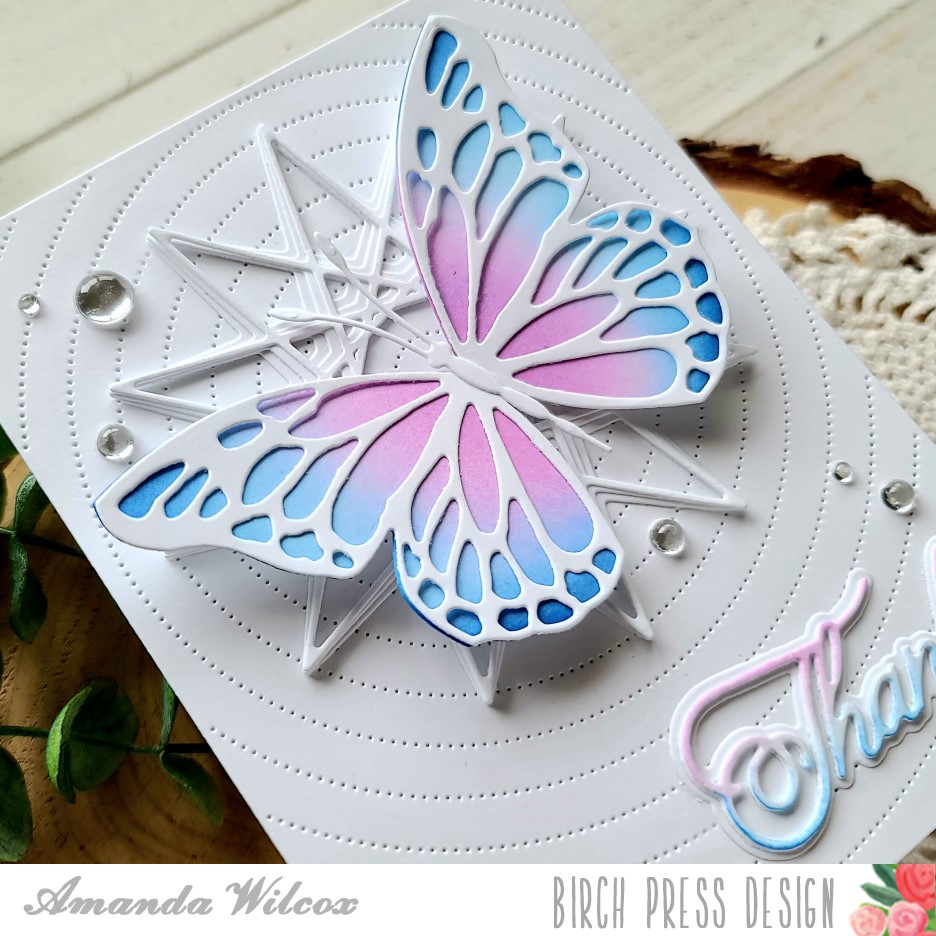
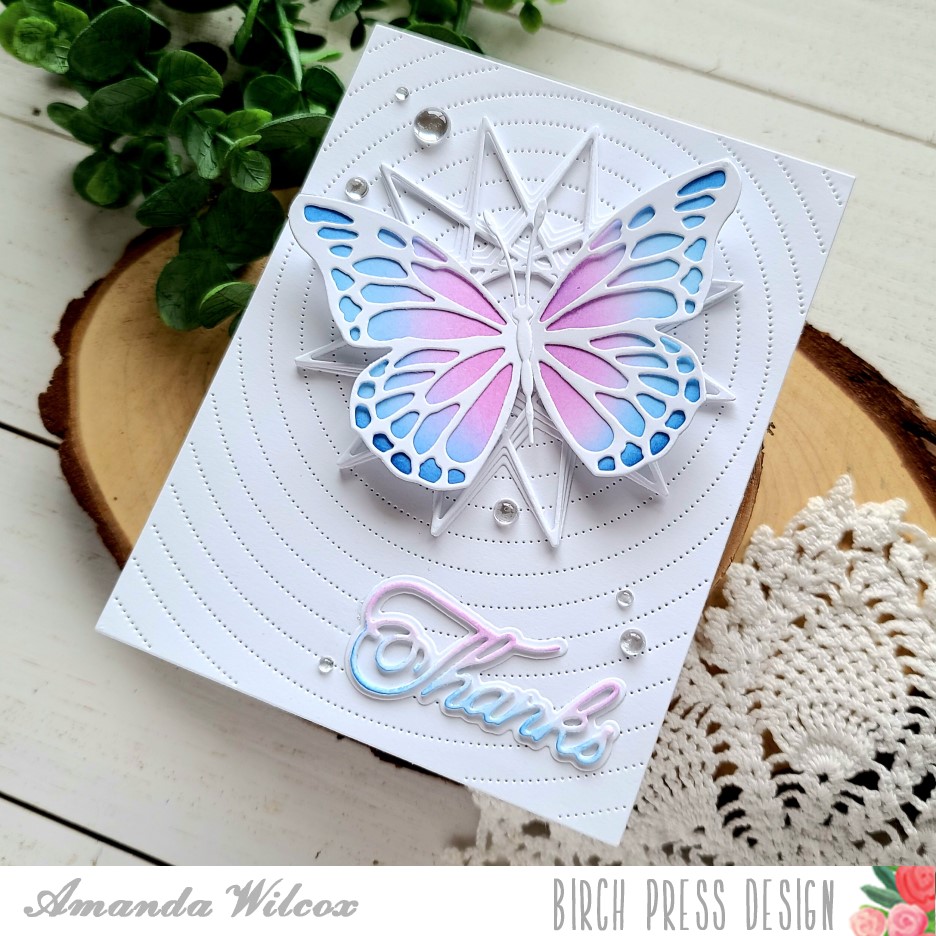
Happy weekend everyone! I’m over on the Birch Press Design blog today with a card featuring a bunch of the brand new products that just hit the shop! Let me start by saying…I’m hooked! I could make butterflies for DAYS!!! Here’s a look at today’s card.
The new butterfly basics die set is absolutely amazing! That’s what I used to create today’s butterfly but there are 4 other layering butterfly sets available too!
I layered todays butterfly over the new starburst layering dies and the awesome radial pinpoint coverplate that is so versatile! I just love it!
I finished things off with a new handwritten thanks sentiment and some cool fairy drops that are new to the shop too!
I appreciate you sharing your time with me. Have a fabulous weekend!!!
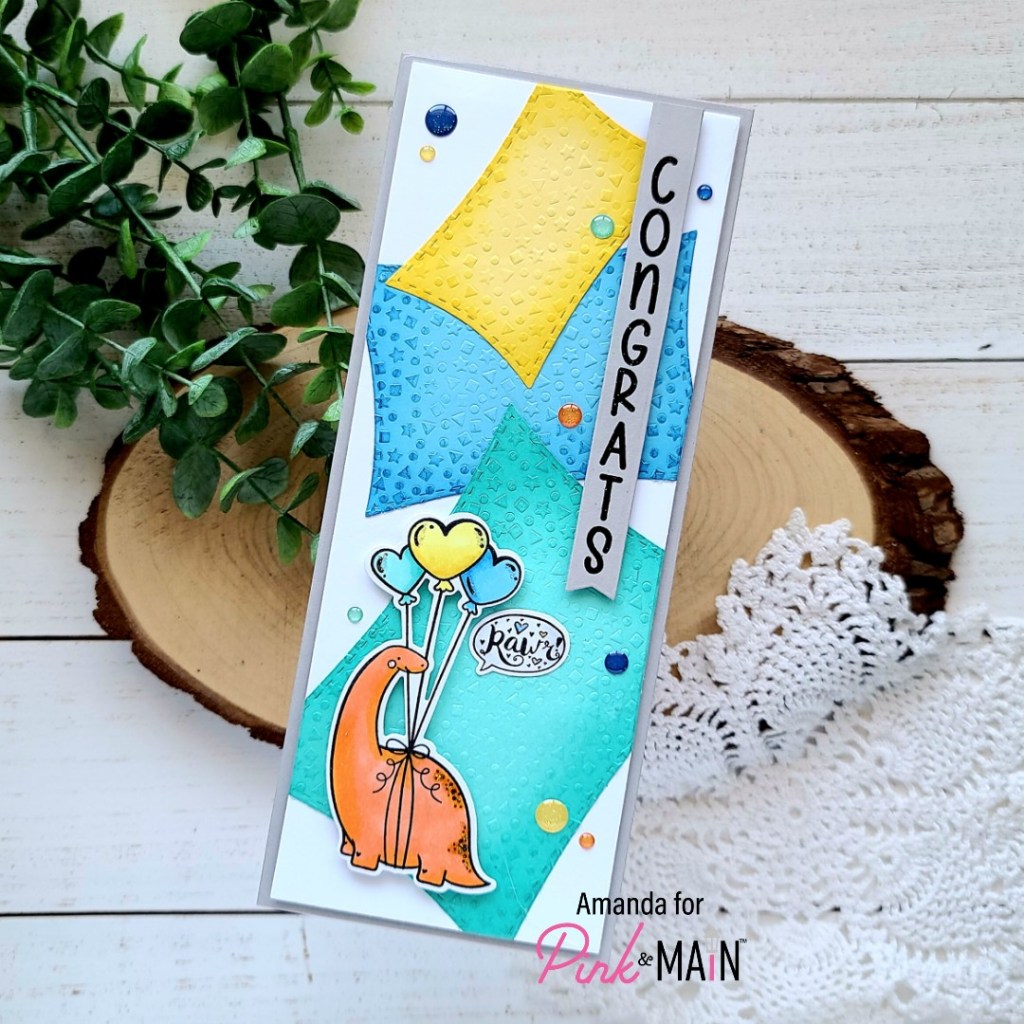
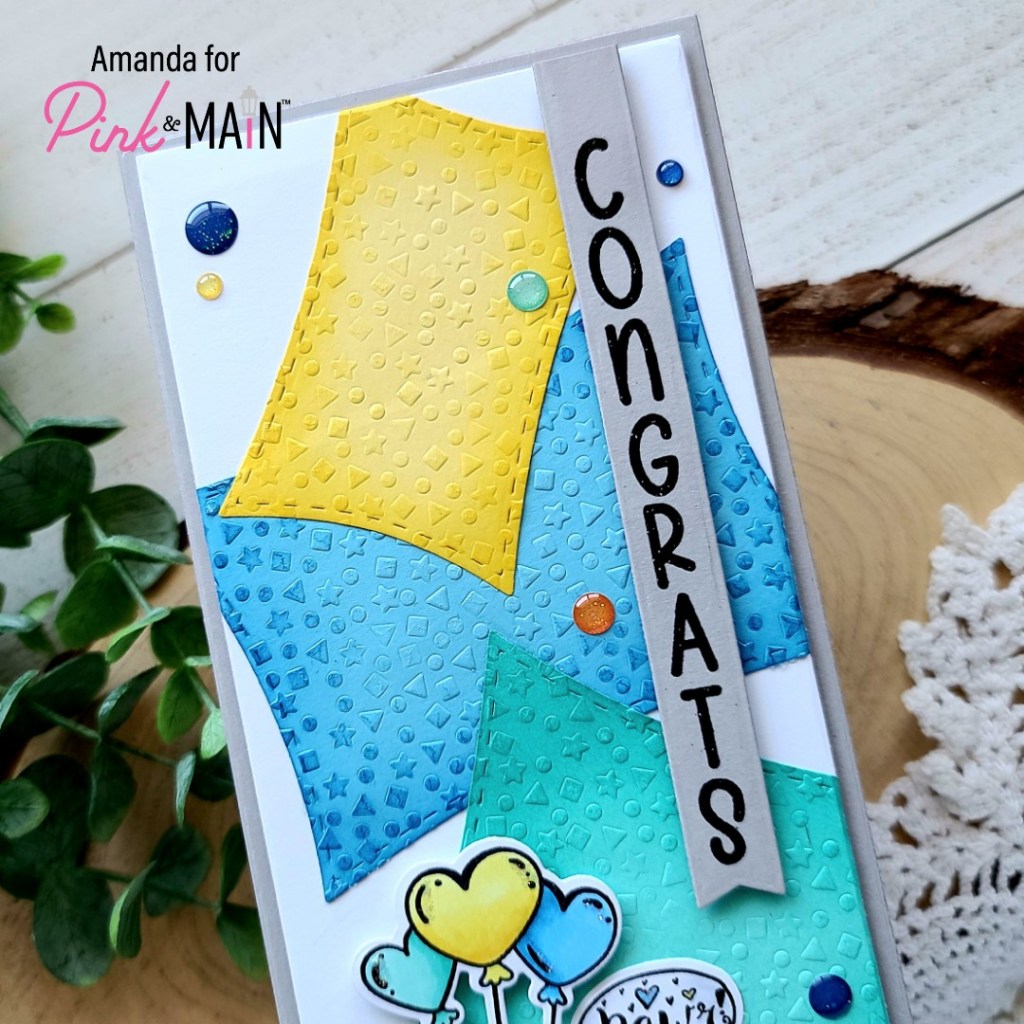
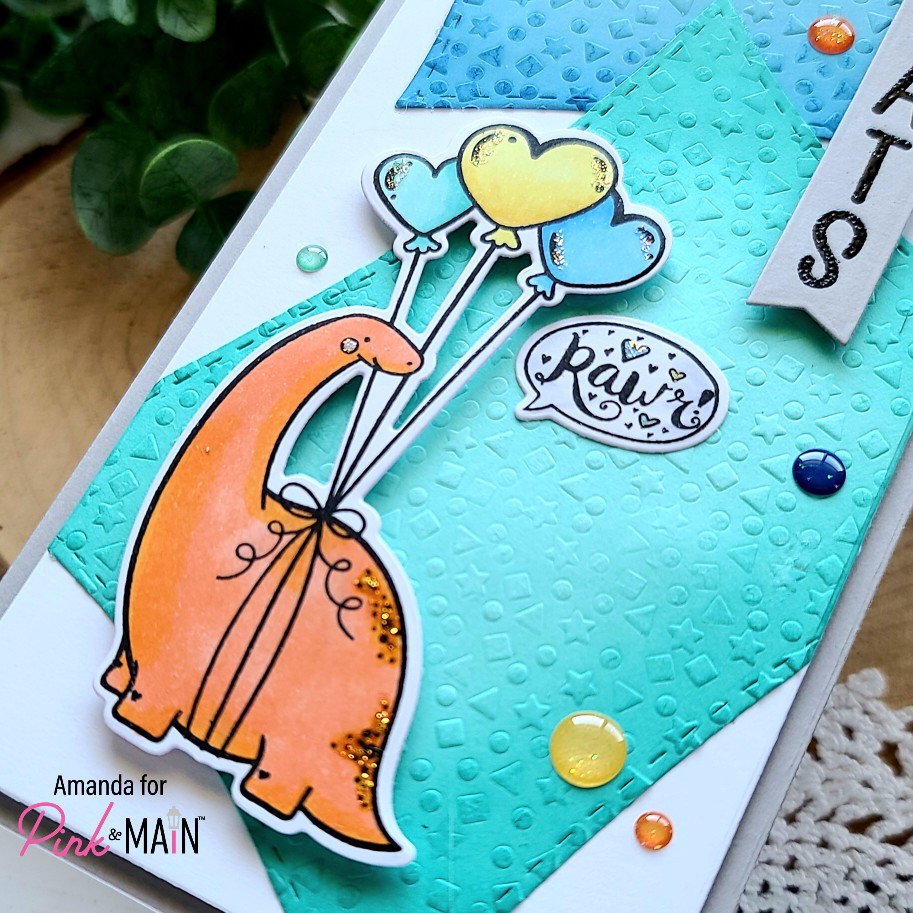
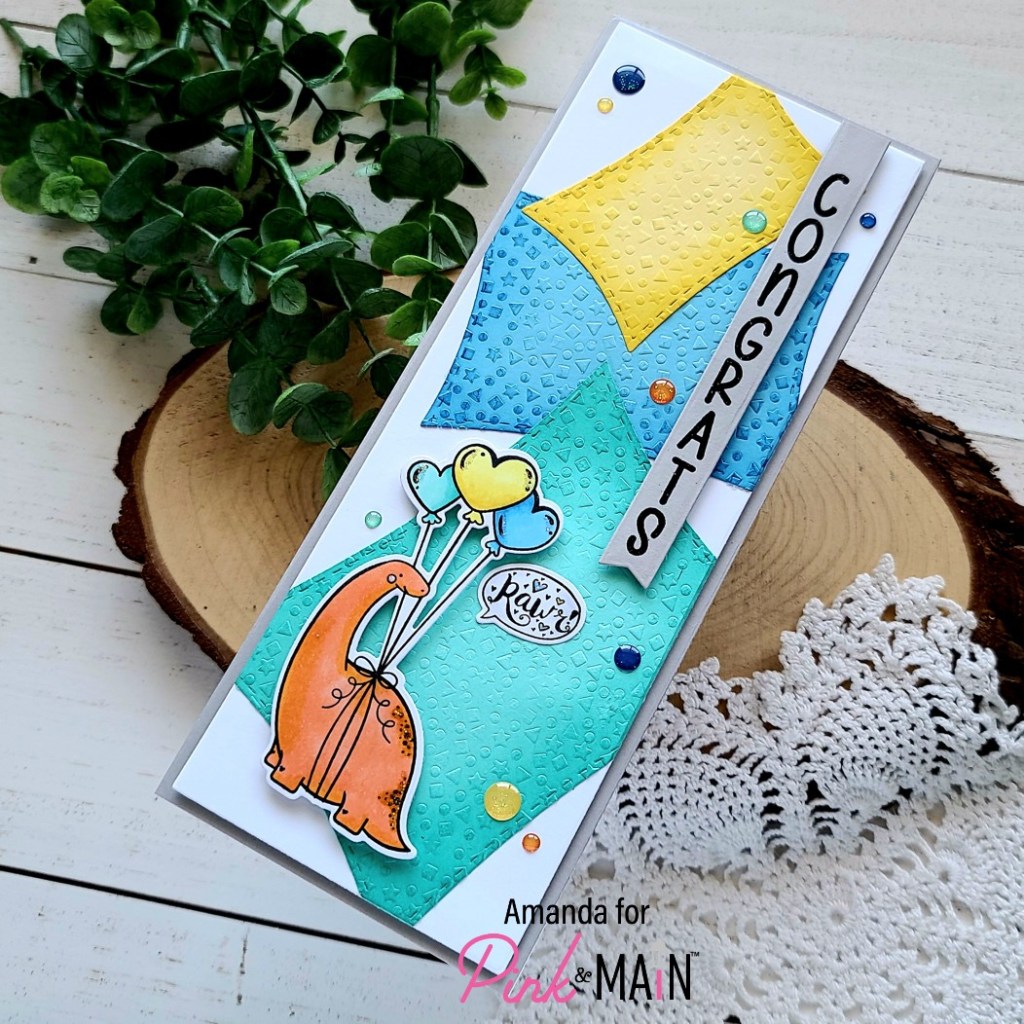
Hello everyone! I’m over on the Pink & Main blog today with this fun dinosaur congratulations card. I wanted to try using this fun stamp set for something not Valentine/love themed and I think it worked out pretty well.
I started by stamping and coloring images from Rawr with my copic markers. I used the coordinating dies to cut them out and moved on to decide on a final background. At first this was going to be an A2 size card but as I was playing with the new concave rectangle dies I thought it would be fun to add multiple and create a slimline design. So I chose paper close to the color palette of my images and die cut 3 sizes of concave rectangle. I rain them through my die cutter with the confetti embossing folder and glued them to a white panel. Then I ran that through my die cutter with the second largest slimline rectangle die.
Next, I stamped and heat embossed a sentiment from big vertical greetings and used a large sentiment strip die to cut it out. Then I cut another slimline rectangle from the same gray I used on the sentiment strip and started adhering my layers. I gray panel is glued to a white card base. Then The background panel with our concave rectangles is popped up with foam tape. Finally, The dino image and banner are adhered with foam squares and the speech bubble with liquid glue.
For finishing touches, I used unicorn Stickles on the dino, balloons and speech bubble hears. Then I scattered some glitter enamel dots from the Thankful and All Occasions packs around the design.
This is such a fun design that I think lends itself to tons of different occasions! I love being able to use stamps throughout the year and not be held to one certain holiday or occasion. And, let’s be real…I absolutely love dinosaurs so I was going to find a way to use these cuties all year long!
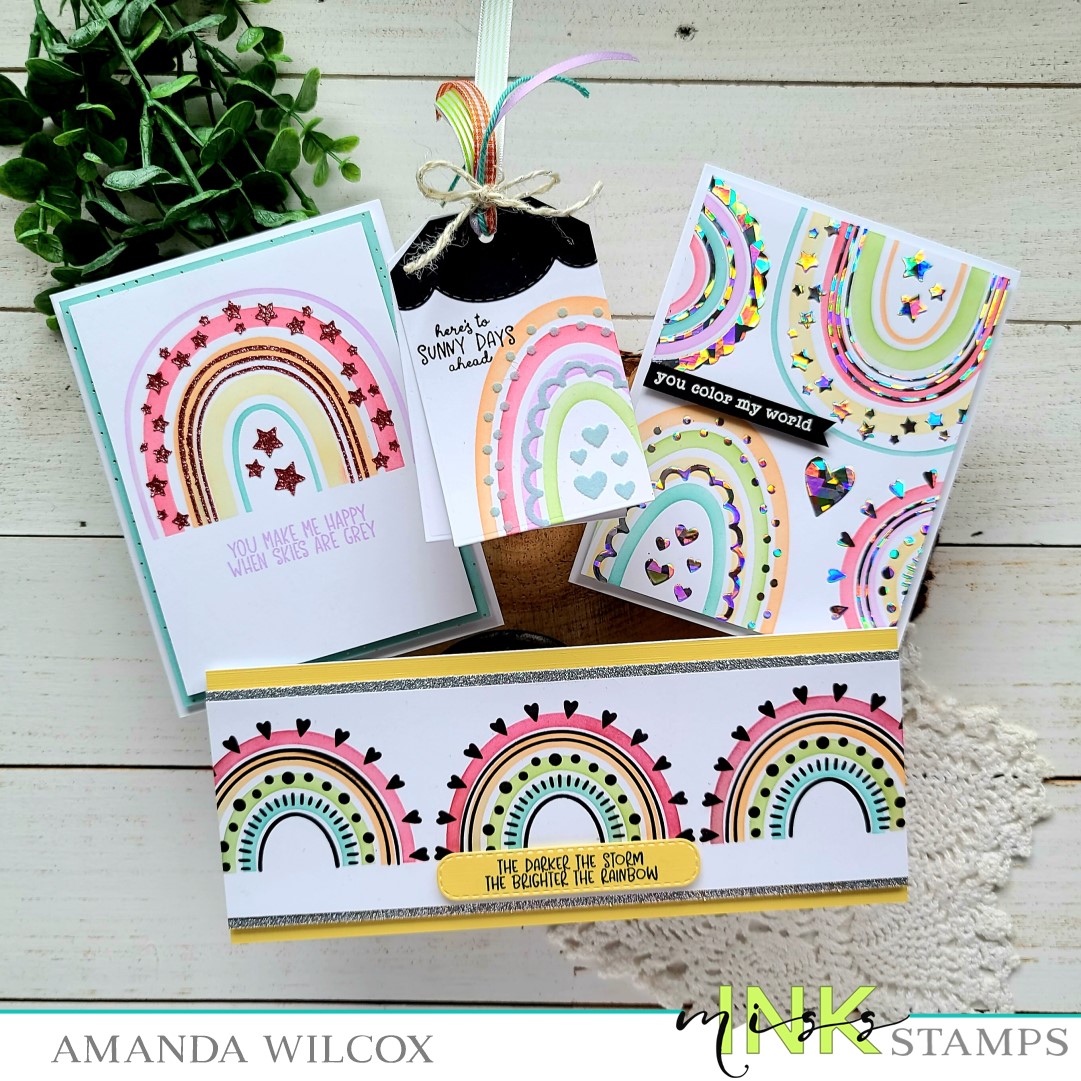
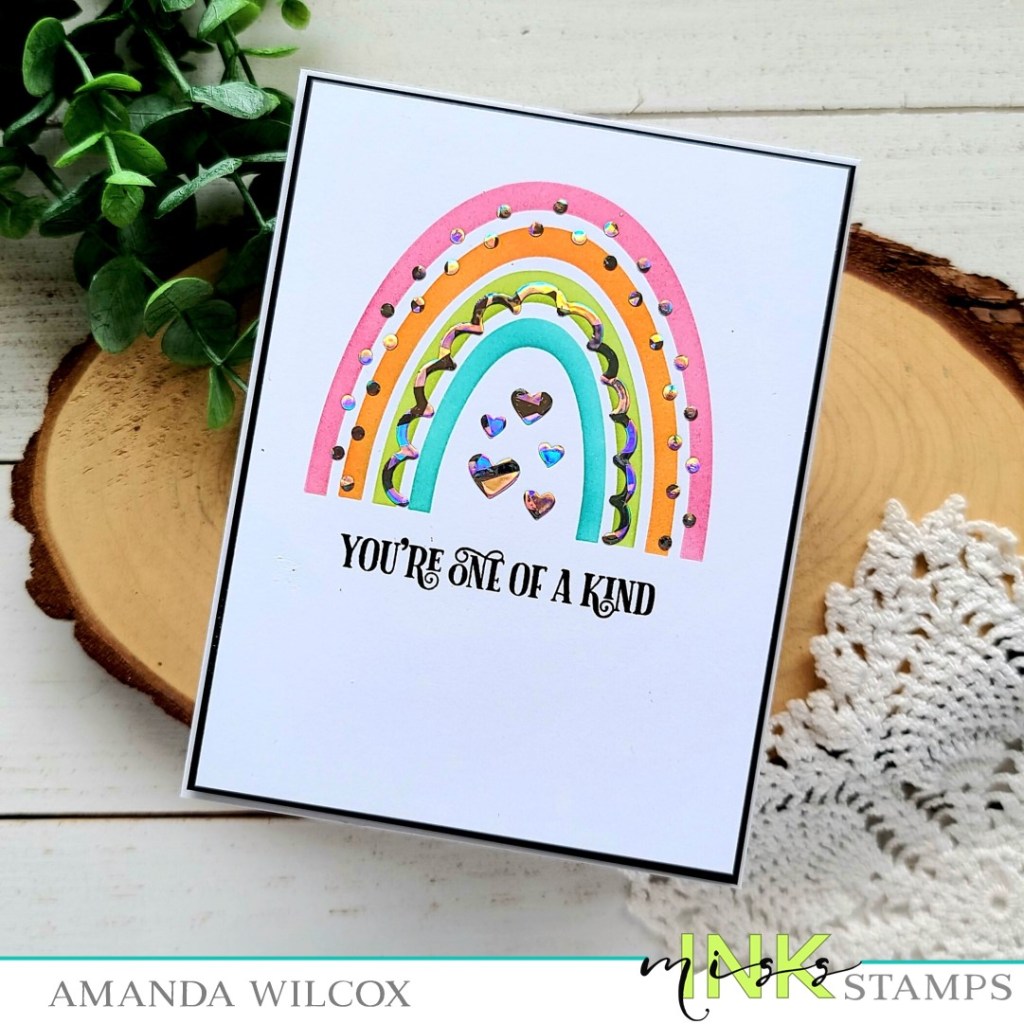
Hey friends! Miss Ink Stamps came out with an amazing new release a couple weeks ago and I finally carved out some time to play with the new rainbow builder stencil set and I’m officially obsessed! I have rainbows everywhere…literally. I love them in all different combinations, shapes and sizes! They are so much fun! I paired them with some of my favorite Thermoweb products to step them up a notch and added sentiments from the amazing new Sunshine and Rainbows sentiment stamp set!
So, today I have 3 cards and a tag to share with you! Aren’t they all so much fun!?! I can’t get over looking at them. Let’s take a look at each one and I’ll go through the basics of how I put them together.
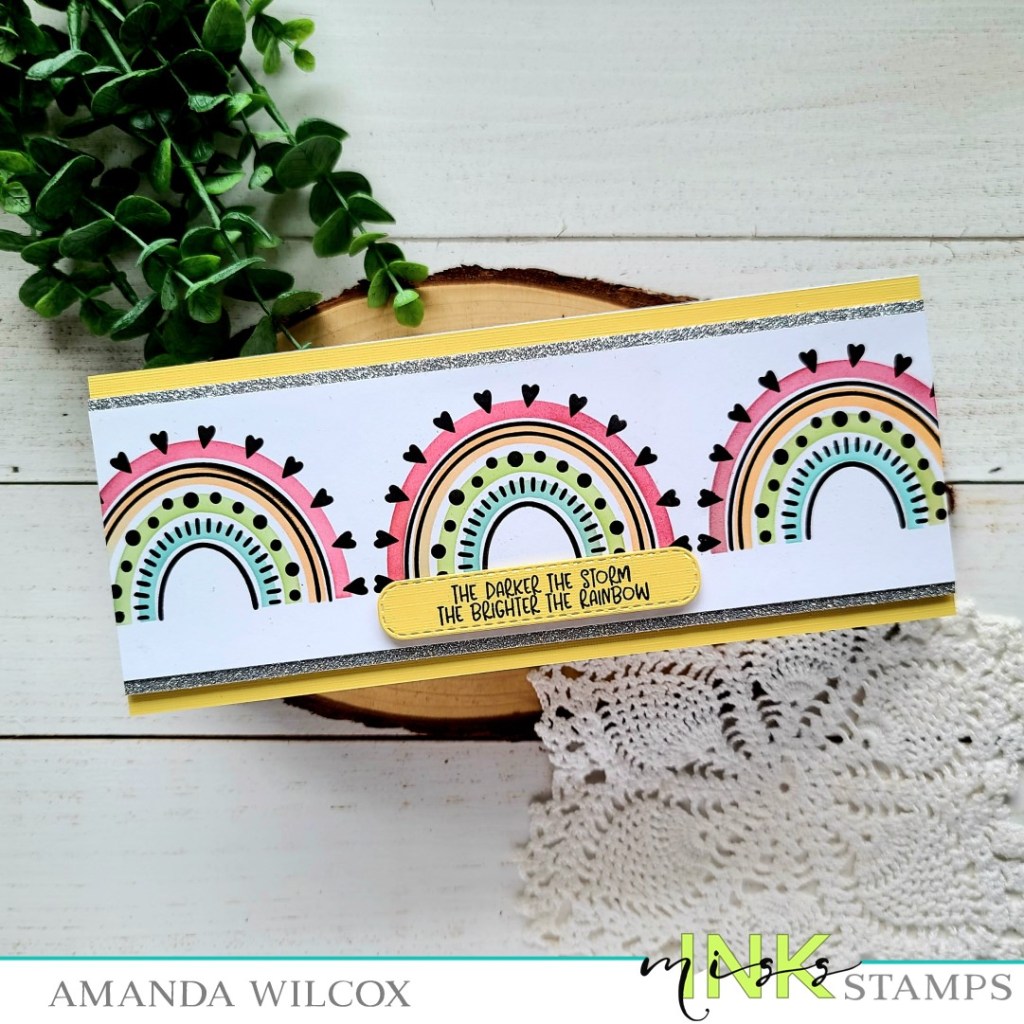
First up is the super fun slimline card because it was probably the most labor intensive one of them all. To ink the rainbows I started by marking the center of the paper with a pencil and did the first stencil layer (red and green on this one). I inked them up center, left, then right. This goes for all of the cards, I inked up everything for one stencil first, then everything for the second, and finished with the decorative layer last. The white panel for this card is 8.5×2.75 inches. I added 1/4 inch strips of silver glitter paper to the top and bottom and popped it up on a yellow slimline panel. Then added it to a white card base. I finished things off by stamping a sentiment on a Newton’s Nook banner trio die and popping it up with foam squares.
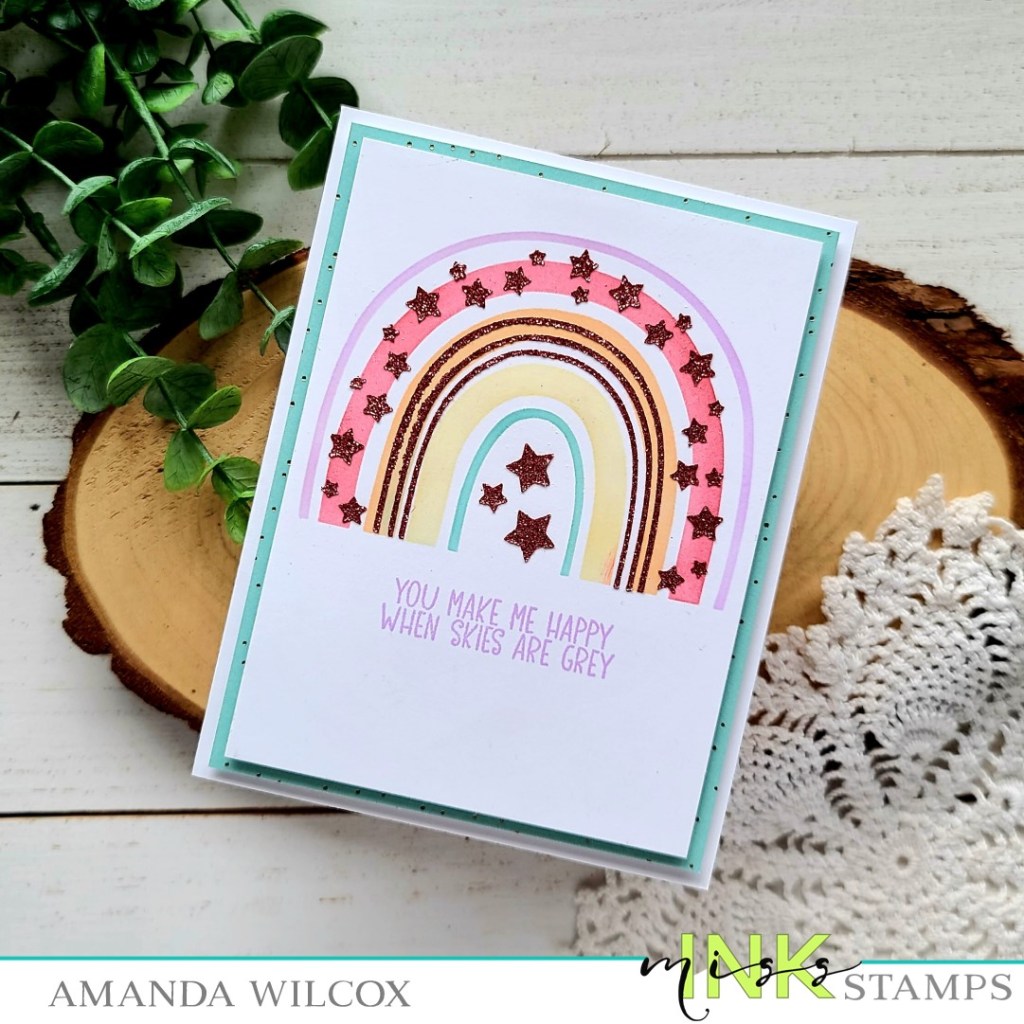
For this sherbet rainbow cuteness, I inked up the layers with some lighter, non-traditional colors. Then finished things off with bubblegum glitz gel! I stamped the sentiment with the same purple that I inked the outer layer with. The white panel measures 3.75×5 inches and is popped up on a piece of Lawn Fawn teal Let it Shine paper. That measures 4×5.25 inches and is popped up on a white card base.
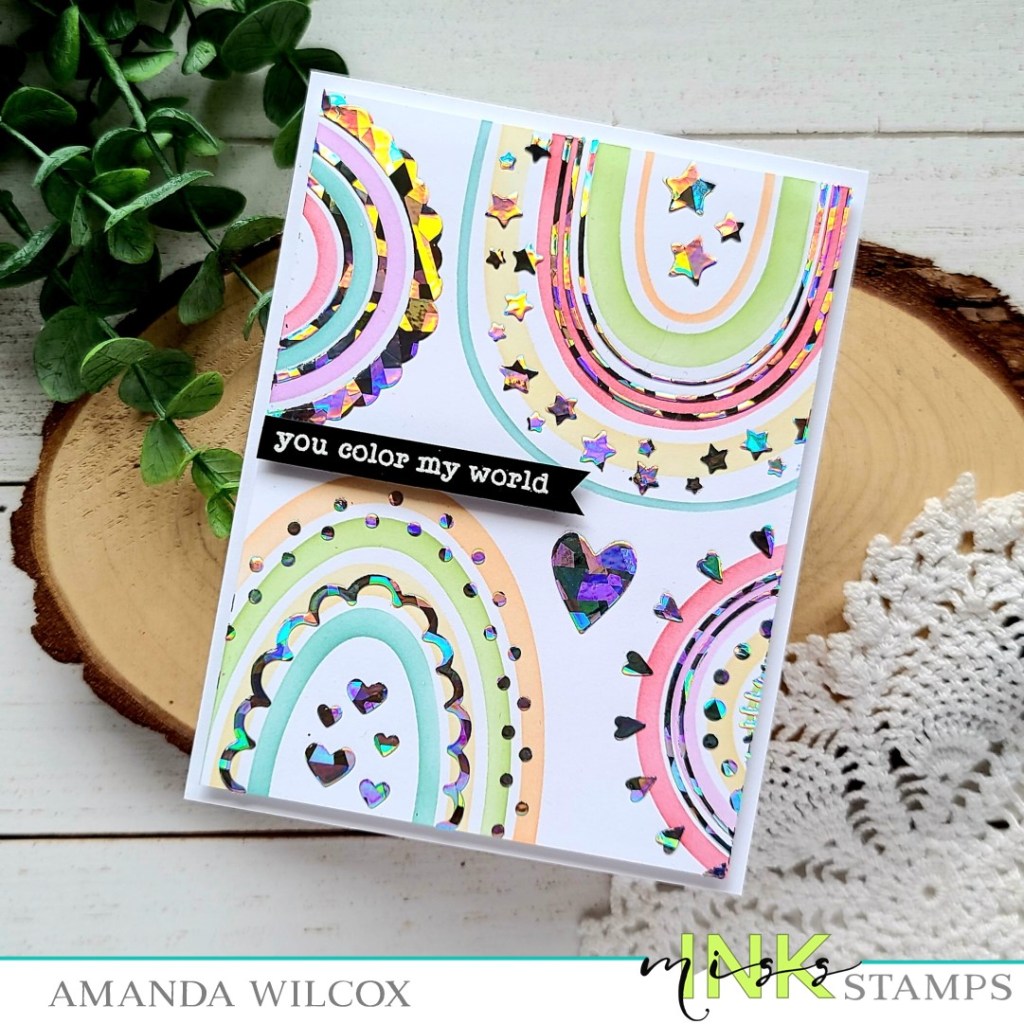
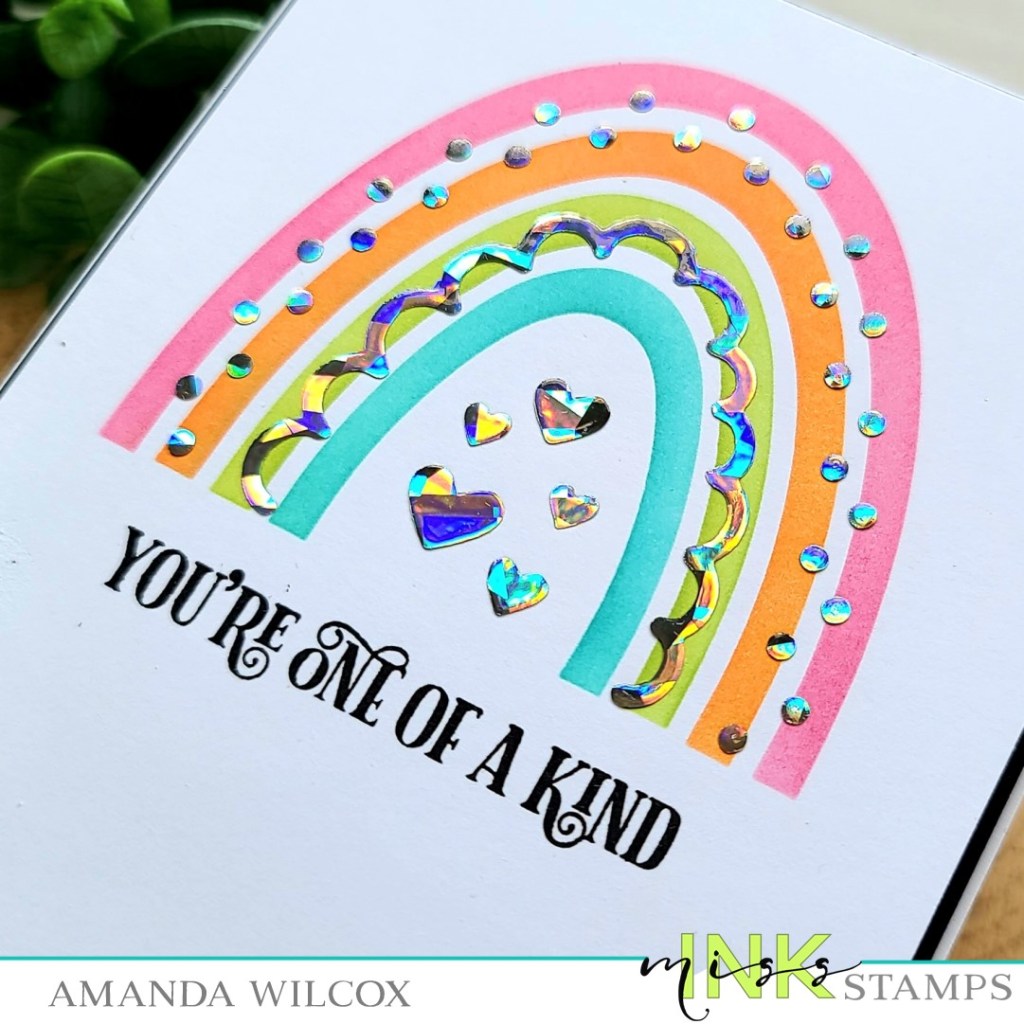
This card is just so much fun! I inked up the rainbows in all different color combinations and then spread transfer gel through the decorative stencil layer and set it aside to dry. While it was drying, I turned on the laminator to heat up and also stamped and heat embossed a sentiment on black cardstock. I trimmed that into a strip and cut a banner tail on one end. When everything was ready, I ran the rainbow panel through the laminator with silver shattered glass decofoil! It’s sooooo cool in the light! I trimmed the panel down to 4×5.25 inches and popped it up on a white card base. Then I added foam strips to the sentiment and popped it on the left-middle-ish of the design. (That’s a very technical term.) 😉
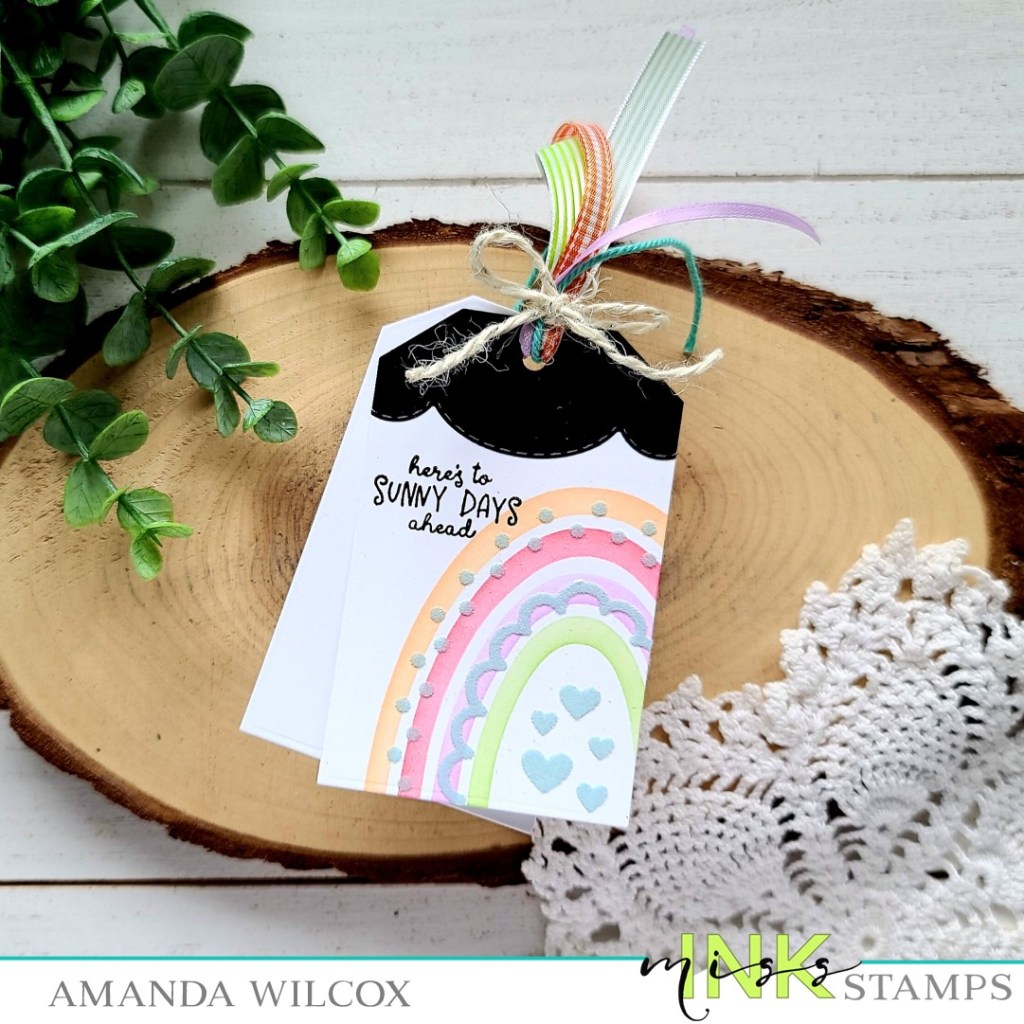
Last but not least, I thought it would be fun to ink up a tag in the mix of everything else. So I die cut the Newton’s Nook Fancy Edges Tag twice from white and once from black. Then I used one of the fancy edges to cut a topper from the black and glued it to one of the white ones. I lined up the rainbow stencil and inked up the layers. I spread transfer gel through the decorative layer again and let it dry. This time I used blue decofoil flock for a little fuzzy fun texture! Last, I popped it in my MISTI and stamped a sentiment on the top left of the tag. Then I chose a few fun ribbons and threaded them through both tags and tied it with baker’s twine. I like having the double layer of tags so I can write on the back one and don’t have to worry about anything bleeding through to the pretty front that I decorated.
Phew! That was a lot of rainbows!!! Oh, but wait…while I was impatiently waiting to get my Sunshine and Rainbows stamp set in the mail, I had played with the rainbow stencil and couldn’t resist completing a card. So here’s a fun bonus for you today!
This rainbow has brighter color palette but I used the same silver shattered glass decofoil. Only, this sentiment comes from the new Lovely Unicorns stamp set. Isn’t it just perfect! The white panel measures 4×5.25 and the black is just 1/8 inch wider for a tiny border and there is foam tape between both layers, ending on a white card base.
So much rainbow fun! I hope you enjoyed it all and found a little inspiration to create something wonderful and share it with someone!
I appreciate you sharing your time with me. Have a fabulous day!
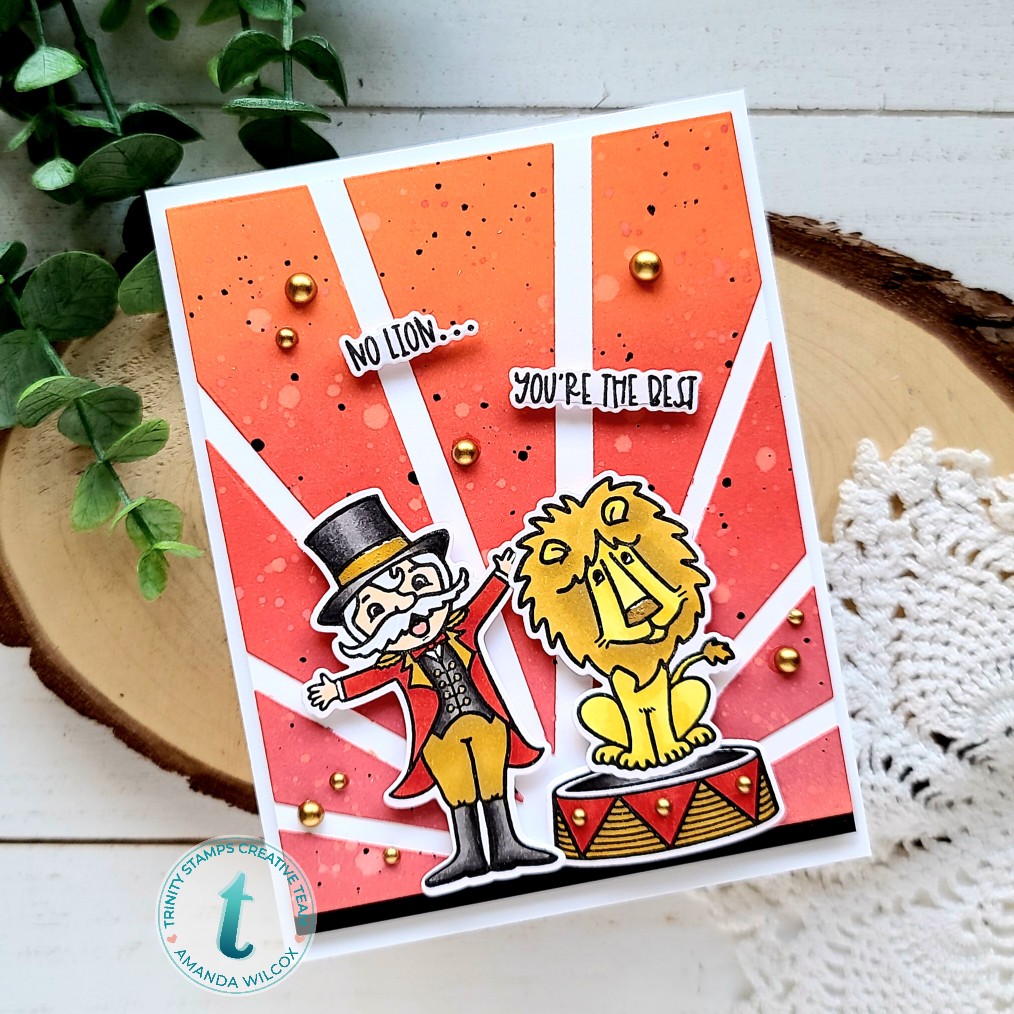
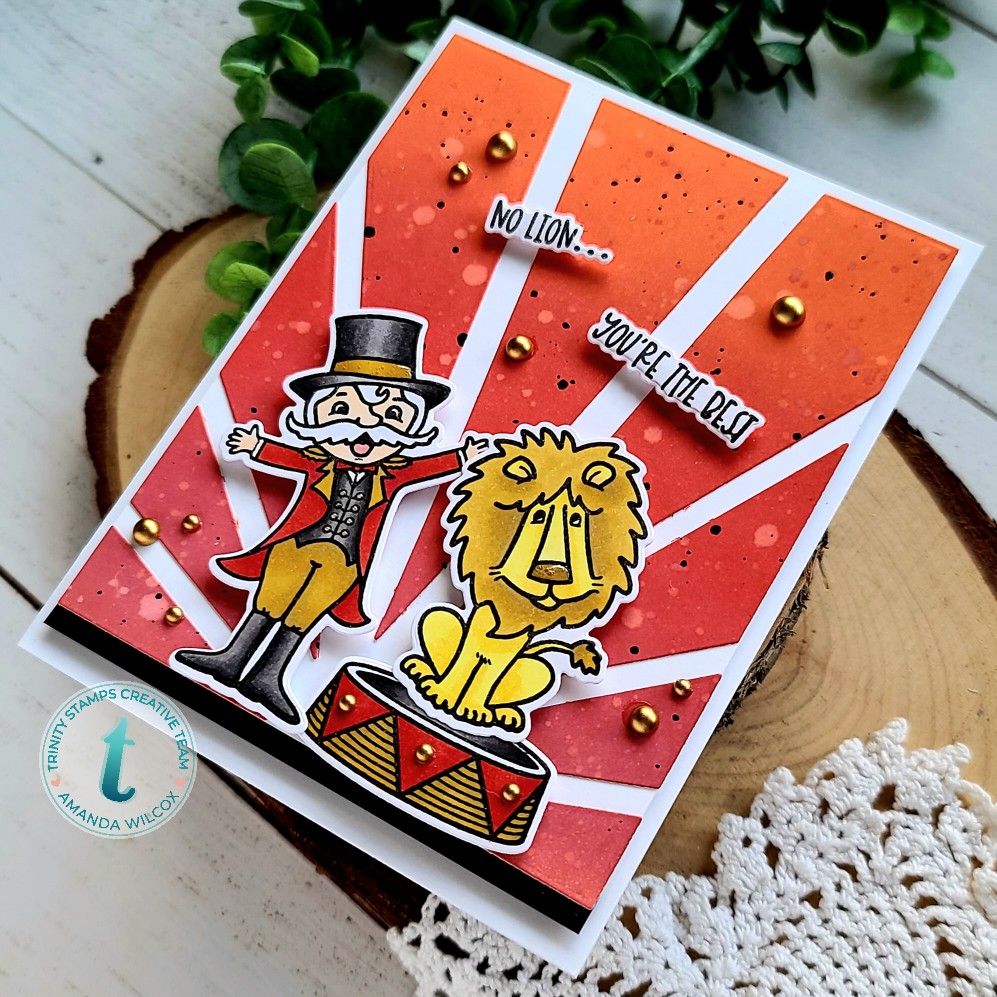
Hey friends! I’m super excited to share today’s fun card with you featuring some new goodies from the Trinity Stamps release that went live last Friday! It’s so super packed with awesomeness, you’re sure to love it all! Head over and check it out HERE if you haven’t yet.
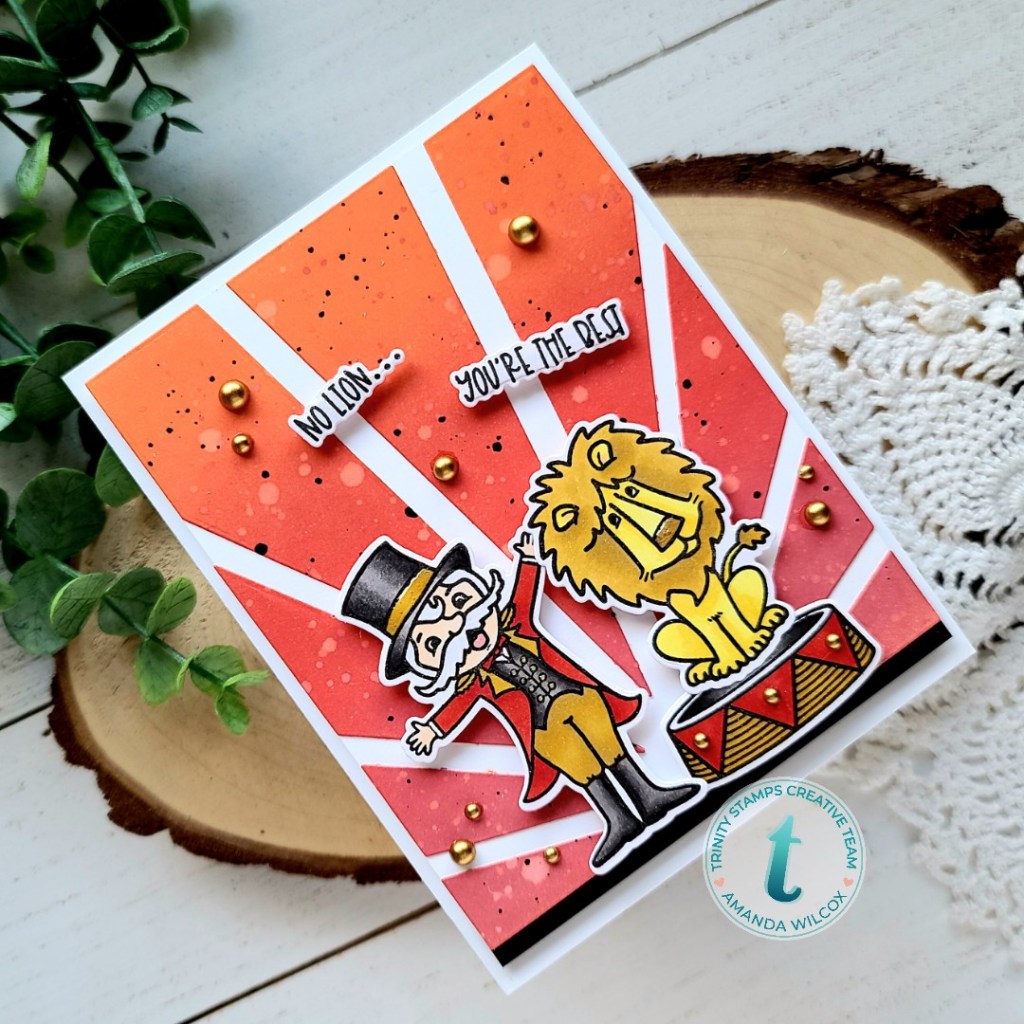
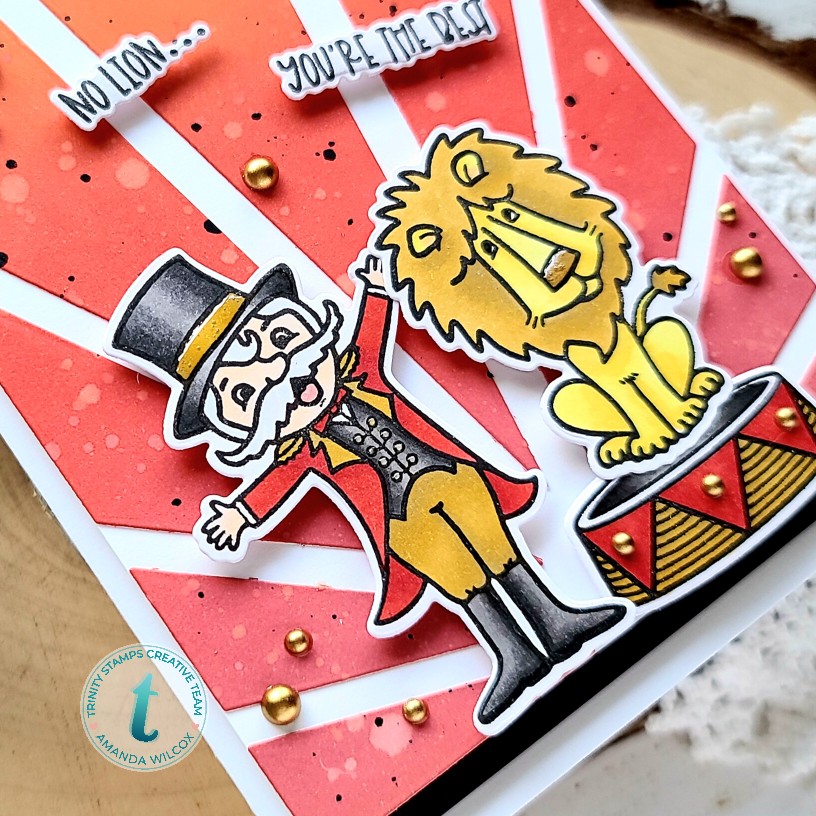
I started this card by inking a panel with distress oxide inks and splattered it with water. Then I splattered it with watered down black acrylic paint and set it aside to dry. While I was waiting, I stamped and colored images from Greatest Friend on Earth with my copic markers. Then I used the coordinating dies to cut them all out, including the sentiment! I love that part of most all Trinity Stamps sets!
With my inked panel dry, I die cut it with the Slimline Center Burst die. Then I arranged the pieces on a white piece of cardstock measuring 4×5. This leaves a larger gap at the top/bottom of your card so I added a strip of black cardstock to the bottom to ground everything. I added foam tape to the back of this panel and adhered it to a white card base.
I added foam squares to the back of my images and sentiment and popped them on the card front. Then, moving on to finishing touches, I added gold satin baubles around the design and on the stand for the lion. Then I added glossy accents to the lion’s nose and Ringmaster’s hat and buttons.
Isn’t this such a fun card!?! I love this entire release so much! It’s just packed full of so much fun and goodness! The magic/circus theme throughout really makes me want to throw a party just so I can create decorations and invitations for it. Haha.
I appreciate you sharing your time with me. Have a fabulous day!