Blog

Pink & Main – Many, Many, Thanks

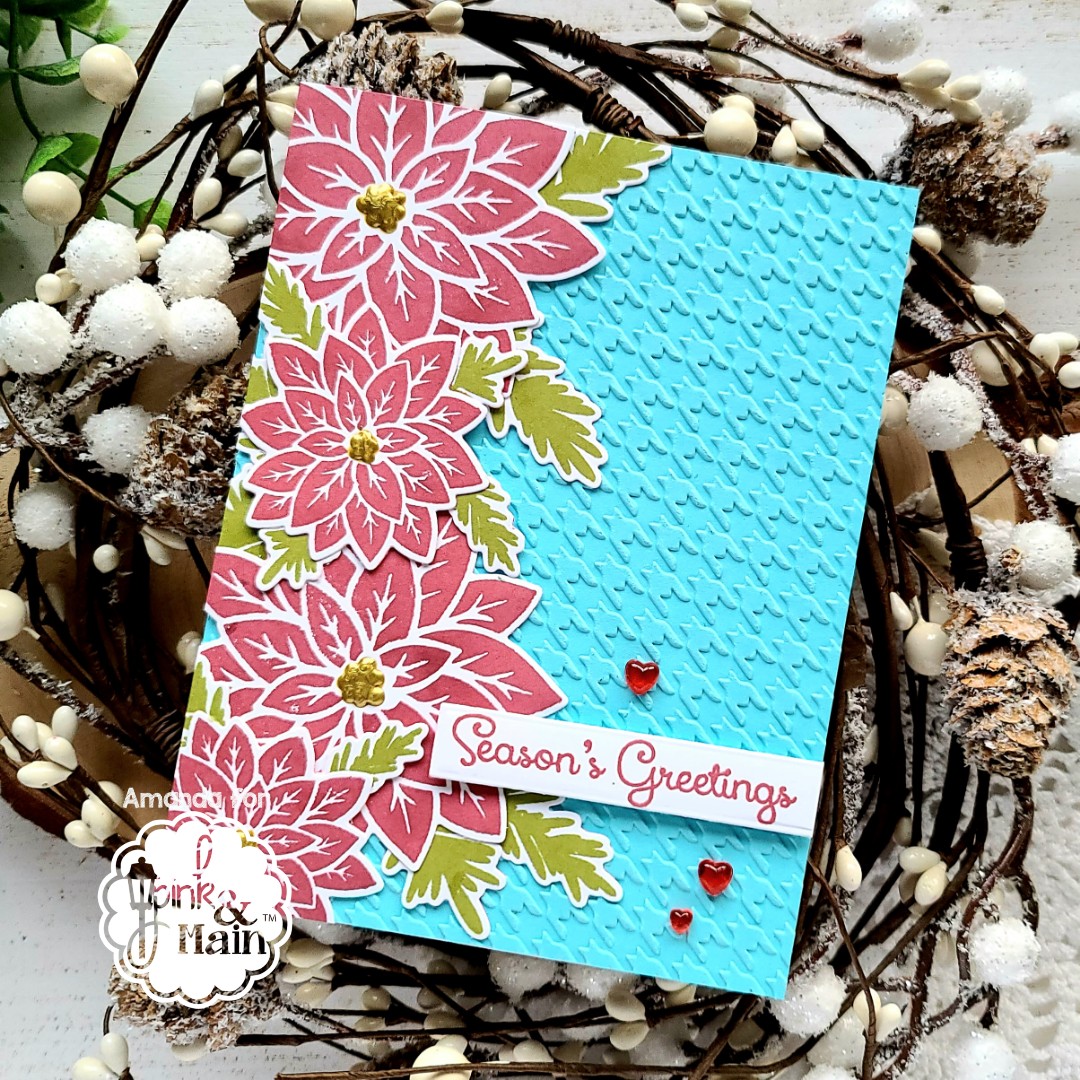
Hello everyone! I hope you all had a wonderful Christmas and are recovering from the celebration nicely. Today I feel like I’ve taken a sharp turn out of holiday creating into thank you cards that need to be mailed. I’m sure some of you are in the same boat so I thought it would be nice to share some inspiration along those lines today. I’m over on the Pink & Main blog with this bright, happy card.

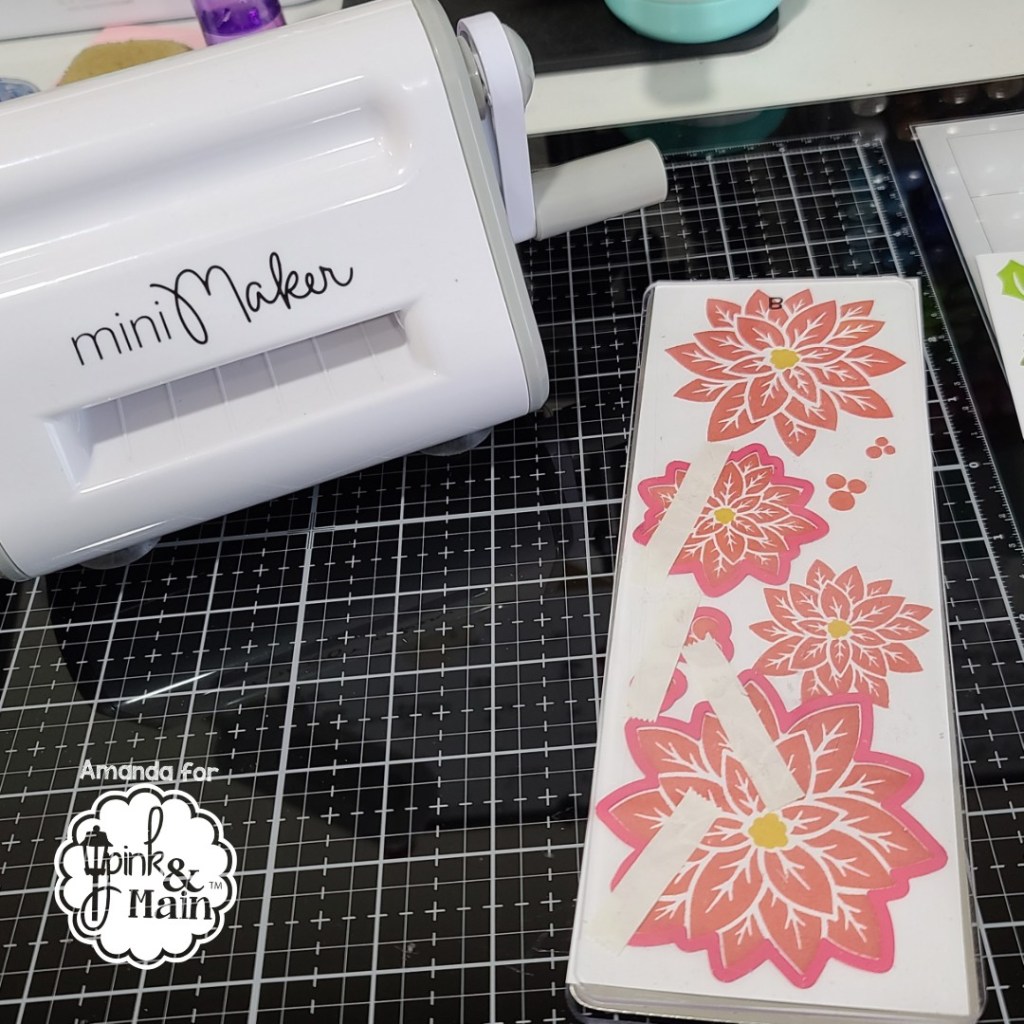
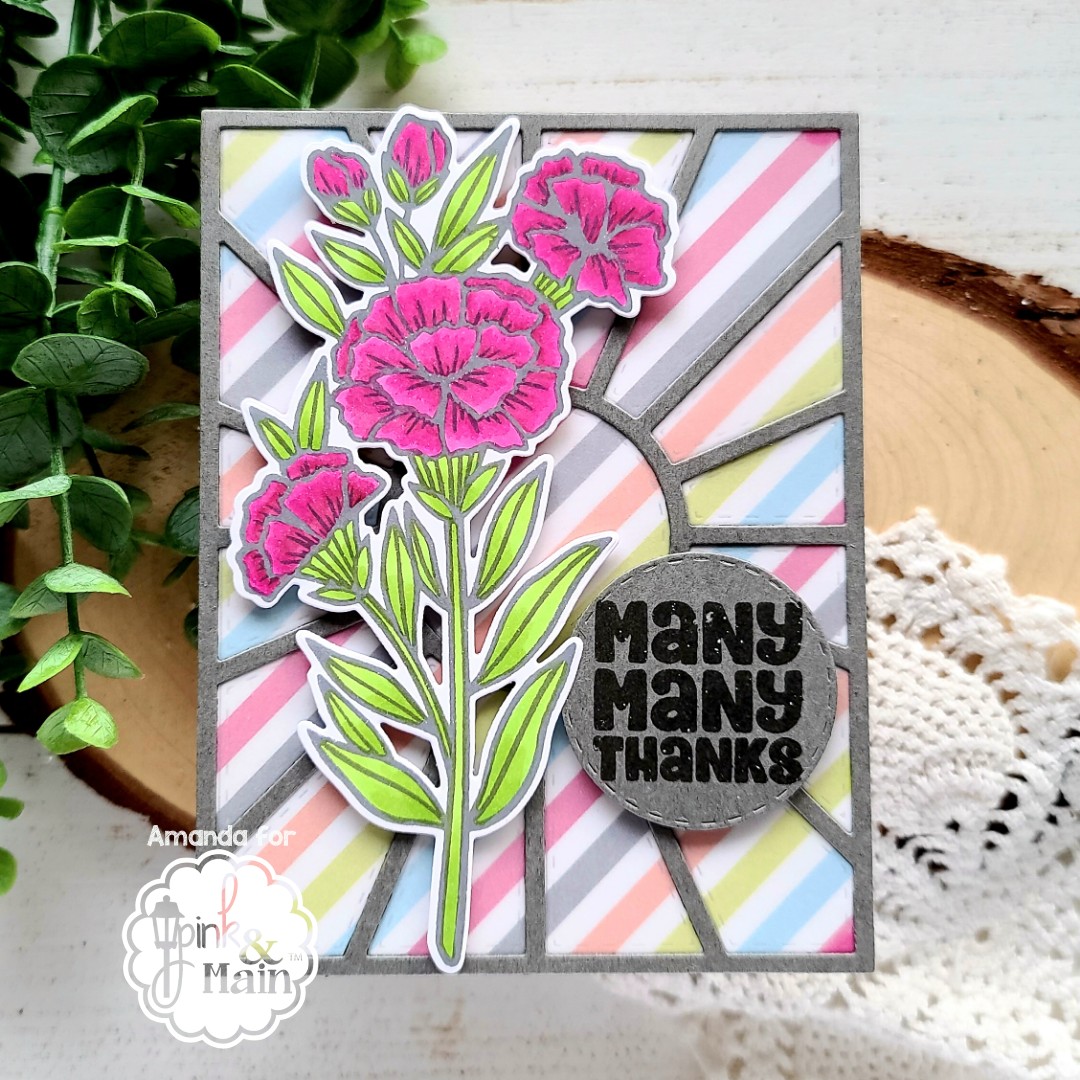
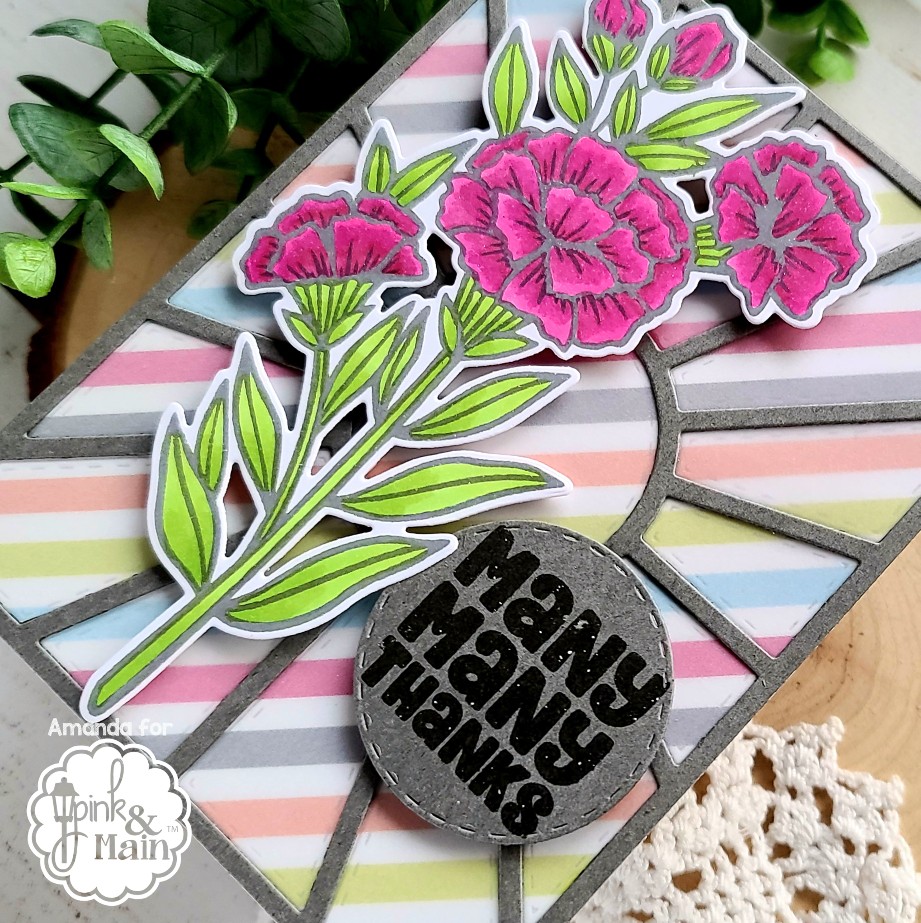
I started my card by stamping and coloring one of the Tall Flowers images with my copic markers. I stamped it in a gray copic-friendly ink for a bit of a different look too. Then I used the coordinating die to cut it out.

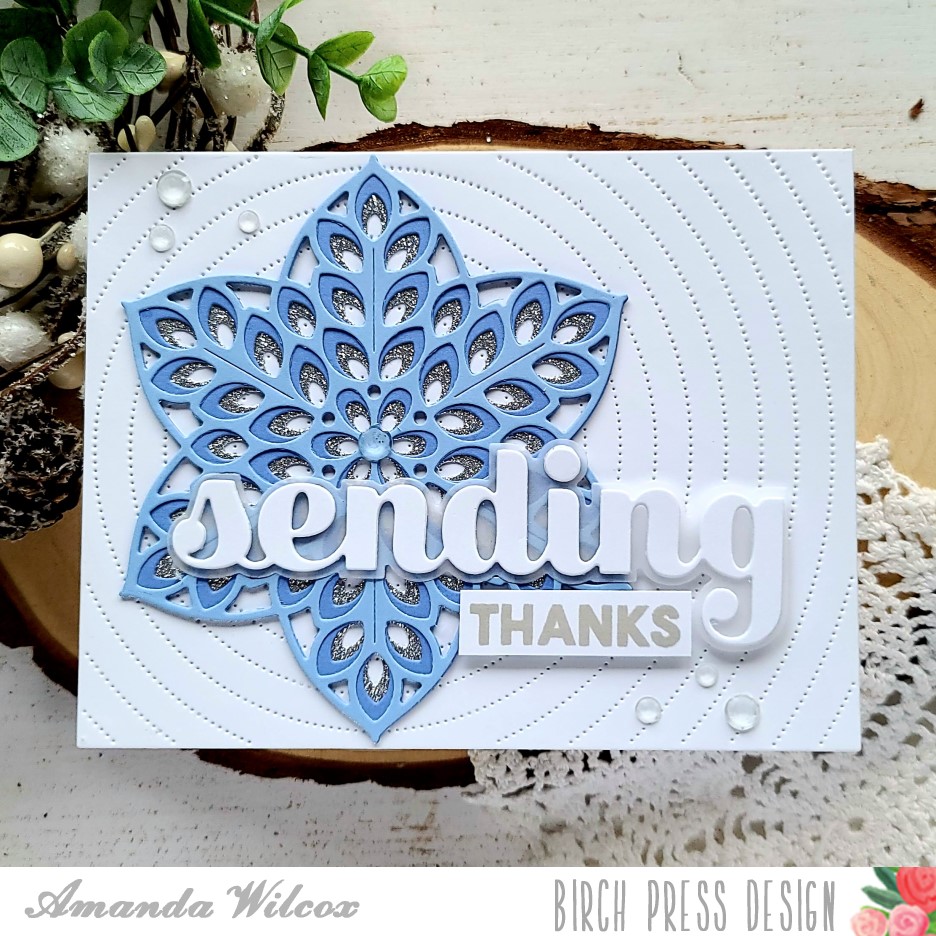
Next, I die cut the Sunburst Cover Die from gray cardstock and the striped paper from the Best Friends paper stack. I glued the frame and inserts of the stripes to a white card base. Then I trimmed a piece of vellum to 4.25×5.5 and adhered it down. Last, I glued the gray frame to the top of that, and my background is finished.

I kept the circle from die cutting the Sunburst Cover and stamped a sentiment from Spotlight Sayings on it with VersaMark ink. I heat embossed it with clear embossing powder and added foam squares to the back. I also added foam squares to the back of my flower image and adhered them both down.

I kept finishing touches on this card very simple because it already has a lot of color and texture going on. I simply added Wink of Stella glitter brush pen to the flowers and felt like it was complete.

I appreciate you sharing your time with me. Have a fabulous day!

Trinity Stamps – Christmas is Coming!

Merry Christmas Eve my friends and family!!! I’m super excited to be over on the Trinity Stamps blog today sharing one last Christmas card! I had a blast going a little extra on this one and I love how it turned out!

I started by blending distress oxides on a panel for my background and spritzed it with water. Then I die cut the rooftops border die from black cardstock. I trimmed some vellum pieces to go behind the window openings and colored them with yellow copic marker. Using the border as a guide I stamped and heat embossed the main image from Christmas Magic in silver. Then I glued my rooftops border down and switched gears to my sentiment.

I stamped and heat embossed the sentiment from Christmas Magic on a strip of vellum and wrapped it around the panel, hiding the adhesive on the back side. Finally, I wanted it to “snow” on my card so I took liquid glue and just added dots in different sizes all over it. Then I sprinkled some snowflake soup glitter all over my card. I patted the glitter into the glue dots to make sure the pieces stuck and left it over night to dry. The next day I adhered my panel to a white slimline card base and it was finished.

I hope you all have an amazing Christmas, celebrating to the fullest this year will allow and find some joy in the season.

I appreciate you sharing your time with me. Have a fabulous day!

Birch Press Design – Winter Thanks

Hello again! I’m over on the Birch Press Design blog today with a pair of thank you cards fit for winter thank yous that we’ll all be sending out soon.

I couldn’t totally decide on a color scheme so I decided to try both ideas and see if I liked them.

I used the Birch Press radial pinpoint plate, floral star and big sugar script sending paired with Trinity Stamps embellishments and the thanks from Lawn Fawn’s Big Thanks set.

The first card has a white bottom layer and gray background for an understated, simpler card but I think it’s beautiful.

Then the other idea I always have with Birch Press layering dies is to add a little bling to one of the layers. It just looks so cool every time! So I added a silver glitter layer to the star, white background and used vellum on the sentiment. Again, beautiful and I love it.

Do you like one more than the other? I think the first one would be better for mass producing as the glitter cardstock can get spendy but I think I like the bling more to be honest.

I appreciate you sharing your time with me. Have a fabulous day!

Pink & Main – Season’s Greetings

Can you believe it’s the last weekend before Christmas? I’m totally stunned at how fast this crazy year has gone. I’m making the most of this time and crafting Christmas right up until it’s here. So I’m over on the Pink & Main blog today squeezing in another beautiful Christmas card to share with you.

I recently got a whole new rainbow of ink pads and was super excited to try them out on this Mistletoe set because the images are pretty solid and can be difficult to get a good impression with. I’m just in love with these and how beautifully they turned out.

To create this card, I cut some strips of cardstock to 3 inches wide and stamped my images on them. When I have a die cut heavy card, it’s nice to do this and sit at my desk using my Mini Maker to cut everything out instead of my big die cut machine which can be daunting. I used the coordinating Mistletoe dies and cut all the images out.

After everything was die cut, I trimmed a piece of light blue cardstock to 4.25×5.5 inches and ran it through my die cut machine with the embossing sandwich and the new houdstooth embossing folder. Then I moved on to assembling my flower cluster down the left side of that panel. Because of the texture I went with liquid glue on the whole thing to make sure things stayed in place. I added a couple of clear blocks on top and left it over night to dry.

For the sentiment, I decided to stamp Season’s Greetings from the same stamp set and die cut it with the smallest Layered Slimline die to create a sentiment strip. I popped it up with some foam squares and moved over to finishing touches.

For those, I decided to keep it simple and used Nuvo Crystal Drops in bright gold on the poinsettia centers and glued a few red jelly drop hearts from Trinity Stamps around my sentiment.

I appreciate you sharing your time with me. Have a fabulous day!

Lawn Fawn – Hap-pea Holidays!

Hey friends! It’s been a minute since I checked in. The holidays have me super busy and I took advantage of the lull in design team requirements to clean my craft room and wrap our gifts over the last week. Yesterday I had some time to play in the craft room and finally pulled out the adorable Lawn Fawn pea sets – Be Hap-pea and Peas on Earth.

I paired those two sweet sets with the MFT Stamps shutter card dies to create a fun, interactive card. Here’s the front with those sweet peas hanging out in their pod and that great Lawn Fawn Snow Day Remix paper.

Ta-da!!! Here’s the inside. Super simple but adorable and sure to make someone smile. Aren’t these peas just the cutest? And I’m totally a fan of those great puns that come in both stamp sets.

Here’s a look at the inside and the band together. I’m still getting the hang of these shutter cards but they are so much fun to create!

We have a few birthdays coming up so I think I’ll try another for one of those.

I appreciate you sharing your time with me. Have a fabulous day!

Coffee Loving Cardmakers – National Tea Day

Hey everyone! It’s a super special day because, not only is it Tuesday Tea with Twiddler’s Nook, but it’s actually National Tea day and we’re going to celebrate with a whole lot of fun! I’ve got a card share for you and then Amy will pop in with some information about a guest designer opportunity and link up at the bottom. Let’s get started with today’s card share!

Today I decided to pull out a fantastic set by The Cat’s Pajamas called Make Tea. I absolutely LOVE the critters in this set and had so much fun coloring them up. For this card, I stamped and colored them with my copics, then used my scan-n-cut to cut them all out. Next, I pulled out some Lawn Fawn snow day remix paper and the reverse stitched scalloped circle window dies to set my mini scene. 

After die cutting and assembling my papers, I used my MISTI to stamp a sentiment over this very chill tea party that’s going on. Since I chose to make this a last minute Christmas card with the patterned paper used, I pulled out the Trinity Stamps Merry Christmas Senti-mini set and stamped a quick Merry Christmas banner which is popped up with foam squares.

For finishing touches on my card, I added some glossy accents to the critter eyes and noses and their mugs. Then I used Wink of Stella glitter brush pen on the steam coming from the cups. Last, I glued a scattering of Trinity Stamps Cinnamon Red Hots Jelly Drop Hearts across the design.

AND THEN, on a whim, I decided to stamp on the inside of my card today too. I never do this but I have a couple of crafty friends who do and I always think it’s super cute. So I grabbed a bunny that I didn’t use on the front and another sentiment from Make Tea and stamped it in red ink to coordinate with the colors on the front. 

Now, it’s your turn to play! Head over to the Coffee Loving Cardmakers Blog for information on a chance to become a guest designer with us!

I appreciate you sharing your time with me. Have a fabulous day!

Newton’s Nook – Designer’s Nook Sneak Peek

Hey friends! I’ve been telling you all year about Newton’s Nook’s subscriber only newsletter called Designer’s Nook. Tomorrow my last contribution to it comes out and I wouldn’t want you to miss it. It’s super fun and adorable because it’s all Newton’s Nook! Head HERE to subscribe so you don’t miss out.

A little sneaky peek for you of tomorrow’s inspiration. I hope you enjoy it! Merry Christmas everyone!

I appreciate you sharing your time with me. Have a fabulous day!

Miss Ink Stamps – New Year Rules

Hi there! Have you seen the most recent release from Miss Ink Stamps? There are some really great ones and today I’m sharing a card featuring one of them – Happy New Year. It just cracks me up!

When I think of New Year celebrations I always think of gold and champagne so those are the colors I gravitate toward. Today was no different. I pulled out the Sunburst stencil and used champagne Metallix gel over black cardstock. While that was drying I stamped and colored images from Happy New Year and Oh, Nuts. Then I used my scan-n-cut to cut them all out.

I stamped my sentiment on a circle and then die cut a stitched circle just a bit bigger in red and adhered them together. Once my background was dry I trimmed it down and popped the circle up with foam tape. Then I used a combination of liquid glue and foam squares to attach my images. Last, I decided to add the second sentiment to the top left corner so I stamped it and trimmed it into a banner and attached it with foam strips.

I don’t know about you but I’d totally party with a squirrel! He looks pretty friendly and there are extra glasses of champagne just waiting for someone to join in.

Cheers to you all! I appreciate you sharing your time with me. Have a fabulous day!

Pink & Main – Polar Bear Wishes

Hey friends! I’m over on the Pink & Main blog today and I decided to dig in my stash and see what stamps I could use for Christmas that aren’t necessarily intended for that. I came across that bear from Happy Fall and thought he would be perfect to turn into a polar bear! So that’s what I did…twice! Because once was not enough with this cutie!

Isn’t he the sweetest ever??? I just love how these turned out. I stamped my bear from Happy Fall with a gray copic friendly ink and colored him with my copics. Then I used the coordinating dies to cut them out and moved on to figure out what I was going to do with them.

For the first card I pulled out the great holly layering stencil and inked it up with some softer colors to match the tone I was looking for with this sweet bear. I trimmed it down to 4×5.25 and, using my bear as a guide, stamped the sentiment from Stocking Stuffers in the same gray ink. Then I added foam tape to the back and popped it on a white card base. Next, I grabbed the wreath base 2 dies and cut the two types of branches out of white cardstock, white glitter cardstock and vellum and glued them around my bear to ground him. I added foam squares to the back of the bear and adhered it down.

Normally, I’m all about shine and glitter but the soft tone of this card made me want to leave it be just how it is. So it’s all finished now and I just love it! Let’s check out the second card I made next.

For this one, I used the new houndstooth embossing folder on a white panel and trimmed it down as well. I added foam tape to the back and popped it on another white card base. Then I cut strips from white cardstock, white glitter cardstock and vellum, trimmed the edges at an angle and adhered them down. I popped my bear up with foam squares over the strips and chose my sentiment. This one is from Christmouse and is also stamped in the same gray ink. I trimmed the sentiment down and popped it up as well.

These cards were effortless and so much fun to put together because I was just in love with the look of this sweet bear and how frosty cold all the white was looking. Isn’t it great?

I appreciate you sharing your time with me. Have a fabulous day!

Trinity Stamps – Critter Christmas Tree

Happy Friday everyone! I’ve got a really fun, adorable card to share with you today. Sometimes the simplest change, like a fold, can take a card from simple to the next level. Today I’ve made a gate-fold card to share with you.

I started by stamping and coloring the adorable Tree-mendous Christmas images and colored them with my copic markers. I used the coordinating dies to cut them all out and set them aside. Next, I created my gate-fold card by cut some green panels to decorate the front. I used some white pigment ink with the first layer of the slimline snowfall stencil, then I went over the second layer with white glitter glitz gel for a little texture. Once those were dry I adhered them to my card front.

Next, I took the slimline stitched strips and cut one from red cardstock a couple of times. I wrapped it around the card front and glued my images to it creating a sort of belly band to keep the card shut. I cut a skinnier strip and stamped the sentiment from Tree-mendous Christmas on it and adhered it down on the top strip.

I did add a few finishing touches like glossy accents to things like noses and antlers, berries and the star on top and also black glaze pen to the critter’s eyes. These little things add so much to the final card and I just love it!

I appreciate you sharing your time with me. Have a fabulous day!