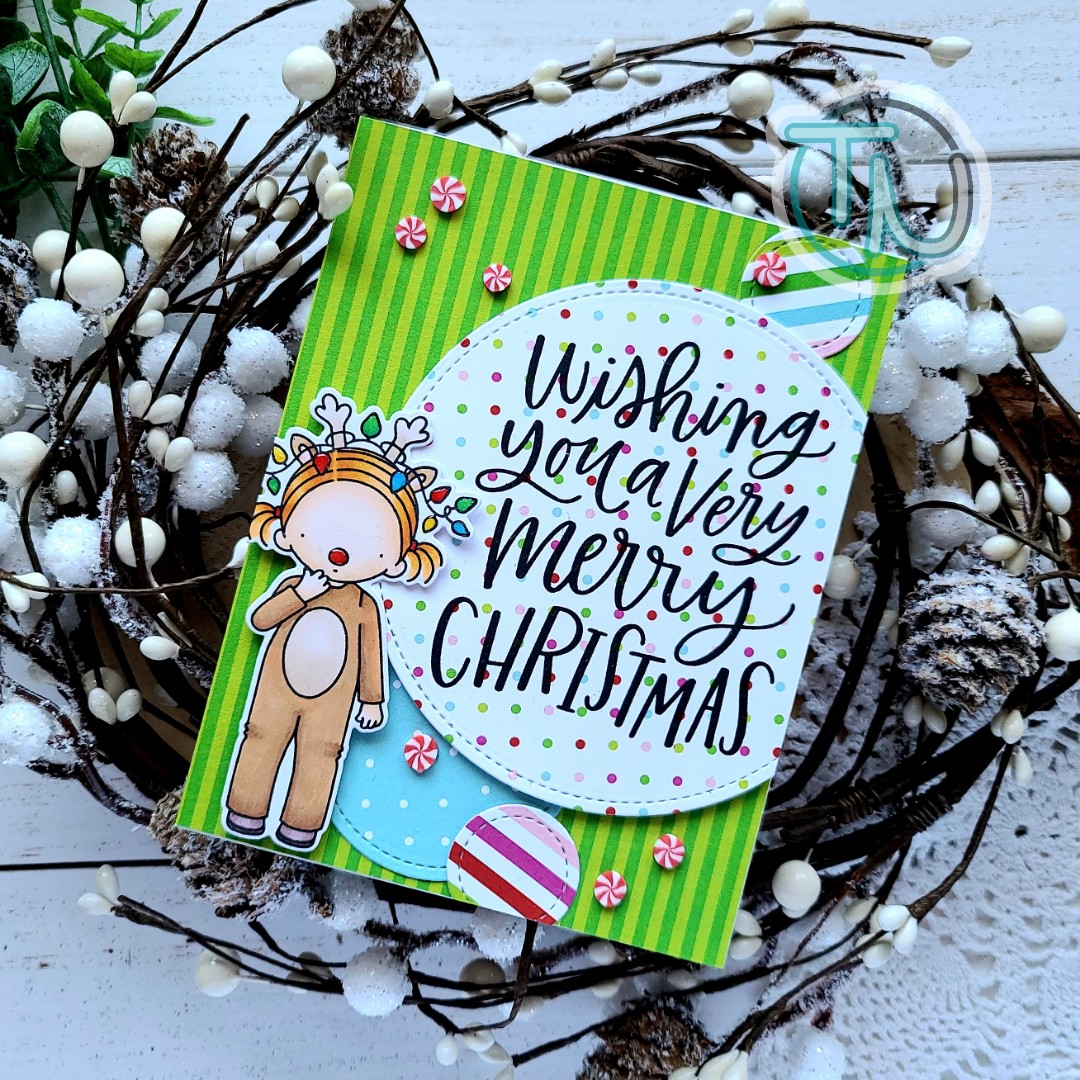
Hey friends! I just had to pop in and share this adorably cute card with you today. The second I saw this reveal from My Favorite Things, I knew I had to have this stamp. There were no if ands or buts, seriously. I was that smitten. Sadly, it took me forever to ink it up and play but I finally did!
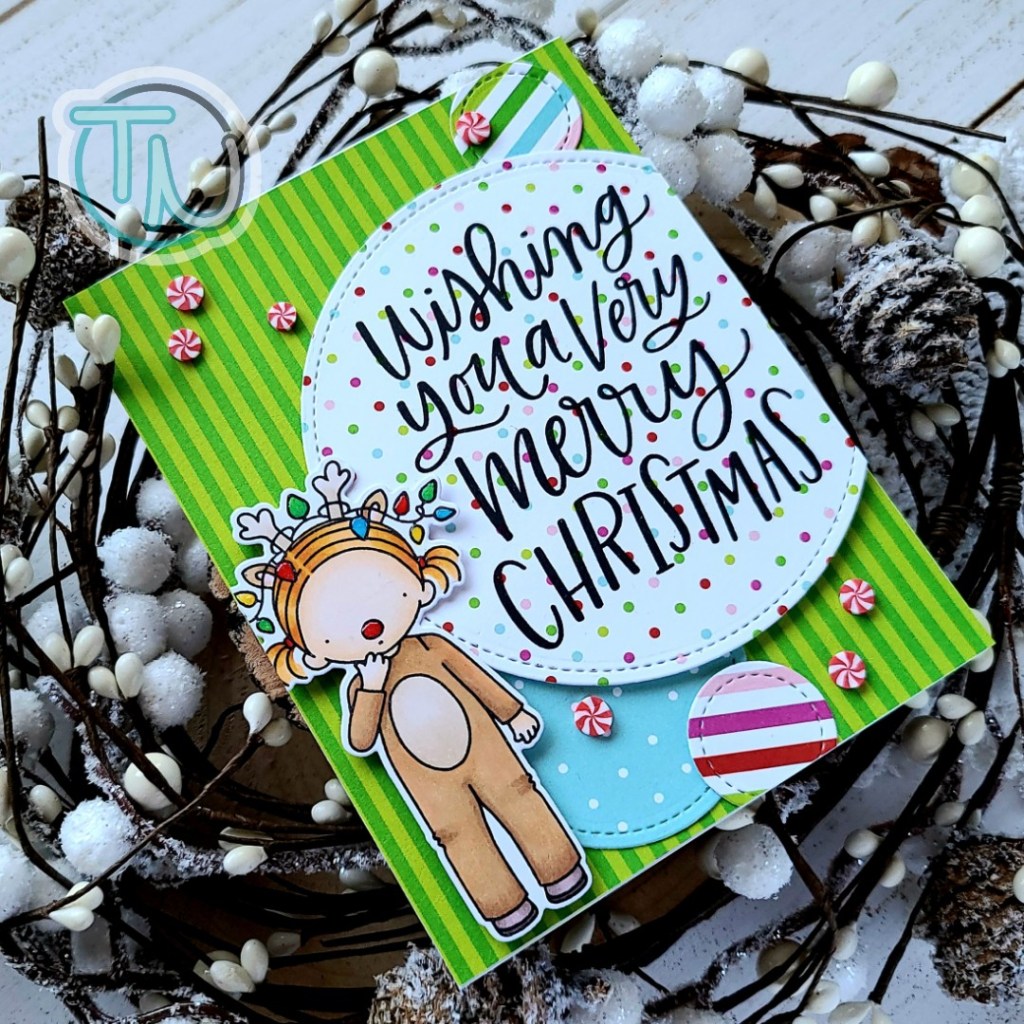
I don’t use patterned paper very often but this was so much fun to mix and match and play with the different ones to create a vibrant and fun background while still showcasing that great sentiment and adorable little girl.
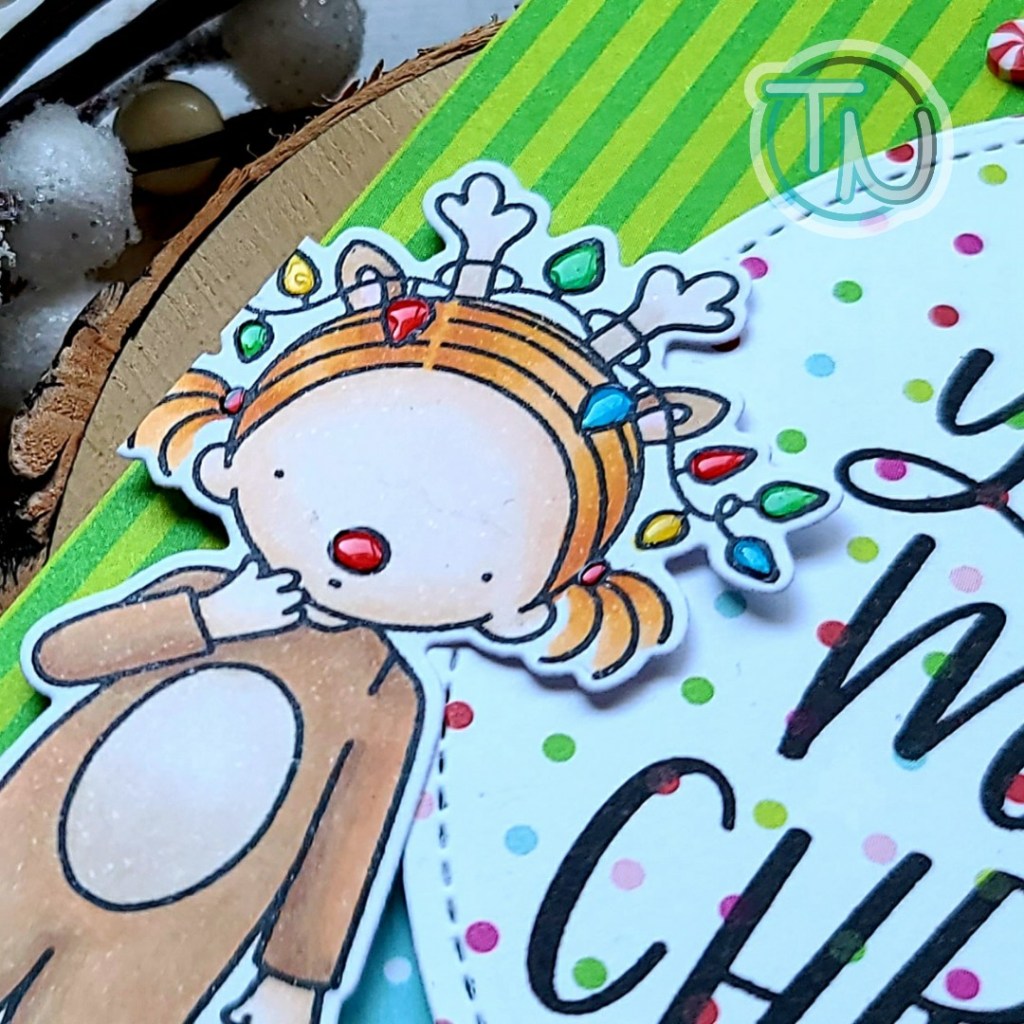
After adding all my layers with liquid glue and foam squares, I did have to add a few finishing touches like glossy accents to that nose and the lights too. They were calling for it.
Then I finished things off with some Trinity Stamps peppermint candy clay embellishments scattered about too.
Do you ever have a stamp set that comes out and you absolutely have to have it? My favorite reindeer colored copic markers were low and I had to wait for refills in the mail but I will be coloring a bundle of this one up and making more cards and a few tags because I love it so much!
I appreciate you sharing your time with me. Have a fabulous day!
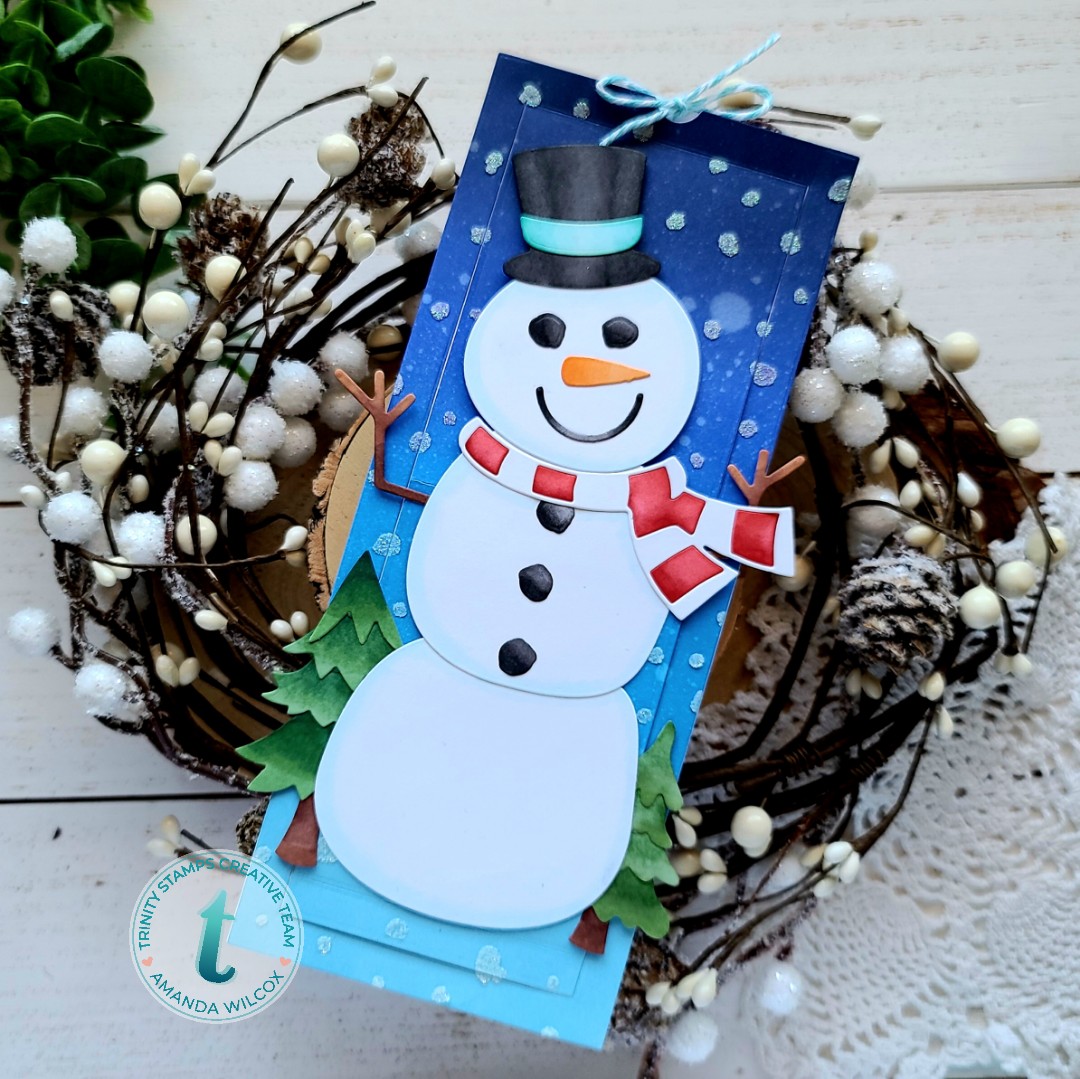
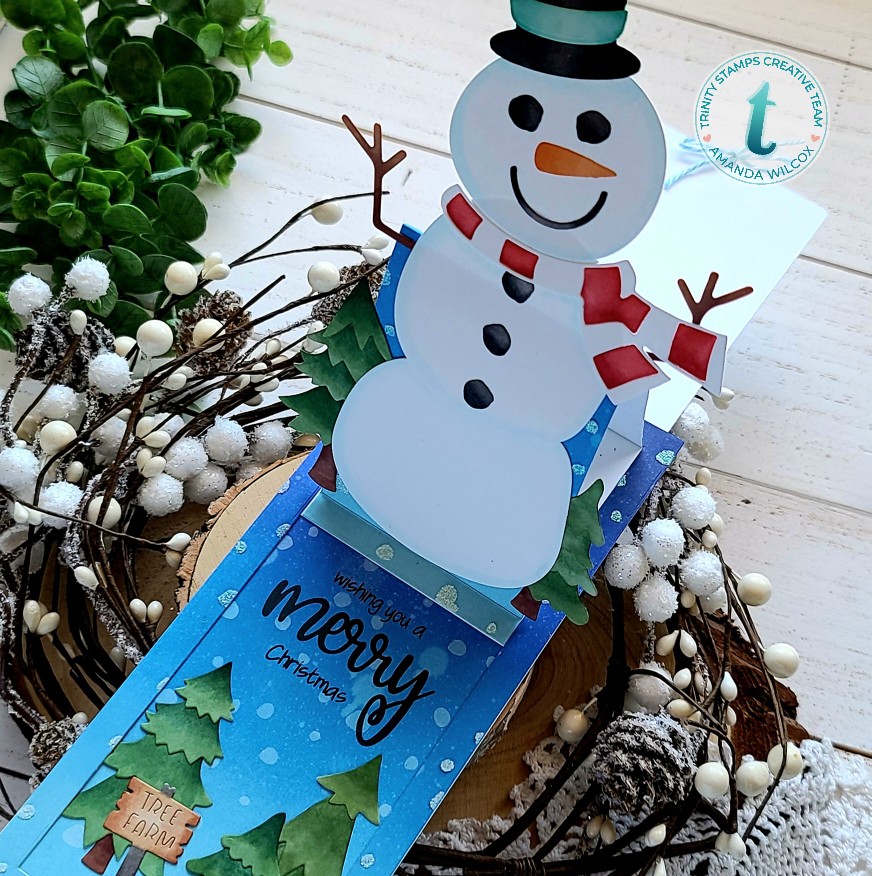
Hey friends!!! I’m soooo excited to share today’s card with you! It was so much fun to create and I absolutely cannot wait to give it to the recipient! It’s a slimline pop up slider that will hold a gift card. Everything I used today is from Trinity Stamps – an excellent source of slimline products! Let’s have a look!
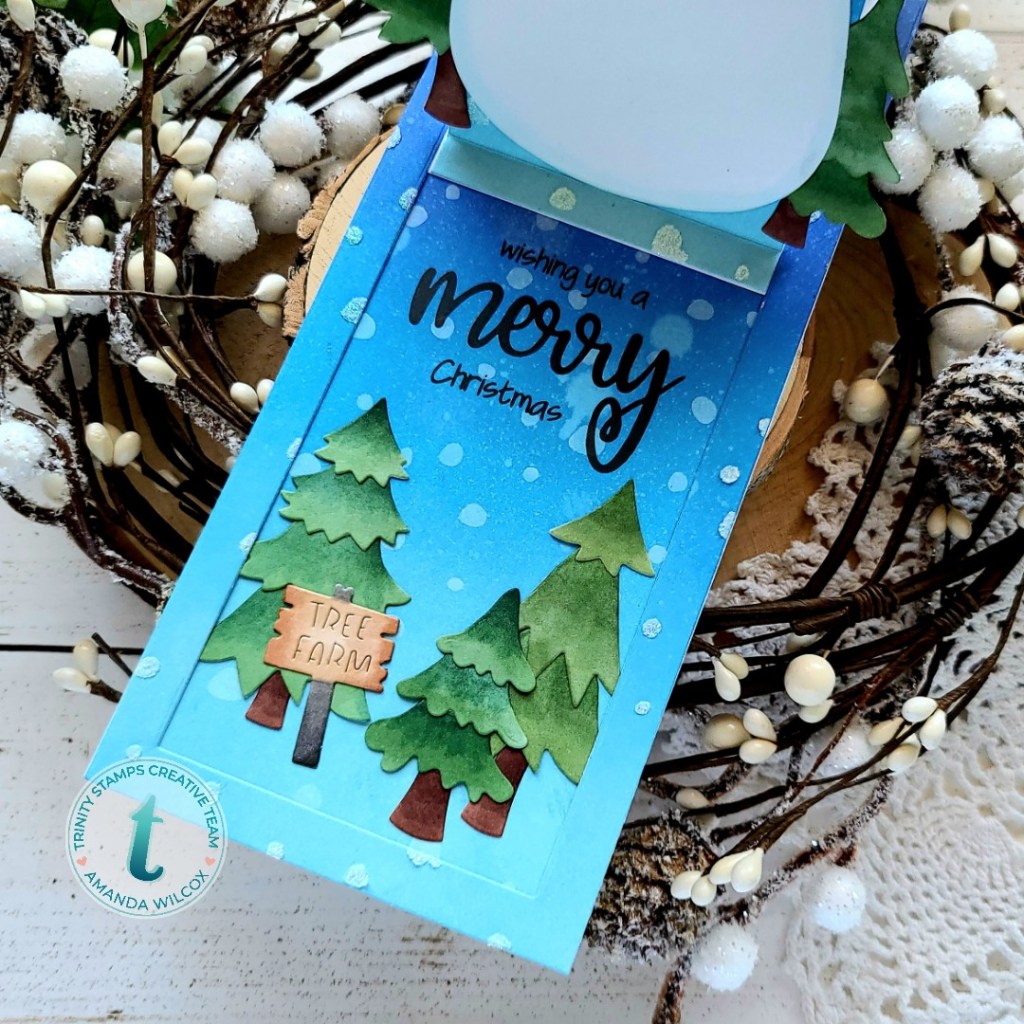
I had so much fun die cutting all of the pieces from Happy Snowman and Happy Little Tree Farm out of white cardstock and coloring them with my copic markers! Then I used distress oxide inks to create a beautiful blue winter scene and used glitter glitz gel over the slimline snowfall stencil. I did the same panel twice but the second time I just used Hero Arts Unicorn white ink on the stencil so it didn’t have any dimension to get in the way of the mechanism moving up and down.
I used the new slimline surprises die set to create my interactive mechanism and liquid glue to adhere all my pieces. I carefully used the Merry Christmas Senti-mini set to stamp a sentiment on the inside. I plan to attach the gift card to tab that gets pulled out of the top for a double surprise!
Here’s a closer look at the inside of the slider surprise portion. Isn’t this just so much fun!?!?! I love it way too much!
I appreciate you sharing your time with me. Have a fabulous day!
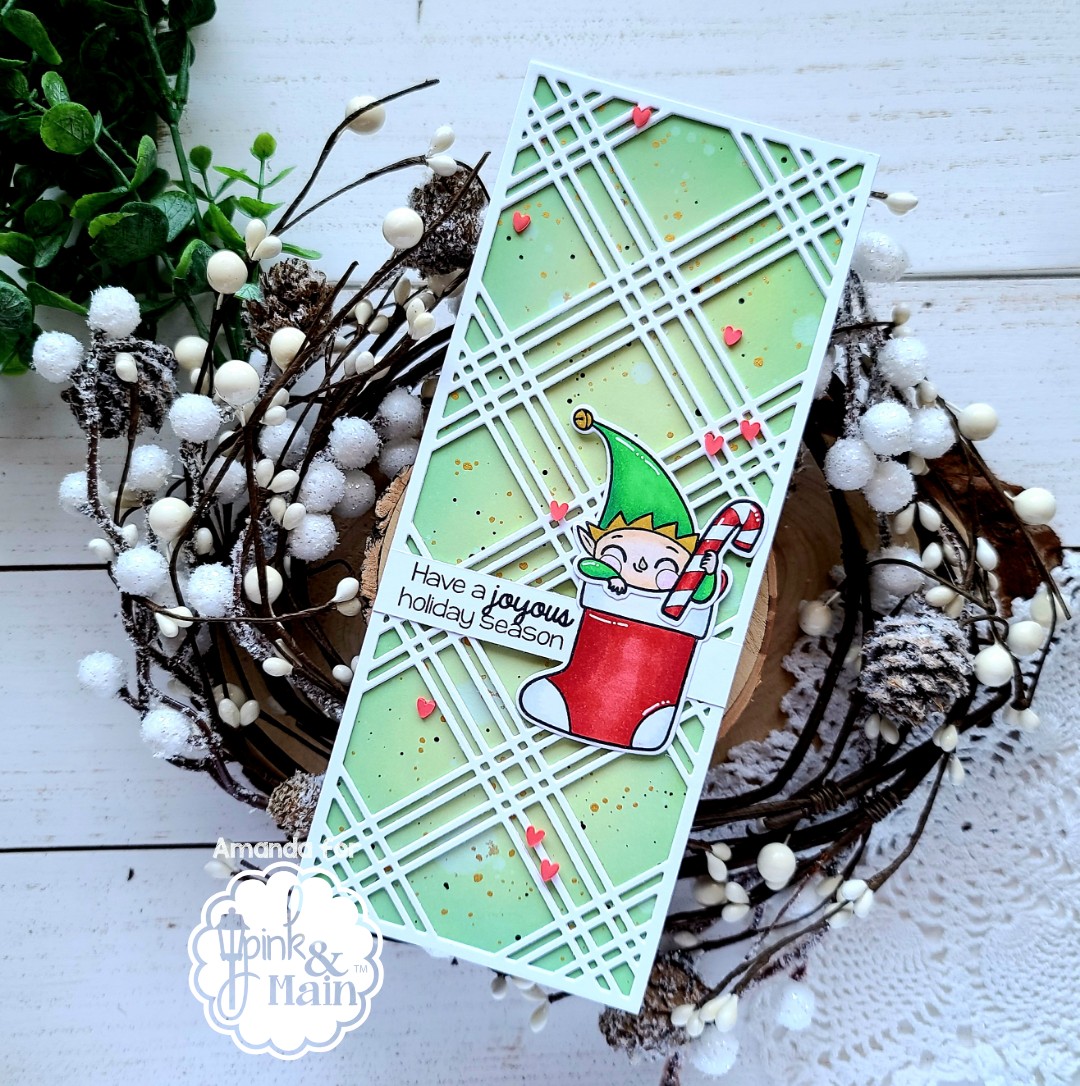
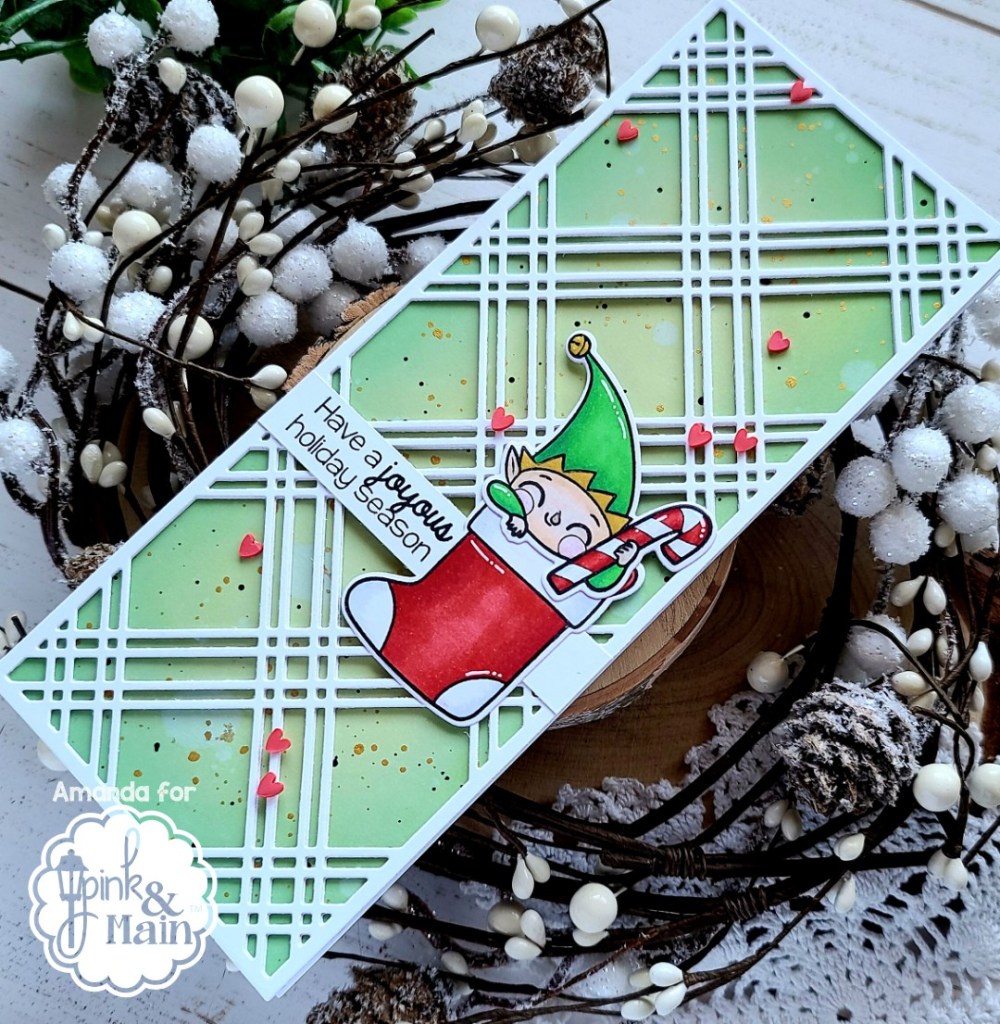
Hey friends! I’m over on the Pink & Main blog today mixing and matching some fun goodies to create an adorable slimline Christmas card!
I knew I wanted to try something with the new slimline plaid die so I cut it out first off. I actually cut it out 3 times and glued them all together for some dimension. Then I pulled out Stocking Stuffers because I have been itching to get that elf colored up! I stamped and colored my images with copic markers and used the coordinating dies to cut them out.
I wasn’t totally sure on a sentiment so I planned to use the Merry Christmas in the Stocking Stuffers set but dug in my stash instead and found this sweet sentiment in Christmouse to use instead. I stamped it on a strip and glued my elf stocking to the side of it.
I couldn’t decide on a background color from my cardstock stash so I pulled out my distress oxide inks and made my own. This is a blend of shabby shutters and mowed lawn. I spritzed it with water and then flicked black acrylic paint and gold watercolor all over it too.
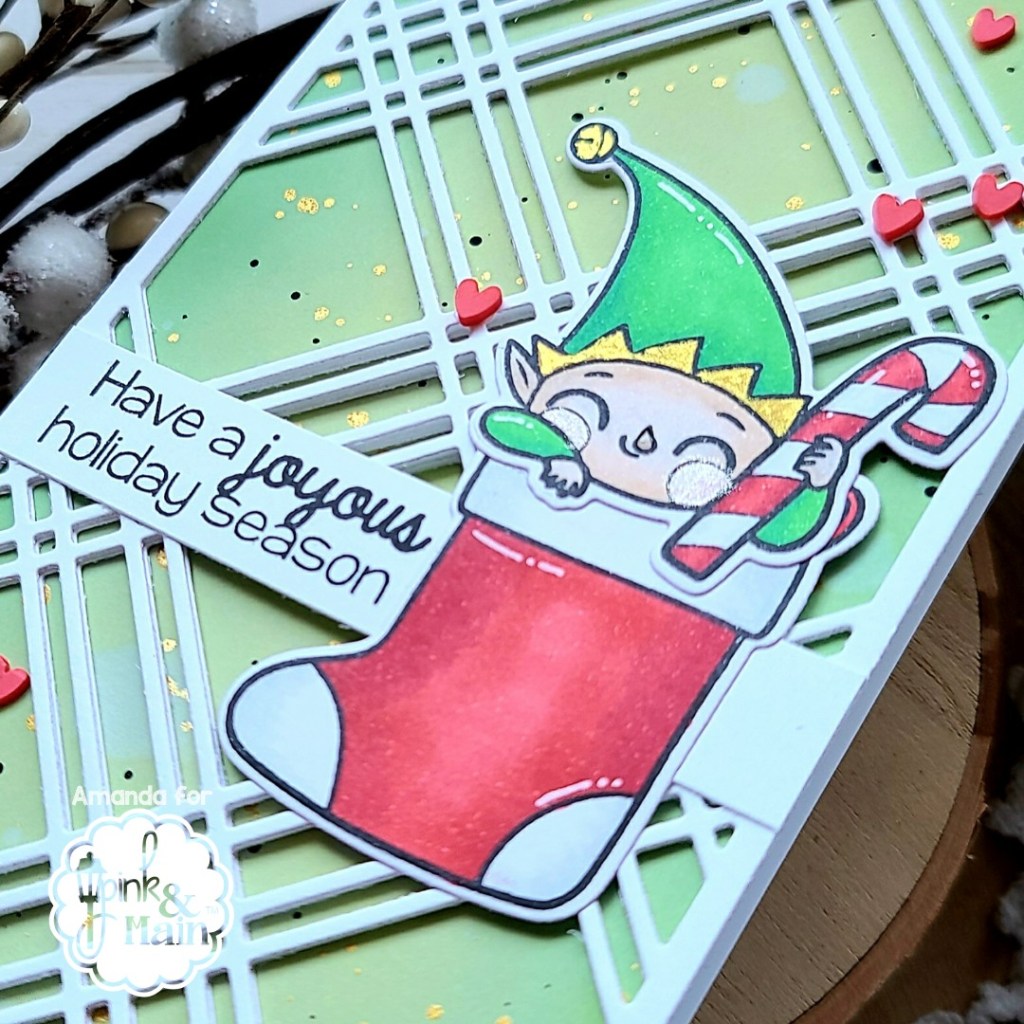
I adhered all of my layers to a white card base and decided to add just a few finishing touches. For those, I started with Wink of Stella glitter brush pen on the elf’s cheeks and then I thought some shimmer on his hat would be good so I watercolored just a bit of gold on his hat brim and bell. I added a little glossy accents to his nose and some white gel pen accents to his hat, sleeve, the candy cane and stocking. Last of all, I added some cute red clay hearts throughout the design.
Such a fun and festive card! I really hope you like it. You could swap out colors of what you stuff the stocking with and make a bundle of these. It would be so cute to see a line up of all the different stockings together.
I appreciate you sharing your time with me. Have a fabulous day!
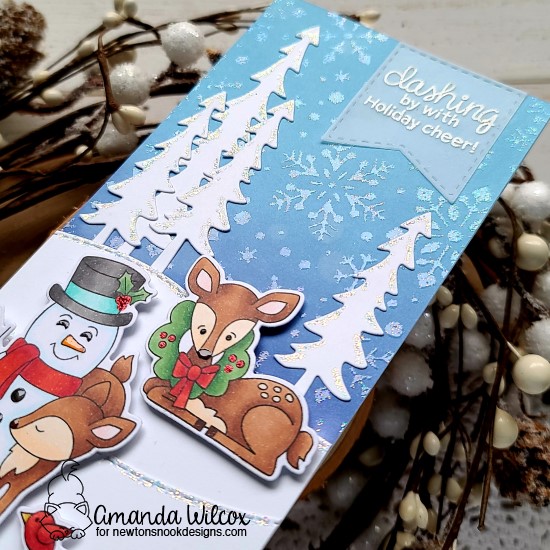
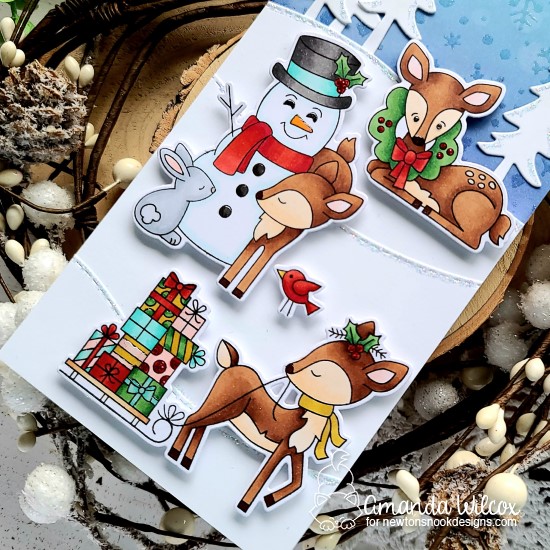
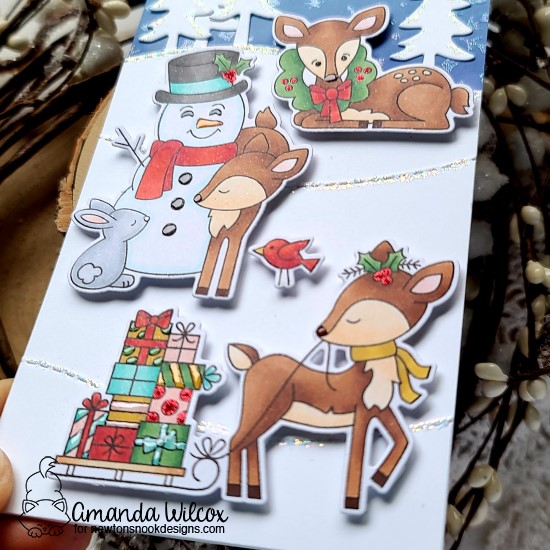
Hey friends! I’m super excited for today’s finale to the Newton’s Nook Deck the Halls with Inky Paws guest designer week, we’re having a blog hop today featuring everyone! Be sure to hop through for tons of great inspiration and comment for a chance to win! There’s also a surprise sale going on so be sure to treat yourself after soaking in all these awesome ideas!
To make my card, I started by stamping and coloring the images from Festive Fawns with my copic markers. Then I used the coordinating dies to cut them all out. I arranged them on an oversized panel to see how far down I need my sky to go, then I blended chipped sapphire and tumbled glass distress oxide ink on a panel. I spritzed it with water and then dried it with my heat gun. I placed the Snowfall stencil over the top and inked it up with my VersaMark ink pad. I sprinkled some crystal glitter embossing powder over it and heated it up. The snowflakes have a little shimmer to them in the light. I just love it!
Next, I took out some white cardstock and used the Land Borders die to cut out some hills for my deer to rest on. Next, to fill in the sky a bit I cut the trees from the Forest Scene Builder die set. I used liquid glue to adhere my trees and hills down, then trimmed the panel to 3.5×8.5. I used foam squares to pop up all of my images and moved on to my sentiment.
For that I die cut a banner from the Slimline Frames & Windows set from vellum and heat embossed my sentiment in white. I hid some liquid glue behind the embossing and adhered it down to the top right of my card.
For finishing touches, I added glossy accents to parts of the packages; the snowman buttons, eyes and nose; and the deer’s eye and noses too! Then I used Christmas Red Stickles to all the red accents like holly berries, package dots and the wreath berries. Last but not least, I added Unicorn Stickles to the edge of the snow hills and the trees at the top too.
Enter to Win! Deck the Halls with Inky Paws Hop Prizes! We will be choosing two lucky winners to win a $25 store credit for Newton’s Nook Designs online shop! To enter, just leave comments on the Design Team Member and Guest blogs (see list below)! Two winners will be chosen at random from the collective blogs in the blog hop. Make sure to check out each of their blogs and comment for your chance to win. You will not know which blog has been chosen so the more you comment on the better your chances are of winning! You have until Sunday, December 6th at 9 pm EST to comment — winners will be announced on the NND blog on Monday, December 7th.
Remember that sale I mentioned, here are the details! Enjoy!
Deck the Halls with Inky Paws SALE! $5 off every $30 You Spend! That means $5 off $30, $10 off $60…up to $25 off $150!* No Coupon Needed Now through Sunday, December 6th! *Maximum $25 discount per order.
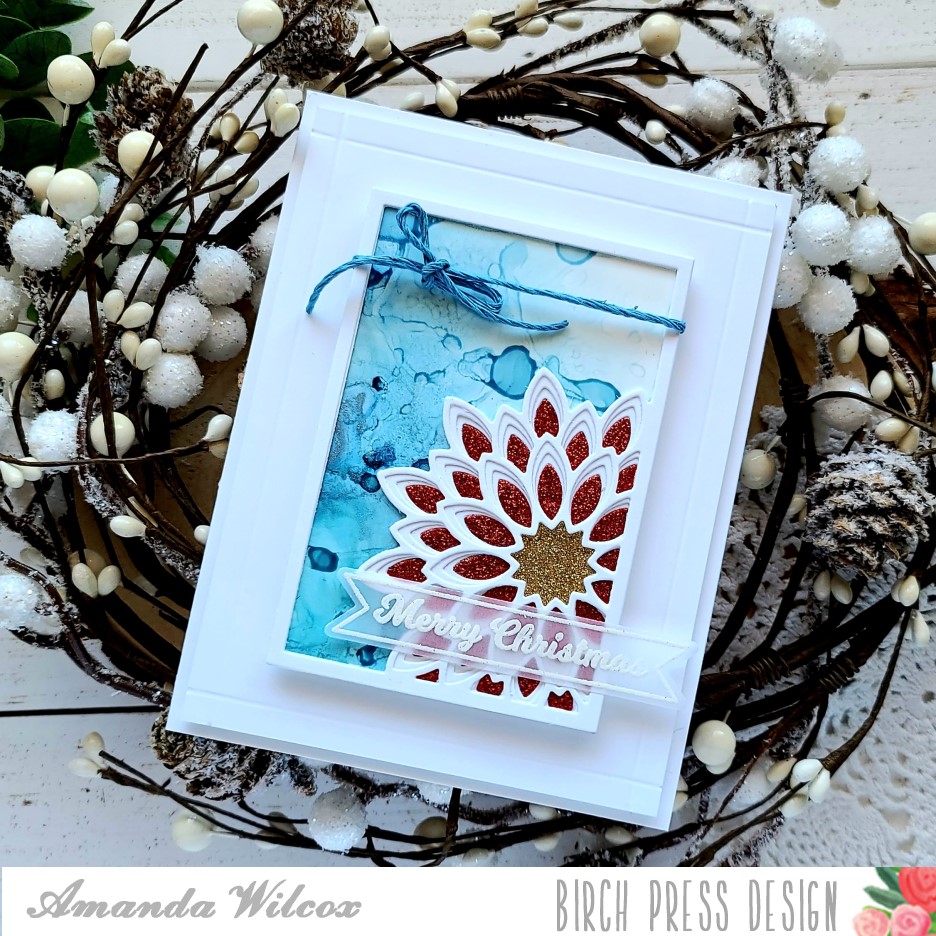
Hello there! I’m over on the Birch Press Design blog today and I’ve decided to try and turn the Dahlia Mini Frame layers into a poinsettia. I think it turned out really pretty and had fun creating this simple card.
After cutting the dahlia layers from white I cut the flower from red glitter and the center from gold glitter cardstocks. I pulled out some alcohol pearl inks and created a serene blue background for my flower and let it dry. I glued the bottom layer of the dahlia mini frame to the alcohol inked background and then treated the glitter pieces like a puzzle and glued them all in place with liquid glue. Then I adhered the other layers on top and added foam tape to the back.
I cut a white panel to 4×5.25 and used my score board to add some embossed details 1/4 inch in from each side. This panel is popped up with foam tape on a white card base. Then I tied twine around the dahlia panel and popped it in place too. Last, I heat embossed a sentiment banner from the Christmas Ornament and Labels set and used liquid glue to attach it.
I just love the texture combination between the layers, glitter cardstock and the alcohol pearl ink. They play off each other nicely and add so much interest to a simple card design.
I appreciate you sharing your time with me. Have a fabulous day!
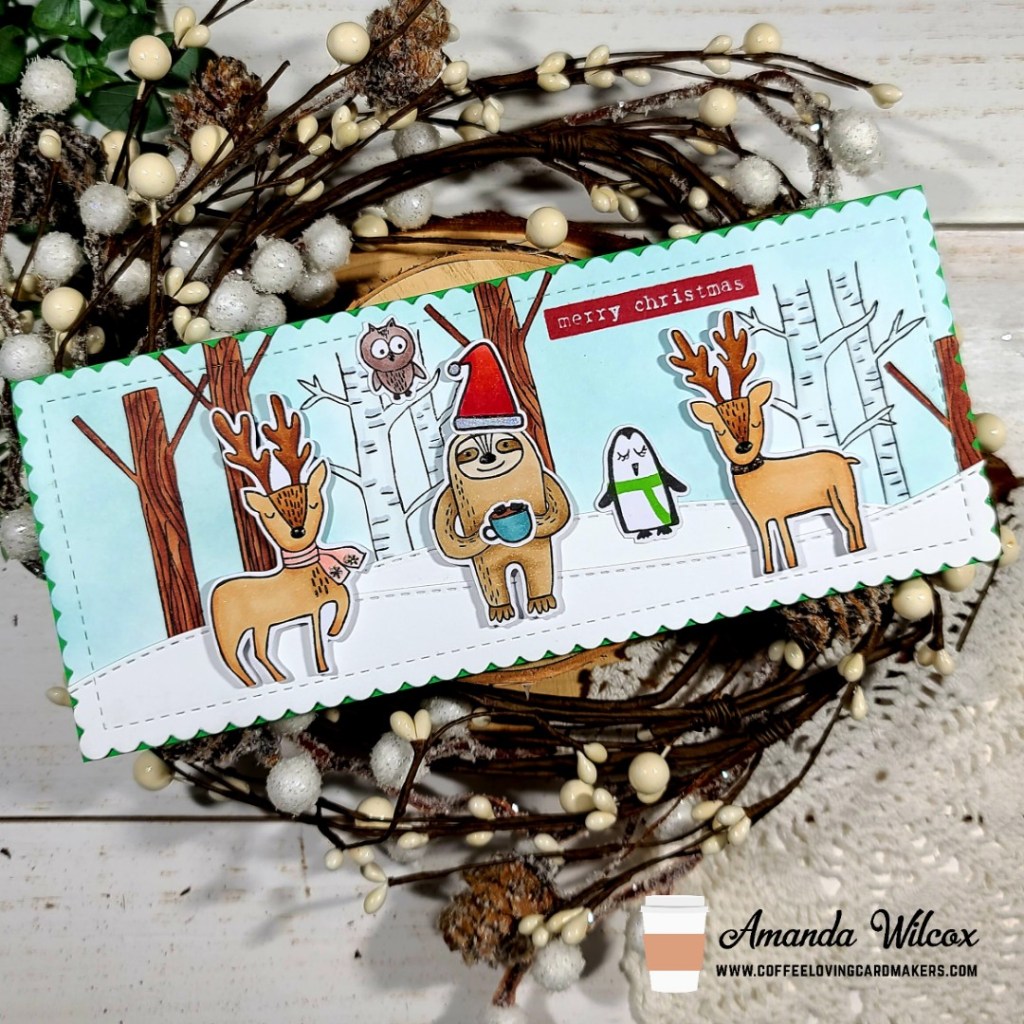
Hey friends! It’s Tuesday Tea over on the Coffee Loving Cardmakers and I am thrilled to share a fun card featuring my prize from the Fall | Winter Coffee Lovers Hop from Flora and Fauna! As soon as it came in the mail this weekend I pulled out all of my sets to see how I could mix and match.
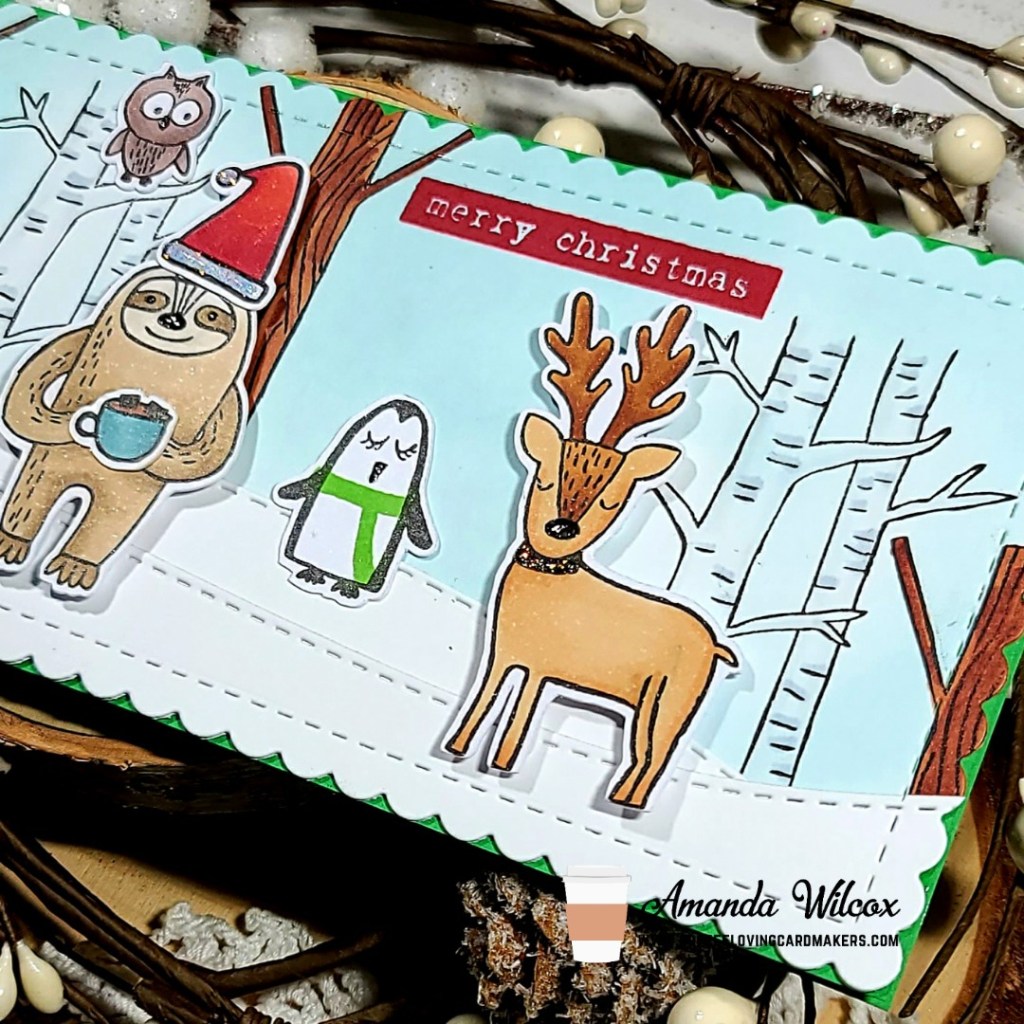
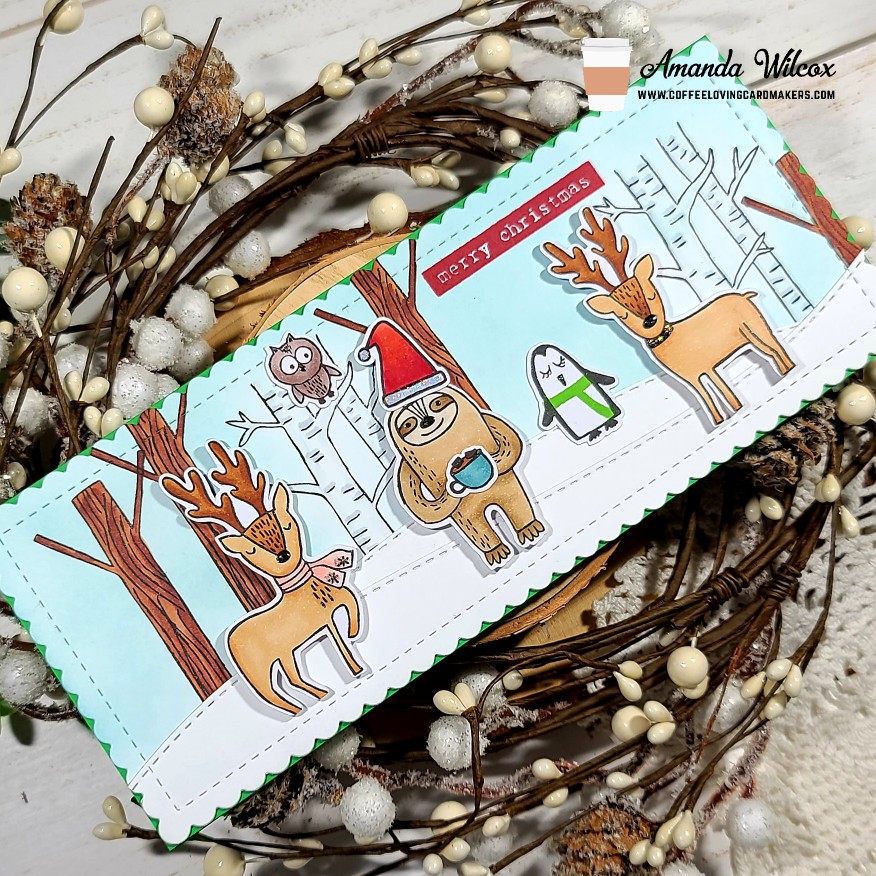
I stamped images from Outline Deer Wonderland, which was my prize and added others from Mini Sloth (we’re pretending he’s a sasquatch this time though) and Woodland Snowglobe and colored it all with my copic markers. Then I used my scan-n-cut to cut them all out. I cut an oversized panel and stamped some of the tree trunks from Outline Deer Wonderland and used my copics to color them in. Then I used my Trinity Stamps blending buddy brush to ink up the sky just a bit with a light blue ink. I cut it out with a Trinity Stamps Slimline Scalloped Panel die, along with a couple of white panels too. Then I used the Slimline Scenic Borders and Slimline Great Outdoors Borders to cut some snowy hills.
I used liquid glue to adhere my layers together and used my images as a guide to stamp the sentiment I chose from the Woodland Snowglobe set. Then using a combo of liquid glue and foam squares I attached all of my critters.
I cut a cardbase from green cardstock that matched my penguin’s scarf for festive fun and attached my whole scene panel down. Moving on to finishing touches, I added Unicorn Stickles to the Santa hat and reindeer scarves. Then I added glossy accents to things like noses and eyes and beaks. My card is all finished and ready to go.
I had so much fun mixing and matching so many products together for this whimsical scene! I hope you enjoyed it too!
I appreciate you sharing your time with me. Have a fabulous day!
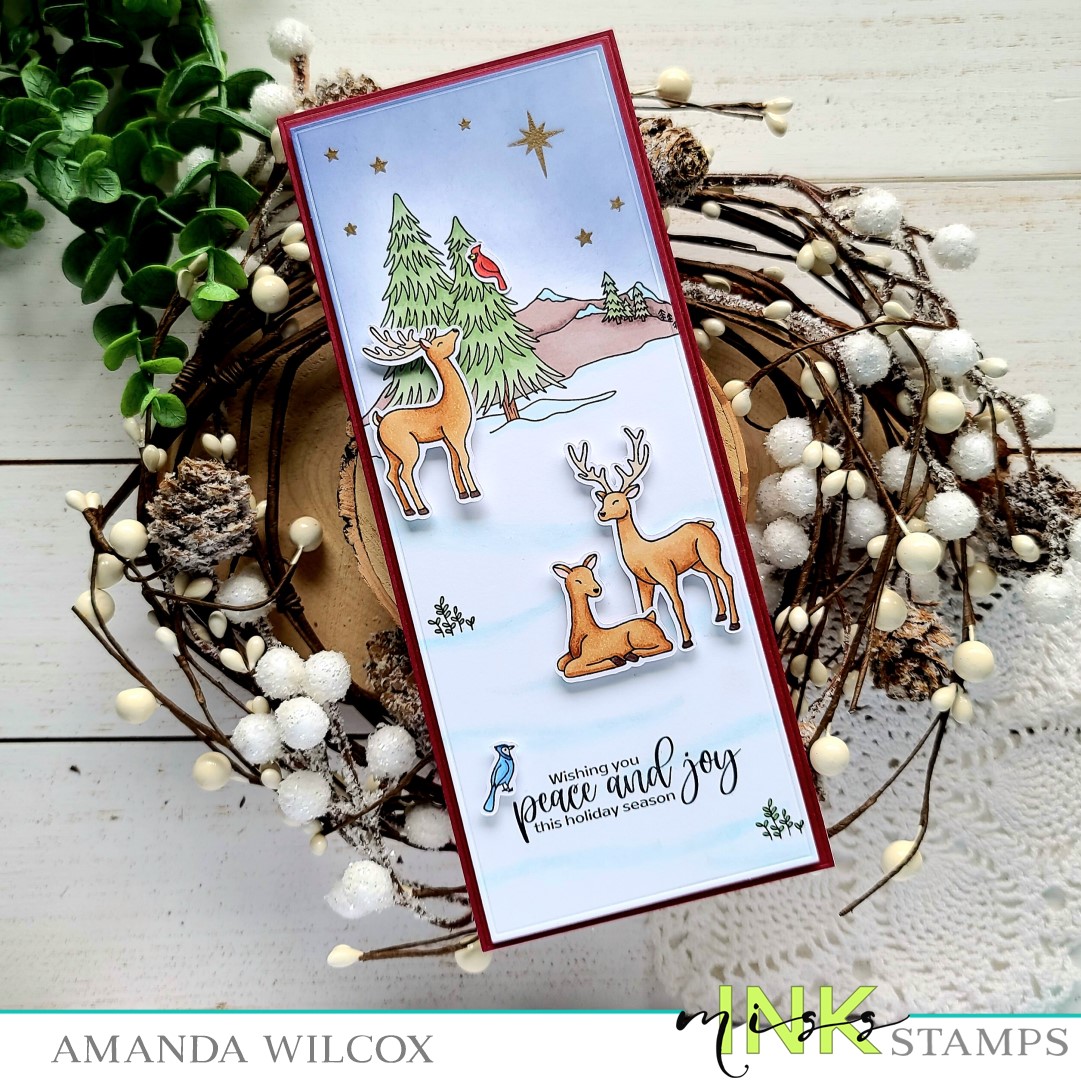
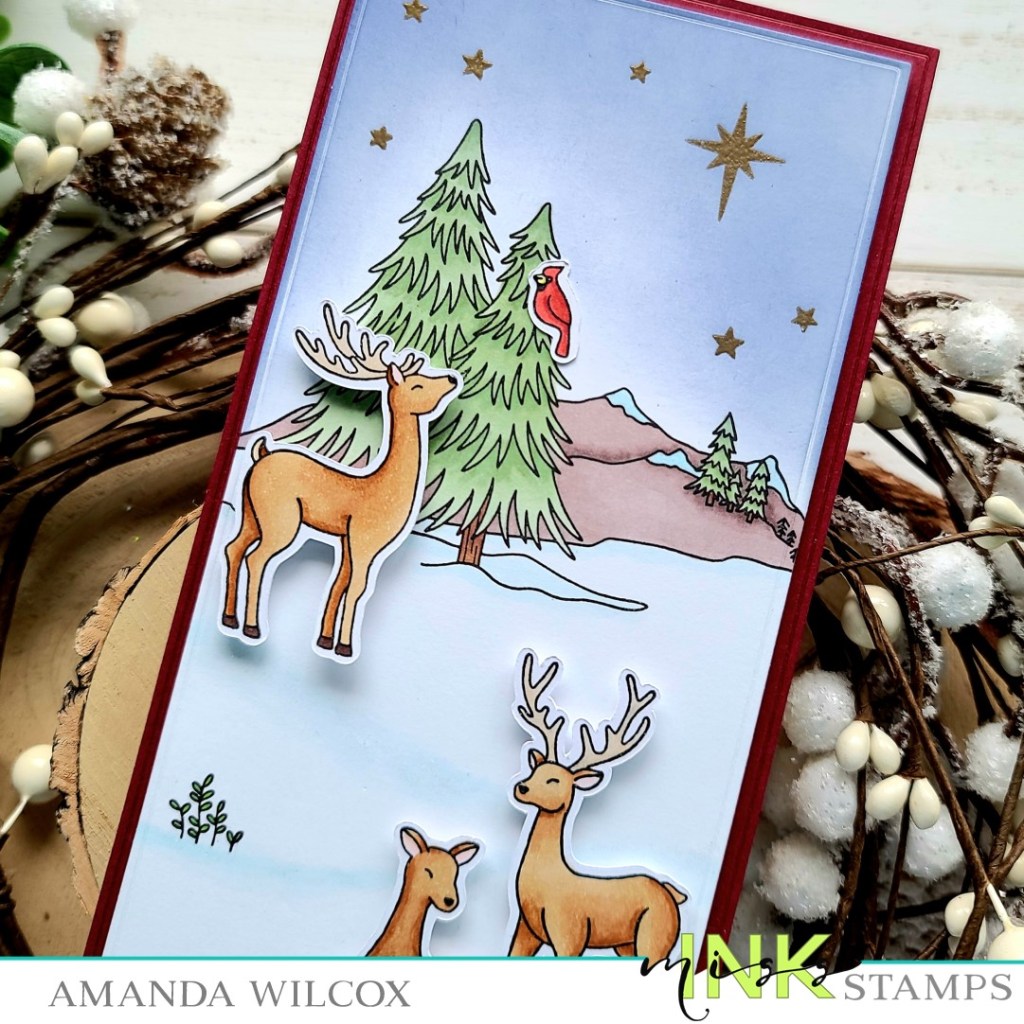
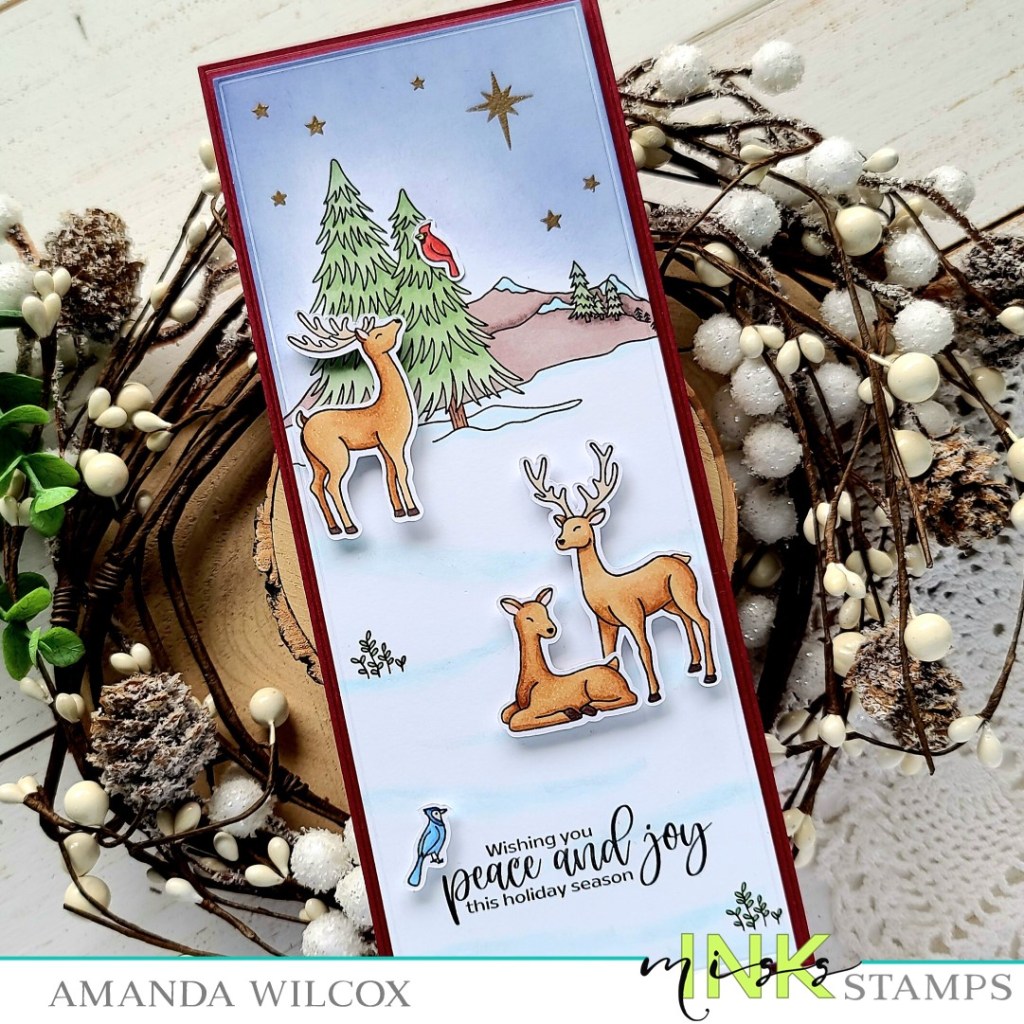
Welcome back everyone! I’m stopping in to share a beautiful slimline scene card featuring some new and older Miss Ink Stamps products. This card was so relaxing to create and I just love how it turned out.
I started this card by laying out all my stamps to see if I wanted to create a more full A2 scene or stretch things out for a slimline. Really, this design would have been great either way but I really like the elongated canvas I chose to work with. After stamping and coloring my images from Oh, Deer!, I used the scan-n-cut to cut them out. Then I took the new Mountainside stamp and stamped it on an oversized panel. I colored it with my copics and brought in the Trinity Stamps Slimline Modern Embossed Panels die to cut it down.
I stamped some stars in the sky from the Mountainside set and heat embossed them in gold. Then I took chipped sapphire distress oxide ink and inked up the sky a little. I used a dry cloth to buff away ink from the stars and adhered my images. The cardinal is adhered directly to the card with liquid glue and the rest of the images are popped up with foam squares.
I put my panel in my MISTI and decided to stamp some of the plant sprouts at the same time I stamped my sentiment. This sentiment is from the new Little Angel set. I die cut one size bigger panel from red cardstock and popped my colored panel up with foam tape. Using liquid glue I adhered the whole thing to a white card base and moved on to finishing touches.
For those, I added glossy accents to the deer noses and bird beaks. I wanted a little shimmer for the snow but nothing super overpowering because the scene is so soft and quiet looking. Instead of my usual Stickles, I went with Wink of Stella glitter brush pen on the mountain tops and snow lines all the way down the card front. It’s hard to photograph but in person, the glitter just shimmers wonderfully!
I appreciate you sharing your time with me. Have a fabulous day!
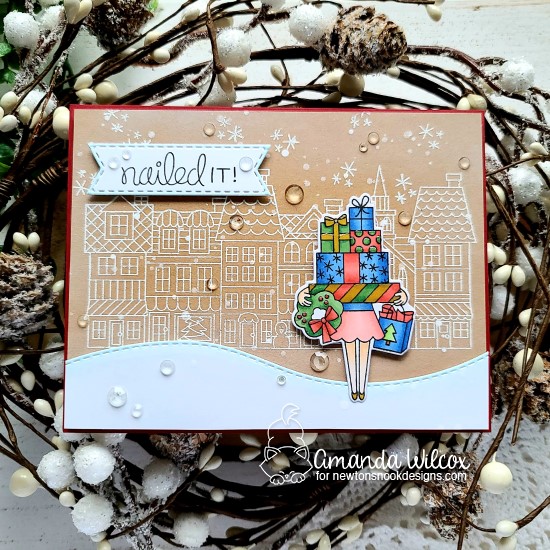
Happy Christmas Season everyone! I’m over on the Newton’s Nook blog today and couldn’t resist making a Black Friday shopping themed card to start the holiday season off.
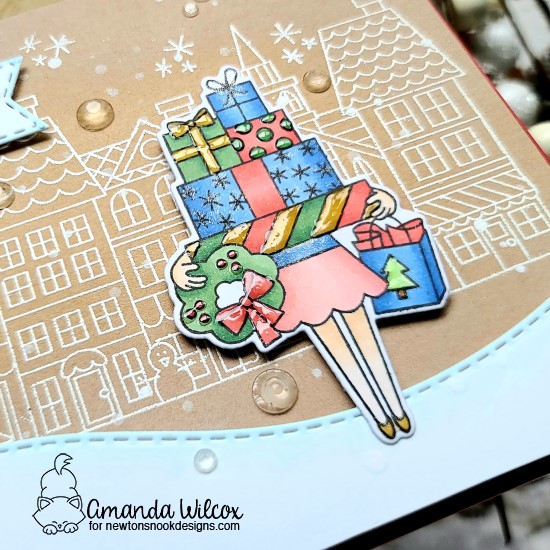
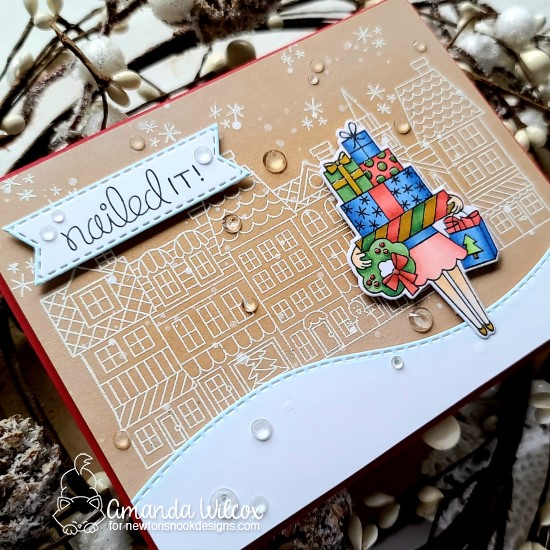
I started by stamping and heat embossing the Main Street image in white embossing powder, then I added some snowflakes to the sky the same way. This image is also part of the Main Street set. Then I used a blending brush and some white pigment ink to cloud up the edges of my panel a little. I trimmed this panel down just a smidge to 5 3/8 x 4 1/8. Then I die cut a white panel with the land borders die and colored the top edge with a light blue copic marker and popped it up with foam tape. At this point I took some white paint, watered it down and flicked it across the panel for a little extra snow.
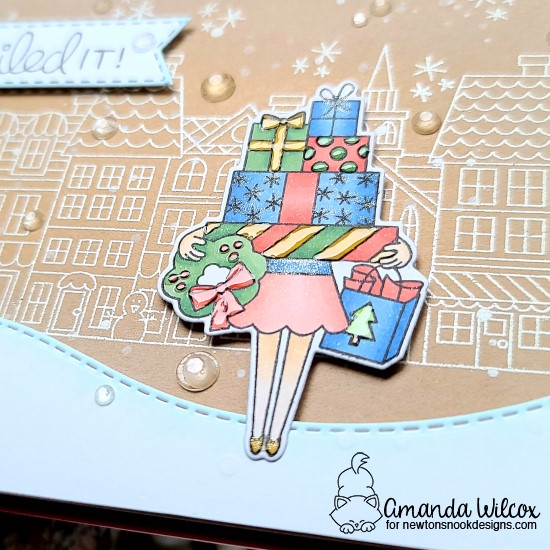
Then I stamped and colored the main image from Christmas Haul with my copics. I used the coordinating dies to cut her out and adhered her with a combo of liquid glue and foam tape so she was the same level as the snow bank. I also die cut one of the Banner Trio dies and stamped my sentiment. *Note, because this is die is solid and I needed it smaller, I did partial die cutting before stamping my sentiment. I just die cut half, shifted the die down a little until the stitches matched up and die cut the other part. Then stamped my sentiment.*
I did take the same light blue marker and color the edge of the sentiment banner for a little accent and then popped it up with foam tape too. I added the panel to a red piece of cardstock measuring 4.25×5.5 and used liquid glue to adhere that to a white card base. Now for those fun finishing touches!
For those I added glossy accents to parts of the wreath and packages the lady is carrying and also Wink of Stella glitter brush pen to other packages and her belt and shoes. Last, I added some clear gems in various sizes throughout the whole design.
I appreciate you sharing your time with me. Have a fabulous day!
Happy Thanksgiving friends!!! I truly am so thankful for each and every one of you! I appreciate the comments and messages and our ability to lift each other up and share our awesome creations!
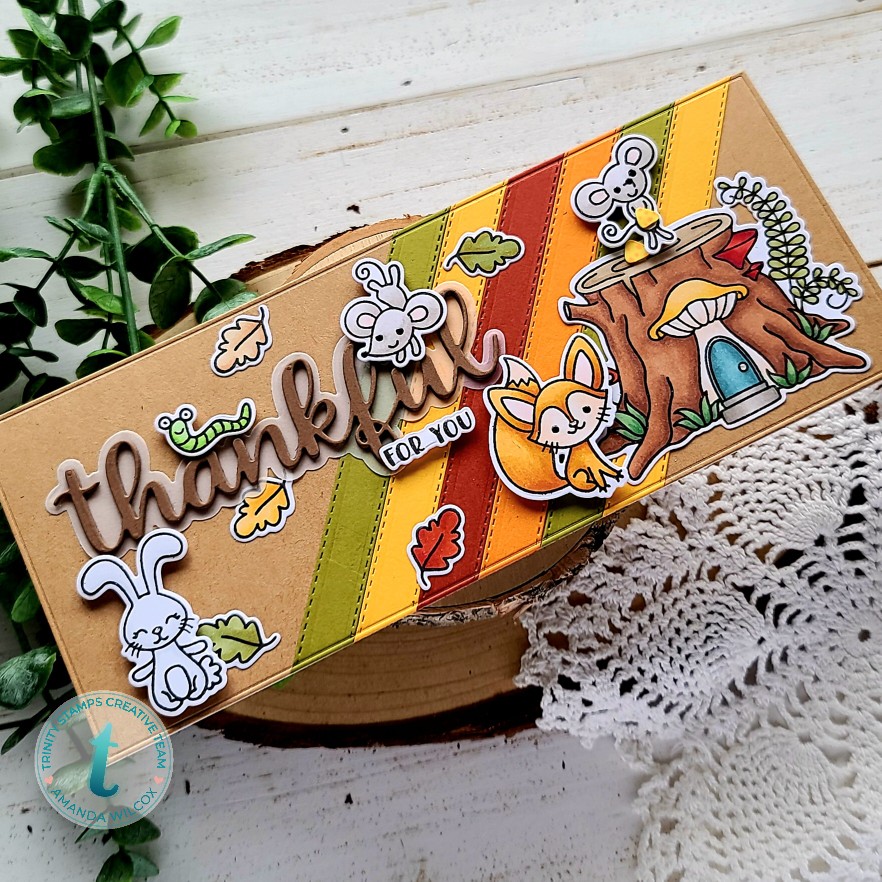
Today I’m over on the Trinity Stamps blog and was super excited to take that opportunity to create a special Thanksgiving card to share with you all.
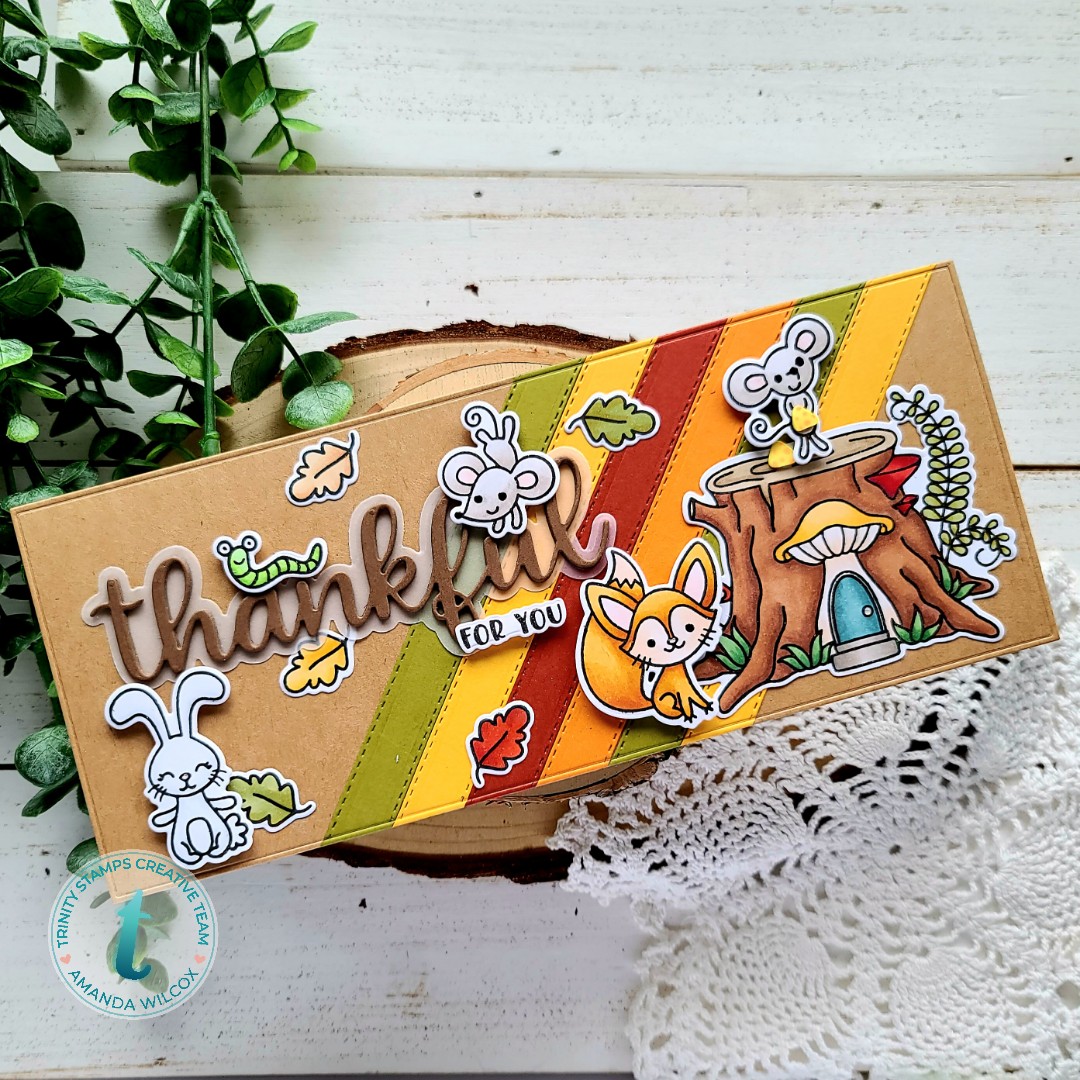
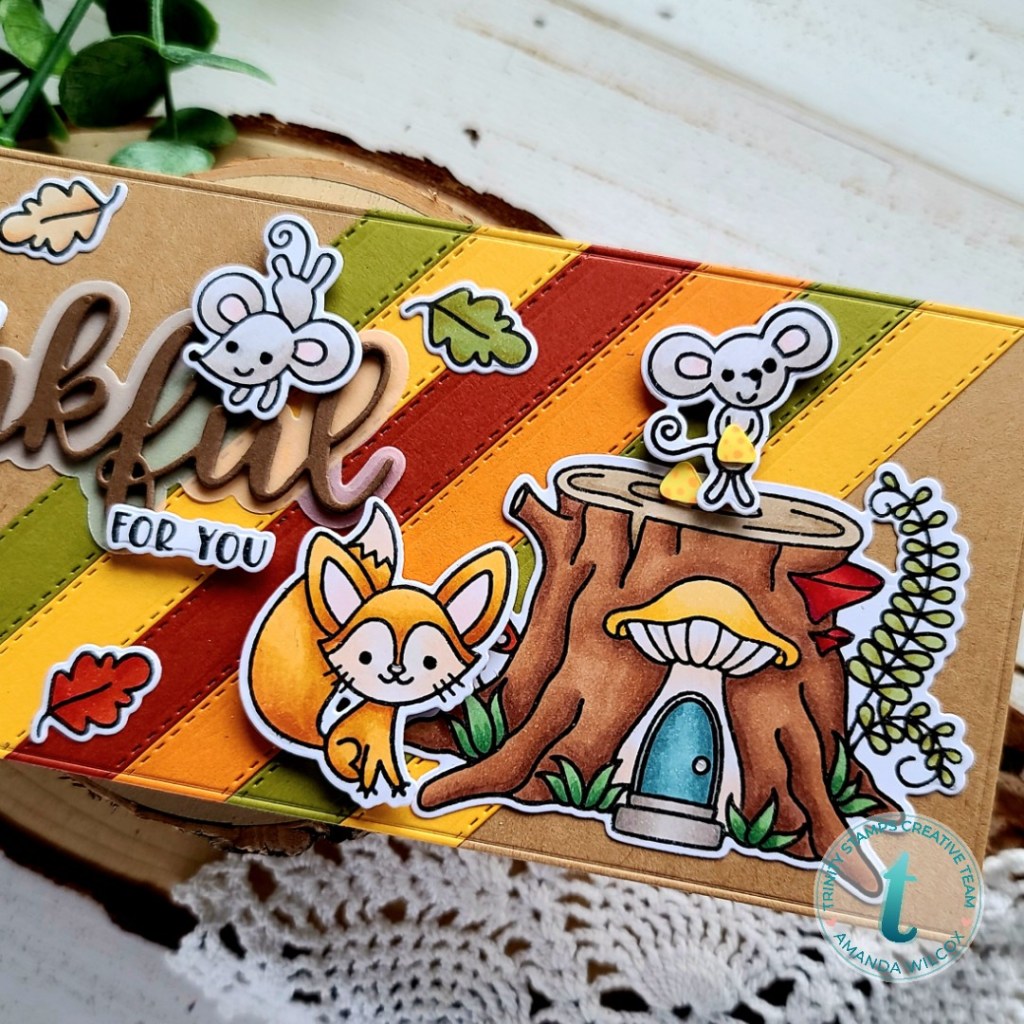
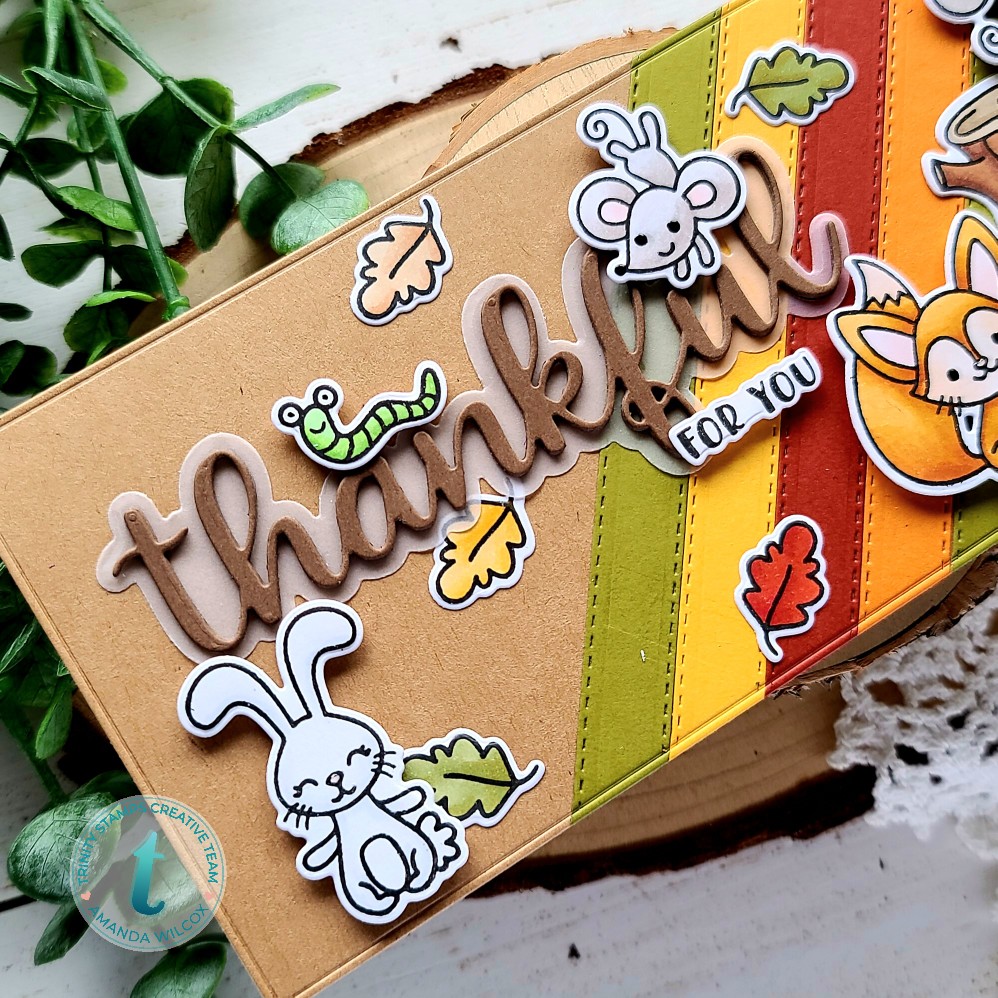
I had an idea in my head so I started by die cutting the a variety of colors of the middle size in the Slimline Stitched Strips set. I used tape runner to adhere them to a kraft cardstock panel and then used largest Slimline Modern Embossed Panels die to cut that whole thing out. That way the embossed edge goes all the way around. I just love this finished look. Then I cut out the Scripty Thankful and it’s shadow and adhered them together. At this point I thought I would use a different image but it didn’t fill the card like I wanted. So I kept looking and found my SUPER FAVORITE mice from House Mouse and their buddies in Bunny Burrow!
So, after laying my images out to get an idea how many I could fit, I stamped everything and colored them all with my copic markers. I used the coordinating Mouse House and Bunny Burrow die sets to cut the images out and began adhering them. I used a combo of foam squares and liquid glue.
I also adhered the die cut sentiment and decided it would be fun to finish it off so I pulled out the Thankful For You stamp set and stamped the “for you” portion from there. I used the coordinating dies to cut it out and adhered it as well.
Finally, I moved on to finishing touches, which were pretty simple. I used black glaze pen on all the eyes and mouse noses, then glossy accents on the other critter noses. Last but not least, I added some clay cheese embellishments to the mouse standing on the mouse house.
I appreciate you sharing your time with me. Have a fabulous day!
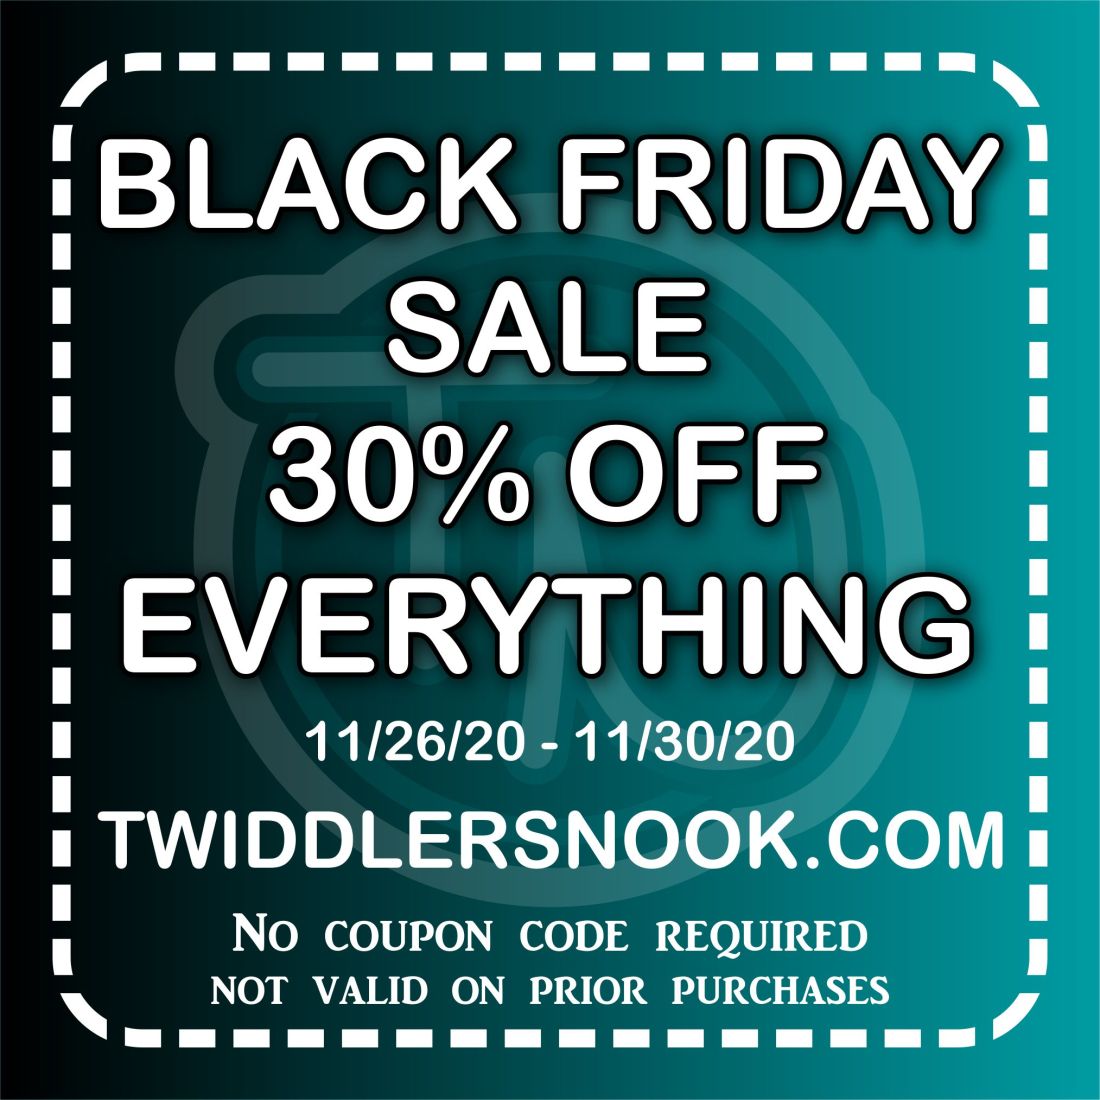
Hey crafty friends!!! Just wanted to pop in and let you know that we’re having a sale for the entire Thanksgiving weekend! We’re so thankful for the love and support we’ve gotten this first year expanding our business past my cardmaking and papercrafting creations. It’s very humbling and we’re excited to be able to extend some appreciation to our customers.
It’s pretty simple…30% off the whole store from now until Monday at midnight. The offer isn’t good on previous purchases and no coupon code needed.
Happy shopping everyone! Please help spread the word and share this with your friends and family. I’ve posted it on our Instagram and Facebook pages so you can share there or forward your email around too!
Tell those shopping for you what your Christmas wish list is or treat yourself!
Thank you again for all of your continued support! We truly appreciate each one of you! Have a fabulous day!