Okay, I couldn’t resist. I’m back with another Clearly Besotted card featuring literally the exact same products. I just couldn’t stop. They are sooooo cute!!! I mean, can you really blame me?
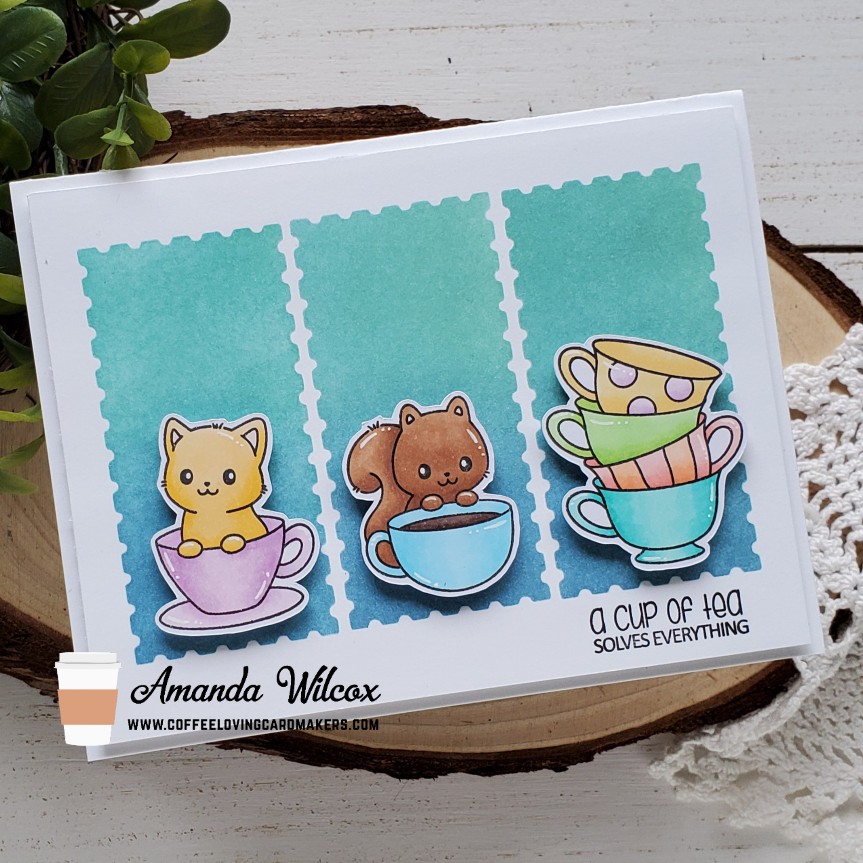
For this card, I used a different portion of the stencil and inked it up with a blend of blue and green inks. I stamped and colored my images, using my scan-n-cut again to cut them out. I stamped my sentiment under the inked rectangles on the right side and assembled everything. The images are popped up with foam squares and the panel is popped up on a card base with foam tape.
I did add some white gel pen accents to these cuties but overall I kept this card fairly simple. I love how it turned out and can’t wait to color more of these guys up right away!!!
I’m linking this beauty up to the Coffee Loving Cardmakers Hop HERE too!
I appreciate you stopping by again today. Have a fabulous day!
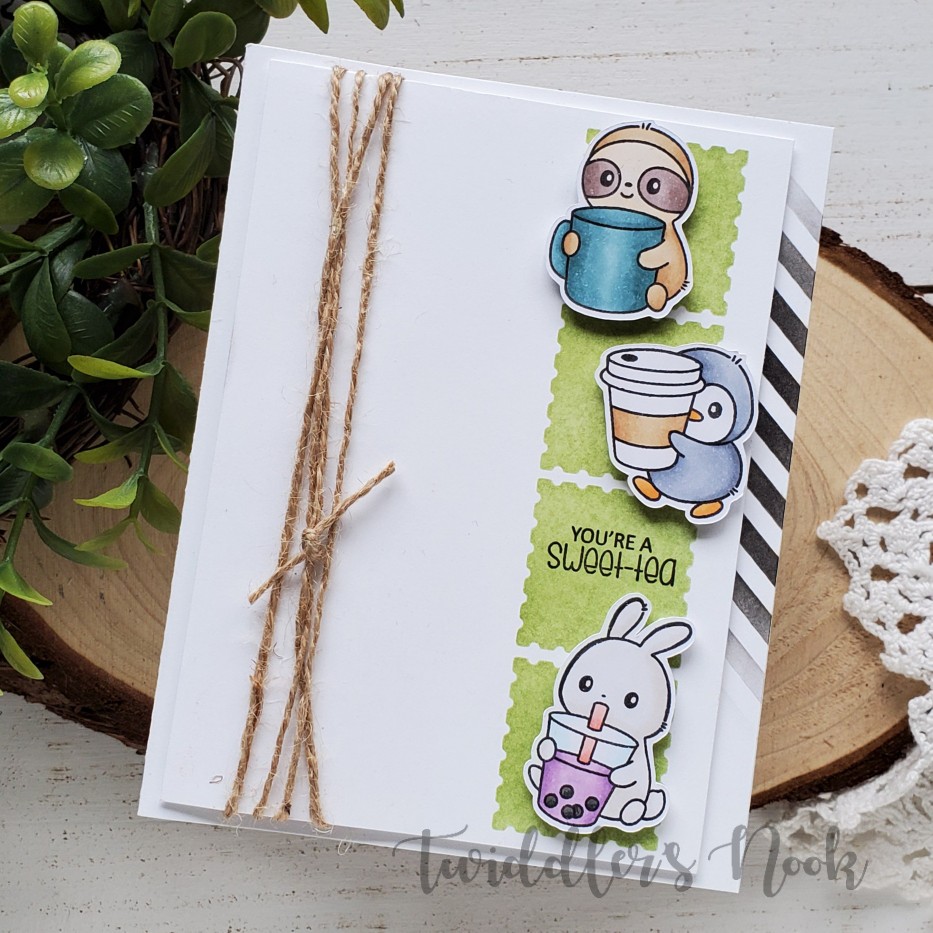
Thanks so much for stopping by today. I’m sharing a really fun card from a new-to-me company, Clearly Besotted. Their artwork is beyond adorable and I’ve been admiring it for a bit. Then with their last release came this adorable set called Spilling Tea and I didn’t even hesitate to order it the second it was available! I love it!
Along with my stamps, I snagged this fun stencil called Stamp On It. It’s got the same postage stamp looking squares and rectangles in 3 different ways on the same stencil. I thought it was absolutely genius!
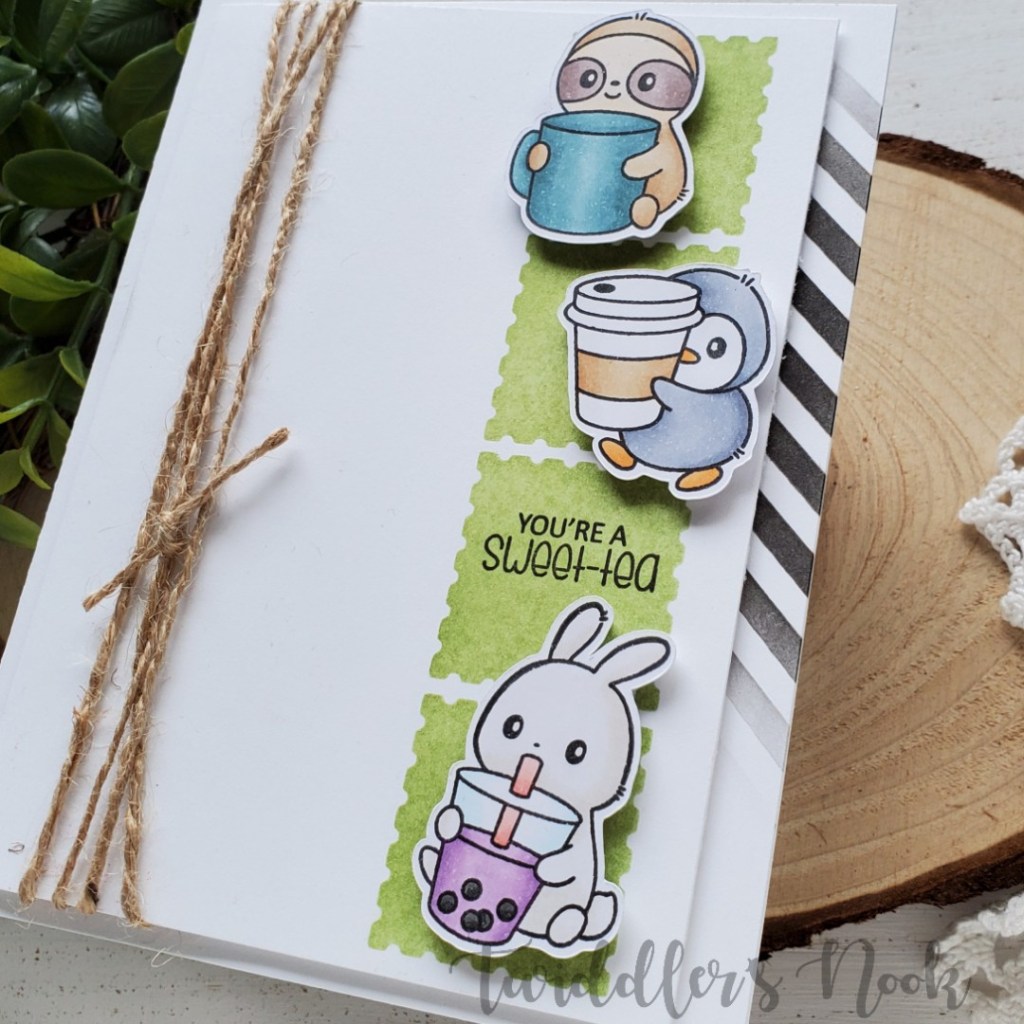
To make this fun card I started by stamping and coloring my images. Then I used my scan-n-cut to cut them out. I inked a column of squares from my new stencil on the right side of a 3.75×5.25 inch panel. Then, using my images as a guide I stamped my sentiment and then adhered the images with foam squares. I wrapped some twine around the left side and added foam tape to the back of this panel. I used my new diagonal stripe stencil from Trinity Stamps on the right edge of a white card base and then adhered my panel to it.
I really just want to squish these little critters. They’re beyond adorable and extra fun with their cups of tea!
I’m linking this fun card up to the Coffee Loving Cardmakers Hop HERE. Don’t forget to play along too! There are so many fun prizes to be won from over 70 amazing companies!
I appreciate you sharing your time with me. Have a fabulous day!
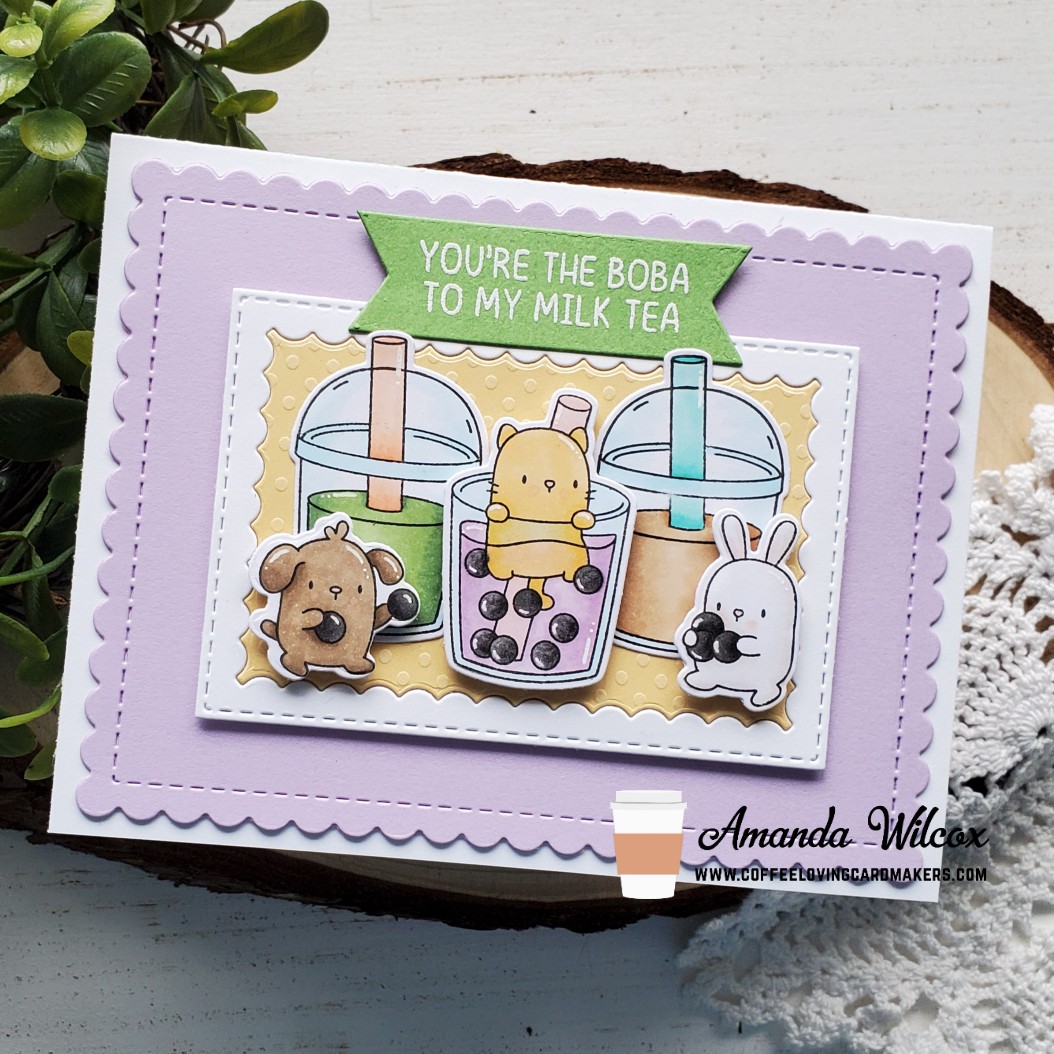
Thanks for stopping by for another caffeinated inspiration post. I was counting down the days until this Mama Elephant boba tea set released and I’ve had a blast with it since it came!
To create this fun card, I started by stamping my images and coloring them with my copics. I used the coordinating dies to cut them out and I set everything aside to work on the base. I pulled out my Newton’s Nook Frames & Flags and Framework die sets and cut some pieces from softer colors that coordinated with how I colored the images and set to assembling.
The purple scalloped rectangle is popped up with foam tape and then the frame and inside is popped up on that. Then for a little different dimension, I glued 2 of the cups to the frame panel and popped the other images up with foam squares.
Then I die cut a flag using the same Newton’s Nook dies and heat embossed my sentiment in white. I popped it up with foam tape on the top half so it lays flat on the frame. Last, I finished the images off with a few white gel pen accents and highlights.
I’ll be linking this up to the Coffee Loving Cardmakers Hop HERE. Are you playing along? I hope so!
I appreciate you sharing your time with me. Have a fabulous day!
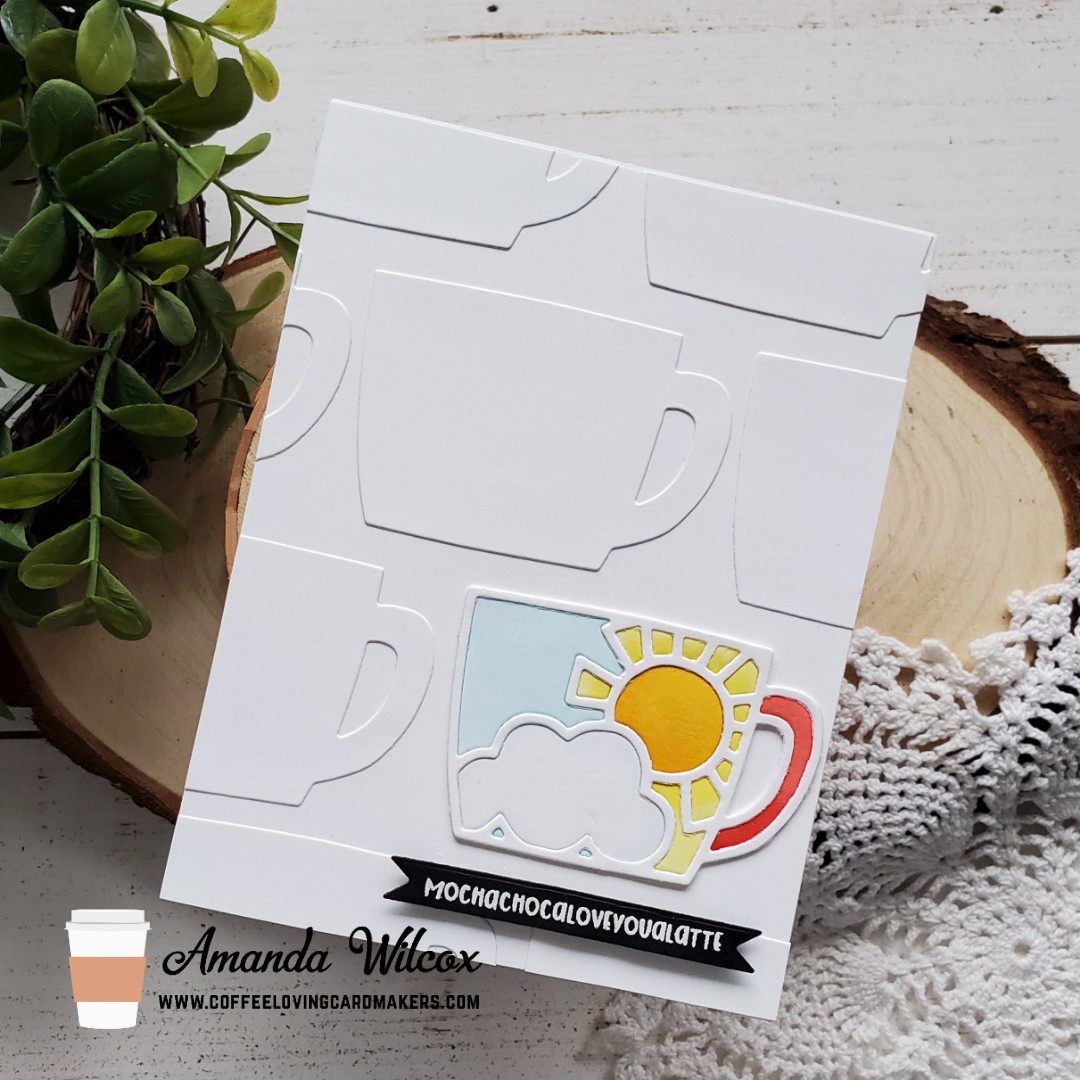
Welcome! Welcome! Today I’ve got completely clean and simple AND die cut! If you’ve followed me for long, you know I don’t like white space. It makes me so uncomfortable but when I saw this design using some other types of dies, I was inspired to try it with this fun Paper Smooches coffee cup die.
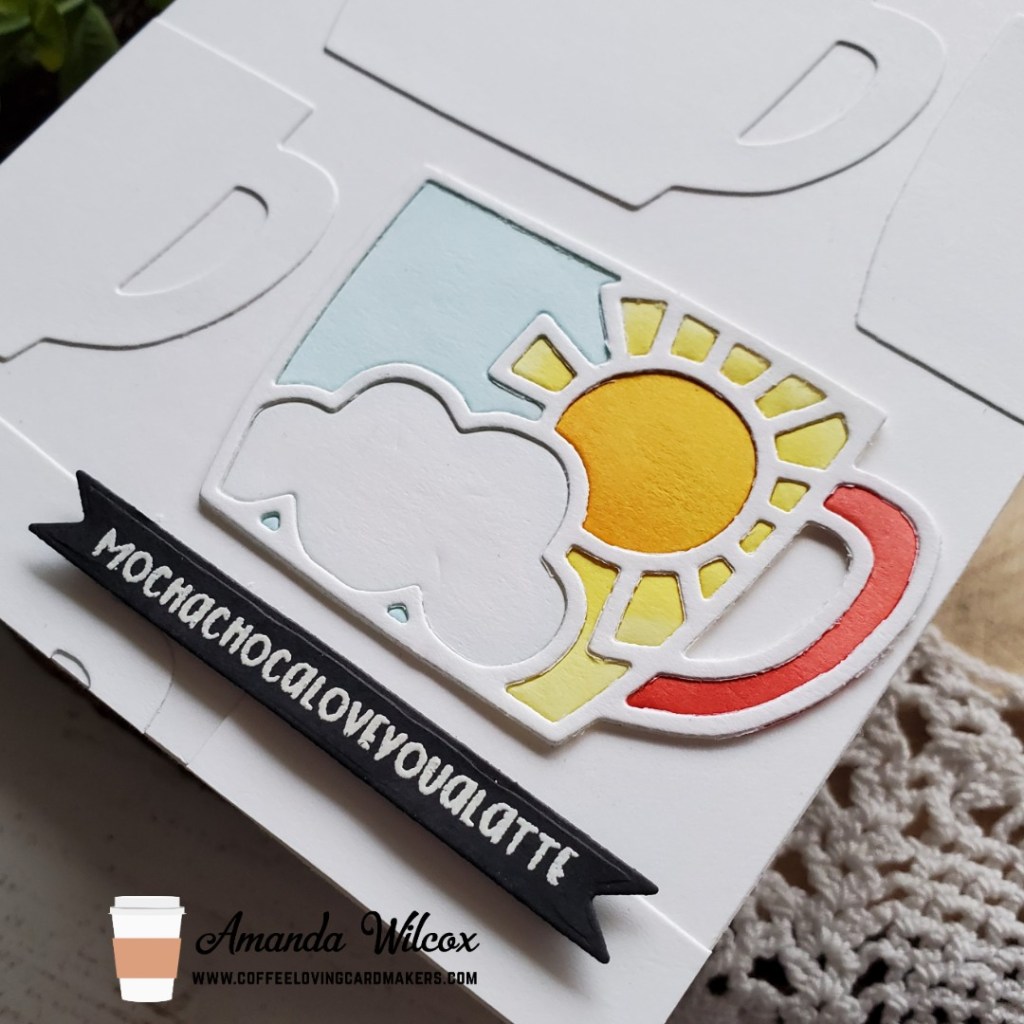
This is a die set with the solid cup and the designed cup. I die cut the solid cup multiple times from white cardstock and glued them offset across my card. I trimmed the excess off the sides and then I die cut the design twice from white cardstock. One set I colored with my copics. Then I took the outline from the second one and glued it over the top. I adhered this to my card base and moved on to my sentiment.
I stamped and heat embossed a sentiment from Paper Smooches Caffeinated on black cardstock with white embossing powder. Then I took a banner die from Trinity Stamps 4-Bar Card Die set to cut it out. I popped this up with foam strips for a little dimension on such a simple card.
I’m linking this up to the Coffee Loving Cardmaker’s Summer-Spring Hop as well. Have you joined in on the fun yet? There’s still time. Head HERE to check out some inspiration and link your projects up as well.
I appreciate you sharing your time with me. Have a fabulous day.
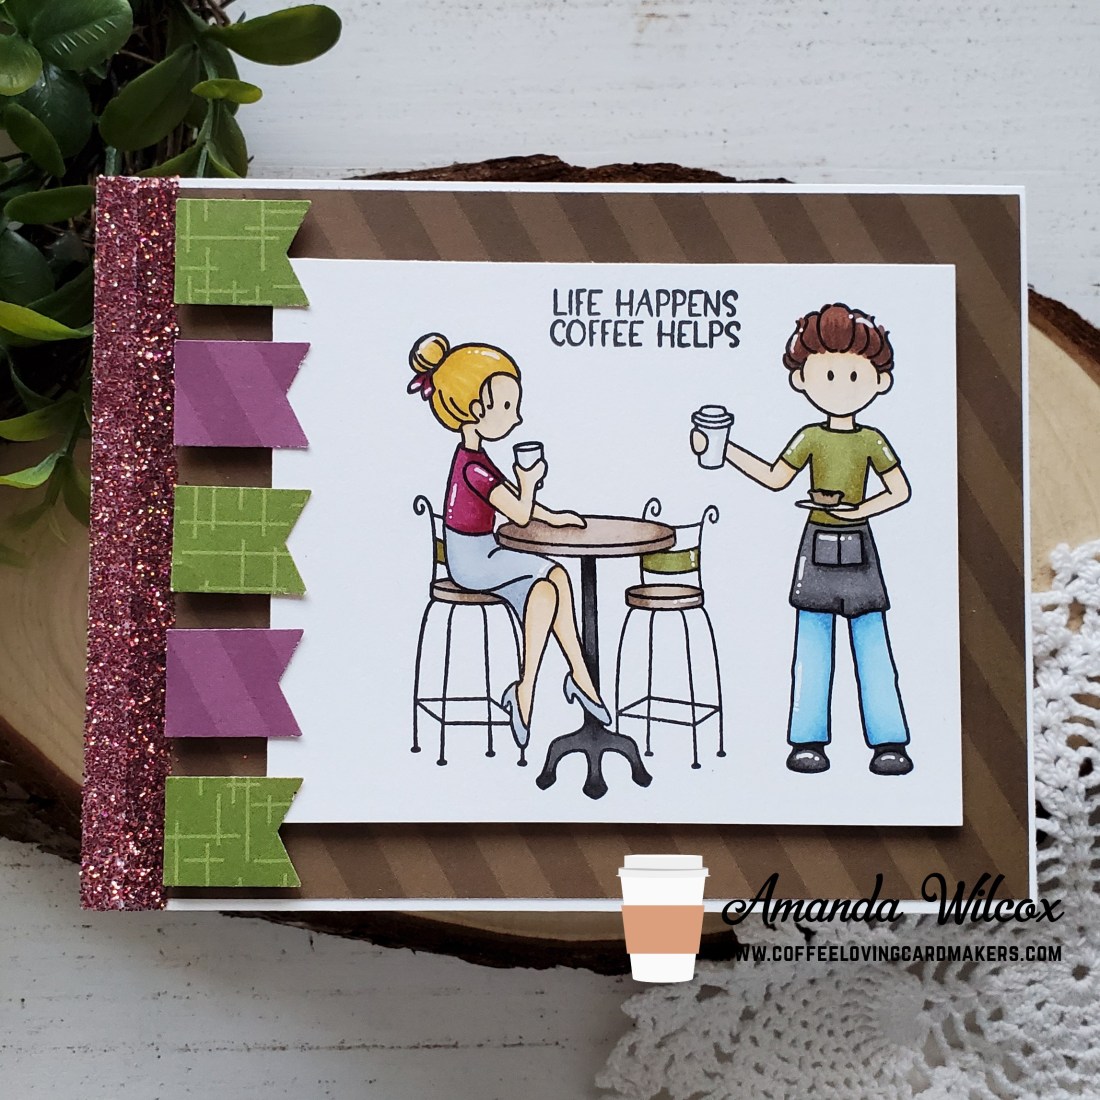
Hello again! Back for more caffeinated inspiration? I’m soooo glad! Today I’ve got a fun card featuring a set from Super Sponsor Miss Ink Stamps called Java Joe’s. I love this set so much! It’s got tons of potential to mix and match the images for great scenes.
To create this fun card, I stamped my images on a white panel and colored them with my copics. Then I punched out some banner flags and cut a background panel all with coordinating paper. I adhered the brown panel to the cardbase, popped up the colored panel and the banners with foam squares. Then I finished it off with some glittery washi tape from my stash for just a touch of bling.
This is a really different design for me but I had a blast putting it together and figuring out how I wanted to showcase the super fun images.
Have you started caffeinated creations to link up to the hop yet? I can’t wait to see what you’re making! Click HERE to get to the post where you can link up.
I appreciate you sharing your time with me. Have a fabulous day!
Hello everyone! I’m super excited to kick off the Coffee Loving Cardmakers Spring-Summer Hop today! Be prepared for a full week of caffeinated inspiration! I really hope you’ll play along and link up your projects for chances at tons of fun prizes!
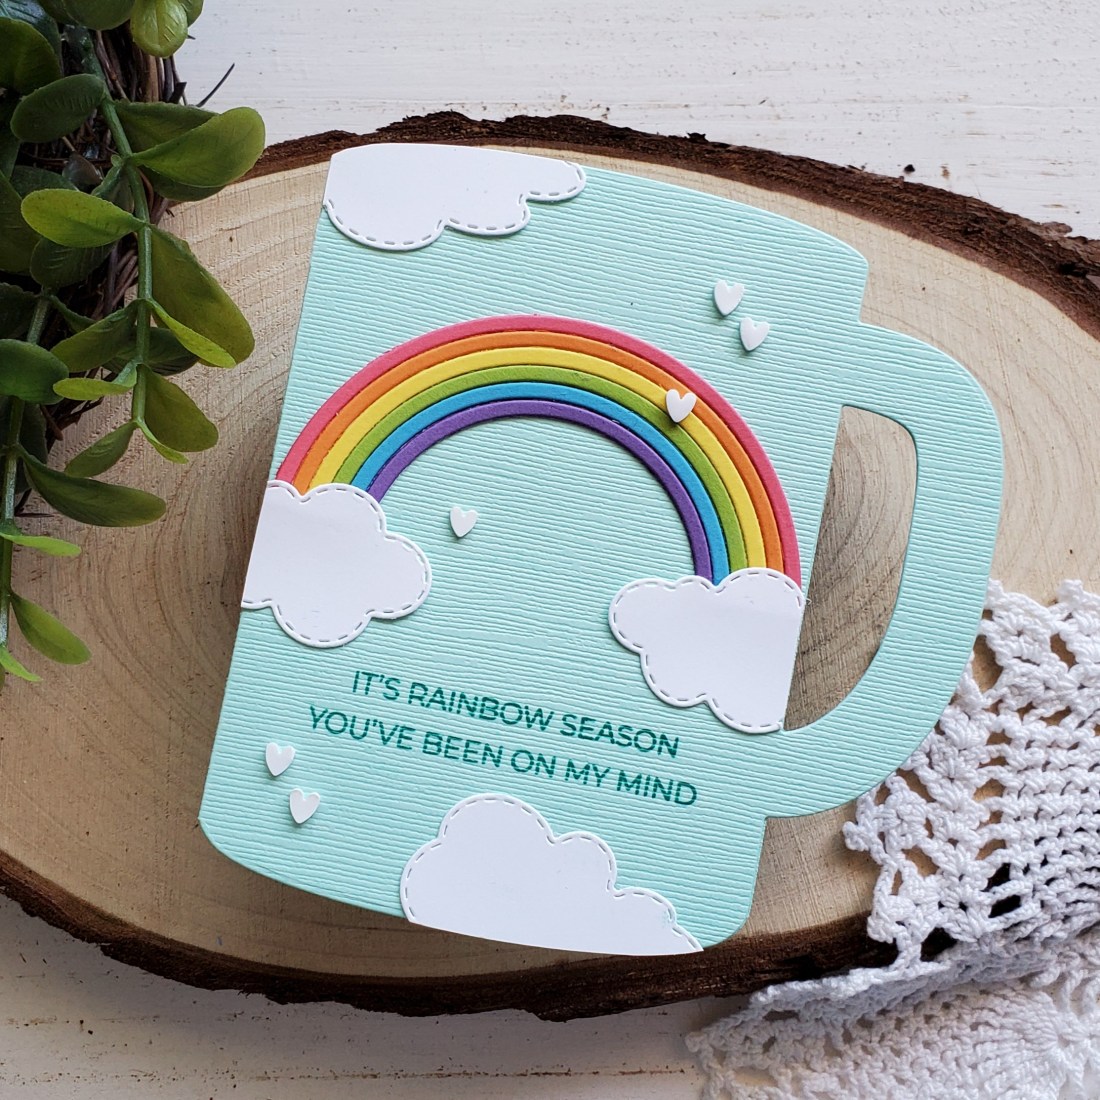
I have so many fun things to share with you this week. It was hard to choose which one to share with you first. Ultimately, I just had to go with a dose of caffeinated happiness in a super fun shaped card featuring products from our Super Sponsor Trinity Stamps.
To create this fun card, I used the coffee mug card die and cut it from a light mint textured cardstock. Then I used the rainbow die on 6 different colors of cardstock and assembled it. I added some clouds to the base of the rainbow and around the mug for a sweet sky scene. Then I pulled out my MISTI and stamped some sentiments from the A Sentiment For (Almost) Everything set in a teal ink to coordinate with the fun colors of the card.
I finished this sweet card off with a scattering of creamy vanilla heart sprinkles. Isn’t it just so happy?!? I sure am addicted to this rainbow die! Pairing it with the coffee cup just seemed perfect.
Remember to head to the main hop post HERE and link up your projects throughout the week. You have plenty of time to create! Now keep hopping for some awesome inspiration.
I appreciate you sharing your time with me. Have a fabulous day!
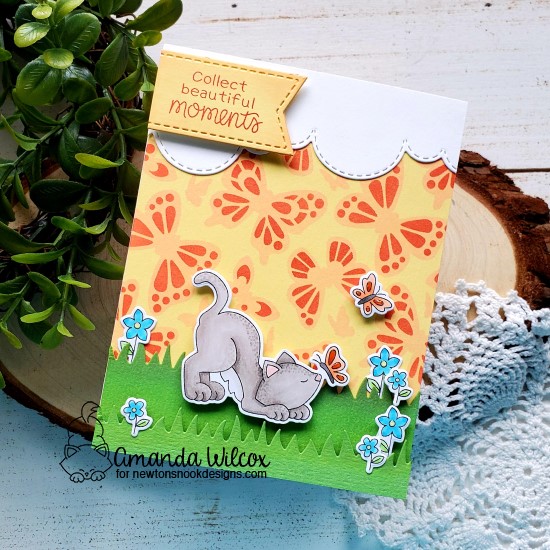
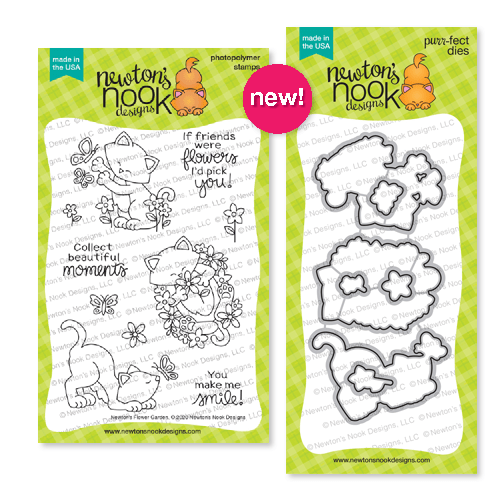
I couldn’t image a Newton’s Nook release without new shenanigans from Newton. So, I’m excited to share Newton’s Flower Garden and the coordinating dies with you today!
These images are beautiful and so versatile with other sets, on their own or all together. Today I’ve managed to choose an image and pair it with the wonderful new butterflies stencil for a little scene card. I hope you enjoy. And remember to comment along all the blogs all week long for chances to win each stamp set!
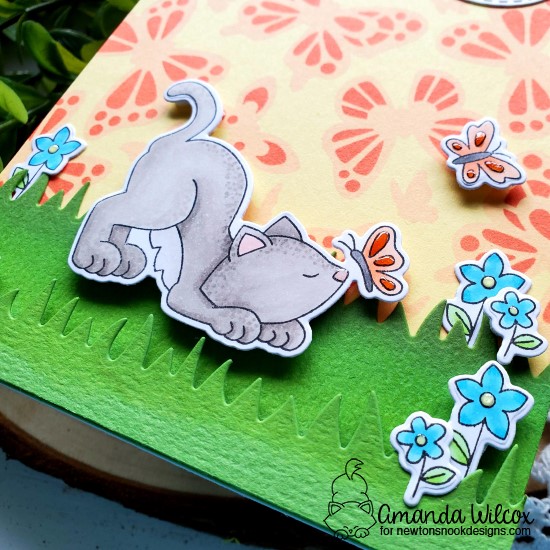
I started this card with a vague idea of what I wanted so I stamped out all my images with a few extra flowers. I colored everything with copics and die cut it out. Once those were set aside, I worked on my background by stenciling the butterflies on a yellow panel. I die cut a couple of grass layers from the land borders set and inked the tops for a little dimension, plus a set of clouds with the sky borders dies.
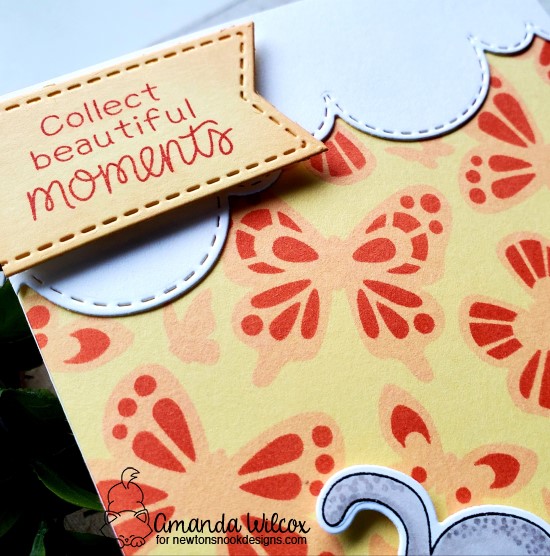
I attached all of my pieces – clouds and back layer of grass directly to the stenciled panel and everything else with foam squares. Then I grabbed the Flags and Frames and die cut a yellow flag for my sentiment. I stamped it in the darker color I used for stenciling and inked the edges a little with the lighter color. This was popped up with foam squares.
Finally, I moved on to finishing touches which were actually very simple. I just added some glossy accents to the flower centers, Newton’s nose and butterfly wings.
Would you like to win the “Newton’s Flower Garden” Stamp Set? This stamp set will be given away to ONE lucky winner! We will choose ONE lucky winner for each stamp set!
Here’s how to win: Comment on the NND blog and Design Team blogs (see list below)! The winner will be chosen at random from the collective reveal posts. Make sure to check out each of their blogs and comment for your chance to win. You will not know which blog has been chosen so the more you comment on the better your chances are of winning! You have until Thursday May 21st at 9pm EST to comment — winners will be announced on the blog post on Friday, May 22nd.
Check out all the awesome Design Team Blogs below to enter:
Oh my goodness, this week is just chugging along. I’m excited to share today’s reveal and a fun interactive card idea for you to try out!
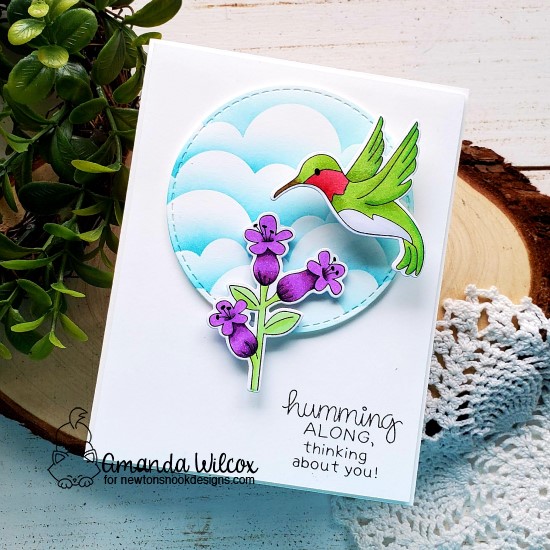
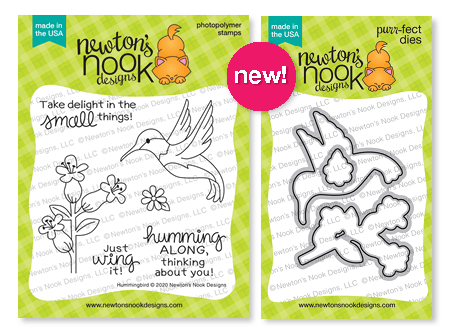
Today we’re sharing Hummingbird and the coordinating dies. Isn’t it beautiful??? I love it and it was so fun to color!
My card today has a simple but so fun interactive element – an action wobble so you can make the hummingbird flutter.
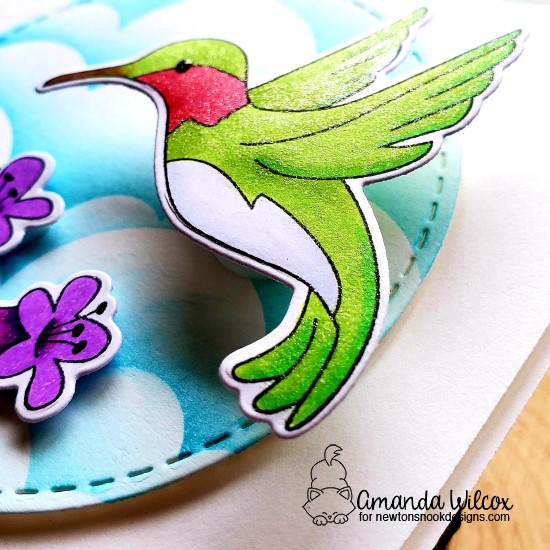
To create this card, I started by stamping, coloring and die cutting my hummingbird images. Then I grabbed those new circle frames dies and cut out a circle. I used the clouds stencil with some bright blue dye ink and a blending brush.
Now for assembly, I started by trimming a white panel down to 4×5.25 and stamped my sentiment on the bottom right. Then I popped it on a card base with foam tape. I popped up the stenciled panel with foam tape as well and positioned my images. The flowers are popped up with foam squares and the hummingbird is attached with an action wobbler.
For simple finishing touches on this card, I used black glaze pen on the hummingbird eye and the stamen of the flowers. Then I used Wink of Stella glitter brush pen to the hummingbird. I thought this was a perfect match for the sheen they always seem to have.
Would you like to win the “Hummingbird” Stamp Set?This stamp set will be given away to ONE lucky winner! We will choose ONE lucky winner for each stamp set!
Here’s how to win: Comment on the NND blog and Design Team blogs (see list below)! Thewinner will be chosen at random from the collective reveal posts. Make sure to check out each of their blogs and comment for your chance to win. You will not know which blog has been chosen so the more you comment on the better your chances are of winning! You have until Thursday May 21st at 9pm EST to comment — winners will be announced on the blog post on Friday, May 22nd.
Check out all the awesome Design Team Blogs below to enter:
We’re back with another fun day of reveals for the Newton’s Nook May release! Today we are sharing fun inspiration for a new stamp and die set along with a stencil. They work wonderfully together but also are so great on their own.
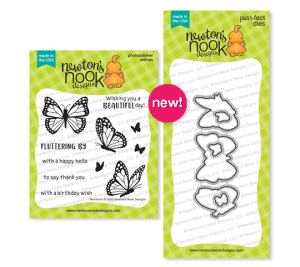
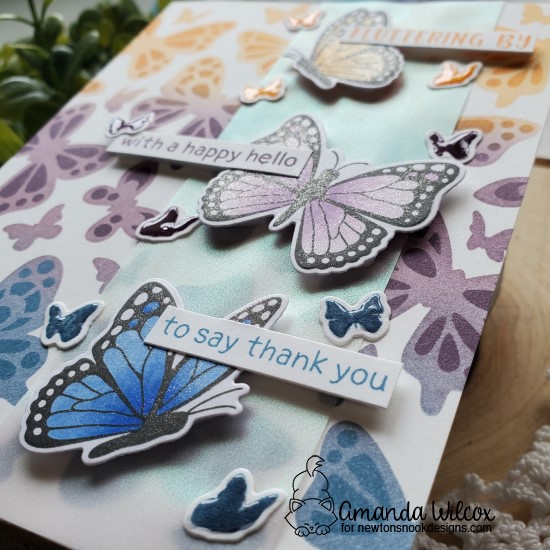
I have had a blast playing with this stencil set in so many different ways. The two layers gives you extra versatility and they match with the Monarchs stamp set wonderfully! Today I’ve used them together on a card.
I started this card by using blending brushes and some die inks with the two layers of the butterflies stencil. Then I colored the butterflies from the Monarchs set to try and match the blended colors. I stamped sentiments from Monarchs on a strip of paper matching the colored areas I wanted to put them in and snipped them apart.
I attached a strip of iridescent vellum and attached the butterflies and sentiment strips to it. Using those to hide my glue, I attached the vellum piece to the stenciled panel. Then I attached the panel to a card base and moved on to finishing touches.
At this point I decided that my card could use a little something extra so I took the small butterflies from Monarchs and stamped them in the same inks I used to blend with, die cut them and glued them down. I covered them with glossy accents for a little shine and added Wink of Stella glitter brush pen to the bigger butterflies.
Would you like to win the “Monarchs” Stamp Set? This stamp set will be given away to ONE lucky winner! We will choose ONE lucky winner for each stamp set!
Here’s how to win: Comment on the NND blog and Design Team blogs (see list below)! Thewinner will be chosen at random from the collective reveal posts. Make sure to check out each of their blogs and comment for your chance to win. You will not know which blog has been chosen so the more you comment on the better your chances are of winning! You have until Thursday May 21st at 9pm EST to comment — winners will be announced on the blog post on Friday, May 22nd.
Check out all the awesome Design Team Blogs below to enter:
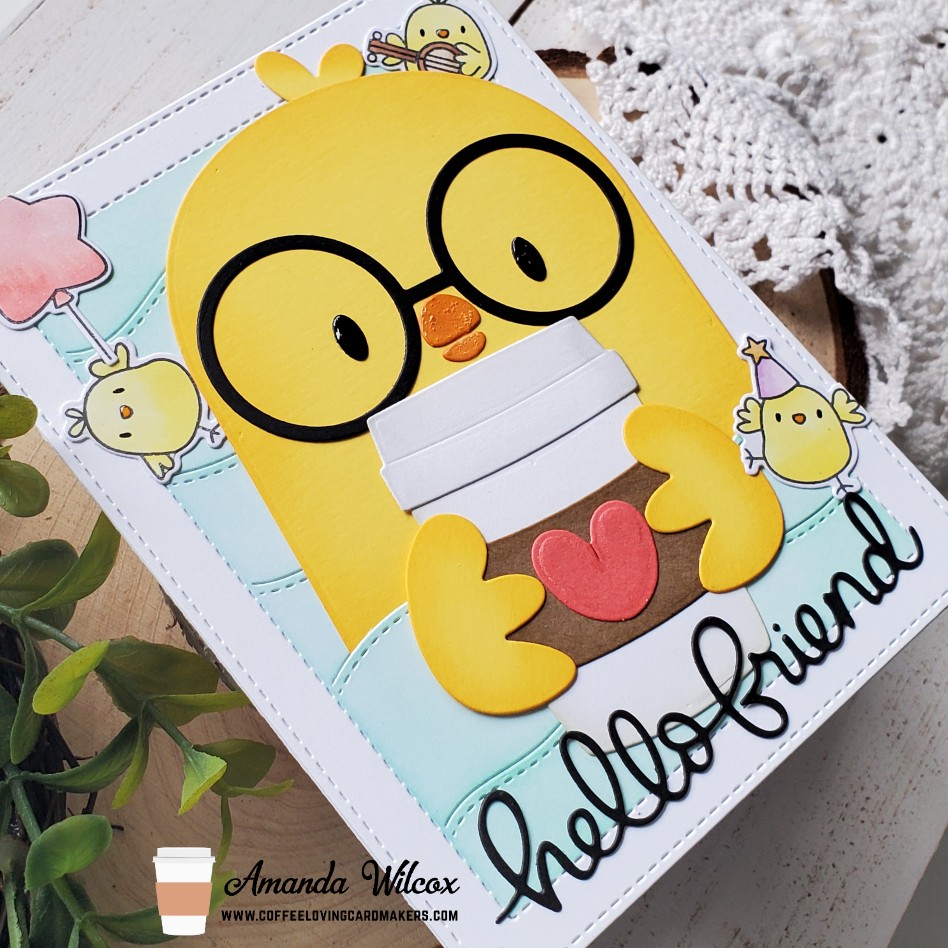
Hello there! I’m over on the Coffee Loving Cardmakers blog today for another Tuesday Tea with Twiddler’s Nook. I’m so excited about the fun card share I’ve got today. I loved digging through some of my Mama Elephant stamps and dies that I haven’t used in a while to combine for a super fun card!
To create this fun card, I die cut all the pieces to the chickie favor bag accessory and the coffee cup from the boba shaker dies. I inked up the edges with coordinating distress inks for a little dimension. Then I die cut the hillside cover and laid it all out. It was missing something but I don’t have the chickie agenda and the critters I do have looked weird so I went digging some more. I found my party animals set and thought these chickies were so fun to add! I stamped and colored them with copics. Then I used the coordinating dies to cut them out and moved on to assembly.
The background looked too stark all white so I masked the edges off and inked the middle up with cracked pistachio distress ink for a subtle something. I added that to a card base and started adding pieces. I tucked the big chickie in place and glued the cup and hands down. Then I added the small chickies and realized I didn’t plan for a sentiment. Oops. I tried a few stamps but it didn’t look right so I pulled out my hello friend die and cut it out. I added this with my quickie glue pen (I love this for skinny little pieces like this.) and moved on to finishing touches.
I added glossy accents to all the chickie’s beaks and the big chickie’s eyes. I used black glaze pen on the little chickie’s eyes and then wink of stella glitter brush pen to the cup’s heart and the balloon.
I’m addicted to these favor bag accessories and think they’re perfect to pair with the new boba shaker dies. I can’t wait to make more with other critters and maybe a boba shaker! Stay tuned for the one!
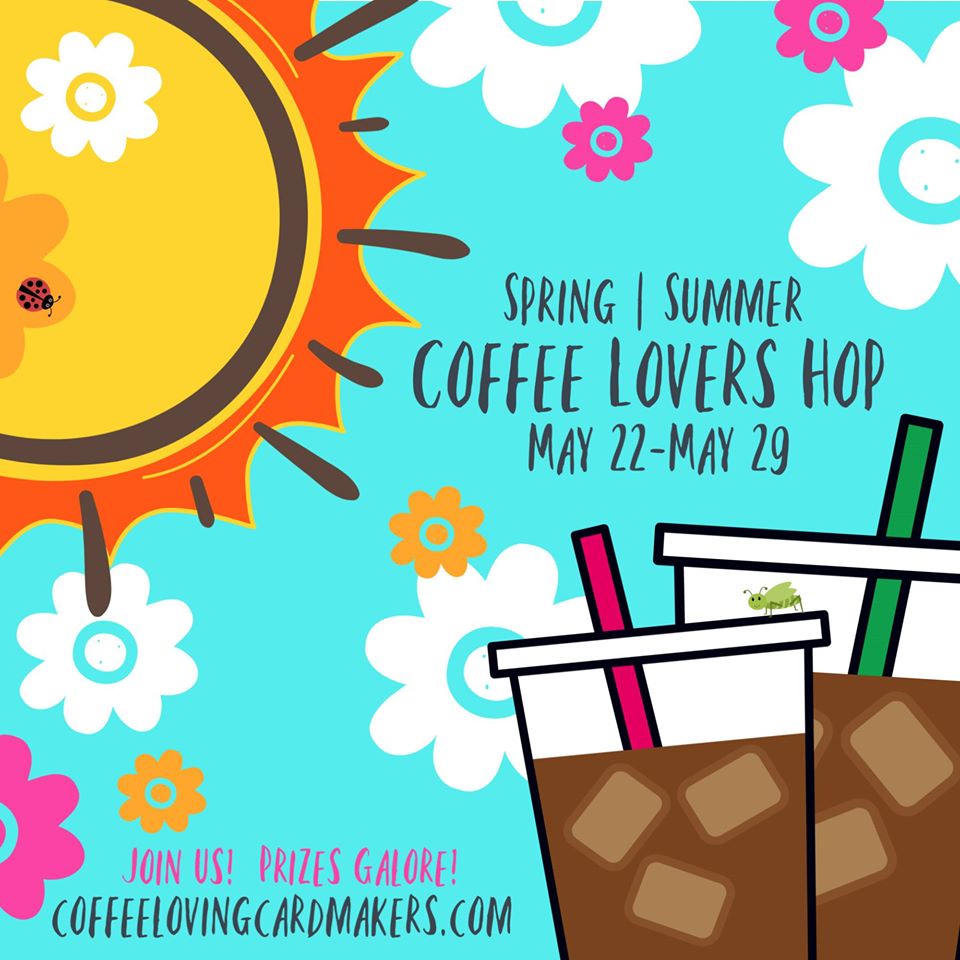
Also, I wanted to remind you that coming this Friday is the start of the Spring/Summer Coffee Lover’s Hop! I hope you’re going to play along with us! I look forward to see everyone’s creations and sharing some more fun inspiration too!
I appreciate you sharing your time with me! Have a fabulous day!