Blog

Trinity Stamps – Rainbow Slider

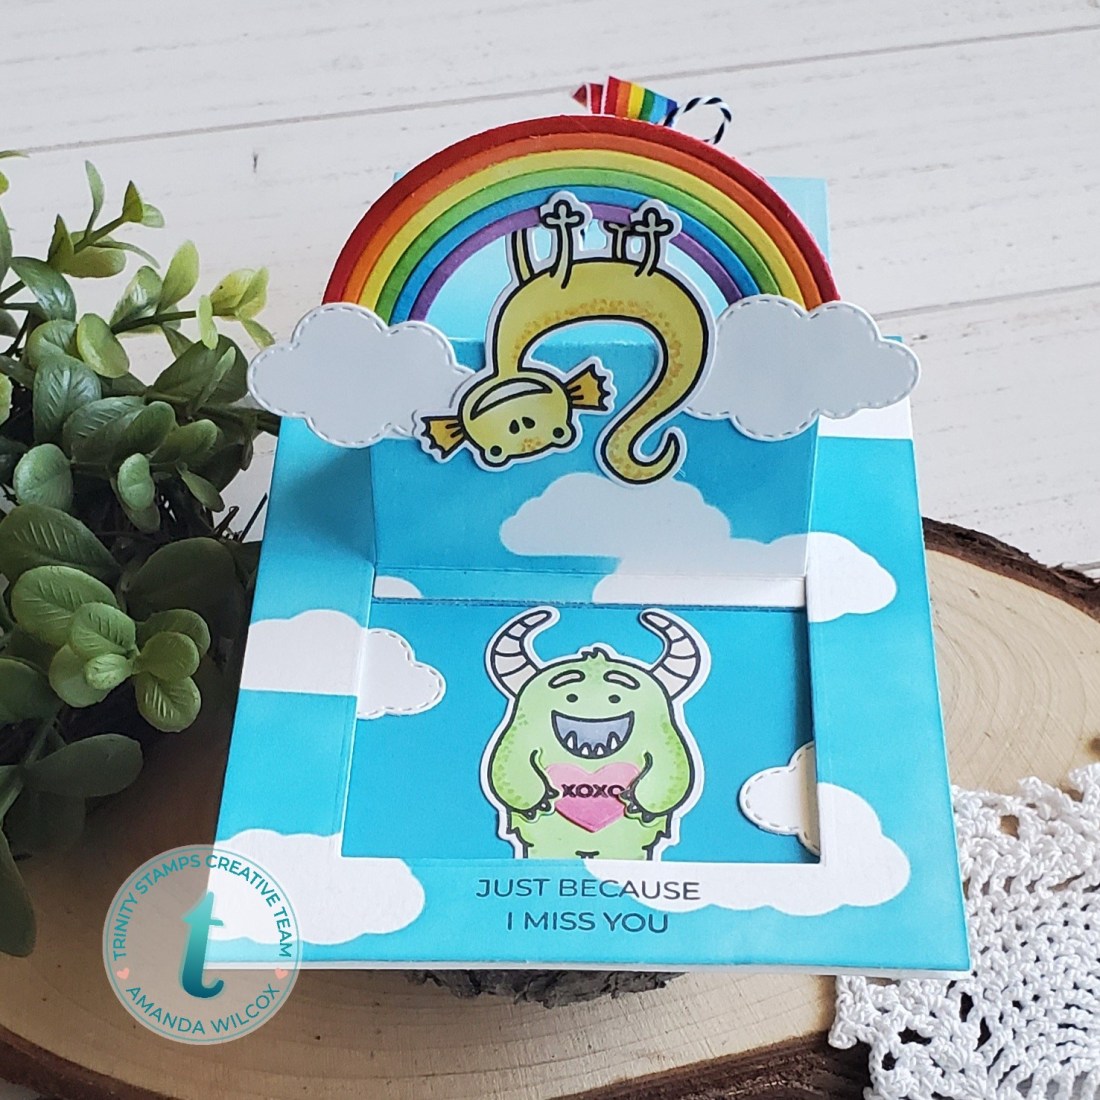
Hey there! I’m up on the Trinity Stamps blog today with this fabulous monster rainbow slider card. I love interactive cards. This one popped in my head and I just had to create it immediately. It’s so happy and fun!

I started this fun card by using the negative of the clouds from the new Layered Lakeside Mountain Stencil to mask white I inked the panel with tumbled glass distress oxide ink. Then I die cut my slider mechanism from it. I cut another A2 size panel and inked the center with the same blue ink. This will be the inside of the slider. The card that attaches to the sliding mechanism was also inked with the same blue so it all goes together.

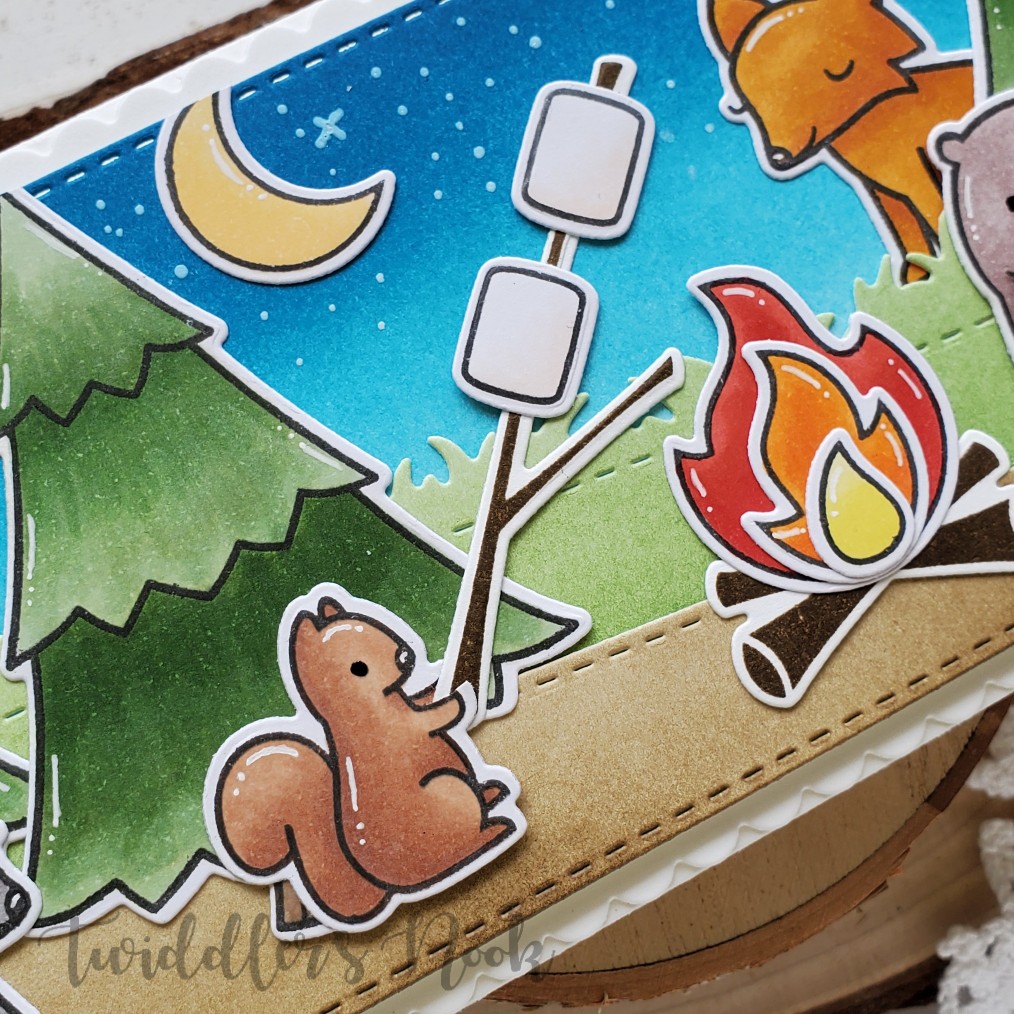
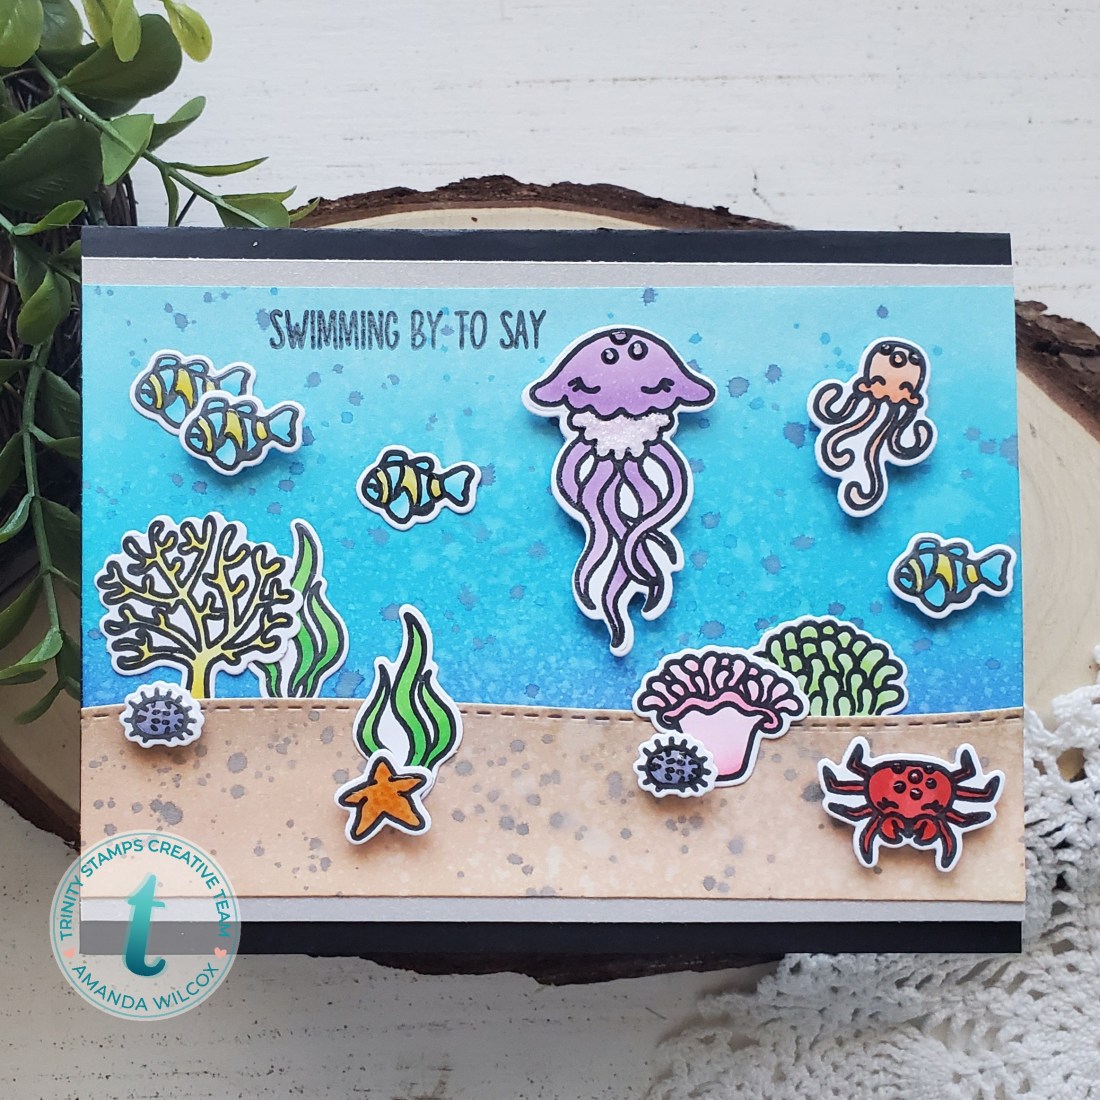
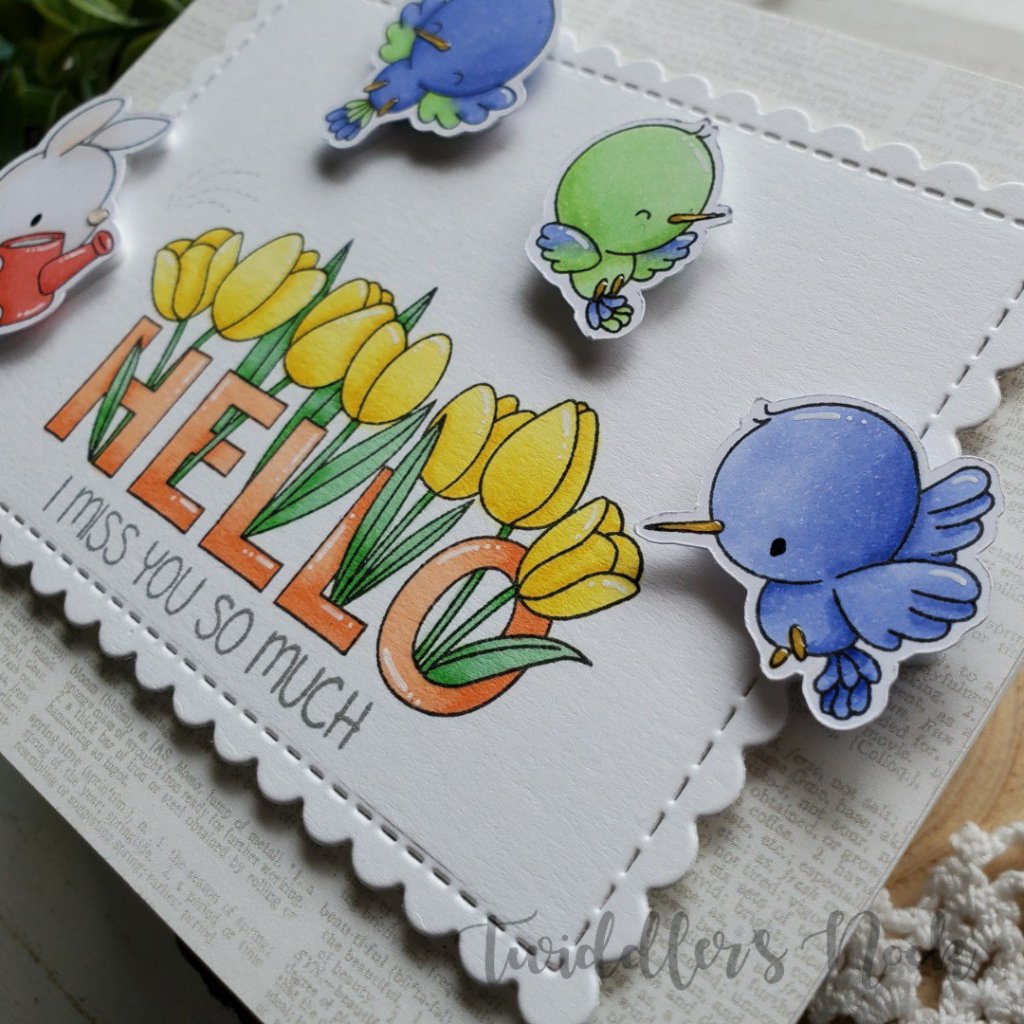
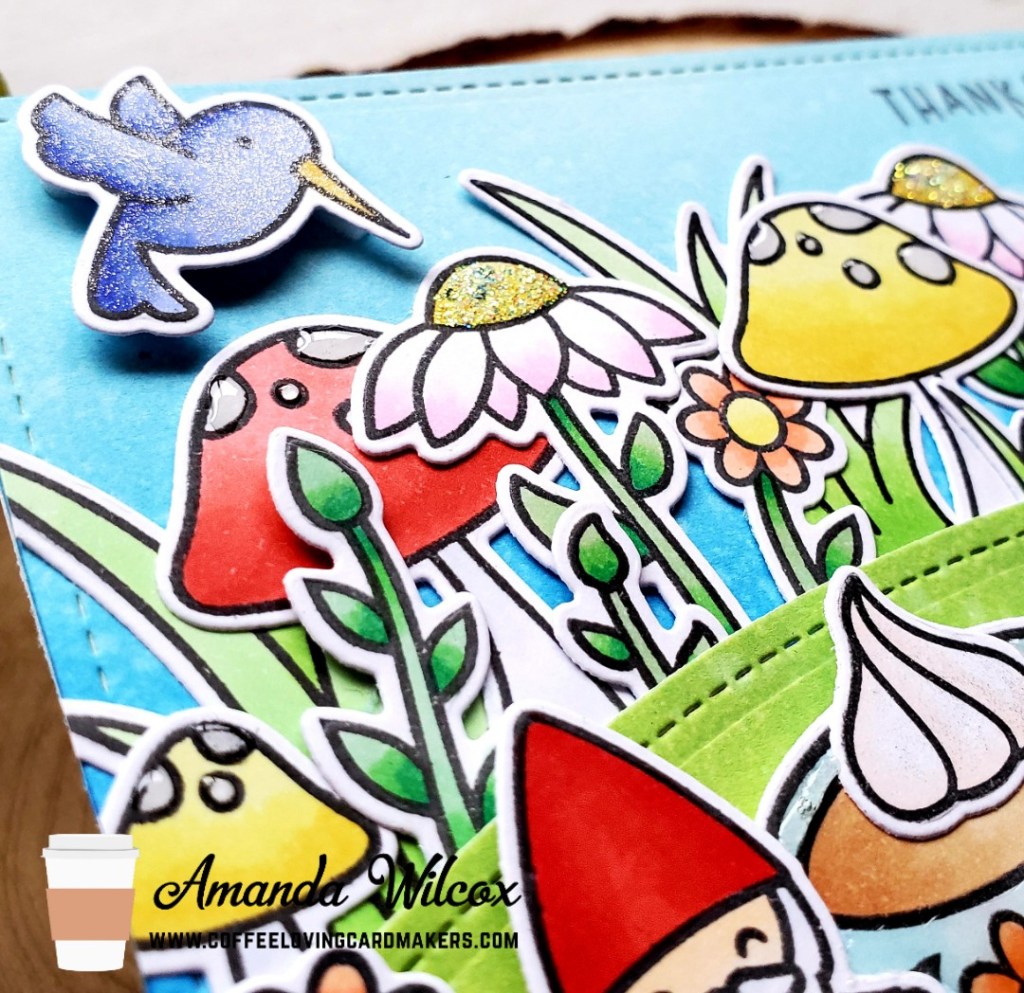
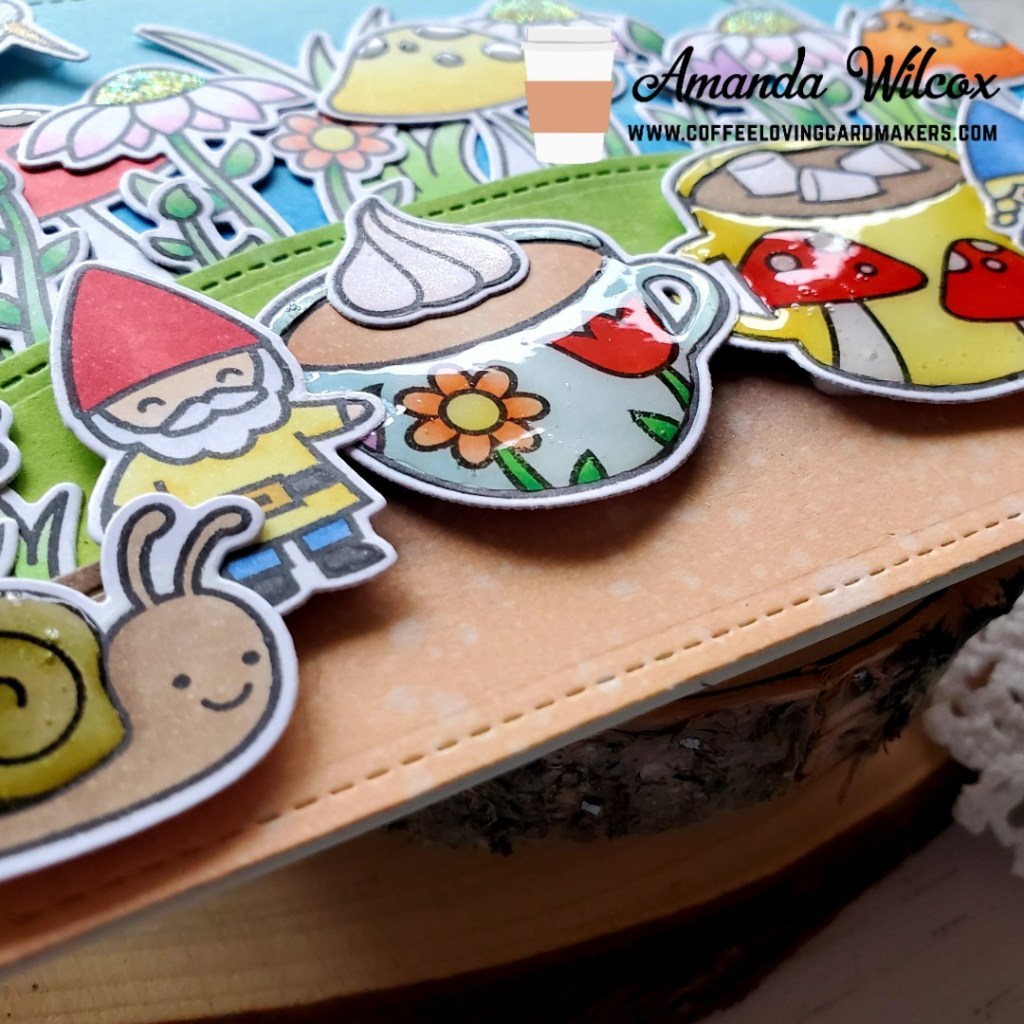
I moved on to my images at this point. I stamped and colored two monsters from the Monster Love stamp set along with one heart. I colored it all with copics and cut them out with the coordinating dies. I used the rainbow set to die cut a rainbow and a bundle of clouds. I used copics to color the rainbow pieces and adhered it all together.

With all of our pieces ready to go, I moved on to assembly. I adhered the panel which is the pull-tab for your slider to the back of the front panel and then lined it with foam tape. This was adhered to the backing panel we just inked the center of. With all of that put together I could add my images exactly where I wanted them. I used liquid glue for all of these, being careful not to glue parts that should overhang when the card is slid open. I snipped the feet of the monster hanging upside down so he could be holding onto the rainbow. I absolutely love this little detail.

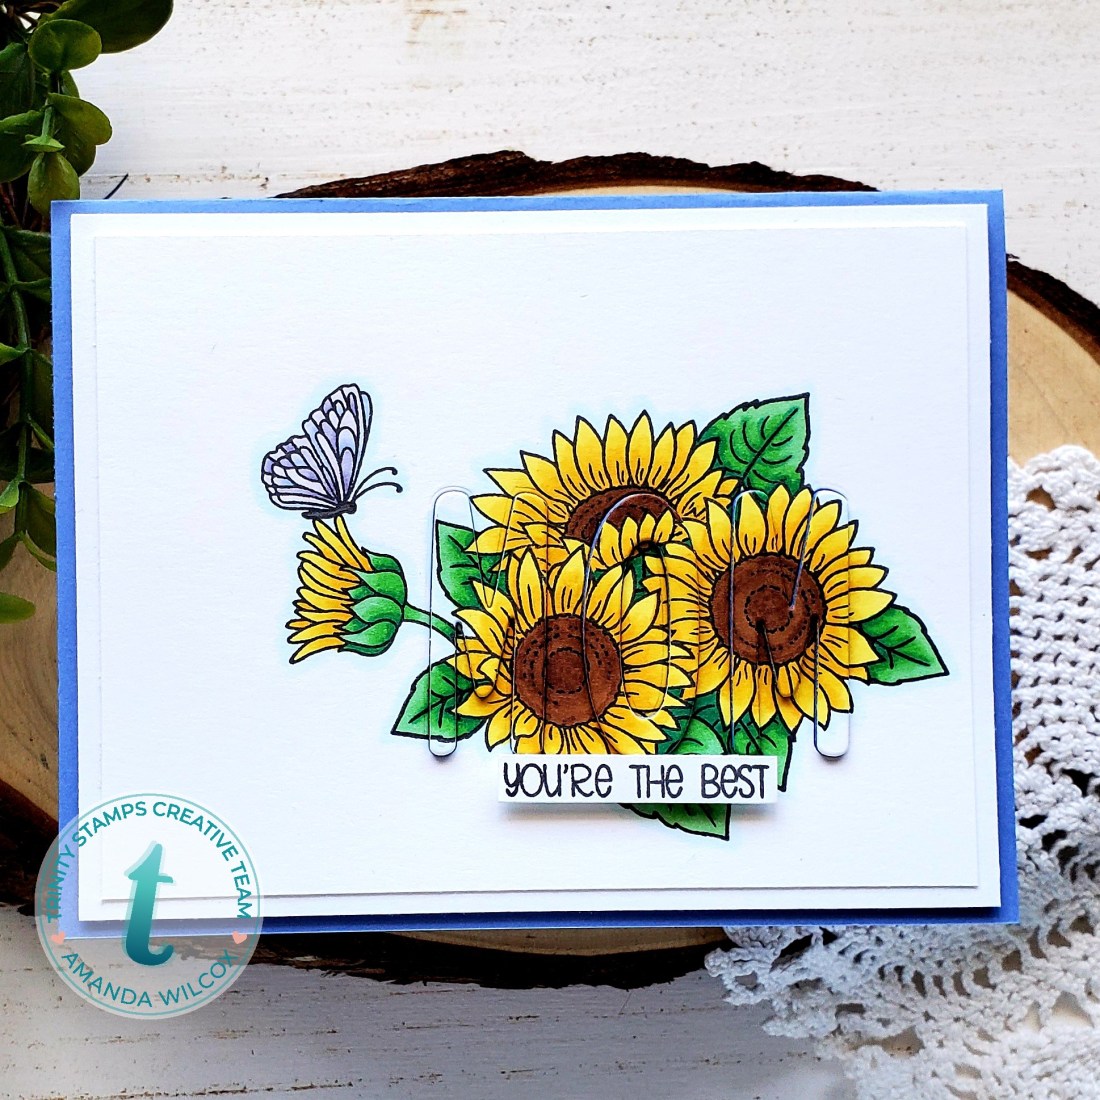
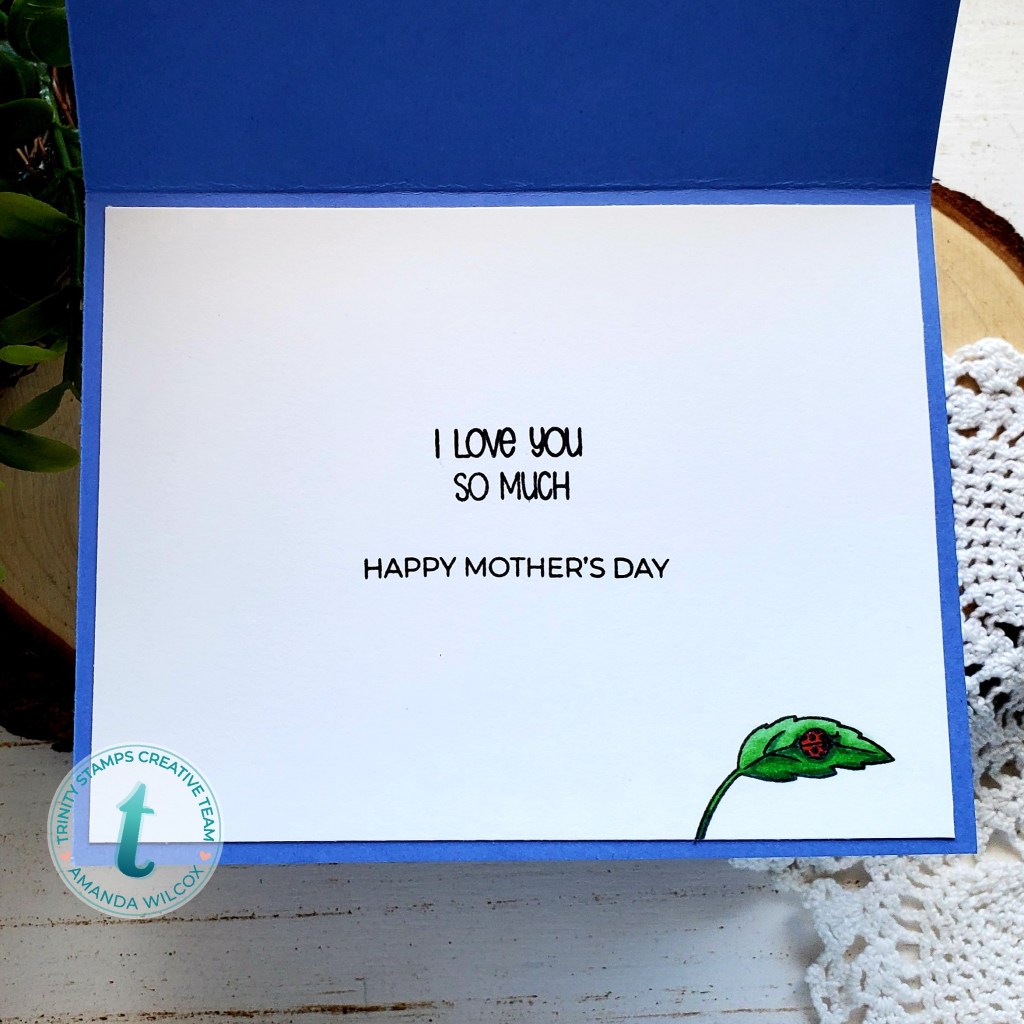
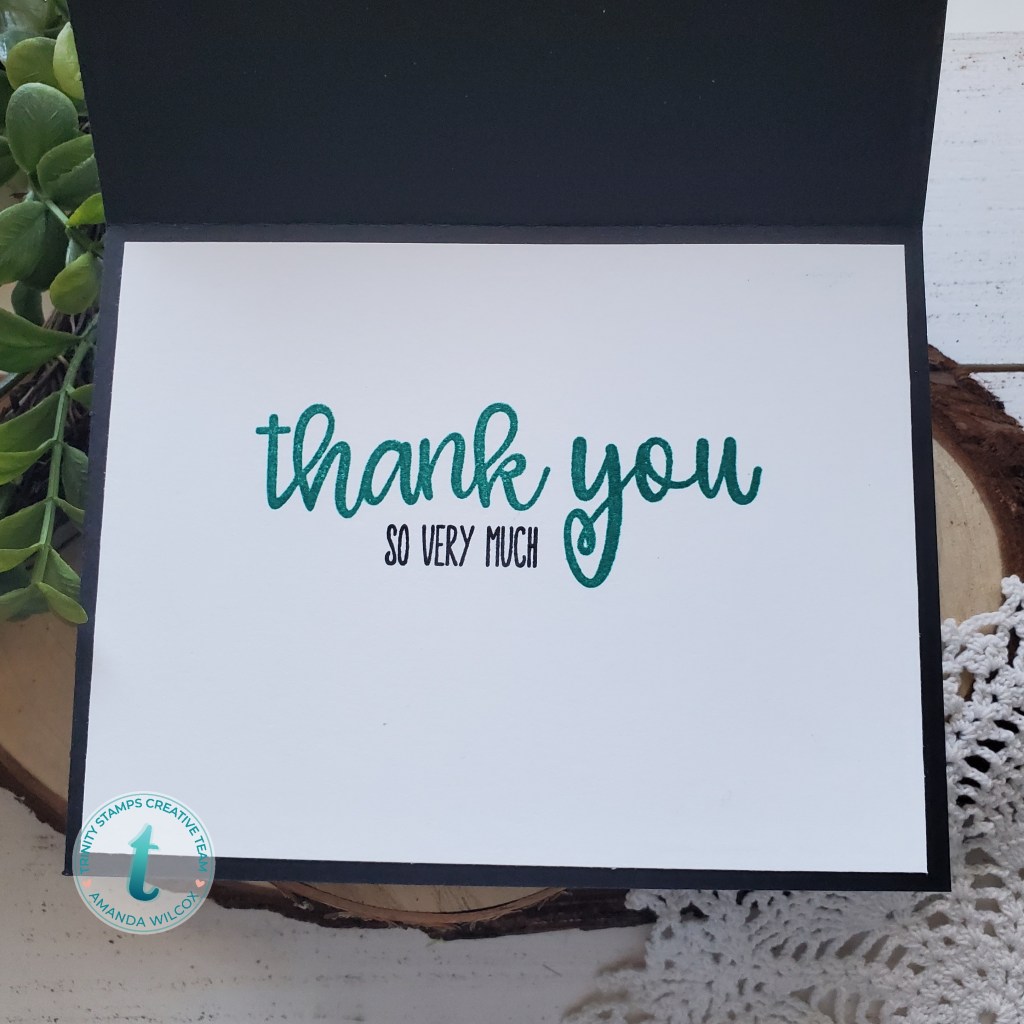
I used my MISTI to stack a couple of sentiments from A Sentiment For (Almost) Everything. I left the back blank for a personal message. Lastly, I added some fun rainbow ribbon through the pull tab and tied it with a bow with some black and white baker’s twine.

I hope you enjoyed today’s fun, interactive card and found some inspiration to make something beautiful.

Also, I don’t want to forget to mention that tomorrow is a Round 2 Spring Release Instagram Hop for Trinity Stamps. Be sure to head over and check out the amazing inspiration the other half of the team has to share with you. Comment for awesome prizes to be won as well!

I appreciate you sharing your time with me. Have a fabulous day!

Newton’s Nook – Picnic Box Card

Welcome back! I’m up on the Newton’s Nook blog today with this fun interactive box card. The critters are having a picnic and you’re invited!

I had a blast creating this adorable card! I started by stamping all of the critters and the soda bottle from Woodland Picnic and colored them with copics. I cut them out with the coordinating dies and moved on to creating my box card.

I die cut all of those pieces from the Lawn Fawn Scalloped Box Card from white cardstock. I took three of the panels for decorating the box and used the gingham stencil with red ink and my blending buddy brushes. Then I stamped some of the ants for fun. For the last one I used the clouds stencil and some light blue ink and also stamped my sentiment with black ink. I also used my brushes with green to create some grass for my layers in the box. I die cut these with the land borders grass die. The grass pieces are glued to the actual divider tabs that are part of the Lawn Fawn Scalloped Box Card. With all of the pieces done, I assembled the box card and started adding my critters.

I adhered all of the images with tape runner to the box card and made sure it still closed up properly. I had one too many images to fit in my card so I added the bunny to the back of the card where I’ll write my message to the recipient. It just adds a fun little whimsy to that part too!

I appreciate you sharing your time with me. Have a fabulous day!

Lawn Fawn – Let’s Go Camping

So, I’ve really been in the mood to go camping lately. I’m ready for summer and the warm sun. As I was perusing my stamps to decide what to play with it hit me and I could make a fun camping scene with some awesome older Lawn Fawn sets that I have. Here’s what I came up with.

I started by stamping so many critters and other images from Love You S’More and Critters in the Forest and colored them with my copic markers. Then I used the coordinating dies to cut them all out. I die cut 2 white panels from my Trinity Stamps Slimline Stitched Panels set – the middle size and ink blended them. The sky is on one whole panel while I split the other panel between grass and dirt and used my Slimline Scenic Border dies to cut them apart.

Then I moved on to assembling everything. I glued all of the scene layers together with tape runner and arranged my images how I wanted them. Once that was decided I glued them in place too. This panel was attached to a Slimline Scalloped Border panel with foam tape and adhered to a white cardbase measuring 3.5×8.5 inches.

For finishing touches on this awesome scene, I added black glaze pen to the critter eyes and white gel pen accents to the images. Then I took a white glaze pen and added starts to the sky. I think the ink colors look like it’s just starting to be dusk when you can just start to see the stars come out.

I’m so ready to make s’mores over a campfire in the middle of nowhere. It’s going to be amazing! Do you like camping?

I appreciate you sharing your time with me. Have a fabulous day!

Birch Press Design – Happy, Happy, Happy Birthday

Hello everyone! I’m super excited to share that today is my first official post over on the Birch Press Design blog as a member of their creative team. I had a blast putting this card together.

Combining some fabulous die cutting with fun and messy ink smooshing, this card came together like a breeze.

For a step-by-step tutorial, be sure to head over to the Birch Press Design blog and check it out.

I appreciate you sharing your time with me. Have a fabulous day!

Trinity Stamps – Happy Mother’s Day

Happy Mother’s Day to all the moms checking in today. Whether your children are people or furry, you’re all amazing and deserve a day of love and celebration! Today I’m sharing the card I made for my mom this year. It took me out of my comfort zone and I’m blown away with the results.

To create this card I started with the Trinity Stamps sunflower bouquet set and stamped them on masking paper right off. Then I laid my stamps out to decide how I wanted to bouquet to look. I stamped the one that would be in the front and put the mask on it. I kept doing this working my way around until it was as full as I wanted. Then for the reveal – I love this part – I pulled off all the masks and colored everything with my copics.

Then I pulled out my marshmallow alphabet dies and cut mom from the middle of the bouquet. I used a clear ruler to line the first 2 letter up, then placed the “O” die back in it’s slot and used the ruler again to line up the second “M.” I die cut the letters an additional 4 times in blue cardstock and glued everything together. I trimmed the colored panel down to 3.75×5 and adhered it to a white panel that was cut down to 4×5.25. I glued the letters in place and popped this panel up with foam tape on a blue cardbase matching the letters.

I pulled out my So Appreciate set and stamped the “You’re the best” sentiment on a strip and popped it up with foam tape. Then I moved on to the inside of the card.

I trimmed another white panel down to 4×5.25 and stamped the leaf and ladybug from the Sunflower Bouquet using masking again and colored it with copics. Then I stamped the sentiments from So Appreciative and A Sentiment for (Almost) Everything to finish the card off.

I’m really excited to give this card to my mom. I know she’ll love it.

I appreciate you sharing your time with me. Have a fabulous day!

Trinity Stamps – Swimming By To Say…

Hello everyone! I’m sharing a fun under water scene thank you card that I made a couple weeks ago. My daughter and I got some happy mail from my aunt who lives on the coast and I thought it was only appropriate to thank her with some ocean themed thanks.

I started this card by stamping out a bunch of ocean critters and seaweed from the Trinity Stamps Ocean Reef Builder set. I colored them with my copics and cut them out with the coordinating dies. I set those aside and moved on to setting the scene.

I took a couple of white panels and blended distress oxides on them for ocean water and some sand. I spritzed them both with water and also flicked the darkest color of watered down ink on them too. This is a cool way to get extra texture on your inked panels.

I used the scenic borders dies to cut some sand from the brown panel and adhered it to the water. I trimmed that down to 3.75×5.5 and attached two strips of silver cardstock to the top and bottom. Then I popped that on a black card base. I think it kind of looks like a giant fish tank, maybe at the aquarium given what’s in it. 😉 Then I moved on to adhering my images. Some are popped up with foam squares and others are glued directly to the scene.

I used my MISTI to stamp the first part of my sentiment on the top left which comes from the Trinity Stamps Mermaid Wishes set. Then I moved on to finishing touches. I started with glossy accents on the critter spots, sea urchins, fish stripes and sea star. Then I went back with some sprinkled sugar Stickles on the jelly fish for extra texture.

Finally, I trimmed down a white panel to 4×5.25 and stamped the Trinity Stamps Thank You Sentimini on that. Once the front was dry, I adhered it with some tape runner, wrote my message and this card was on its way.

I love scene cards and ocean scenes are some of my favorites! The critters in this set are so fun and the sentiments give you so many options to create with them.

I appreciate you sharing your time with me. Have a fabulous day!

Paperie Ink – Hello, I Miss You So Much

Welcome back everyone. Thanks for stopping by. Today I’m sharing a card by a new-to-me stamp company just starting out on Etsy called Paperie Ink. Her images are to-die-for adorable and I was very fortunate to win an Instagram contest that gifted me three sets recently.

I finally took time to play with one – Hello Hummingbirds – and had so much fun creating this little scene.

For this card, I used my stamps to get an idea of the layout to make sure everything would fit. Once I decided, I stamped them out and colored them with copics. I used my scan-n-cut to cut them out and moved on to the large image and final layout.

I die cut a piece of Bristol smooth cardstock with the smaller scalloped panel in the Newton’s Nook Framework die set and stamped the hello image with copic-friendly ink. I colored it up and stamped the rest of the sentiment in gray below it. Using my images for a guide, I stamped the water sprinkling out of the watering can in the same gray.

Moving on to final assembly, I trimmed down some text patterned paper and adhered it to a card base. Then I popped the scalloped panel up with foam tape and added my images to that with foam squares. Some parts that are hanging off have double layered foam squares to keep them laying nice and flat.

For finishing touches on this sweet card, I added glossy accents to the bird beaks and feet, the bunny’s nose and water in the watering can. I also added white gel pen accents throughout the images and black glaze pen to the eyes.

I hope you enjoyed this sweet card today.

I appreciate you sharing your time with me. Have a fabulous day!

Neat & Tangled – Puppy’s Favorite Things

Welcome! I picked this sweet puppy up from Neat & Tangled a while ago and finally had a chance to ink him up. He’s just adorable and so fun to color! I paired him with some fun Newton’s Nook products to create a birthday card for a change of theme these days.

I started by stamping and coloring the images from Puppy’s Favorite Things and then used the coordinating dies to cut them out.

Then I grabbed my Newton’s Nook balloons stencil and my Trinity Stamps blending buddy brushes to ink up the balloons different colors. Then I used the Framework dies from Newton’s Nook to cut the panel out along with an orange woodgrain floor. I trimmed down a teal piece of cardstock to 4 1/8×5 3/8 and popped the stenciled panel on it with foam tape. This is all glued to a white card base.

I had used the special die to cut the puppy’s hands out so he could hold the cupcake so I glued that in place. Then I added foam squares to the back of all my images and put them in place. Last, I die cut a banner from the Newton’s Nook Frames and Flags set and stamped my sentiment. This banner is also popped up with foam squares.

For finishing touches I added white gel pen accents throughout the images, black glaze pen to the puppy’s eyes and nose and glossy accents on a few images. I also added sprinkled sugar Stickles to the cupcake frosting and yellow Stickles to the top of the birthday hat.

I appreciate you sharing your time with me. Have a fabulous day!

Coffee Loving Cardmakers – Thanks a Latte

Hey all! It’s another Tuesday Tea with Twiddler’s Nook over on the Coffee Loving Cardmakers blog and I’ve got a fantastic card to share with you!

I am so excited with how this fun card turned out. I started by stamping images from Lawn Fawn sets – Thanks a Latte, Oh Gnome and Gleeful Gardens. Then I cut some masking paper for the mugs and stamped the flowers and mushrooms from Oh Gnome on them. I set to work coloring everything with my copic markers and then used the coordinating dies to cut it all out.

I set those aside and started working on my background. I took three white panels and inked them up with distress oxide inks for dirt, grass and sky. I used tea dye and gathered twigs, twisted citron and mowed lawn, and tumbled glass and salty ocean. Then I spritzed the panels with water, blotted them dry and die cut each with the largest stitched rectangle. I glued the blue one to a card base and die cut the other two with hills from the simple stitched hillsides. Then I adhered those as well and started deciding on final placement all of my images.

Everything is glued directly to the cardfront, tucked behind the hills with tape runner, with the exception of the hummingbird in the sky, the cups, gnomes and snails on the bottom.

I used my MISTI to stamp a sentiment at the top and moved on to finishing touches. At first I wasn’t going to do much but that went out the window quick. I added unicorn Stickles to the flower centers and glossy accents to the mushroom dots. Then I added Wink of Stella glitter brush pen to the hummingbird. I thought I was done but I was wrong. 😉 I added glossy accents to the snail shells and mugs and then for fun, I added Wink of Stella to the whipped cream and marshmallows too.

It’s a super busy card but I love it! It’s like we’ve discovered a little gnome coffee date in the middle of a flower garden or something.

I appreciate you sharing your time with me. Have a fabulous day!

Miss Ink Stamps – Unstoppable Trio

Hello again! Today I’ve got a seriously Unstoppable trio of super fun cards to share with you. 😉 I recently purchased a grab bag from Miss Ink Stamps with my fingers and toes crossed that I might get the awesome dinosaur set they have called Unstoppable. AND I GOT IT!!!! Yes, I’m yelling. I was SO excited about this! I couldn’t stop myself and created 3 fun cards with it right away.

The first one I’m sharing is a very clean and simple design…completely out of my comfort zone but I felt like the look on this little dino just called for something simple.

I masked off the bottom of a white panel and inked it up with distress oxides in blueprint sketch, chipped sapphire and gathered twigs. Then I created a dark blue card base, trimmed a brown panel down to 4 1/8×5 3/8 inches and adhered it down. I trimmed the inked panel down to 4×5.5 inches, stamped the palm tree in black ink and head embossed the sentiment before popping it up with foam tape. Then I popped the dino up with foam squares as well. I used black glaze pen with a white gel pen accent on his eyes and glossy accents on his claws for a little added interest.

For this next fun card I knew I wanted to pair this sentiment with the dino and his claw arms. It’s just too cute together! I trimmed down a white panel to 3.75×5 inches and inked the edges. Then I used the My Favorite Things stitched window die to cut a hole. I lined the window with acetate and covered the back of the panel with foam tape. I adhered the red patterned paper to a white card base and sprinkled some champagne stardust glitter that came in my grab bag too! I popped the window panel on the card to create a shaker and used my MISTI to stamp the sentiment under the opening. Then I popped up my dino with his cute claw arms and moved on to finishing touches.

For those I added black glaze pen with white gel pen highlight to his eyes and glossy accents to his claws – including the extended claws. haha! So much fun!

For this my card I had a blast creating an apocalyptic scene and added a silly sentiment to go with it. I ink blended tumbled glass and salty ocean distress oxides on my card front and then gathered twigs and ground espresso on a panel for some dirt. I die cut the ground with Lawn Fawn simple stitched hillside border and glued it to the card front. I die cut a window from dark gray cardstock and then used an embossing folder from my stash on it. This panel is popped up with foam tape.

Now to set the scene. I tucked the volcano behind the dirt and adhered it with liquid glue. Then I added the palm trees and meteors with a combo of liquid glue and foam squares. Last I added my dino and sentiment banner with foam tape.

For finishing touches I added glossy accents to the meteors, lava and dino claws. Then I added black glaze pen to the dino eyes with that white gel pen highlight again.

Phew! I know that was a lot and I really appreciate you sticking around until the end. I hope you enjoyed today’s cards and find some inspiration to go make something you love.

Have a fabulous day!