Blog

Lawn Fawn – Thankful For You

Thanks for stopping by today! I’m sharing a fun card that was inspired by my friend Tammy at Paper Pretty Boutique. She made a great design with the new Pretty Pink Post hedgehogs and while I love those hedgehogs I immediately wanted to try the design with what I had at home. I showed my daughter and told her my idea but she got SO EXCITED and shared a totally awesome idea that I had to jump on it immediately!

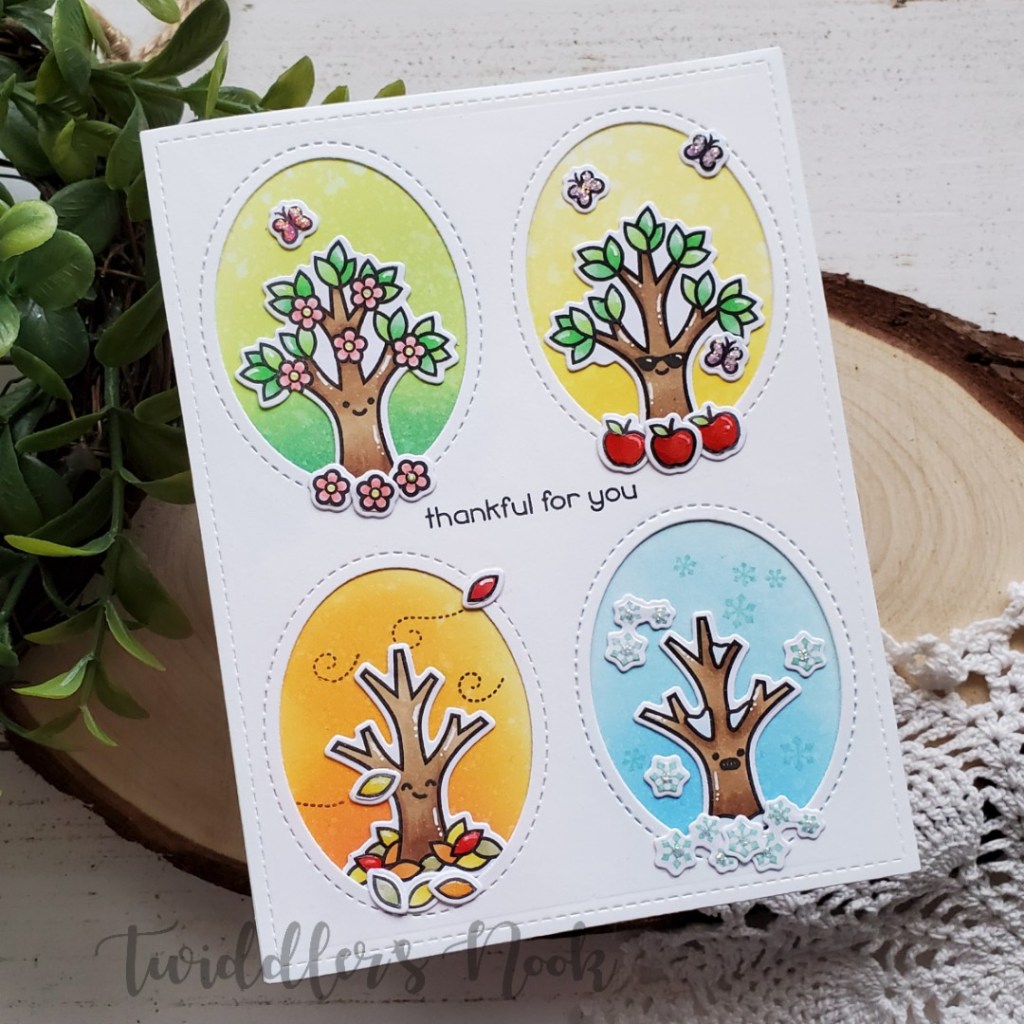
To make this awesome card, I die cut the largest rectangle from the Lawn Fawn large stitched rectangles set and then lightly marked it into four equal quadrants. Then I went searching through my dies to find something that would cut windows in all the sections. I ended up landing on the oval window from the shadow box die set. I die cut it four times and erased my pencil lines.

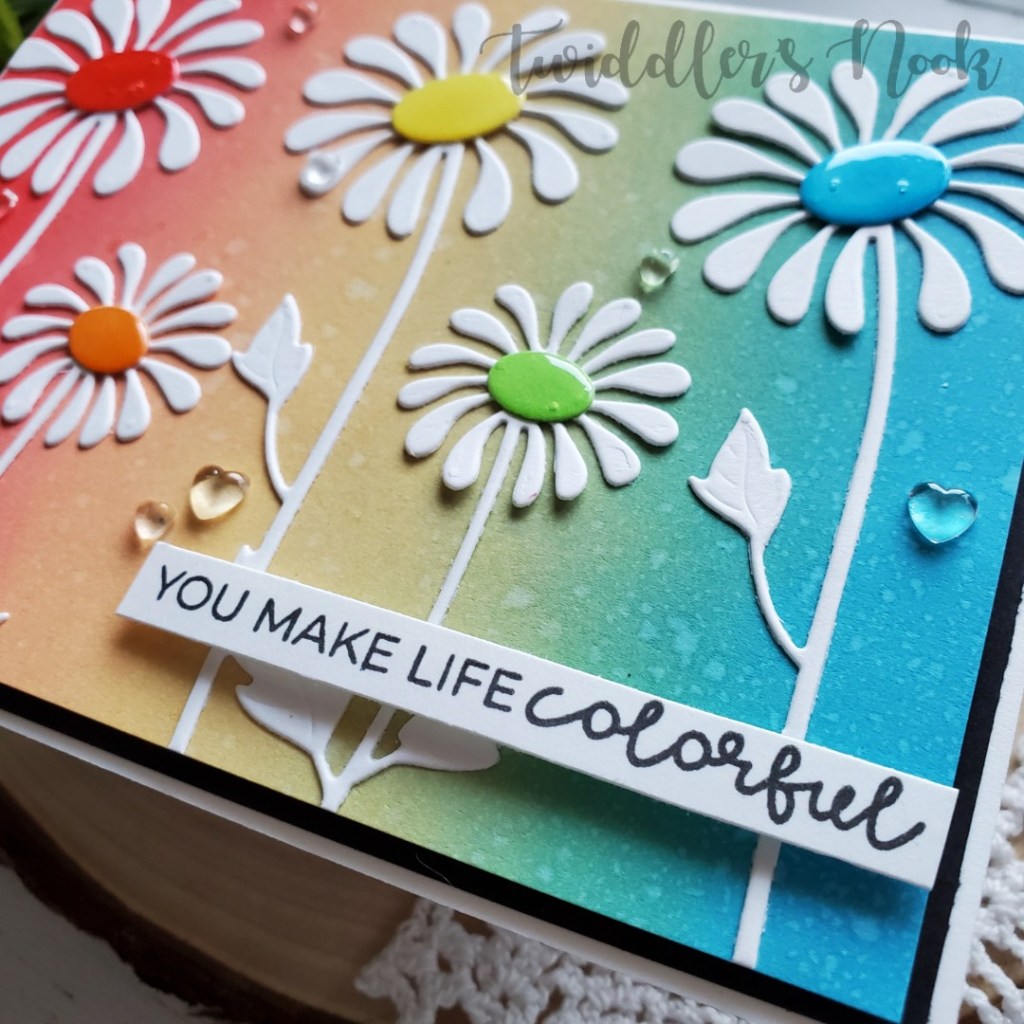
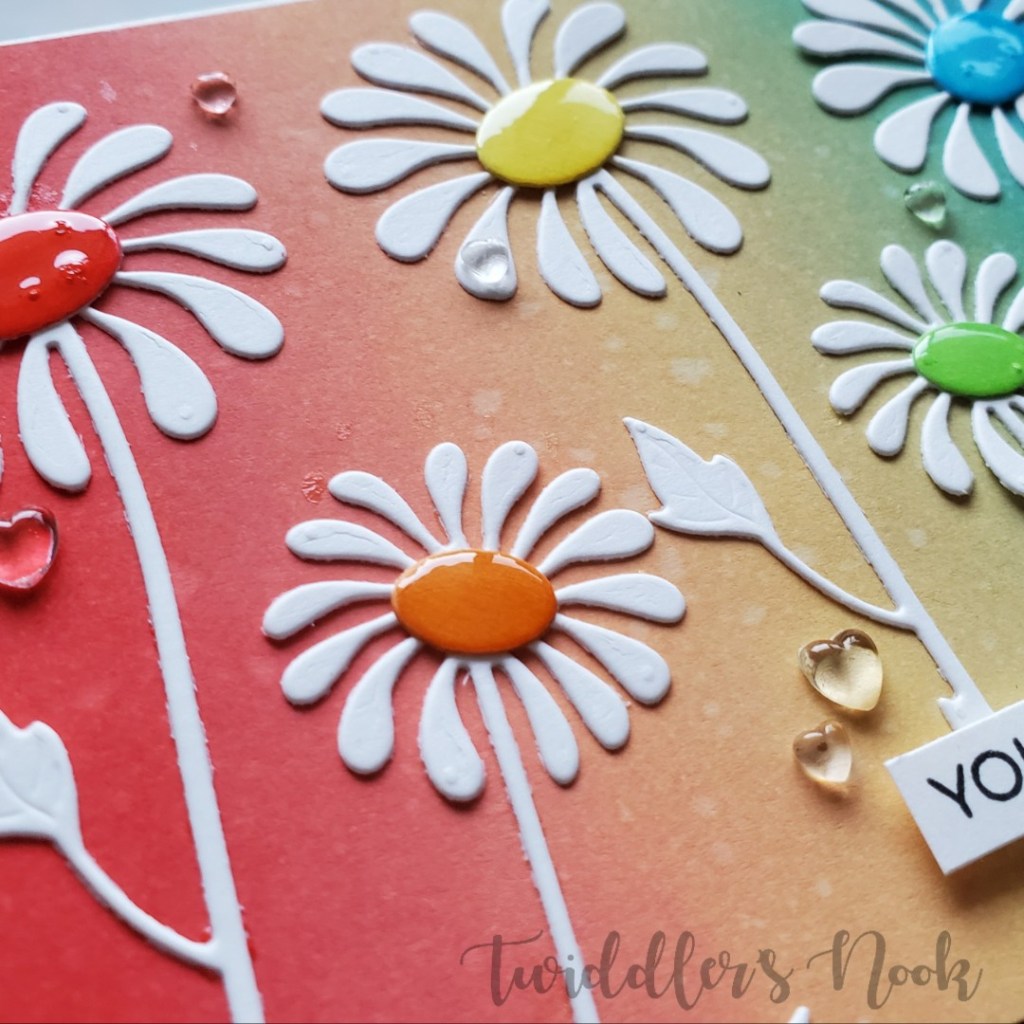
Next, using my windows as a guide, I used distress oxides to ink up the card front so the colors showed through each window and spritzed it with water. Going clockwise from top left, I used twisted citron and mowed lawn, scattered straw and mustard seed, spiced marmalade and wild honey, and tumbled glass and salty ocean.

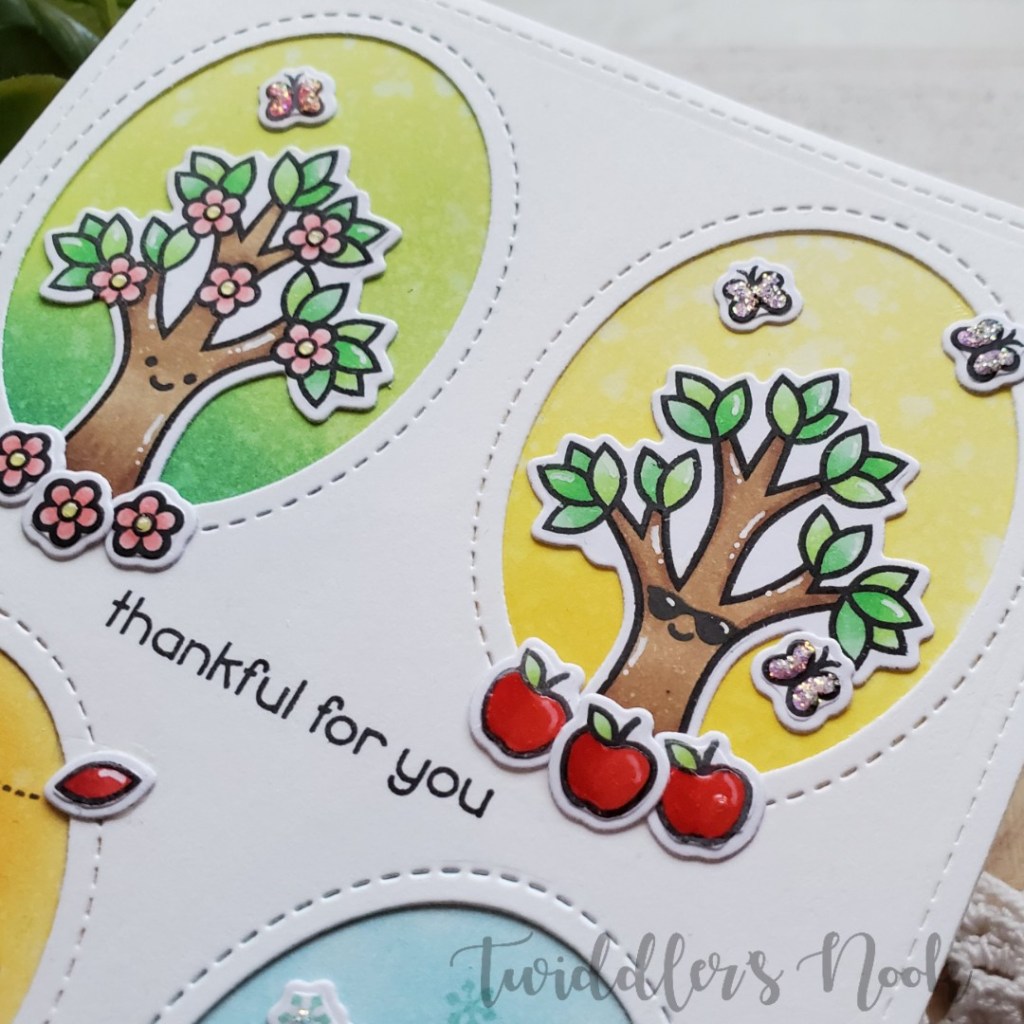
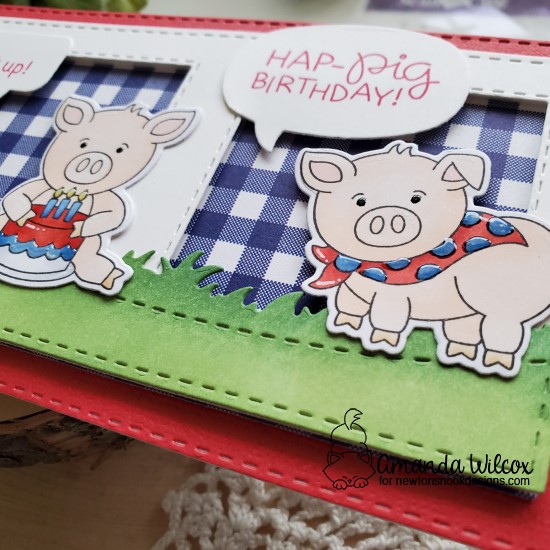
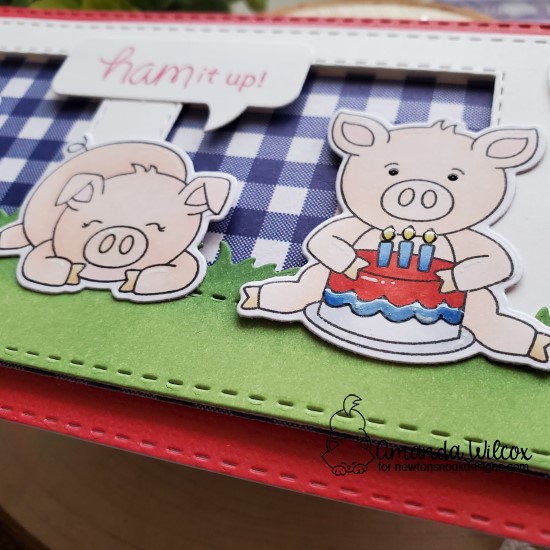
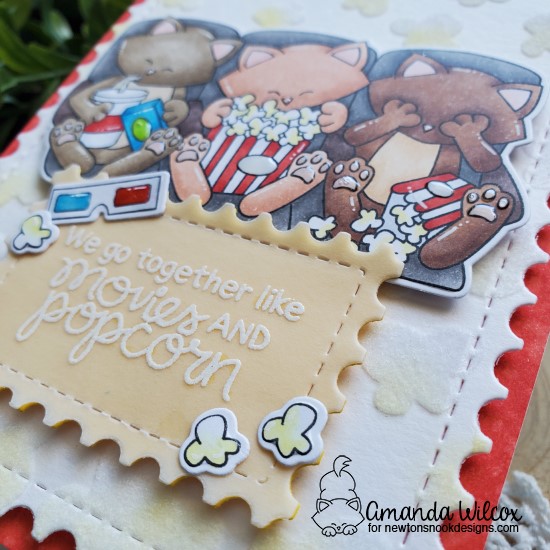
Then I stamped, colored and die cut my images from the Tree Before n’ Afters set. I adhered my images to each window and chose a sentiment for my card. I liked how versatile this one was and how it perfectly fit in the center of the windows. After stamping that I moved on to finishing touches for my card.

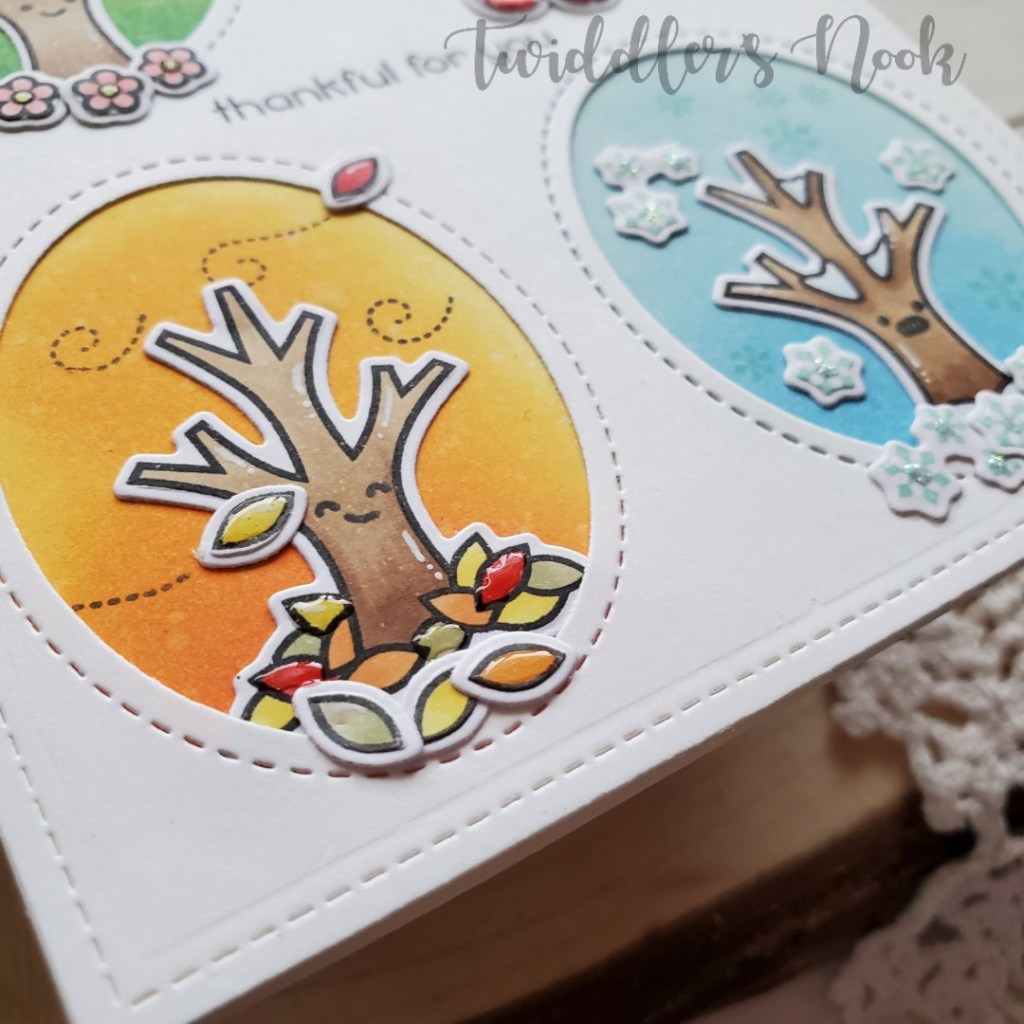
For those I stamped additional things for interest in some of the windows like extra snowflakes and the windy lines for the leaves. Then I added white gel pen accents throughout, glossy accents to the apples, flower centers and leaves and Stickles to the butterflies and snowflakes. At this point I thought my card was missing something, so when it was completely dry, I went ahead and used my MISTI to stamp faces on the tree trunks for a little extra fun.

I love how this turned out and think this is a really fun card to send to someone any time of the year.

I appreciate you sharing your time with me. Have a fabulous day!

Newton's Nook – Let's Be Mermaids

Hello everyone! I’m super excited to be up on the Newton’s Nook blog today featuring this super bright and colorful purr-maid card.

I had a general idea of what I wanted to do with this and it definitely started with deco-foil on that awesome seashells stencil. I spread transfer gel over the stencil and set it aside to dry. Then ran it through my laminator with shattered rainbow deco-foil and look at that awesomeness!!!

Next, I laid out my dies and stamps for a general layout so I could stamp and color my images from Purr-maid and cut them with the coordinating dies. Then I die cut a rounded rectangle from iridescent vellum and used my images for guide where to stamp and heat emboss some fun bubbles and the sentiment. At this point I also die cut my deco-foiled panel with the scalloped rectangle. Both of those are from the Frames & Flags die set. Then I moved on to assembly.

To do this I worked kind of backward. I popped my images up on the vellum panel and then hid glue behind those to adhere it to the seashell panel. Then that whole thing is popped up on a textured teal cardstock panel and finally it’s all attached to a card base.

Last I finished things up with some Wink of Stella glitter brush pen on the mermaid tails, glossy accents on the kitty noses, seashells, seahorse and fish, and lastly Unicorn Stickles on the bubbles.

There is so much bright and fun going on with this card. I just love each piece of it! I hope you do too!

I appreciate you sharing your time with me. Have a fabulous day!

Newton’s Nook – Hap-Pig Birthday!

Hi there! I’ve been making so many thinking of you cards that I decided to go a different route for today’s card. I’m using Oink from Newton’s Nook with some Trinity Stamps dies. The punny sentiments in this set are just the best for many occasions but the birthday one made me giggle.

I started this card by stamping out all of the images from the Oink set and coloring them with my copics. Then using the coordinating dies, I cut them out…one was lost because the die shifted in my die cutter, such a bummer but the ones left worked out great for this design.

Wanting to use all of the images on one card, I decided to make it a slimline. Using my Trinity Stamps Slimline series dies, I cut out all the layers and started deciding on a final layout. At this point I thought it would be fun to have some grass for my piggies to sit on so I inked up a panel and die cut it with the Slimline Borders grass die.

Now for the actual assembly, I adhered the red panel to a card base, then the blue patterned paper to that. I popped up the white frame with foam squares and adhered the grass to that. The piggies are attached with a combo of tape runner and foam squares where they overlap the window openings.

I decided on the sentiments I wanted to use and found speech bubbles from the Newton’s Nook speech bubble die set that fit them. Once those were die cut and stamped, I added them to the card front and moved on to finishing touches.

I kept those pretty simple with a black glaze pen to the eyes, white gel pen accents throughout and glossy accents to a few key places like the bow, bandana and cake.

This fun card is all finished and ready for the world. These piggies seriously make me smile every time I look at them! I can’t wait to make more fun cards with them, especially with the one image I didn’t get to include here.

I appreciate you sharing your time with me. Have a fabulous day!

Mama Elephant – Just Wanted to Say…

Hi there! I’m back with another card from the bundle of Mama Elephant Stackable Cutie cards I made. This one was super quick to come together but it’s so adorable! I just love it!

To make this card I took some Perfectly Plaid Lawn Fawn paper and die cut it with a stitched rectangle. Then I cut the My Favorite Things Rectangle Peek-a-boo Window from that. Using the window as a guide I inked a pink shadow with my blending buddy brush, and then popped my frame and elephant up with foam tape.

Using my MISTI I stamped a speech bubble above the elephant with the same ink I used for the background. I also stamped part of a sentiment from the Trinity Stamps Hello Senti-mini set and popped it up with a foam strip. Next, I stamped the hello from the same set on the inside of the card in a light blue dye ink.

For finishing touches I added black glaze pen to the eyes, white gel pen accents and a scattering of clay hearts around.

A simple, super sweet card perfect for someone in my life!

I appreciate you sharing your time with me. Have a fabulous day!

Mama Elephant – Stackable Cuties

Hello everyone! I’m still making cards to send to friends and family for a little break in the day. I hope it’s making them smile and as fun for them as it is for me to make and send. I recently pulled out my Mama Elephant Stackable Cuties to play with and made a couple of cards with them.

When I get an inkling like this, I usually stamp and color a bunch of images and make cards afterward. Here is the first one.

To make this card, I die cut the My Favorite Things Arched Window (the next to the largest) from a white cardstock panel that measures 4×5.25. I took the window it cuts out and used my Newton’s Nook clouds stencil to ink up some sky using my Trinity Stamps blending buddy brush and a blue dye ink. Then I die cut a second arch, inked it up with green and die cut it with my grass die from the Newton’s Nook land borders dies. I adhered these together, added my critters and glued it to my card front.

Using my MISTI, I added a couple of appropriate speech bubbles from the same stamp set and then popped my frame up around the scene with foam tape.

I finished this card off with glossy accents on the noses, kitty’s fish and puppy’s bone. Then I scattered some Your Next Stamp gumdrops across the design. Very last, I added black glaze pen to the eyes and white gel pen accents to the images.

I appreciate you sharing your time with me. Have a fabulous day!

Newton's Nook – We Go Together…

Thanks so much for stopping by! I’m super excited to share today’s card for a whole bunch of reasons! Mostly being…it’s awesome!!!! I hope you enjoy it too!

I started today’s card by stamping Newton’s Movie Night images and coloring them with my copics. Then I die cut them and set them aside.

I knew I wanted to use Therm-o-Web flock on the popcorn stencil so I started by spreading my transfer gel and then set it aside to dry. Once it was I sent it through my laminator with white flocking and it came out perfect! Then I die cut the panel with the largest Frameworks die. I wanted a little more depth on the popcorn so I used a finger dauber and some yellow chalk to give it a buttery look. I love how this turned out!

Next I stamped and heat embossed my sentiment on vellum and then die cut it from another Frameworks die. I cut a second layer in bright yellow to go behind it and adhered the two together.

I wanted the popcorn panel to pop off the card base so I took candied apple distress oxide ink and inked up a panel and spritzed it with water. I popped the popcorn panel up with foam tape and then popped the images up with foam tape as well.

For finishing touches on this fun card, I added white gel pen accents to the images, glossy accents to kitty noses and toe beans, popcorn boxes and candy box and also to the 3-D glasses.

I’m so excited how I was able to take an idea from my head and so perfectly make it a reality. I absolutely love how this card turned out.

I appreciate you sharing your time with me. Have a fabulous day!

Coffee Loving Cardmakers – Exploding Envelope

It’s Tuesday Tea with Twiddler’s Nook over on the Coffee Loving Cardmakers blog. Today I’m excited to finally share a project I’ve been wanting to try for a while…an exploding envelope. I used my We R Memory Keepers envelop punch board paired with a bunch of awesome Newton’s Nook goodies to create this awesome gift!

To start this project, I chose 2 main colors – green and pink and created my base envelope with my punch board and some trimmed inserts to cover the panels. The envelope is 5×7 inches so that I had extra surface area to play with. From there I chose the Newton’s Nook Flower Trio dies and cut out bunch of them in the same green and pink, along with some yellow and kraft to add a little contrast. 

I knew that I wanted a tag and a mini envelope on the center panel so I cut those out and glued them together. With the main elements figured out, I took my stamps from Loveable Llamas and Cuppa Cactus and decided how many of each I needed to stamp. Once they were stamped, I colored them with copics and used the coordinating dies to cut them out. 

I adhered all my pieces to the main envelope with liquid glue and moved on to create the belly band that will hold the whole thing closed.

I cut two 2×11 inch strips from the same kraft cardstock I used on the flowers and scored them both at about 7 1/4, then adhered the two together. (Pro tip: In the future, I would rework this so the glued seams are in the centers not at the edge. The band catches sometimes when you slide it off but it’s not horrible.) Once that was made, I adhered the extra images and flowers I had set aside and used my MISTI to stamp Hello! from the Cuppa Cactus set.

Here’s a closer look at the inside of the envelope. I plan to put a coffee gift card in the small envelope, along with a note for the recipient. 

Isn’t this a fun way to give a gift? I’m super excited to make more of these in different themes! I hope you enjoyed today’s project and are inspired to go make something beautiful.

I appreciate you sharing your time with me. Have a fabulous day!

Poppystamps – Hello Again

Well, hello there…again! 😉 Today I’m sharing yet another way I thought to use the Poppystamps Delightful Daisy dies paired with the Luscious Script Hello. I absolutely love this sentiment die! You’ll be seeing a lot of it, I can already tell!

For today’s card, I started by die cutting my flowers from heavy weight cardstock and colored them with copic markers. Playing off the colors I chose for the flowers, I inked up a panel with distress oxide inks using picked raspberry and scattered straw. I spritzed the panel with water and then flicked gold watercolor on it. Once it was dry, I trimmed it down to 4 1/8 x 5 3/8 so there is just a teeny white border showing from the cardbase. The flowers are glued directly to the inked panel and that is popped up on the card base with foam tape.

Then I moved on to the sentiment. I die cut the word hello from gold cardstock once and white cardstsock three times. I adhered all of these together and then die cut the shadow from white as well and glued them together. The sentiment is glued directly to the card front and I moved on to finishing details.

With the shimmer from the gold cardstock and the watercolor splatters, I didn’t think it needed a whole lot but was missing something. I reached for my stash of embellishments and landed on Trinity Stamps Fortune Teller embellishments. I love how these show a little of the color that is behind them but have an opalescent sheen. So pretty! I scattered them about the design and, voila, this card is finished.

This is my final entry into the Poppystamps challenge for this month. I hope you enjoyed these last few days, seeing different ways to use the same dies. It’s always great to get more mileage out of the products you have. I hope you’ve found some inspiration and enjoyed the cards I’ve made.

I appreciate you sharing your time with me. Have a fabulous day!

Poppystamps – Colorful Daisies

Hi there! I’m so excited to share another card using my new Poppystamps Delightful Daisy dies. While I was making yesterday’s card, this idea popped in my head and I had to try it out. It took a couple of tries but I really like how it turned out.

I started out trying Tombow markers on watercolor paper but it just wasn’t giving me the results I was hoping for, so I reached for my distress oxide inks and started blending. This is different than my original idea but I love it. After I was done blending, I spritzed it with water and set it aside to dry while I die cut my flowers. Then, I took copic markers and colored the flower centers and glued them on.

I adhered my flowers down to the inked panel and trimmed it down to 4×5.25. Then I cut a black mat to show about 1/8 of an inch around that. The black panel is adhered to the card front and the inked panel is popped up with foam tape. I stamped my sentiment from Trinity Stamps A Crafters Heart stamp set, trimmed it to a strip and popped it up as well.

For finishing touches I put glossy accents on the flower centers for a bit of shine and then glued Trinity Stamps boiled sugar jelly drop hearts around the design.

I absolutely adore this rainbow of flowers! This sentiment couldn’t be more perfect too! I’m excited to link this card up to the Poppystamps monthly challenge too.

I appreciate you sharing your time with me. Have a fabulous day!

Poppystamps – Hello

Happy Saturday everyone!!! Thanks for taking a minute to stop by. I received some happy mail a couple days ago and couldn’t wait to dig in and make a few cards with my new dies from Poppystamps. Here is the first one I finished. I’ll be entering it into their monthly challenge – floral.

I had an idea what I wanted to do with the dies so I started on my background. I cut a white panel down to A2 size and grabbed my Tombow markers for a little ink smooshing. After a few layers I liked what was going on and set it aside to dry. Then I die cut the delightful daisy 4 times from white cardstock and glued them together. I did the same with the flower centers as well. Then I die cut the luscious script hello 4 times from the same white cardstock and the shadow from a light purple and adhered them all together as well.

I finished things off with some Wink of Stella glitter brush pen to the flower centers and a scattering of Jellyfish Jewels from Trinity Stamps.

In light of things going on, I’ve been mailing out a lot of happy mail and thought this card would be a perfect addition to that stash.

I appreciate you sharing your time with me. Have a fabulous day!