Blog

Avery Elle – Peek-a-boo Pals Fair Fun

I am BEYOND EXCITED to finally have had the chance to play with the most recent Avery Elle release…specifically more of my beloved Peek-a-Boo Pals! I have had this idea in my head since I saw the stamps at Creativation in January and was so happy to finally put ink to paper and make it happen!

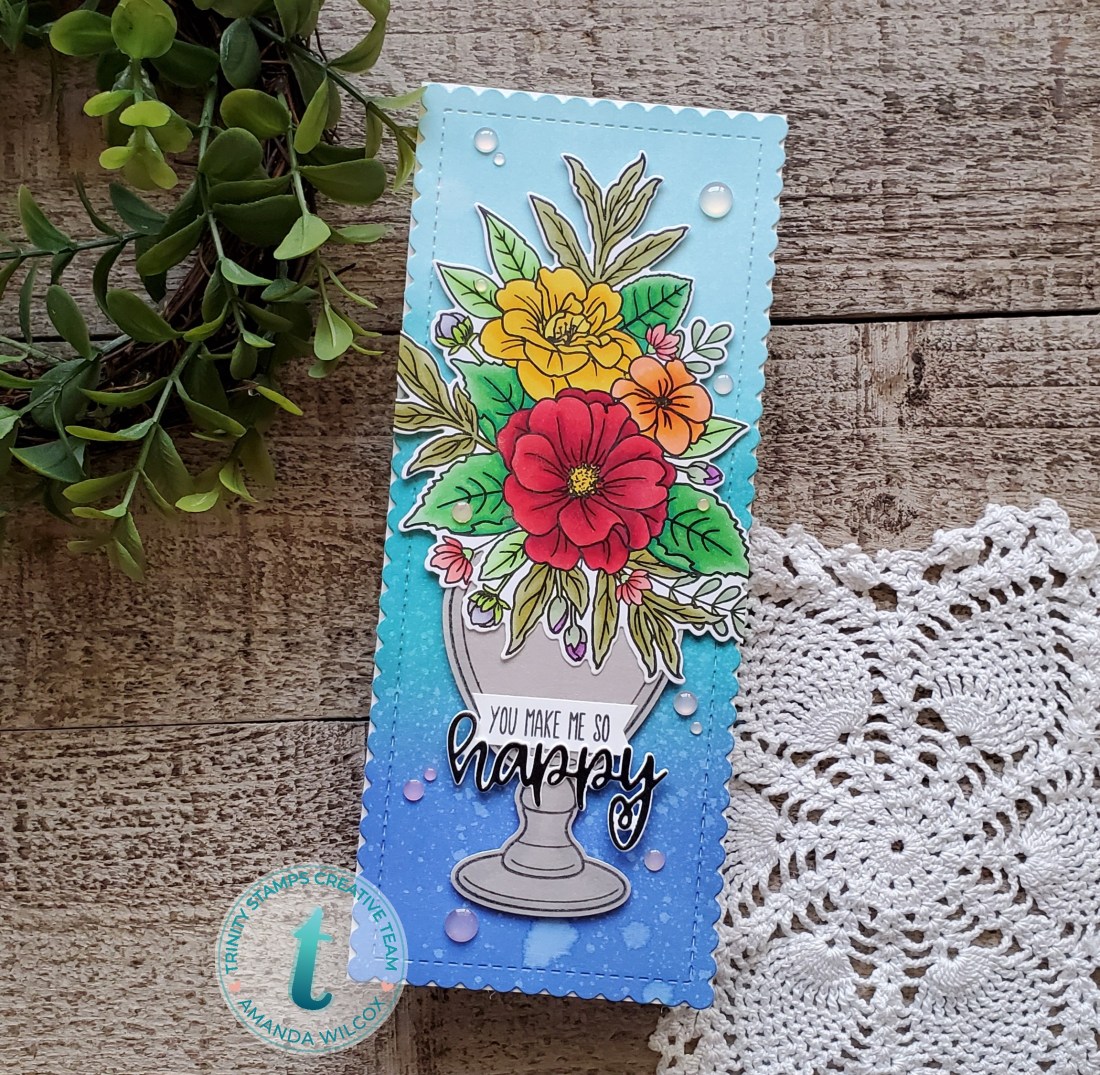
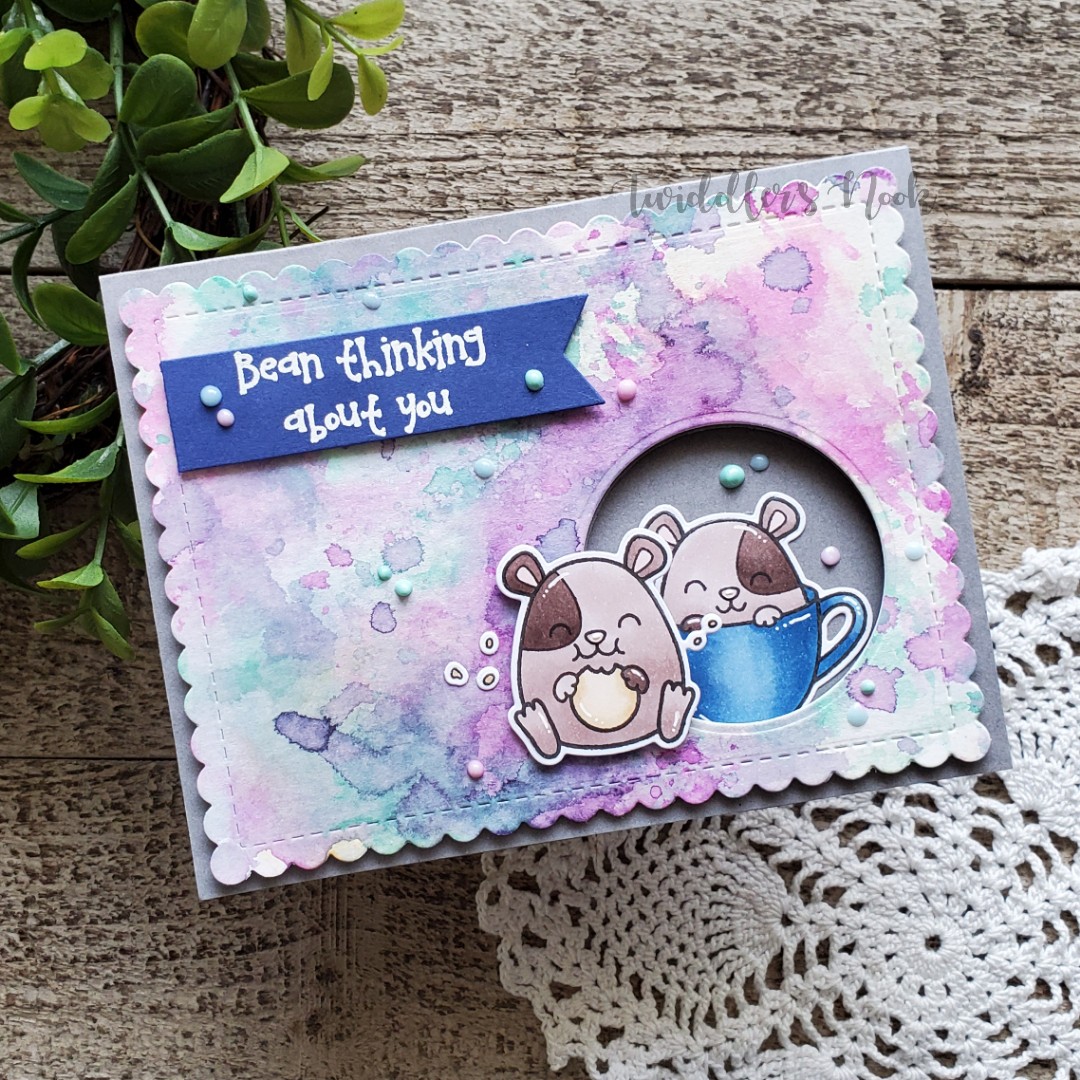
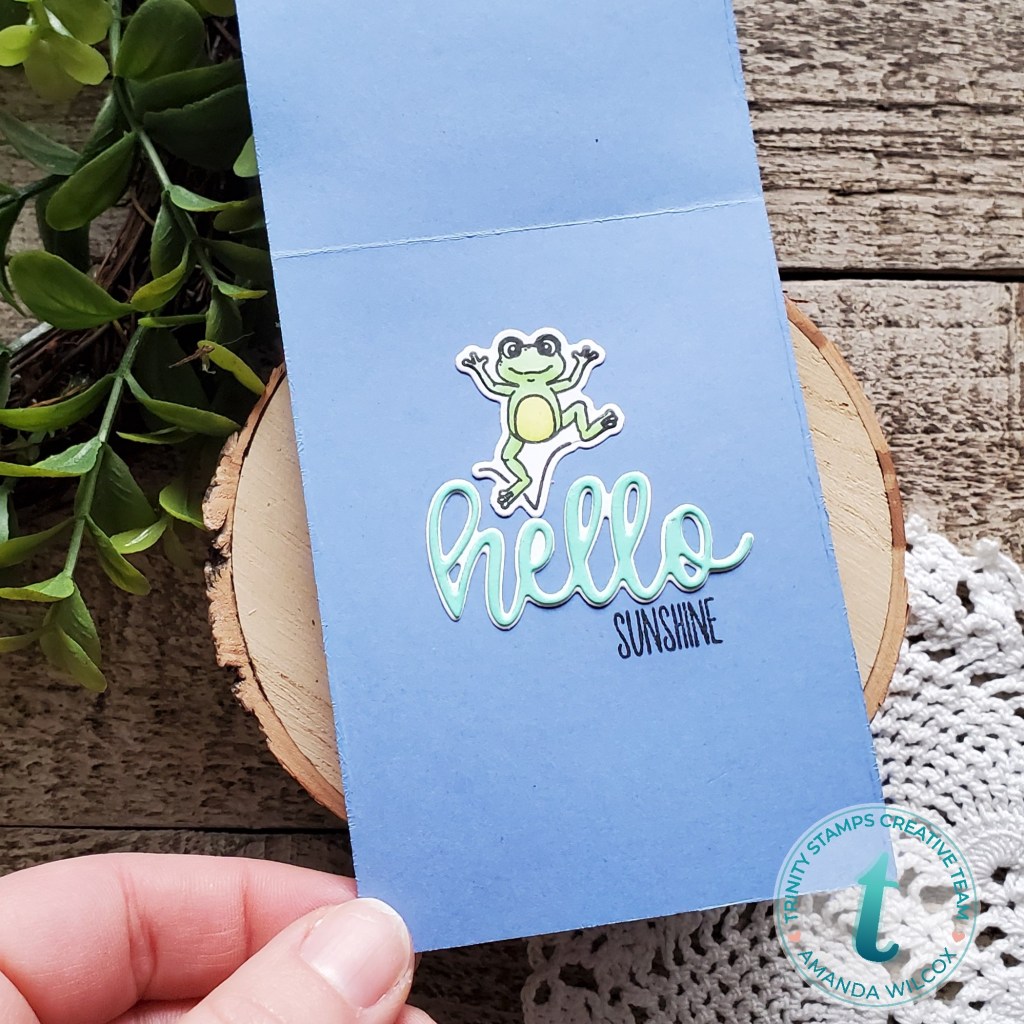
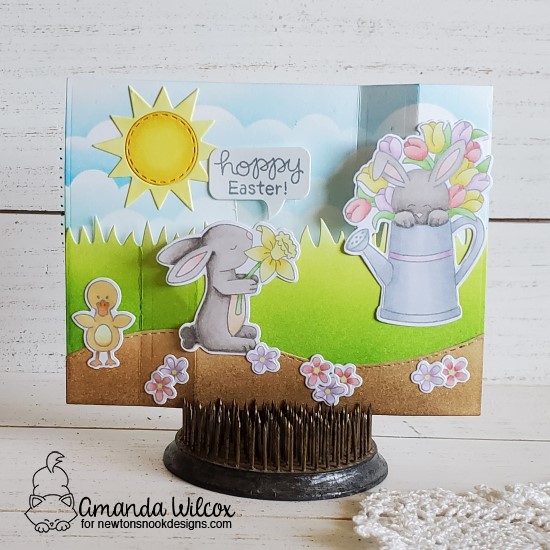
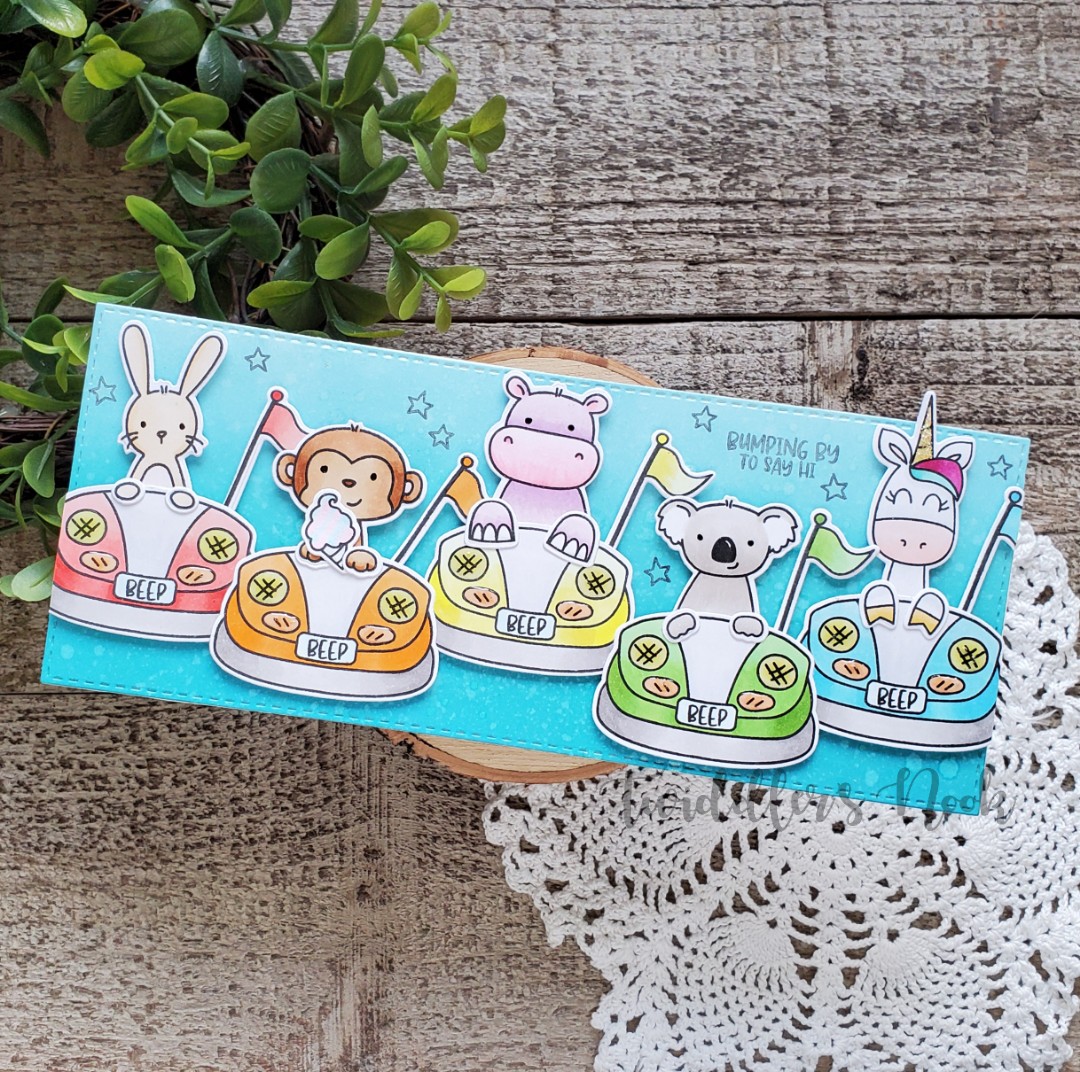
To create this card, I started by inking up a panel with distress oxide inks in mermaid lagoon, peacock feathers and tumbled glass and then die cut it with my slimline dies from Trinity Stamps.

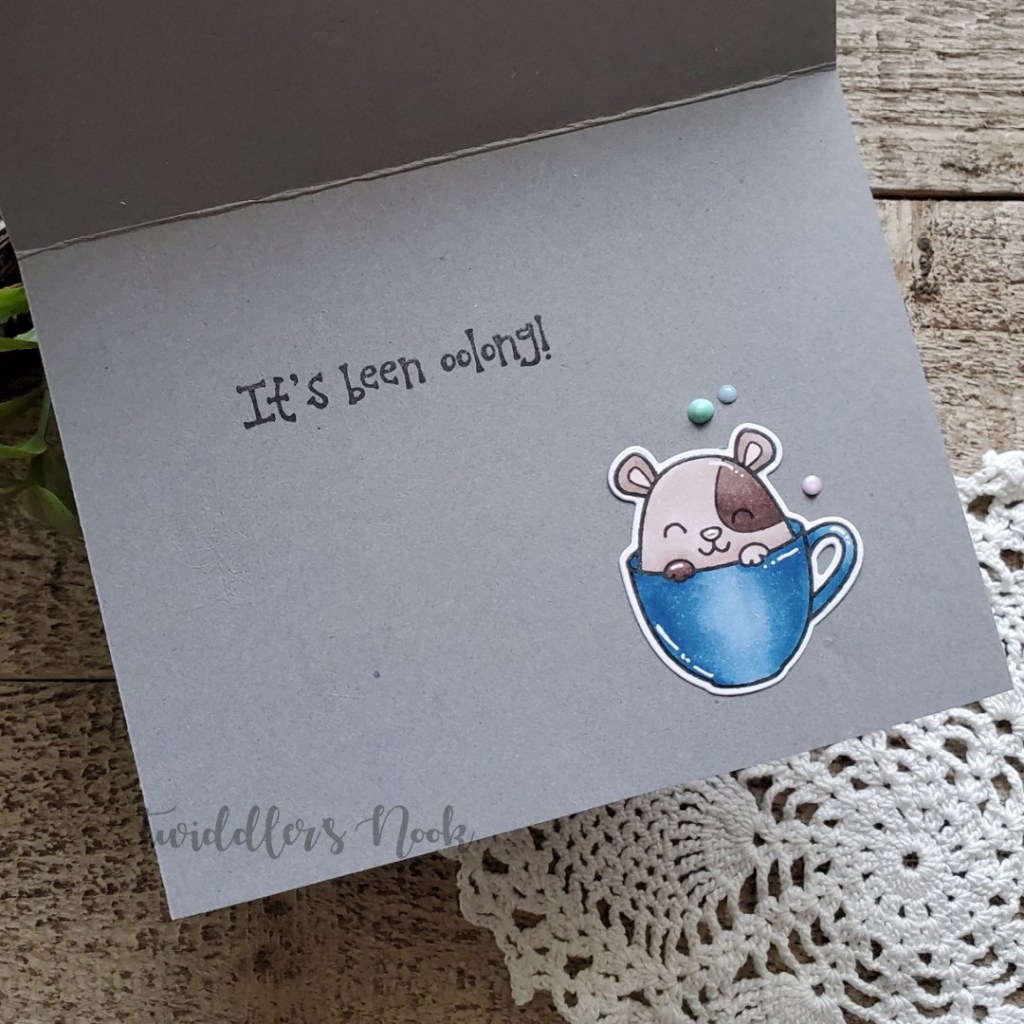
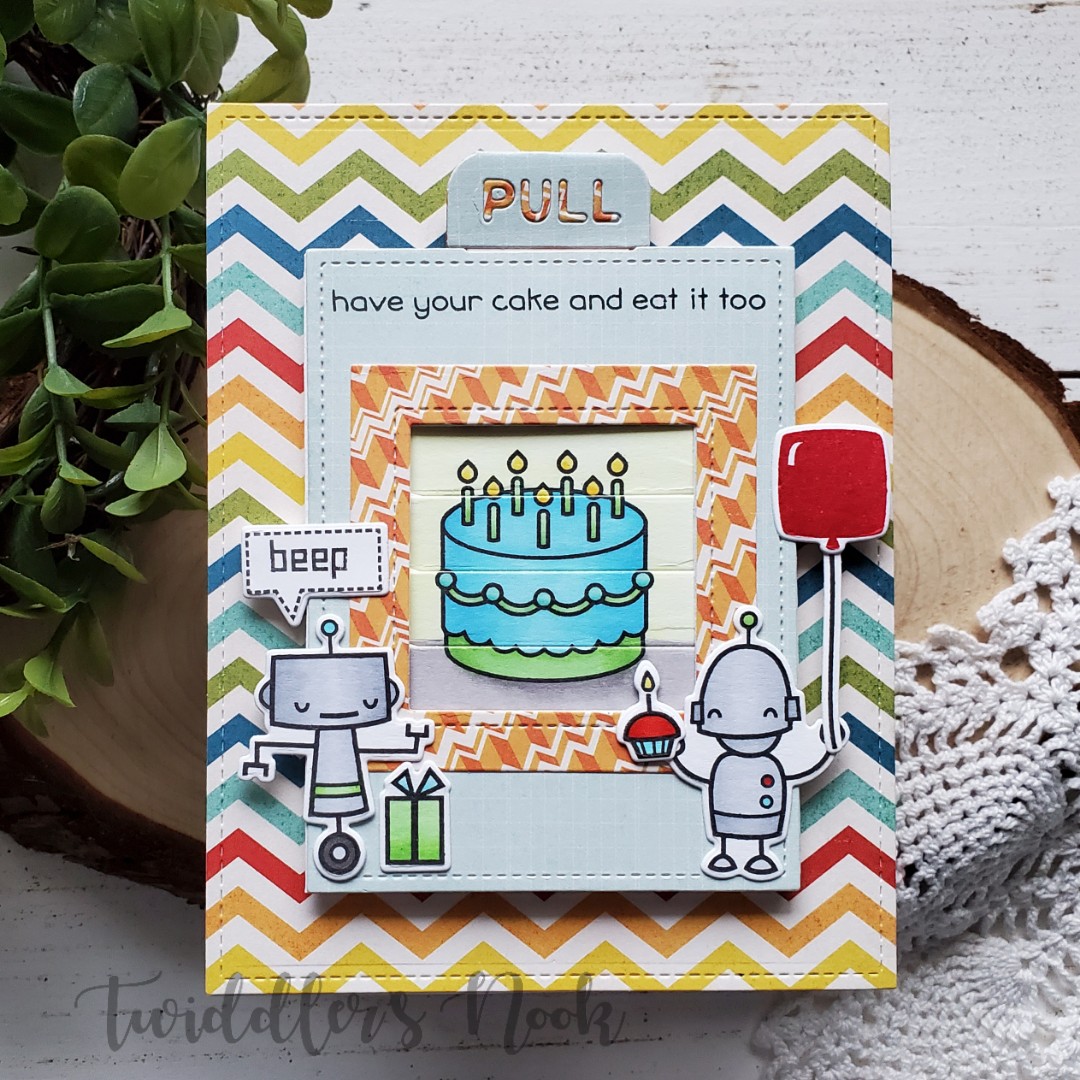
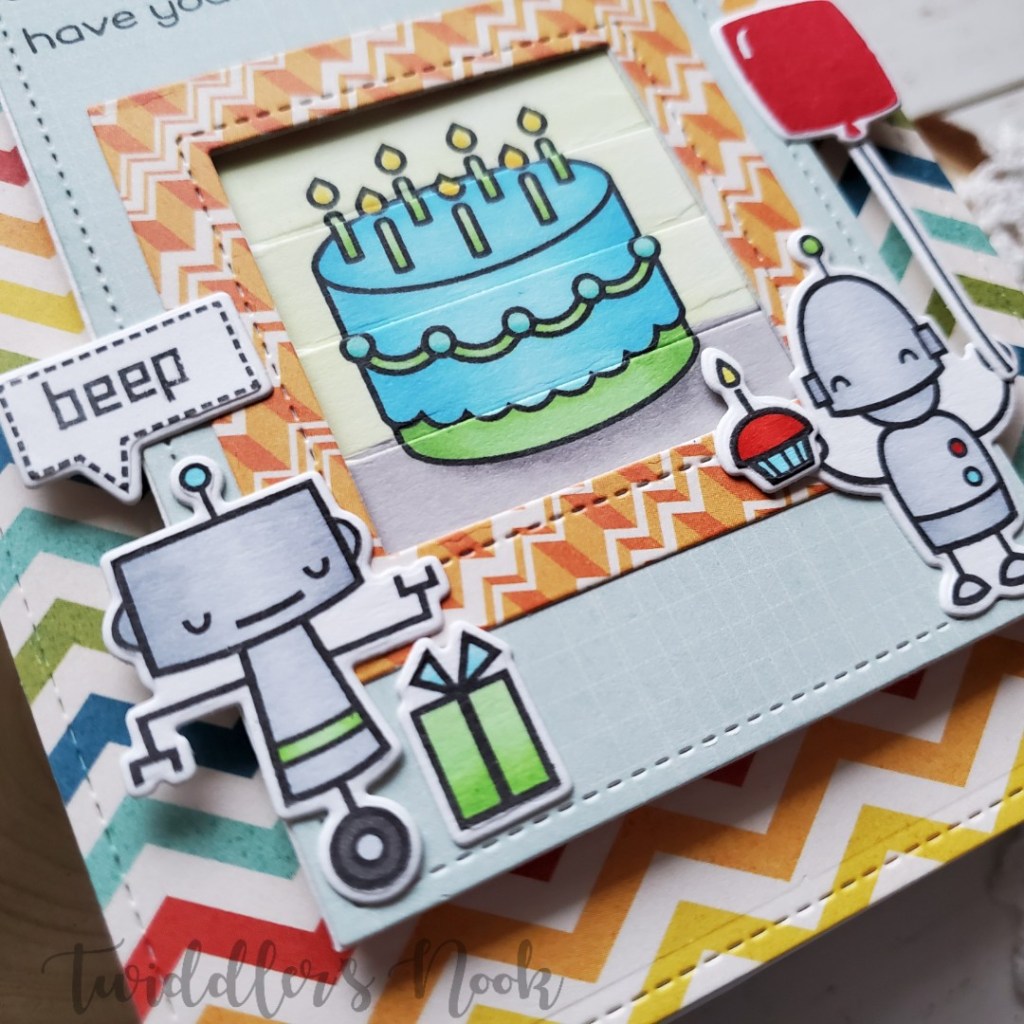
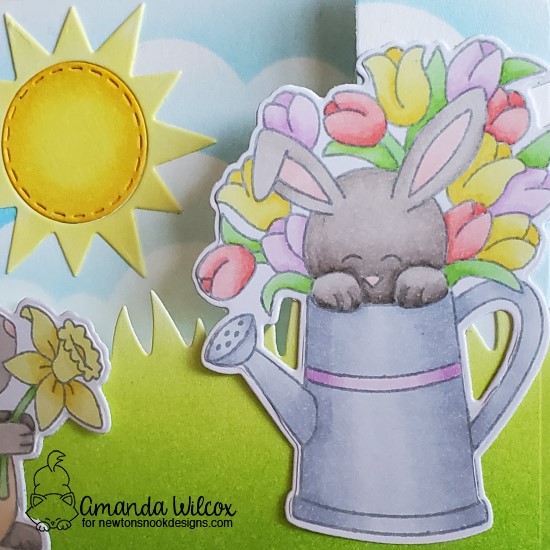
Next, I moved on to stamping, coloring and die cutting all my images from Peek-a-boo Pals Fair and Peek-a-boo Pals! They’re so stinking cute! I just love all these critters!!!

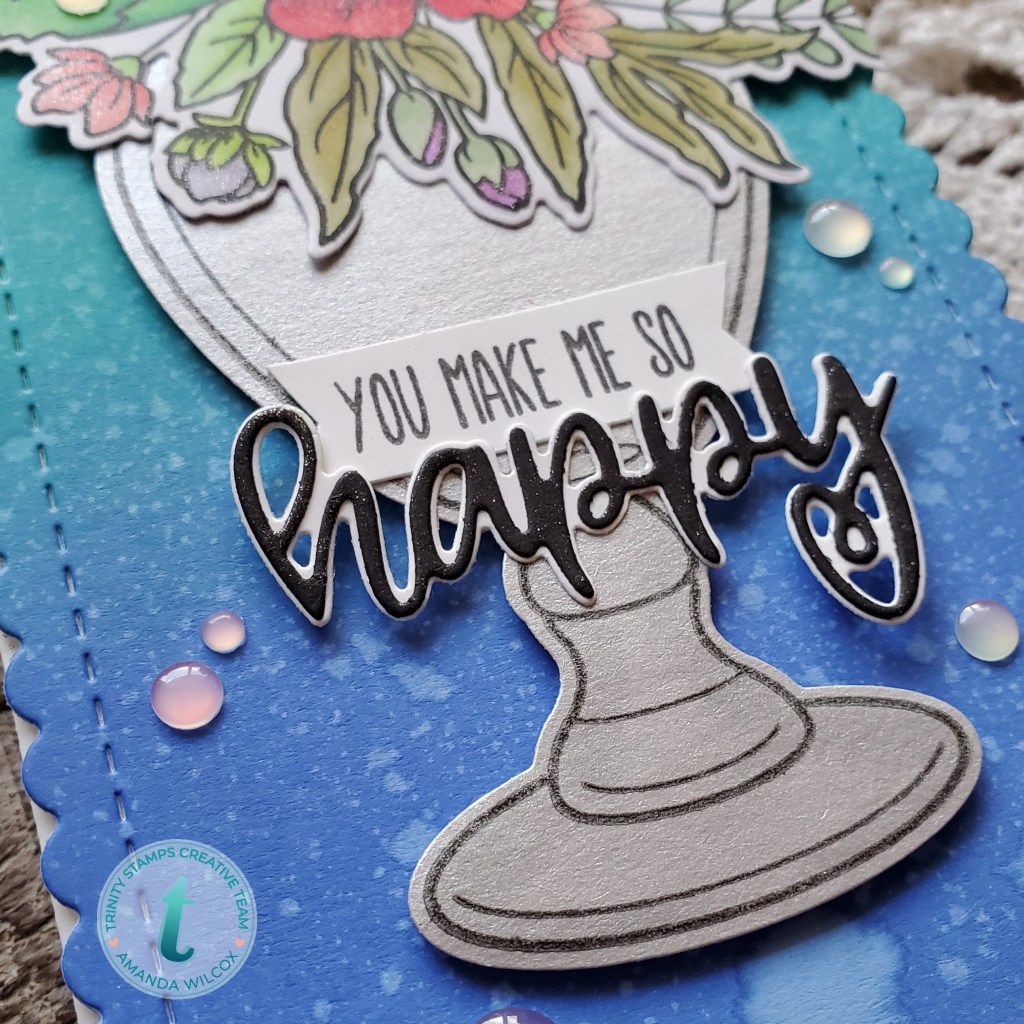
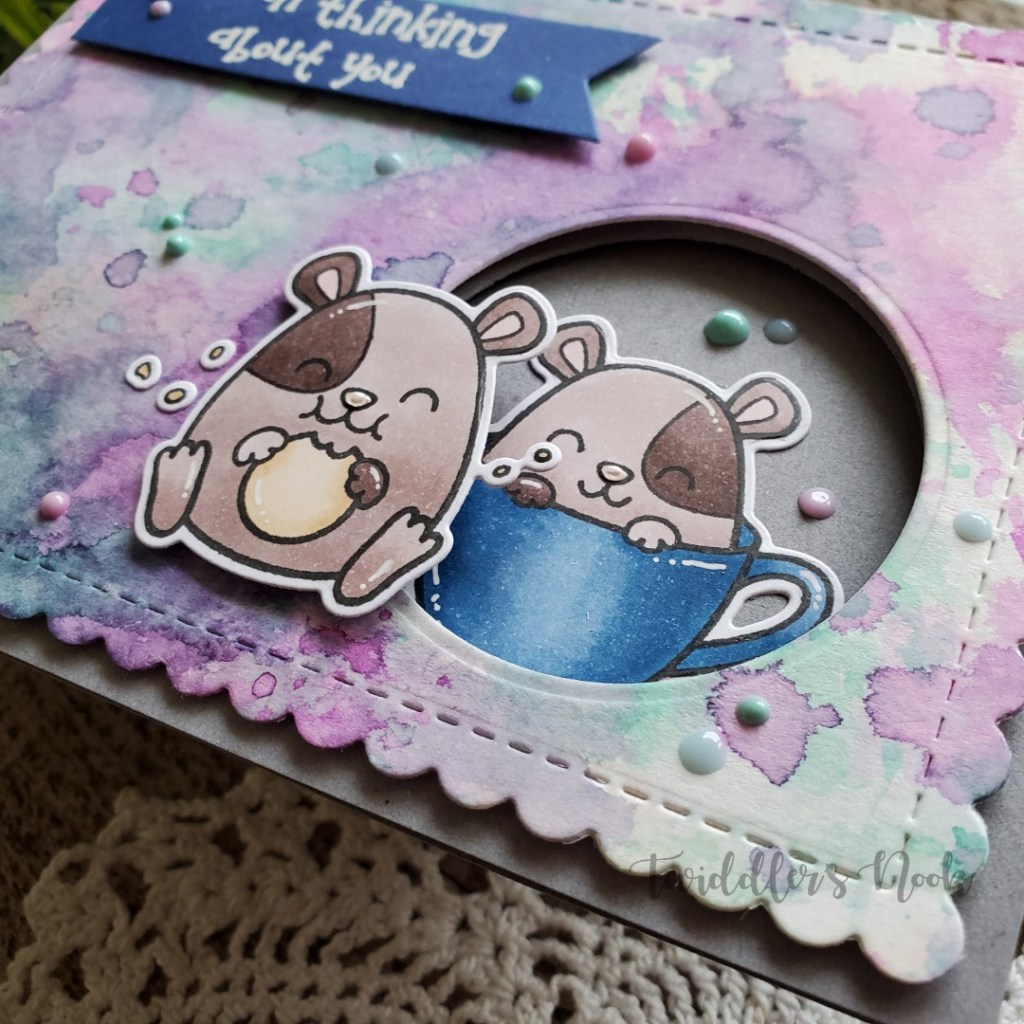
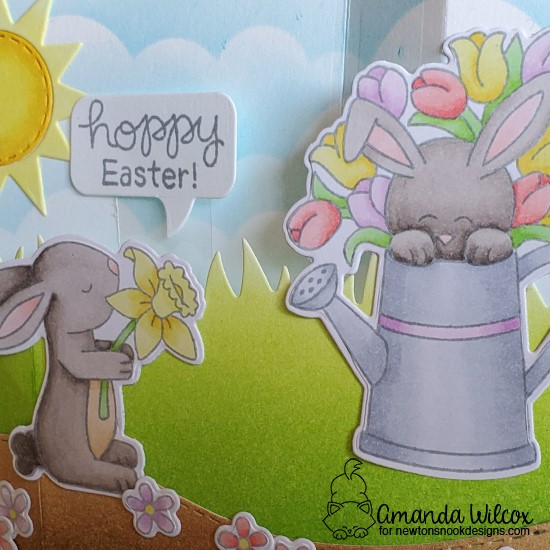
I assembled all the bumper cars with their critters and flags and popped them all up on the inked panel with foam tape. Then I stamped my sentiment along with some fun stars to fill in the open space. I really like the look this gives without taking away from the main images.

I added the panel to a card base measuring 3.5×8.5. For finishing touches I added black glaze pen to the animal’s eyes, glossy accents to the bumper car lights and Stickles to the unicorn’s horn.

This card just makes me smile! I hope you enjoyed it too!

I appreciate you sharing your time with me. Have a fabulous day!

Trinity Stamps – Slimline You Make Me Happy Bouquet

Hello everyone! I’m up on the Trinity Stamps blog today featuring this beautiful floral image – Love You Bunches. I had this idea pop in my head the other night when I was laying in bed and was so excited the next morning when I got up and put the flowers over the candy jar and could make it look like a vase instead!

I started by stamping and die cutting my candy jar from silver metallic cardstock. Since these flowers don’t have stems I wanted it to look like a solid vase and I thought the neutral silver would work well with whatever colors I chose for my flowers.

Next I stamped, colored and die cut my flowers from Love you Bunches and set it all aside to create my background. For this I cut a panel to 8.5x a scant bigger than 3.5 and used distress oxides on it – tumbled glass, peacock feathers, to blueprint sketch and spritzed it with water. I hit it with my heat gun to help it dry faster before die cutting it from the largest in the slimline series: scalloped card panels dies.

At this point I started assembling my card so that I could make final decisions on my sentiment. The inked panel is glued directly to my card base and then the flowers and candy jar are popped up with foam tape.

I ended up deciding to use the happy senti-mini stamps and dies together for my sentiment and glued them both directly to the candy jar base.

For finishing touches on this card I scattered fortune teller embellishments throughout the design and then loaded my Wink of Stella glitter brush pen on the flowers and the die cut happy.

Photos really don’t do the Wink of Stella justice. It’s sooooo cool to see it shimmer when it’s moved in the light. And I really love these iridescent embellishments playing off the colors in the card.

Trinity Stamps is starting up a monthly challenge today too! It’s a brand new, fun thing and I really hope you’ll play along. This month’s challenge is floral. Keep an eye out later this morning for all the details!

I appreciate you sharing your time with me. Have a fabulous day!

Newton’s Nook – Newton’s Book Club

Hello again! Today I’m up on the Newton’s Nook blog sharing this simple but adorable card featuring Newton’s Book Club. I just adore this set because I’m not just a crafter, but a total book nerd too! This will be a fun card to send a book loving friend.

To make this card I started by stamping my image from Newton’s Book Club and coloring him in. I had an idea of the layout and now that he was colored, I pulled cardstock that coordinated with the colors I chose for the other elements of my card. I used the coordinating dies to cut my image out and started on the rest of my card.

The woodgrain paper gave great texture but the teal and red papers were too plain so I went over the red using my gingham stencil with red ink for a tone-on-tone look. I liked this much better. I adhered the teal to my card base and then die cut my red piece from the largest in the Frames & Flags die set and popped it up with foam tape.

For the next layer, I took a wood-grain patterned paper from my stash and die cut it with the rounded rectangle, also from the Frames & Flags die set, and then used the coordinating die from Newton’s Book Club to cut a window in it. This is when I stamped and heat embossed my sentiment. The woodgrain panel is popped up while the Newton image is glued inset. Kind of like Newton really is in the bookcase. 😉

For finishing touches I added white gel pen accents throughout the image and glossy accents to the spines of some of the books.

Thanks for stopping by today. I appreciate you sharing your time with me. Have a fabulous day!

Your Next Stamp – Challenge Take 2

Thanks so much for stopping by again today! I had so much fun with the Your Next Stamp challenge that I wanted to pull out the only other set I have from them – Snorkel Fun Penguin – and try another simple but fun idea I had for it.

For this card I inked up a panel with distress inks and spritzed it with water. Then I die cut some water from iridescent vellum using my sea borders dies from Newton’s Nook. Then I stamped my penguin and die cut him out. I thought it would be fun to put the sentiment in speech bubble like the penguin was saying it so I grabbed my Newton’s Nook Speech Bubble dies and chose the one that fit best.

The top of the card looked empty so I grabbed my sky scene builder dies and cut some clouds out. I needed a way to hide the adhesive under the vellum so I pulled out the largest of my stitched scalloped rectangle frames from Lawn Fawn, die cut one from white cardstock and set out to assemble all my pieces.

Once everything was adhered I moved to the inside of my card. I stamped my sentiment in two inks for added interest and then thought it would be fun to put some fish around it to bring the ocean feel from the front to inside too! These fish are from the Lawn Fawn Tank You stamp set.

Once those were glued in place I went back to the front for finishing touches!

Which happened to be simple white gel pen accents and glossy accents on the penguin’s goggles, snorkel and the polka dots on his floaty. The iridescent vellum adds some fun shimmer already so I didn’t think it needed much more.

I appreciate you sharing your time with me. Have a fabulous day!

Your Next Stamp – Inside and Out Challenge

Hello again! A little bit ago I shared a fun card featuring my very first stamps from Your Next Stamp. I love those little hammies and also had so much fun playing along with their challenge that I decided to play along again! Sooooo…guess who’s back??? 😉

Well, Hammie, of course! The challenge is “inside and out” which means you need to decorate the inside and outside of your card. Not difficult but I don’t typically do it so I thought it would be fun to give it a shot.

For this card, I used watercolor paper and my Tombow markers with the smooshing effect. I always love how this turns out. Then I used my largest Flags and Frames die from Newton’s Nook to cut the panel out. I temporarily adhered it to a gray cardbase and die cut a circle from both at the same time. Then I added foam tape to the watercolor panel and put it back in place so the windows lined up.

Then I grabbed my Hammie – Coffee and Tea stamps, inked them up and colored them with my copics. Once they were die cut I glued one inside the card peeking through the window and popped the other up with foam tape slightly overlapping the window.

Last, I stamped and heat embossed my sentiment and die cut it with a flag from the same Frames and Flags die set I used earlier. This was also popped up with foam tape.

I opened up my card and stamped a second sentiment that I thought played off the first one quite well and then set to finishing touches.

For those, I added white gel pen accents throughout the images, glossy accents to the Hammie noses and scattered a few colors of Nuvo Crystal Drops throughout the design.

Making this card totally on a whim, I love how it turned out! It will be fun to mail to someone just to make them smile. Happy mail is the best! Don’t you think?

Thanks for stopping by. I appreciate you sharing your time with me. Have a fabulous day!

Trinity Stamps – Awesome Human Mini Card

Happy Weekend everyone! I’m hopping in today to share an extra special card for an extra special someone!

My daughter has a dance team competition today so I made her a special card. They do fun gift deliveries to the kids in their rooms while they are waiting to perform and I try to make a special card each time to tie to a balloon.

To make my card, I started by die cutting the stitched rectangle from Trinity Stamps Slimline Series: Frame and Fold dies. Then I stamped the Awesome Human stamp on it and colored it with copic markers. I chose a coordinating color of cardstock and die cut the card from the same Slimline Series: Frame and Fold dies. I love how many different things you can do with this die set. It’s got amazing potential!

The stamped panel is adhered to fun foam and then adhered to the card for a bit of dimension and interest on a simple card design.

Then, I decided to add a little something fun to the inside of my card too! I grabbed my hello senti-mini stamps and dies and started deciding how I wanted it to look. In the end I chose teal and white cardstock to make the hello from and stamped sunshine below it. This wasn’t quite enough so after digging through my stash I thought it would be so fun to have the cute frog from Puddle Jumpers hopping off the word hello.

This made me giggle for 2 reasons…it’s Leap Day after all! And because my daughter is always bouncing around and loves all things critter just like her mama. 😉

For finishing touches on the front I did a combo of all the things! I started with Wink of Stella glitter brush pen on the word YOU, then moved to yellow Stickles on all the stars. Next I added white gel pen to the banner and then finished it off with glossy accents on HUMAN.

Super fun card and I’m really excited to give it to her! This is the second of four competitions they have this season and my ideas are already turning for what to make next time!

Thanks so much for stopping by! Enjoy your weekend and have a fabulous day!

Coffee Loving Cardmakers – Coffee Date

Happy Friday everyone! I’m over at the Coffee Loving Cardmakers blog again today having a coffee date with someone very special! (It’s actually a hot cocoa date but, hey, details.) 😉

My special date today is my daughter, Micaela, who has been loving making cards with me lately. When I asked if she wanted to join me for this, she jumped at the chance! Together we sat down with our cocoa and came up with a plan.

She decided that we had to use the Trinity Stamps Mug Card die set and then she got on Pinterest and found a color palette we have to follow as well.

color palette credit to colorpalette.net

Next, we took turns taking over the craft room; stamping, coloring, die cutting and all the fun things! Here is her creation.

She die cut her mug out of kraft cardstock and then added a sweet grassy ground for her adorable Love You S’more critters! Then she added a sentiment to a banner from Bannertastic and popped it up with foam squares. She finished her adorable scene off with some white gel pen stars.

Her copic coloring is just fabulous and I think she did pretty amazing sticking to the color palette she chose as well! Whoever gets this card must be pretty darn special! 😉

Next was my turn to figure something out. I wanted to think outside of the typical coffee mug box so I reached for a stamp set I just recently purchased but hadn’t played with yet – Trinity Stamps Sweet Surprise. Here’s what I did with it!

I die cut my mug card and then stamped the cupcake, sentiment and hearts from Sweet Surprise directly to the card. Then I stamped another cupcake on yellow striped paper I had in my stash and cut out the frosting for some paper piecing. I don’t do this often but I thought it would give some fun texture to the scene. Then I colored everything else with copics and did a little ink blending at the bottom for added interest.

I used Nuvo Crystal Drops on the sprinkles and added glossy accents to all the hearts. This was a super fun card to make and I look forward to giving it to a special coffee loving person for their birthday!

We appreciate you sharing your time with us today! Have a fabulous day!

Lawn Fawn – Magic Picture Changer Birthday Card

Hello everyone! I hope your week is going well. Thanks for stopping by to check out this fun magic picture changer card featuring Lawn Fawn stamps and dies. This card was a request and it turned out so fun I wanted to share it here too.

Here it is closed like it’s coming out of the envelope.

And here is a look at it opened up to reveal the eaten cake!

To make this card, I started with the Magic Picture Changer portion. I stamped my cakes from Birthday Before ‘n Afters and colored them in. Then die cut the pieces and assembled the mechanism. Next, I pulled out my patterned paper and started decorating the card front and the front of the interactive portion too. I did use the Magic Picture Changer Add On along with the original dies.

It seems kind of backward but this is when I pulled out my robots from Beep Boop Birthday to decide all the images I wanted to add to my card. After stamping and coloring them, I used the coordinating dies to cut them out.

For assembly, I used foam tape on the back of the Magic Picture Changer and then a combination of liquid glue and foam tape on my images. Last, I popped the card in my MISTI and stamped the sentiment on the front and a simple “Happy Birthday!” on the inside. Both sentiments are from the Birthday Before ‘n Afters set.

I appreciate you sharing your time with me. Have a fabulous day!

Newton’s Nook – Hop Into Spring Pop-up Fun

Hello everyone! I’m up on the Newton’s Nook blog today sharing this really fun interactive card featuring the newly released Hop Into Spring bunnies and a guest appearance by a little duckie from Newton’s Rain Boots too! (To create the interactive portion of this card, I used the Mama Elephant Wiper Surprise die set.)

Here’s a peek at the card folded up tight like it’s coming out of the envelope. I just love these sweet images. This time I stamped them in a gray copic-friendly ink for a different, softer look. I kind of like it for a change of pace.

And here it is opened up, with that sweet bunny wishing you a “Hoppy Easter!” Who is that I see peeking in from the left…that sweet duck from Newton’s Rain Boots along with his flower friends from the same set covering the ground.

I used the land borders dies to cut my grassy front panel and the dirt layer too. Then I used the clouds stencil to ink my cloudy sky. I was able to grab the sun from the new sky scene builder so everything is nice and sunshiny bright too!

And then when you pull the card open to reveal the wiper surprise, you get a cute speech bubble wishing you a “Hoppy Easter!” It’s just too fun. I’ve been playing with it endlessly.

I appreciate you sharing your time with me. Have a fabulous day!

Coffee Loving Cardmakers – Frappy Camper

Happy Tuesday everyone! I’m up on the Coffee Loving Cardmakers blog today. I was recently inspired by my teammate and friend, Katie, to create my own background. Check out her post here. So I grabbed the stamps that spoke to me and started to work!

For this project I actually started with the bookmark that Katie inspired me to create! I die cut it from the Trinity Stamps Narrow Card and Bookmark die set, inked it up with my Trinity Stamps Frappy Camper stamps and then added the banner and hole reinforcer to finish it off.

Then I set to work on the card by stamping, coloring and die cutting my Frappy Camper images and moved on to start building my scene. This time I die cut the card panel from the Narrow Card masked off the edges and used the Layered Birch stencils to create my ground and trees. Last, I added my images with liquid glue and then stamped my sentiment. 

For finishing touches on this card, I added white gel pen accents throughout and then a couple of touches of glossy accents on things like the awning to the trailer and the lid to the guy’s frapp!

I also added black glaze pen to the eyes. When all of that way dry, I added this panel to a 3×6 inch card base and tucked the cute bookmark inside. This will be a great gift to pop in the mail to one of my book loving friends!

I appreciate you sharing your time with me. Have a fabulous day!