Hey friends! I’m going to be popping in and out the next week with some really fun inspiration with today’s Ranger Ink | Simon Hurley Create release! It’s the BERRY cutest and most fun to create with for sure!

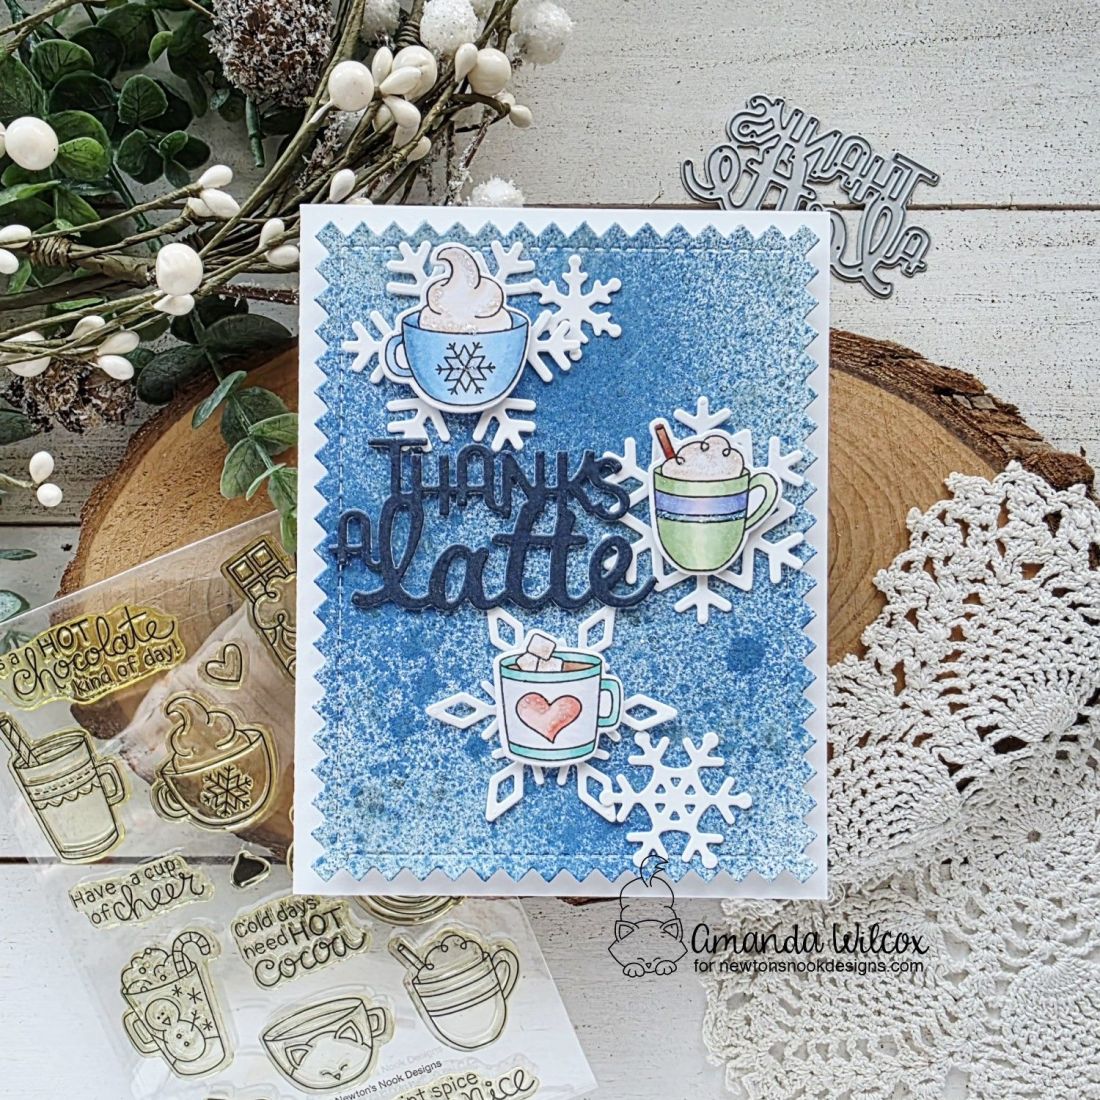
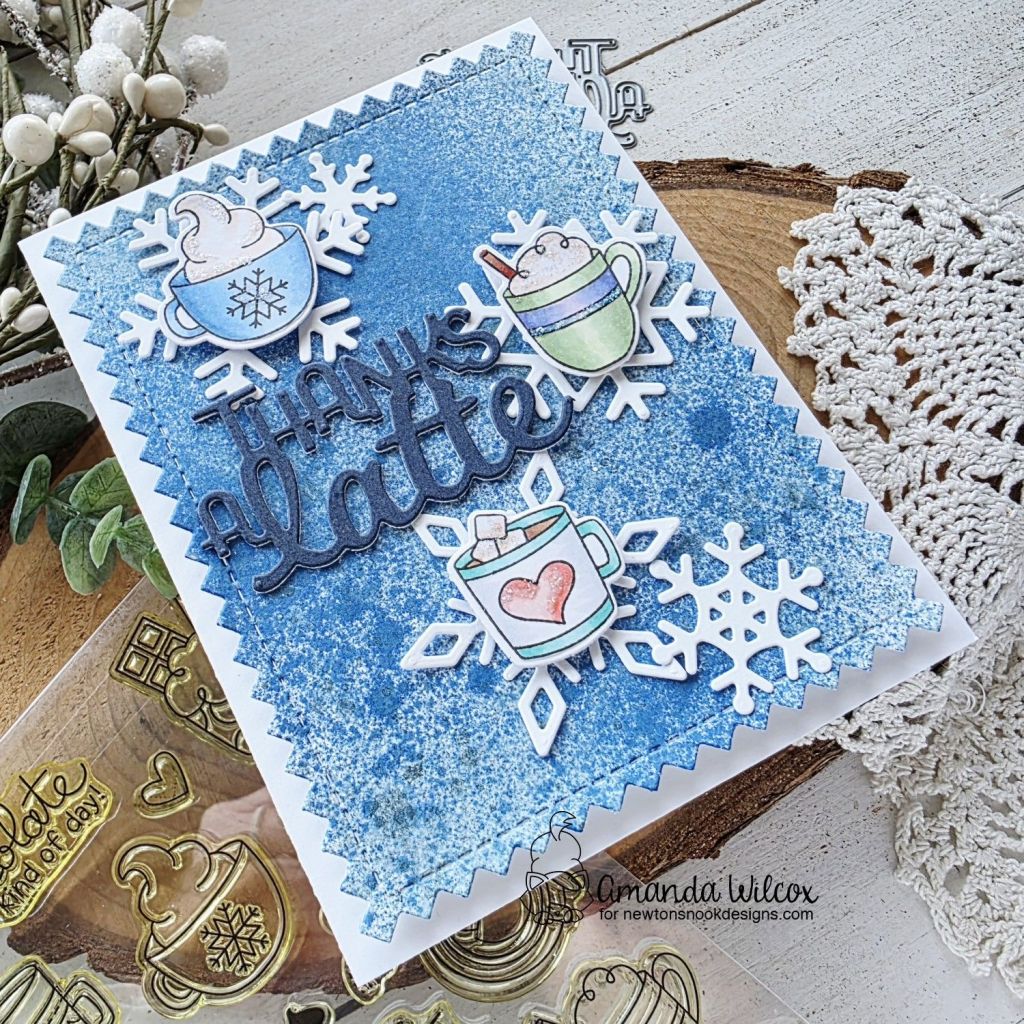
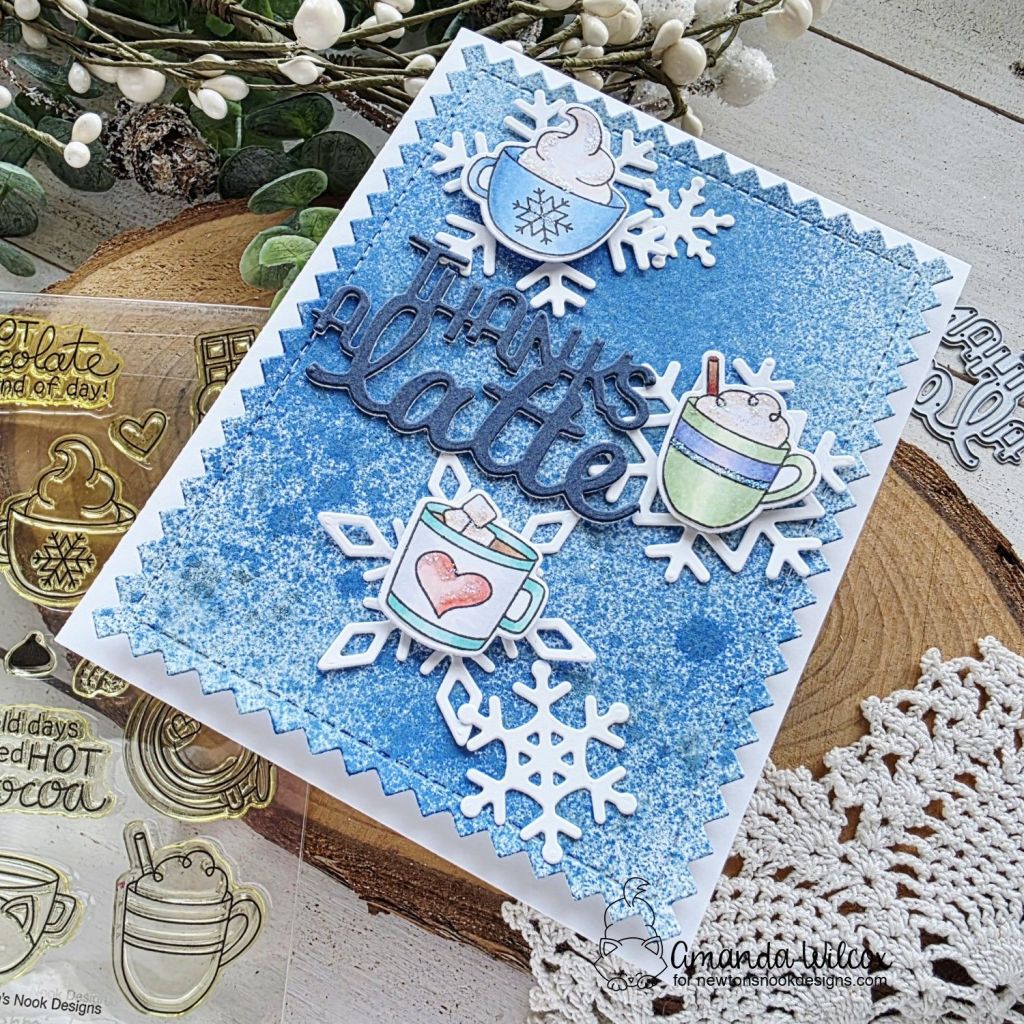
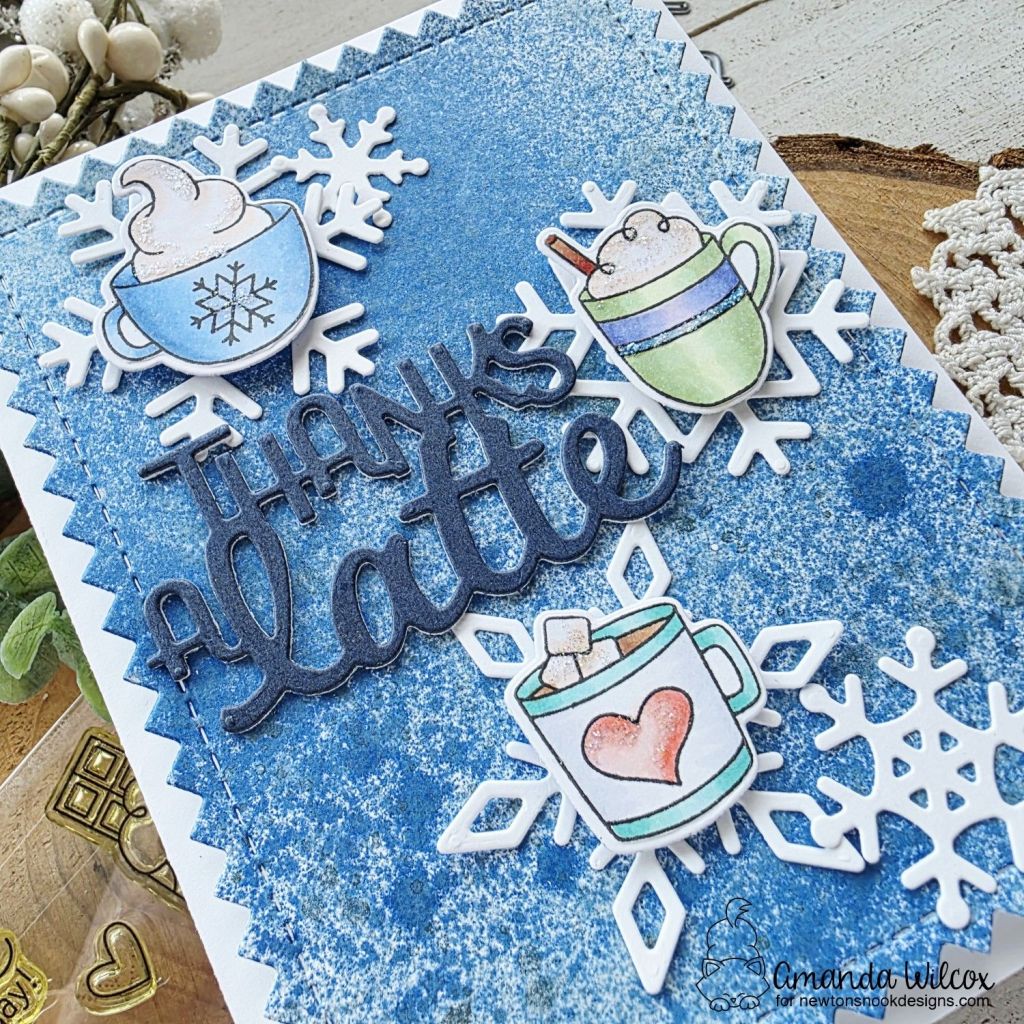
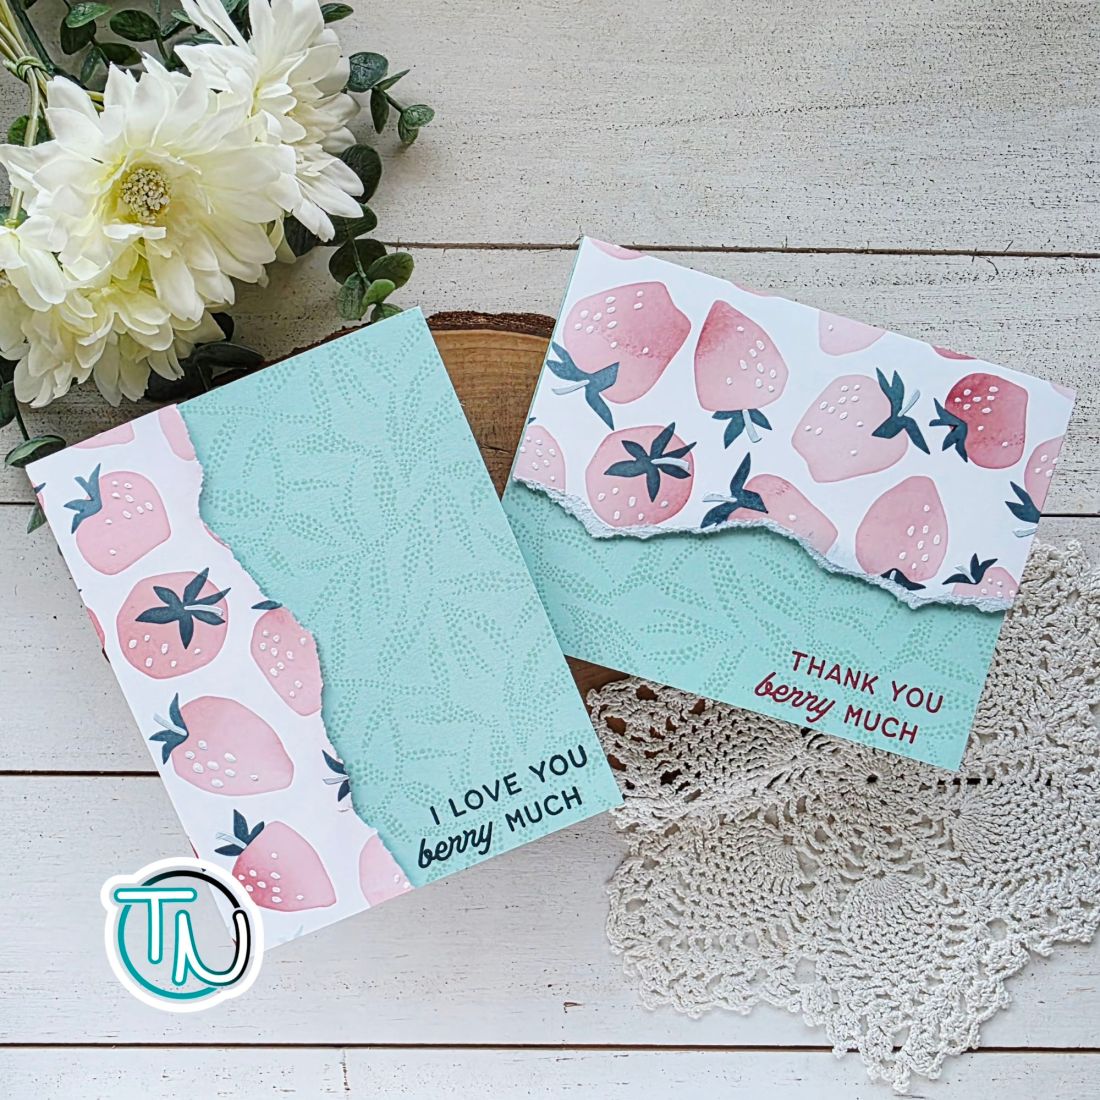
Today I have a pair of cards I created using one stenciled background torn in two! That’s right, I inked the new Very Berry stencils with my Stellar Inks and blending brushes, used some new stellar paste on the final layer, let it all dry and tore it in two pieces.
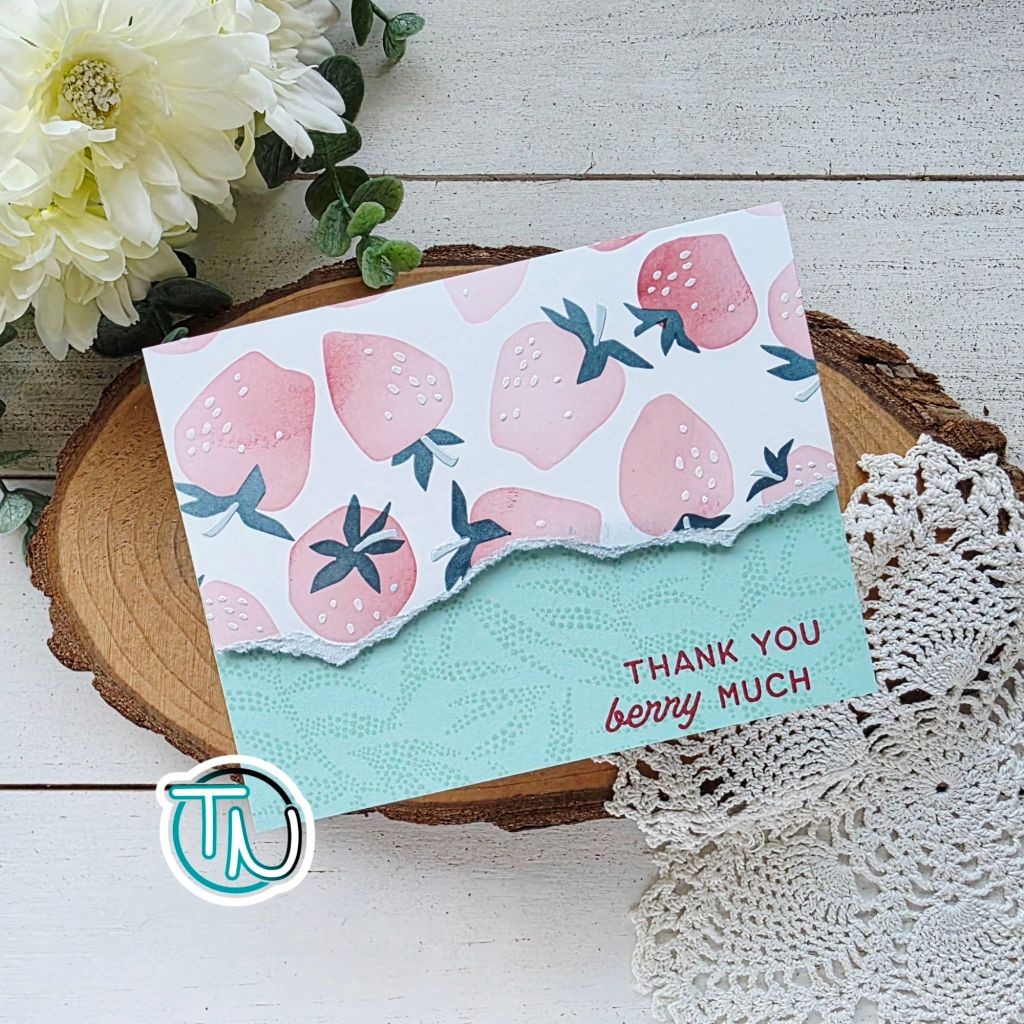
Then I cut two teal card bases and stamped the new Dotted Leaves on those with iced out Stellar Ink. I took the stenciled pieces and added foam tape to the back before popping them up on the teal card bases and also inked the torn edges for added interest. I like how this looks on the raw edge.
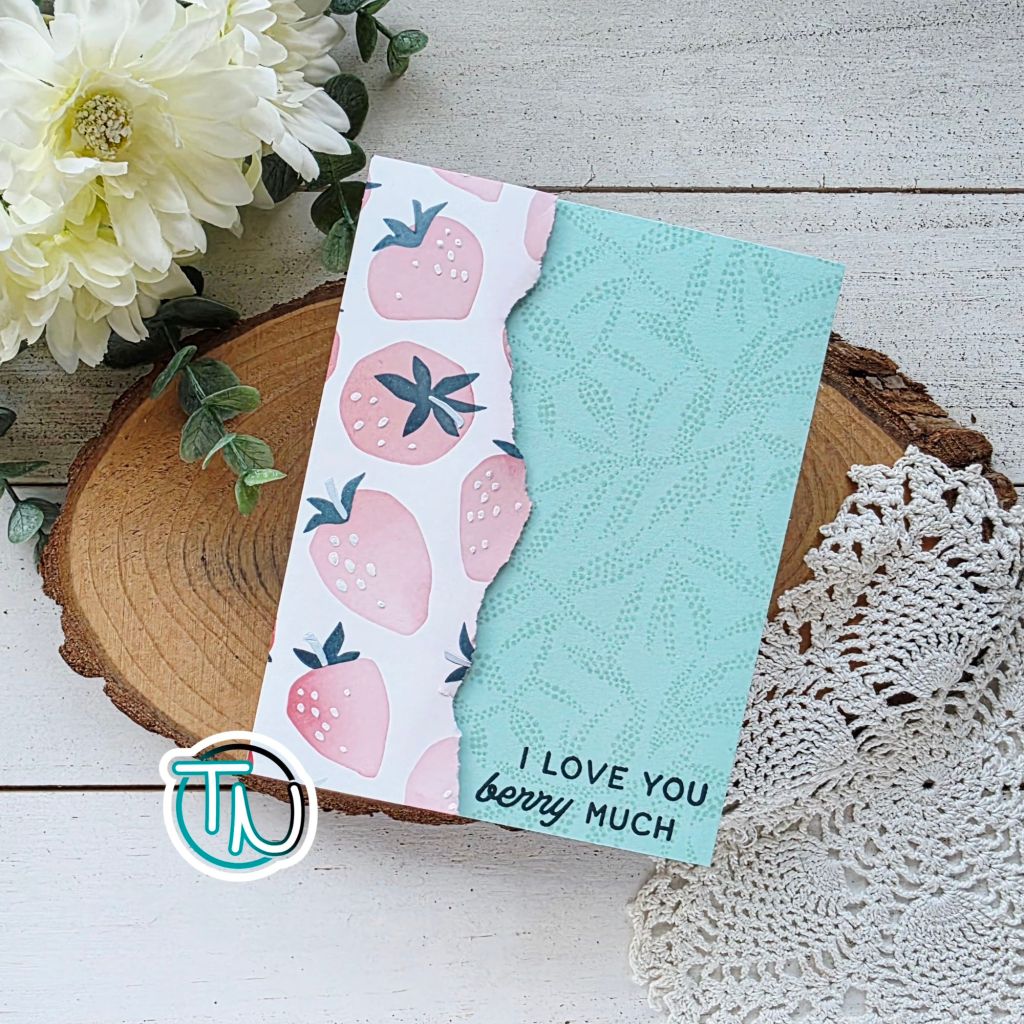
After adding those torn panels, I chose sentiments from the new Berry Best stamp set and stamped them in the bee string and loch ness ink colors that my ink blending was done with.

This is such a fun release with so many options to create different styles of projects! This is just the tip of the iceberg for what I’ve created. So, stay tuned!
I appreciate you sharing your time with me. Have a fabulous day!