Hello everyone. I’m popping in with a fun little card I made last weekend using some older, but new to me, Mama Elephant products. I had passed on the fun wreath dies when they came out but when Mama Elephant had their Thank You Sale, I decided to pick them up, plus a couple of other things.

First I chose eight cute Little Agenda Snowmen to stamp and color. Then I used the coordinating dies to cut them all out. I kept to a fairly traditional Christmas color palette with a splash of teal because it’s me.
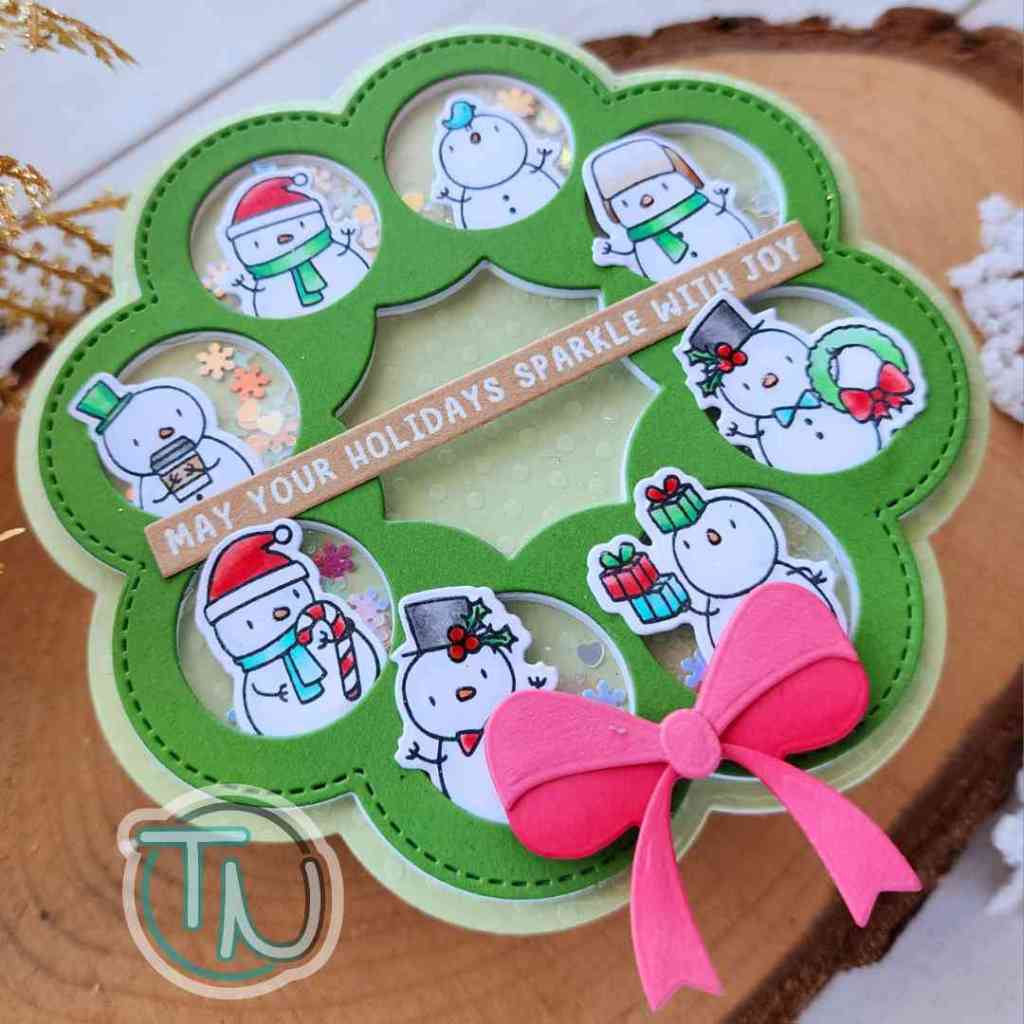
Then I cut all the pieces to my wreath and bow. I used a little ink blending on the bow to make the bottom layer a smidge darker. Then I used liquid glue to adhere everything. There isn’t a die that cuts a solid piece to make the wreath a shaker so I traced it on acetate and cut it by hand.

I added Twiddler’s Nook Snow Queen embellishments to each circle opening before sealing it up with the acetate layer. When I glued the top green wreath layer down I was careful to only add adhesive to the outer edge so I could tuck my snowmen underneath.
Finally I popped the bow up with a foam square and added a sentiment strip across the card front. To make this a shaped card, I just cut another wreath “shadow” shape from white cardstock, scored it about 1/2″ from one edge and adhered it to the back by just that 1/2″ hinge.
Products used:
Mama Elephant Little Agenda Snowmen stamps and dies
Mama Elephant Wreath Shaker dies
Mama Elephant Easy Xmas Greetings stamps and die
Liquid glue
Foam squares
Magic anti-static powder brush
Embossing powder – frosting
Embossing & Watermark ink
Touch of gloss
Twiddler’s Nook Snow Queen embellishments
I appreciate you sharing your time with me. Have a fabulous day!