Blog

Waffle Flower – Grip Mats Revisited Christmas Edition

Hey everyone! I couldn’t resist but come back with another card featuring the amazing new Grip Mats from Waffle Flower. They’re so cool and my first crafting session left me with lots of goodies to create fun cards with! So today I’m back using some of their new Christmas in July release along with the grip mats.

***Remember you can still comment on my INSTAGRAM post from Tuesday for a chance to win! Or just use the links at the bottom of this post to snag your own now!***

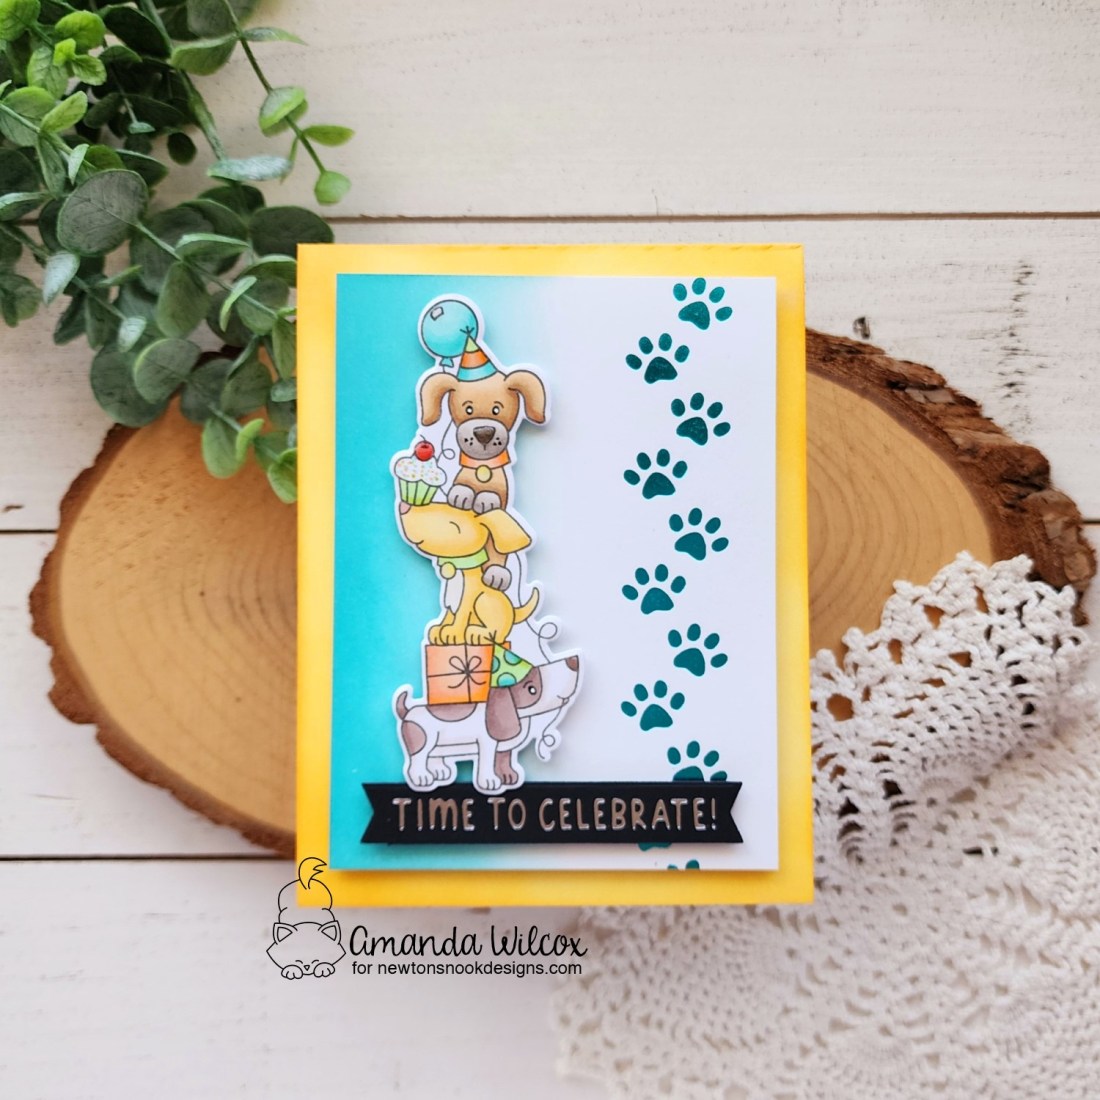
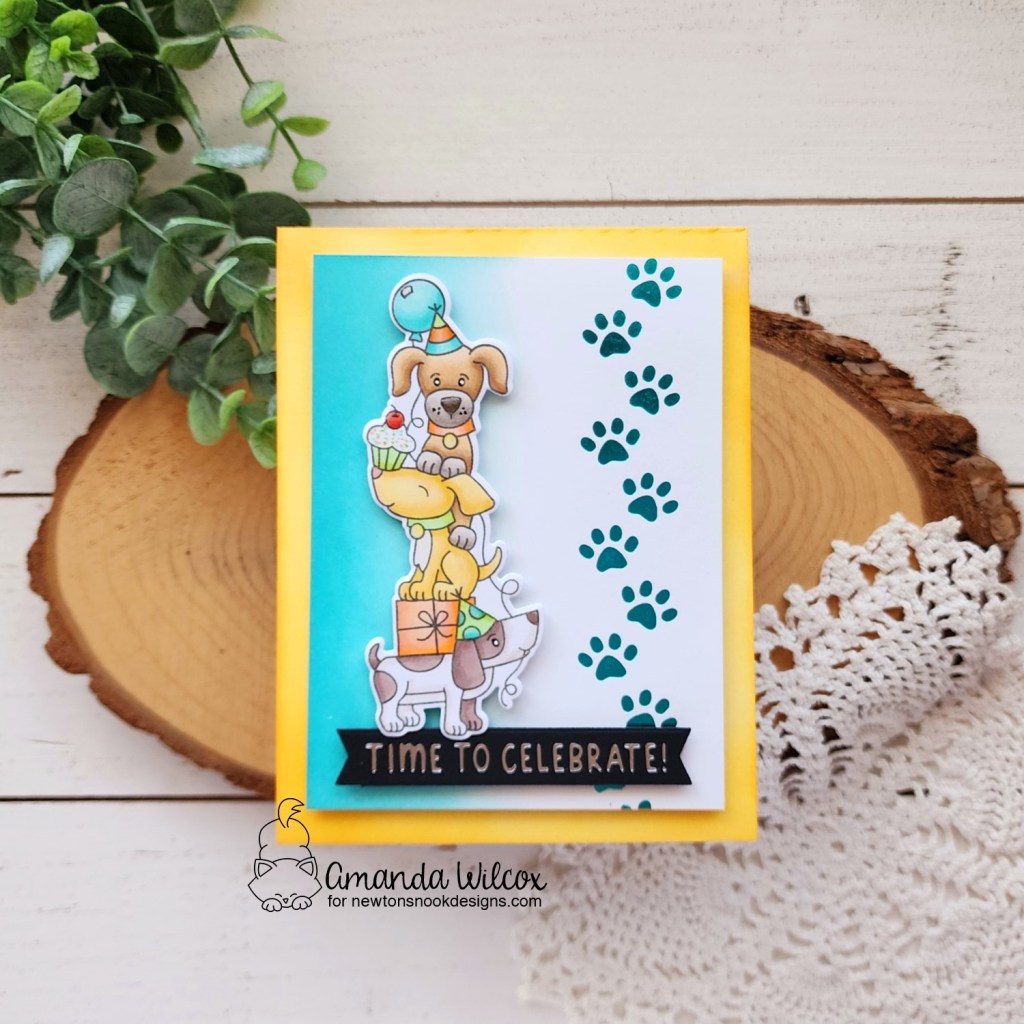
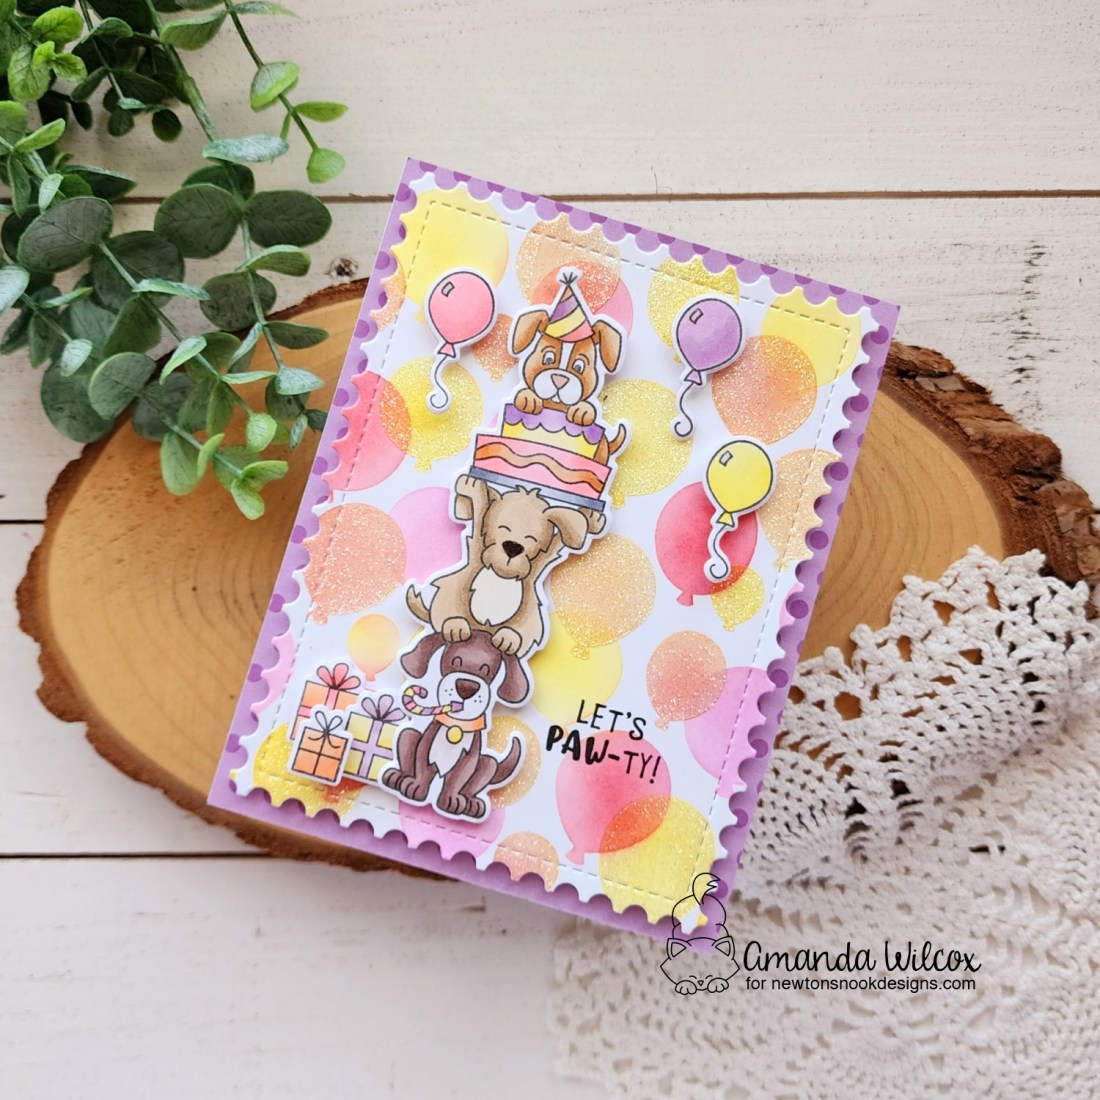
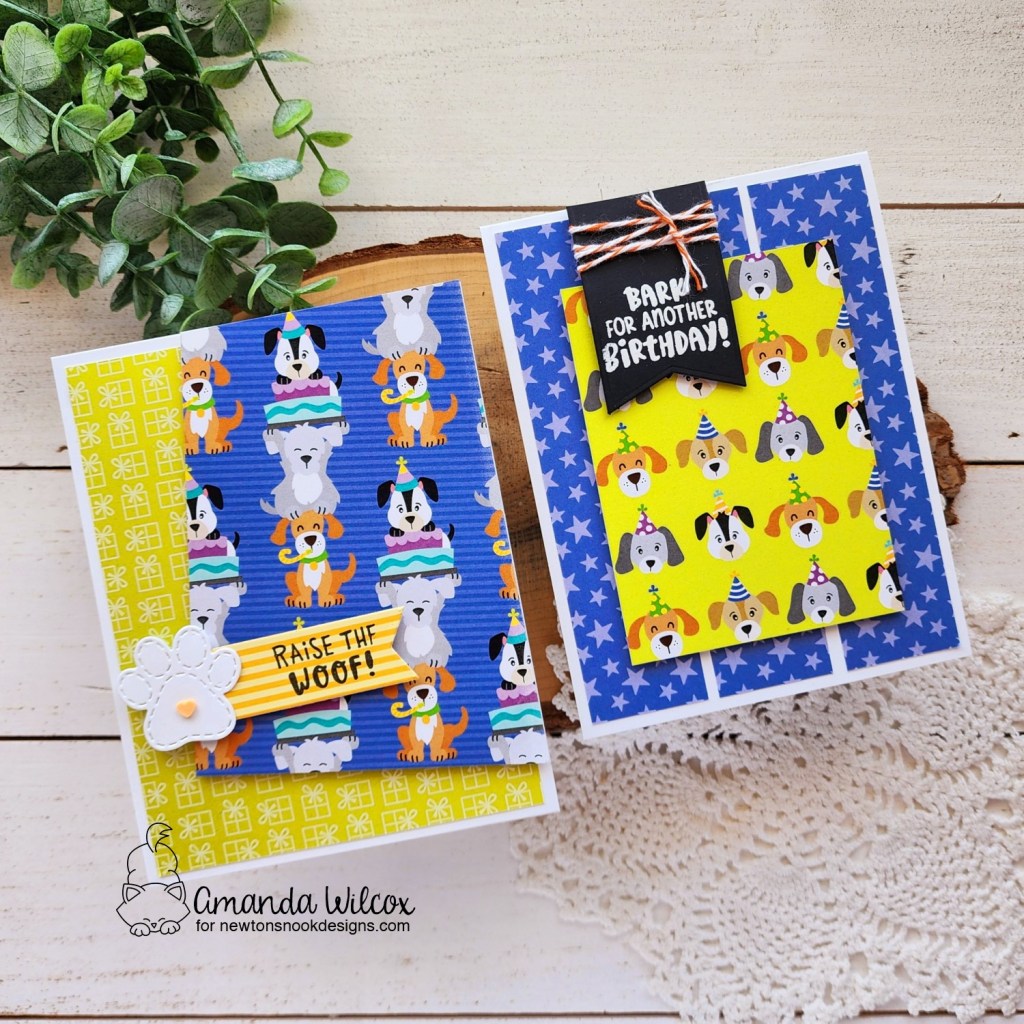
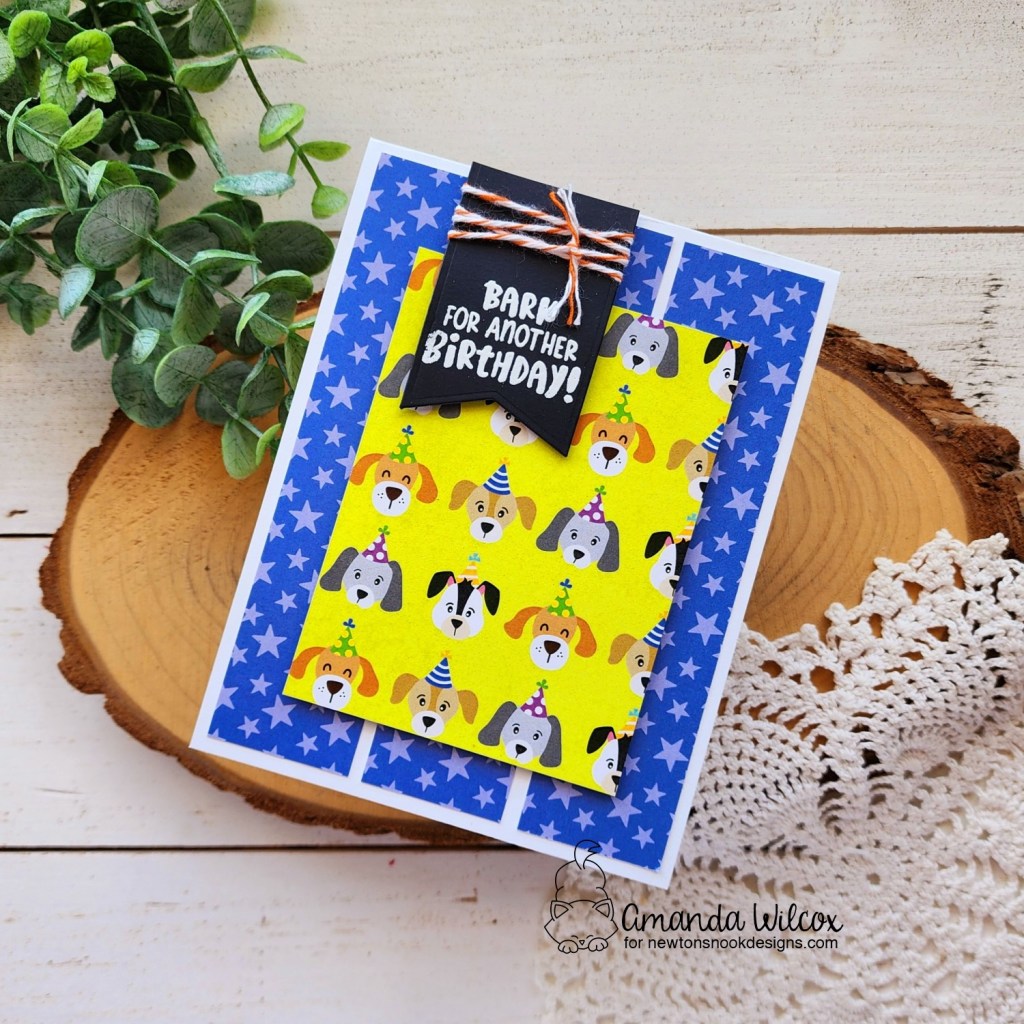
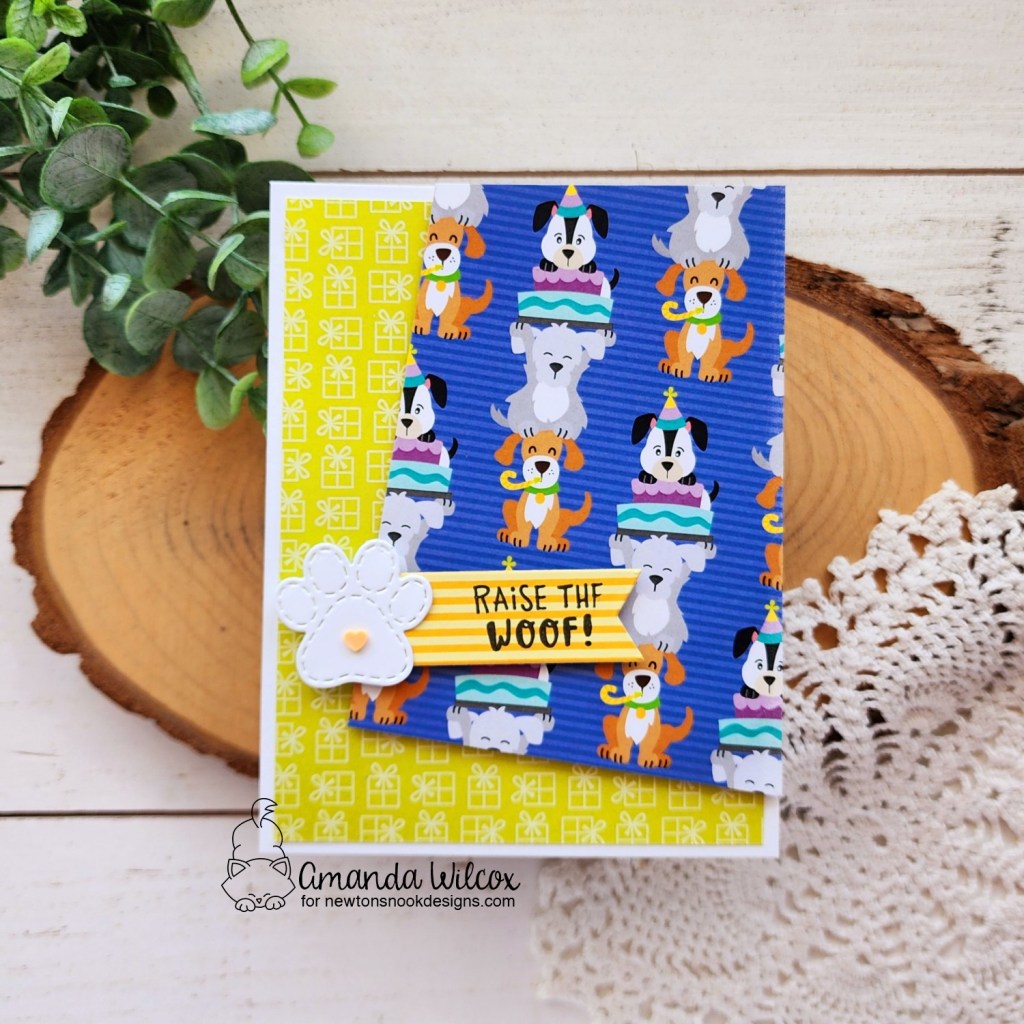
OMG! How freaking cute is this pupper!?! I’m in love with him and had a blast creating this card specifically to use him on! Let’s check out the process again, shall we?

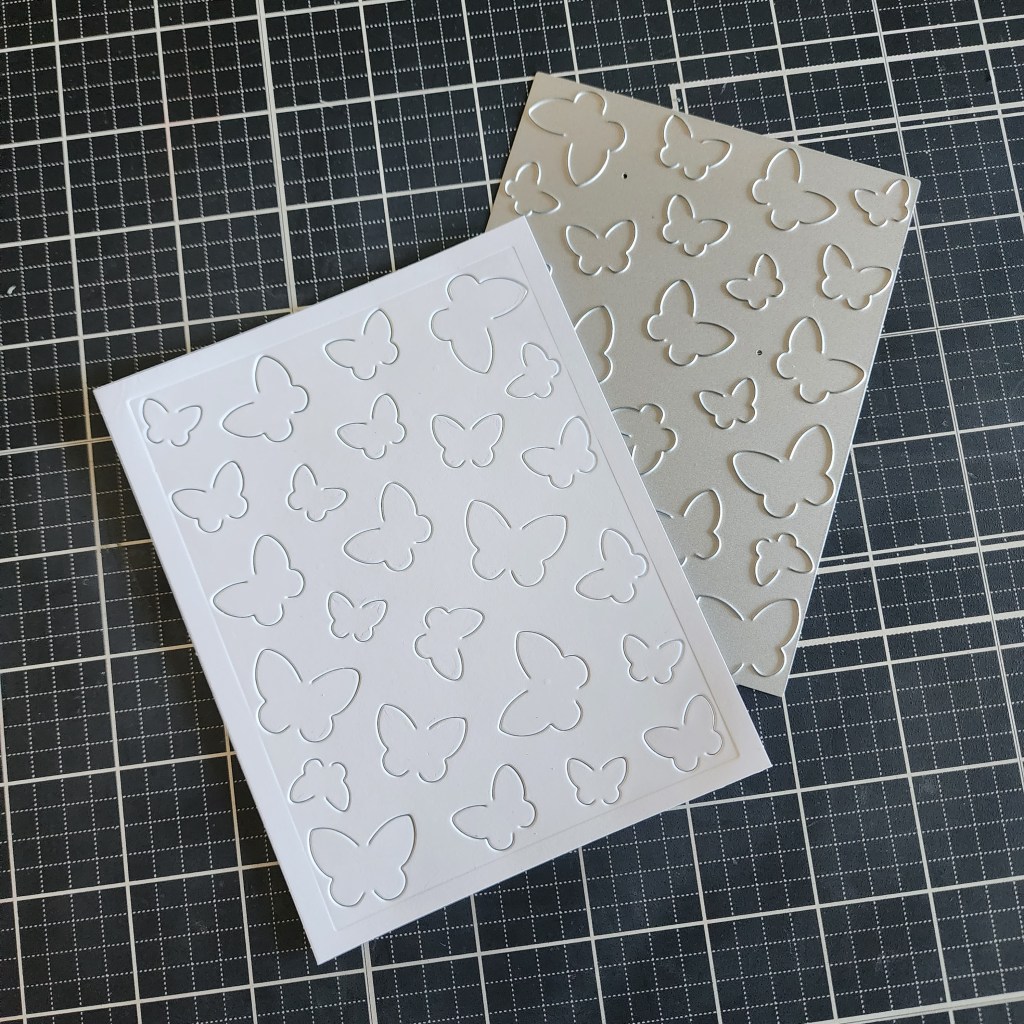
Add your grip mat to your work surface. Any surface will do that I can tell so far. I have a self healing mat but I’ve tried it on a glass mat and a regular desk too. All stuck great!

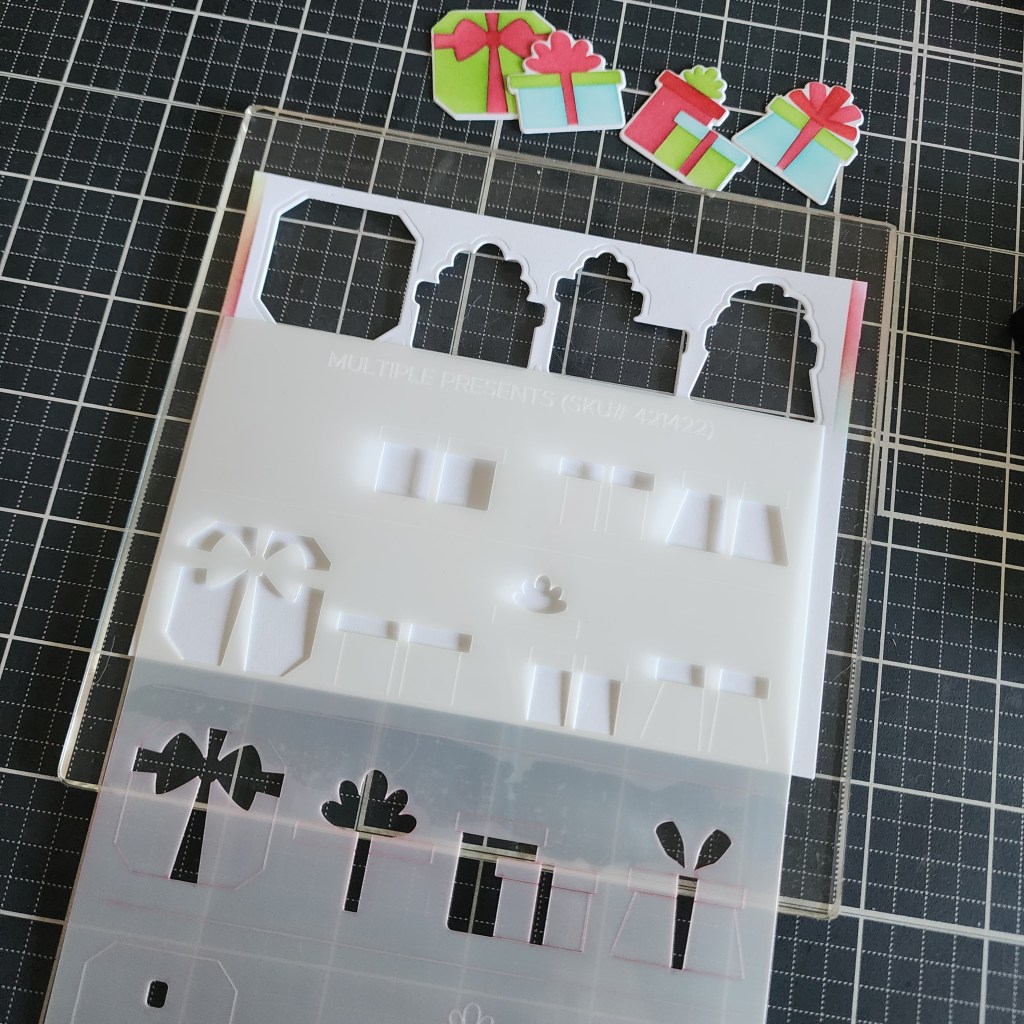
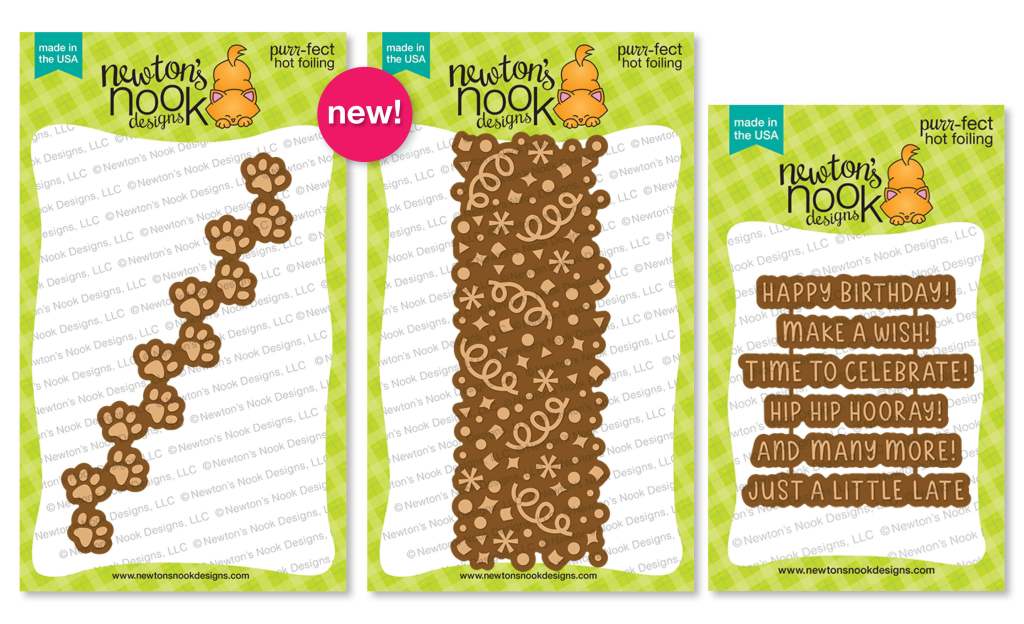
This time we’re going to ink blend the super cool Multiple Presents Die-n-Stencil combo. Both times I did this (you can see my first attempt at the top of my panel…quality control to see if my brain was processing this properly) I started at the top and worked my way down one line at a time. Leave your cardstock in place and move the stencil, inking each layer.

It’s really just that easy. I didn’t even clean the stencil until I was completely finished with the last layer.

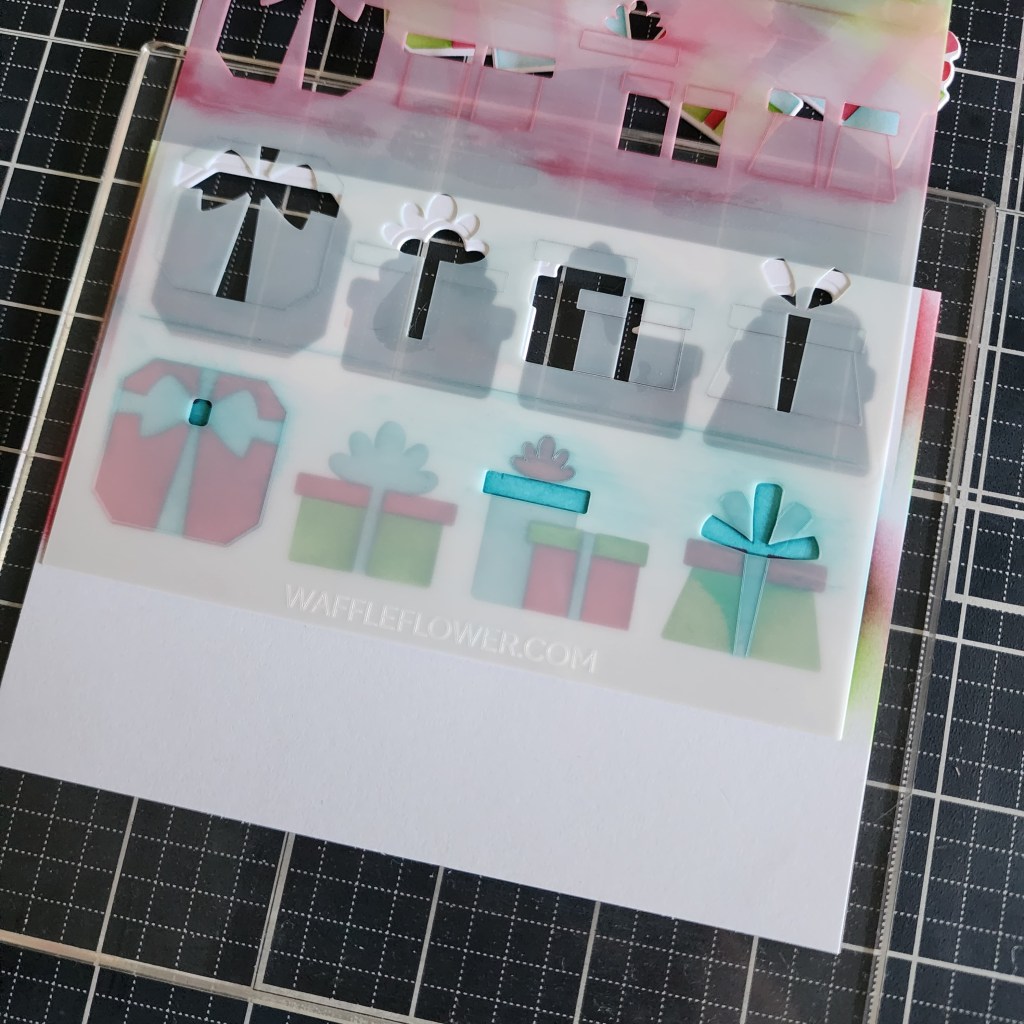
Keep going, we’re almost there. Remember, especially things like these presents, are great for all celebrations…not just Christmas. Mix and match your colors for birthdays, just for fun, celebrate everything!

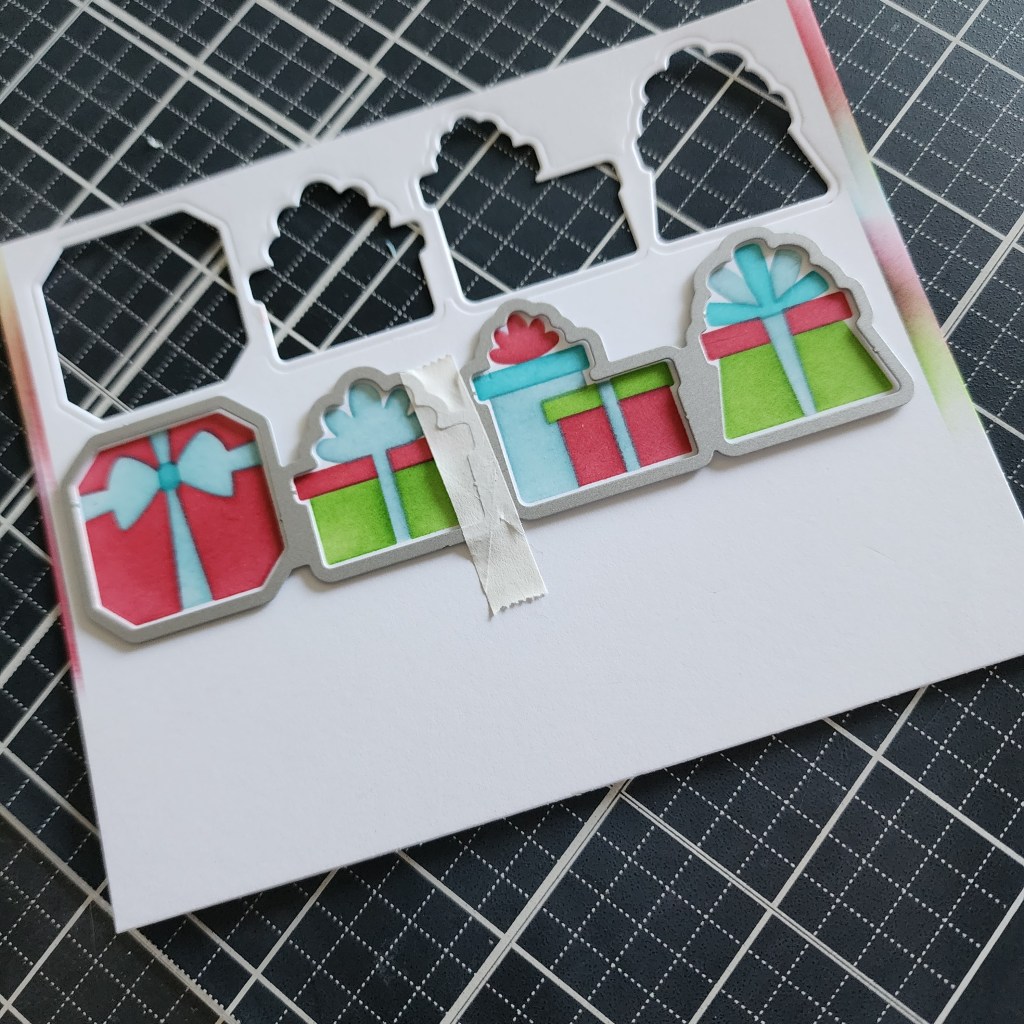
Okay, my gifts are inked, looking super adorable and my panel peeled off the grip mat flawlessly. It doesn’t curl or anything. I lined up the die and cut these out. Now I have 8 separate gift images inked and ready for crafting!

Another fantastic use of the grip mat is to hold images in place. For this card, I used it to play with arrangement of my presents. I mixed and matched things deciding how I wanted them layered. Then I used a strip of post-it tape to pull them off and set them aside until I was ready to add them to my card.

I forgot to photograph it but I also used the mat to hold the pieces of my pup while I ink blended them too. They didn’t budge a millimeter even with the blending brush pushing on them.

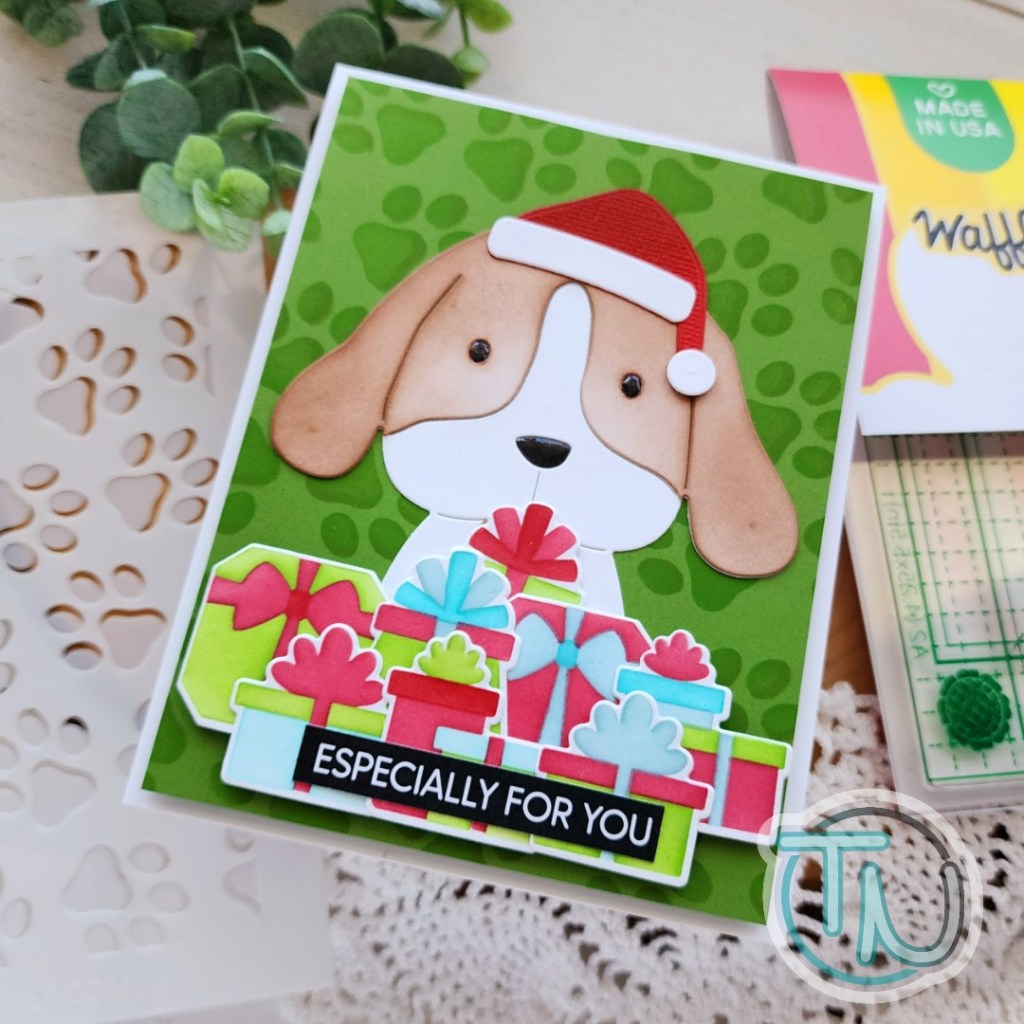
So I assembled my pup and his sweet Santa hat, gluing everything together with liquid glue. But when I was arranging everything on my card, I thought the background was lacking. So I grabbed my grip mat and Paw Print stencil duo and inked it up two two different green inks for some texture.

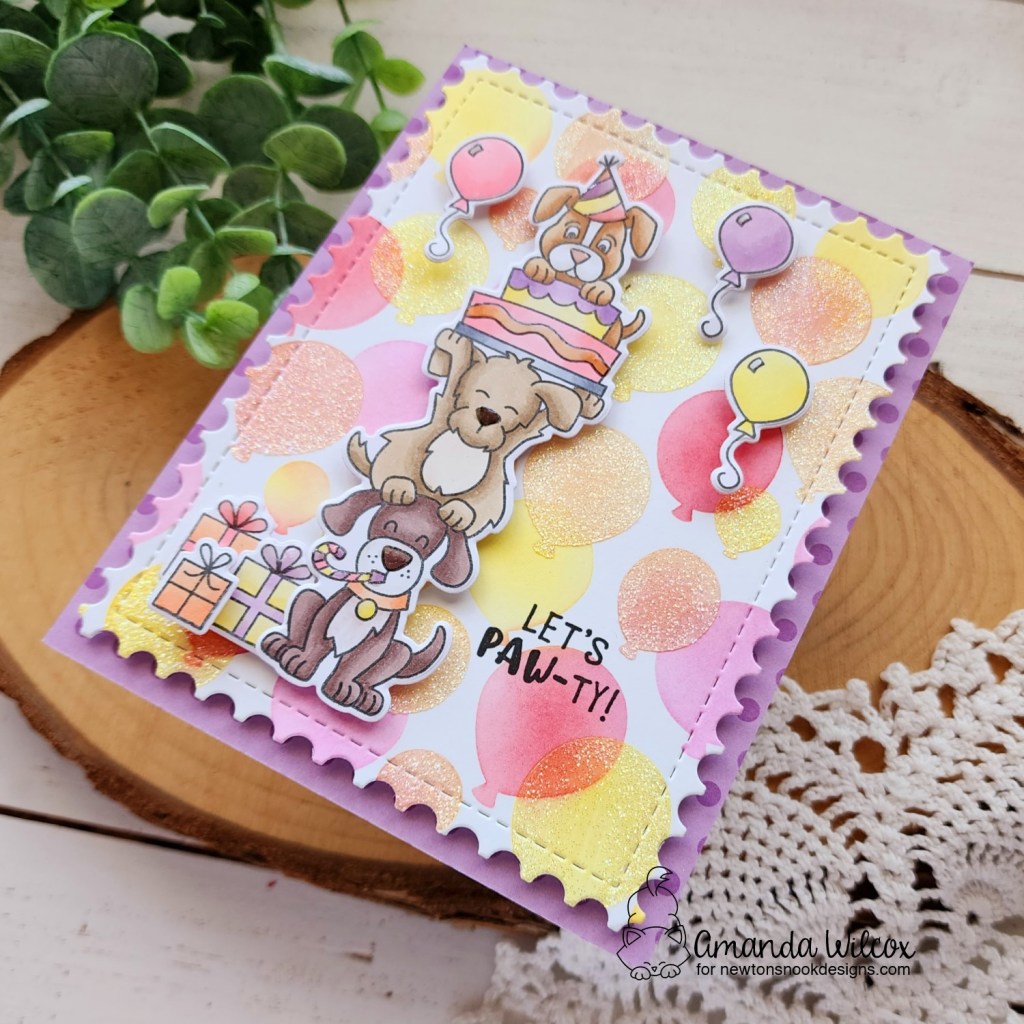
For assembly, I popped the green panel up on a white card base with foam tape. Then liquid glue for my pup and finally foam tape for the gifts. I even saved one to add to the puppy’s paws too. It’s so cute!

Last, I added a preprinted sentiment strip with liquid glue and some Touch of Gloss to the pup’s eyes and nose.

Products used today:
Be a Dog dies
Be Christmas Accessories dies
Multiple Presents Die-n-Stencil
Paw Prints stencil duo
Grip Mat – 6×6
Subsentiments Gift die cuts

Liquid glue
Foam tape

I appreciate you sharing your time with me. Have a fabulous day!

Pixi Dust Designs – Snowman Mug Card with Ink Blending Fun

Hi crafty friends! Thanks for stopping by. Today I have a card using the Pixi Dust Designs Snowman Mug dies, instead of the box I shared on release day. I am all about treat boxes and 3D projects with our cardmaking supplies, but it’s so great when things can work both ways!

When creating my snowman mug, I went with a more traditional color palette this time. I used liquid glue to adhere all the pieces. That extra wiggle time is great when creating projects like these.

Pro tip, the mug die cuts a slit for the candy cane and spoon that gets hidden by the whipped cream. I slid my pieces in the slot and held them together with washi tape to keep them from moving around while the glue dried and I was adding my other elements.

Next, I started on my background. This time I used distress oxide inks in kitsch flamingo and spun sugar for a soft pink tone. After blending at a diagonal on the panel, fading to nothing, I spritzed it with water and blotted it dry. For extra texture I splattered both colors on the panel too.

To create a focal point for my mug, I cut the largest Doily die from vellum and used foam squares to attach my snowman to that. Then I used liquid glue to adhere that to the inked panel. This hides the glue and makes it easy to attach. next, I used the Mug Add On dies to cut a sentiment from black cardstock and glued that with liquid glue at the bottom.

For finishing touches today I just added white gel pen highlights around the whole mug. Isn’t he just the sweetest!?! Totally adorable and other Christmas card for my stash, ready to go in December!

Products used:
Snowman Mug dies
Mug Add On dies
Doily dies

Foam squares
Liquid glue
Distress Oxide Ink – kitsch flamingo and spun sugar

I appreciate you sharing your time with me. Have a fabulous day!

Pink & Main – Two-for-One Designs with Foiling and Embossing

Hello everyone! I’m over on the Pink & Main blog today sharing two cards that I created by making two backgrounds, cutting them in half and swapping them. I added a sentiment, some embellishments and have two super cute cards to share!

For these cards, I used the new Many Flowers embossing folder on a piece of Dress Shop cardstock. Then I foiled the new Big Posies foilable panel with silver flowers CheerFoil. I ink blended the foiled panel with Night Sky ink fading as I went down. Then, I held the two pieces together and used my paper trimmer to cut them at a diagonal. Next I simply swapped one half for another and held the pieces together with washi tape. I added foam tape to the back and popped the backgrounds up on white card bases.

For my sentiments, I chose two from Stay Strong and stamped them on white cardstock with Night Sky ink. After die cutting them with the coordinating dies, I inked the edges with the leftover ink in my blending brush from earlier and added foam squares to the back so I can pop them up too.

For a little shimmer I splattered both card fronts with flamingo Water Gems. For this step, I sprinkled a tiny bit of powder on an acrylic block and added a few drops of water. After mixing it with my paint brush I just flicked it all over both cards. The pink is very close to the Dress Shop cardstock but it still adds sparkle even to that part of the card.

After the splatters were dry, I glued a scattering of purple On the Town Gems across both designs. There are dark and light in the colorways of this embellishment pack and I used both purples for variety.

Finally, I tied some purple ribbon around the top of both cards to finish off the designs. I like having things across the card – top and bottom – so your eye is drawn all over, not focused on one area only.

Products used:
Stay Strong stamps and dies
Many Flower embossing folder
Big Posies Foilable panel
Silver Flowers CheerFoil
Mini Minc Machine
Dress Shop cardstock
Night Sky ink
On the Town gems
Ergonomic blending brush
Water Gems watercolor
Foam tape
Liquid glue

I appreciate you sharing your time with me. Have a fabulous day!

Newton’s Nook – Missing You Seashell Card with Glitz Gel Background

Hi there! I’m so happy to be over on the Newton’s Nook blog again today. This time I’ve gone ocean themed with a different sentiment and an inky, messy fun background! You know this is my favorite!

I was flipping through my stamps, trying to decide what jumped out to play with and this sweet mini set called Newton’s Seashell did just that. It’s such an adorable image and so fun to color. So that’s what I did, then I used the coordinating die to cut it out.

Switching gears to my background panel, I ink blended white cardstock with distress oxide inks in abandoned coral and tattered rose, fading out to nothing. Then I placed the Seashells stencil over the top and spread gold Glitz Glitter Gel through it. After letting the panel dry, I trimmed it to 4×5.5 inches and popped it up on a white card base with foam tape.

I cut two banners for my sentiments – one from Banner Trio dies and the other from A7 Frames dies. I heat embossed the black one and stamped the other. Then I popped those with the Newton image up on foam squares.

For finishing touches I added Touch of Gloss to the inside of the seashell and Newton’s nose. Last, I added a couple strips of skinny washi tape to the edge of my card for added gold shine and interest.

Products used:
Newton’s Seashell stamps and dies
Seashells stencil
A7 Frames dies
Banner Trio dies
Foam tape and squares
Glitz Glitter Gel – gold
Stencil Pal
Touch of Gloss
Distress Oxide Ink – tattered rose, abandoned coral

I appreciate you sharing your time with me. Have a fabulous day!

Waffle Flower – Grip Mat Launch Party

Hey friends! I’m over the moon to have a fun card and tutorial to share with you today featuring the new Waffle Flower Grip Mats! They’re so cool, easy to use and definitely handy to have in your crafty tool stash! I officially, highly recommend!

Today I tested them with ink blending multiple layers and spreading glitter paste for my base card panel. It worked beautifully and seamlessly. Let’s take a step by step look at things.

I grabbed all my pieces, plus a panel of white A2 size cardstock to ink on. This will be cut down later but it’s always smart to start bigger and trim later.

Die cut your panel with the pop-up butterflies background die so you can line up your stencils.

Place your grip mat on your work surface, then add your cardstock and finally line up your layer 1 stencil over that. I’m using a 6×6 grip mat today so there is an edge to hold the stencil around my paper. It’s perfect!

I ink blended layer 1 of the stencil, swapped for layer 2 adding a different color. Then I was feeling froggy so I added layer 1 back in place and spread glitter glaze over the top. The cardstock held perfectly the entire time and each stencil stayed perfectly in place while I was using it too!

Here’s my panel, peeled off the grip mat to be set aside to dry. I suppose you could leave it on the grip mat to dry but let’s be real…I immediately grabbed another piece of cardstock and kept playing because this thing was AWESOME!

After the panel was done drying, I die cut it with an infinity rectangle die and popped it up on a piece of blue cardstock that coordinated with my blue ink blending. Then I cut the Oversized Smile word from Spellbinders die cutting glitter foam and the shadow from vellum. I used liquid glue to adhere them together and to my card front.

Last, I glued the panel to a white card base and then went around creasing my butterflies open where the sentiment would allow. Isn’t this just beautiful?!?

I’m so happy with how it turned out and truly believe it was smoother and easier using the grip mats. Be sure to check them out, affiliate links below. But also, head to my Instagram and enter to with an A2 grip mat to test out yourself! Commenting closes July 30 for that.

Products used today:
Pop-up Butterflies cover die
Duo-tone Butterfly stencils

Oversized Smile dies
Grip Mat – 6×6

Blending brushes
Lawn Fawn Ink – mermaid and forget-me-not
Brutus Monroe glitter glaze
Foam squares
Pink & Main Layered Rectangle dies

I appreciate you sharing your time with me. Have a fabulous day!

Doodlebugs – Hip Hip Hooray Spellbinders Hot Foiling with Mama Elephant Celebration Hamsters

Welcome, welcome friends! I’m so glad you stopped by today. I’m over on the Doodlebugs blog sharing a fun celebratory card featuring goodies from Spellbinders and Mama Elephant.

Today’s creation could very well be a birthday card but it’s also generic enough to celebrate just about anything you feel like!

I started my card today by stamping and coloring the two images from Mama Elephant Celebration Hamsters with my copic markers. I used the coordinating dies to cut them out and set them aside.

Next, I heated up my Glimmer Hot Foil System and foiled the Hip Hip Hooray with rose gold hot foil. I thought it went perfectly with the pink in my balloons. I used the coordinating die to cut it out and set it with my images for now.

Next, I embossed a 4×5.25 inch piece of white cardstock with the Spellbinders Balloons 3D embossing folder. Then I used a blending brush to add some teal ink to bring them to life. I added foam tape to the back and popped it up on a white card base.

Then I added my sentiment and images with foam squares and started on finishing touches. For this little cutie, I added black glaze pen to his eyes, glossy accents to his nose and a little stardust Stickles to the sparklers.

Last, for this sweetheart floating in the sky I added black glaze pen to his eyes too and glossy accents to his nose and ALL of those balloons. It might be a little extra, but I’m so okay with it! It’s really fun and shines so pretty in the light.

These kind of cards are invaluable in my stash because sometimes you can’t plan the type of celebration you need a card for and it’s not always a birthday! Am I right!?!

Products used:
Mama Elephant Celebration Hamsters stamps and dies
Spellbinders Hot Foil – rose gold
Spellbinders Hip Hip Hooray hot foil dies
Spellbinders Balloons 3D embossing folder

Spellbinders Glimmer Hot Foil System
Foam tape and squares
Blending brush
Lawn Fawn mermaid ink
Glossy accents
Sakura Glaze pen – black
Stickles – stardust

I appreciate you sharing your time with me. Have a fabulous day!

Miss Ink Stamps – You Are My Rainbow

Happy Thursday friends! I’m back today with another card featuring the new Miss Ink Stamps July release. I love this bear and bunny series. They are so cute! I had fun creating a scene with these since they are all separate stamps.

I started by stamping the rainbow on my panel, then positioned the critters and finally added the sunshine butted right up against the edge of the rainbow. I colored everything with copic markers and then added my sentiment in the top right corner.

Pulling from colors in my coloring, I decided to ink my background panel with seedless preserves distress oxide ink. I usually spray my panel with a distress sprayer but it’s been a little too misty for my liking lately so I just used water on my fingers to flick it on the panel. It took a bit more work but I really like how it turned out. Then I used a paintbrush and watered down ink to add another layer of texture over that. Last I splattered unicorn watercolor on the panel and set it aside to dry completely.

While it was drying I added foam tape to the back of the scene panel and painted the same watercolor lightly on my rainbow so it was shimmery too. I also added black glaze pen to critter eyes and noses.

With everything dry, I glued the inked panel to a card base and popped the scene panel up on that.

Not a lot of parts today, mostly waiting for things to dry. But it’s so striking and pretty. I’m really happy with how it turned out. I think this set is going to make a gorgeous box card next though.

Products used:
Rainbow Bear and Bunny stamps
Distress Oxide Ink – seedless preserves
Foam tape
Black glaze pen
LH Colors watercolor – unicorn

I appreciate you sharing your time with me. Have a fabulous day!

Pink & Main – Just a Note Bee-Cause Shaker Card with Foiling Fun Background

Hey friends! I’m over on the Pink & Main blog today sharing a fun shaker card featuring some of the Foilables and gorgeous CheerFoils too. Have you picked up your awesome pink Mini Minc Machine yet? This is a game changer in the world of foils. It gives such consistent, awesome results. I’m seriously in love with it.

Starting things off I foiled one of the backgrounds in the Beeyoutiful Foilable Kit with Starry Gold CheerFoil. Then I used the shadow die from my sentiment to cut a window. I covered the window with acetate using EZ Tear Tape and lined the back of the panel with foam tape creating a well for my shaker glitter.

Next, I took a piece of teal cardstock and inked the edges with salvaged patina distress ink. I spritzed it with water but the effect was minor so I splattered it with peacock feathers ink and gold watercolor instead. That gave a really pretty look. I added some lemonade super fine glitter where the window would fall and adhered my foiled panel, sealing the glitter in place.

I die cut the sentiment from black cardstock and adhered it in place with liquid glue. Then I stamped some images from Hap-Bee and colored them with my copic markers. I used the coordinating dies to cut them all out and added foam squares to the back to attach them to my card front.

Using EZ Squeeze liquid glue, I adhered the panel to a white card base. Then added Touch of Gloss to the bee wings and black glaze pen to the eyes, nose and antennae on the bear. Last, I added a little Touch of Gloss to the honey on the bear’s honey stick.

Shake! Shake! This sweet card is finished in all its shiny glory.

Products used:
Hap-Bee stamps and dies
Simple Greetings dies
Mini Minc Machine
Beeyoutiful Foilable Kit
Starry Gold CheerFoil
Super Fine Glitter – lemonade
Touch of Gloss
Foam tape
EZ Squeeze liquid glue
EZ Tear Tape – 1/4″

I appreciate you sharing your time with me. Have a fabulous day!

Newton’s Nook – July Release Reveals Day 3

It’s already day 3 of release reveals and this time, it’s our final day! Be sure to comment on the hop each day for chances to win something revealed that day! But let’s not linger…get on with the HOT show! Hot foil that is!!!

Paw Prints, Confetti and Birthday Sentiments Hot Foil Plates

I have a couple of cards to share with you featuring some of these goodies today! They are all so fun and the options are endless to mix and match them! It’s so great.

First up is this sweet card featuring the Paw Prints and Birthday Sentiments hot foil plates, along with the sentiment duo dies that work perfectly with the hot foil sentiments. Then I couldn’t resist these adorable pups from Birthday Barks that really needed to hang out!

I ink blended a card front with a light orange ink and also inked the side of my hot foil panel with teal ink so it coordinated with the foiling. For finishing touches I came in with Touch of Gloss on puppy noses, the cherry and other things like collar tags and party hats. Then I added black glaze pen to puppy eyes with a white gel pen highlight after that was dry.

I went a little darker for my Confetti Hot Foil card front. It seemed like too much white space for my liking so I ended up almost galaxy feeling but it’s super fun and so shimmery between metallic watercolor and silver hot foil everywhere!

I inked my hot foil panel before coloring these sweet kitties so it was easy to choose a color palette that coordinated making my cake frosting extra fun! For finishing touches I added stardust Stickles to polka dots and Touch of Gloss to kitty noses and toe beans.

I also added another sentiment using the Birthday Sentiments Hot Foil set and Banner Duo dies. These sentiments are great to hot foil in mass and keep in your pocket with the foil plates so you have them on hand whenever you need. That’s my new go-to thing and I love it!

Would you like to win the “Paw Print” Hot Foil Plate? This foil set will be given away to ONE lucky winner!

Here’s how to win: Comment on the NND blog and Design Team blogs (see list below)! Thewinner will be chosen at random from the collective reveal posts. Make sure to check out each of their blogs and comment for your chance to win. You will not know which blog has been chosen so the more you comment on the better your chances are of winning! You have until Wednesday July 19th at 9pm ET to comment  — winners will be announced on the blog post on Thursday, July 18th. 

Check out all the awesome Design Team Blogs below to enter:

Newton’s Nook Designs
Donna Idlet
Ellen Haxelmans
Tina Herbeck
Larissa Heskett
Samantha Mann
Diane Morales
Maria Russell
Farhana Sarker
Tatiana Trafimovich
Amanda Wilcox

Newton’s Nook – July Release Reveals Day 2

We’re back for day 2 of release reveals for the Newton’s Nook 10 year celebration! Today someone let the dogs out because they’re EVERYWHERE!!! And I love it!!

Birthday Barks

Birthday Barks Paper Pad

This time I have three cards to share with you. I had fun creating with those sweet stacks of pups but also loved creating with the paper pad using some fun sketches I found on Pinterest.

I actually pulled my color palette inspiration for this card from the Birthday Meows paper pad but it works so well with these guys I couldn’t resist! I colored all the images with copic markers and used coordinating dies to cut it all out.

Then I inked up a white panel with the Bokeh Balloons stencil set using similar colors. Once the panel was inked, I wiped my last stencil off and went over it again with glitter paste. Once that was dry, I die cut it with the largest Framework die.

Then I used my images as guides so I could stamp my sentiment and popped everything up with foam tape and squares. I finished the design off with Touch of Gloss on the balloons shine marks, puppy noses and parts of the gifts, cake and such as well.

So much shine and so much fun! Next, I needed to give some love to the cool colors that make up the amazing Birthday Woofs paper pad as well. I love it!

I just went perusing on Pinterest and found a couple of sketches that caught my eye. They’re everywhere…including over at the Ink Paws Challenge blog if you’re in the mood!

First we’ve got rows and rows of sweet pups and a heat embossed sentiment from the Birthday Barks stamp set. How fun is this?!?

And last, I added the fun paw from the Bookmark die set with my sentiment and a little clay heart from the Twiddler’s Nook Conversation Hearts mix. These cards were simple to create and adorable because of the paper pad!

Would you like to win the “Birthday Barks” Stamp Set ? This stamp set will be given away to ONE lucky winner!

Here’s how to win: Comment on the NND blog and Design Team blogs (see list below)! Thewinner will be chosen at random from the collective reveal posts. Make sure to check out each of their blogs and comment for your chance to win. You will not know which blog has been chosen so the more you comment on the better your chances are of winning! You have until Wednesday July 19th at 9pm ET to comment  — winners will be announced on the blog post on Thursday, July 18th. 

Check out all the awesome Design Team Blogs below to enter:

Newton’s Nook Designs
Donna Idlet
Ellen Haxelmans
Tina Herbeck
Larissa Heskett
Samantha Mann
Diane Morales
Maria Russell
Farhana Sarker
Tatiana Trafimovich
Amanda Wilcox