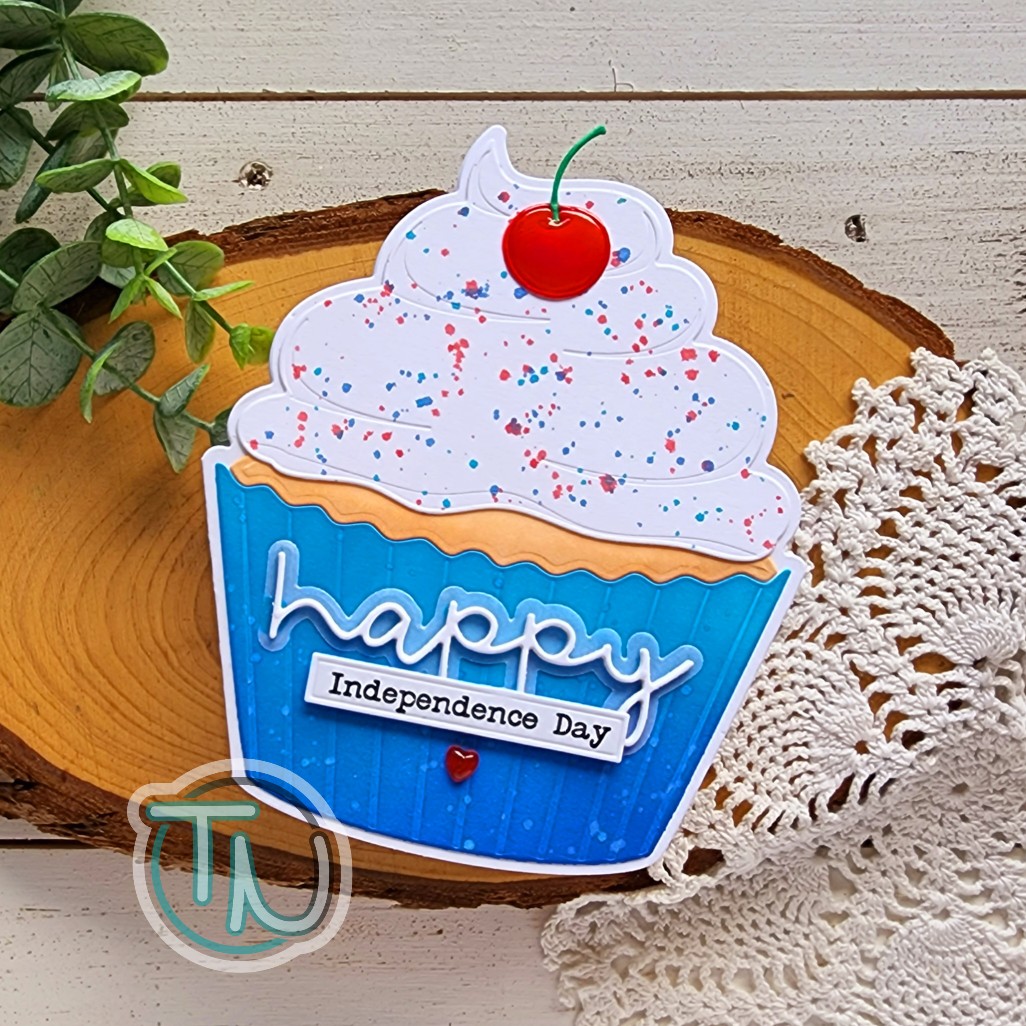
Happy Independence Day to all of my USA friends! Today I’m guest designing on the Trinity Stamps blog and couldn’t resist using the new Cupcake Card die set to create a really fun 4th of July themed card to share! Creating this card just reminded me how fun it is to take things typically meant for something specific and twisting things like color schemes and sentiments to broaden their use.

To start today’s project, I pulled out the dies from the set I intended to use and cut everything from white heavy weight cardstock. I folded the card base on the score line and set it aside to add color to my pieces.
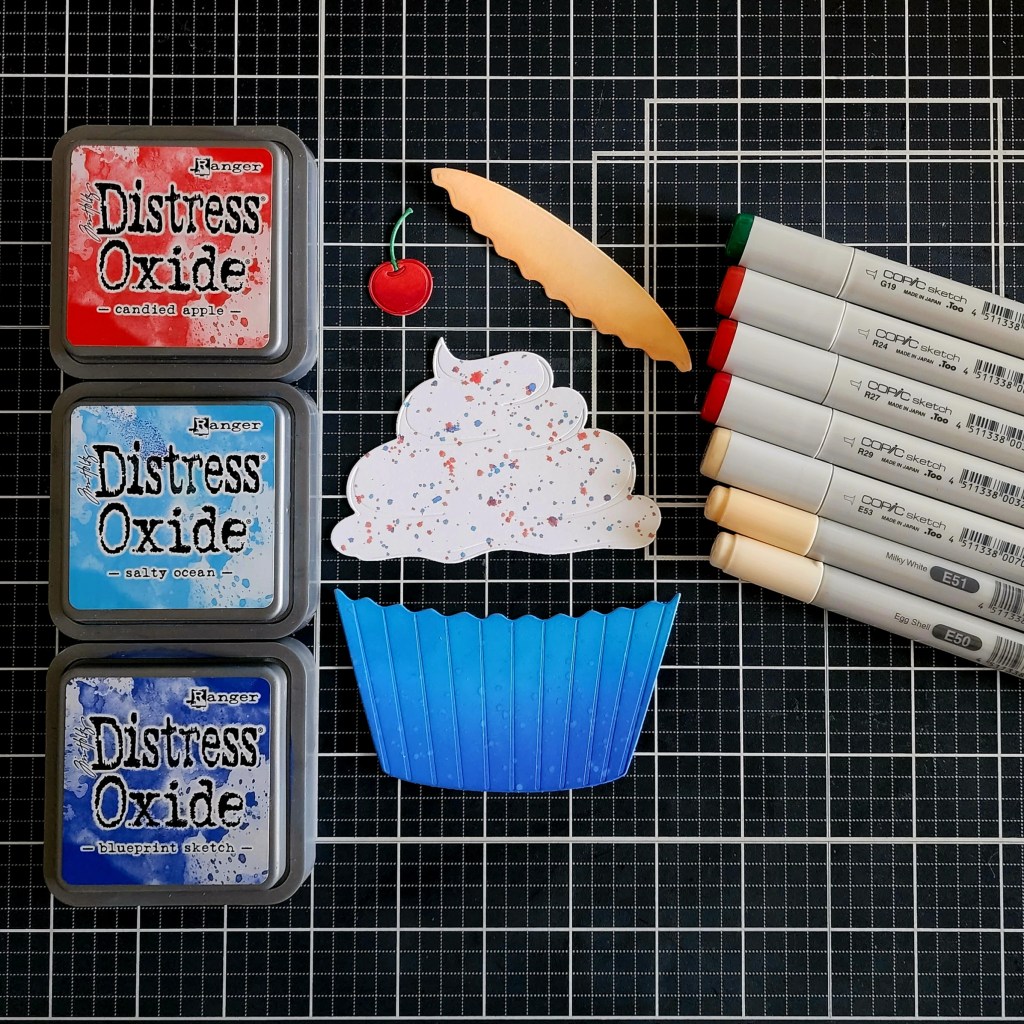
Here’s a quick and easy photo to show you the colors I used for all the pieces. It’s really simple when you break it down. I inked up the cupcake liner with distress oxide in blueprint sketch and salty ocean. Then I added it and the frosting piece to my splatter box and flicked watered down ink in both blues to both pieces. I removed the liner paper and flicked some candied apple on the frosting to bring that classic red into the mix. I set those aside to dry while I colored the remaining pieces with copic markers.
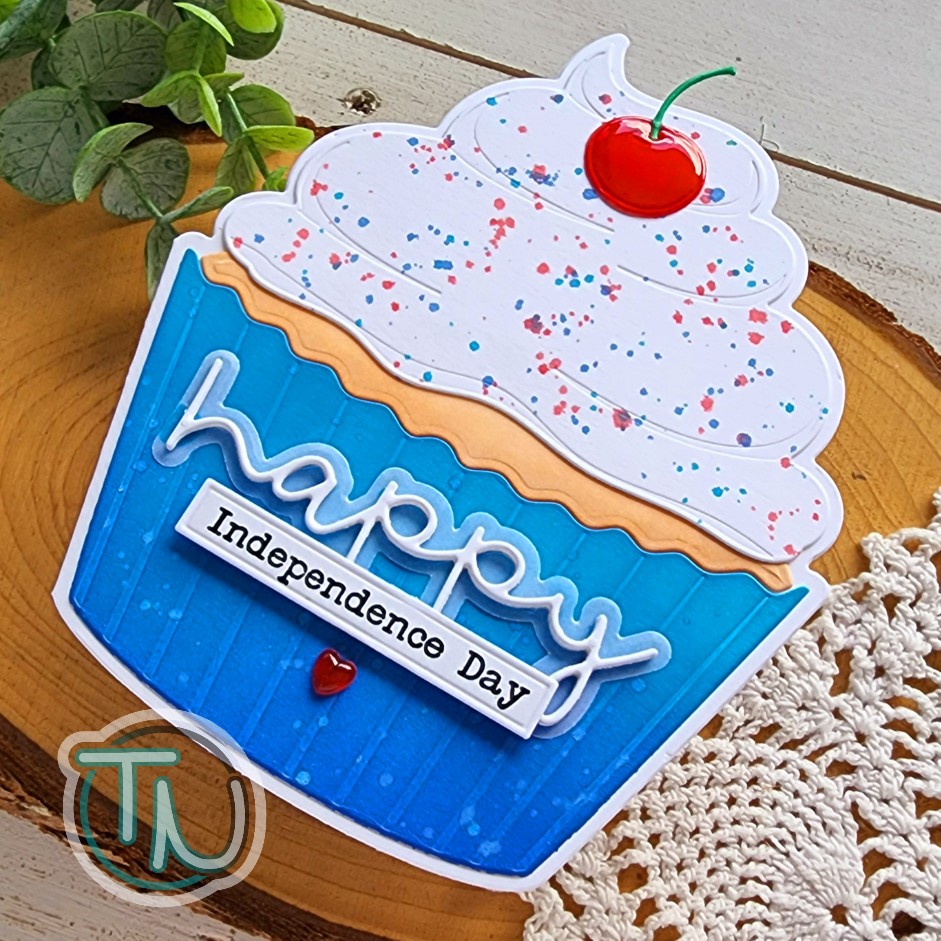
Next, I pulled out the Simply Sentimental – Happy stamps and dies out to work on my sentiment. I cut the shadow from vellum and the word “happy” from white cardstock 4 times and adhered them all together with liquid glue. Then I stamped “Independence Day” from the stamp set in black ink and used the smallest Embossed Edge Rectangle die to create a sentiment strip.
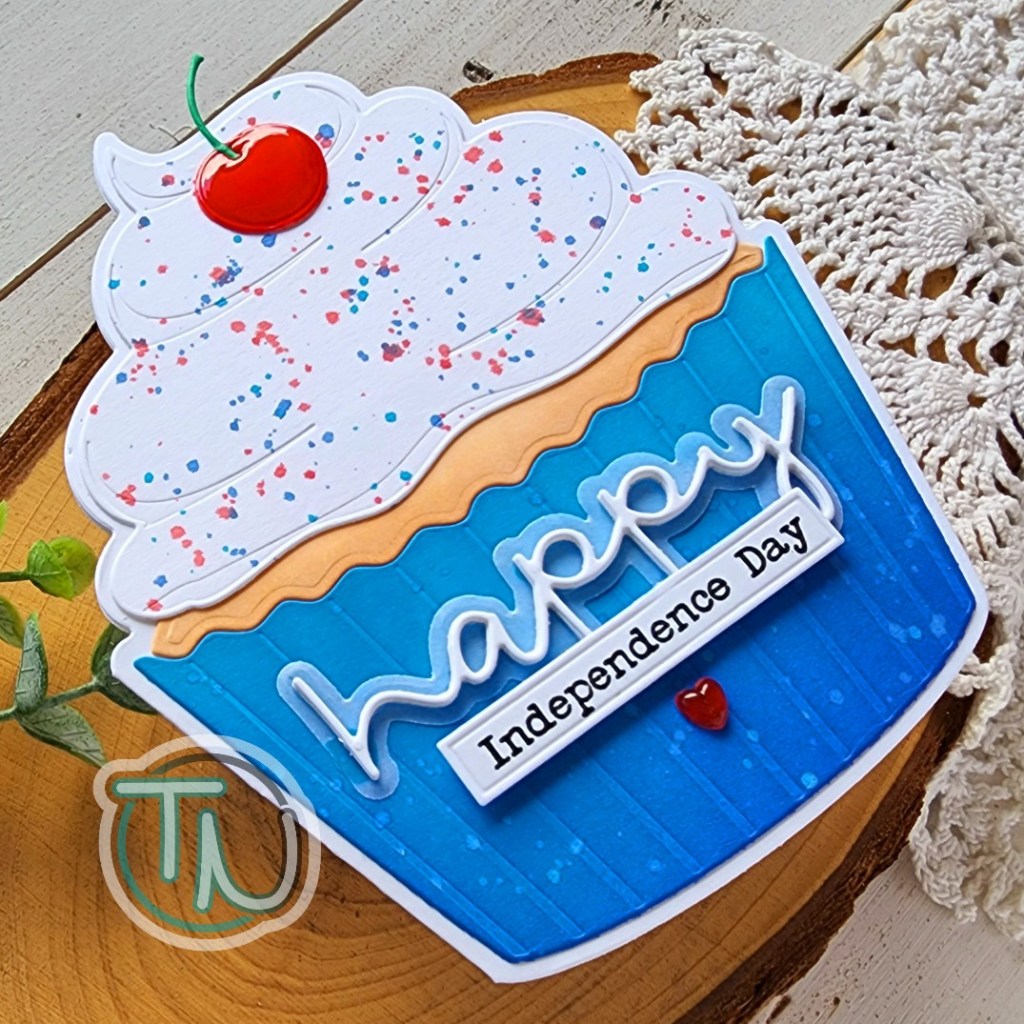
To assemble all my pieces, I used liquid glue starting with the cupcake liner piece first, then the cupcake and finally the frosting and cherry. I added “happy” with liquid glue and popped the sentiment strip up with foam tape.
For finishing touches, I added glossy accents to the cherry and one Jelly Drop Heart embellishment below the sentiment.
I hope you enjoyed today’s project and find some inspiration to create something fun to share with someone.
Products used today:
Cupcake Card dies
Embossed Edge Rectangle dies
Simply Sentimental – Happy stamps and dies
Jelly Drop Hearts – red
Foam tape
Bearly Art liquid glue
Distress Oxide Ink – blueprint sketch, salty ocean, candied apple
Glossy accents
I appreciate you sharing your time with me. Have a fabulous day!