Blog

Pink & Main – Life is All About Balance

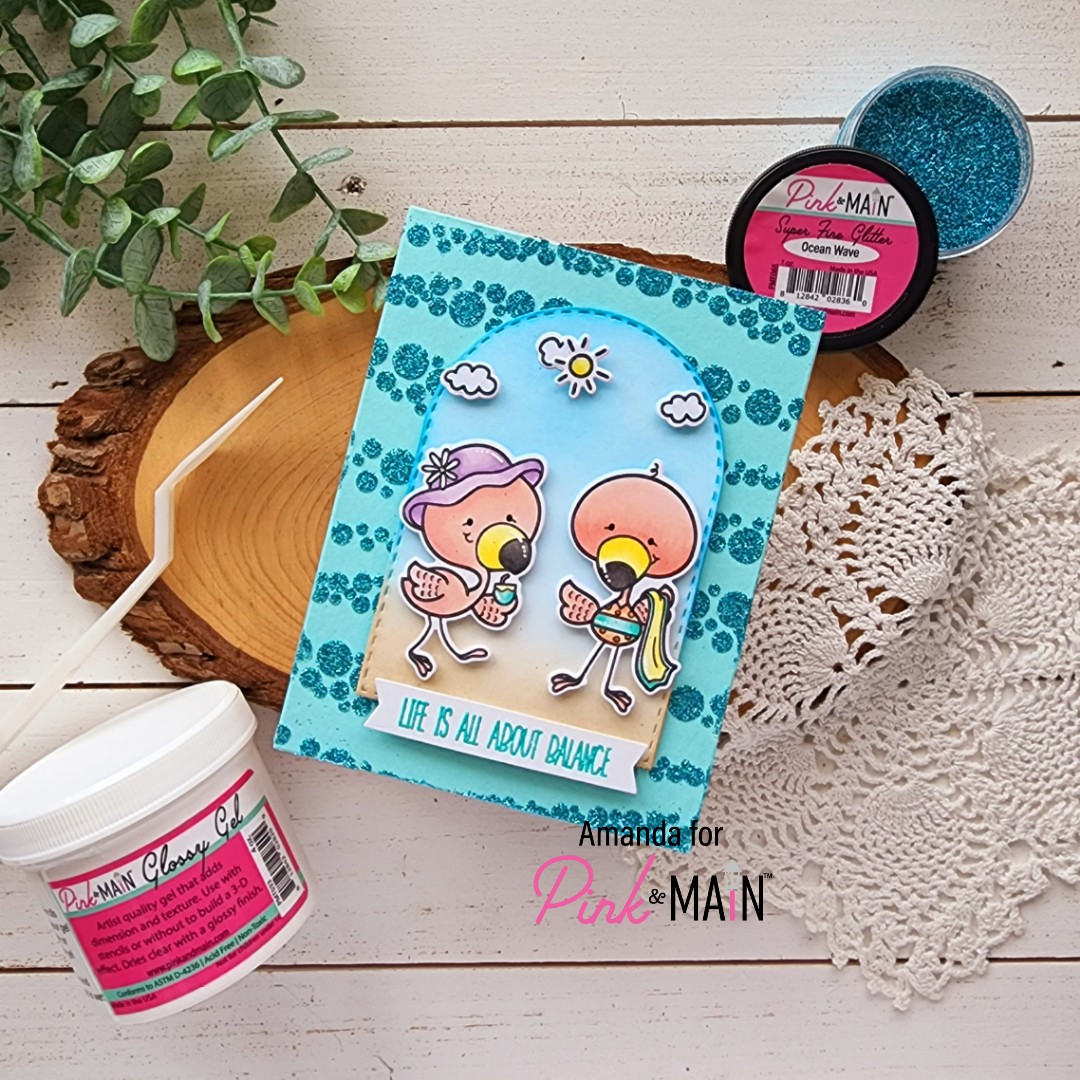
Happy Friday everyone! I hope you still have your sunscreen handy from my summery posts all week because you’re going to need it still! Today I have a super sparkly fun card featuring the brand new Pink & Main June release! It’s so summer and absolutely wonderful for so many interests!

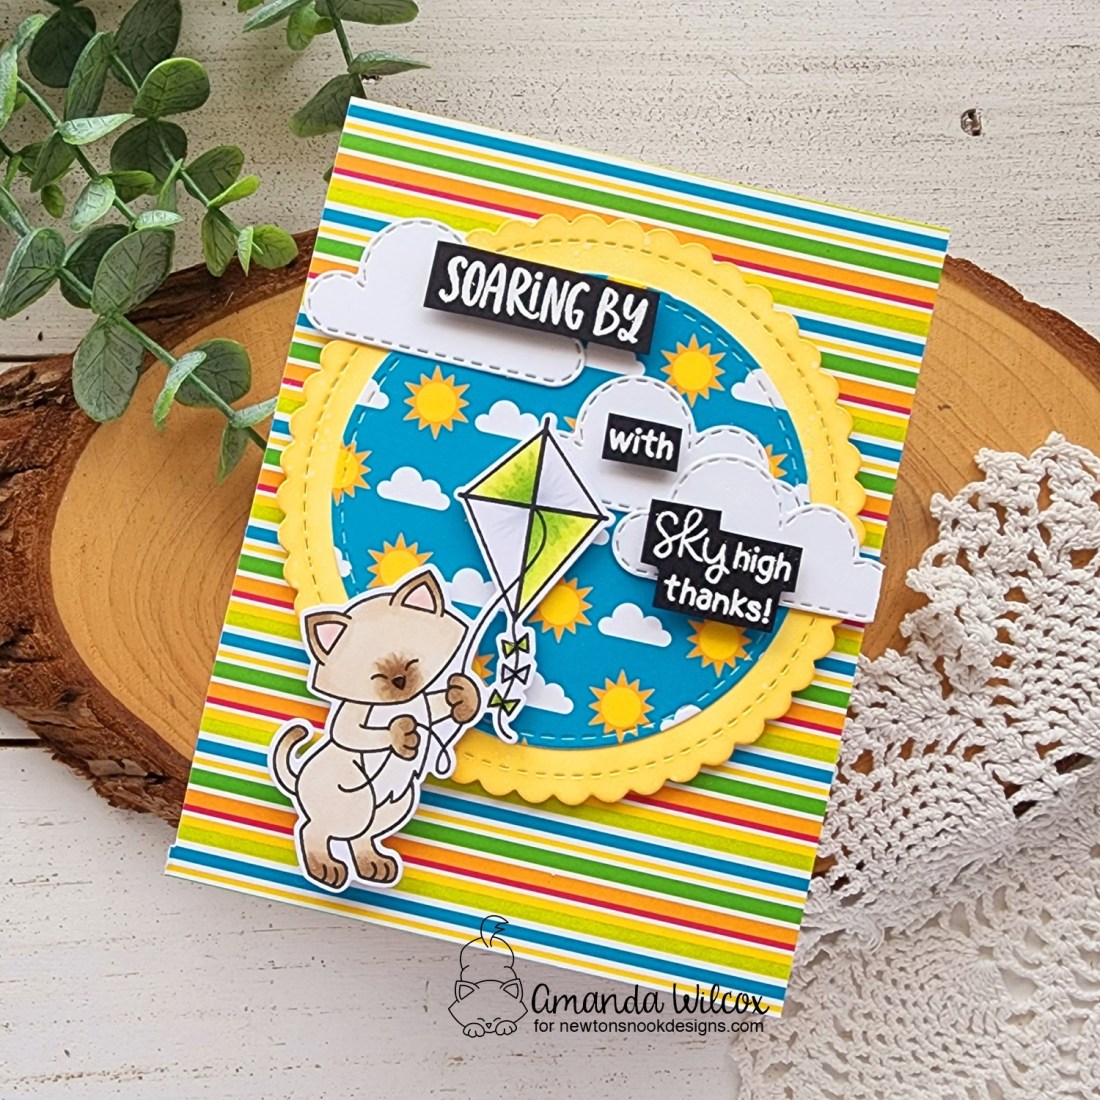
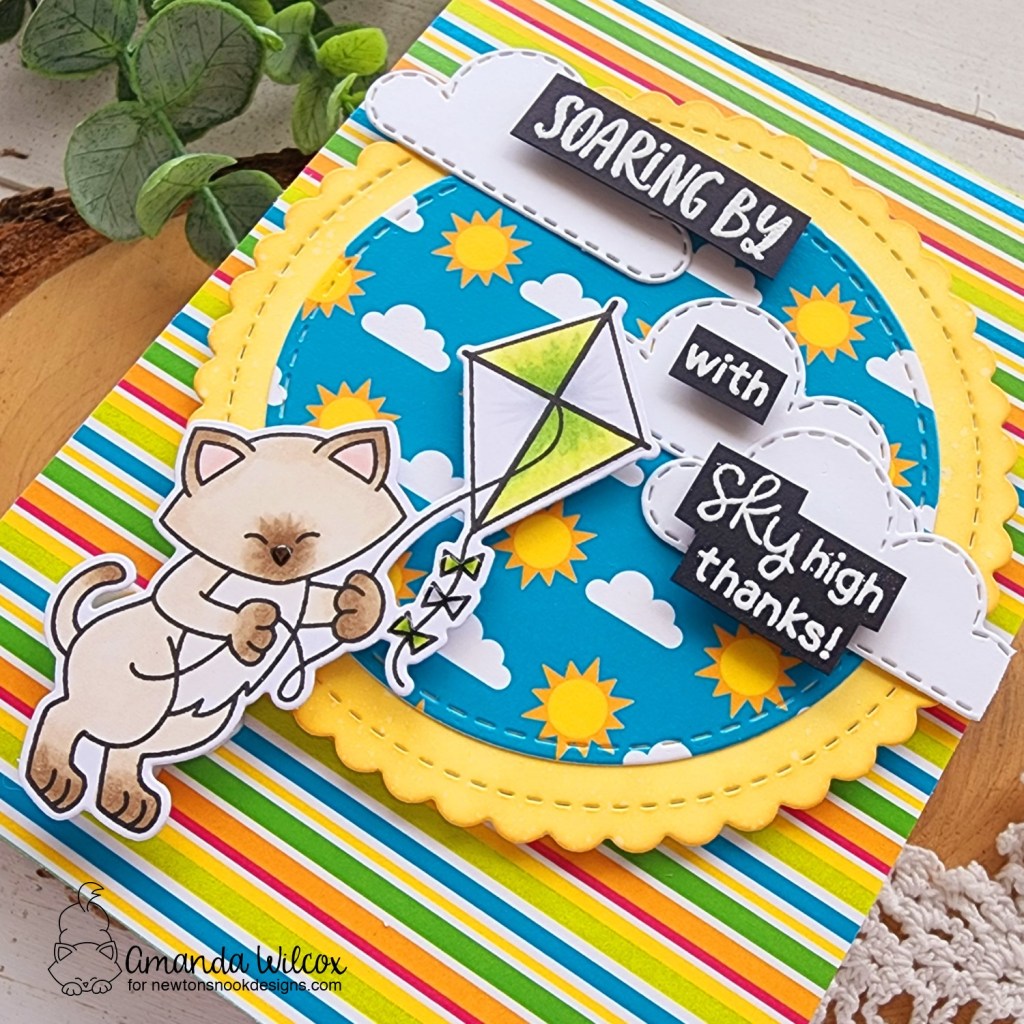
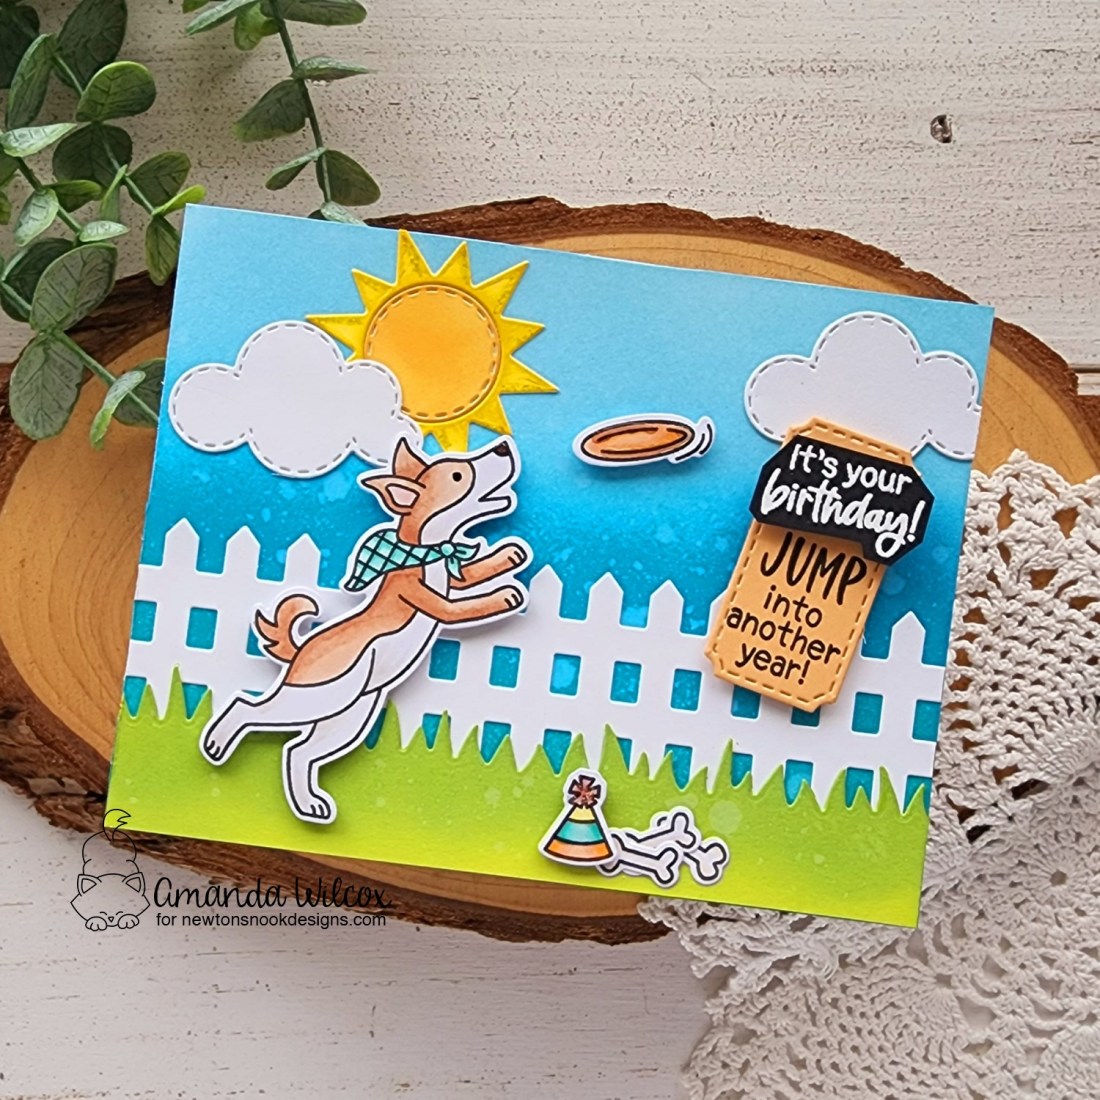
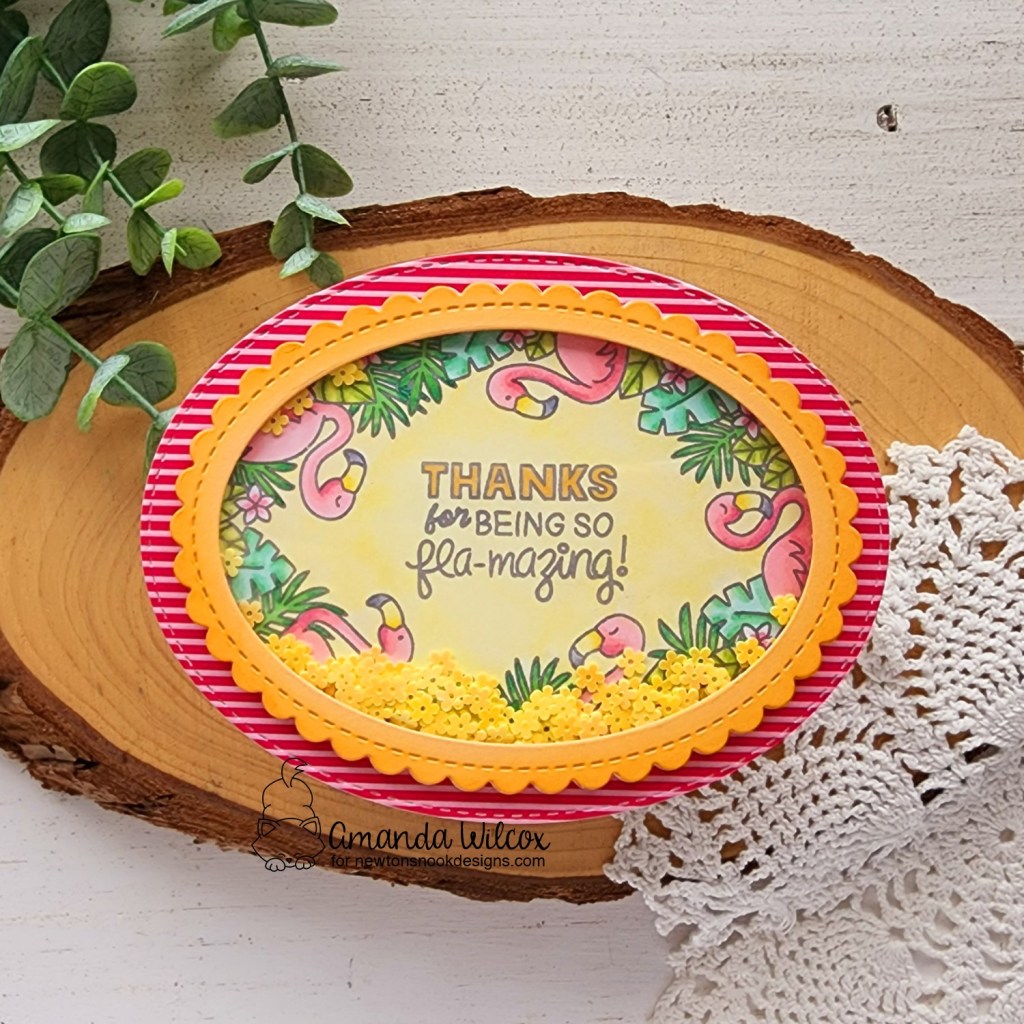
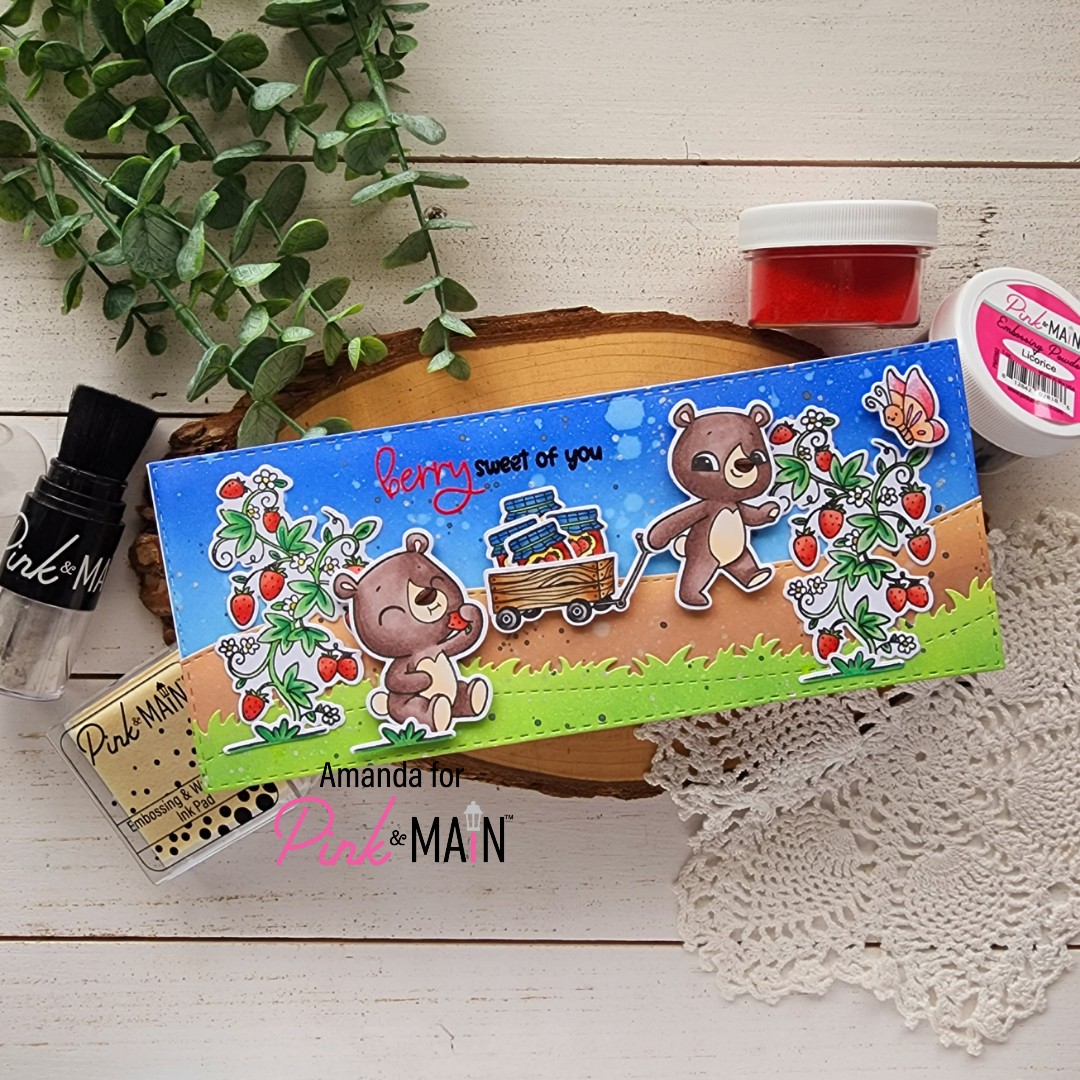
Two things I love most when crafting – critters and getting messy! Today I got to do both and I loved every moment of it! I chose some images from the brand new Flocks of Love stamp set. I colored everything with copic markers and used the coordinating dies to cut them out. Then I cut a Stitched Arch from white cardstock and used my blending brushes to ink up a sky and some sand. I popped the images up with foam squares to create a mini scene.

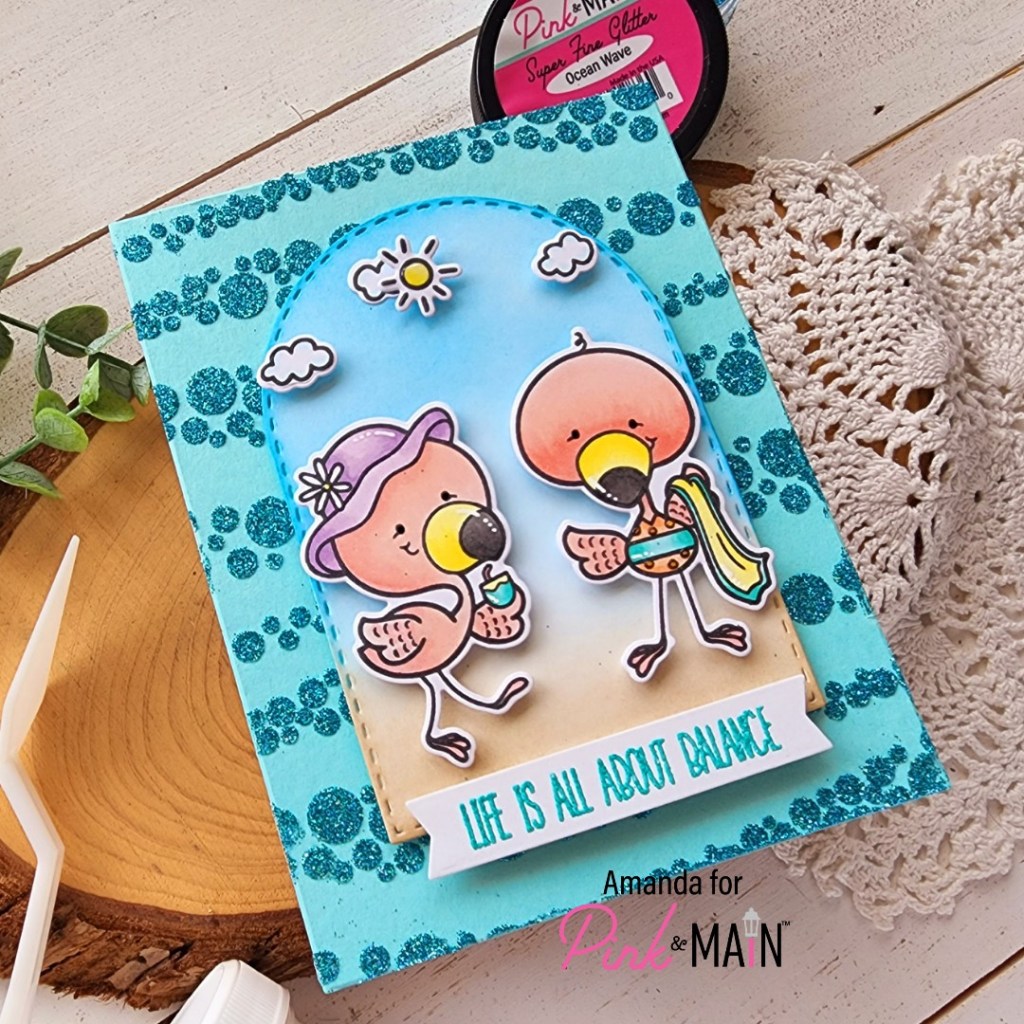
Next, I stamped and heat embossed a sentiment from the set with my favorite aquatini embossing powder! You guys, I’m seriously obsessed with the new Pink & Main embossing powder line! It’s amazing!

Anyway, after the heat embossing was cooled I die cut the sentiment with a Large Sentiment Strip die that fit the length I wanted and popped it up at the bottom of my arch scene with foam squares too.

For my background, I used the Layered Rectangles A2 dies to cut a teal panel the size of my A2 card front and spread Glossy Gel through the new Bubbly Waves stencil. I removed the stencil and sprinkled Ocean Wave super fine glitter on it and set it aside to dry.

I cleaned up my work space and realized, I went about this totally backwards. Lol! It worked out because it was time to cook dinner for my family.

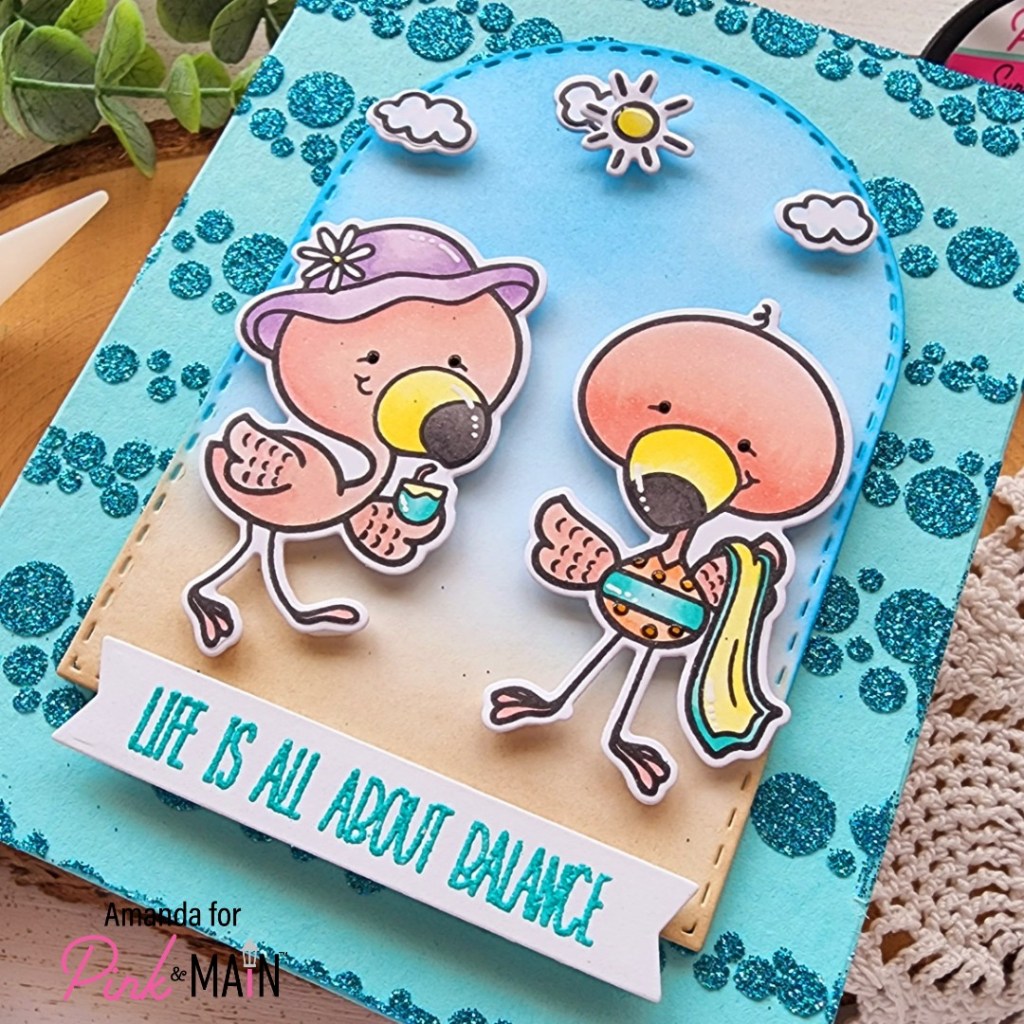
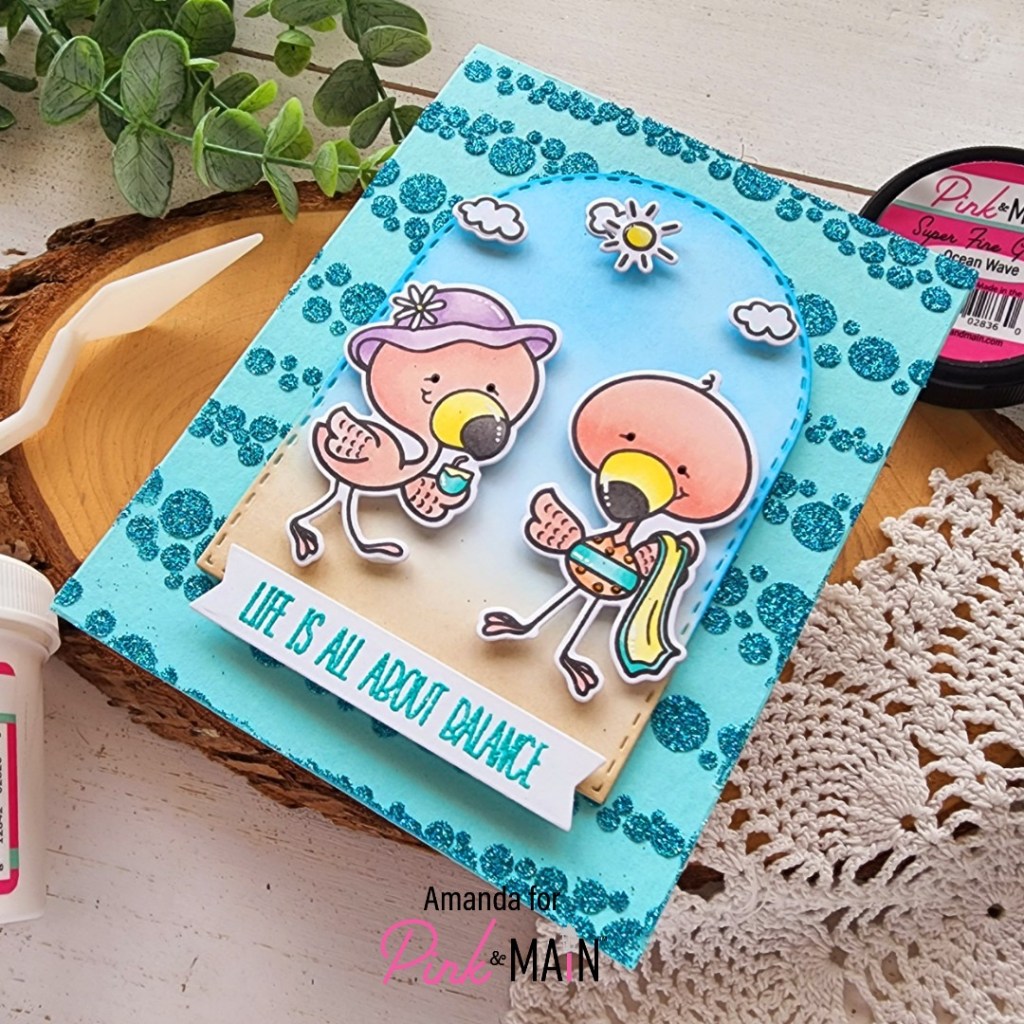
Once the glitter panel was dry, I adhered it to a card base and popped my arch scene up on it with foam tape. Then for finishing touches I added black glaze pen to flamingo eyes, white gel pen accents to various parts of the images and glossy accents to the swimsuit dots, flower center and sunshine in the sky.

Be sure to head to the Pink & Main shop and check out the whole release. It’s so much fun and it sure to get you in the summer spirit!

Products used today:
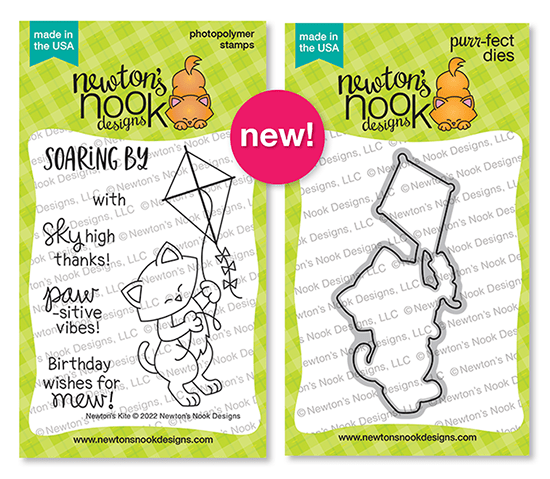
Flocks of Love stamps and dies
Bubbly Waves stencil
Stitched Arches dies
Large Sentiment Strip dies
Glossy Gel
Super Fine Glitter – ocean wave
Heat Embossing & Watermark Ink
Magic Anti-static Powder Tool
Embossing Powder – aquatini
Ergonomic Blending Brush
Foam tape and squares

I appreciate you sharing your time with me. Have a fabulous day!

Miss Ink Stamps – Don’t Worry, Be Hoppy

Hello again, everyone! I’m popping in with some more stencil layering inspiration with Miss Ink Stamps products. I have been itching to play with this Flower Shower stencil set and finally just put it on my desk so I would make a point to try it out. I am in love! It’s so pretty!

I started by inking up a panel with the flower layer using a bright purple ink. Then I layered the leaves and flower centers stencil in it’s place and spread gold glitz glitter gel through the whole thing. It’s so pretty! I set the panel aside to dry while I started stamping and coloring images next.

I haven’t played with the Say Cheese stamps set in a while and I thought these cute mice would be a great combo with my floral background. After they were colored, I used the scan-n-cut to cut everything out and started deciding on my placement. It felt weird just placing the images on the stenciled background so I pulled out the Trinity Stamps Nested Hearts dies and cut one from vellum. I just love the look this gives. Once I had that, I attached the images with foam squares and attached them to the heart.

Next, I decided to trim the stenciled background down to 4×5.25 inches and popped it up with foam tape on an A2 size panel of green dot textured cardstock from my stash. I used liquid glue to adhere the heart to the stenciled panel because of the glitz gel texture. I placed a big acrylic block on top of it while it dried and I heat embossed my sentiment. That was cut out with a banner from Trinity Stamps 4-Bar Card die set and added with a foam strip.

For finishing touches I added glossy accents to the mouse’s nose and frog hat eyes. Then I came in with unicorn Stickles on the hat cheeks, butterflies and clouds. Last, I added some twine tied in a bow on the left side of the card. I like this more natural texture paired with the flashy glitz gel. I feel like they balance each other out in a really cool way.

To be honest, I have had to restart my computer 3 times while writing this post and thought I lost it one of those times. So I hope you enjoyed today’s project and I’m so happy to have it all written down finally.

Products used today:
Say Cheese! stamps
Flower Shower stencils
Thermoweb Glitz Glitter Gel – gold
Thermoweb stencil pal
Trinity Stamps Nested Heart dies
Trinity Stamps Embossed Edge Rectangle dies
Trinity Stamps 4-Bar Card dies
Foam strips and squares
Glossy accents
Liquid glue
Stickles – unicorn
Pink & Main embossing ink and powder

I appreciate you sharing your time with me. Have a fabulous day!

Newton’s Nook – June Release Day 4

Oh my WOW! It’s already the final day of release reveals for the Newton’s Nook June release! I hope you are loving each item and have your checklist prepared because it’s all available starting TOMORROW!!!

But first, let’s reveal our final stamp and die set and get on to some fun inspiration.

Newton’s Kite

I will be honest, this may be the final day of reveals but I was so in love with this image and the new paper pad, that this was the first card I created. I had so much fun and love how bright it is.

I stamped and colored the image first, pulling the green choice from the paper pad. I used the coordinating dies to cut it out. While flipping through the paper pad I remembered the sun and clouds pattern which I thought would be fun background to the kite in the sky. So I used a die from Circle Frames to cut it out and also trimmed the stripes down to A2 size. The patterns together were too busy so I cut the scalloped circle from yellow cardstock to break them up a bit.

While toying with different ideas for my sentiment I thought they might fit being stamped directly on the clouds…but it’s a bit squishy and I didn’t love it. So I switched gears, keeping the clouds because that was a happy accident that I loved! Instead, I stamped and heat embossed each part of the phrase and trimmed them out with my scissors. That bold black sentiment looks so cool with all the bright color.

To assemble everything, I used liquid glue to add the sun and cloud paper to the yellow circle, along with the die cut clouds. Then I added foam squares to Newton and attached him. I flipped the whole thing over and added foam tape and squares to it all (some of Newton is double layer so he lays flat), removed the release paper and attached it to the striped panel. Last, I added the sentiment pieces with foam squares to the clouds.

I kept finishing touches very simple but just adding a little glossy accents to Newton’s nose and the bows on the kite tail.

I hope you have enjoyed all the inspiration this week from the team and are ready to order some new, fun goodies tomorrow! But first…

Would you like to win the “Newton’s Kite” Stamp Set? This stamp set will be given away to ONE lucky winner!

Here’s how to win: Comment on the NND blog and Design Team blogs (see list below)! The winner will be chosen at random from the collective reveal posts. Make sure to check out each of their blogs and comment for your chance to win. You will not know which blog has been chosen so the more you comment on the better your chances are of winning! You have until Thursday June 16th at 9pm ET to comment  — winners will be announced on the blog post on Friday June 17th. 

Check out all the awesome Design Team Blogs below to enter:

Newton’s Nook Designs
Donna Idlet
Ellen Haxelmans
Tina Herbeck
Larissa Heskett
Samantha Mann
Zsofia Molnar
Maria Russell
Farhana Sarker
Tatiana Trafimovich
Amanda Wilcox

Newton’s Nook – June Release Day 3

My, my, how this week is flying by! We’re up to day 3 of the Newton’s Nook June release reveals. I hope you’re loving things so far. Today we have another stamp and die set to have a look at! Let’s go!

Dog Park

I just couldn’t resist the opportunity to create a super fun scene card with this new great set!

I started by stamping my images and coloring them with copic markers. I used the coordinating dies to cut everything out and laid them out on an A2 panel to figure out spacing and scene elements. Once I had an idea, I started getting inky!

The sky panel is distress oxide in peacock feathers, salty ocean and tumbled glass, while the grass is mowed lawn and twisted citron. I spritzed the panels with water and blotted them dry. Next, I die cut the fence, clouds and sun from white cardstock. I used the ink left in my blending tools to add color to the sun – using mustard seed and spiced marmalade distress oxide ink.

Now, to assemble everything, I used liquid glue for the scene layers and dog bones in the grass. The pup, his frisbee and party hat are all added with foam squares. Then, for my sentiment I stamped part on the smallest Framework die and heat embossed the other part, cutting it out with scissors. I added both elements with foam squares too.

For finishing touches I added glossy accents to the dog’s nose and frisbee. Then I came in with unicorn Stickles on the party hat and sunshine rays.

I am very excited for the recipient of this card to open it up! I just know they are going to LOVE IT so much!

Would you like to win the “Dog Park” Stamp Set? This stamp set will be given away to ONE lucky winner!

Here’s how to win: Comment on the NND blog and Design Team blogs (see list below)! The winner will be chosen at random from the collective reveal posts. Make sure to check out each of their blogs and comment for your chance to win. You will not know which blog has been chosen so the more you comment on the better your chances are of winning! You have until Thursday June 16th at 9pm ET to comment  — winners will be announced on the blog post on Friday June 17th. 

Check out all the awesome Design Team Blogs below to enter:

Newton’s Nook Designs
Donna Idlet
Ellen Haxelmans
Tina Herbeck
Larissa Heskett
Samantha Mann
Zsofia Molnar
Maria Russell
Farhana Sarker
Tatiana Trafimovich
Amanda Wilcox

Miss Ink Stamps – Big Mugs

Hello again friends. I’m over on the Miss Ink Stamps blog today sharing a little coffee themed inspiration and ideas for stepping up your multi-layer stencils.

Here’s a look at the finished card before we start with the stenciling process. I went with foil with is super fun when it catches the light and adds a lot of interest to your background.

I started by inking up the mug shape stencil layer with gathered twigs distress oxide ink on a kraft panel. You could use any ink and any color at this point. This will be the base of your coffee mugs for the layering stencil set.

Then, I lined up the detail layer which adds the mug handles and decorations to each mug too. At this point you have tons of choices. Keep it simple and ink another color, add transfer gel which leads you to either flocking or foiling, or add glitz glitter gel for some pizazz. So many different looks!

Today I used transfer gel blanco, cleaned up my stencils and work station and set the panel aside to dry. While it’s drying, this is the prime time to stamp and color your images, heat emboss your sentiment, all the other things.

When the panel was dry, I heated up my laminator and ran it through in a craft & carrier sheet with an emerald watercolor deco foil transfer sheet. It’s like magic every time you peel one of these away. It’s so cool!

Once the panel was foiled, I wanted it to have more texture and dimension so I inked up the edges with brown dye ink and splattered some of the same ink across it too. A little note, if you foil, you you can blot splatters off the foiling, but if you flock it will soak in. Just keep that in mind when you’re crafting.

Then, like I said before, while the panel was drying, I stamped and colored the image from Big Mugs and fussy cut him out. Then I stamped and heat embossed a sentiment on black cardstock and die cut it with a sentiment banner. I decided that I wanted a focal point behind my image to draw your eye in, so I cut a zig zag circle from vellum and adhered the images and sentiment with foam squares.

I love how the vellum cancels the reflective part of the foil and just the color shows through. This is mind baffling to me but I love it! So, after adding the zig zag circle to the foiled panel with tape runner, I trimmed the excess off the edge and adhered it to a card base.

I finished things off with some white gel pen highlights to the image and let the background really shine. It’s so fun to turn in the light and see the different colors on the foil. I love it!

Products used today:
Big Mugs stamps
Hugs in a Mug stencils
Thermoweb Transfer Gel Blanco
Thermoweb Deco Foil Transfer – emerald watercolor
Pink & Main Large Sentiment Strips dies
Pink & Main Zig Zag Circles dies
Pink & Main Embossing Ink, Powder and Anti-static Powder Tool
Foam squares

I appreciate you sharing your time with me. Have a fabulous day!

Newton’s Nook – June Release Day 2

Here we are again! It’s time for day 2 of reveals for the Newton’s Nook June release! Today we have another addition to the newest full card front series – ovals!

Flamingo Oval

I love how you can used this with the oval frames dies or on it’s own to fill up your card front. This time, I created an oval shaped card and turned it into a shaker too! This was really fun to make and I love playing with it!

First, I die cut the largest scalloped oval from white cardstock and lined up my stamp within the stitching lines. This is the easiest way for me to make sure I have enough edge for the scallop. I used my copics and colored the whole panel in, then chose a sentiment to stamp in the center.

Then I cut another of the same scallop from orange cardstock but used the next smallest oval to cut a window out of it. I inked up the edges with my blending brush, then added liquid glue to add an acetate window to the back side. I lined the oval frame with foam strips, filled my shaker well and added the colored panel to the back to seal it all up.

Finally, I cut the largest oval twice – once from the pink stripe in the Summertime paper pad we saw yesterday and once from white cardstock. I added a score line about 1/2 inch from one of the long side and adhered the two with scrappy tape only on this flap. That created the shaped card base. Last, I used liquid glue to add the shaker mechanism to the top.

Voila! The card is all finished and ready to play with. Isn’t it so fun!

Would you like to win the “Flamingo Oval” Stamp Set? This stamp set will be given away to ONE lucky winner!

Here’s how to win: Comment on the NND blog and Design Team blogs (see list below)! The winner will be chosen at random from the collective reveal posts. Make sure to check out each of their blogs and comment for your chance to win. You will not know which blog has been chosen so the more you comment on the better your chances are of winning! You have until Thursday June 16th at 9pm ET to comment  — winners will be announced on the blog post on Friday June 17th. 

Check out all the awesome Design Team Blogs below to enter:

Newton’s Nook Designs
Donna Idlet
Ellen Haxelmans
Tina Herbeck
Larissa Heskett
Samantha Mann
Zsofia Molnar
Maria Russell
Farhana Sarker
Tatiana Trafimovich
Amanda Wilcox

Newton’s Nook – June Release Day 1

Welcome everyone! Super excited to be starting the release reveals for the Newton’s Nook June release! Get your sunscreen out because we’re ready for summer!!! Let’s take a peek at what’s revealing today.

Summertime paper pad

Palm Tree Line stencil

Beach Bound stamps and dies

Isn’t this an incredible way to kick things off??? I can tell you right now, I’m obsessed with this paper pad and having so much fun with everything else too! I have two cards to share with you so let’s get started.

For my first card, I inked up the new palm tree line stencil with various dye inks and trimmed it into a strip. Then I lined the panel with some strips from the paper pad. I popped this up on an A2 size piece of that fun blue bubble print from the paper pad but I thought it needed something else.

I just adore those flip flops from Flip Flop Life so I stamped and colored those, then used the coordinating dies to cut them out. I thought it would be fun to mount them on a circle cut from another print in the paper pad so I used a circle die from Circle Frames and another from Frames Squared for that and my sentiment and added everything with foam squares.

I finished the card off with glossy accents on the flip flops and tied some pink twine around the top of my card.

You better apply a second layer of sunscreen before we move on. You’re going to get a sunburn. Lol.

For this card, I took all the vehicles from Beach Bound out and created my own patterned paper stamping them in gray on a white panel. Then I picked one – I just love that Bug – stamped and colored it with copics, then used the coordinating die to cut it out. This time I cut 3 1/4 inch strips from various prints in the paper pad for the border under my car. But the background with the other cars was a little distracting.

To remedy that, I took a strip of white cardstock and inked it up with mustard seed distress oxide ink and spritzed it with water. Then, to give it a little interest I layered the Sunscape stencil over the top and inked a little sunshine in the top left with spiced marmalade distress oxide ink. It’s subtle but I love it.

Now, to assemble all my layers, I used liquid glue to add the yellow panel to the top of the car panel. Then I popped my cute blue bug and the strips of paper up with foam squares and strips. Last, I die cut a banner from the Frames & Flags die set and heat embossed a sentiment from Beach Bound on it. I trimmed the top off and slid it under the striped strip, securing it with foam squares.

For finishing touches I added some glossy accents to the wheels and lights on the car and unicorn Stickles to parts of the surf board.

Would you like to win the “Beach Bound” Stamp Set? This stamp set will be given away to ONE lucky winner!

Here’s how to win: Comment on the NND blog and Design Team blogs (see list below)! Thewinner will be chosen at random from the collective reveal posts. Make sure to check out each of their blogs and comment for your chance to win. You will not know which blog has been chosen so the more you comment on the better your chances are of winning! You have until Thursday June 16th at 9pm ET to comment  — winners will be announced on the blog post on Friday June 17th. 

Check out all the awesome Design Team Blogs below to enter:

Newton’s Nook Designs
Donna Idlet
Ellen Haxelmans
Tina Herbeck
Larissa Heskett
Samantha Mann
Zsofia Molnar
Maria Russell
Farhana Sarker
Tatiana Trafimovich
Amanda Wilcox

Pink & Main – Berry Sweet Scene Card

Hello everyone! Thank you so much for stopping by today. I have a REALLY fun slimline scene card to share with you featuring my favorite Pink & Main bears. I love them so much and have so much fun mixing and matching them whenever I can.

Today my scene includes images from Bear With Wagon and Berry Sweet stamp sets. I chose various images from both sets and stamped them out, multiples of some like the berry plants and jam jars. I colored everything with my copics and used the coordinating dies to cut them all out. I had a plan for layering my images so I used EZ Squeeze liquid glue to adhere the grass tufts to the berry plants and sitting bear and then added the jam jars to the wagon and the wagon handle to the bear’s paw. Now we can switch gears to our scene and get inky!

I used the largest Stitched Slim Line die to cut two white panels. The main panel I inked with blueprint sketch and tumbled glass distress oxide inks for my sky. The second panel I cut in half and inked one side with twisted citron and mowed lawn distress oxides while the other half was gathered twigs and tea dye. I spritzed all the panels with water and blotted them dry. Then I splattered them with pearl watercolor and black acrylic paint. It’s silly, but I don’t wash my brush going from the pearl watercolor to the paint so my black ends up a little shimmery too. I think it’s fun but you could just rinse the brush to avoid it if you wanted.

When my panels were dry, I used EZ Squeeze liquid glue to adhere the layers together and also put them on a slimline card base. Then I added my images with a combination of liquid glue and foam squares for dimension and interest.

The last things I did were stamp and heat emboss my sentiment and finishing touches. I love that the sentiments in Berry Sweet are all punny and the the word “berry” is a separate stamp so you have options. Because it’s super easy to stamp one part and then the other, I decided to heat emboss them using different colors to emphasize the pun even more. These new heat embossing products are absolutely amazing and my favorites to use everyone! The ink stamps crisp and perfect, the anti-static tool is incredible and the embossing powders all melt beautifully.

I digress, but seriously, these products are awesome! So, after my sentiment was heat embossed, I came in with glossy accents on the bear’s noses and flower centers on the berry bushes for a little shine here and there.

I hope you enjoyed today’s project even a sliver of the amount that I enjoyed creating it.

Products used:
Bear with Wagon stamps and dies
Berry Sweet stamps and dies
Stitched Slim Line dies
EZ Squeeze liquid glue
Magic Anti-Static brush
Embossing & Watermark Ink
Embossing powders – licorice and candy apple
Foam squares
Glossy accents
Distress Oxide Ink – blueprint sketch, tumbled glass, mowed lawn, twisted citron, tea dye, gathered twigs

I appreciate you sharing your time with me. Have a fabulous day!

Miss Ink Stamps – For My Friend

Happy Thursday everyone. I hope your week is going good. Today I have some new Miss Ink Stamps inspiration featuring some stencil layering and that fabulous pup – Slim! I have fun coloring him in different combos each time, and the sentiments in this set get me giggling too!

I stamped and colored slim with my copic markers first, then fussy cut him out and set him aside. Next, I chose a sentiment, stamped and die cut it with a banner die and glued the two together. I love my dimension so I added foam tape to the back of these and switched gears to my background.

I knew that I wanted to use the new Diagonal Stripes Mask stencil so I started with that. You just place it over your cardstock, ink it up however you like, rotate it 180 degrees and ink it again to fill in all the spots perfectly. It’s so cool! Today I inked them up in gradient greens and teals, then layered another stencil over the top and added more of the same ink color to add texture to each space. The green has the square dance stencil over top and the teal has pocket full of posies.

I trimmed the stenciling down to 4×5.25 inches and popped it up on a white card base with foam tape, then added my image and sentiment. For finishing touches, I added white gel pen highlights and glossy accents to Slim’s eyes and nose. Last, I glued a scattering of stars from the champagne star dust sequin mix.

I had lots of fun getting inky and coloring Slim in a brand new combo for me. I hope you enjoyed today’s project too.

Products used today:
Slim’s Whims stamps
Square Dance stencil
Diagonals Masking stencil
Champagne Star Dust sequin mix
Lawn Fawn ink – jalapeno, celery stick, mermaid, peacock
Blending brushes
Foam tape
Glossy accents

I appreciate you sharing your time with me. Have a fabulous day!

Newton’s Nook – PAW-sitive Vibes

Hey friends! Today I’m over on the Newton’s Nook blog sharing an adorable card that requires no coloring. I used a new paper pad and die set to create adorable kitty images and a fun sentiment to tie it all together.

This whole card started with me choosing a simple color palette and cutting strips of cardstock at random widths to create a background. I adhered the strips to a piece of copy paper with tape runner and used the rounded rectangle in the Frames & Flags die set to cut it out. After looking at the panel cut out, I realized I had chosen colors that go great with the new A Cat’s Life paper pad! So I ran with it.

I chose a neutral colored piece from the pad for my card front and glued it down. Then popped the striped panel up with foam tape. Next, I chose 3 more patterns of paper and cut the Cat Silhouettes from them. I haven’t even cut these dies apart yet, and just cut them all from each pattern, keeping the rest for another project later on.

Next, I chose a sentiment from Heartfelt Meows and heat embossed it on a banner from the Banner Trio die set. I added the kitties and sentiment with foam squares onto the striped panel.

For finishing touches, I glued 3 white hearts from the Twiddler’s Nook Sweethearts clay embellishment mix above the cats and tied some gray twine around the left side of the card front.

Super simple and really fun with all of the patterns and textures together!

Products used:
A Cat’s Life paper pad
Cat Silhouettes dies
Frames & Flags dies
Banner Trio Dies
Heartfelt Meows stamps
Twiddler’s Nook Sweethearts embellishments
3D foam tape and foam squares
iCraft tape runner
Pink & Main embossing ink and embossing powder

I appreciate you sharing your time with me. Have a fabulous day!