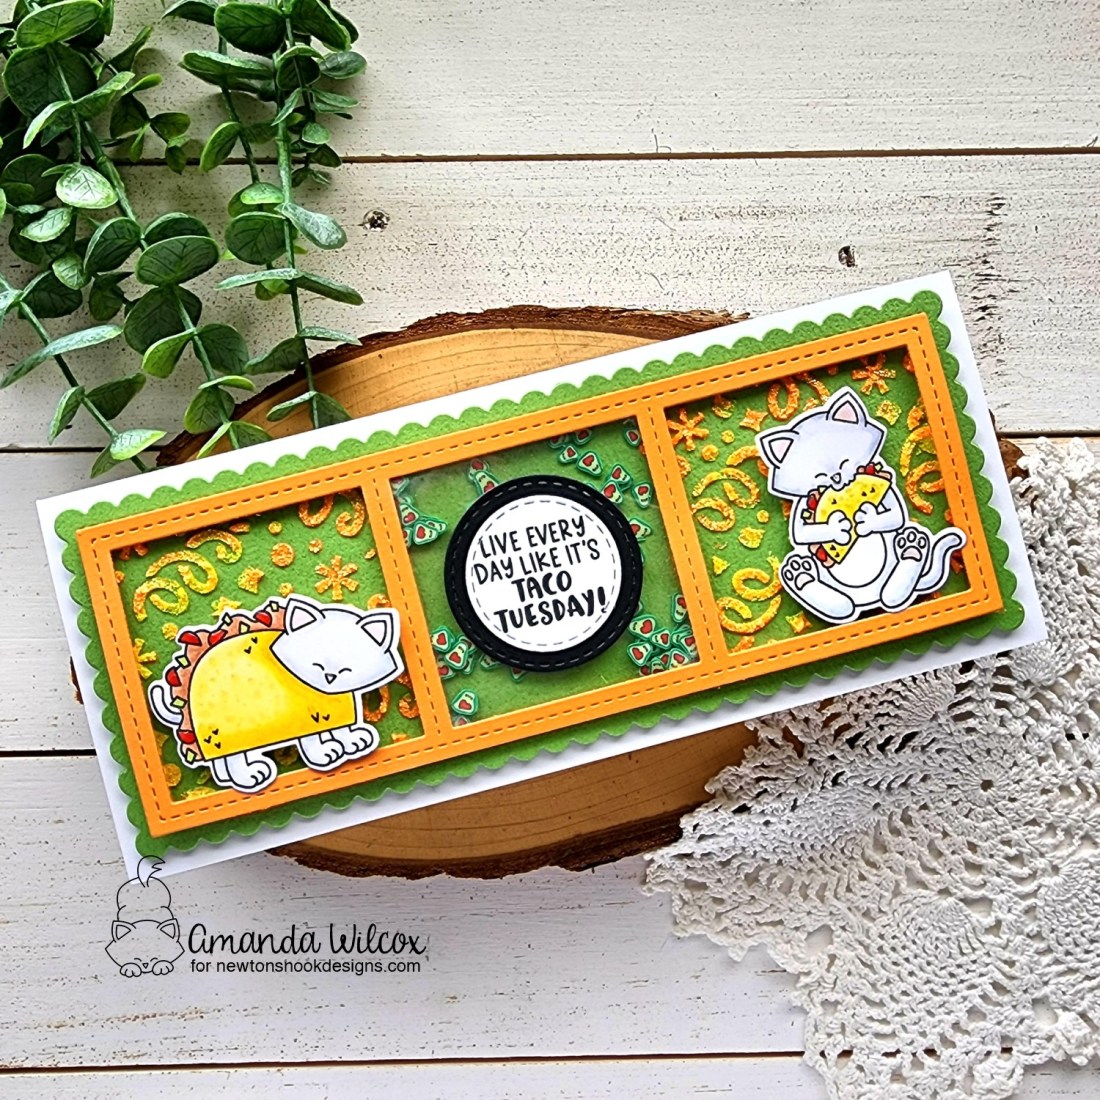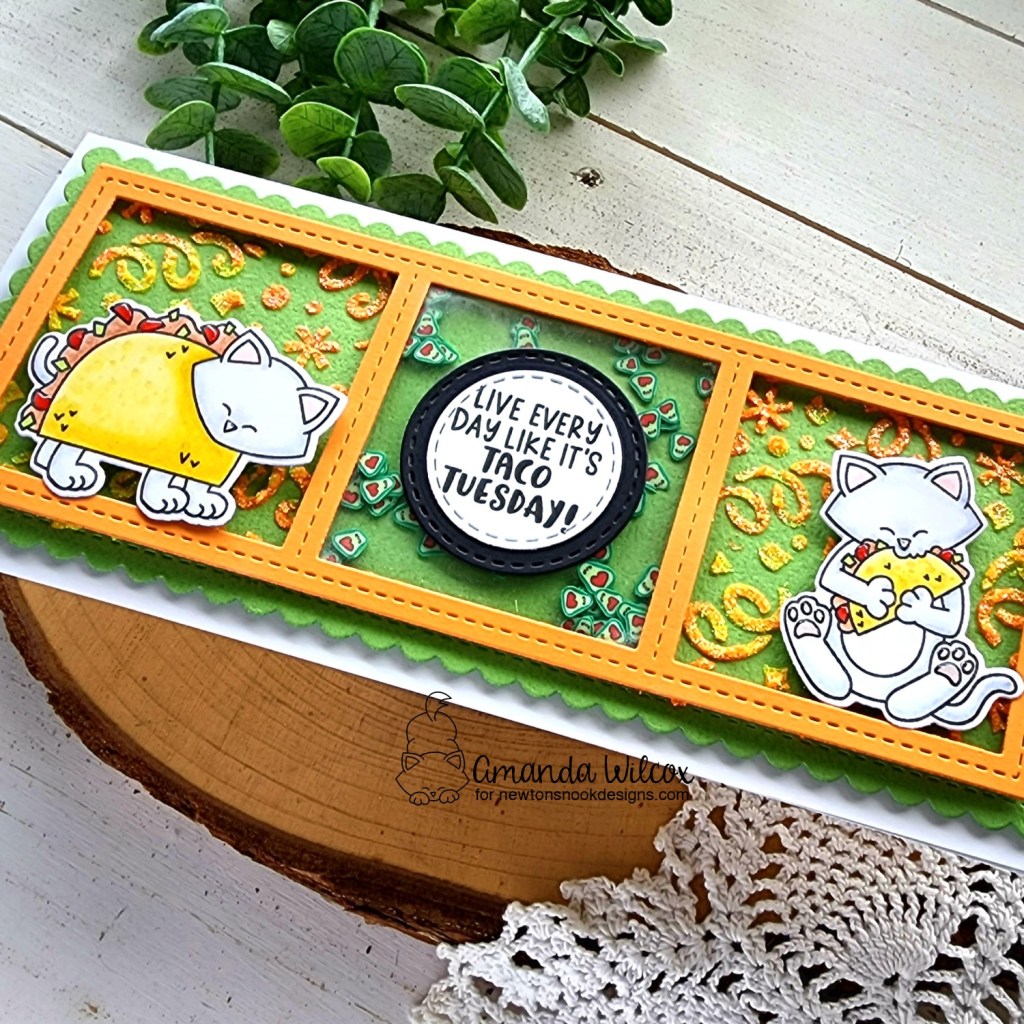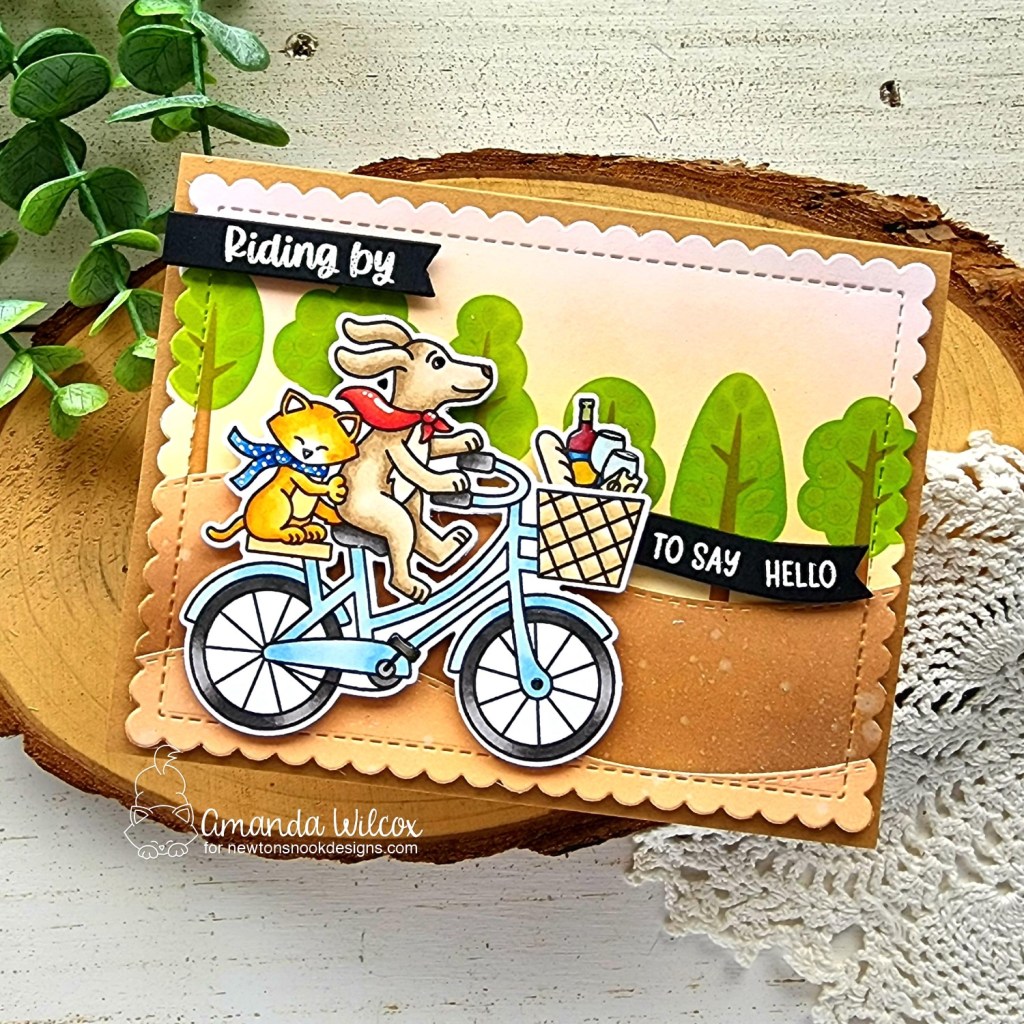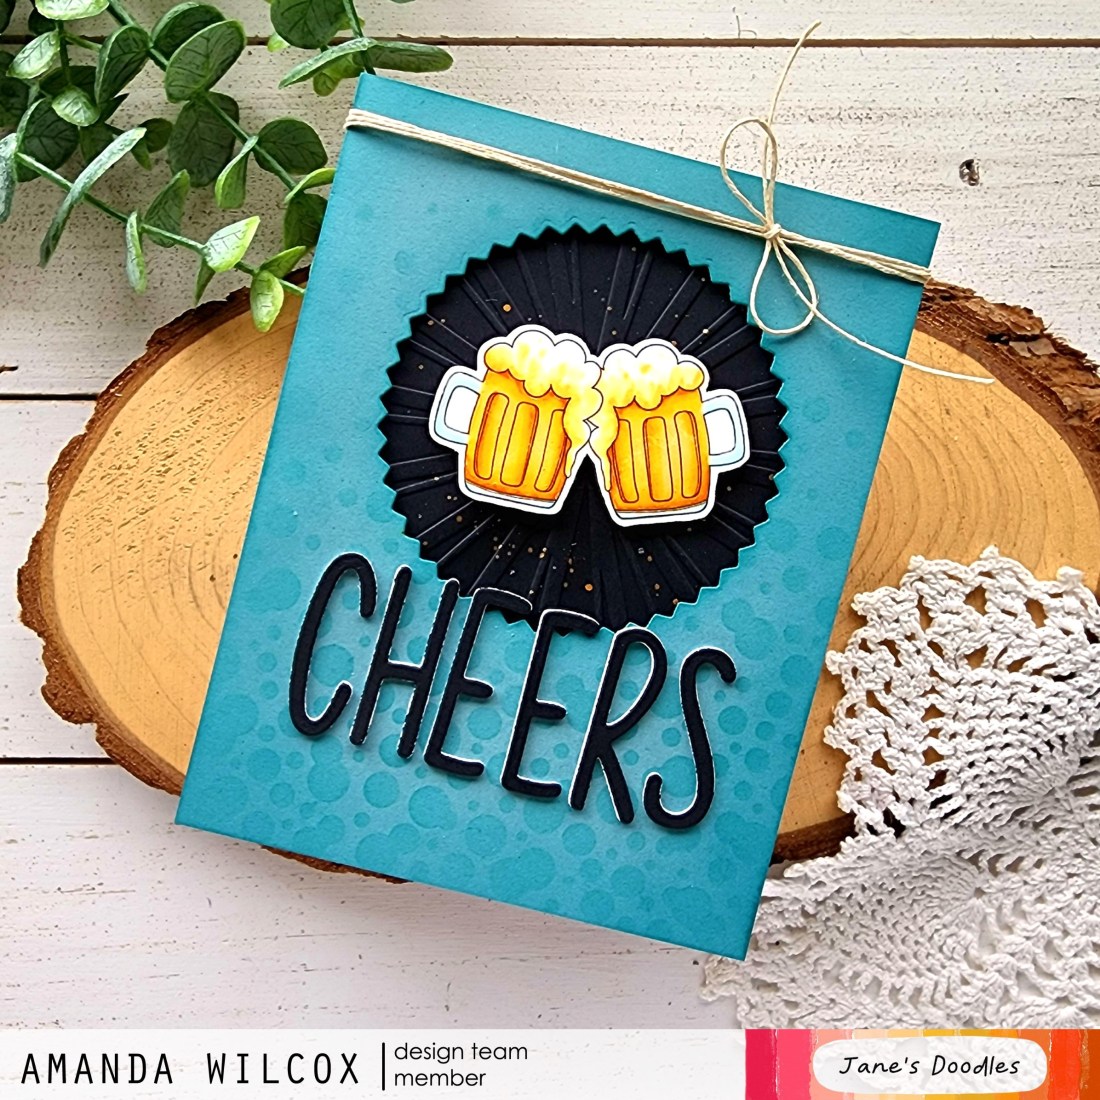
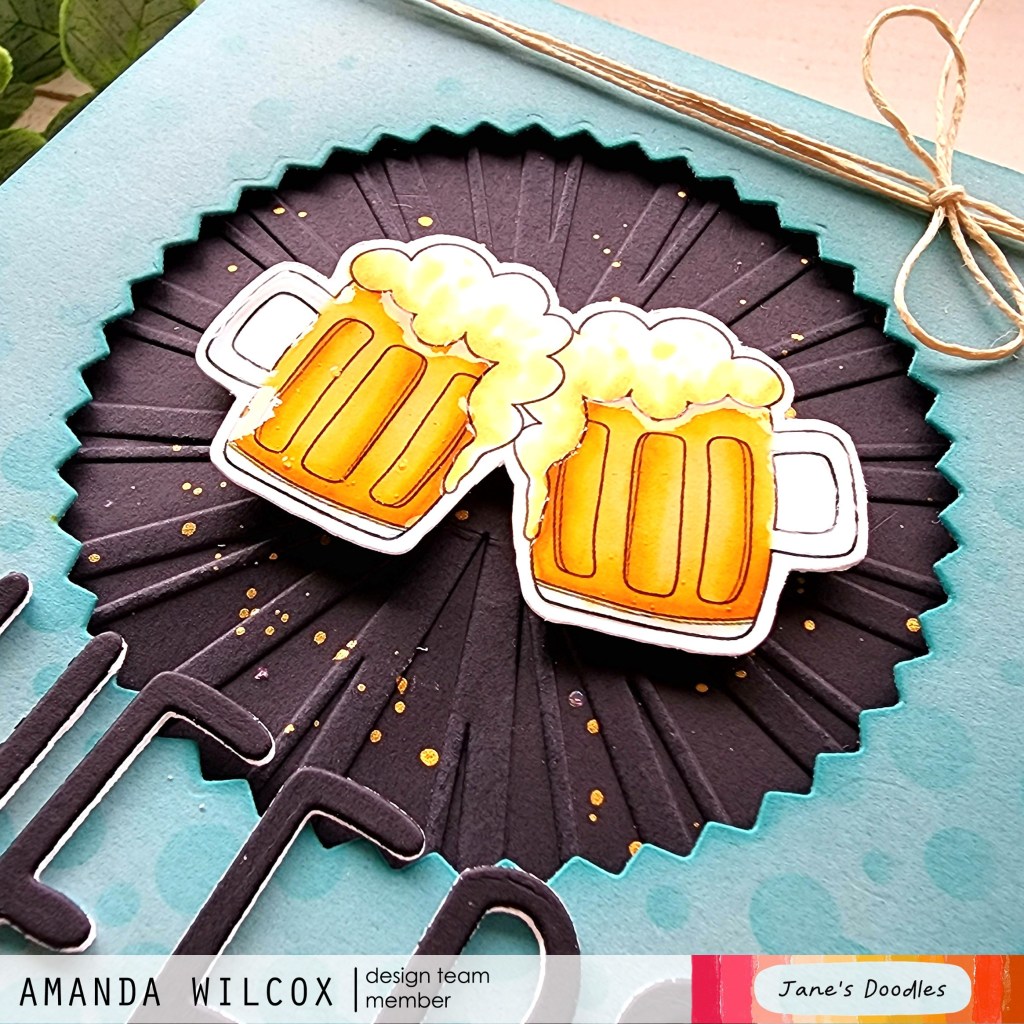
Hello again! I’m over on the Jane’s Doodles blog today with a card featuring the Cheers digital stamp. It’s simple but I love the masculine color palette and how the whole thing came together.

I printed my image and colored it with my copic markers before using the scan-n-cut to cut it out. Instead of using one of the digital sentiments in the set, I just pulled out my Pink & Main alphabet dies and cut the word “cheers” from white cardstock three times and black once. I used liquid glue to adhere them together and set an acrylic block on top while I worked on my background layers.
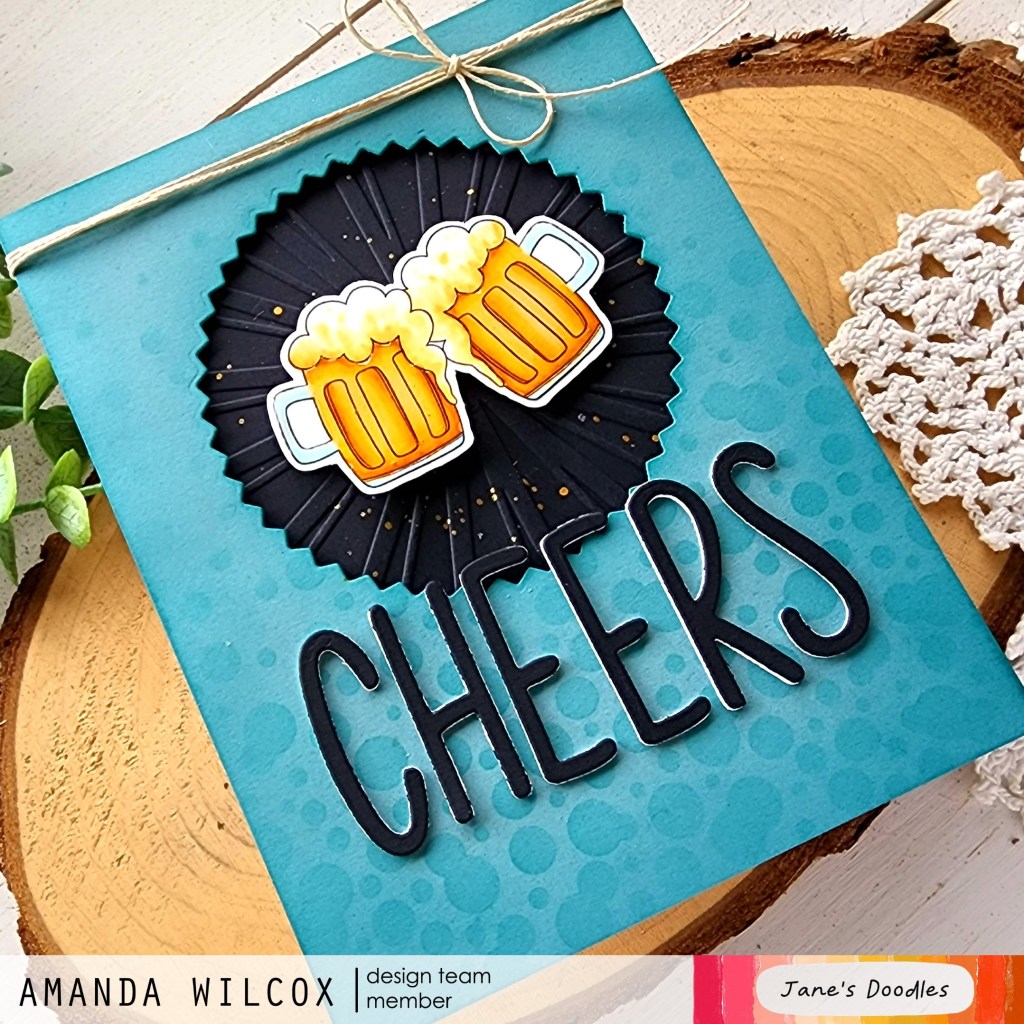
First, I took a black scrap of cardstock and used the Pink & Main Sun Ray embossing folder on it. I splattered it with gold watercolor and set it aside to dry. Then I cut an A2 size piece of dark teal cardstock and cut a zig zag circle out of the top-center big enough to frame up my beer mugs. Next, I pulled out the Newton’s Nook Bubbly stencil and inked it up with a dark teal ink for a tone-on-tone texture.
I popped the teal panel up on the black panel with foam tape and adhered that to a white card base with liquid glue. Then I popped the image up in the middle of the window with foam squares. I added the “cheers” letters with liquid glue and tied some twine around the top for a little interest and balance.
For finishing touches I added glossy accents to the glass portion of the beer mugs and that’s all. I intended this to be a masculine card so I didn’t want to add too much sparkle but I like the shine of the glossy accents and watercolor in the light.
Products used:
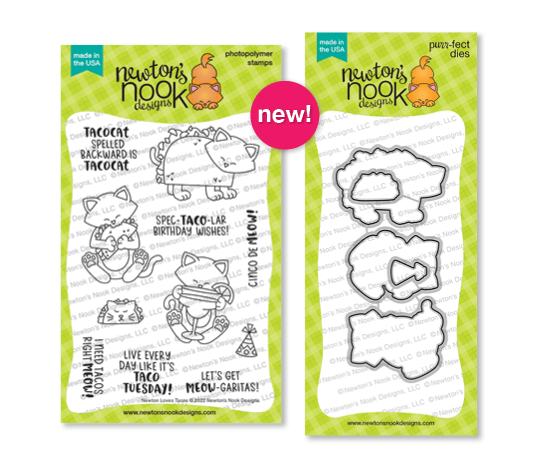
Jane’s Doodles Cheers digital stamps
Pink & Main Zig Zag Circle dies
Pink & Main Sun Ray embossing folders
Newton’s Nook Bubbly stencil
Blending brush
Lawn Fawn Rainforest ink
Foam tape and squares
Glossy accents
Bearly Art liquid glue
I appreciate you sharing your time with me. Have a fabulous day!