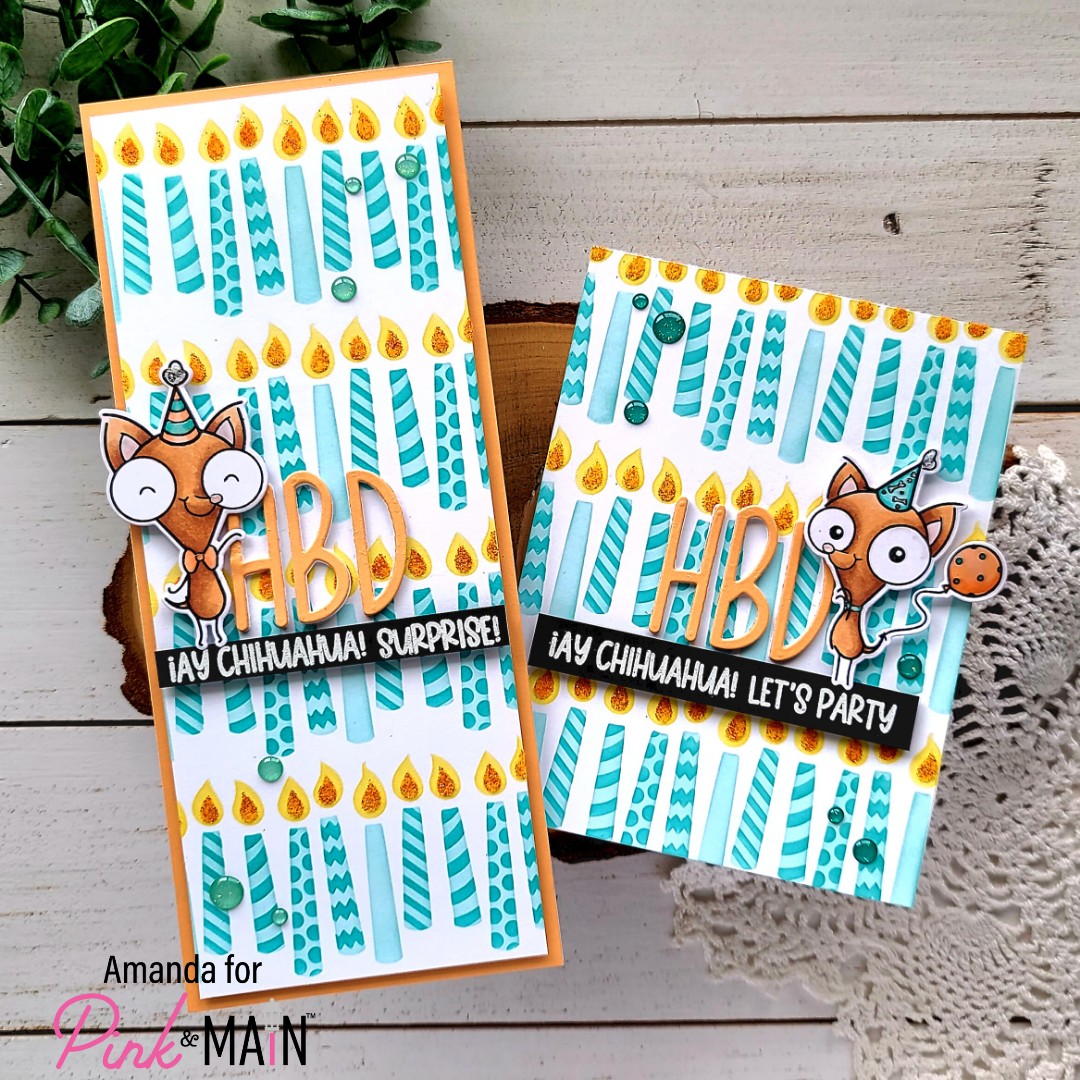
Hello again! Today I’m over on the Pink & Main blog sharing this pair of cards I made with the March release of birthday amazingness! The new version of stencils from Pink & Main are wonderful for all sizes of cards – A2, A7 and slimline alike! So today I took a fun design and made it in A2 and slimline versions to show you.

I started by creating the backgrounds just to play with the new Birthday Candles layering stencils. They are so fun and I just had to play. After creating the A2 version, I tested the size of a slimline and was SO HAPPY to realize it fits perfectly there too! So I made a second one the exact same way.
The candles are just light and dark teal ink for the candle, yellow ink for the flame and glossy gel through the inner flame. After I removed the stencil from the glossy gel, I poured on sparkling monarch flock and tapped it into each flame. I flicked off the excess and set the panels aside to dry.
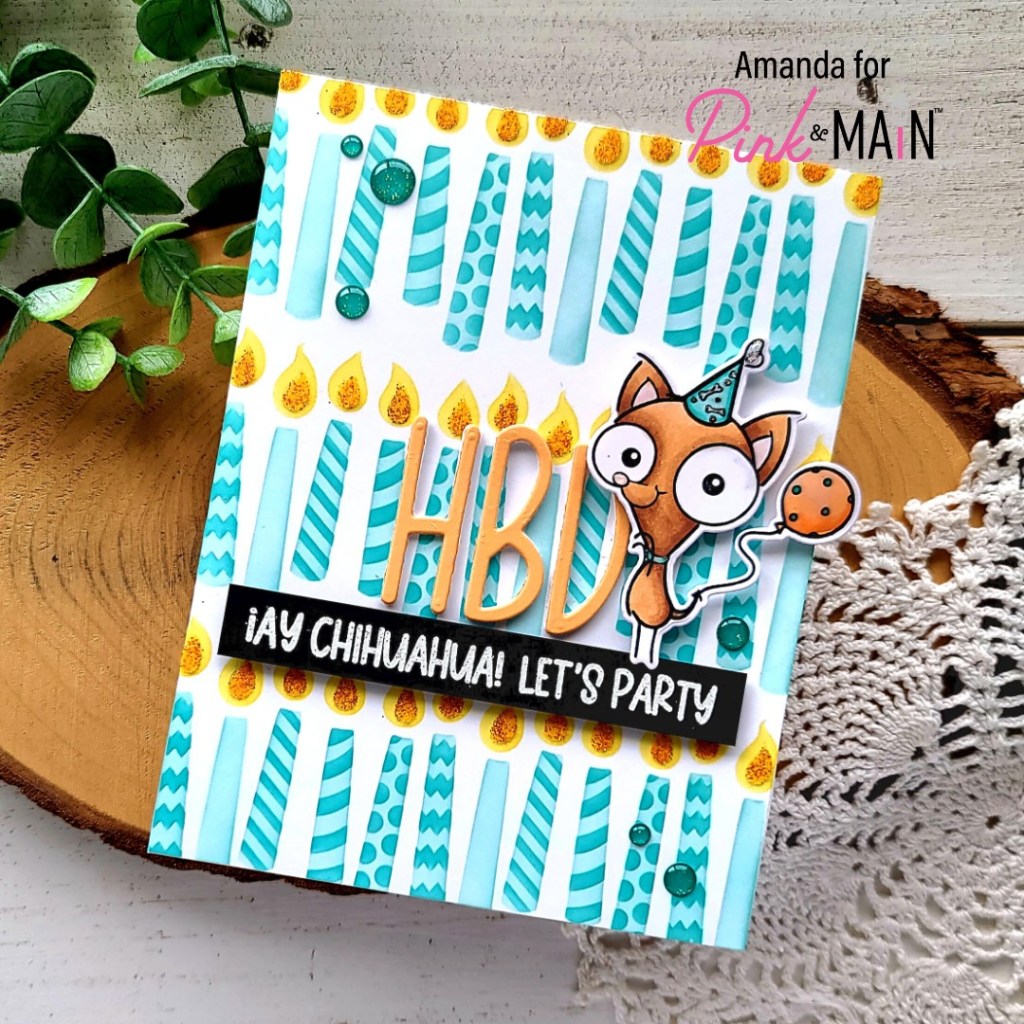
While the panels were drying, I stamped images from Yappy Birthday and colored them with my copic markers. I used the coordinating dies to cut them out and set them aside. Next, I die cut “HBD” letters from peach cardstock once for each card and white cardstock 3 more times for each card. I used my EZ Squeeze liquid glue to adhere the letters together and put acrylic blocks on top while they dried.

I chose sentiments for each card from Yappy Birthday and heat embossed them in white on black cardstock before cutting them into strips. Then I glued the letters down with liquid glue and popped the image and sentiment strip up with foam squares.
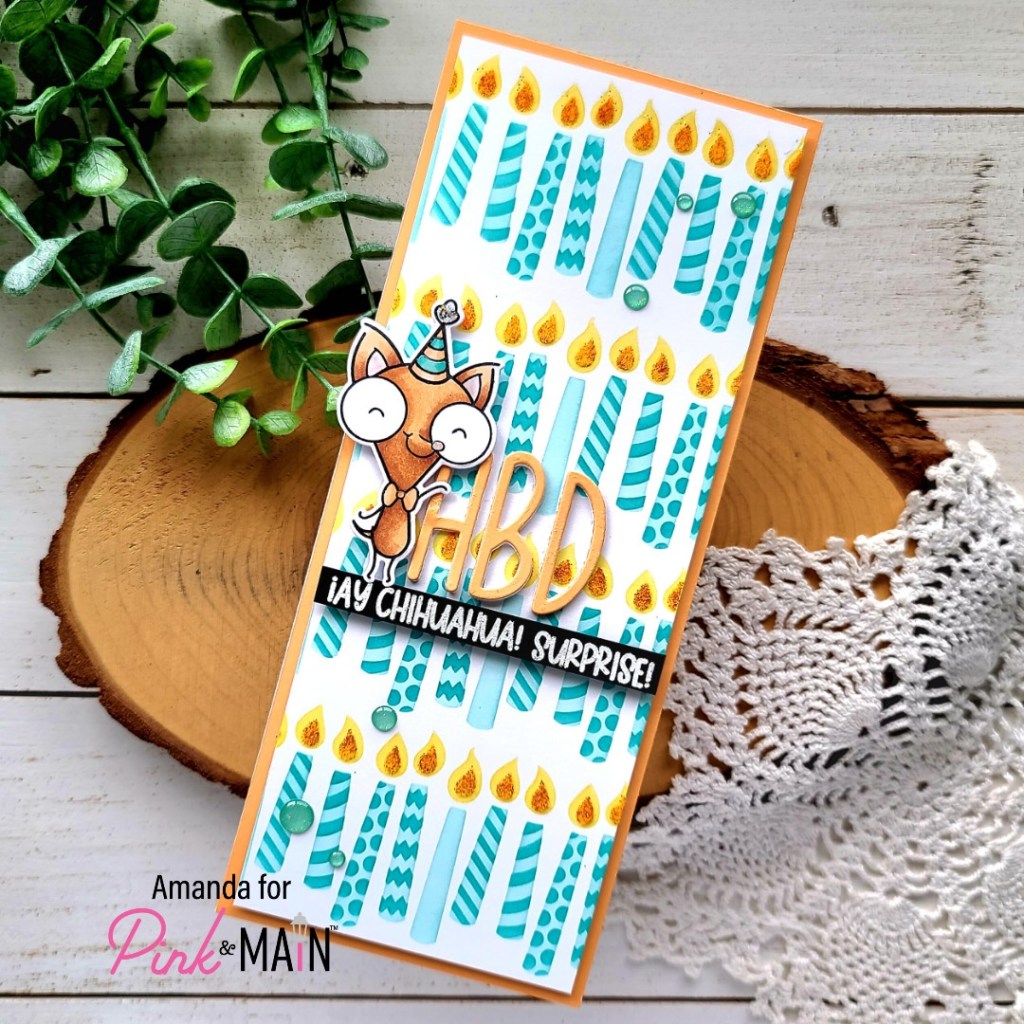
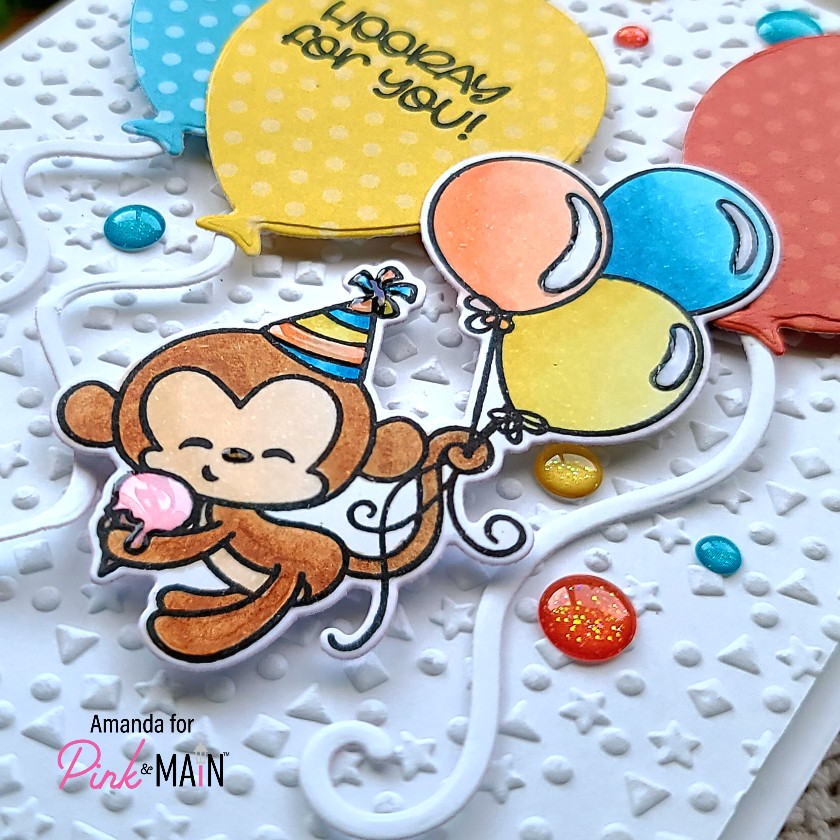
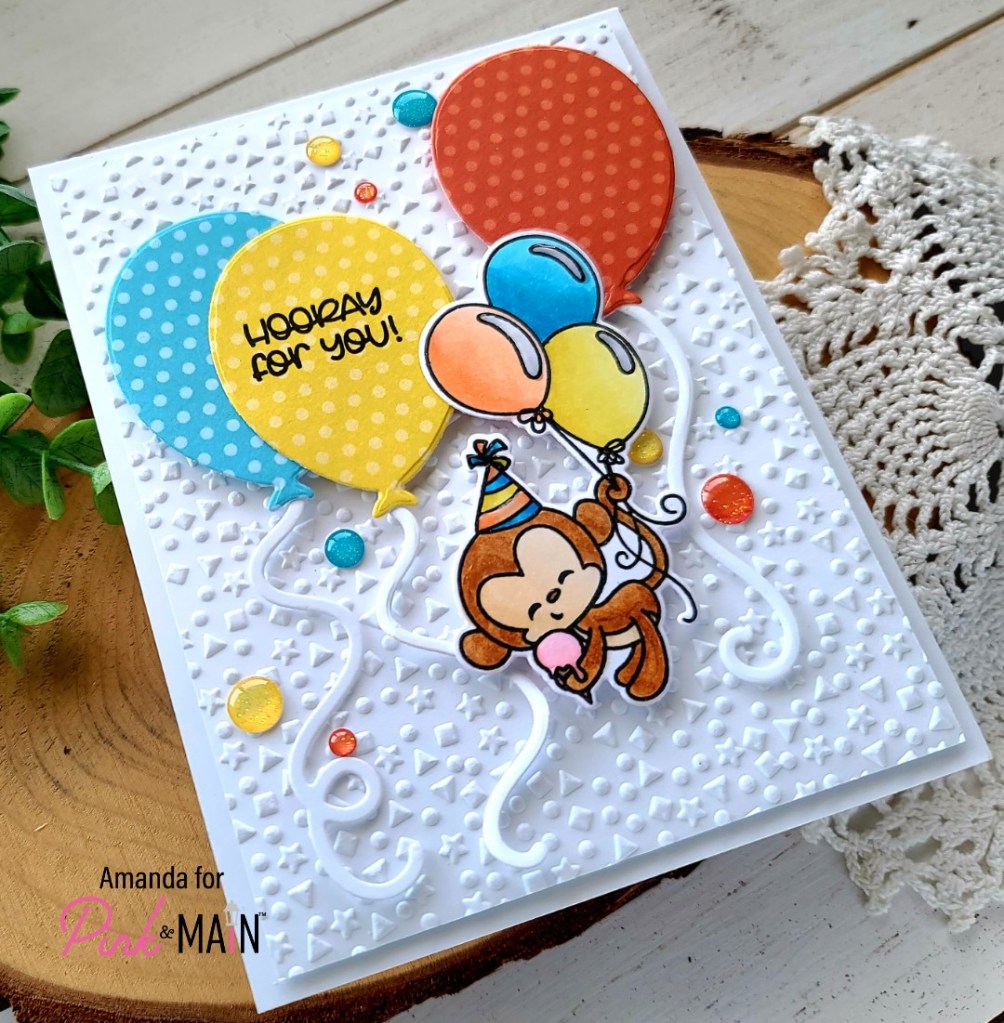
I absolutely made these cards simultaneously and the process was the same on both. I just used different pups for each card because it was a fun excuse to color different cuties!

For finishing touches on both cards, I added a scattering of enamel dots across the designs and unicorn Stickles on tops of the party hats. Then, last I added glossy accents to both images on the party hats, puppy noses and bowtie/collar.
I hope you liked seeing this card design and how you can do similar designs on different size cards depending on your need or mood.
Products used today:
Yappy Birthday stamps and dies
Birthday Candles stencils
Thin Alpha dies
Sparkling Monarch Flock
Glossy Gel
Vitamin Sea Glitter Enamel Dots
EZ Squeeze liquid glue
Glossy accents
Stickles – unicorn
Copic markers
I appreciate you sharing your time with me. Have a fabulous day!