Hey friends! I’ve got some fun sneak peeks for you from Pink & Main today! The new release is coming quick and it’s wonderful!
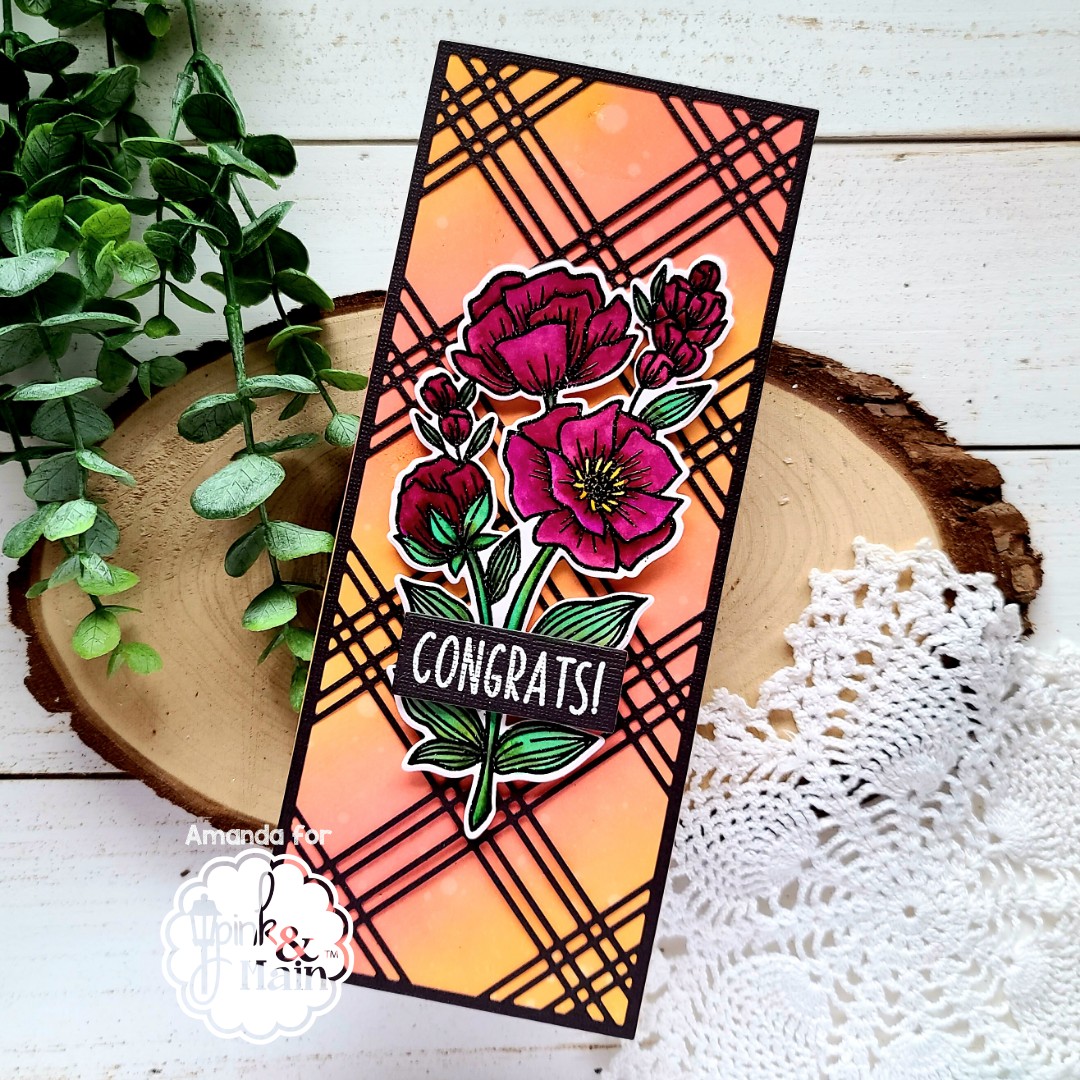
Check out that fantastic slim line plaid background die! It’s totally swoon worthy! There are also some gorgeous florals coming your way and lots of sentiments!
I heat embossed the florals today and watercolored them with my Zig markers and a waterbrush pen. It will forever be my favorite style for flowers. I used distress oxides on my background panel in abandoned coral and wild honey.
I hope you enjoyed today’s card! Stay tuned for the whole release from Pink & Main! You’re going to love it!
I appreciate you sharing your time with me. Have a fabulous day!
Hi again! I’m popping in one more time today for my final farewell for the 2020 Fall | Winter Coffee Lovers Hop! Today is the final day to link up your caffeinated projects for a chance to win one of the incredible prizes up for grabs!
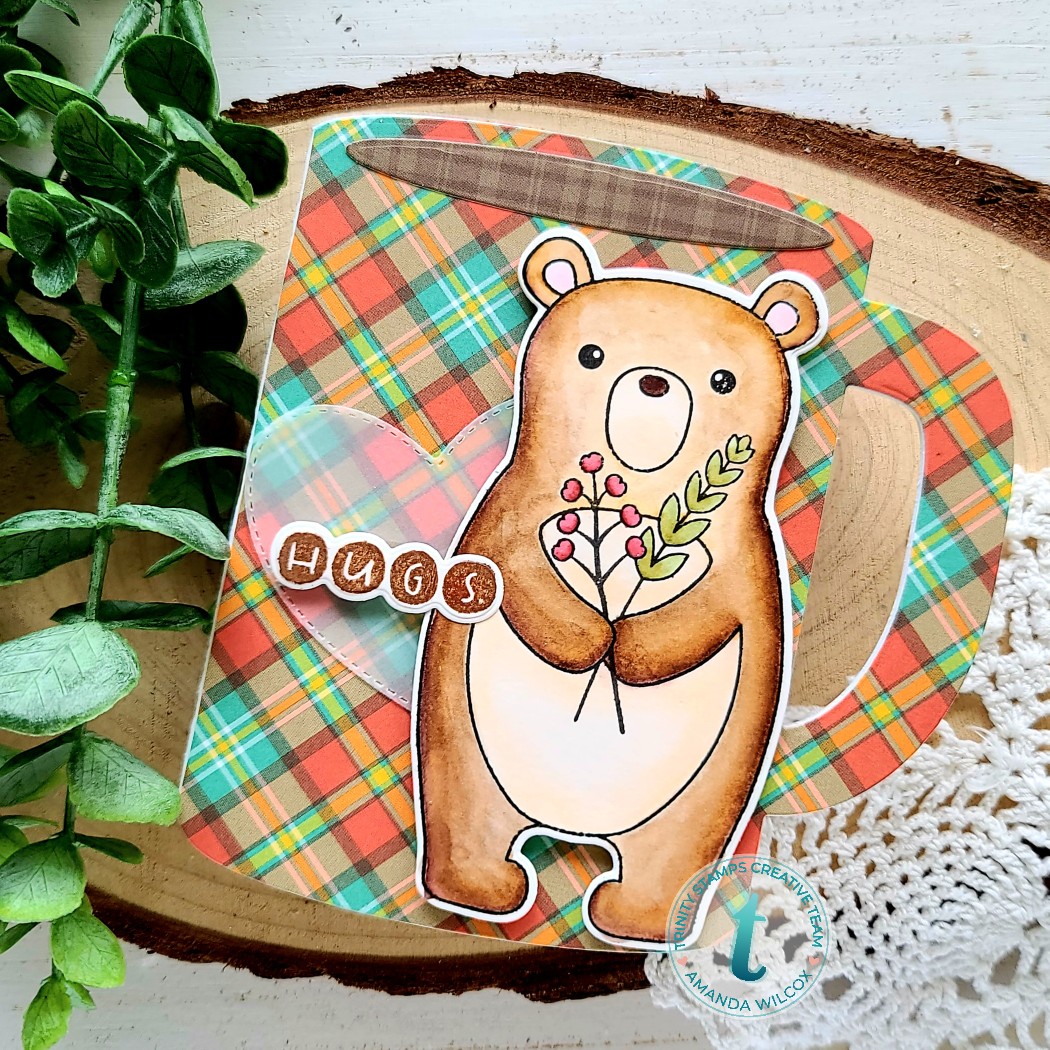
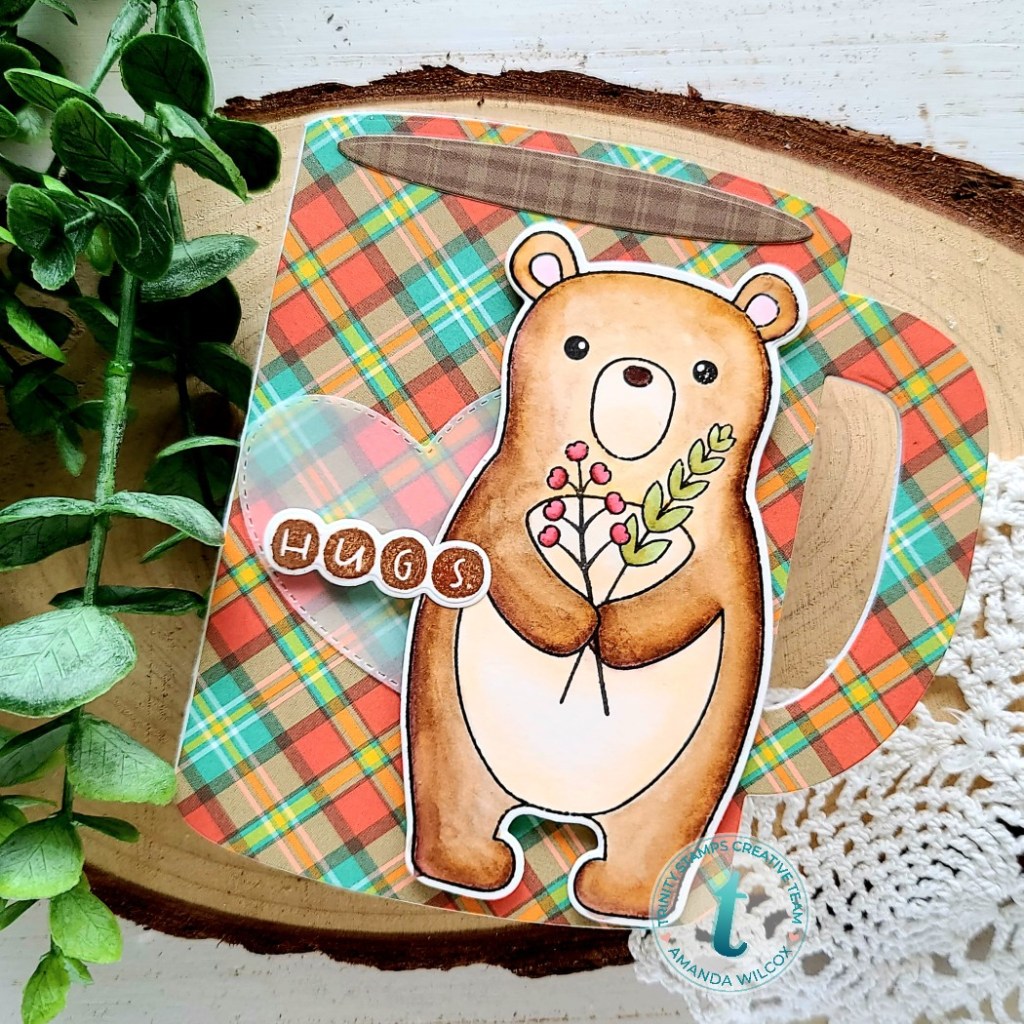
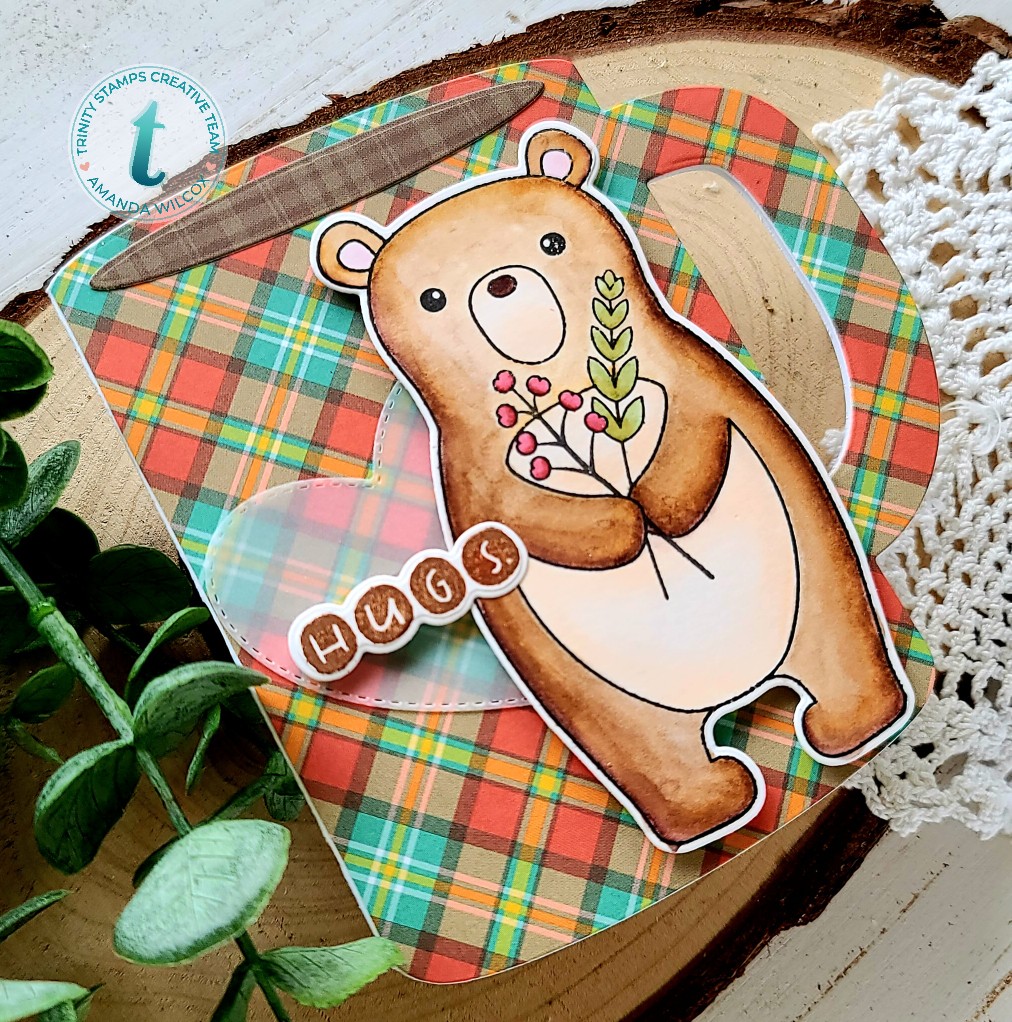
For today’s card, I played with my Zig markers and watercolored this sweet Trinity Stamps Blessing Bear image. I used the coordinating dies to cut him out, then stamped the sentiment with some Lawn Fawn walnut ink and used the dies to cut that out too.
I die cut the coffee mug card from white cardstock and then cut the front half from plaid patterned paper as well. I just trimmed off anything over the fold like and adhered it to the white mug shaped card base. I cut the die that makes it look like the coffee in the mug from brown plaid and glued it down too.
There’s a great stitched heart in the Slimline Frame and Fold die set that I cut out of vellum too. Then I used a combination of foam squares and liquid glue to adhere all my pieces.
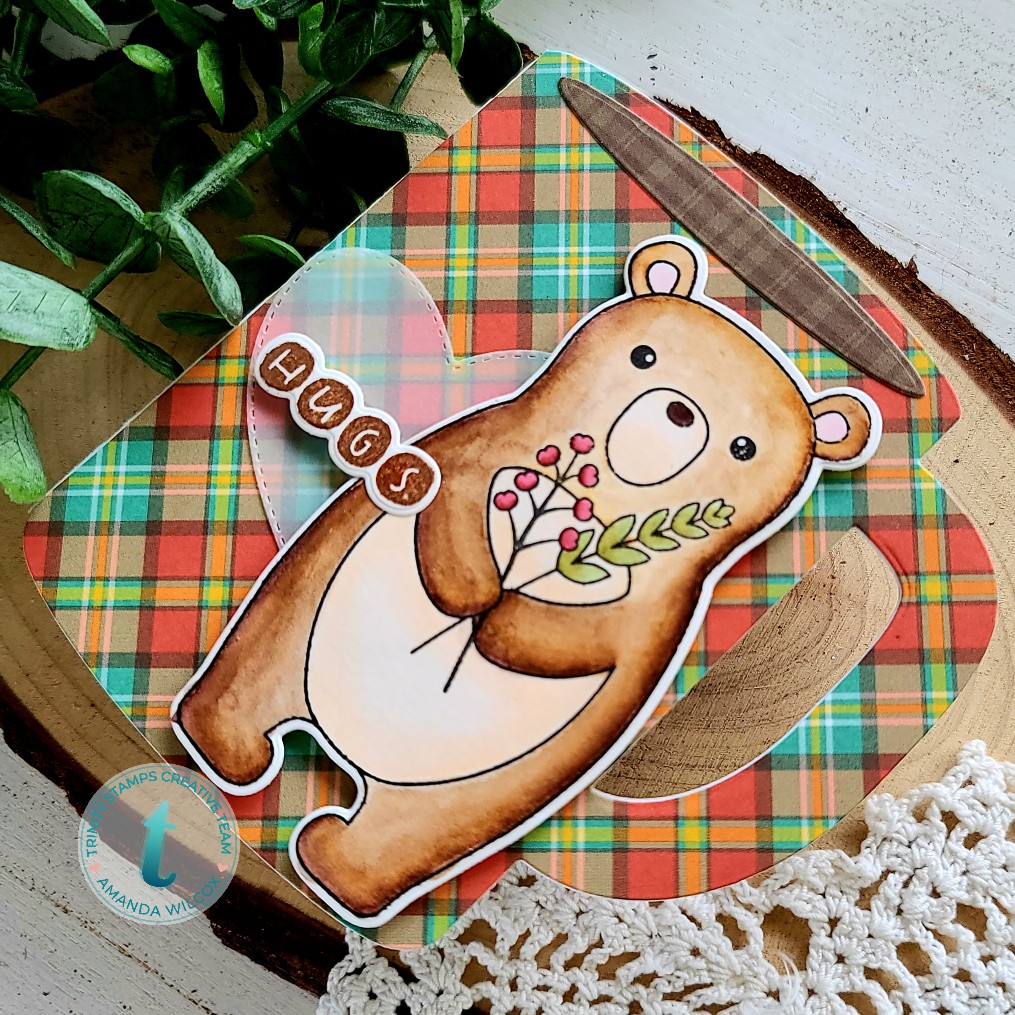
I just love this bear image. I think he’s the sweetest and was happy to include him in my collection of caffeinated inspiration for you all this week.
I hope you enjoyed all the inspiration and found a moment to craft along and link up some projects.
I appreciate you sharing your time with me. Have a fabulous day!
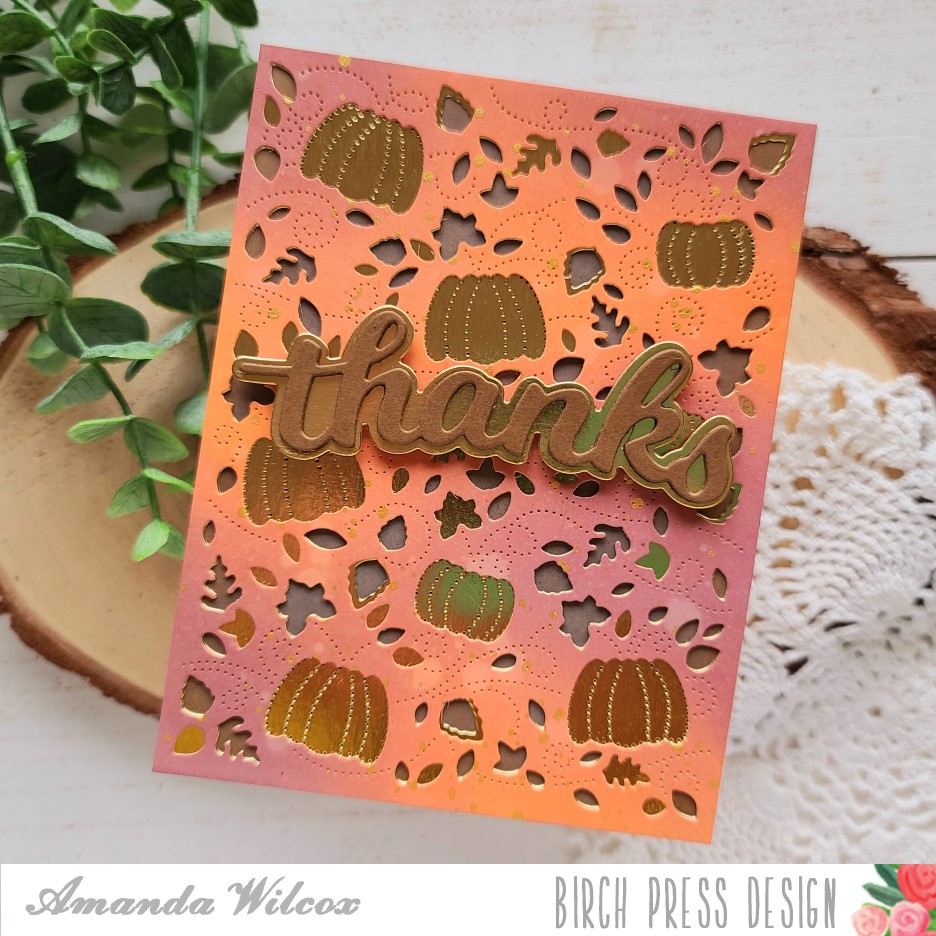
Happy Friday everyone! It’s been a long week and I’m so excited for the weekend. For today’s card, I’m sharing process photos on the Birch Press Design blog how to create this fall themed Thanks card. With Thanksgiving looking a lot different this year, I thought it would be nice to mail some thankful cards to friends and family to let them know I’m thinking of them.
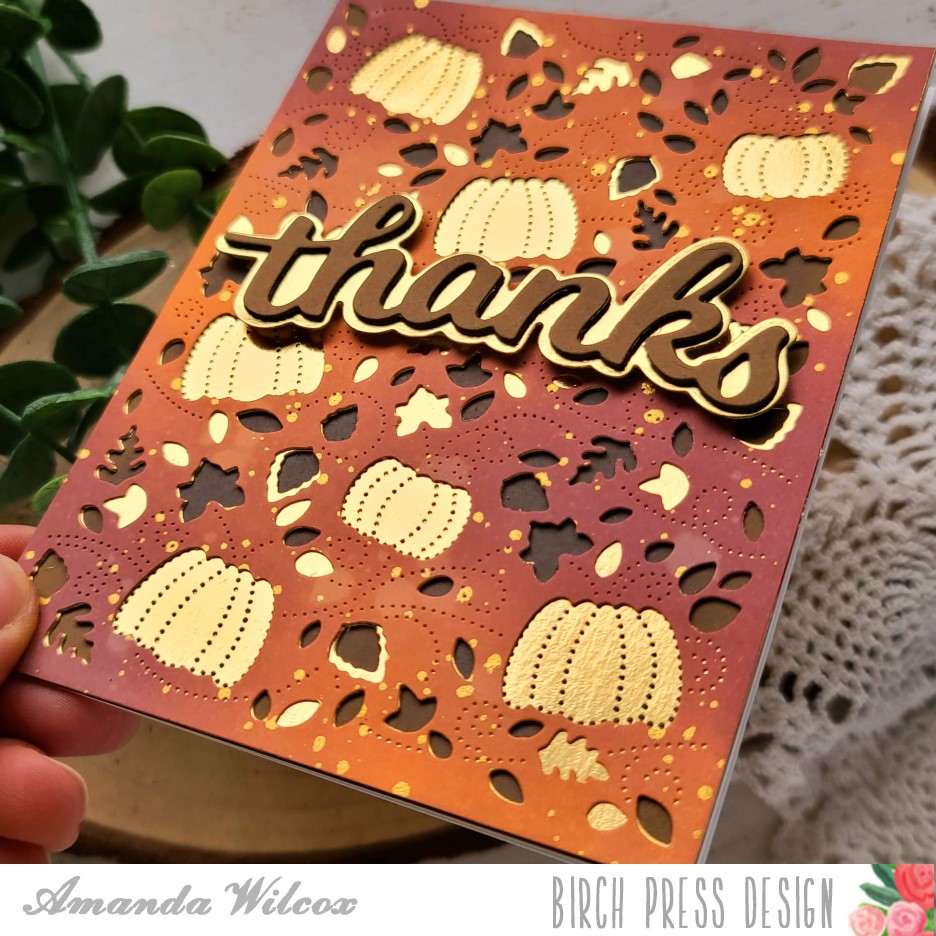
I paired some fun ink blending with distress oxides with mirrored cardstock on this layered die cut card. For a little extra interest I even added spritzed water to the distress oxides and flicked gold watercolor too. Seriously people, I love making a mess in the craft room!
Here’s a different look at it tipped in the light. That mirrored cardstock is just fabulous and adds so much to the layers. Don’t you think?
How is Thanksgiving looking for you this year? I’m curious how many people are altering their celebrations and how creative are you getting. Please share in the comments.
I appreciate you sharing your time with me. Have a fabulous day!
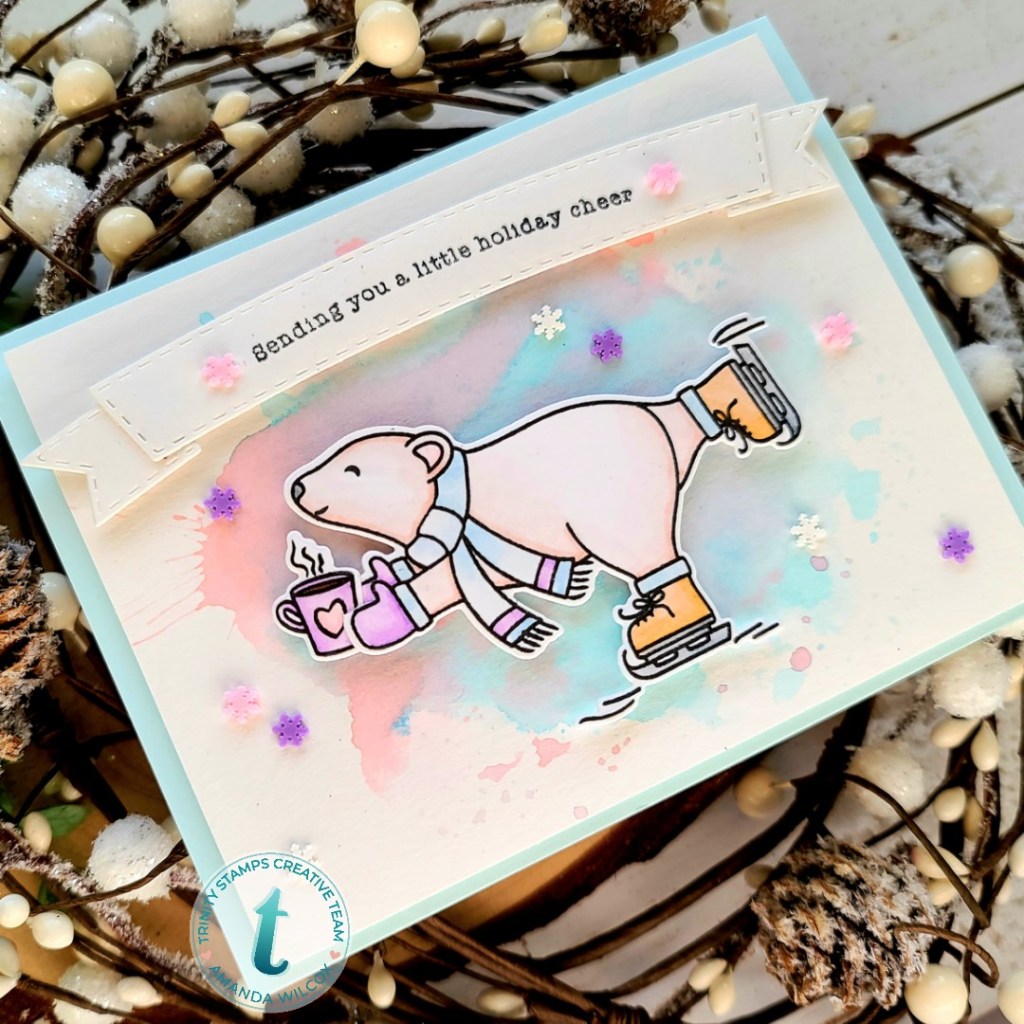
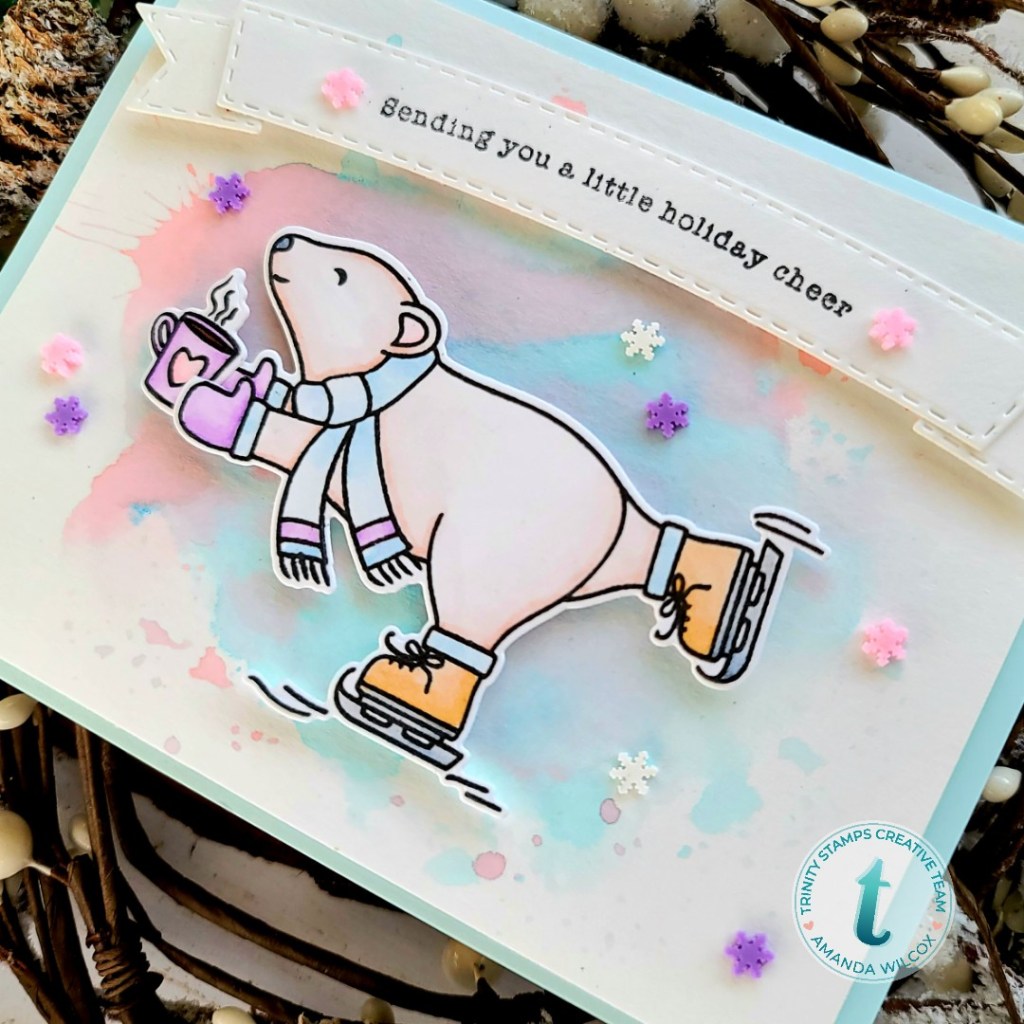
Hey friends! I’m over on the Trinity Stamps blog today with a bit more caffeinated inspiration for the 2020 Fall | Winter Coffee Lovers Hop that’s still going on through tomorrow. So get your crafty fingers working and link up some projects for a chance to win one of the amazing prizes up for grabs!
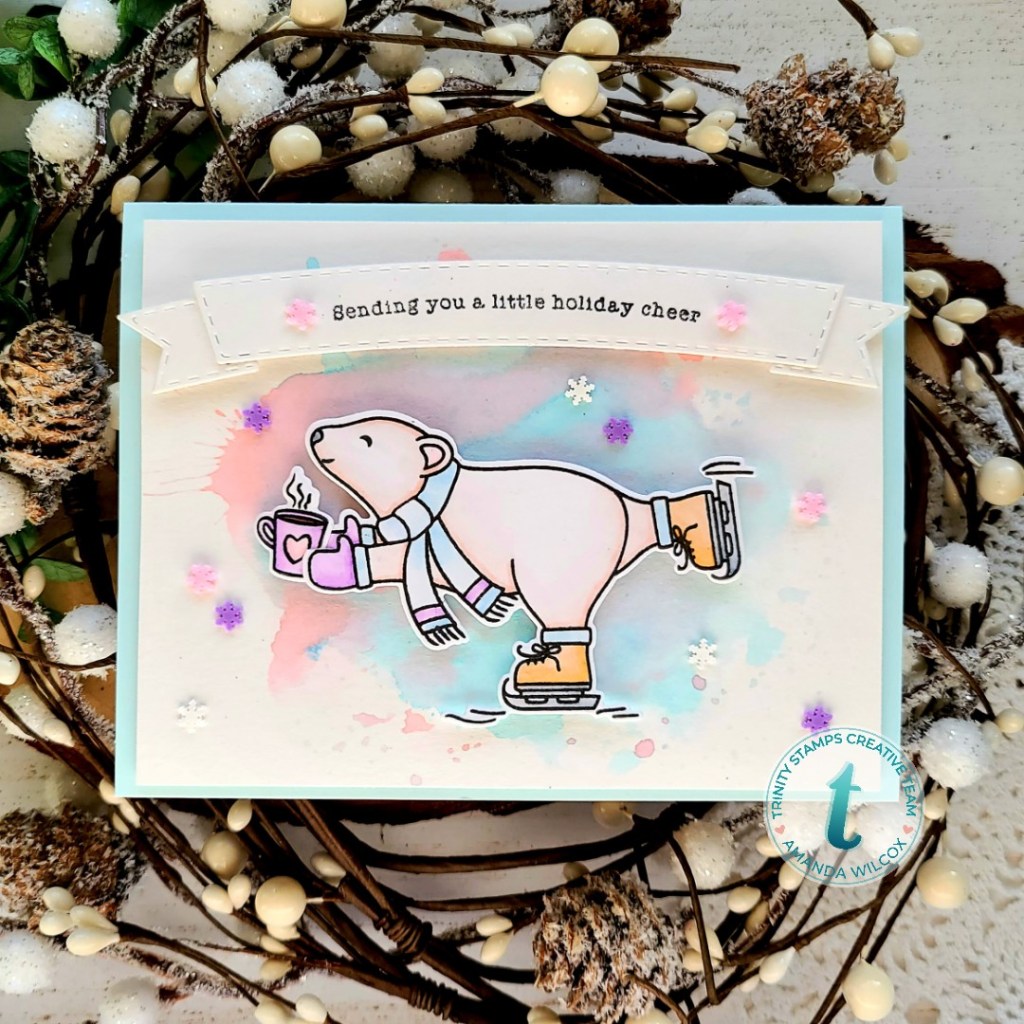
I had a little relaxing time watercoloring with my Zig markers the other night and am so thrilled with how this card turned out. It’s much more subtle than my typical color palette…I’m amazed that I was able to keep it chill. Haha!
I used some Tombow brush markers and an acrylic block on a piece of watercolor paper to create my ink smooshed background in colors that went with the images I colored earlier. After that was dry, I trimmed it down to 4×5.25 and popped it on a blue card base with foam tape. I added foam squares to the back of my banner and images and popped them in place next.
For finishing touches, I added a few Rainbow Blizzard embellishments scattered around the scene and on the banner too. I love having them flank the sentiment.
Have you ever been ice skating? I used to go a lot as a kid but we don’t have a rink anymore. This card makes me wish we did. I just love it.
I appreciate you sharing your time with me. Have a fabulous day!
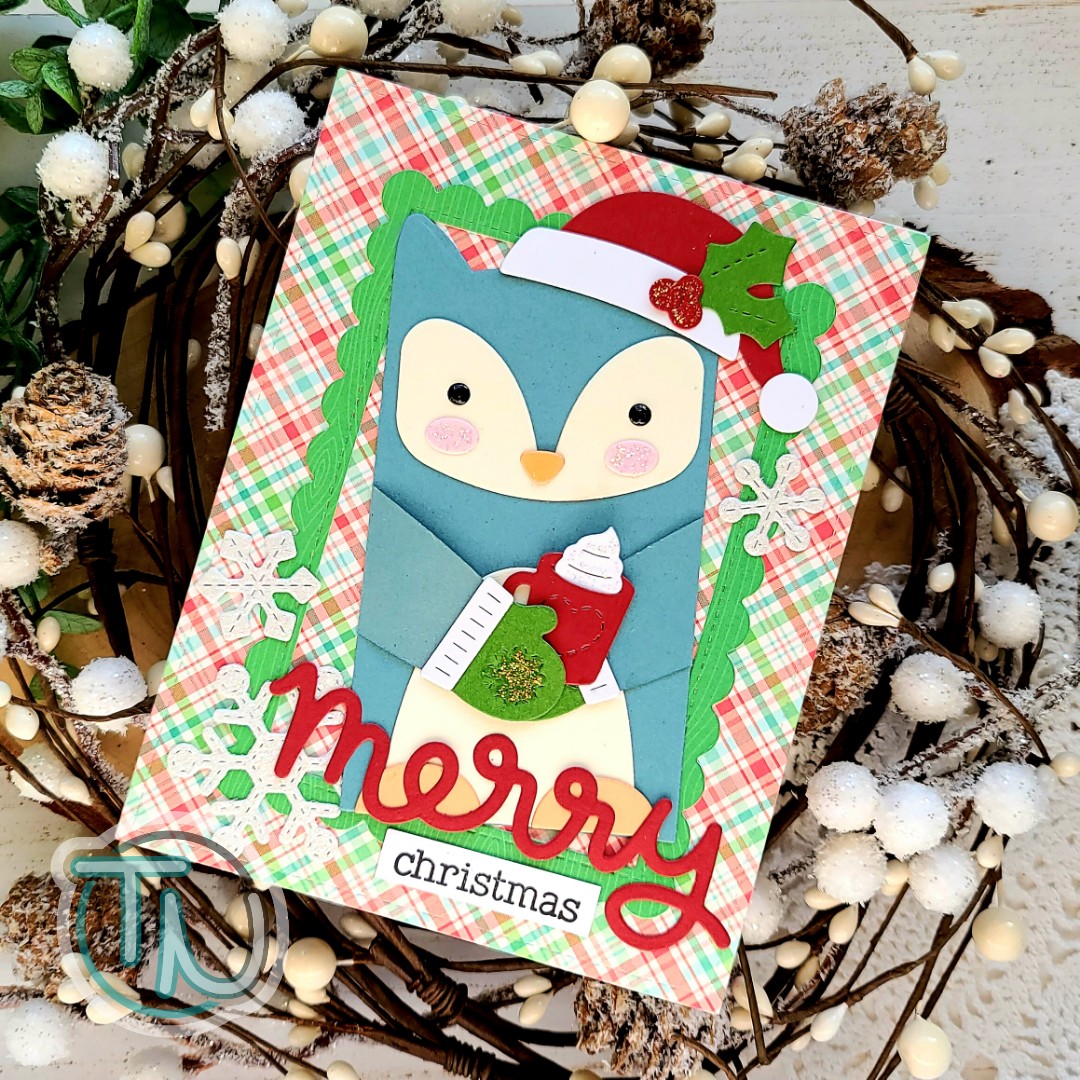
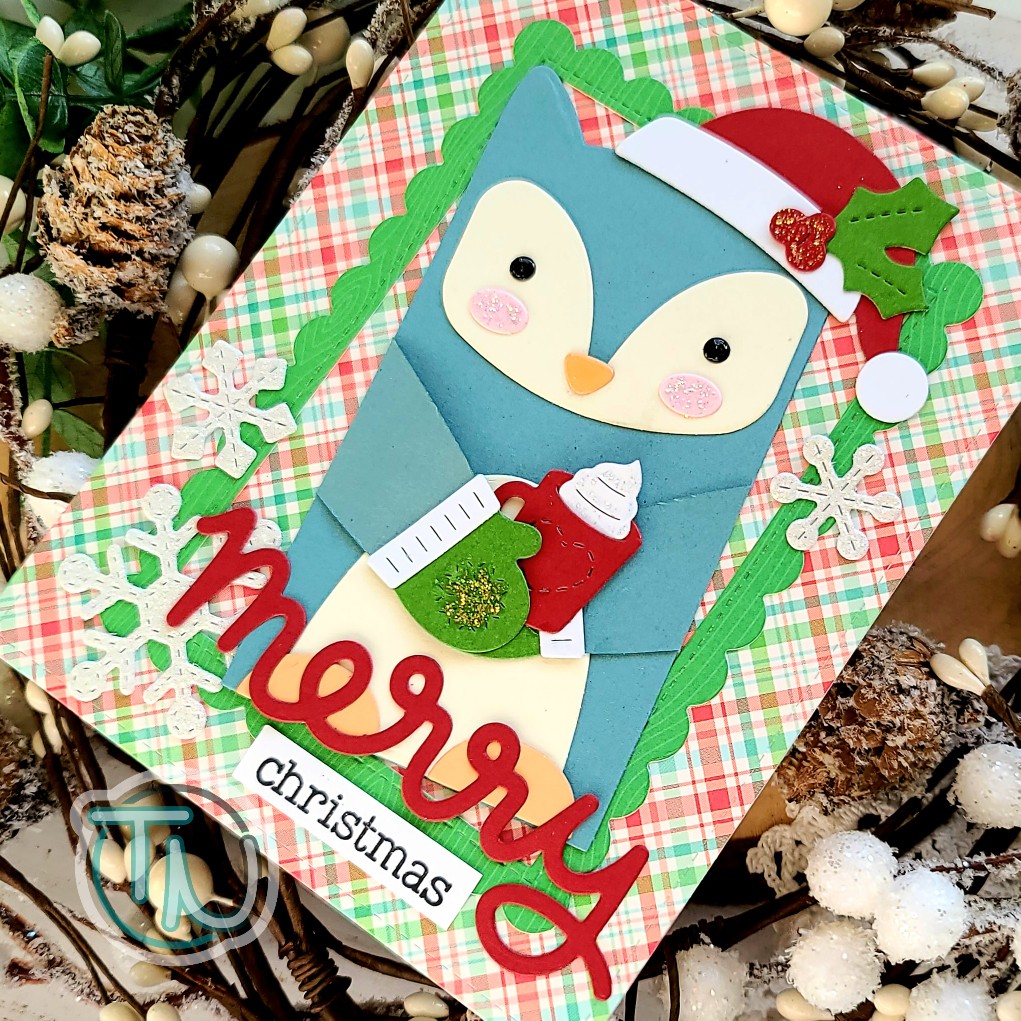
Hey there! I’m back with my daily entry and inspiration for the 2020 Fall | Winter Coffee Lovers Hop! I had some fun die cutting last night and playing with my Lawn Fawn goodies, which I don’t do as often anymore.
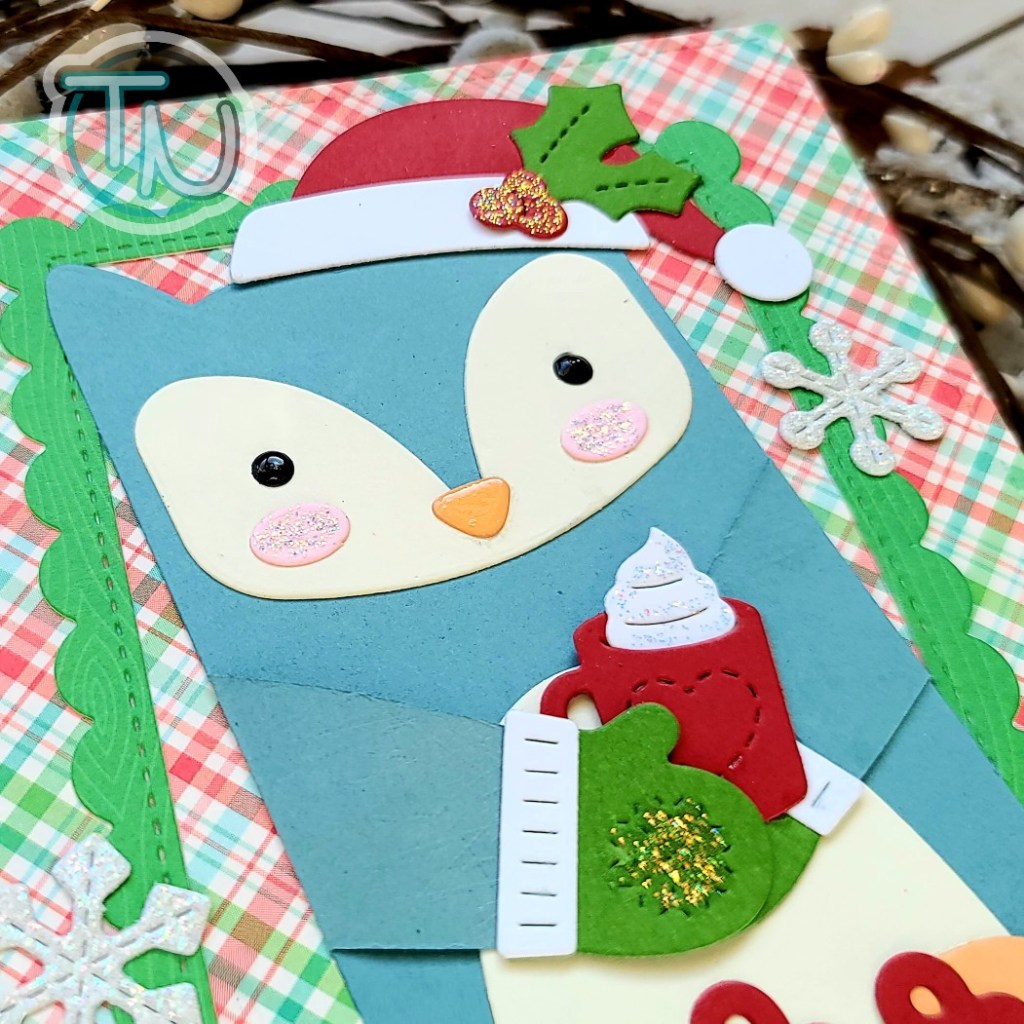
This card is pretty straight forward, die cutting my critter hugger elements and the holiday add on elements too and then I glued it all together. I used the scalloped stitched frames in green woodgrain over the plaid stitched rectangle. Then I pulled out the stitched snowflakes in white glitter paper for a little extra interest. I finishing things off with scripty merry and stamped Christmas from Cheery Christmas and cut it into a strip.
For finishing touches I added Unicorn Stickles to the mittens, whipped cream, holly berries and owl’s cheeks. Then I added glossy accents to the owl’s eyes and beak.
You can guarantee I’ll be playing with these cuties again very soon! I think maybe some shaped cards for Thanksgiving place markers would be a blast! Writing a thankful message inside each one! Wouldn’t that be great?
I appreciate you sharing your time with me. Have a fabulous day!
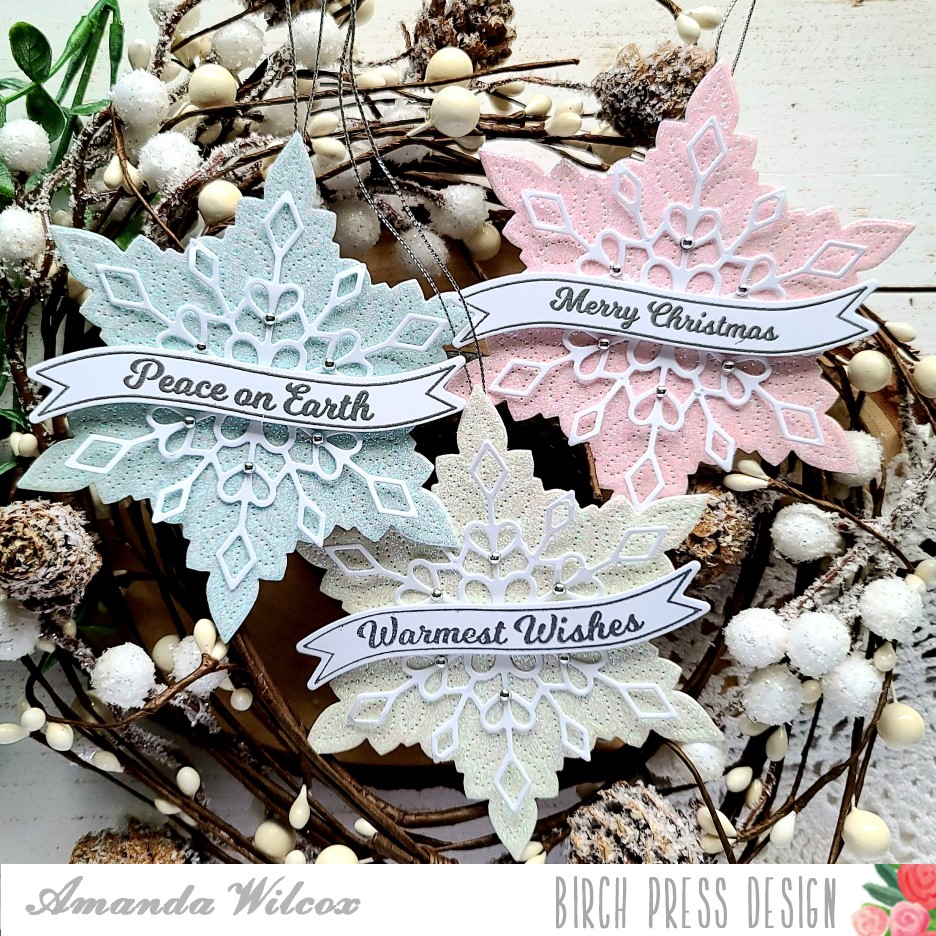
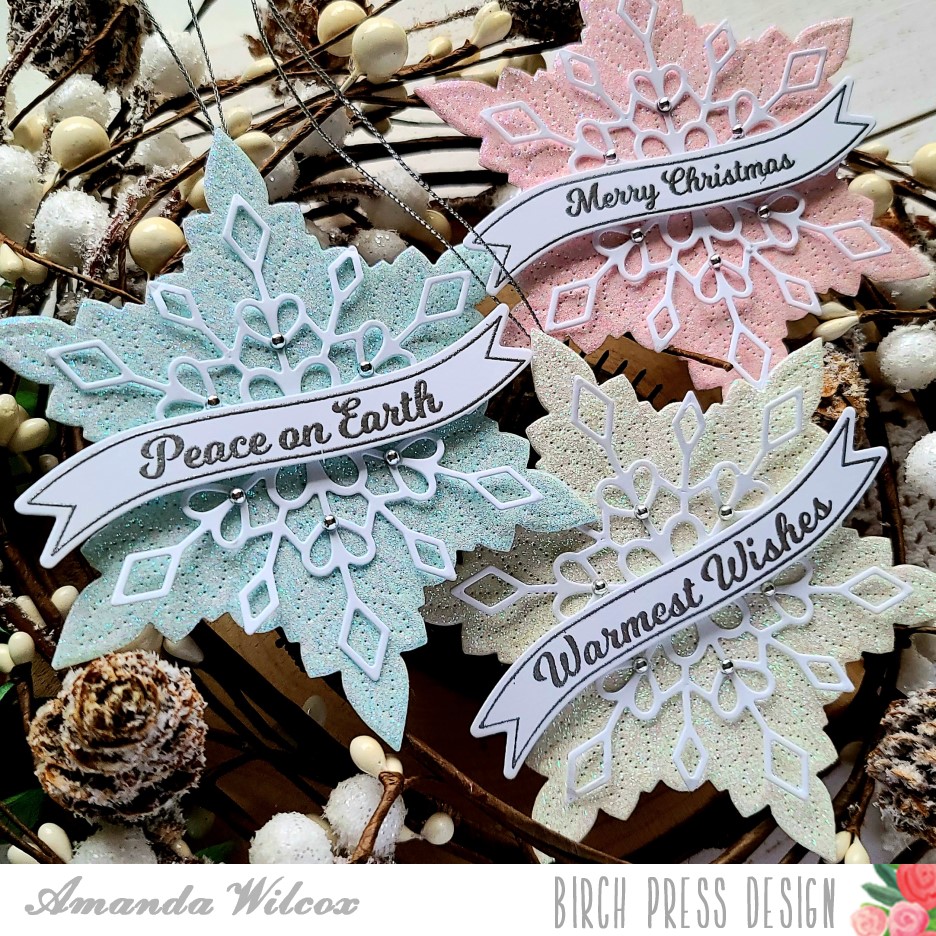
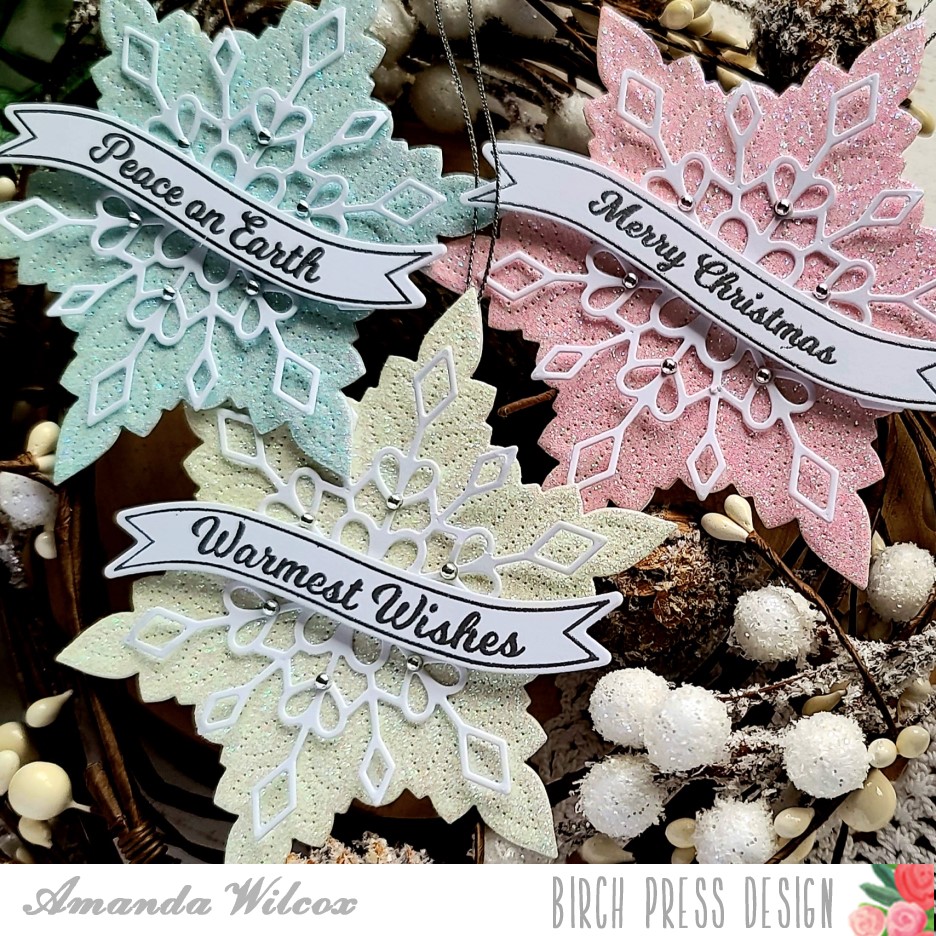
I’m back today with my final contribution to the 25 Days of Christmas tags featuring a set of 3 using stamps and dies from Birch Press Design. I enjoyed mixing and matching different products for today’s project. I hope you like them too.
To make these tags, I die cut the Pinpoint Snowflake 3 times using the Memory Box delicate pastels glitter cardstock. I love this die because you can choose to cut the pinpoint detail or not. So then I cut 3 more snowflakes without the detail from white cardstock and glued them back-to-back so I had a nice clean place to write the recipient’s name.
Then I die cut the Frosty Flake – Layer A 3 times from white cardstock and only glued it to the glitter snowflake in the center so the points lifted a little on their own. I really like this little detail.
Finally I took the wavy labels stamps from Christmas Ornament and Labels set, stamped and heat embossed them silver and used the coordinating die to cut them all out. These are all popped up with foam squares.
To finish these beautiful tags off, I added some silver baubles to the snowflake and glued some silver cording between the layers of the pinpoint snowflake. I used my tweezers to clamp this down while each one dried to make sure it had a good bond.
Don’t forget to head to Tracey’s main post HERE and see how to participate in the event and be eligble to win one of the incredible prizes she has up for grabs!
I appreciate you sharing your time with me. Have a fabulous day!
Hello again! I’m popping in a little late today because I made this super fun card yesterday for the Coffee Lovers Hop but ran out of daylight to take photos. I got some taken this morning and couldn’t wait to share. I had fun putting this one together.
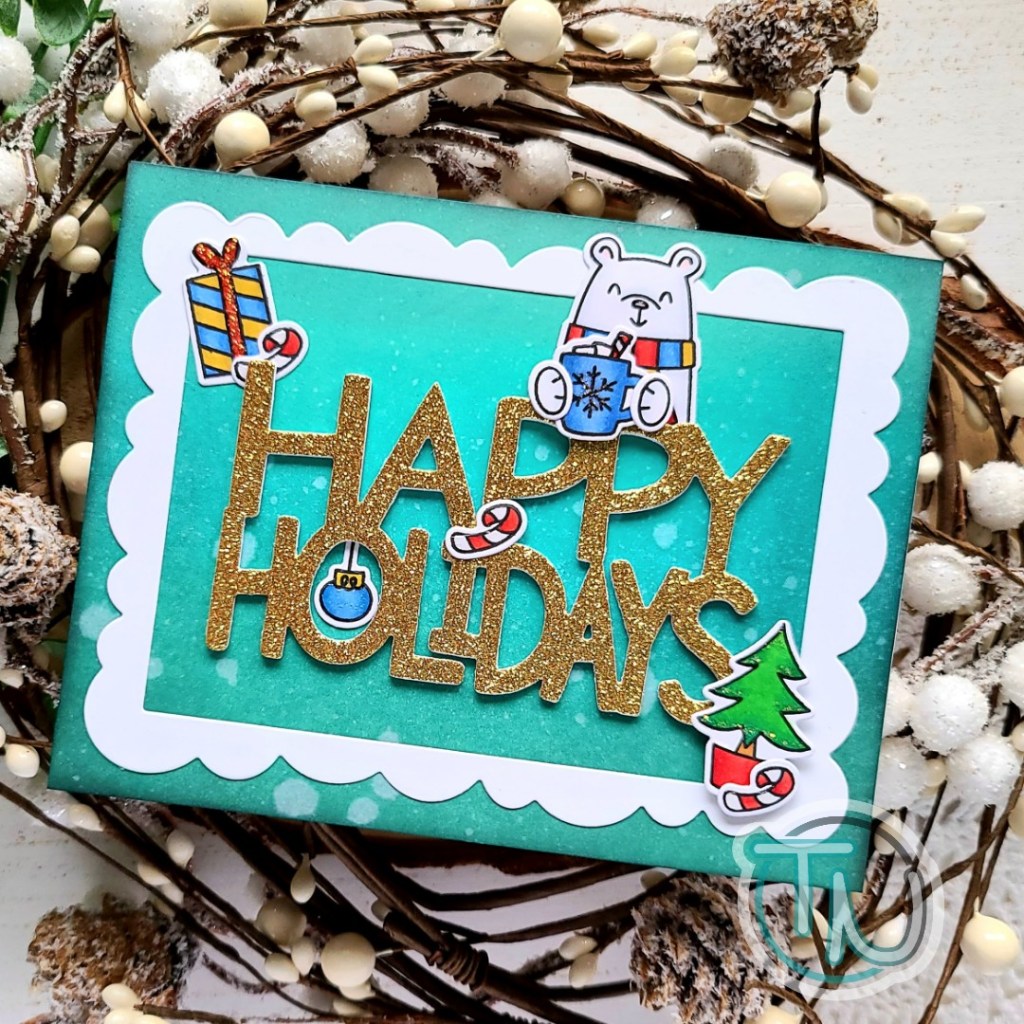
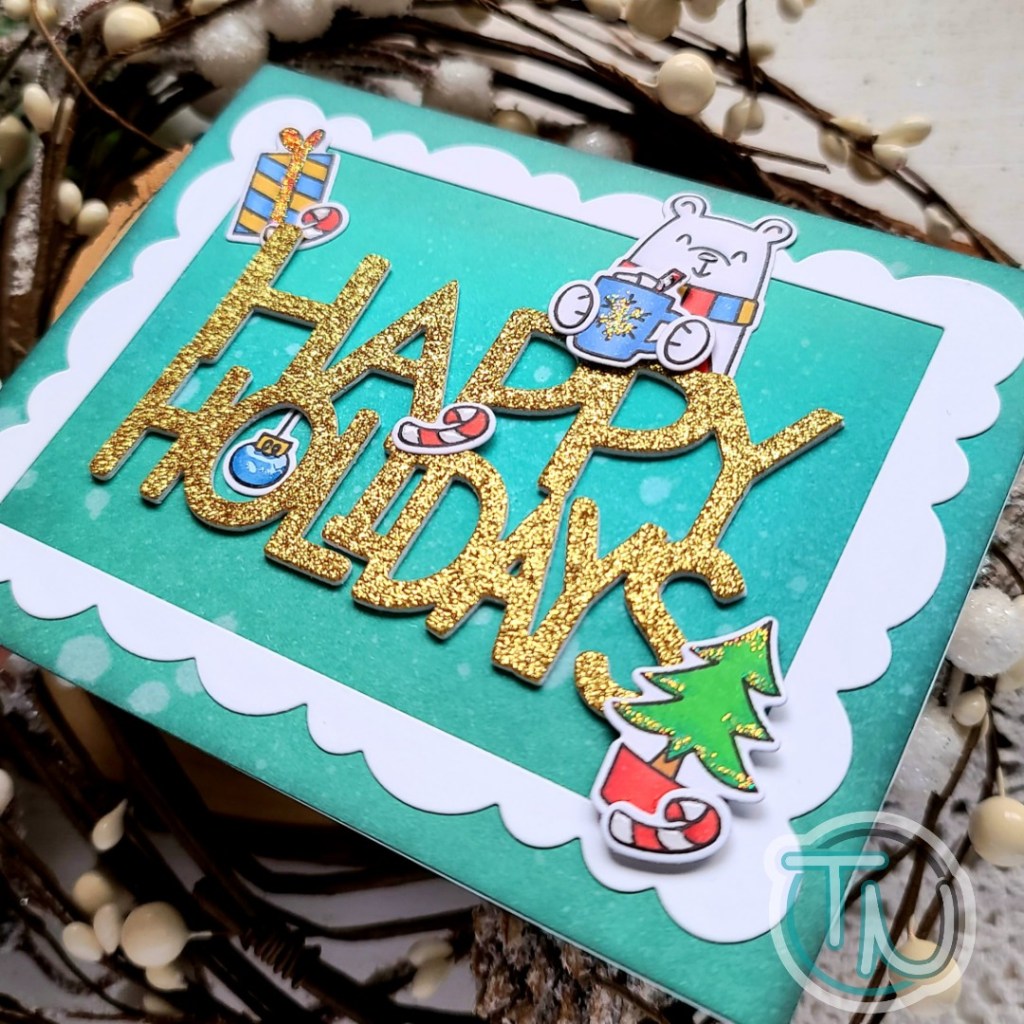
I had an idea so I started stamping and coloring my images from Avery Elle’s Cocoa Stand right away. I used the coordinating dies to cut them out and moved on to my die cut sentiment. At first I thought I would ink blend it and then I looked at my glitter cardstock and had to use that instead. There are 3 white sentiments glued together with the gold glitter glued on top.
Then I die cut a white Wonky Frame and set it all aside while I ink blended my background. This ended up being distress inks in evergreen bough, mermaid lagoon, cracked pistachio and black soot spritzed with water and blotted dry.
I used a combination of liquid glue and foam squares to adhere all of my images and then added them all to the inked panel. The panel was glued to a white card base and I moved on to finishing touches.
For those I used a combination of glossy accents and Unicorn Stickles on the various images throughout the whole design.
I just love all the fun glitter and shine that’s going on with this happy card. I hope you enjoyed it too. I’m linking up to the Coffee Lovers Hop. Are you playing along?
I appreciate you sharing your time with me. Have a fabulous day!
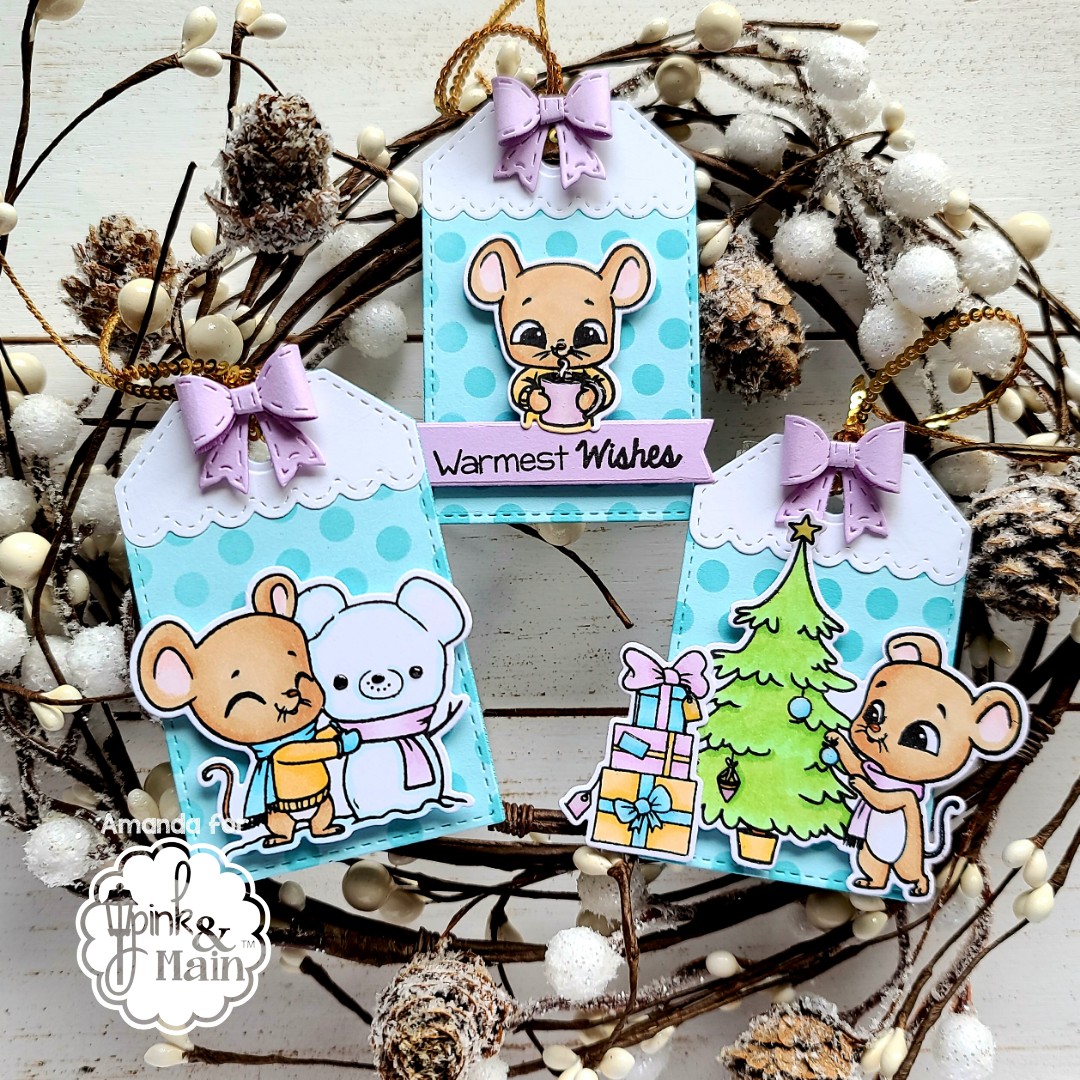
Hey friends! I’m back with round 2 of 25 Days of Christmas Tags and today we get to play with Pink & Main products! Don’t forget to head to Tracey’s main post HERE to find out how to play along and enter to win from the array of amazing prizes up for grabs! Without further ado, let’s get to the cute stuff!
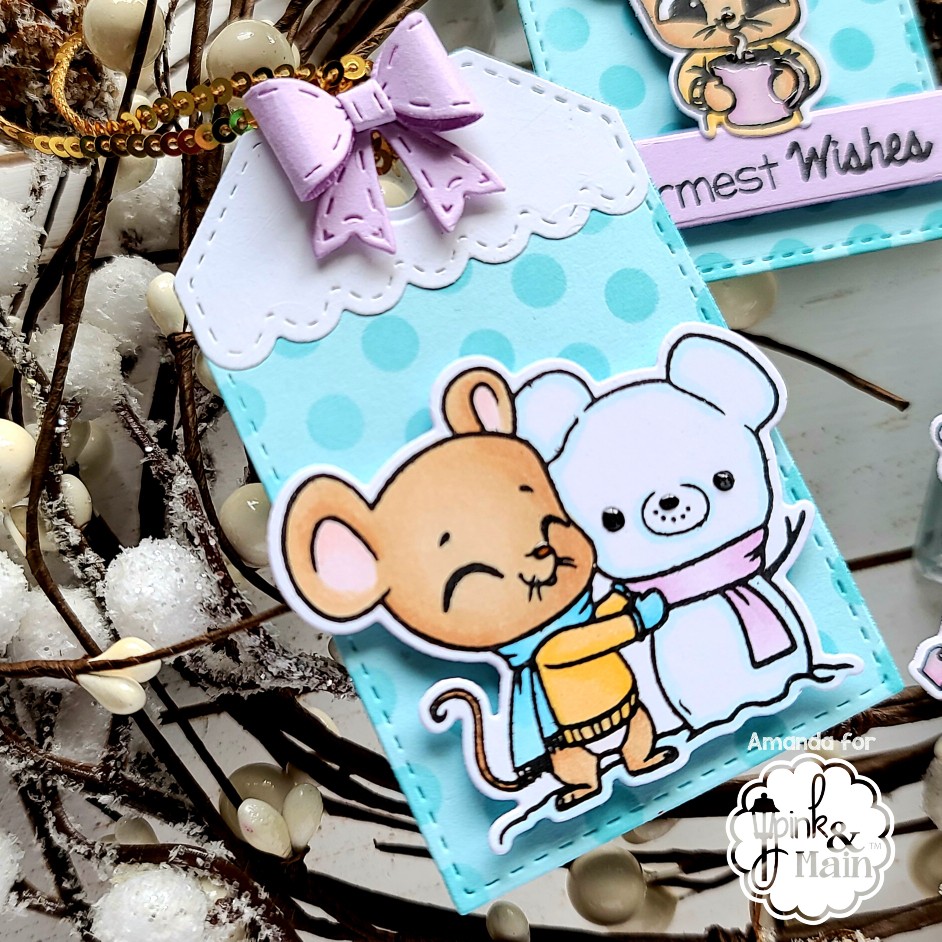
I took all of the images from Christmouse and colored them in the same color scheme. I used the coordinating dies to cut them all out and set them aside. Then I cut out some tags using dies from a previous Craft Courtyard kit and used the dotty stencil with blue ink for a tone-on-tone look. The topper for the tags are cut from white cardstock and adhered down and the images are all popped up with foam squares. Then I used the smallest bow from the stitched bows die set and created purple bows for all of the tags.
Taking a look at each tag individually, I thought it would be fun to add the banner from the die set with a little sentiment for this sweet mouse holding his hot cocoa. I also added glossy accents to his nose and mug for a little shine.
This little scene is just the sweetest1 I love it! I added some glossy accents to the mouse’s nose, Christmas ornaments and the tags on the packages for some added interest.
And last but not least, this sweet snowmouse scene is just adorable! I added glossy accents to the snowmouse’s eyes and nose and the mouse’s nose too.
I threaded some sequin ribbon I had in my stash through the top to finish them off and voila! An adorable set of tags ready for the holidays!
I appreciate you sharing your time with me. Have a fabulous day!
Hello everyone!!! Today is a very special day in our house…our daughter’s 14th birthday. Seriously, where the heck has the time gone??? I have no idea but we’re loving every minute of it. She’s amazing and we’re having a blast celebrating this weekend.
And on here I’m also still celebrating the Fall | Winter Coffee Lovers Hop! I have a fun Newton’s Nook shaker card to share with you featuring shaker bits from my shop too!
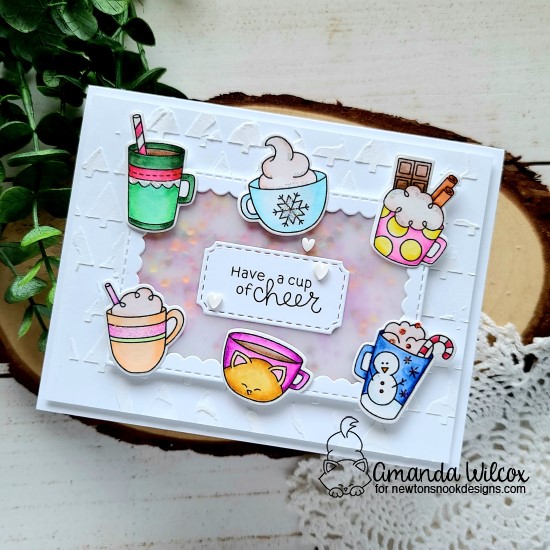
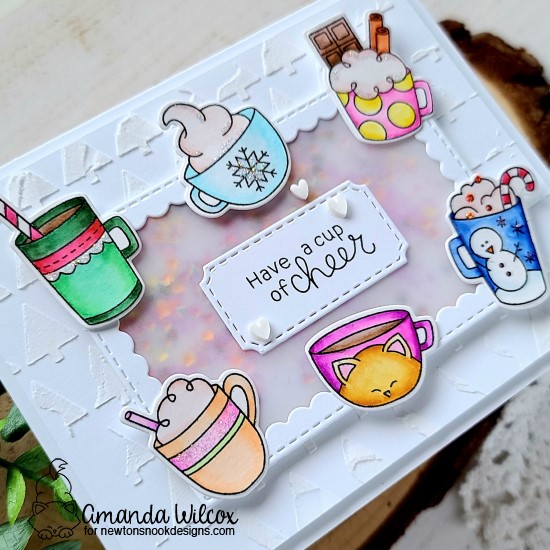
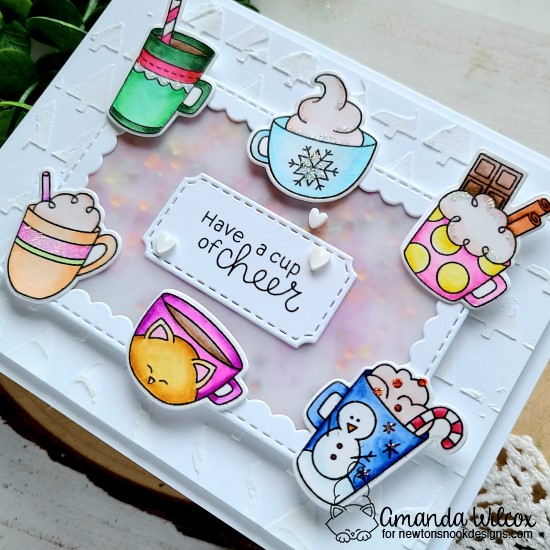
A few weeks ago we went away for the weekend so I stamped some images and packed my Zig markers to watercolor while we were gone. This fun batch of mugs were part of that. The images are from Cup of Cocoa and I used the coordinating dies to cut them out. Then I pulled out my tiny trees stencil and used texture paste for an intentionally imperfect background.
Moving on to my shaker mechanism, I die cut a frame from Framework dies and the ticket looking shape too. I backed the frame with vellum and foam tape. I poured some Burning Embers and Pixie Dust Micro Beads in the Vidia color to the center of my stenciled panel and adhered the shaker frame on top. I stamped my sentiment on the ticket shape and attached it to the vellum.
I attached my mugs around the frame and moved on to finishing touches. For those I added Stickles in unicorn to each of the mugs somewhere and a few white clay hearts to by the sentiment.
Such a fun and sweet card! Are you linking up fun projects to the Coffee Lovers Hop? I hope so! I can’t wait to see them all!
I appreciate you sharing your time with me. Have a fabulous day!
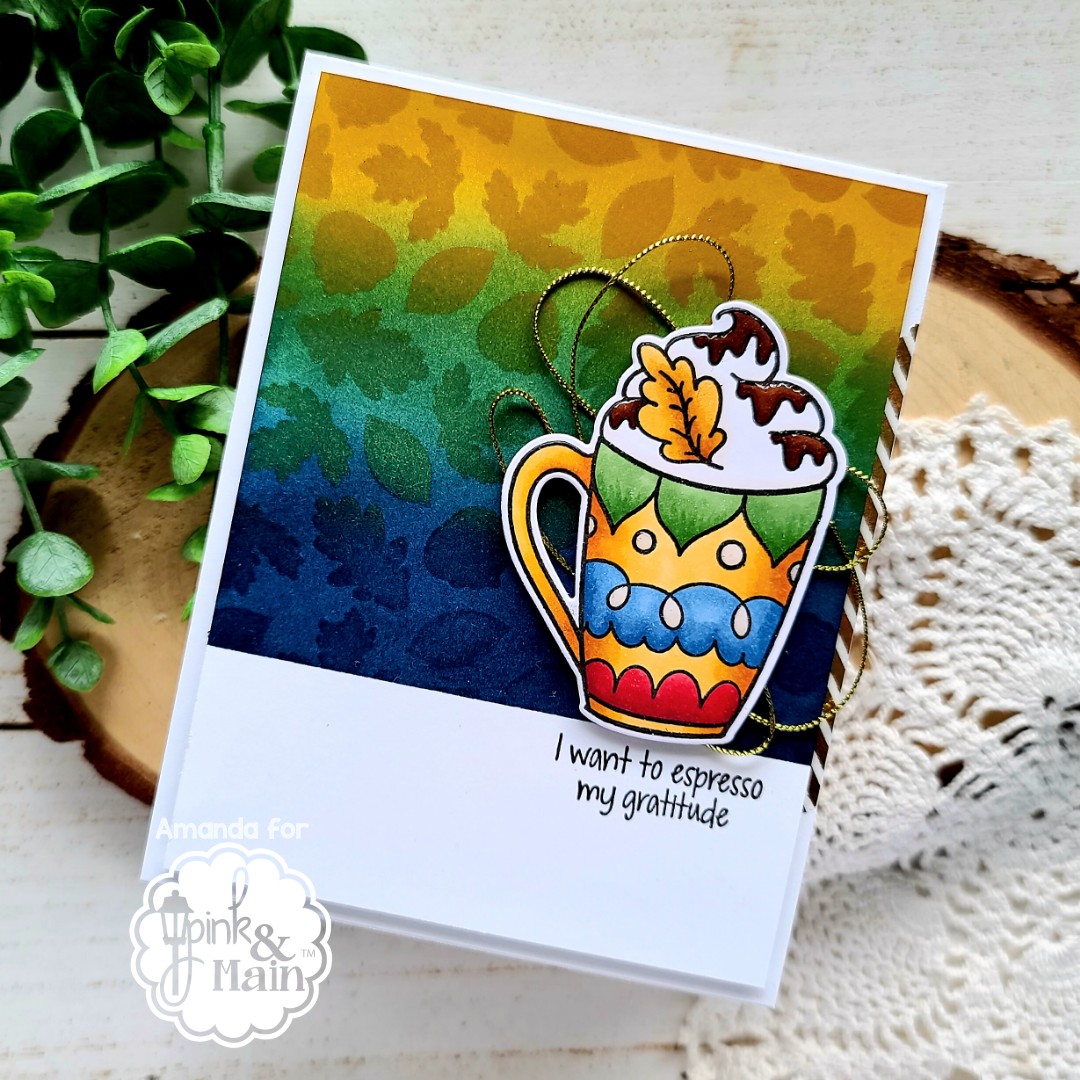
Hi friends! I’m over on the Pink & Main blog today featuring some caffeinated fun to keep you inspired for the Coffee Loving Cardmakers Fall | Winter hop going on right now!
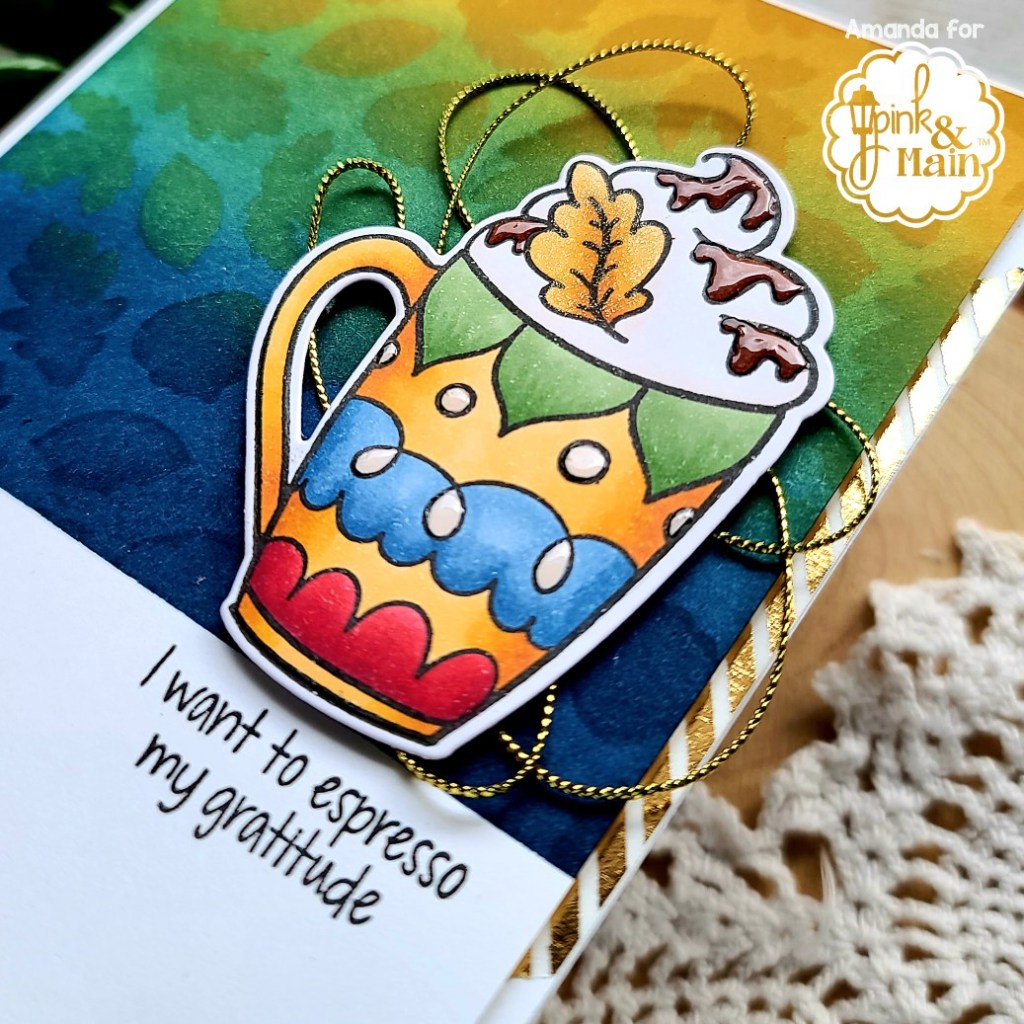
I just think this Need to Venti set is so much fun! I pictured today’s cup of yummy to be a fantastic mocha with whipped cream and chocolate syrup on top! Drooling yet? Yeah, me too. Let’s get to crafting now. 😉
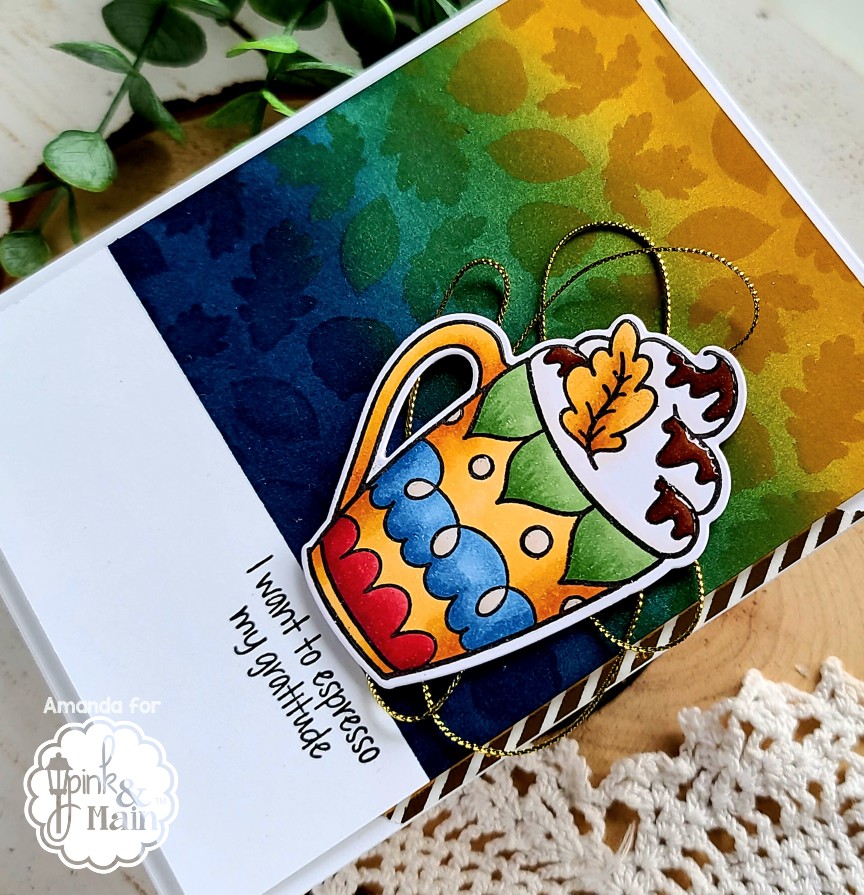
I stamped and colored my image with copics. Then used the coordinating dies to cut it out and moved over to stenciling my background. For that I used the leafy stencil, my blending brushes and some dye inks. I inked up the panel, then put the stencil over the top and did another layer of the same colors on top of that. Isn’t it fabulous? I’m totally in love with it. After removed my mask, I used my MISTI to stamp the sentiment just below the stenciling on the right side of the card front.
I created a white card base and stuck some gold striped washi tape to the side. Then I trimmed the stenciled panel down to 4×5.25 and popped it up with foam tape. I added foam squares to the back of my image and stuck some gold wire thread to the back, then flipped it over and put it in place.
For finishing touches, I added glossy accents to the chocolate syrup and a few select places on the mug. Then I decided to add Wink of Stella glitter brush pen to the leaf in the whipped cream. I’ve decided this is made of chocolate and that edible glitter.
I hope you enjoyed today’s yummy creation and found some inspiration to play along with the Coffee Loving Cardmakers Hop too!
I appreciate you sharing your time with me. Have a fabulous day!