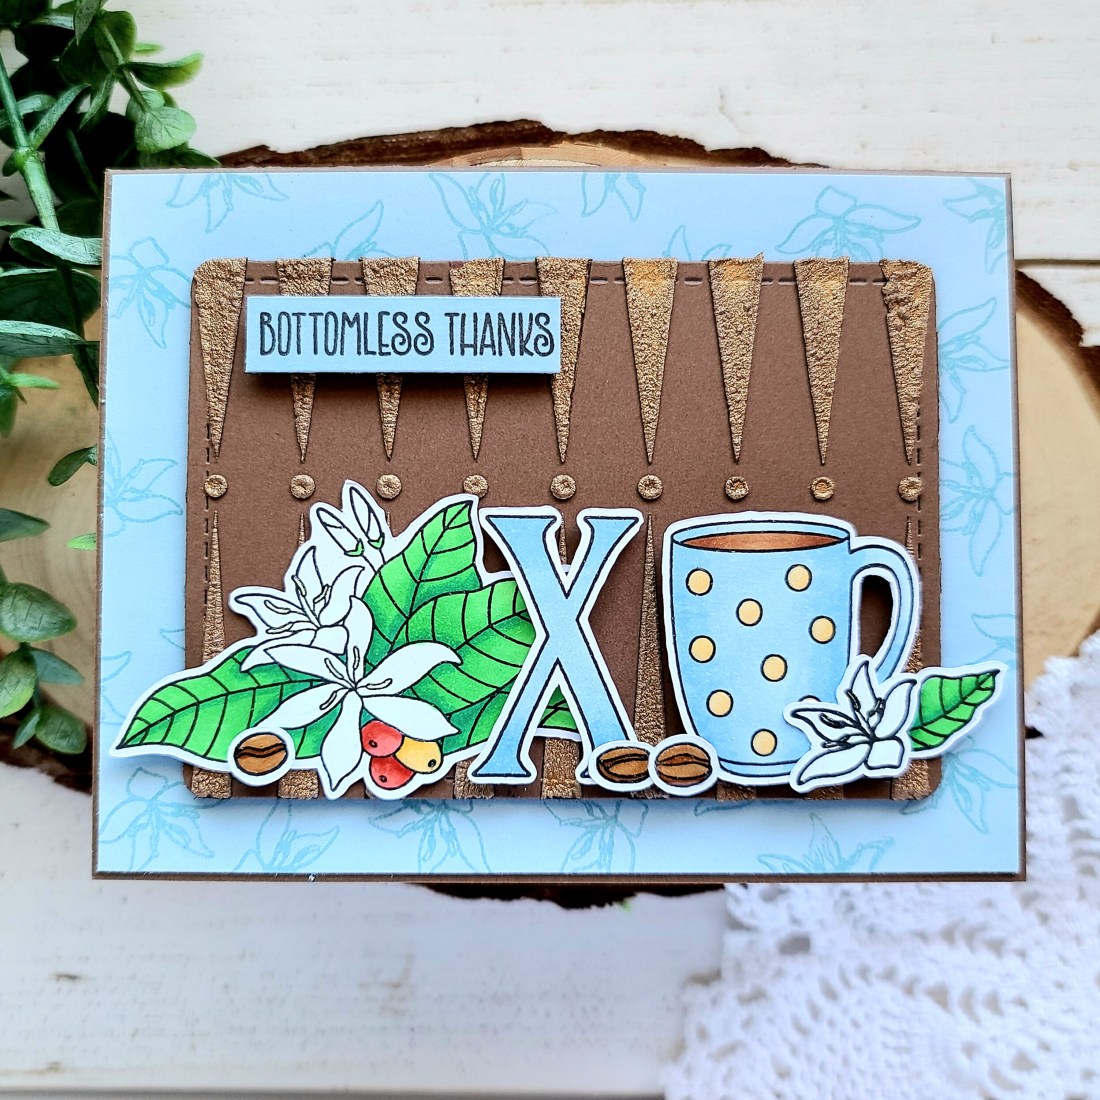
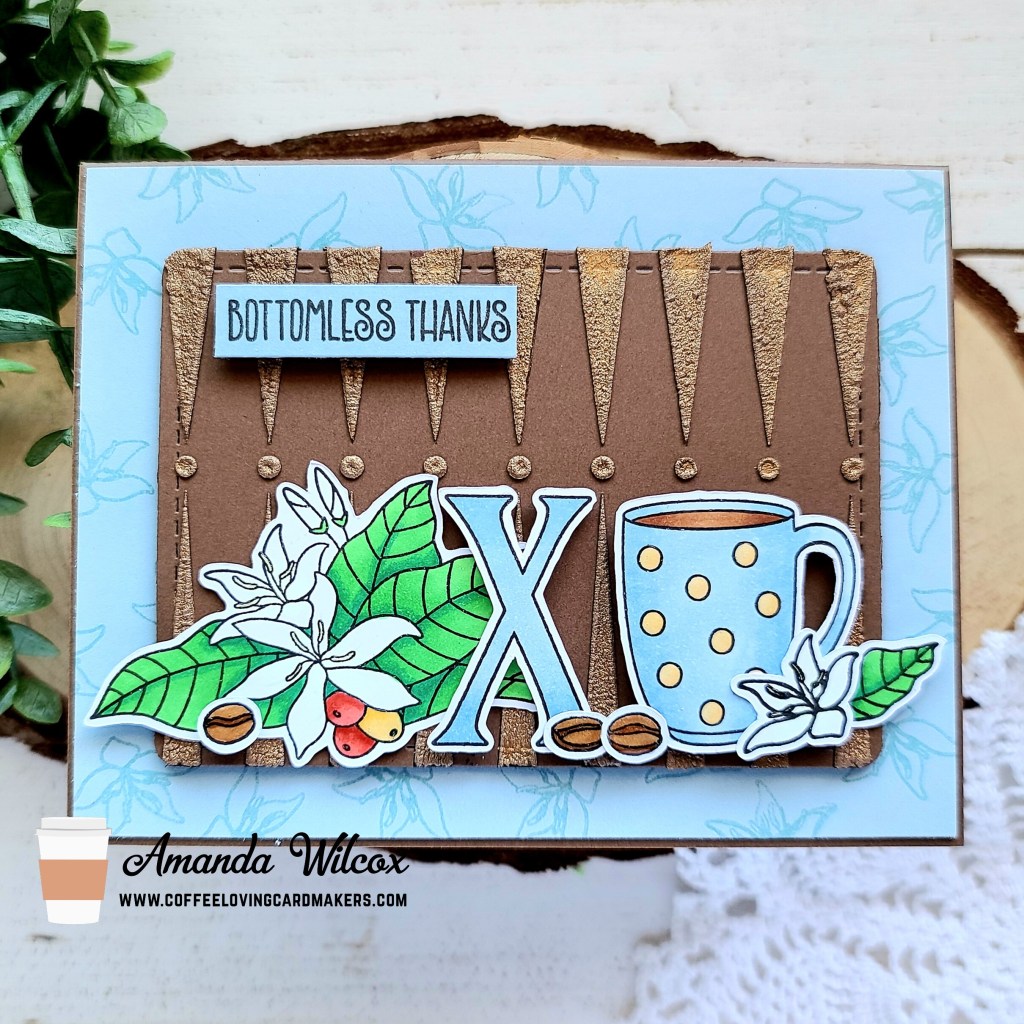
Hey there! It’s time for another Tuesday Tea with Twiddler’s Nook over on the Coffee Loving Cardmakers blog. Today I’m sharing bottomless thanks and some new-to-me products. It was messy fun!
I had lots of fun creating today’s card. I started by stamping and coloring my images from Miss Ink Stamps Brewtiful set with my copics. Then I used the scan-n-cut to cut them all out and I started deciding how to create the background I had in my head. After lots of trial and error, I landed on using the Backgammon 2 stencil on brown cardstock with some Nuvo expanding mousse I recently purchased. I decided to try heating it up for that puffy look. It’s sooo cool! I’ll definitely have to get some more colors. Then I die cut the panel with my Frames & Flags dies from Newton’s Nook.
Next, I cut a piece of blue cardstock matching my mug and stamped the smaller flower images from the set repeatedly creating my own patterned paper. I glued this to a brown card base and popped my stenciled panel up with foam tape. Then with a combination of liquid glue and foam squares I adhered my images. I stamped my sentiment on the same blue cardstock and trimmed it into a strip, popping it up with foam squares too.
For finishing touches on my card today, I added glossy accents to the dots on the mug, flower stamen and the coffee beans. I also added a little Wink of Stella glitter brush pen to the sentiment strip and the “X” in my XO.
I love cards with dimension and texture and this one is packed full. I had fun creating it and hope you enjoyed it too.
I appreciate you sharing your time with me. Have a fabulous day!
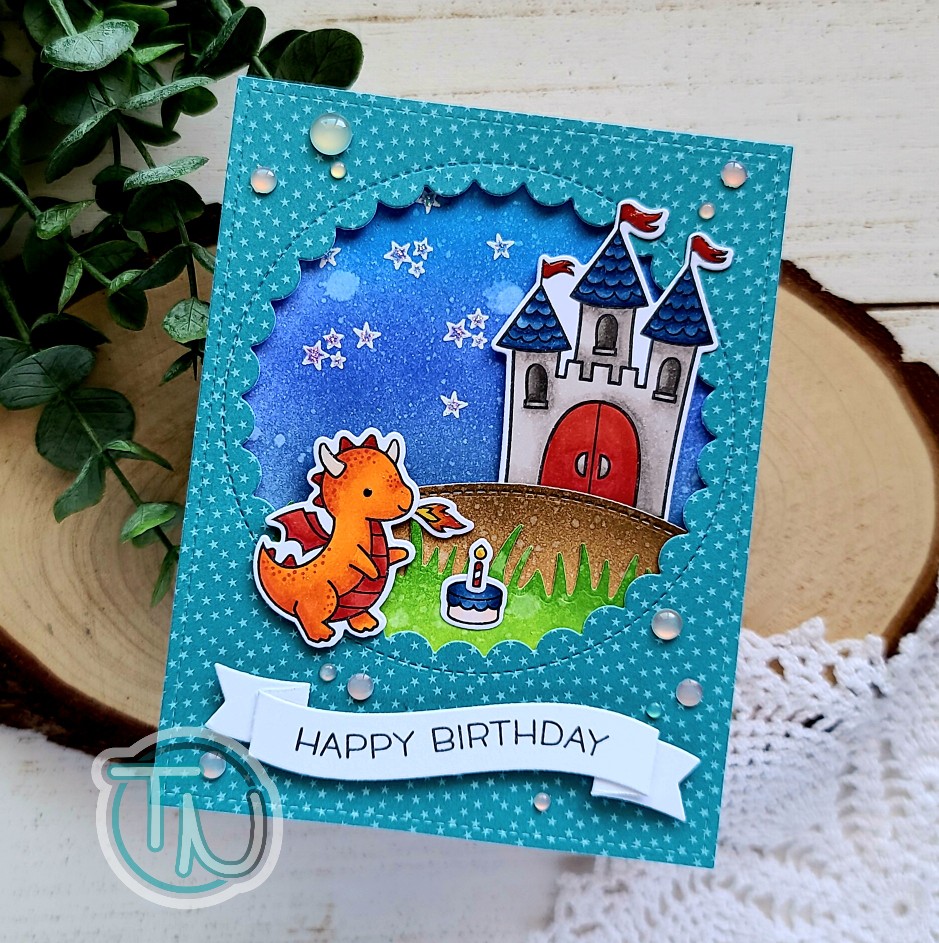
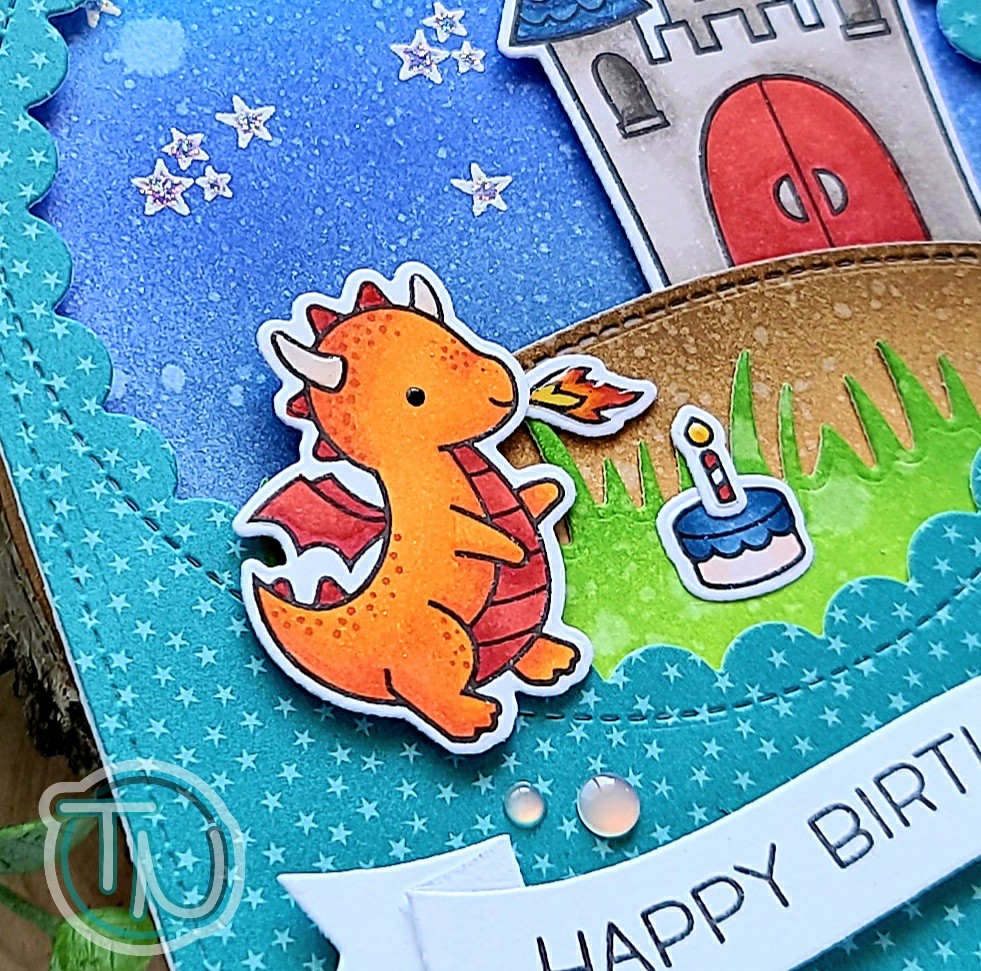
Welcome to a new week. I hope you all had a wonderful weekend. I recently had a moment to play with some new goodies I ordered from Scrapbookpal.com. It was mostly supplies but I had to throw in a few fun things too and one of them was the new Little Dragon mini set.
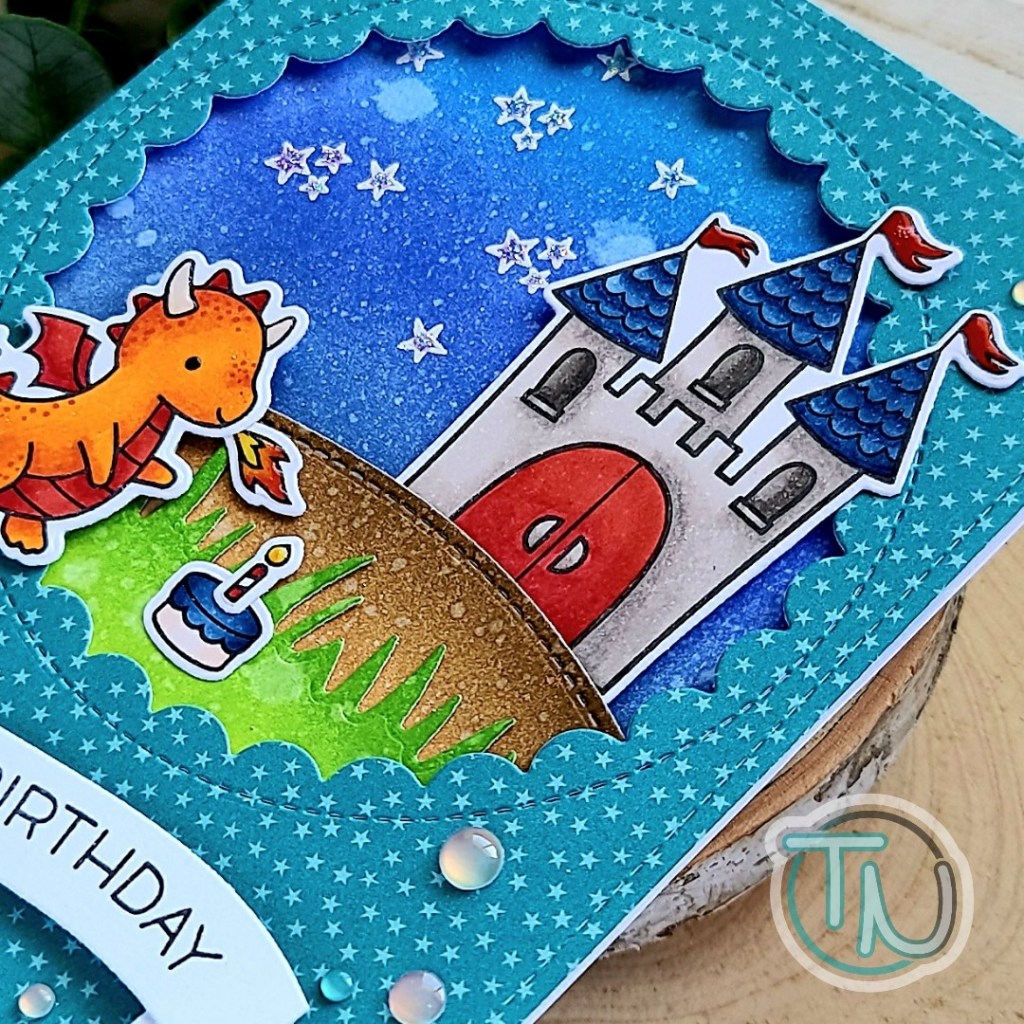
To create my card, I started by stamping and coloring my images with my copics. I used the Little Dragon and Critters Ever After stamp sets to create this scene. Then I inked up a panel with distress inks for a darker sky and spritzed it with water. Next, I inked up 2 other panels – for grass and a hill – and die cut them with my grassy border die and one of the stitched hillside borders.
I die cut a stitched rectangle from an old Beachside paper pad I’ve been hoarding. Then I cut the largest outside-in stitched scalloped circle from the center. Using my images as a guide I stamped some stars in the sky with VersaMark ink and heat embossed them in white. Now, it’s time for assembly.
I adhered the hill and grass together and then to the back of the panel with the circle hole. I line the back of that with foam tape and adhered it to my inked panel. This whole panel was then glued to a card base and I started on my images. Those are adhered with a combination of foam squares and liquid glue.
For my sentiment, I die cut one of the wavy banners and stamped “Happy Birthday” from the wavy sayings stamp set. After folding on the crease lines I added a little glue to the folds and popped the banner up with foam squares.
To finish this card off, I added unicorn Stickles to the stars in the sky, glossy accents to the dragon horns, flames and flags on the castle and a black glaze pen on the dragon’s eye. Last, I glued down a scattering of Fortune Teller flat back beads from Trinity Stamps.
I had so much fun creating this card! I hope you enjoyed it and find a little inspiration to make something wonderful.
I appreciate you sharing your time with me. Have a fabulous day!
Oh my goodess friends! I am SOOOOOOOOOOO excited to share with you that I have joined the Pink & Main Design Team! This is thrilling and going to be such a fun adventure! Today is my first card share over on their blog and I’m really excited about it! They just had a new release and I’ve been playing with the new goodies. I hope you love it!
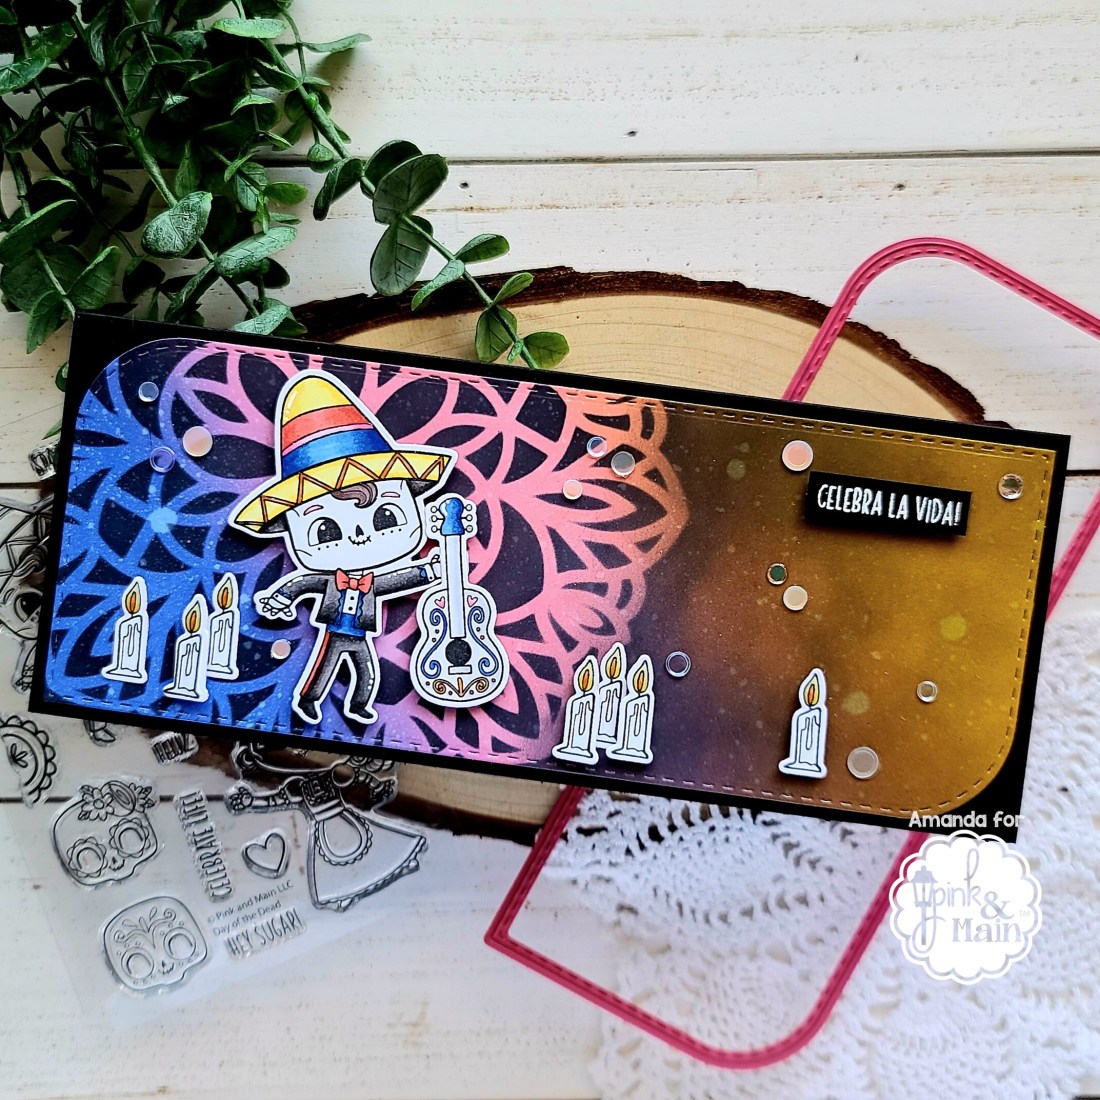
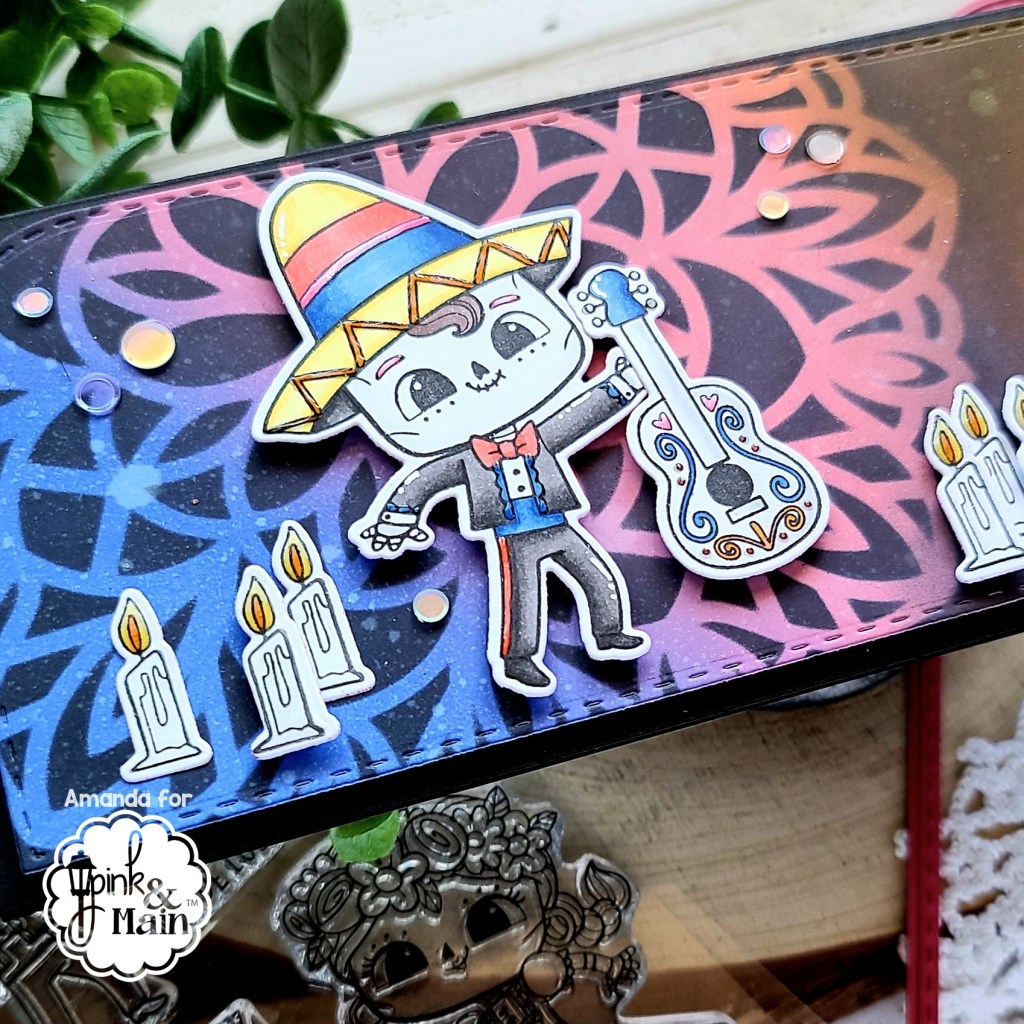
To create my card, I started by inking a panel with distress oxides in blueprint sketch, picked raspberry and mustard seed. Then I used distress ink in black soot over the whole thing, using the mandala stencil. I spritzed it all with water and then ran it through my die cut machine with the larger of the new Beautiful slimline dies.
Next, I stamped and colored my images from Day of the Dead with my copics and then used the coordinating dies to cut them all out. I arranged them on my panel how I wanted and then adhered them with a combination of liquid glue and foam squares.
I didn’t want my sentiment to distract from the cool stenciled background or that cutie boy and his guitar so I kept it simple. I stamped and heat embossed it in white on black cardstock and trimmed it into a strip. I popped it up with foam squares. I adhered the whole panel to a black card base measuring 3.5×8.5 inches with foam tape for a little dimension. Then I moved on to finishing touches.
For those, I added some white gel pen accents to some of the images and then glossy accents to the candle flames and some details on the boy and his guitar. Last, I used liquid glue and adhered a scattering of confetti bits from my stash throughout the design. I really love how this finishes it off and makes the card feel complete.
I hope you enjoyed today’s share and found some inspiration to create something wonderful. Remember all the new goodies are for sale in the shop, so head over and check it all out!
I appreciate you sharing your time with me. Have a fabulous day!
Happy Friday everyone!!! I’m super excited to be sharing inspiration for Cupcake Inspirations’ 500th Challenge! This is amazing and Newton’s Nook is a sponsor so we’re playing along.
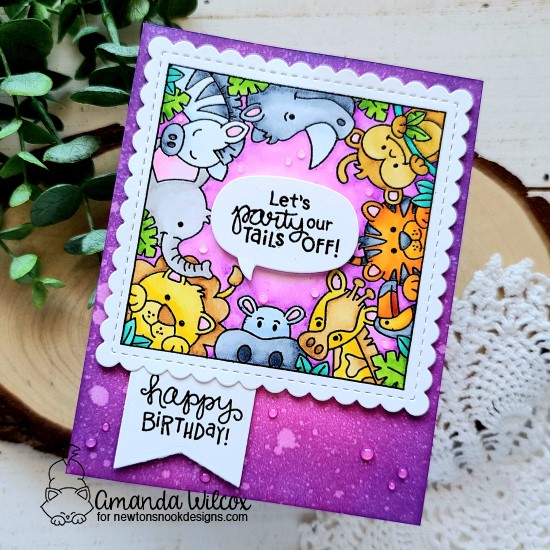
I decided to go a little bold and wild for their awesome birthday theme this challenge.
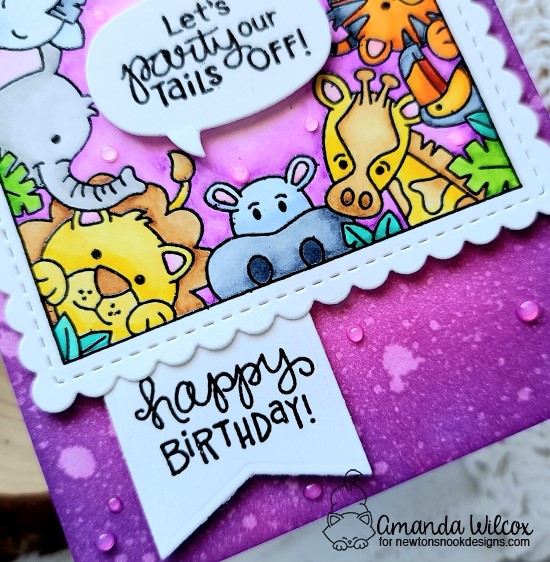
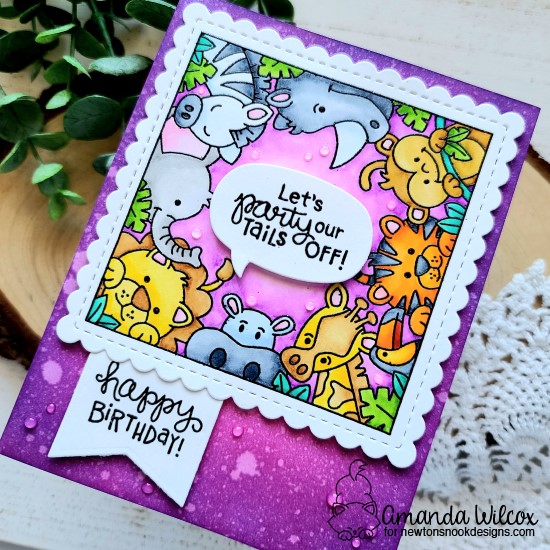
To create my card, I started by die cutting my scalloped square and then I stamped and heat embossed the zoo party image. I used my Zig Clean Color Real Brush Markers and a water brush pen to watercolor the scene. I love coloring these critters up! It’s so relaxing and fun!
Next, I blended picked raspberry and blueprint sketch distress inks on a panel and spritzed it with water. The panel was adhered to a card base and the zoo party image was popped up with foam tape. I die cut one of the speech bubbles from the Newton’s Nook set and I heat embossed a sentiment on it. This is popped up as well.
Then I die cut a banner from the Frames & Flags set and another sentiment was heat embossed on it. It’s popped up with foam tape but tucked under the edge of the square panel.
I finished the card off with Nuvo Crystal Drops in morning dew scattered throughout the card design. I love the subtle interest this gives without distracting from those awesome critters!
I hope you’ve found some fun inspiration to create a fantastic birthday themed card to play along with the Cupcake Inspirations 500th Challenge!
I appreciate you sharing your time with me. Have a fabulous day!
Holy moly! It’s been an amazing week of Newton’s Nook awesomeness and today is the icing on the cake! These new images are sooo much fun! I love them both!
Pug-kin and Knight Owl Stamps and Dies
Seriously??? They are the cutest things ever and I have super fun cards using each one to share with you today.
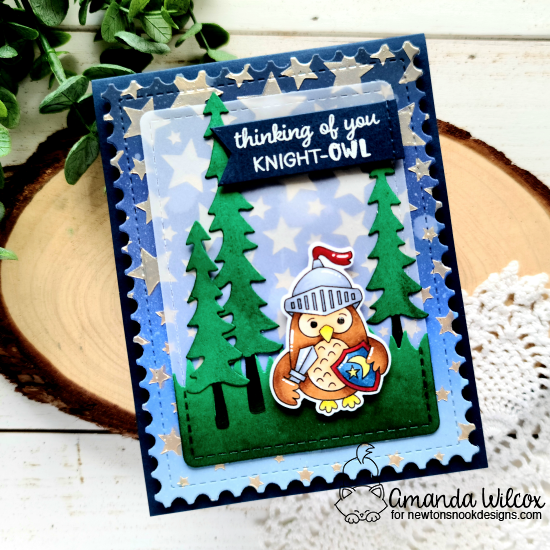
I knew straight off that I wanted to create a fun forest scene for my Knight Owl to be in. He’s on a quest, you know. This is just fitting. 😉 I inked up a panel with distress inks and used the Falling Stars stencil and some Metallix gel for a night time background. Then I die cut a vellum panel from one of the Frames & Flags dies. I inked up another panel with green and die cut it from the same die and again with the grassy border die. Then I cut some trees from the Forest Scene Builder set and inked them up. I die cut my starry panel with the Framework die and popped it up on a dark blue card base with foam tape. I glued my grass and trees to the vellum panel and carefully put glue on the vellum behind those places and stuck it down to the stenciled panel. This hides your glue spots.
I had colored my Knight Owl with copics and die cut him, now it was time to pop him up with foam squares. I decided to pull that dark blue in a little more and heat embossed my sentiment (which is a combo of Heartfelt Essentials and Knight Owl) on a flag from Frames & Flags. To make things cohesive I ran the flag through my die cutter with the same die as my vellum panel so the stitching matches up. The flag is popped up with foam tape. To finish the design off I added white gel pen highlights and glossy accents in a couple of spots like the shield and owl’s beak and feet.
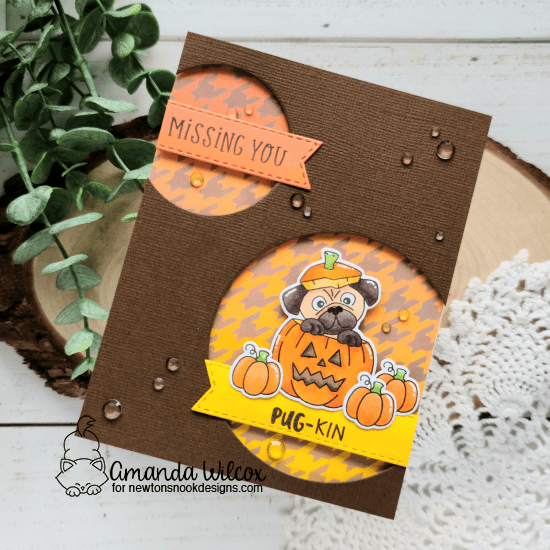
I have to be totally honest here…I could color a hundred of these pug-kins and it wouldn’t get old. I really love watching them come to life. They’re too cute! I paired this little sweetie with some extra pumpkins from the new Paw-tumn set from earlier in the week. For the background, I inked up a panel with distress oxides and then used the new Houndstooth stencil over the top in brown. I found a brown textured cardstock in my stash and cut a couple of circles out using the Circle Frames dies. The brown panel is popped up with foam tape. I die cut 2 banners from the Banner Trio dies and stamped my sentiments (one from Heartfelt Essentials and the other from Pug-kin) on them. Those are popped up with foam tape and then the cute Pug-kin and his pumpkins are adhered with a combo of liquid glue and foam squares.
I finished this card off with some white gel pen highlights, a little glossy accents on his nose and some clear gems from my stash. I just love this!!!
Would you like to win the “Knight Owl” and the “Pug-kin” Stamp Set?We will choose TWO lucky winners to each win this duo of stamp sets!
Here’s how to win: Comment on the NND blog and Design Team blogs (see list below)! Thewinner will be chosen at random from the collective reveal posts. Make sure to check out each of their blogs and comment for your chance to win. You will not know which blog has been chosen so the more you comment on the better your chances are of winning! You have until Thursday August 20th at 9pm EST to comment — winners will be announced on the blog post on Friday, August 21st.
Check out all the awesome Design Team Blogs below to enter:
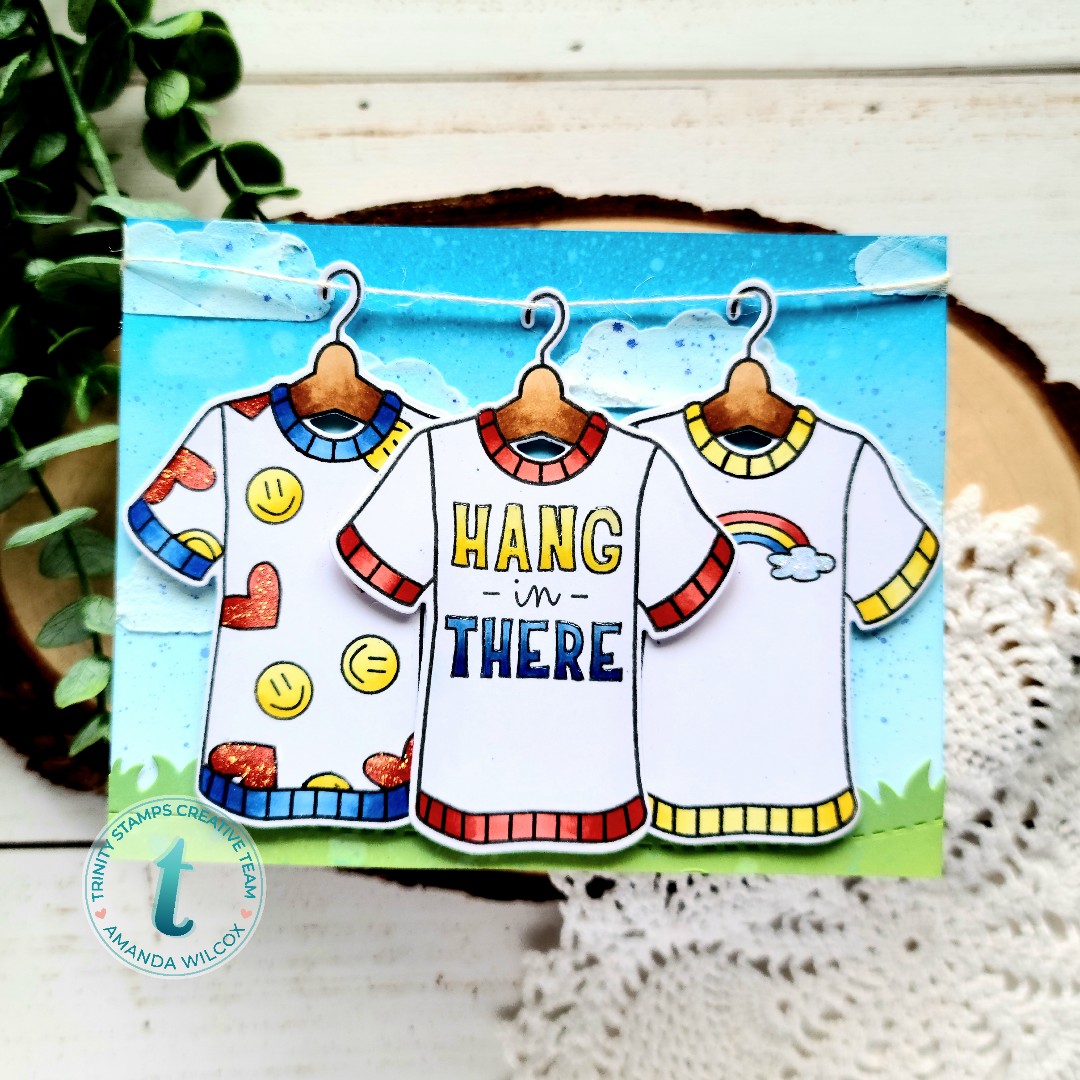
Hello everyone. I’m joining you today for a fun way to customize the new Hang In There stamp set from Trinity Stamps. I had so much fun creating this card and hope you enjoy it.
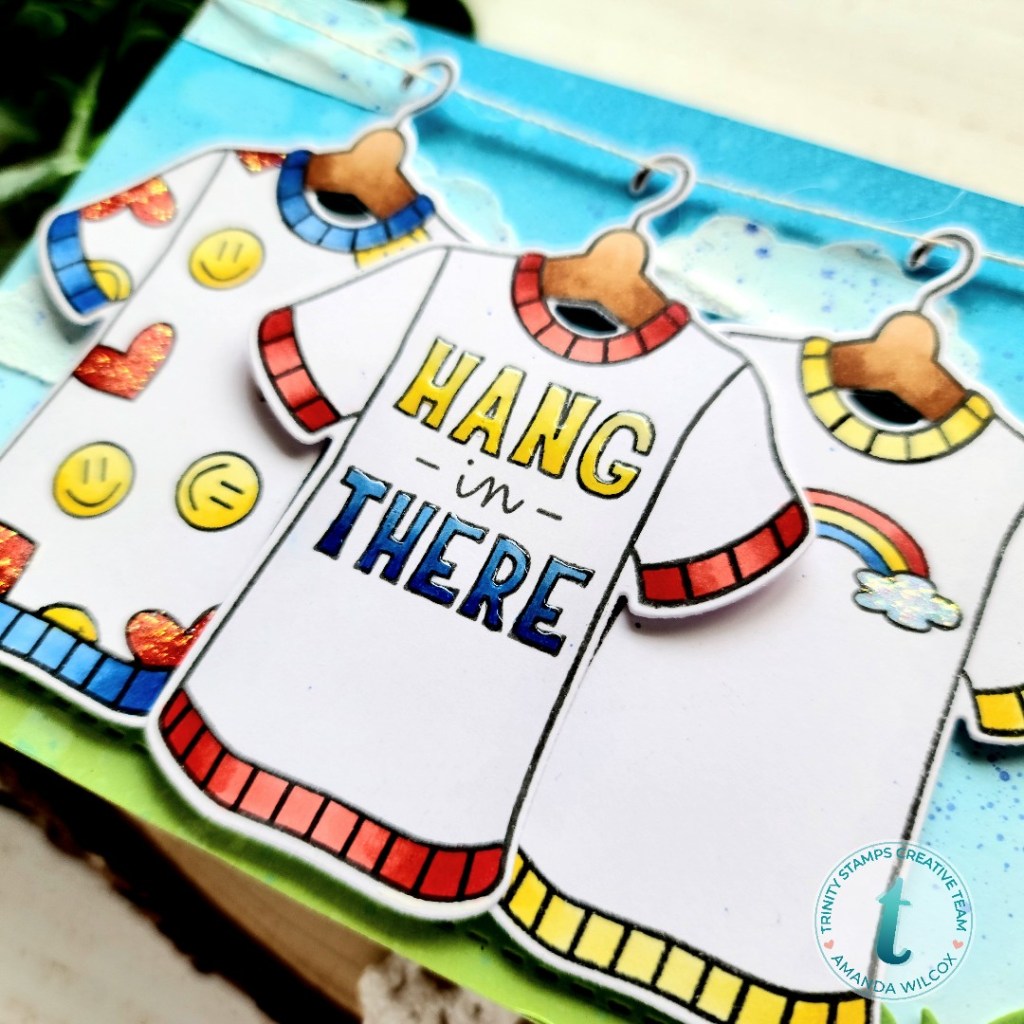
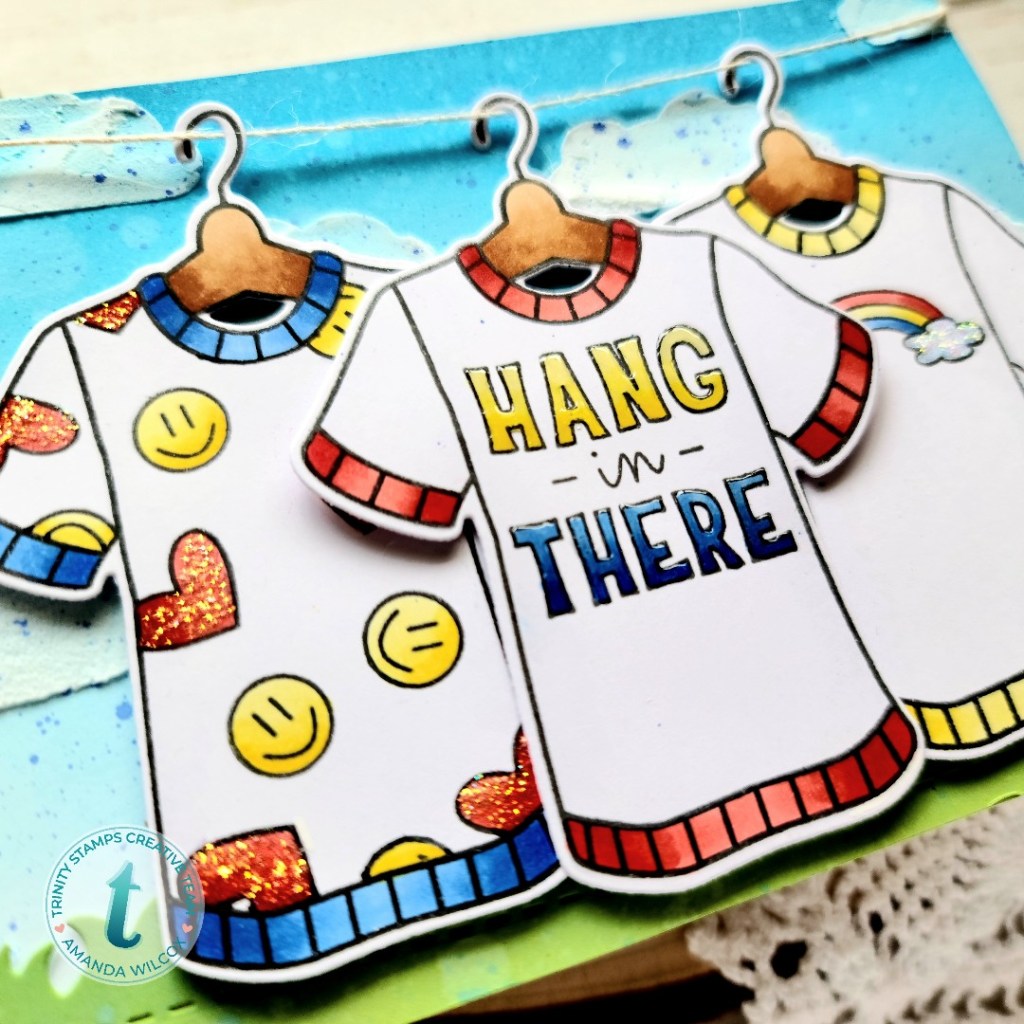
I started this card by stamping the image from Hang In There as it is. Then I masked off the words on the inside and stamped 2 more shirts. Then I cut another mask for the negative of the shirt, being sure to cover the ribbing too. I chose the smaller images in the set to decorate my other shirts with but really, the possibilities are endless. You could add anything you wanted.
I colored the images with my copic markers and used the coordinating dies to cut them out. Then, moving on to my background I blended distress inks on a panel and splattered it with the darkest of the inks. I took out the Layered Lakeside stencil set out and stenciled some clouds with texture paste over the top.
I inked up a small panel in greens and splattered it as well. Then I used the slimline scenic borders dies to cut some grass from it and adhered it to my panel sky panel.
Next, I adhered some twine to the back of the panel so my shirts could hang on the line and adhered it to a card base. The shirts are popped up with foam squares and then I moved on to finishing touches.
For those, I added glossy accents to the words and Stickles to the hearts and clouds on the other shirts.
I appreciate you sharing your time with me. Have a fabulous day!
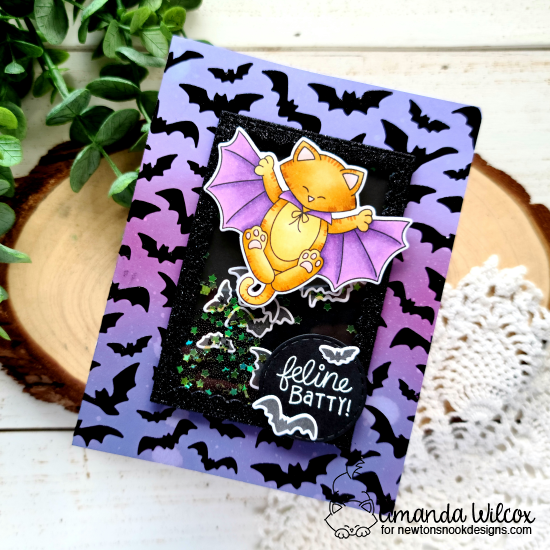
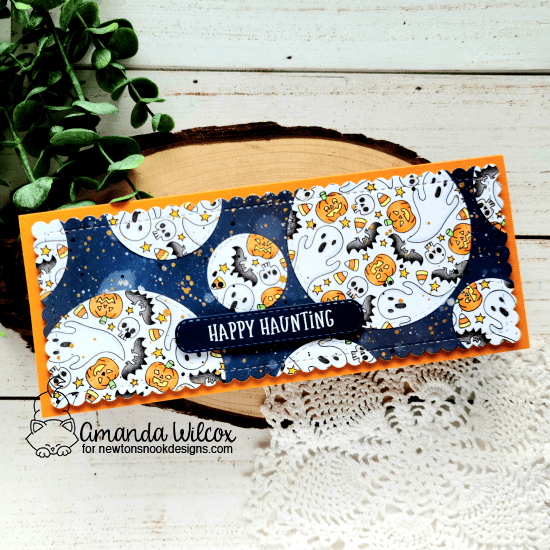
Welcome to day 3 of Newton’s Nook’s August release reveals! Today is packed full of Halloween goodness! I have 3 awesome cards to share with you so I’ll keep them all brief.
Isn’t all of this incredible?!?!? I love Halloween and creating Halloween themed projects, so today is making me sooo happy! I hope you like it all too!
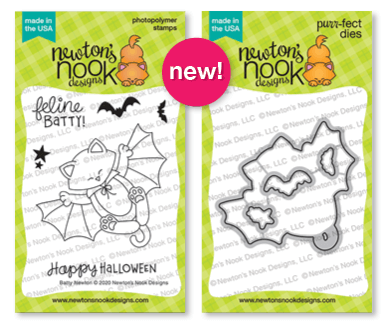
To create this fun Batty Newton shaker, I started with blending distress inks on a panel and used Thermoweb transfer gel and black decofoil with the bats stencil. Then to create the shaker mechanism I used Thermoweb glitz gel on a panel, let it dry and die cut a frame from the Framework die set to make it super glittery. I stamped, colored and die cut my Batty Newton; making sure to cut lots of extra bats for my shaker. I die cut the smallest Circle Frame and heat embossed my sentiment. Batty Newton and the sentiment are popped up with foam tape on the shaker and the shaker is adhered to the foiled panel with liquid glue. Then the whole thing was popped on a card base and I used some simple glossy accents on Newton’s nose and toe beans.
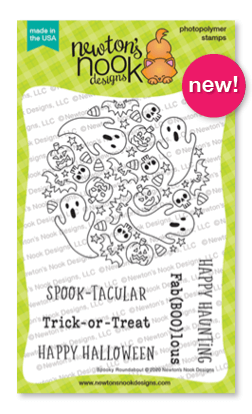
For a different spin on the roundabout series, I stamped and colored 2 Spooky Roundabout images. Then I took various dies from the Circle Frames set and cut them out. I inked up a panel from the Slimline Frames and Portholes with distress inks and spritzed it with water. I adhered my circles all over and then flicked pearl and gold watercolor and black paint all over it. This panel is popped up with foam tape on an orange card base. I used the Banner Trio dies and heat embossed my sentiment. Then this is also popped up with foam squares. Isn’t it so much fun?
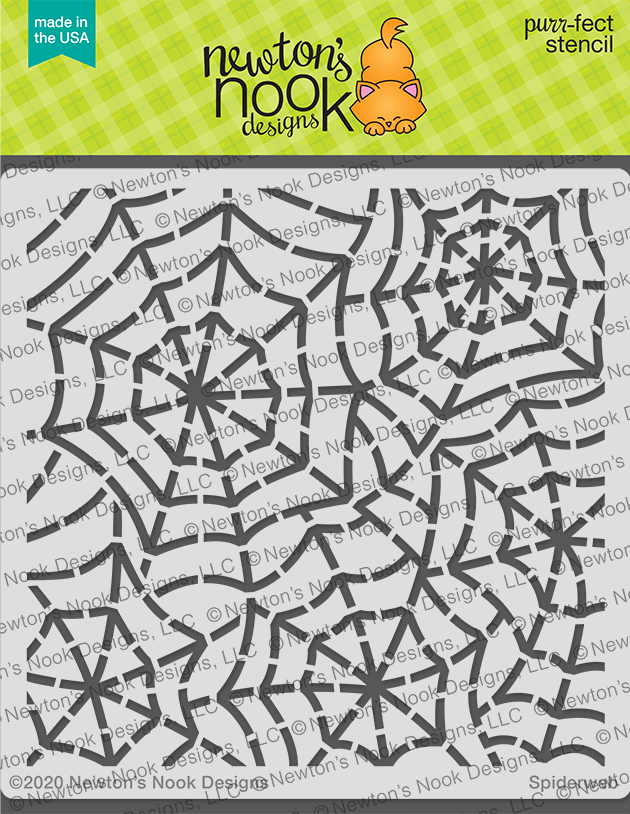
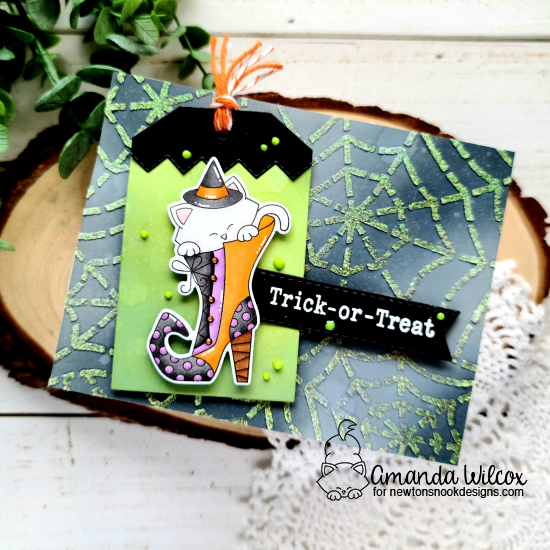
Finally, I wanted to create a card where the new Spider Web stencil was the star of the show. So I inked up a panel with distress oxide inks and used Thermoweb glitz gel over the stencil and set it aside to dry. I pulled out the fabulous Witchy Newton image from last year and color him with my copics, die cutting him with the coordinating dies and setting it aside. I pulled out the Fancy Edges Tag set and cut out a tag base from a green distress inked panel. I cut a black top and adhered it together, popping Newton up with foam squares. I strung some baker’s twine through the hole and popped the tag up over the stenciled panel. For a sentiment I used the Spooky Roundabout set and another Banner Trio die and popped it up. For finishing touches I added glossy accents to the image and Nuvo Crystal Drops in apple green.
Would you like to win the “Spooky Roundabout” or the “Batty Newton” Stamp Set?We will choose ONE lucky winner for each stamp set!
Here’s how to win: Comment on the NND blog and Design Team blogs (see list below)! Thewinner will be chosen at random from the collective reveal posts. Make sure to check out each of their blogs and comment for your chance to win. You will not know which blog has been chosen so the more you comment on the better your chances are of winning! You have until Thursday August 20th at 9pm EST to comment — winners will be announced on the blog post on Friday, August 21st.
Check out all the awesome Design Team Blogs below to enter:
Thanks for stopping by again. Today we’ve got even more fall fun to share with you! A few stamp sets and one coordinating die set. Let’s jump right in.
Heartfelt Essentials Stamps (coordinates with Banner Trio dies)
With all of this goodness, I’ve got 2 cards to share with you today. I had so much fun creating both of them; I hope you enjoy them!
For my fall roundabout card, I started by stamping my image on Bristol smooth cardstock and watercolored with my zig clean color real brush markers. Then I took out the circle frame dies and cut it out, along with creating a frame from the same cardstock. I create a circle shaker feature and set it aside to work on the rest of my card.
I used various Nuvo embellishment mousses on cardstock, let them dry and die cut autumn leaves from the panels. I cut an A2 panel from kraft cardstock and used the houndstooth stencil with brown ink. I arranged my leaves under the shaker mechanism and adhered them with liquid glue. Then I adhered my shaker and moved on to a sentiment. I love that the sentiments in the roundabout sets work perfectly with the banner trio dies so I die cut a banner and stamped my sentiment on it. Then I went around the letters with a light blue zig marker for a little extra interest. The banner was then folded on the crease lines and adhered with liquid glue.
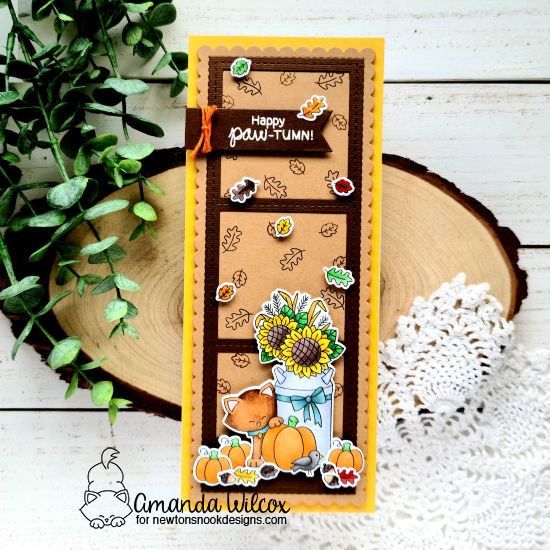
For this amazingly adorable paw-tumn set, I’ve got some great slimline fun to share with you. I started by coloring my images with copics and then used the coordinating dies to cut them all out. I stamped extra leaves, pumpkins and acorns because I wasn’t sure how many I would want in my scene. Pulling from the fall colors I used on the images, I die cut a panel from kraft cardstock using the slimline frames and portholes dies. Then I cut a frame from dark brown using the slimline frames and windows dies. I stamped the leaves all over the kraft panel and adhered the dark brown frame with liquid glue. Then I popped that panel up with foam tape on a golden yellow card base. I arranged my images and adhered them with a combination of foam squares and liquid glue.
For the sentiment, I die cut a flag from Frames & Flags die set and heat embossed it in white. I wrapped some baker’s twine around the end and glued one last leaf to the end. Then I popped it up with foam squares. For finishing touches on this card, I added glossy accents to various parts of the images like sunflower centers, acorn tops, leaves and pumpkin stems.
Would you like to win the “Fall Roundabout” or the “Paw-tumn Newton” Stamp Set?We will choose ONE lucky winner for each stamp set!
Here’s how to win: Comment on the NND blog and Design Team blogs (see list below)! Thewinner will be chosen at random from the collective reveal posts. Make sure to check out each of their blogs and comment for your chance to win. You will not know which blog has been chosen so the more you comment on the better your chances are of winning! You have until Thursday August 20th at 9pm EST to comment — winners will be announced on the blog post on Friday, August 21st.
Check out all the awesome Design Team Blogs below to enter:
Yippee!!! Welcome to another amazing release from Newton’s Nook! Today for day 1 we’ve got a couple of fabulous stencils and an amazing stamp and die set to share with you! Be sure to check back each day to see all of the fun that’s in store.
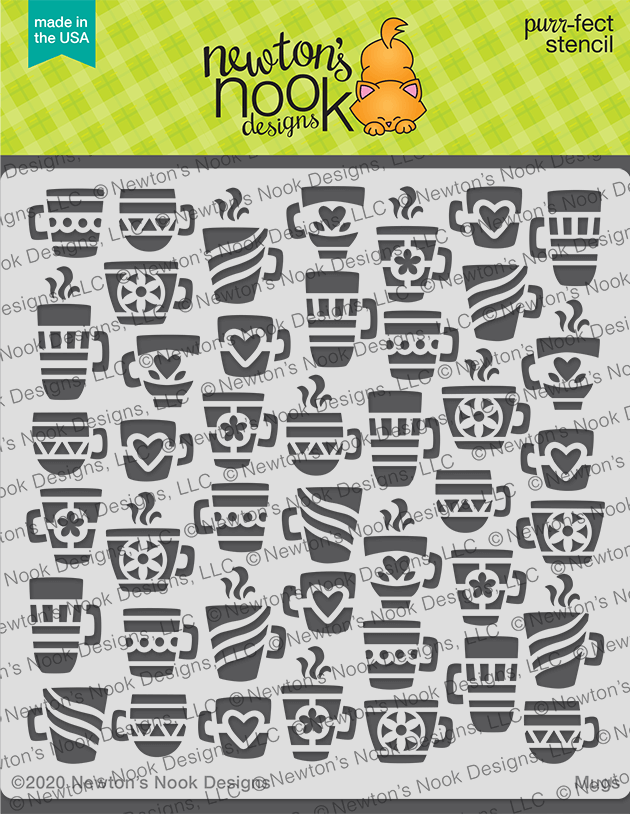
Mugs Stencil
Houndstooth Stencil
Sips & Stories Stamps and Dies
Aren’t these all so fun! I had a blast creating with everything. Today I have a card to share with you using the new mugs stencil and Sips & Stories. I hope you like it.
To create my card I started by using Thermoweb transfer gel over my mugs stencil. I let it dry and ran it through my laminator with light blue flocking. So the mugs in the background are all fuzzy. It’s super fun! I stamped, colored and die cut my images and started arranging them. Then I thought it would be fun to make a couple of scenes on my card so I used the Framework dies and cut dark brown frames and glued vellum to the back. After getting and idea for image placement I stamped and heat embossed my sentiment. Then went back to adhere all of my images and finally adhered the panels to my flocked piece.
The panel was attached to a card base and I moved on to finishing touches which were just a few spots of glossy accents on the book spines and various mugs in the scenes.
Would you like to win the “Sips & Stories” Stamp Set?This stamp set will be given away to ONE lucky winner!
Here’s how to win: Comment on the NND blog and Design Team blogs (see list below)! Thewinner will be chosen at random from the collective reveal posts. Make sure to check out each of their blogs and comment for your chance to win. You will not know which blog has been chosen so the more you comment on the better your chances are of winning! You have until Thursday August 20th at 9pm EST to comment — winners will be announced on the blog post on Friday, August 21st.
Check out all the awesome Design Team Blogs below to enter:
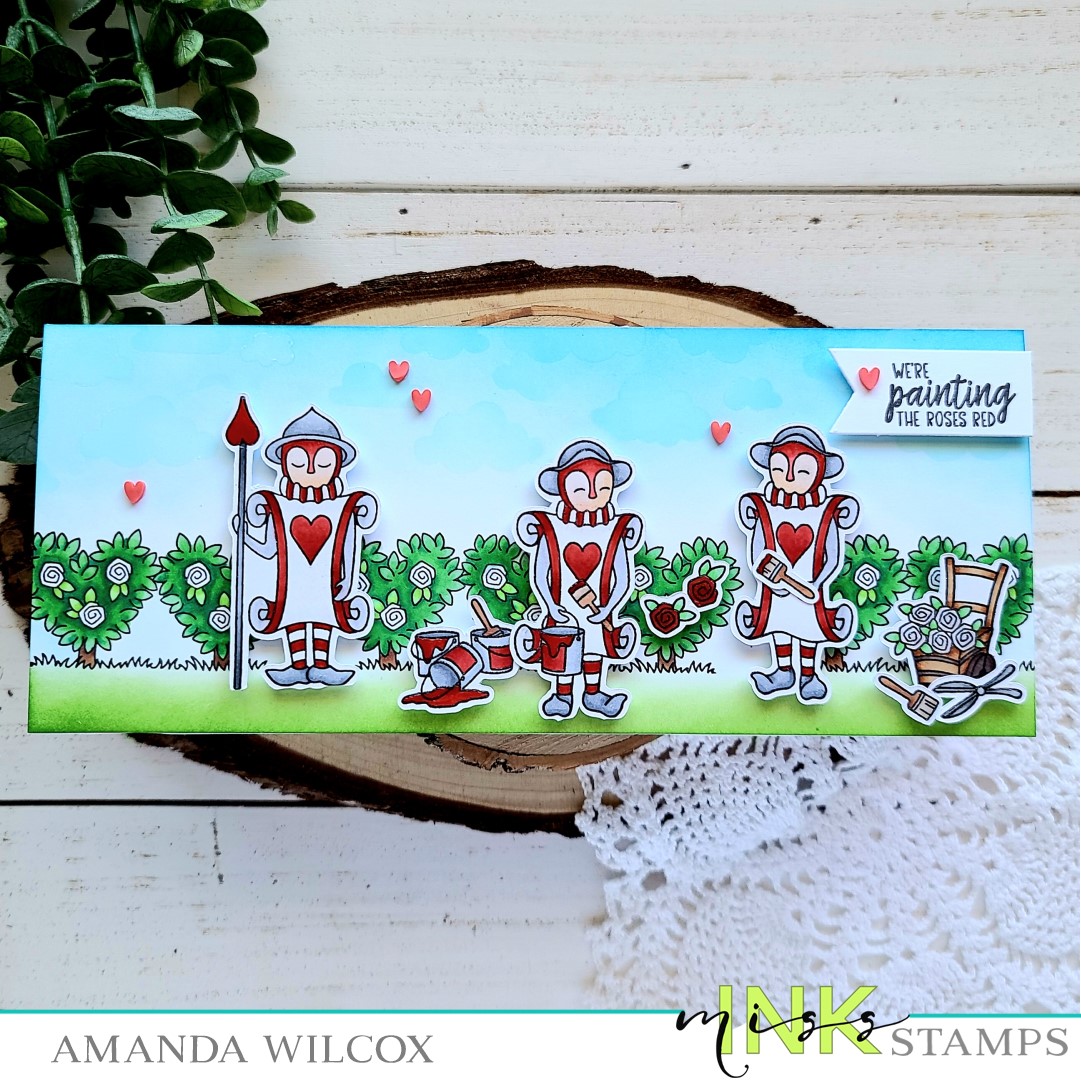
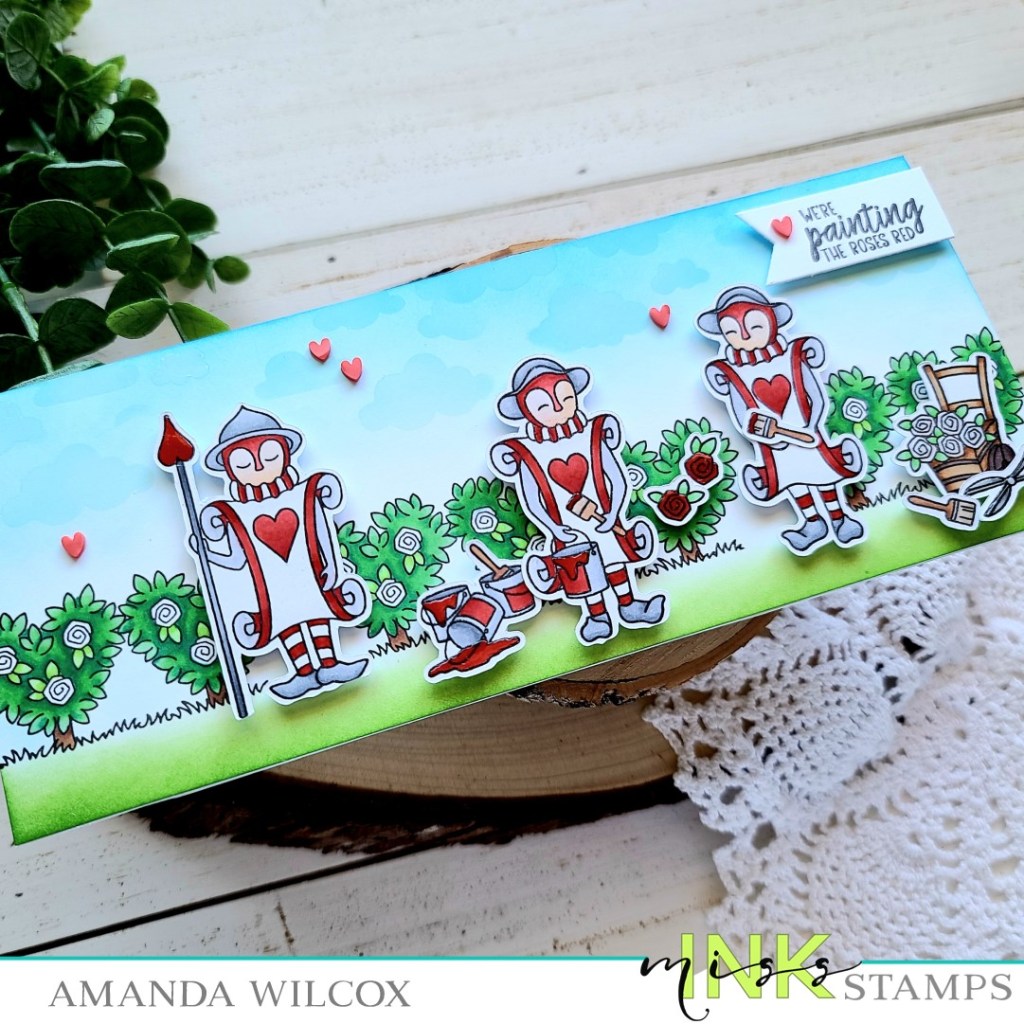
Hellooooooo everyone!!! I am soooooooo beyond excited to share that I have joined the Miss Ink Stamps Design Team! This is so surreal and I am so grateful to be designing along this incredible team of talent! To celebrate, I’m sharing my first card today!
This super fun card was created with just one of the stamp sets from the amazing Alice in Wonderland release from earlier this year. I stamped and colored the images from Painting the Roses with my copics. Then I ran them through my scan-n-cut to cut them out. Then I took the bush image and repeat stamped it across a slimline size panel (8.5×3.5 inches). Then I used distress inks in mowed lawn and salty ocean to create my grass and sky. Next I colored the bushes with my copics and set to adhering the images where I wanted them.
I popped them up with foam squares to give the card a little extra dimension and interest. Then I stamped my sentiment and cut it into a flag shape, popping it up too.
At this point I thought my sky was a little boring so I pulled out a Newton’s Nooks stencil called cloudy sky and inked Hero Arts unicorn white pigment ink through it with a blending brush. It was easy to manipulate the stencil around the images and I love the little bit that it adds. Finally I finished the design off with glossy accents on various things like some roses, garden tools and the soldier’s staff and then a scattering of red clay hearts across the sky and one on the sentiment to tie it all together.
This is just the beginning of sharing some amazing creations with Miss Ink Stamps products. I hope you enjoy the journey with me.
I appreciate you sharing your time with me. Have a fabulous day!