I wanted to pop in today to wish everyone a happy and healthy new year! I hope your holiday season was wonderful and you’re ready to tackle all the new adventures that come with 2025!

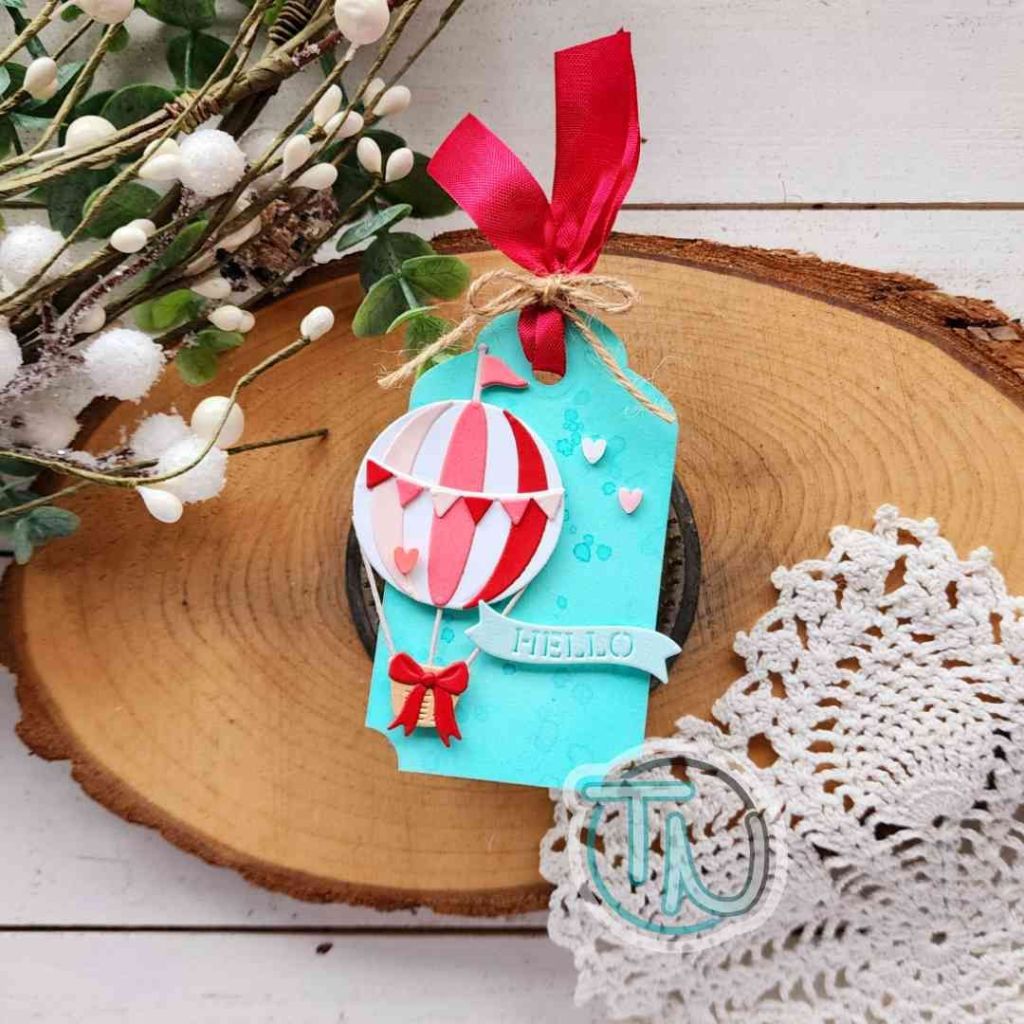
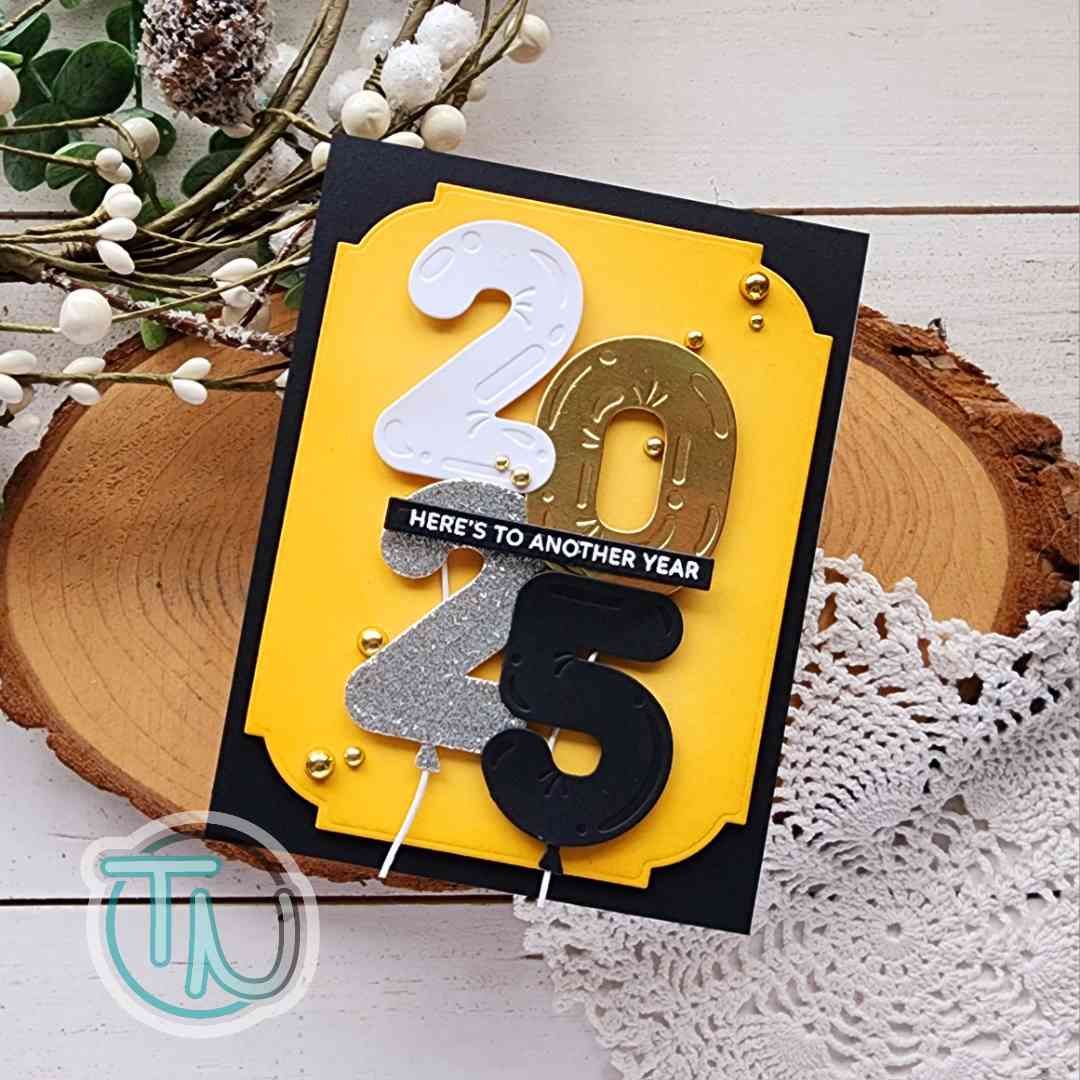
I created a card to share with all of you to start us off crafty and inspired. I used the Spellbinders Birthday Balloons dies, using liquid glue to adhere the pieces together. Then I cut the next-to-largest Notched Corner Rectangle from a gold-yellow cardstock and inked the edges with Lawn Fawn no. 2 pencil ink for depth.
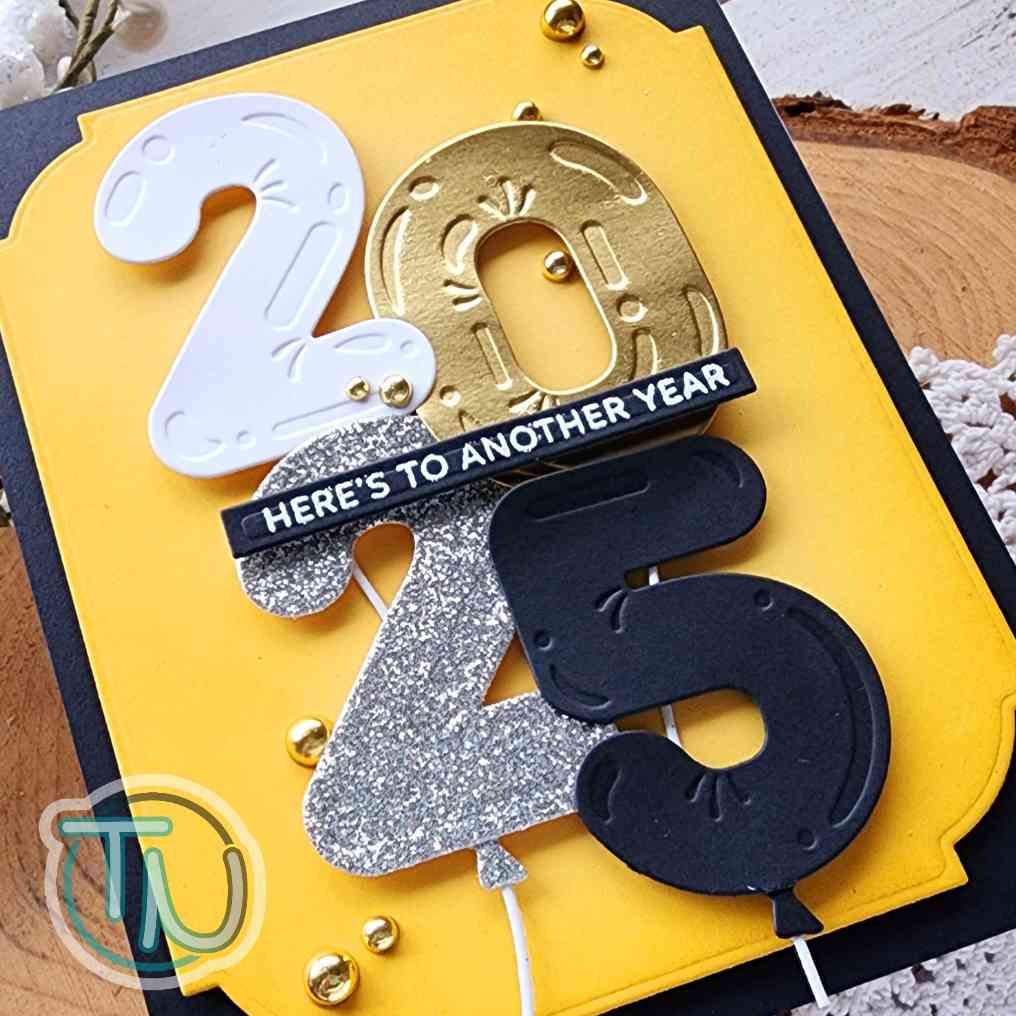
I popped the yellow panel up on a piece of black cardstock and glued that to a white card base. Then I added foam squares to the balloons and popped them in place one at a time, layering as I went. Once those were placed, I trimmed the strings hanging off the bottom.
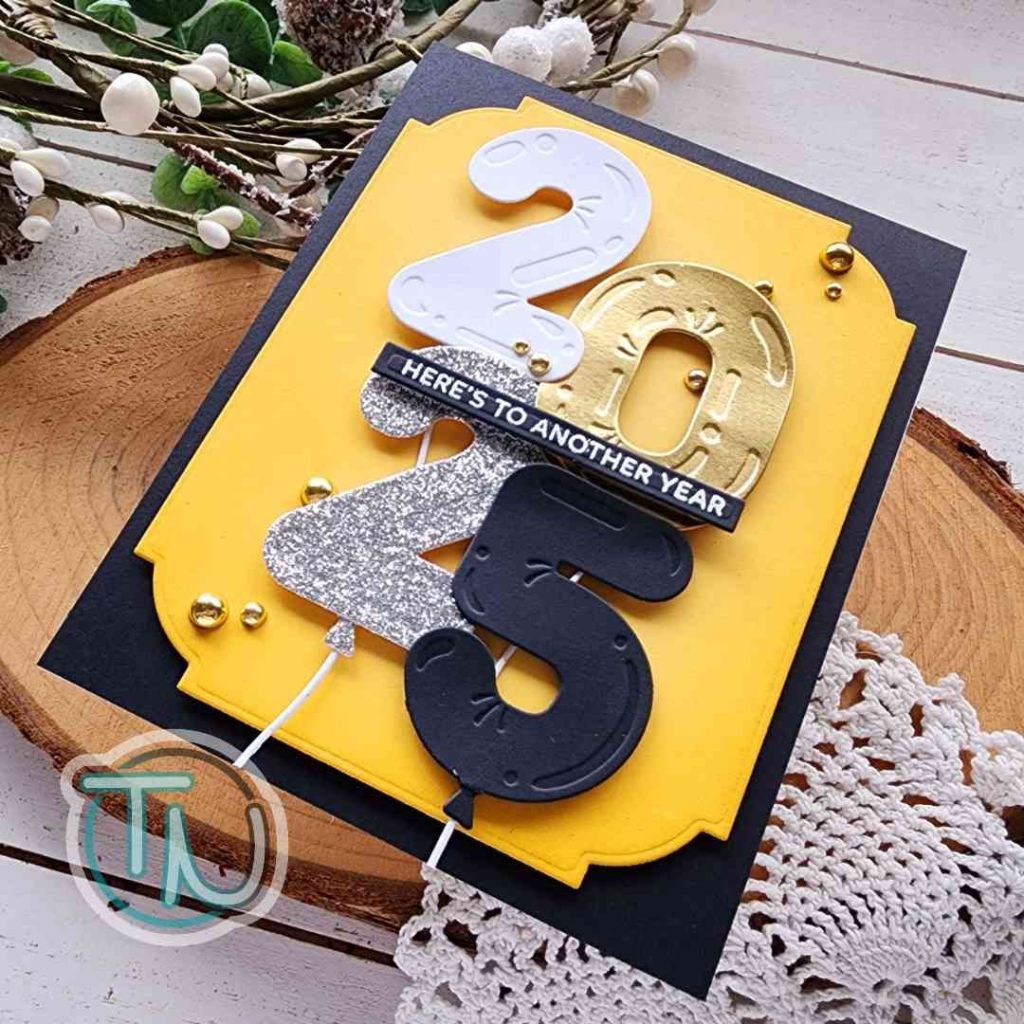
Next I stamped and heat embossed a sentiment from Pretty Pink Posh Sentiment Strips | Birthday and cut it out with a senitment strip die. That is popped up with a foam strip and I finished the design off with a scattering of gold baubles from Pretty Pink Posh as well.
I don’t do the resolution thing but I have some simple goals for the year – move my body more, go camping more and try some new things throughout the year. What about you? Any thoughts for the new year?
Products used:
Spellbinders Birthday Balloons dies
Spellbinders Notched Rectangle dies
Pretty Pink Posh Sentiment Strips dies
Pretty Pink Posh Sentiment Strips | Birthday stamps
Pretty Pink Posh gold pearls
Embossing powder – frosting
Magic anti-static tool
Embossing & Watermark ink
Lawn Fawn no. 2 pencil ink
Blending brush
Liquid glue
Foam strips, squares and tape
I appreciate you sharing your time with me. Have a fabulous day!