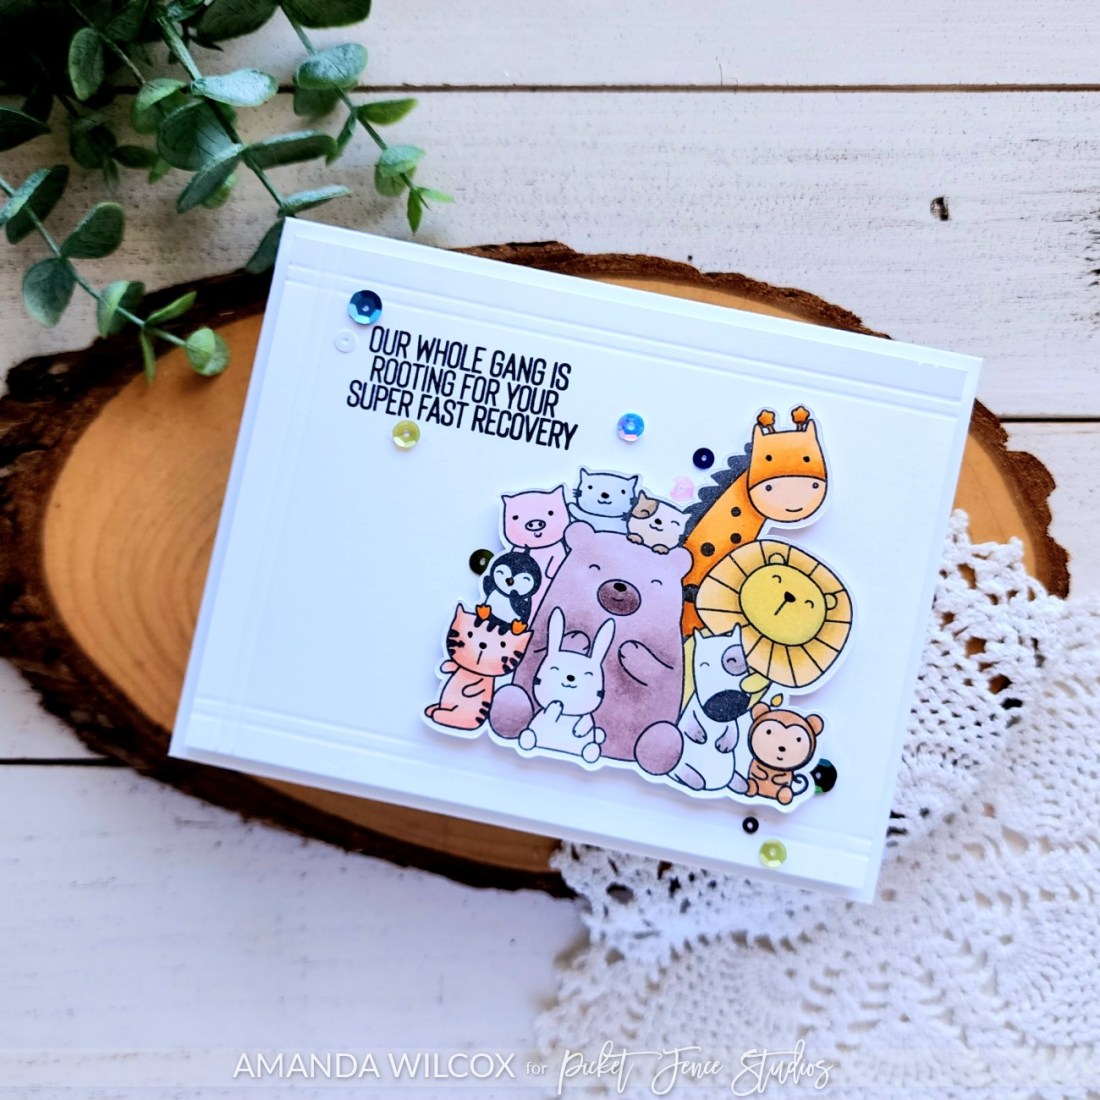
Hello again! I wanted to share another card I created for the Picket Fence Studios June release featuring their adorable Animal Crackers line. This group of critters are rooting for a speedy recovery and I love it!
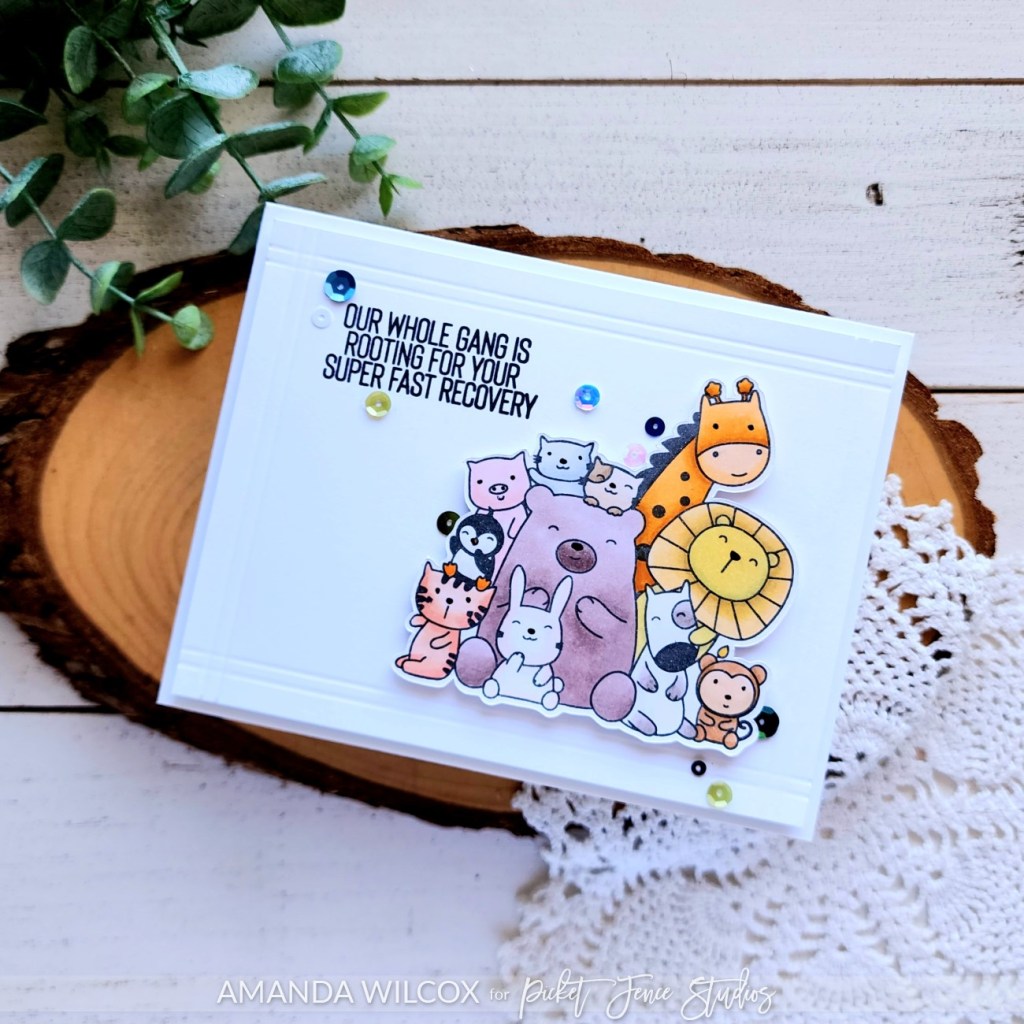
I started by stamping the image and taking my time coloring all of these cuties with my copic markers. Then I cut it out and set it aside.
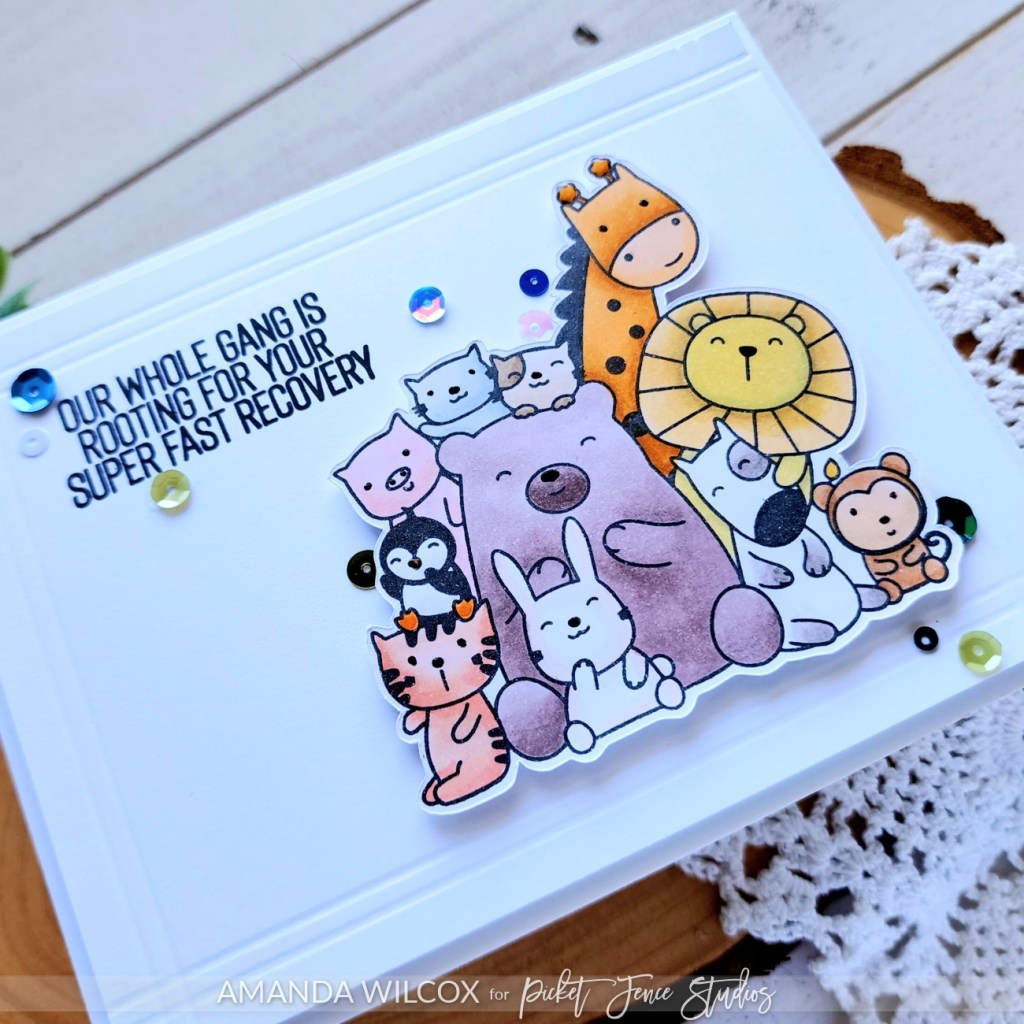
For my background panel, I cut a piece of white cardstock to 4×5.25 inches and used my scoring board to emboss lines 1/4″ in and 1/8″ apart all the way around. This gives a subtle frame and great detail to your focal panel. Then I placed the panel in my MISTI and stamped the sentiment, making sure I had room for my image because it’s so big.
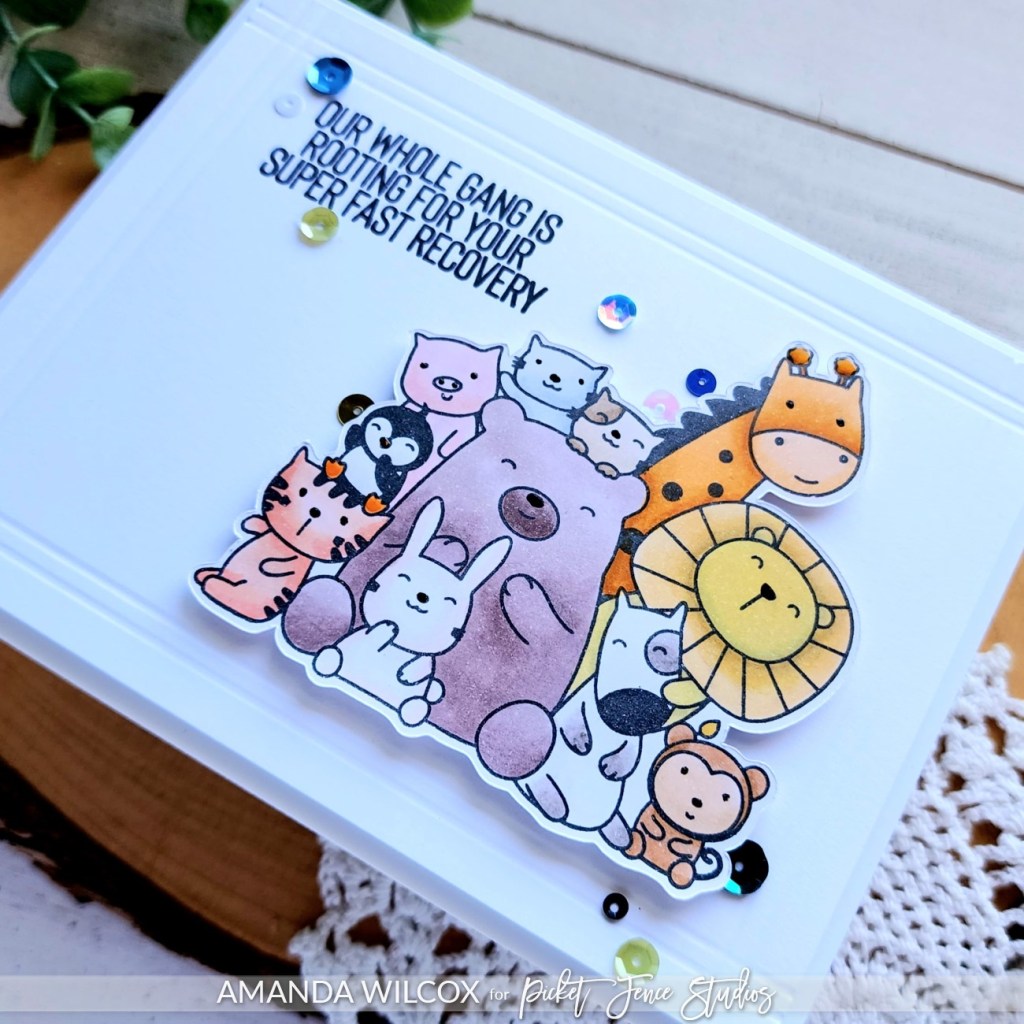
I popped the panel up with foam tape and then did the same thing with the image. For finishing touches I added black glaze pen to critter eyes and noses. Then I glued down a scattering of sequins from the new Lake Tahoe embellishment mix.
Products used today:
Animal Crackers: Kind Messages stamps and dies
Lake Tahoe embellishment mix
Foam tape
Liquid glue
I appreciate you sharing your time with me. Have a fabulous day!