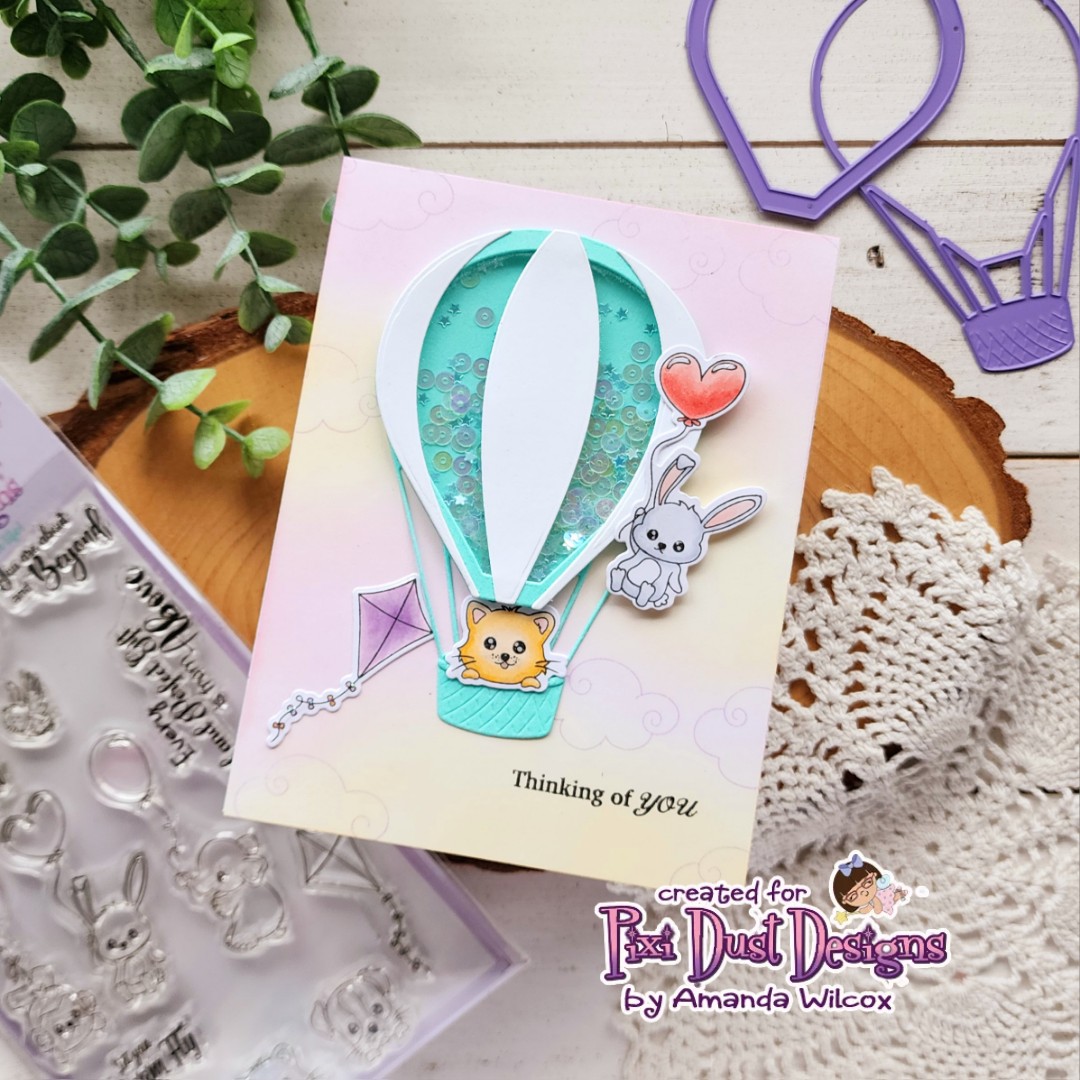
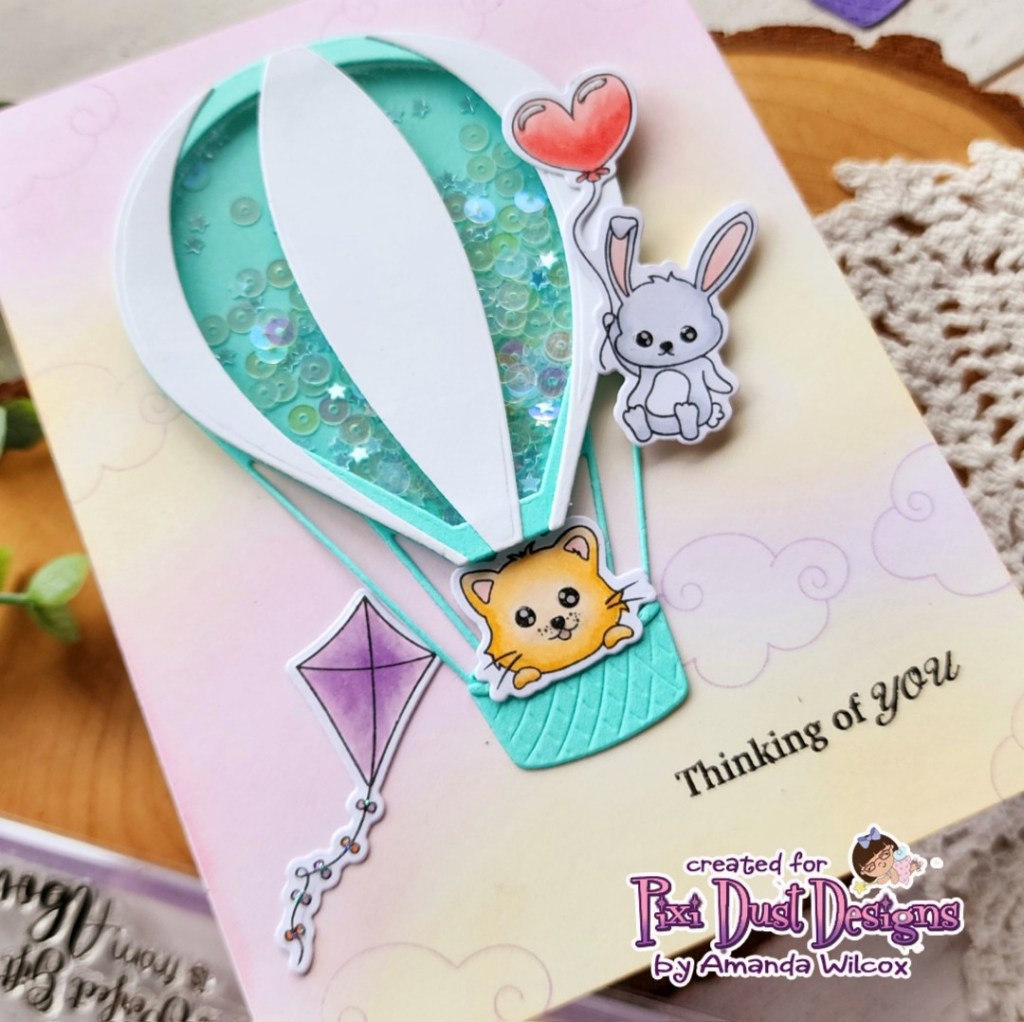
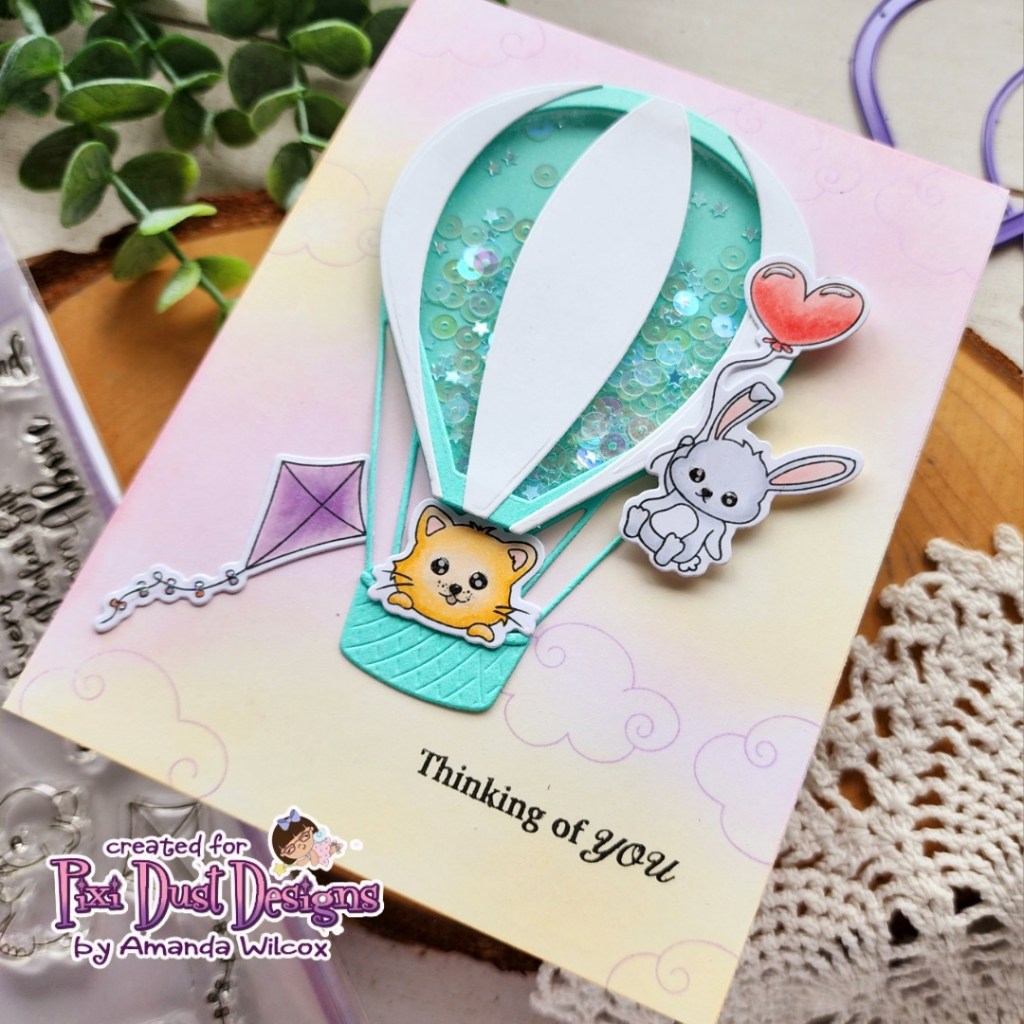
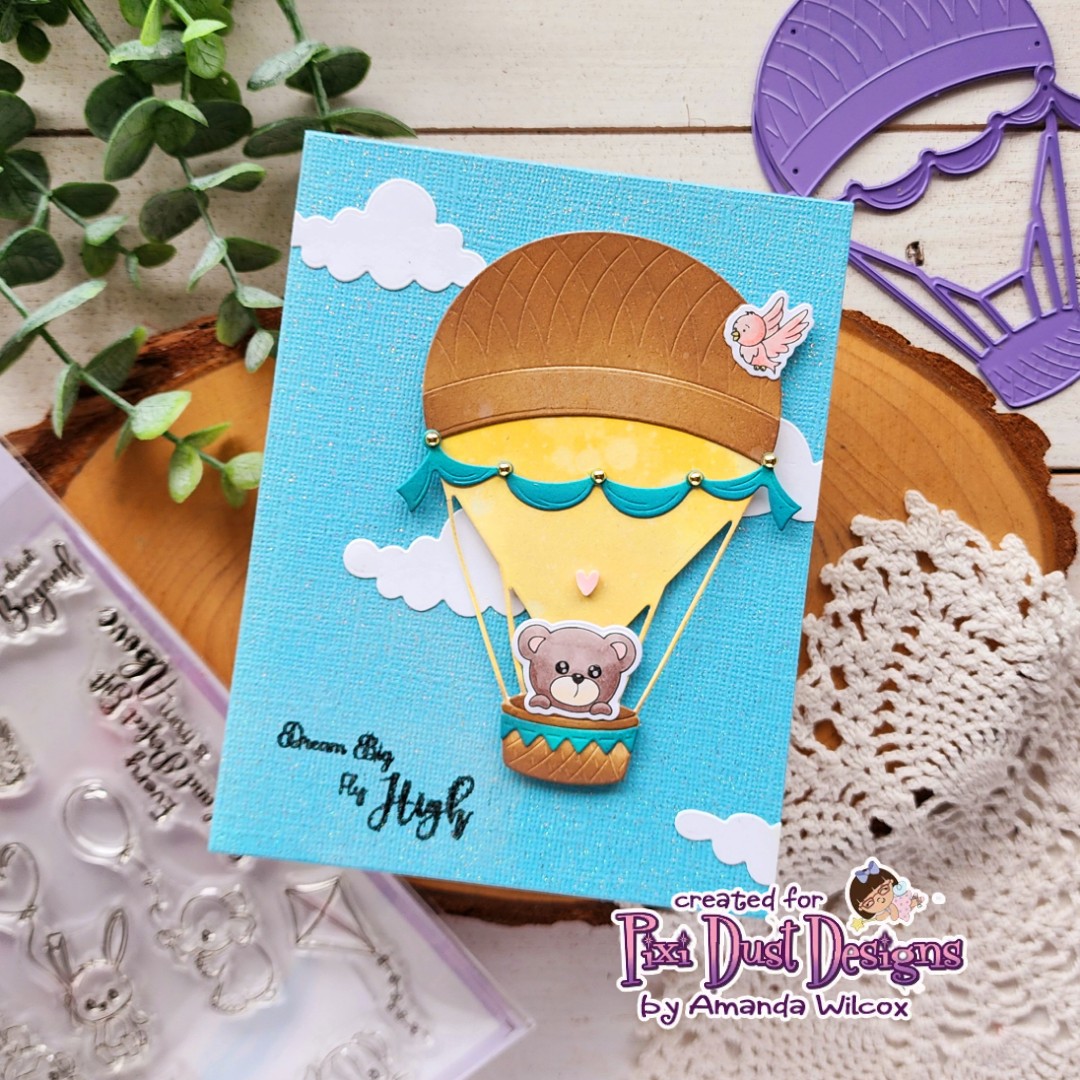
Miss Ink Stamps – Toucan of my Appreciation

Happy Thursday everyone! We’re one day closer to the weekend and I’m here for it! Today I’m sharing a little card inspiration featuring stamps and stencil from Miss Ink Stamps. I love all of her critters! The art is amazing and I have so much fun coloring the elements.

Today I chose two images from Pretty Bird, stamped and colored them with copic markers before using the scan-n-cut to cut them out. I added foam tape to the bird and popped it on the leaf image. Then switched to my background.

I simply trimmed a piece of green cardstock and pulled out my On the Vine stencil. I sprayed the stencil with Pixie Spray from Thermoweb and let it dry for a minute for adhering it to the cardstock. Then I blended two colors of green ink across the panel. I wanted variety in the background so it wasn’t flat. Using the images as a guide, I placed the panel in my MISTI and stamped my sentiment in the lower center.

The green cardstock measured 3.5×4.75 inches so I found orange cardstock in my stash and trimmed it to 3.75×5 and adhered them together. Next, I added foam tape to the back and popped it up on a white card base. Finally I added the images above the sentiment and finished them off with black glaze pen on the bird’s eye, then white gel pen highlights all over the images. Very last I found some glitter enamel dots in the perfect orange and added them across the design as well.

Isn’t this such a fun and silly thank you card? I love puns so much and this one is top notch!

Products used:
Pretty Bird stamps
On the Vine stencil
Pixie Spray
Blending brushes
Lawn Fawn ink – cilantro and artichoke
Foam tape
Tape runner
Sakura gel pen – white and black
Glitter enamel dots

I appreciate you sharing your time with me. Have a fabulous day!

Newton’s Nook – Taco Tuesday

Hi there crafty friends! I’m always happy to be back on the Newton’s Nook blog sharing adorable and fun inspiration. Today we’re pretending it’s Tuesday and living our best taco life!

I had a general layout idea in mind so I started by taking an A2 piece of white cardstock and inking up the edges with spiced marmalade distress oxide ink and spritzing it generously with water. I blotted it dry and set it aside. Then, I took a second piece of white cardstock and used the mini taco image in the Newton Loves Tacos stamp set to create a fun background of little yellow tacos. Then I die cut the panel with the second-to-largest die in the Framework die set.

Then, I stamped and colored my sweet taco cat with copic markers before using the coordinating die to cut him out. Using the image as a guide, I stamped and heat embossed my sentiment on the taco panel so it was shiny and stood out a little. I added foam squares to the kitty and popped him up on the panel above that.

For assembly, I added the inked panel to a white card base with liquid glue and then popped the scalloped panel up on that with foam tape.

For finishing touches, I added red clay hearts to the design for fun. These come from the Sweethearts clay mix from the Twiddler’s Nook shop. Then I added touch of gloss to the kitty’s nose and parts of the taco.

Products used:
Newton Loves Tacos stamps and dies
Framework dies
Pink & Main embossing ink, powder and anti-static brush
P&M touch of gloss
P&M foam tape
Distress Oxide Ink – spiced marmalade
Twiddler’s Nook Sweethearts embellishments

I appreciate you sharing your time with me. Have a fabulous day!

Pink & Main – Sending Sunshine & Smiles Shaker Card

Welcome crafty friends! I’m over on the Pink & Main blog today with another peek at the upcoming release for April. We had a little flub last week and were rushing the month faster than we meant to. So you get two weeks of sneak peeks instead of one.

Today’s design started one way and definitely didn’t turn out as planned. But when this happens we just improvise or make changes. No big deal. The original plan was to put that sweet mushroom on top of the “h” in hi but it just wasn’t working for me. I went back to the drawing board and found these other sweet images in a different upcoming set and thing the end result is pretty darn cute!

The layered scallops rectangle die set is fabulous and comes with two sizes of scallop layers and two sizes of stitched rectangles to give a finished look on top, PLUS the awesome giant “hi” and even more! Such an amazing set and made it really easy with a little acetate and foam tape to create a shaker.

Today’s shaker filler is sparkling cotton candy flock with glitter. It just seems to float around when you shake it which is so fun and doesn’t add a bunch of extra bulk or weight to the card.

My images come from Sunshine Days and Mush Love. The are from Mommy Lhey is just adorable and so fun to color and create with. You’re going to love these new sets so much!

I chose to stamp and heat emboss my sentiment in grape soda embossing powder on vellum before die cutting it and carefully adhering it with a thin layer of liquid glue. Isn’t it a fun touch?

For finishing touches I added black glaze pen to the butterfly and sun’s eyes and stardust Stickles to elements of the cloud, sun, mushroom and butterfly. A little extra sparkle never hurt anyone and I love it!

Products used:
Mush Love stamps and dies
Sunshine Days stamps and dies
Layered Scallops Rectangles dies

Foam tape
Magic Anti-static Brush
Embossing & Watermark Ink
Embossing powder – grape soda
Flock with Glitter – sparkling cotton candy
EZ Squeeze liquid glue
Stickles – stardust
Black glaze pen

I appreciate you sharing your time with me. Have a fabulous day!

Pixi Dust Designs – Peek-a-boo Gift Tags

Hi there! I have a couple of really adorable gift tags to share with you today featuring the new Tag D die set from Pixi Dust Designs. It just released last week and I love it. It’s a great combo of options to make shaker and regular tags.

Today I created one shaker tag and one regular to show how some of the different dies in the set work with the base tag shape. I couldn’t resist adding the sweet critters from Up, Up and Away to them too.

For my shaker tag, I cut a yellow base and melon frame, lined the back of the frame with acetate and foam strips and chose my favorite Wonka’s Candy Jar embellishments to fill the well with. After sealing it up, I added the monkey floating away and chose to cut a blue hole reinforcer to match the balloon. I added a sentiment strip and finished things off with Touch of Glossy to the balloon and monkey’s eyes and nose.

For my other tag, I cut the base from green cardstock and then a topper and bottom edge from blue. After I glued the layers together, I popped the kitty and puppy up with foam squares and stamped a sentiment. For finishing touches I added Touch of Gloss to the eyes and nose plus that kitty’s cute tongue too. The red clay heart came from the 
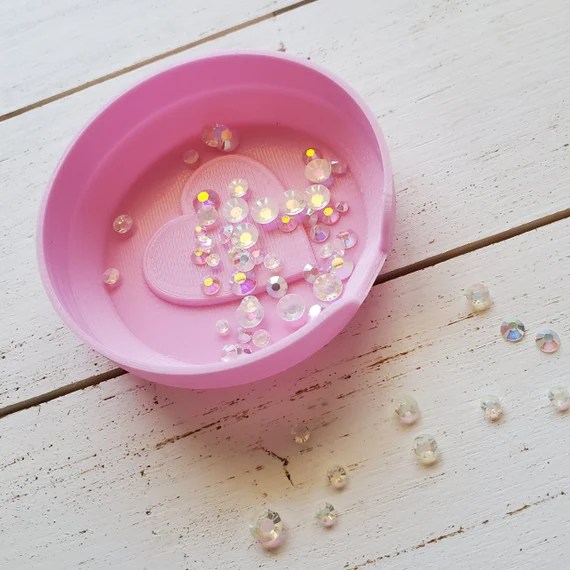
Sweethearts embellishment mix in the Twiddler’s Nook shop.

One little note I thought I would add today – when I create tags like this, I almost always cut another base tag shape from white cardstock so that I have a place to write to and from, plus a message too.

Products used today:
Tag D dies
Up, Up and Away stamps
Woodland Friends stamps
Panda-stic stamps

Foam strips
Twiddler’s Nook embellishments – Wonka’s Candy Jar and Sweethearts
Touch of Gloss
Bearly Art liquid glue

I appreciate you sharing your time with me. Have a fabulous day!

Pixi Dust Designs – Thinking of You Shaker

Happy Friday everyone! Thanks for stopping by today. I’m excited to share a card I created with the new release from Pixi Dust Designs which is available in the shop TODAY!!!! This new hot air balloon die set is so much fun to create with! You can make shakers or just gorgeous hot air balloons. There are so many different options to decorate your balloon it’s hard to choose!

Today I chose the shaker frame to make my balloon a shaker but also added the cool stripes over the top because these were the kind of balloons I always loved as a kid when we would go to the night glows.

For my sky, I inked pink and yellow lightly on a white panel and then stamped the cloud images from the Up, Up and Away stamp set. After adhering my balloon shaker, I added a sweet kitty to the balloon basket, a kite flying away in the sky and the adorable bunny floating along with his kitty friend.

My sentiment comes from the Woodland Friends stamp set. Once that was stamped, I adhered my panel to a card base and added glossy accents to the critter eyes and noses. last, I added stardust Stickles to the kite tail and highlights on the heart balloon.

Be sure to pop over to the Pixi Dust Designs shop to see what other adorable and amazing products are available today.

Products used today:
Up, Up and Away stamps and dies
Hot Air Balloon dies
Woodland Friends stamps

Blending brushes
Foam tape
Touch of Gloss
Stardust Stickles
Bearly Art liquid glue

I appreciate you sharing your time with me. Have a fabulous day!

Pink & Main – Thank You Fairy Much

Happy Wednesday everyone! It’s sneak peek week for the upcoming April release for Pink & Main. To say this is a big release packed with amazing is really an understatement. I hope you enjoy sneak peeks and can’t wait to see what you all choose to stock up on come release day!

For my card today, I paired some upcoming fairy cuteness with a new embossing folder, scalloped circle dies and the new fabulous foilable sheets! Phew! So many amazing products to create with leads to endless possibilities for crafting.

After foiling my panel, I inked it up with a very light hand using night sky ink. Then I popped the scalloped circle panel up with foam tape and popped the fairies and sentiment up with foam squares too.

I almost forgot but before adding the fairies, I took a brayer roller to add white pigment ink to the clouds on the embossed panel. It helps them stand out and gives a cool look.

Finally I splattered pearl watercolor over the whole panel before adhering it to a card base and tying some glittery twine around the left side. For finishing touches I just added some Touch of Gloss to the flower centers and fairy’s shoes. Then I added Wink of Stella glitter brush pen to the fairy wings too.

I hope you’re as excited for release day as I am! Check the Pink & Main store first thing Friday to snag some new crafty goodness.

Products used today:
Pixie Dust stamps and dies
Clouds embossing folder
Layered Scallops Circles dies

Large Sentiment Strips dies
Fairy Wings CheerFoil
Ergonomic blending brush
Night Sky ink
Full Bloom foilable kit
Foam tape
Touch of Gloss
LH Colors pearl watercolor

I appreciate you sharing your time with me. Have a fabulous day!

Spellbinders – Floral Friendship Paper Suite

Welcome everyone! Yesterday was release day for Spellbinders and with it came a fantastic collection of paper goodies – Floral Friendship Paper Suite! There are ephemera packs, embellishments, chipboard frames and a gorgeous 6×6 paper pad in the collection. I had a blast playing with the whole collection creating a bunch of cards the other night.

I started my creative process by opening both packages of ephemera a sorted them into categories. There are a TON of images and sentiments in these packs so it’s really helpful to get a handle on what your choices are. I chose simple categories like banners, sentiments with images, florals, birds, butterflies, etc.

While doing this, some of the images just jumped out at me to pair together or try with certain paper in the paper pad. I kept some cards simpler than others but with the gold foiling in the images and paper, none of these are plain by any standards.

The color palette through the whole collection is so pretty too! For these first cards I barely made a dent in the products and I also didn’t use anything outside of the collection itself. It would be great to add elements from other die sets to step things up too.

I also appreciate the variety of sentiments included in the ephemera pack. It covers every type of card you would want or need to create. Sympathy cards are one kind that are not fun to make when you need one so it’s always smart to have some on hand.

Oh, and don’t get me started on how fun these amazing gemstones are! They come in a variety of colors to coordinate and three sizes of each color. I used them on a few cards and have a bundle left for more cards to come!

I hope you enjoyed these simple to create beautiful cards today. Be sure to check out the collection over at Spellbinders and pick up some new goodies to create with!

Products used:
Floral Friendship Paper Pad
Floral Friendship Chipboard Frames
Floral Friendship Printed Die Cuts
Floral Friendship Printed Die Cut Sentiments
Floral Friendship Gemstones
Floral Friendship Butterflies

I appreciate you sharing your time with me. Have a fabulous day!

Newton’s Nook – Meow-ing in the Rain!

Welcome friends! Today I’m over on the Newton’s Nook blog with an extra project to share gearing us up for all things spring! I’m very ready for more sunshine and time outside. How about you?

When shuffling stamps around moving out of the winter season, I found this adorable set that I haven’t given enough love – Newton’s Rainy Day Trio! So I immediately pulled it out to create with.

I wanted to keep the colors soft so I started by coloring my kitties all the same but with very light colors. Then I kept to the softer colors for the others as well. This took some effort for me because I lean toward the bold side. I think they turned out really sweet though and it was fun to think differently about color combos.

I stamped a few music notes before using the coordinating dies to cut everything out. Then I used the Raindrops stencil on a piece of white cardstock with teal ink fading as I went down. I removed the stencil and inked the top of the paper with the same color.

Next, I cut a strip of white cardstock and stamped my sentiment on it. I started with 1.5 inches but went down to 1.25 inches instead. I added foam tape to the back and popped it up on the bottom of the stenciled panel.

Next, I added the kitties and music notes with foam squares to keep them the same level as the sentiment panel. For finishing touches I added glossy accents to the buttons and boots, and you can’t forget the kitty noses too! Then I decided a little shine on the umbrella handles and tips would be good too.

I added Wink of Stella glitter brush pen to the music notes so they shimmer in the light and last of all I came in with a white gel pen to add highlights to the kitty images.

I live in Oregon where it rains all the time so I can relate to these kitties pretty well. I’m definitely more like the kitty in yellow – just put your hood on and enjoy it because it’s not going anywhere. Lol!

Products used today:
Newton’s Rainy Day Trio stamps and dies
Raindrops stencil
Foam tape and squares
Glossy accents
Wink of Stella glitter brush pen

I appreciate you sharing your time with me. Have a fabulous day!

Spellbinders – Junk Journal Envelopes with Flea Market Finds

Welcome everyone! I’m so glad you’re here today. I have been playing around with different types of crafts lately, some paper-related and some not. One has been journaling and decorating the pages here and there when I feel like it. I thought it would be fun to play with some of the Spellbinders Flea Market Finds envelopes and things to make additions for future pages.

I created a few envelopes of both sizes from cardstock and folded them up. Then I various additions for each one using the other dies in the Envelopes 2 set – faux wax seals, inserts, stamps – whatever struck me at the time.

Then I started decorating the various pieces with the Reading Matter stamp set for added interest. I pulled one of the fun ephemera pieces from the Miscellany pack for this envelope and added ribbon to the tab on my insert too.

I love the postage stamp and really wanted to use it so I flipped one of the envelopes over and decorated the front instead of the back too. I thought this would give a little something different for the page too. These stamps are so vintage and cool. I love them!

For the last envelope I switched to teal and a white insert while stamping in colored ink for a little extra something. I love how this one turned out. There’s something about the brightness on this round of creations that are making me happy.

Do you have other crafty ventures besides card making? I’d love to hear about them!

Products used today:
Mini Envelope 2 dies
Florals 2 Palette paper pad
Reading Matter stamps
Coat Check Miscellany printed die cuts

White liner tape
Tape runner

I appreciate you sharing your time with me. Have a fabulous day!

Pink & Main – You Are My Sunshine

Happy Wednesday everyone! It’s Pink & Main day on the blog and today I finally get to share this sweet baby card with you featuring the new stamp and die set Welcome Baby. This might be my most favorite baby set of all time. It’s super versatile and absolutely adorable!

I kept my colors a little gender neutral today so I could have a card in my stash for those parents who don’t find out or maybe I get extra excited and want to send a congrats card before they know. These are very real possibilities people. And I totally couldn’t resist decorating the onesie with the you are my sunshine sentiment. It’s my favorite next to that dinosaur!

For my background, I cut a white panel down to 4×5.5 inches and inked up the left edge with construction ink over the Scattered Stars stencil. I popped this panel up with foam tape on a white card base and added a little washi tape strip for interest.

Next, I popped the onesie up with foam squares. The coordinating die set comes with the letters to cut the word baby so I decided to add it below the onesie with construction cardstock.

For finishing touches I added stardust Stickles to the bottom of the die cut letters. I like the extra sparkle and interest it gives the otherwise flat addition to the design.

Then I added Touch of Gloss to the snaps and sun on the onesie and stardust Stickles to the cloud. Final finishing touches are those couple of glitter enamel dots from the In the Garden pack.

Do you keep different occasion cards in your stash like baby or wedding cards? I’m not very good at it but when I have them on hand I am always pleased with myself. Lol.

Products used today:
Welcome Baby stamps and dies
Scattered Stars stencil
Ergonomic Blending Brush
Construction ink and cardstock
In the Garden enamel dots
Touch of Gloss
Foam tape and squares
Stickles – stardust

I appreciate you sharing your time with me. Have a fabulous day!