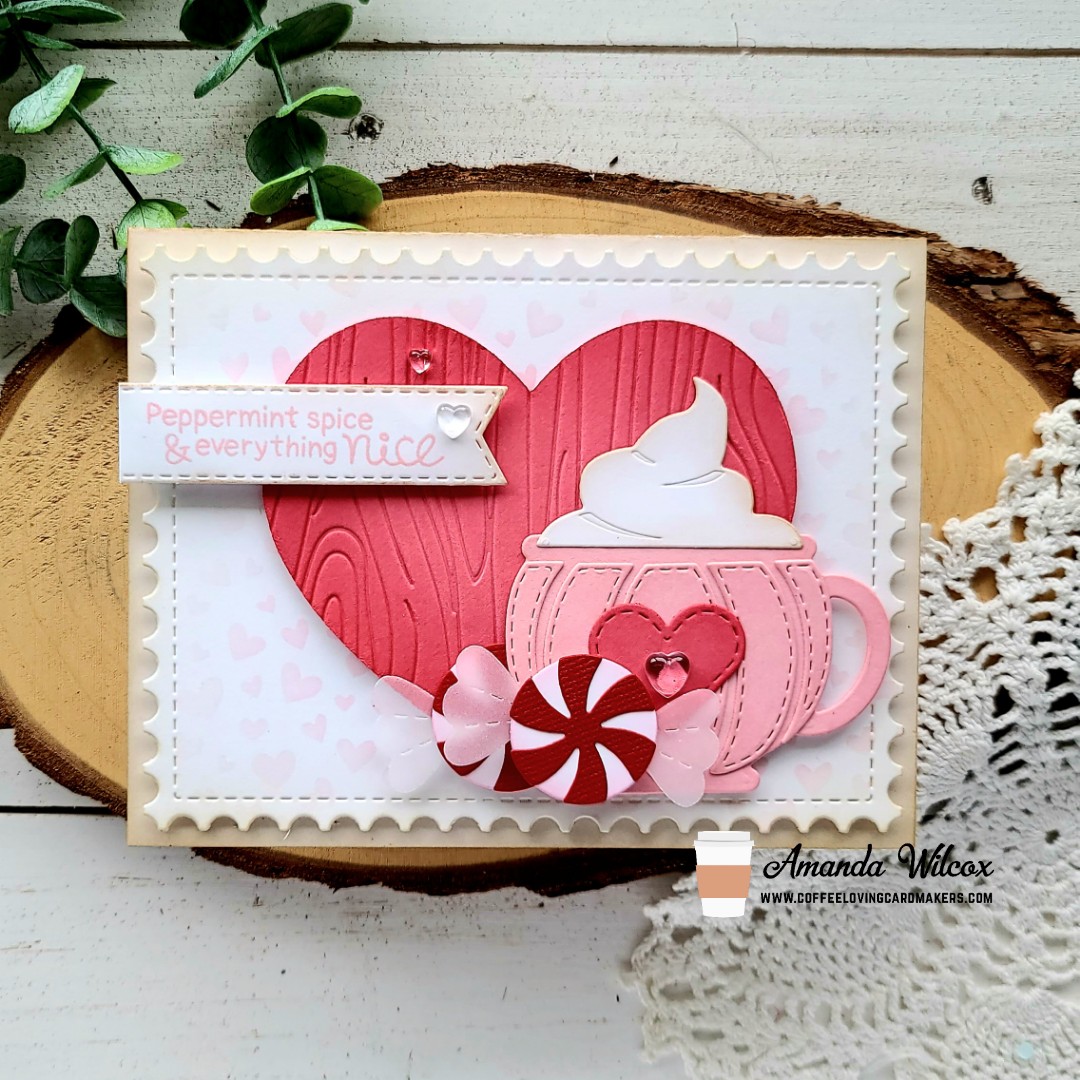
Happy Wednesday crafty friends! Today I’m over on the Newton’s Nook blog with a fun donut themed card. I kept my colors muted for a more masculine feel to help those in need of some boy-ish Valentine/love inspiration.
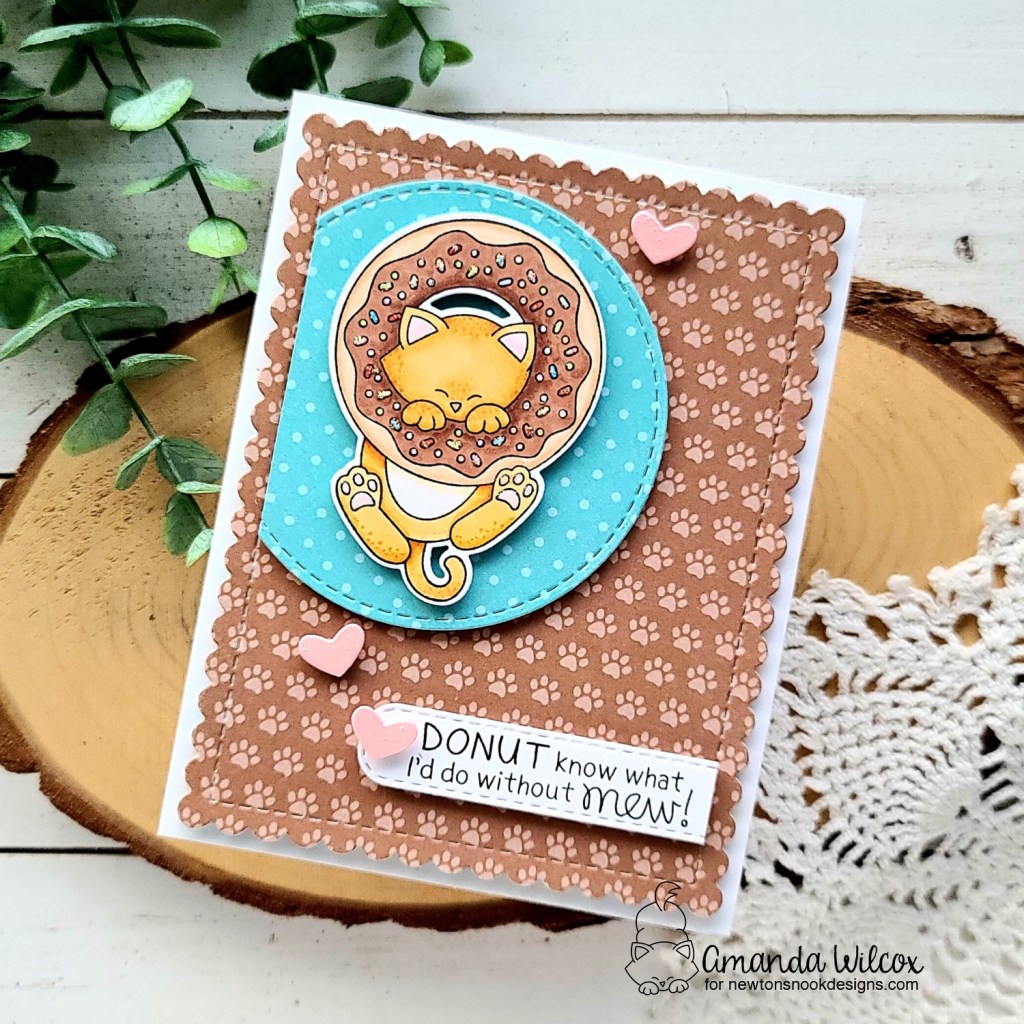
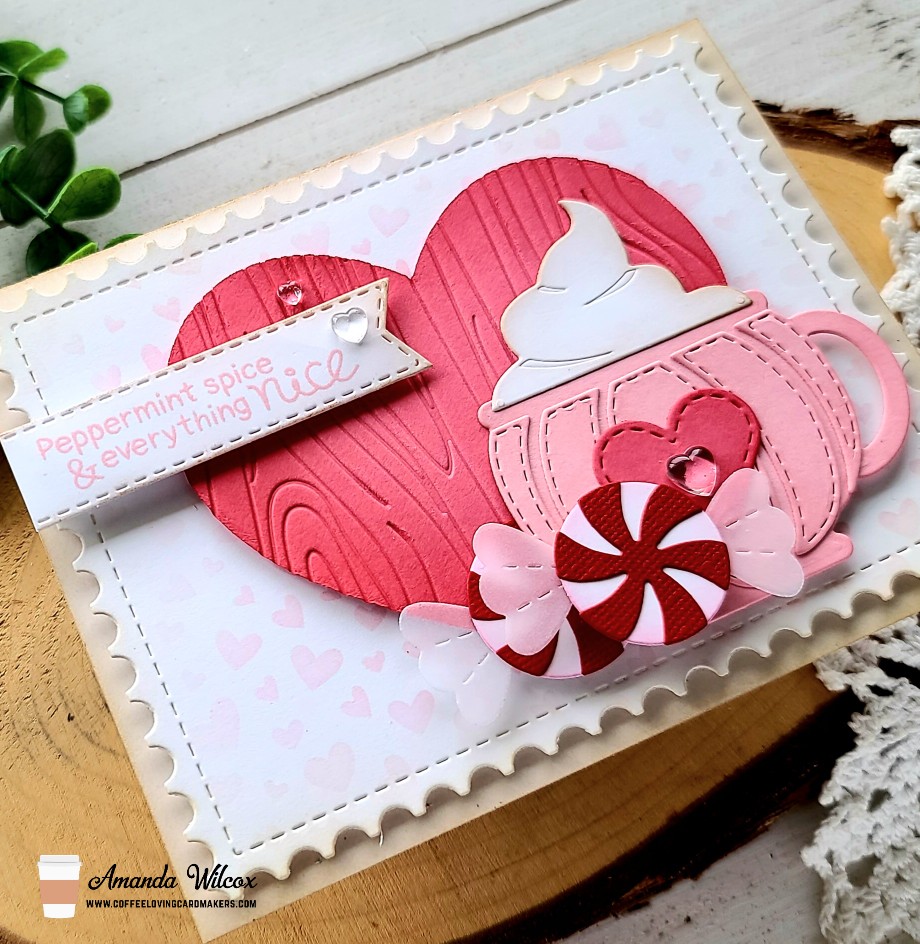
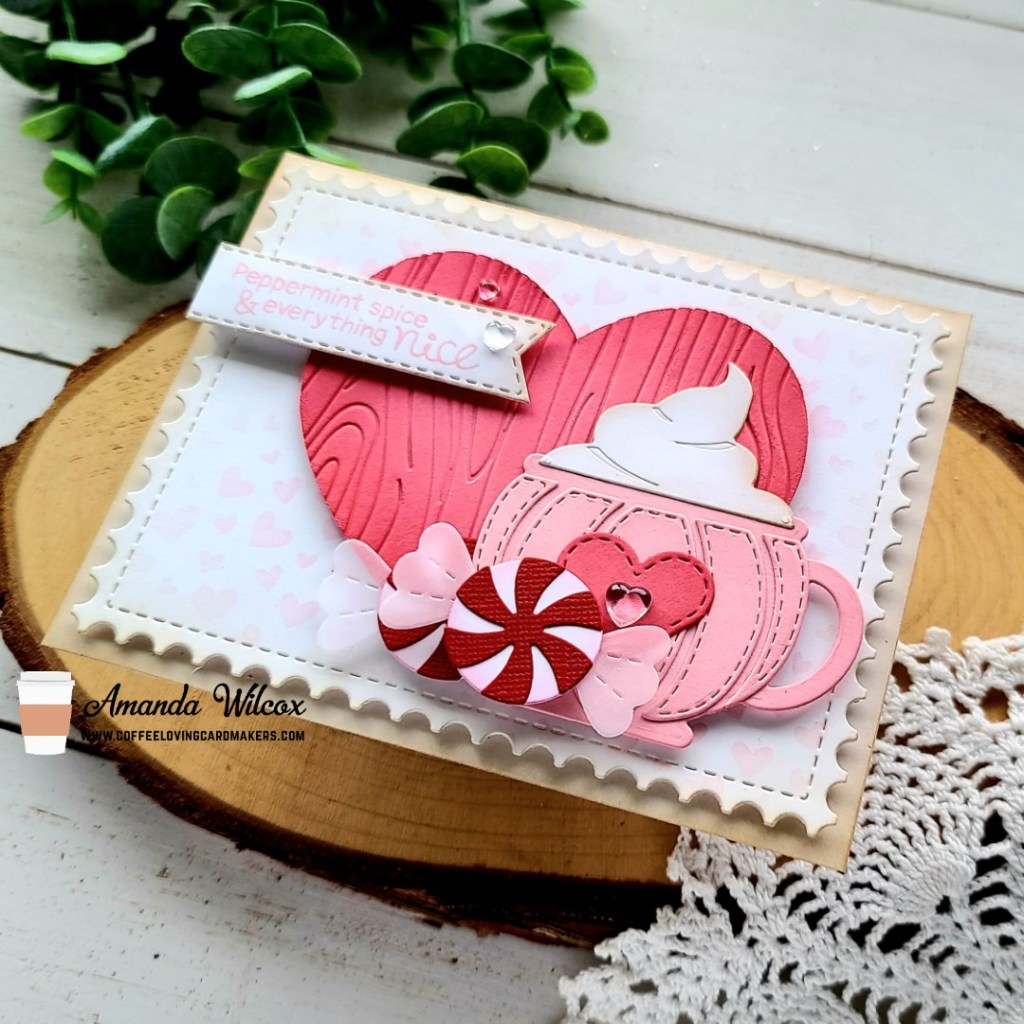
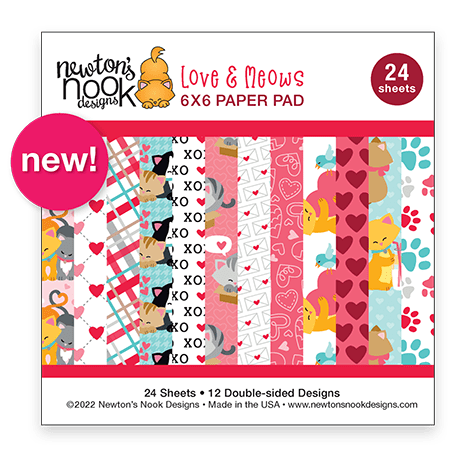
I started by stamping and coloring my image from Newton’s Donut with my copic markers. Then I used the coordinating dies to cut him out. Where I had a general design in mind, I hadn’t chose details like backgrounds and such. So I went digging in my stash for a stencil or something that fit but nothing was working. Then I pulled out the new Love & Meows paper pad and found these fantastic patterned papers and everything just fell into place.
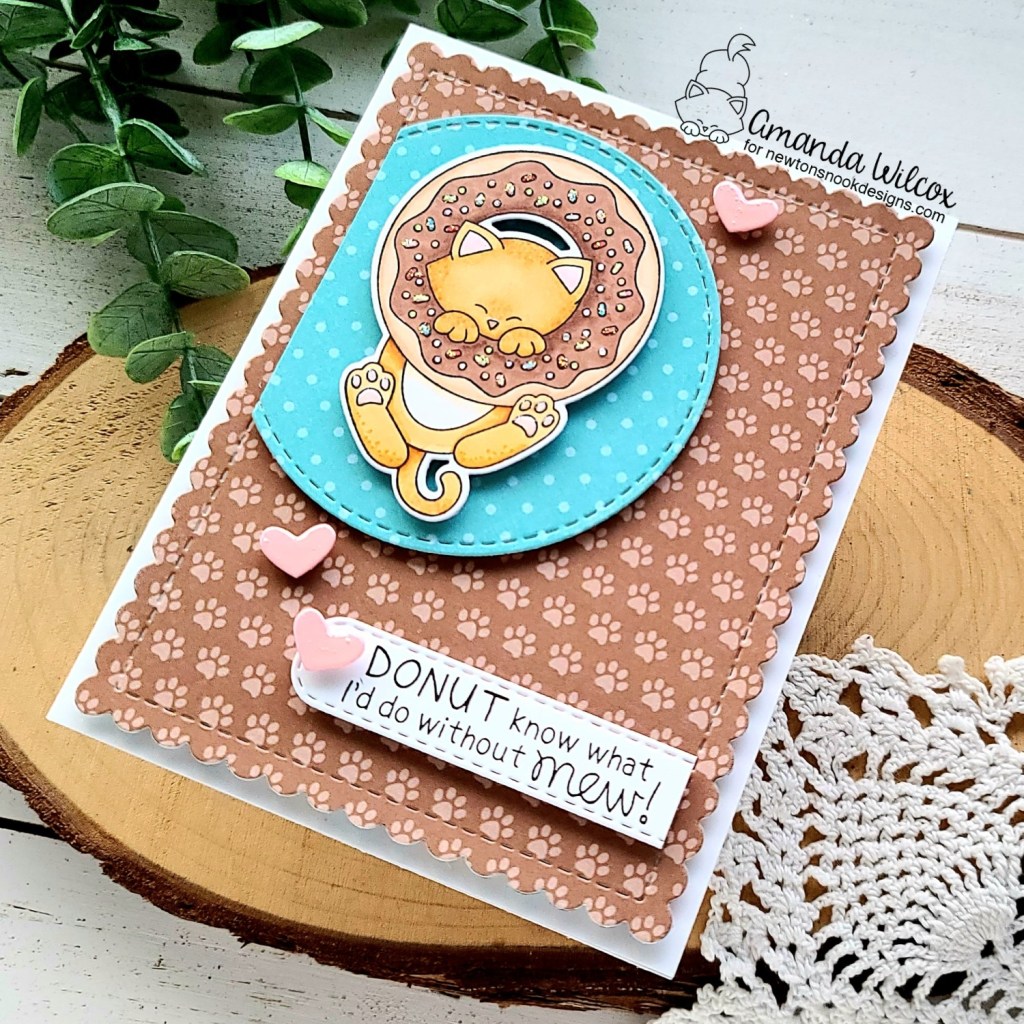
I cut the brown paper from the largest Frames & Flags die and the blue paper from the next-to-largest Circle Frame die. Then I cut a banner from the Banner Trio set and stamped my sentiment. Using my image as a guide, I trimmed the side off the circle and also trimmed the extra off the sentiment strip. Now we’re ready to assemble.

We popped the brown panel up with foam tape and popped the circle up on that. Then We added foam squares to Newton and added him next. Finally we added foam squares to the sentiment strip and added it to the bottom right. But things are looking a little plain and boring…
So I went digging and found this teeny heart in the Speech Bubbles die set. I cut it from light pink cardstock 3 times and popped them up with foam squares too. They were just the perfect addition.
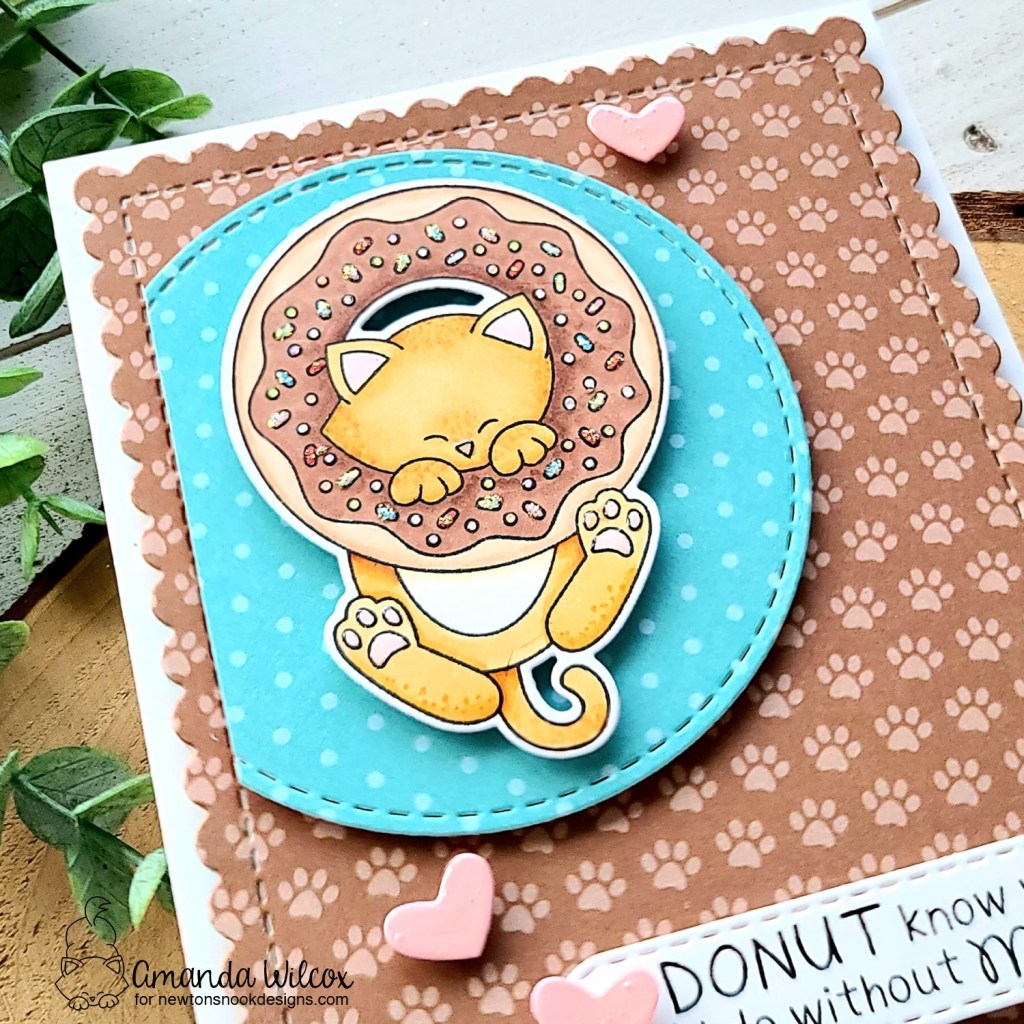
For finishing touches I started with glossy accents on Newton’s nose and toe beans. Then I added it to the circle sprinkles on the donut too. Not enough shine. So I came in with unicorn Stickles on the other sprinkles and liked it a little more but this made the hearts look really plain because the patterned paper has a shine. So I went for it and covered the pink hearts with glossy accents and I absolutely love it!
I hope you enjoyed today’s creation and found some inspiration to create something wonderful to share with someone.
Products used today:
Newton’s Donut stamps and dies
Frames & Flags dies
Circle Frames dies
Speech Bubbles dies
Banner Trio dies
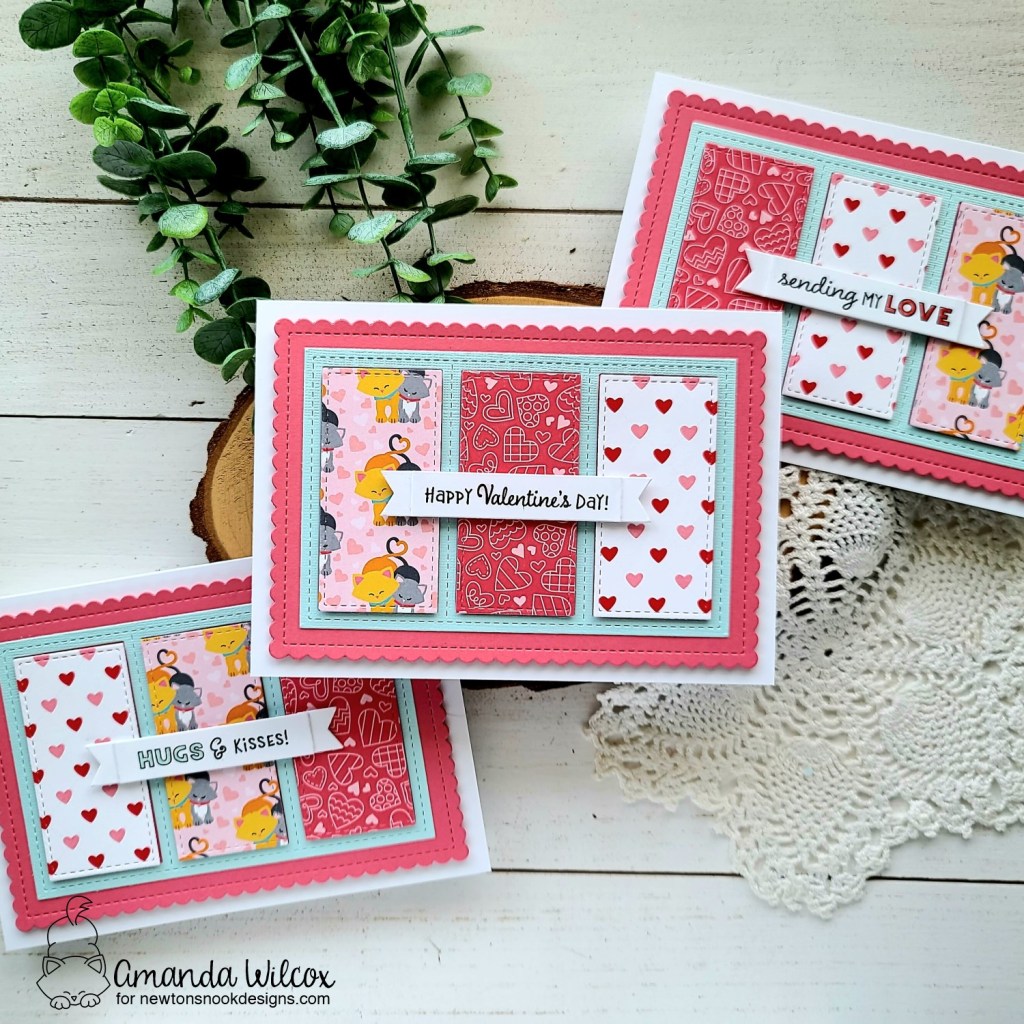
Love & Meows paper pad
3D foam tape and squares
Stickles – unicorn
Glossy accents
Copic markers
I appreciate you sharing your time with me. Have a fabulous day!