Newton’s Nook – Kit-tea Cat

Hello again! I’m over on the Newton’s Nook blog today with a super fun caffeinated creation to get your juices flowing today! I’ll be entering it into the Coffee Loving Cardmakers Spring|Summer Hop. I really hope you’re playing along with us. It’s so fun and there is so much inspiration to be had and prizes to be won!

I am honestly, SUPER EXCITED to share this card with you today! I had the fun idea to mask off the mug from Newton’s Mug and stamp one of the Monarchs images inside it for a decorated coffee cup! I love it! I colored the image with my copics and used the coordinating dies to cut it out.

Then for my background I cut a white panel to A2 size and inked up the Mugs stencil with light yellow ink. I took the Framework dies and cut the largest rectangle, then cut the rounded rectangle from the Frames & Flags set out of the center to create a frame.

For my sentiment, I chose the first one from Newton’s Mug and stamped it on a stitched circle from the Frames Squared set. Then I added a sentiment from Heartfelt Essentials to a banner from the Banner Trio set. I inked up the edges of the circle with a light green ink as close to the mug color as I could get, then I inked up the bottom of the banner with the same yellow as the mugs stenciling.

Moving on to assembling my card, I added the stenciled panel to a white card base, then popped the frame up with foam strips. I added foam squares to Newton’s Mug and popped it in place. I used liquid glue to adhere the circle to the banner and added foam squares to the back of that before placing it at the top of the design.

For finishing touches, I added a little glossy accents to Newton’s nose and Wink of Stella glitter brush pen to the butterfly on the mug and the circle sentiment.

I appreciate you sharing your time with me. Have a fabulous day!

Trinity Stamps – Some Bunny Mug

Hi everyone! I’m back with another fun caffeinated card to share with you featuring some goodies from Trinity Stamps‘ most recent release.

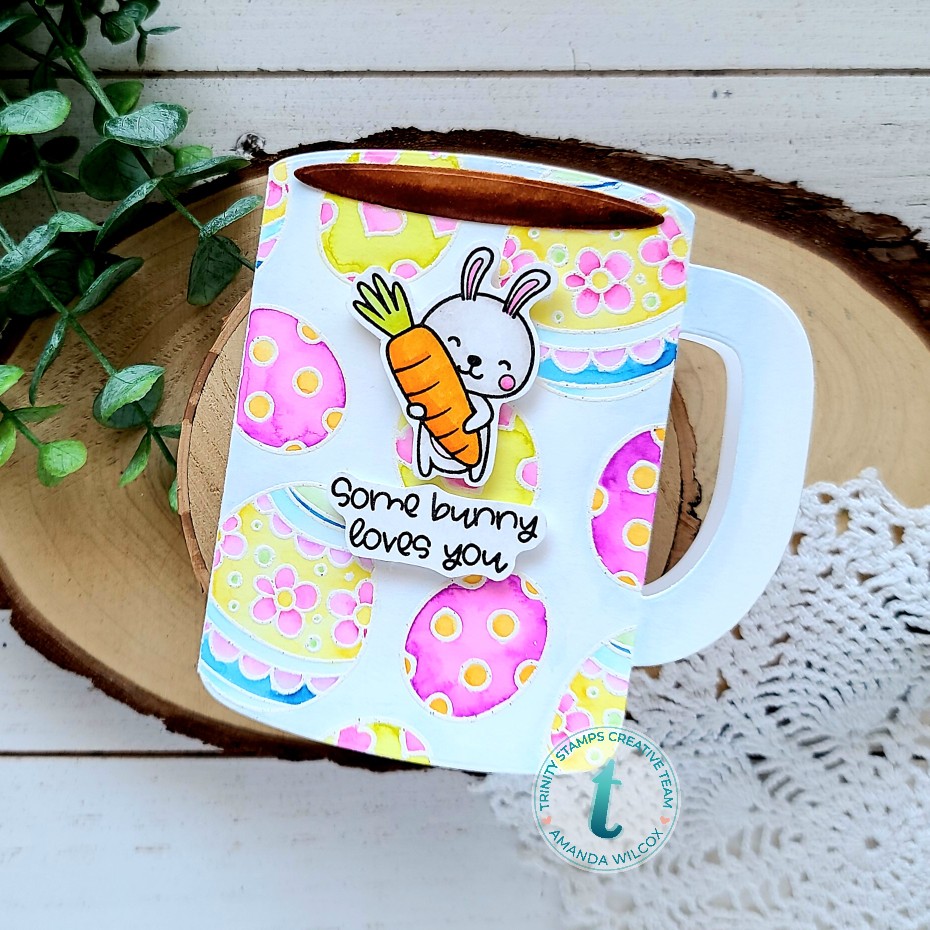
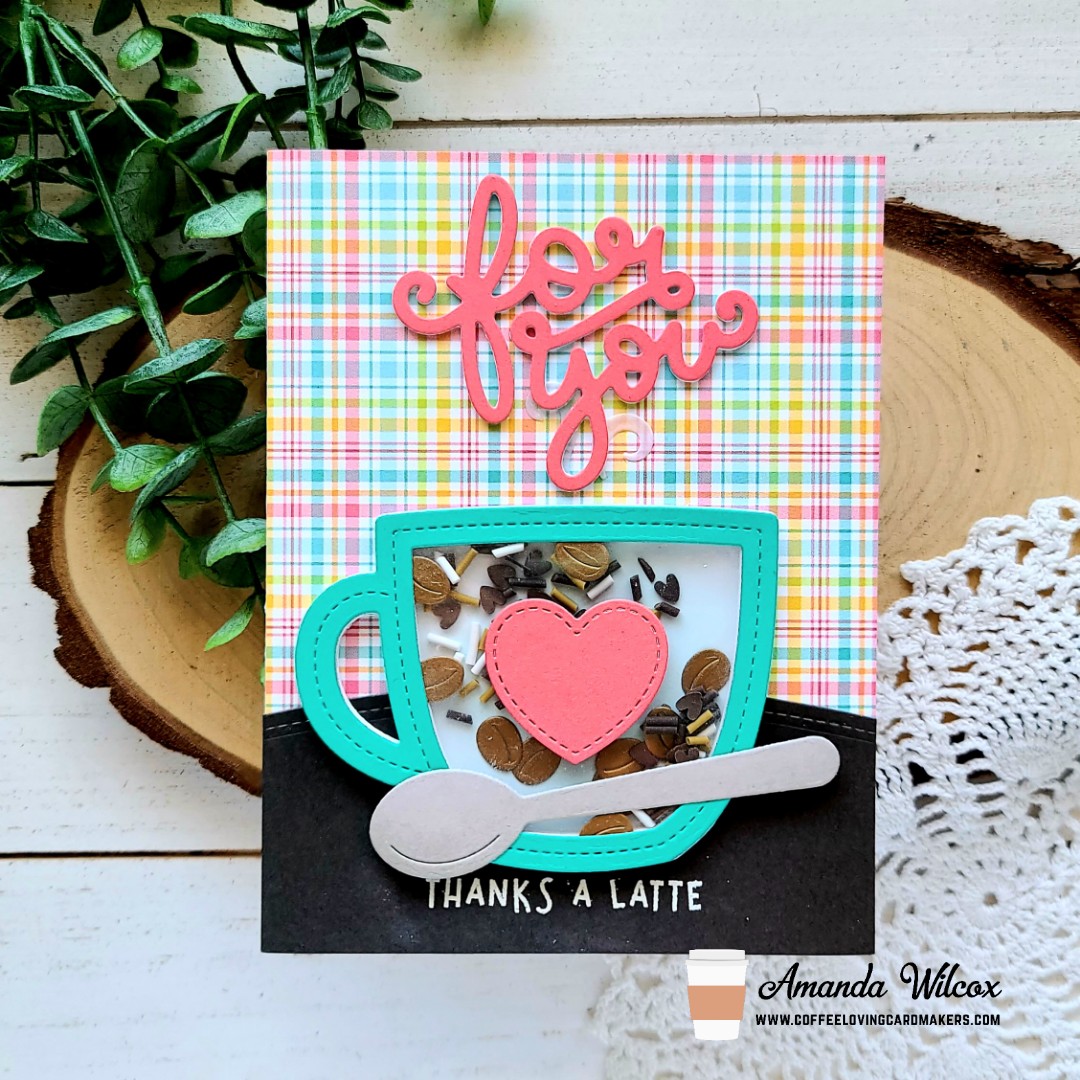
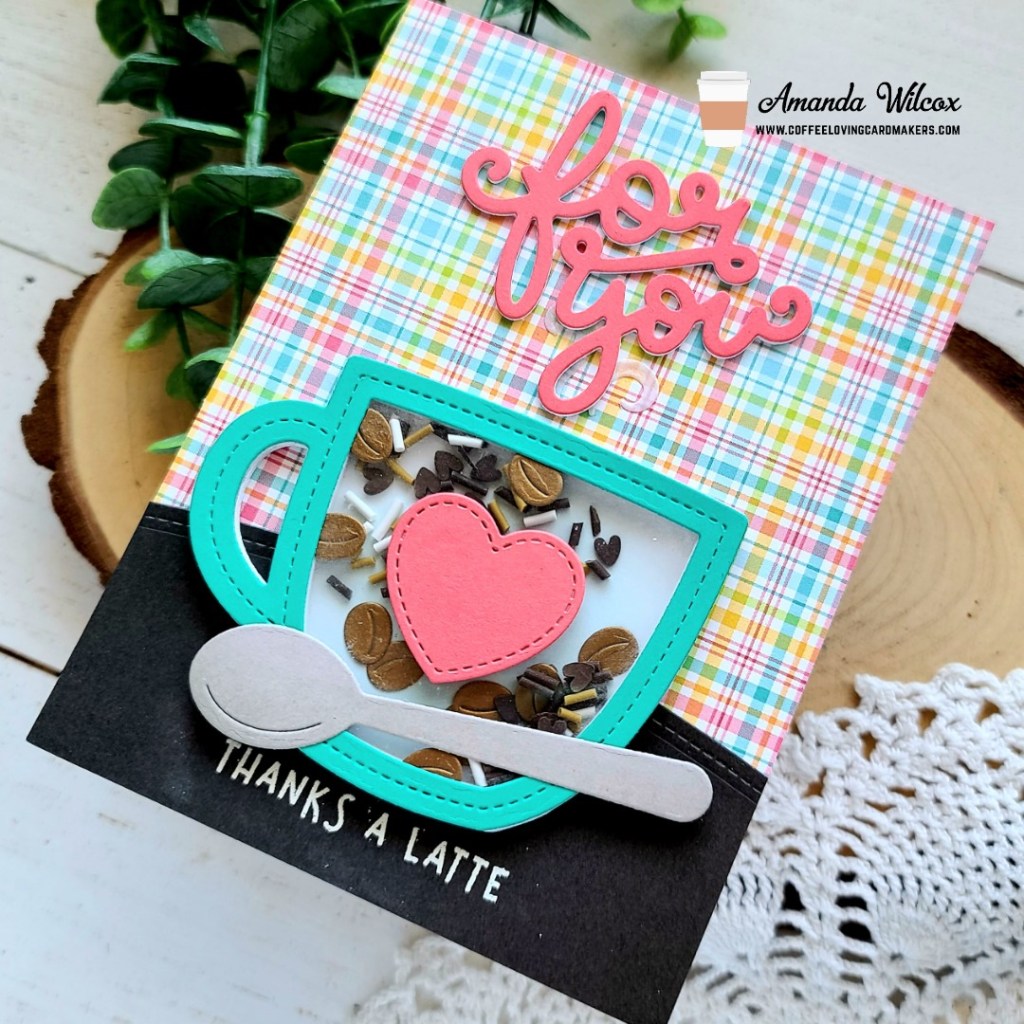
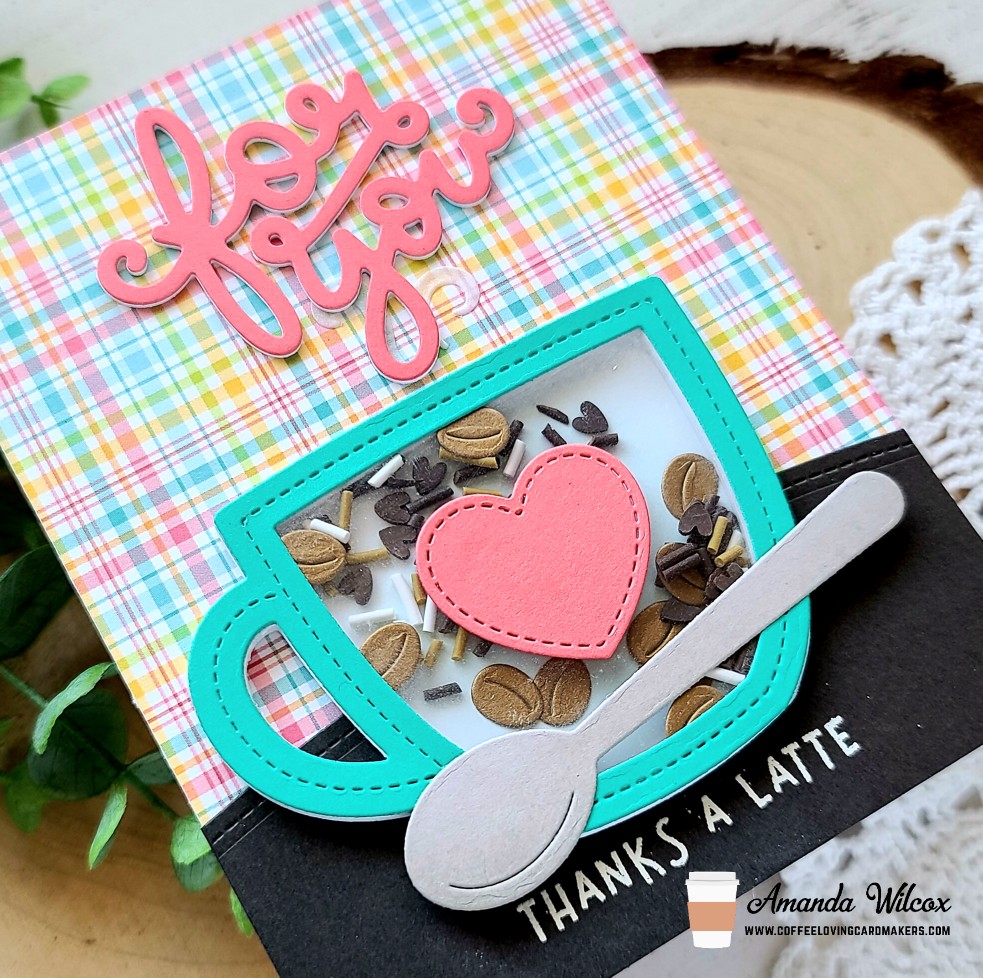
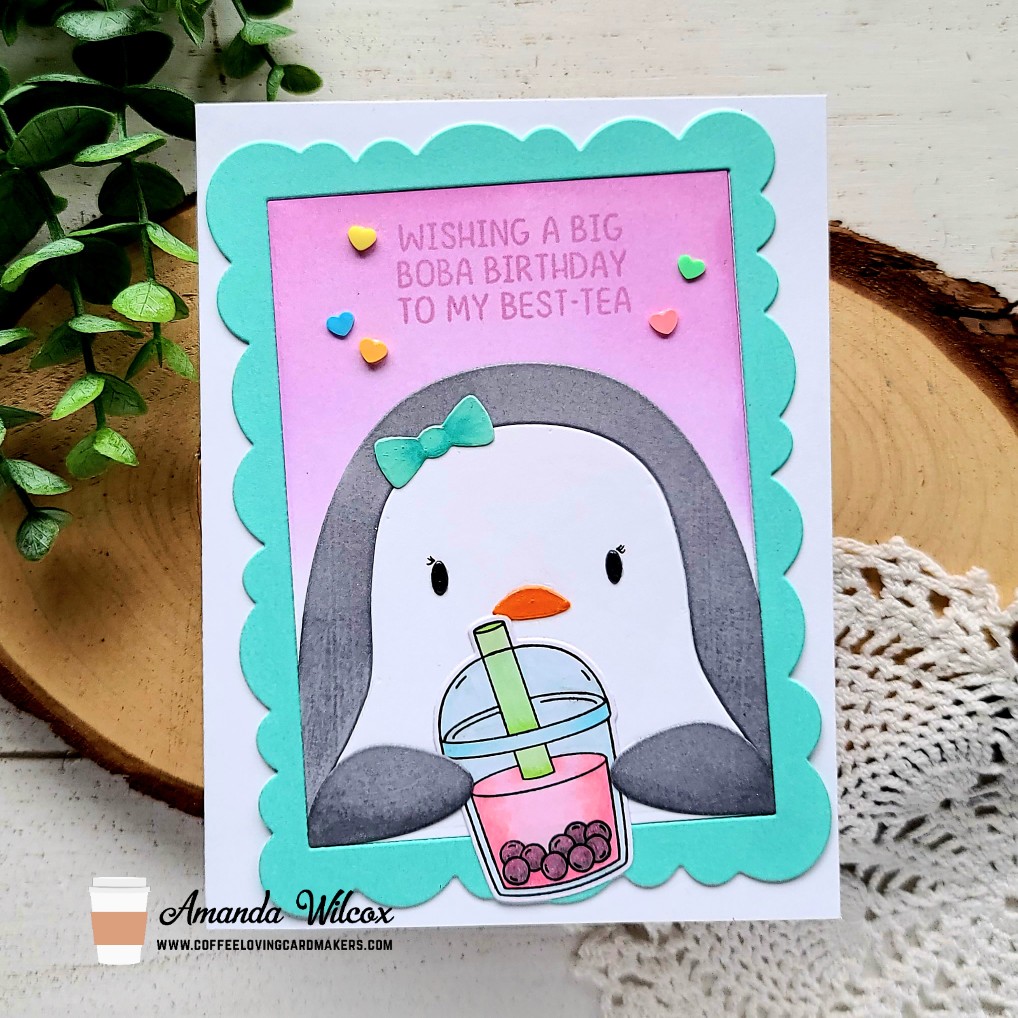
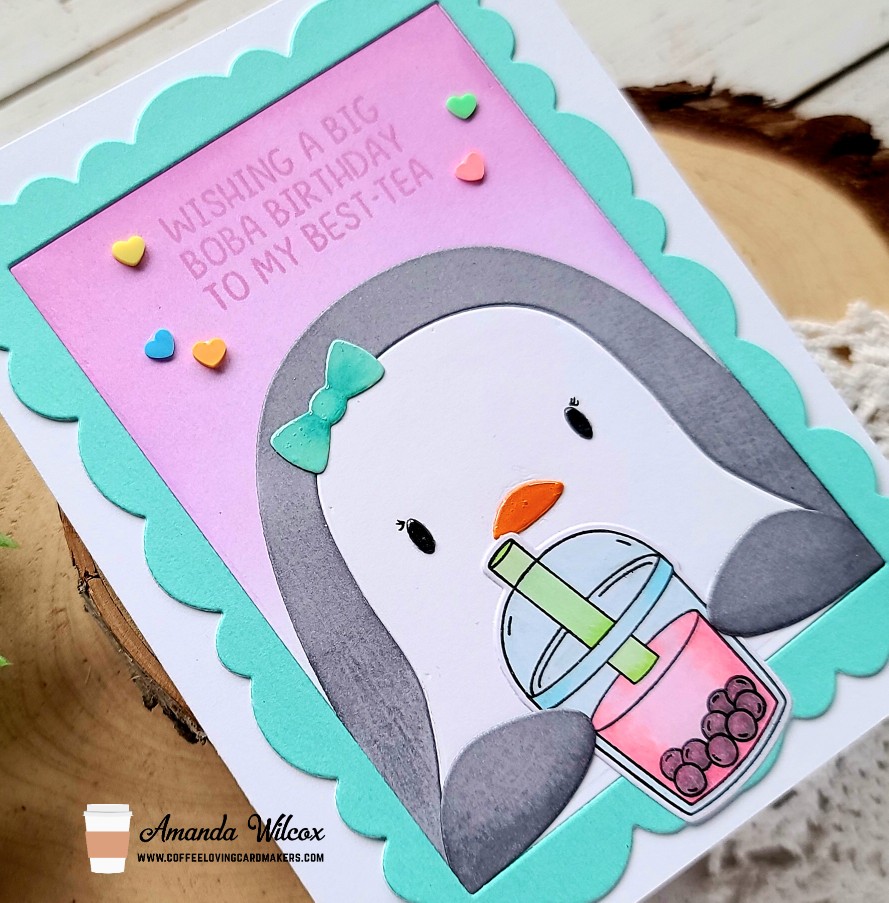
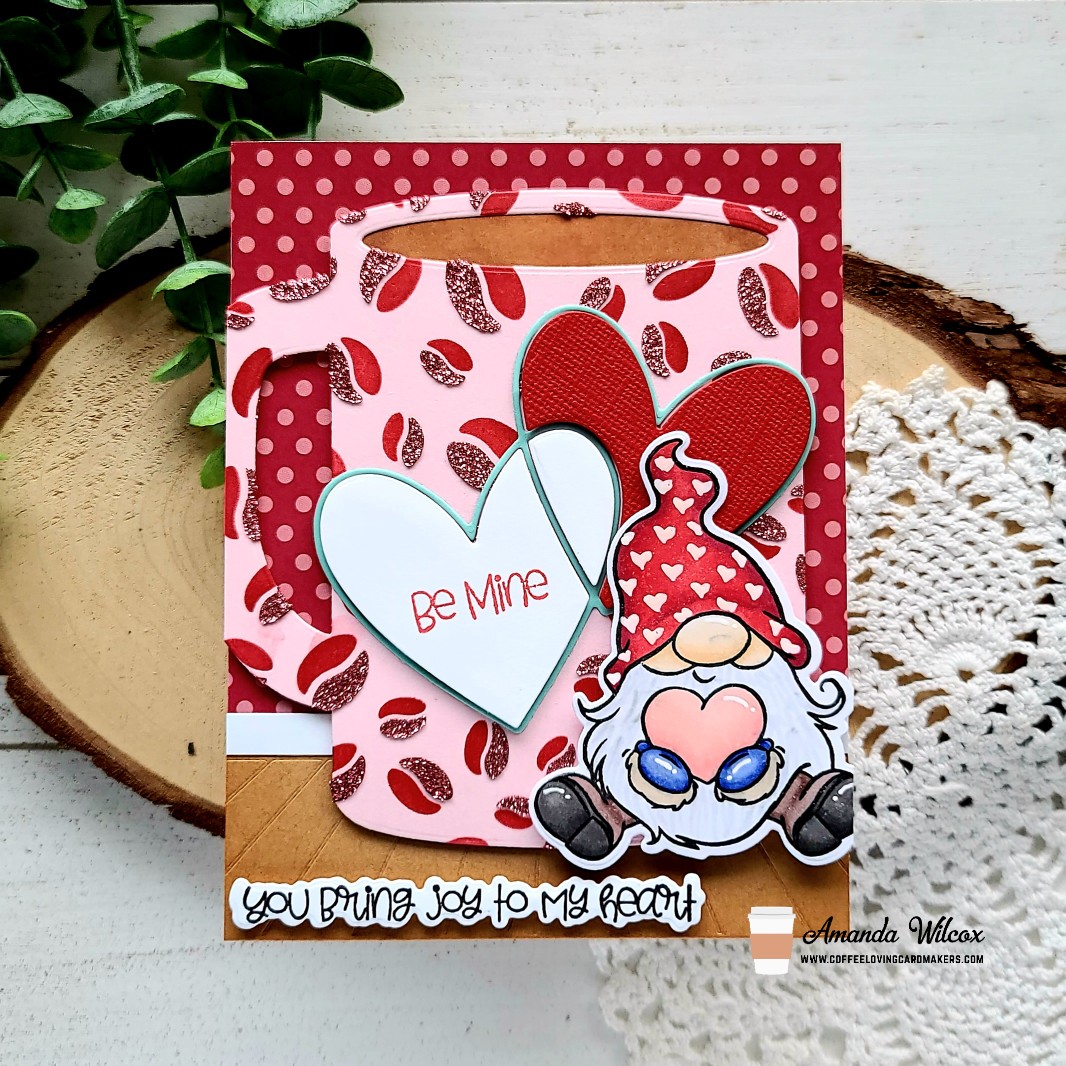
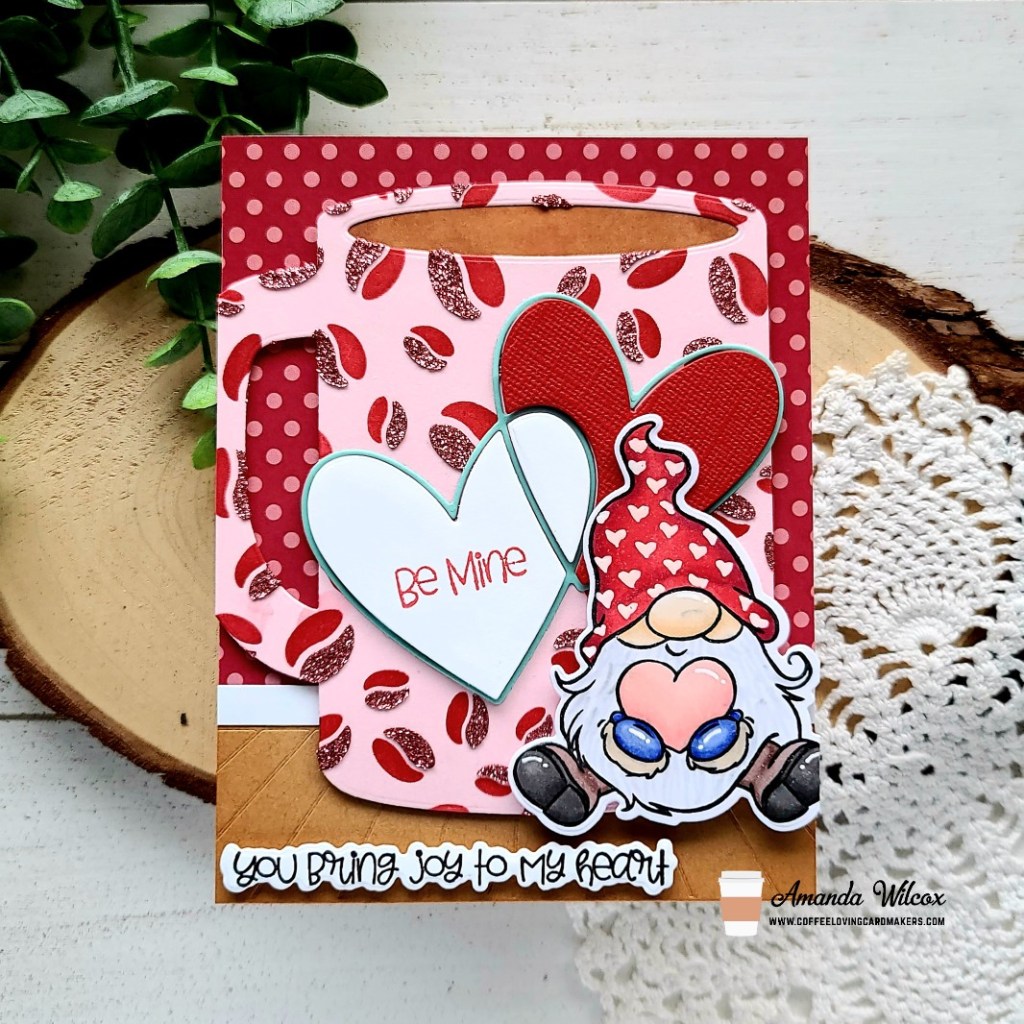
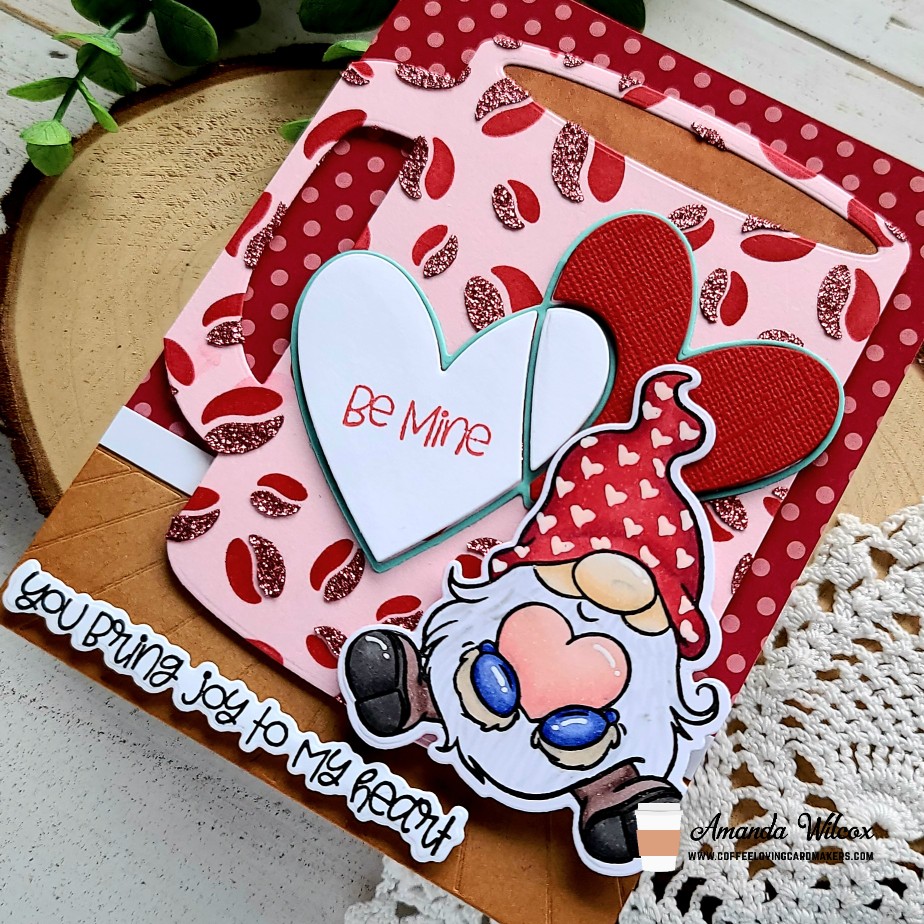
For today’s card, I die cut the coffee mug card die from Bristol Smooth cardstock and heat embossed the Easter eggs from Gnome Bunny in white. Then I watercolored them with my zig clean color real brush markers. Then I took one of the extra bunny images in Slimline Bunnies, stamped him and colored him with my zigs too. I also stamped a sentiment from that set and fussy cut them both out. I popped them up on my cute mug with foam squares and this quick and fun card is all finished!

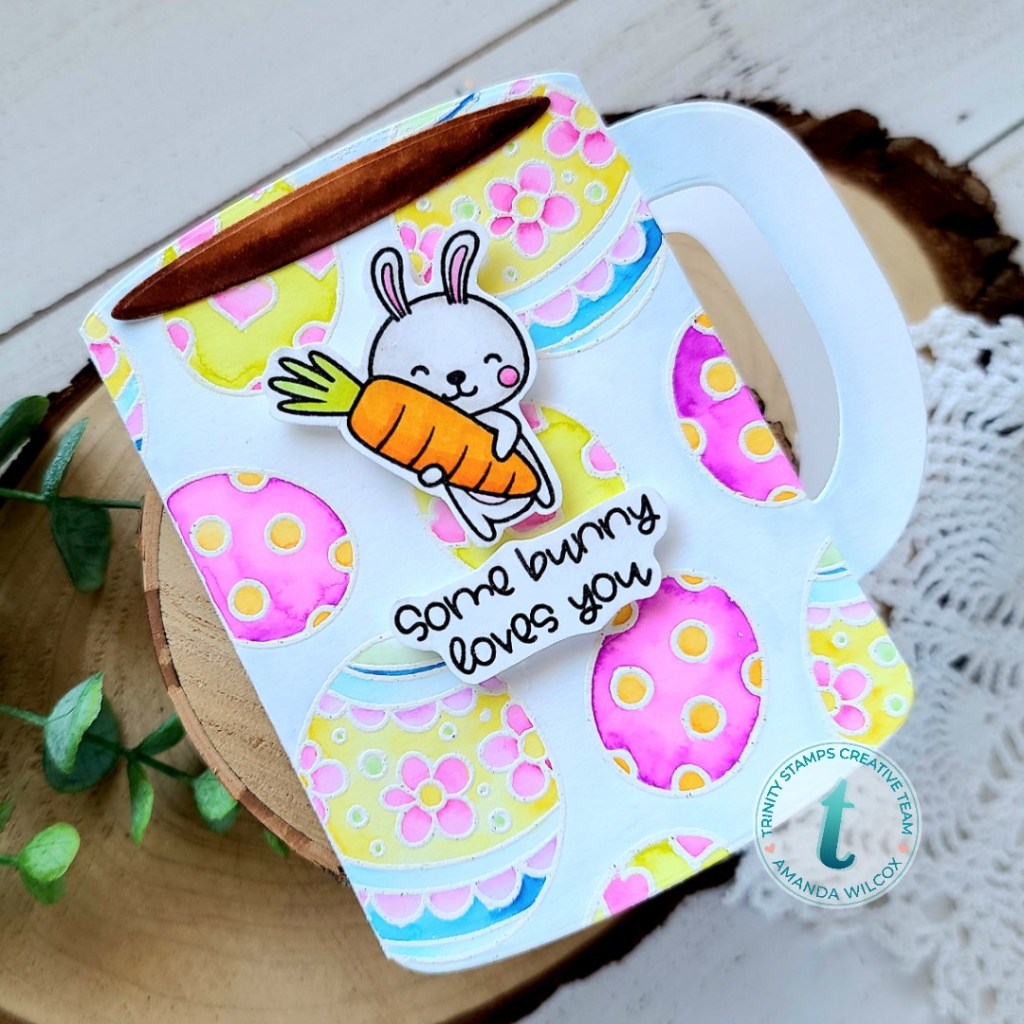
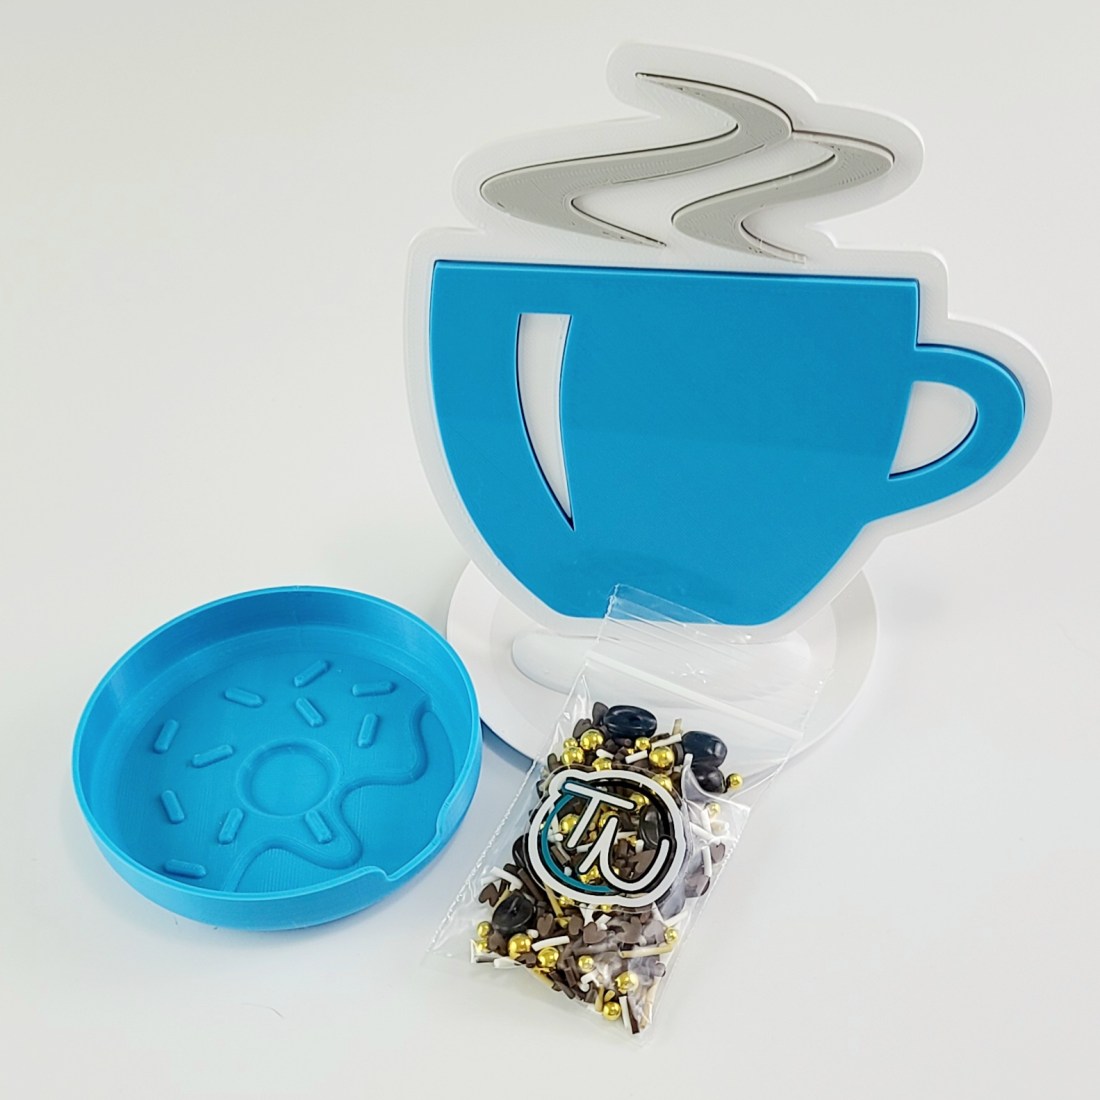
This die set comes with an optional insert for a gift card too! I haven’t decided who is getting this fun card yet but I just might add that insert to the inside and make this an extra fun surprise for someone!

Remember, the Coffee Lovers Spring|Summer Hop is still going on! I’m linking this cutie up and hope you’re playing along with us!

I appreciate you sharing your time with me.

Lawn Fawn – For You Thanks a Latte

Hello everyone! I’m back today with another fun caffeinated creation for the Spring|Summer Coffee Lovers Hop! Today I’m featuring some adorable Lawn Fawn goodies along with the Caffeinated Crafting embellishment mix for my shaker from the Twiddler’s Nook shop. This mix is part of the special that we have going on this week. Head HERE to check that out!

I started my card by die cutting the outside in stitched mug from white cardstock and inked up the center with mermaid ink and a blending brush. Then I cut the frame 8 times from white cardstock and once from teal. Next I cut the mug again from acetate. I used liquid glue to adhere my layers together, leaving the teal and acetate off until I filled the mechanism with my shaker bits. For those I die cut the beans from the mug die set from gold cardstock and also added some of the bits from the Caffeinated Crafting mix. Once it was all sealed up, I adhered a pink heart to the center and die cut the spoon from gray cardstock, adding it with liquid glue too.

To set my scene, I cut a piece of Perfectly Plaid paper to A2 size and trimmed down a piece of card gray cardstock for a table to sit my mug on. I used the simple stitched hillside border to trim the top of that. I stamped and heat embossed a sentiment from Thanks a Latte and used liquid glue to adhere my layers together, then I added those to a white card base.

Next, I die cut the scripty For You die 3 times from white cardstock and once from the same pink as the heart and used liquid glue to adhere them together. I wasn’t positive on my placement of this piece so I die cut the steam from vellum and glued it down. It ended up being mostly covered but it’s there for what it’s worth. Haha. Last, I added my mug and spoon and my card is all finished.

Are you playing along with the Coffee Lovers Hop? Be sure to head HERE to link up your caffeinated creations for chances to win tons of awesome prizes!

I appreciate you sharing your time with me! Have a fabulous day!

Coffee Loving Cardmakers – S’more Fun

I’m just going to start by exclaiming exactly how much FUN I had creating this card! It all came together just as I had hoped and it’s so STINKING CUTE!!!

Okay, backtracking a little…it’s the awesome week of the Coffee Lovers Spring|Summer Hop so I’ll continue to spam you with super fun caffeinated inspiration each day until we’re done. I hope you love it as much as I do! Let’s get cracking on today’s fun card now, shall we?!?

I started by stamping and coloring these sweet little penguins from the Mama Elephant Little Penguin Agenda set and cut them out with the coordinating dies. Then I had the brilliant idea that I wanted to die cut a large sentiment to go with them so I pulled out the big scripty hello die and started to decide just how I was going to put it all together.

Then it hit me to do the shadow technique so I cut an A2 panel and inked it up with distress oxides in gathered twigs, chipped sapphire and salty ocean. I spritzed it with water and flicked pearl and gold watercolor on it for that starry effect. I didn’t mask anything off but tried to keep it all to the blue part of the panel. Then I die cut the big scripty hello from the top portion and also cut an additional 3 from white cardstock. I used liquid glue to adhere the panel to my card base and then the words together as well.

I added foam squares to the back of my images and popped them in place. That’s when I decided my card needed a little something else so I went digging. I found this fun sentiment in the Avery Elle camping critters so I stamped and heat embossed it on black cardstock, trimmed it into a strip and adhered it with a combo of liquid glue and foam squares.

For finishing touches, I added glossy accents to the penguin beaks and feet, the fire and the coffee cup lid. Super adorable, don’t you think?

Are you playing along with us this week? Be sure to head to the Coffee Loving Cardmakers blog and link up your caffeinated projects for chances to win tons of amazing prizes!

I appreciate you sharing your time with me. Have a fabulous day!

Coffee Loving Cardmakers – Spring|Summer Hop

Hey friends! It’s time for the Spring|Summer Coffee Lovers Hop! Be prepared for a week chock full of awesome caffeinated inspiration! Once again, Twiddler’s Nook has the privilege of being a Super Sponsor for the hop. This time we’re running a special package deal for all of you caffeinated crafters.

Our Coffee Mug Die Cut Stand, Donut Embellishment Tray and a package of Caffeinated Crafting embellishment mix for $24 during the week of the hop. CLICK HERE to head over to the shop and pick yours up!

Be sure to comment on this post as well because we’re giving away 2 – $20 gift certificates to the shop as part of the hop itself.

Thank you so much for all of your support throughout the year and happy crafting everyone!!!

Coffee Loving Cardmakers – Boba Tea Birthday Wishes

Hey everyone! Over on the Coffee Loving Cardmakers for another fantastic Tuesday Tea with Twiddler’s Nook! Today I’m playing with some really fun Mama Elephant goodies my family spoiled me with for Christmas.

I simply started by die cutting the penguin favor bag add on from white cardstock and colored it with my copics. Then I had a fun idea to add it to a frame so I pulled out my Avery Elle wonky scalloped frames and cut the largest from teal cardstock. I inked up the center part that the frame cuts out with a couple of purple inks and my blending brushes and decided my penguin needed to hold something. My mind immediately went to the super fun boba tea set so I went to work stamping and coloring one of the cups. I used the coordinating dies to cut it out and started assembling everything.

I found it easiest to adhere my penguin to the inside frame panel and then adhere it to the card base. Then I added the frame around it because it overlaps the side of the penguin just a bit. I carefully tucked the boba cup in the penguins hands and glued it in place. Then I popped the whole thing in my MISTI and stamped my sentiment in the same purple ink that I blended on the panel.

For finishing touches, I added eyelashes to my penguin and glossy accents to the penguin beak, eyes and the bow on her head. Finally, I added some conversation hearts clay bits from the Twiddler’s Nook shop around the sentiment.

Isn’t this just the cutest?!? I seriously have a thing for these big die cut cuties! I love playing around with them!

I appreciate you sharing your time with me. Have a fabulous day!

Coffee Loving Cardmakers – Hero Arts

Happy Tuesday everyone! It’s time for another Tuesday Tea with Twiddler’s Nook over on the Coffee Loving Cardmakers blog. I was recently gifted some incredible caffeinated products from Hero Arts from a very generous friend and I’m obsessed with it all! This was the My Monthly Hero kit from August 2018, so maybe you have it in your stash and can bring it out to new light.

As soon as I laid my eyes on this die I knew I had to try it in black and white and I love them both! Such different effects by just changing a simple color of cardstock, always amazes me.

For this black one, I blended distress oxides in tattered rose, ripened perssimon and fired brick on an A2 panel. I spritzed it with water and flicked gold watercolor all over it. Once that was dry, I grabbed a sentiment from the stamp set and inked it up with VersaFine onyx black ink, using my die cut panel as a guide. Then I added foam squares and strips to the back of the die cut panel and adhered them together. I used liquid glue to attach the whole thing to a card base and, voila, it’s all done.

For this second panel, I used cracked pistachio, broken china and wilted violet distress oxides on the background panel. Then after spritzing water, I flicked a pearl watercolor over the whole panel. It gives a great shimmer in the light. I used my die cut panel for a guide again and stamped another sentiment from the stamp set included in the kit. Adding the same foam squares and strips to the back I popped the panel in place and adhered this to a card base.

If you’ve followed me for long, you know I love getting messy in the craft room so these cards were extra fun! My fingers are always rainbow when I’m finished and it just makes me smile. I hope you found a little inspiration to create something wonderful.

I appreciate you sharing your time with me. Have a fabulous day!

Coffee Loving Cardmakers – Joy to My Heart

Hey friends! It’s Tuesday Tea over on the Coffee Loving Cardmakers blog today and I’m playing with some old and some brand new Trinity Stamps goodies today. They’ve got such a fun line of gnomes I decided to pair one of the new ones with the coffee mug die.

I started my card by die cutting half of the coffee mug and then inking up the layered coffee bean stencil. Half is red dye ink and the second half is glitter glitz gel. So sparkly and fun! I had die cut the hole for the coffee initially, so I colored some white cardstock and layered it behind the opening too. Then I die cut the new intertwined heart 3 times from red, white and teal. I glued the frame to the mug and popped the inside pieces up with foam squares.

Next, I stamped and colored the gnome from Joyful Heart with my copic markers. Then I used the coordinating dies to cut him out. I added foam squares to the back of him and added him to the mug. For my background, I die cut the “floor” from the slimline room builder dies and trimmed it to fit my card front. Then I cut a piece of red paper from the Autumn Rainbow pad for the top and adhered both to my card front. I thought it needed a border so I cut a strip of white paper 1/4 inch and glued it over the seam. Then I popped my mug and gnome up with foam tape and adhered them down.

Last, I stamped a sentiment from the Joyful Heart set and used the coordinating dies to cut it out and added it to the bottom of the card with foam squares. I thought the white heart on the mug looked a little empty so I also stamped a sentiment on it with red ink.

For finishing touches, I just added some white gel pen accents to my image and hearts to the gnome’s hat.

This combo is just too cute! A giant coffee cup with a sweet gnome professing his love…to you or the coffee??? I suppose that’s up for interpretation.

I appreciate you sharing your time with me. Have a fabulous day!

Coffee Loving Cardmakers | Sweet ‘n Sassy Collab

Happy Friday everyone! I’m super excited to be apart of the Coffee Loving Cardmakers – Sweet ‘n Sassy Stamps Collaboration today! I’ve made 2 cards to share with you featuring I Like Big Cups and Coffee Talk 2. These sets pair perfectly together so I couldn’t resist.

Let’s talk slimline first, shall we? I inked up a panel with ground espresso, vintage photo and tea dye distress oxide inks. Then I flicked some watered down ground espresso ink and regular water all over the panel. Once that was dry, I pulled out the Trinity Stamps slimline modern embossed panels dies and cut the 3 largest sizes from: dark brown, rose gold and the inked panel. The brown was adhered to a slimline card base with liquid glue, then the rose gold with foam tape. I wrapped some twine around the inked panel, tied it in a knot and put foam tape on the back avoiding the twine and put it in place too. Then I stamped and colored the travel cup and sleeve from I Like Big Cups and cut them out. I stamped a sentiment from Coffee Talk 2 on the sleeve and adhered them together with liquid glued. I added foam tape to the back of the cup, skipping the part where it overlaps the twine so it lays flat and popped it in place. For finishing touches I added some hearts and coffee beans from Twiddler’s Nook Caffeinated Crafting embellishment mix.

For my second card, I wanted to brighten things up a bit. So I chose a selection of blue and teal cardstocks and cut some different width strips. I added adhesive to a white panel and stuck the strips down at an angle and trimmed off the excess. I trimmed the panel down to 4×5.25 inches and stamped a sentiment from Coffee Talk 2 in the bottom right corner. I stamped another mug from I Like Big Cups, colored it with my copics and cut it out. I popped it up with foam squares and added foam tape to the back of the striped panel. I decided for a little contrast so I attached it to a black A2 size panel and used liquid glue to adhere it on a white card base. Then for finishing touches I added some white gel pen accents to the mug and a scattering of Twiddler’s Nook Princess Rings – Tiana across the design.

Remember, we’re hopping along today for the chance to win a $25 gift code to the Sweet ‘n Sassy Stamps store! You should have come from the fabulous Lori Turner and now will head over to the amazing Christine Burillo-Kirch.

If you get lost along the way, head back to the Coffee Loving Cardmakers or Sweet ‘n Sassy pages to get your bearings.

You have until Friday, Feb. 5, at 11:59 PDT to comment. Winner will be announced on the Coffee Loving Cardmakers blog Sunday, Feb. 7.

I appreciate you sharing your time with me. Happy hopping! Have a fabulous day!

Coffee Loving Cardmakers – Coffee Love Monster

Welcome everyone! Today is the first Tuesday Tea with Twiddler’s Nook over on the Coffee Loving Cardmakers blog. I had sooooo much fun playing with a bunch of different products from Trinity Stamps to create a coffee love monster. I hope you like her too!

I started this card by die cutting the pieces to my monster using the Make-a-Monster dies. Then I cut the pieces to that yummy frap with the Summertime Sips dies. I took the Heartburst stencil and inked red and dark pink hearts on the cup for a little interest. I die cut the largest Slimline Modern Embossed Panel from light blue and the same red as the monster arms. Then with the red panel I took the cloud die from Slimline Scenic Borders and cut the top off creating some monster hair.

Now for assembly…I did this in steps. I glued all of the frap cup pieces together and then used it as a guide where to glue the monster face on. I glued the monster panel to the blue background panel and moved on to deciding where to add my sentiment. I tried up in the sky but I didn’t like it so I die cut a banner from the Mini Slimline Card and Envelope die set and stamped a sentiment from Love and Stuff on that. This is popped up with foam squares.

Moving on to finishing touches, I decided that my monster was a girl and she needed a bow so I die cut the smallest from the Bunch of Bows set and put it together. I used liquid glue and my tweezers to attach it to the top right side of the monster. Then I pulled out some adorable clay hearts from the Craft Hugs embellishment mix which was an exclusive Trinity handed out at Creativation last year. These tiny hearts were just the ticket to finish off my card.

Phew, that was a lot of steps. I hope you enjoyed it as much as I did creating it!

I appreciate you sharing your time with me. Have a fabulous day!