Coffee Loving Cardmakers – Warm and Cozy Thanks!

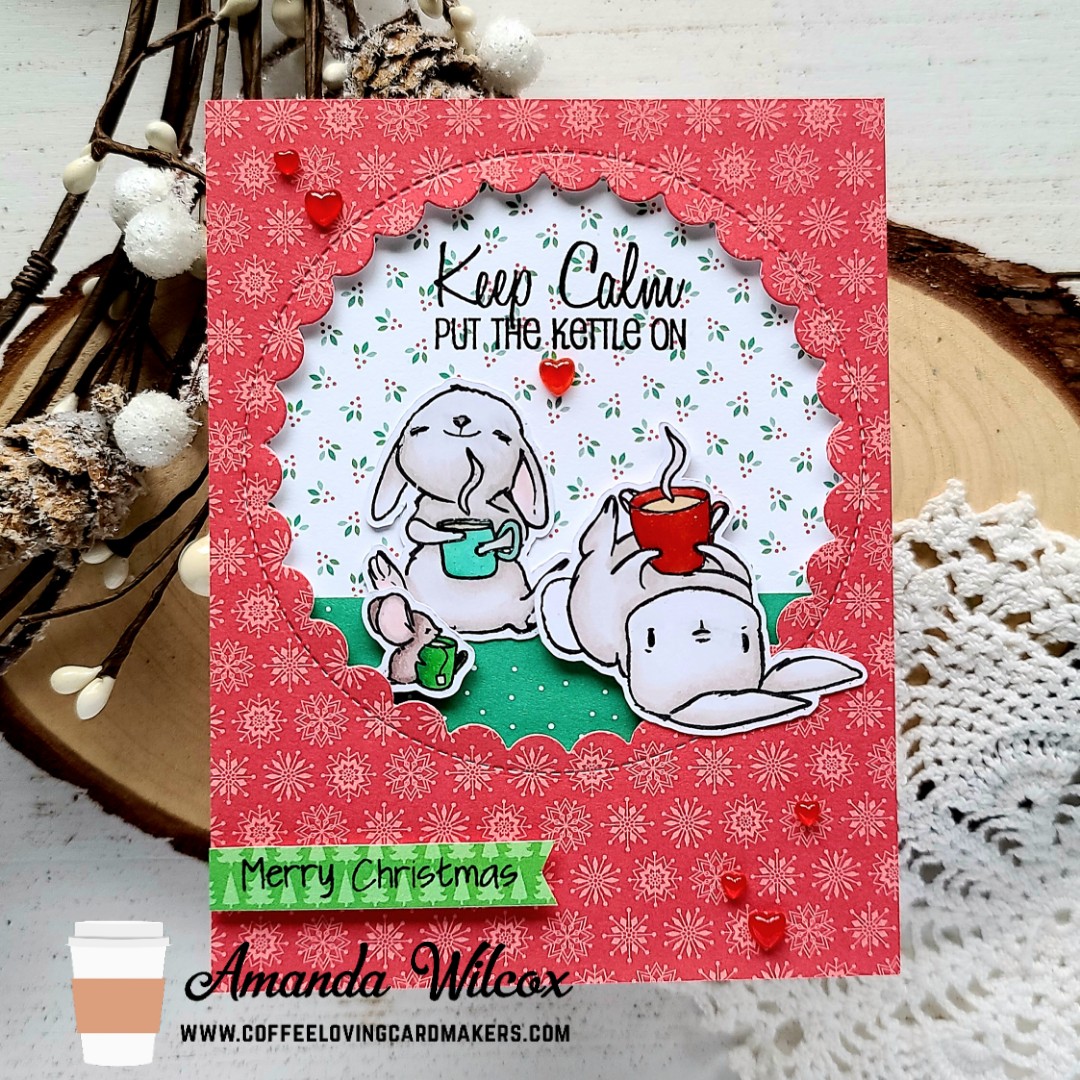
Hey friends! I’m over on the Coffee Loving Cardmakers blog for one final installment of Tuesday Tea with Twiddler’s Nook for 2020! I’m still stocking my stash with thank you cards featuring some of my favorite winter and Christmas sets that I wasn’t ready to put away just yet.

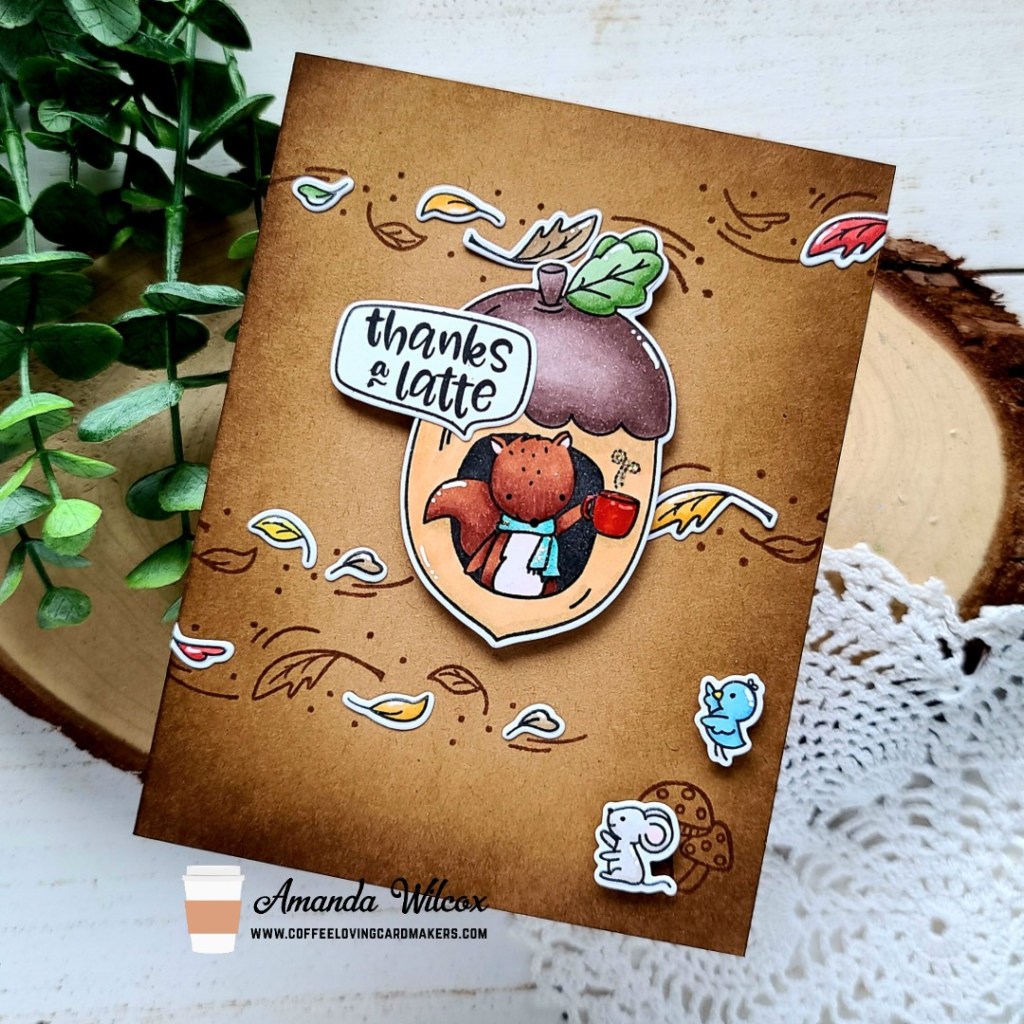
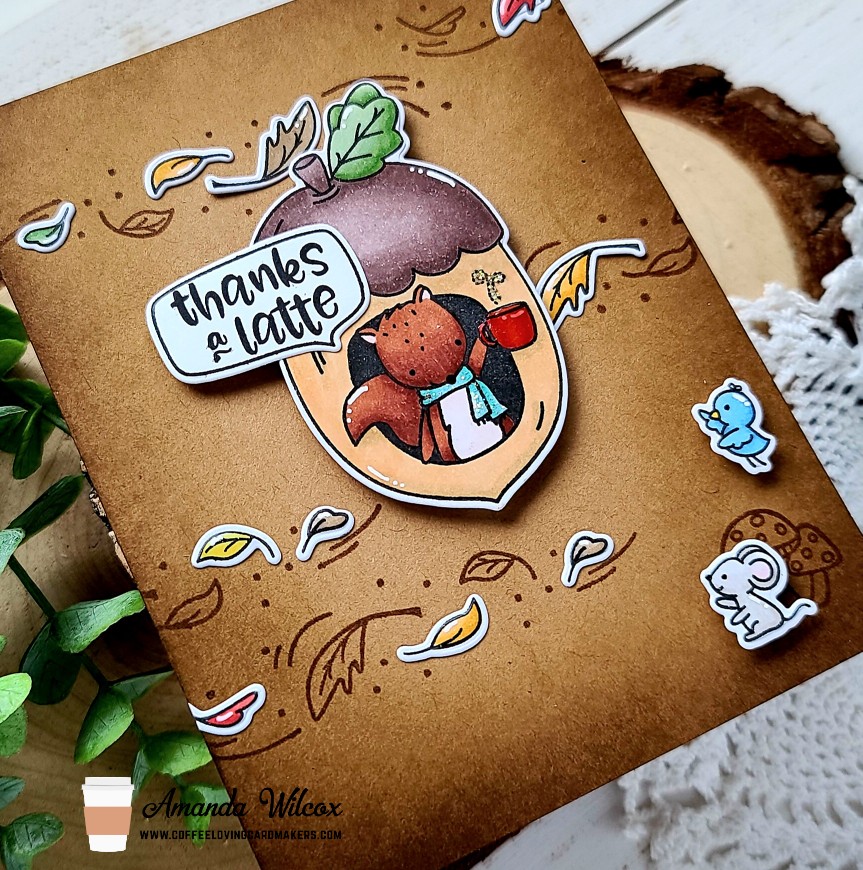
Today features a few sets from Jane’s Doodles, dies from Trinity Stamps and a token “thanks” from a Lawn Fawn set. I just love these critters and that hot cocoa stand has me dreaming of snow and cocoa adventures.

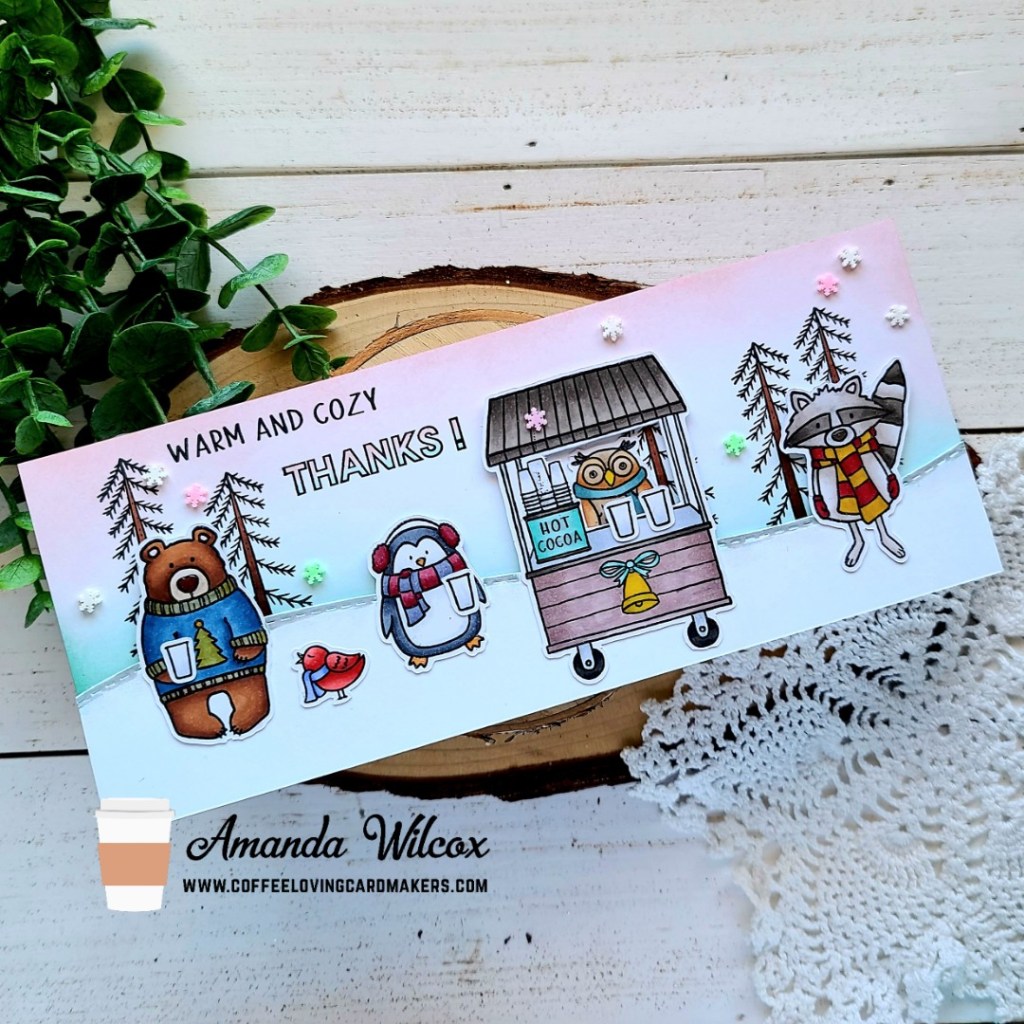
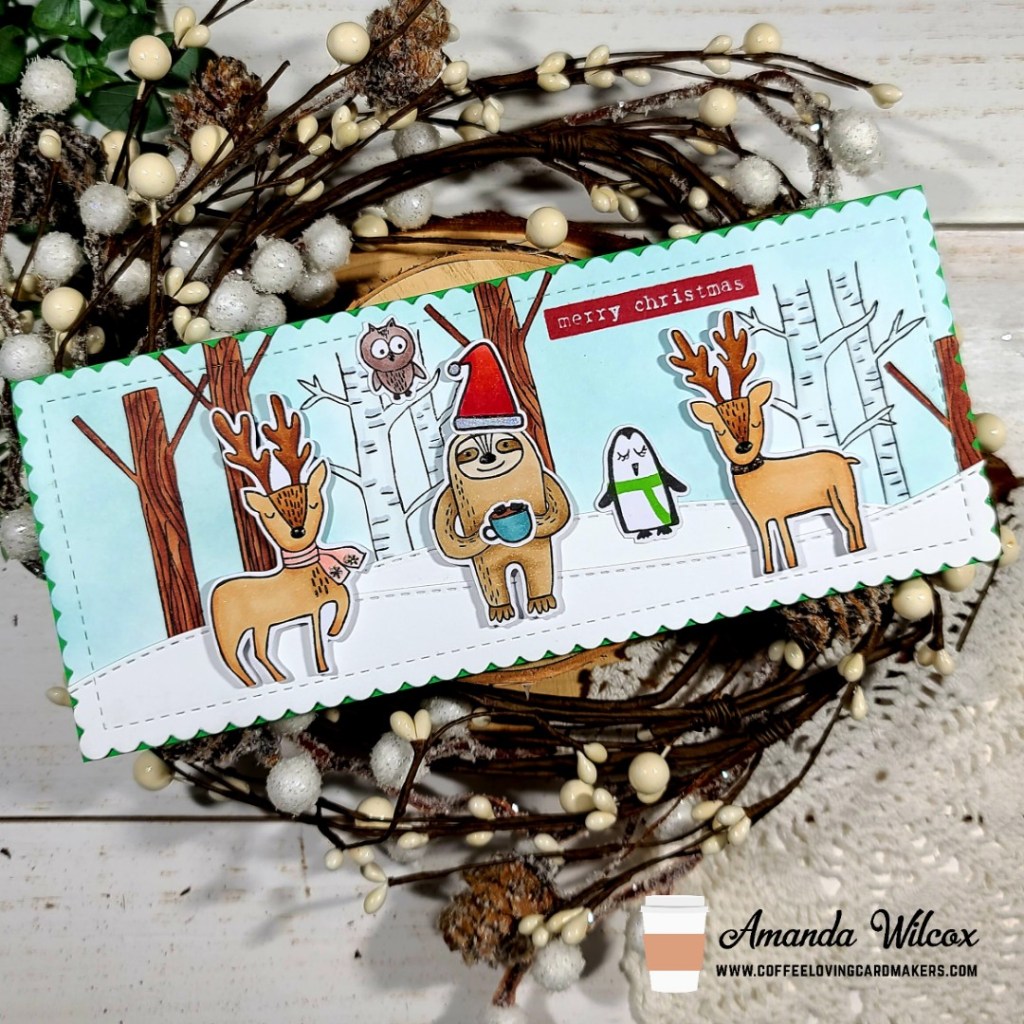
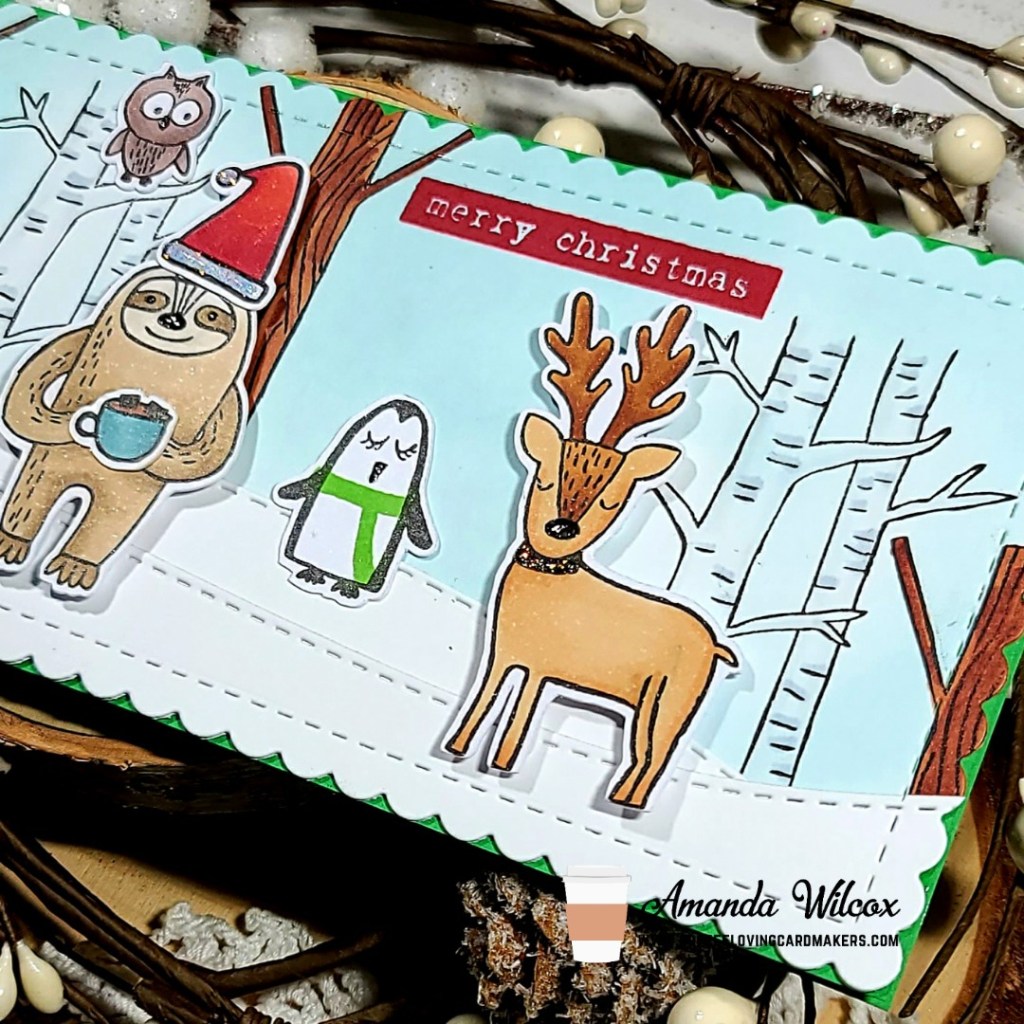
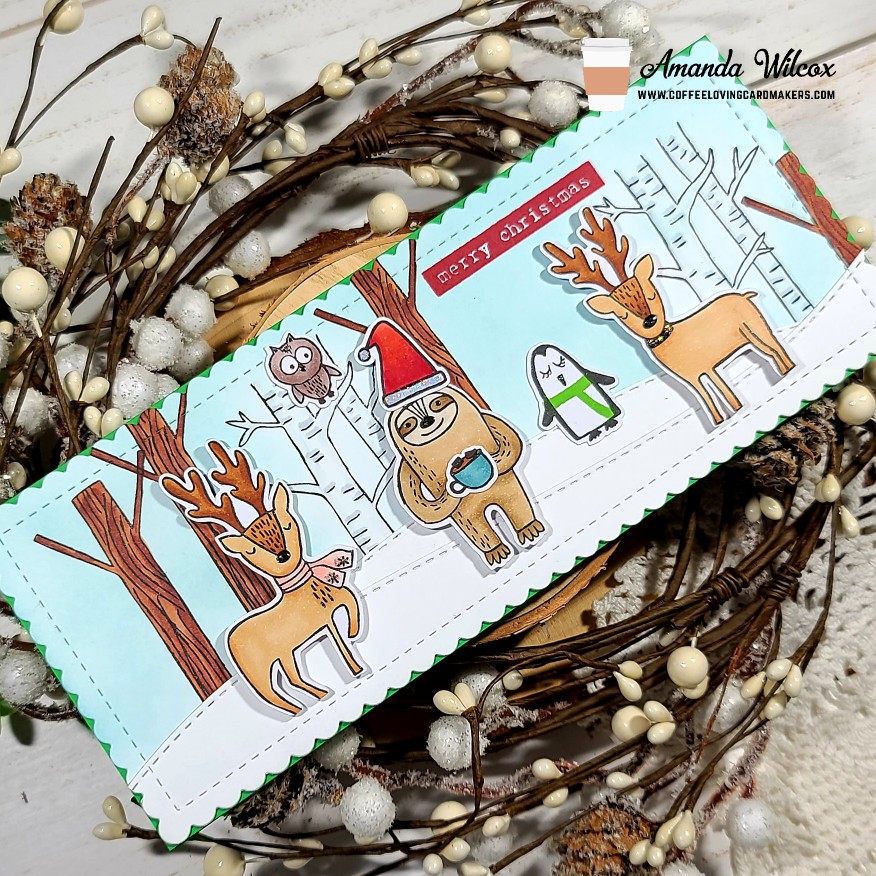
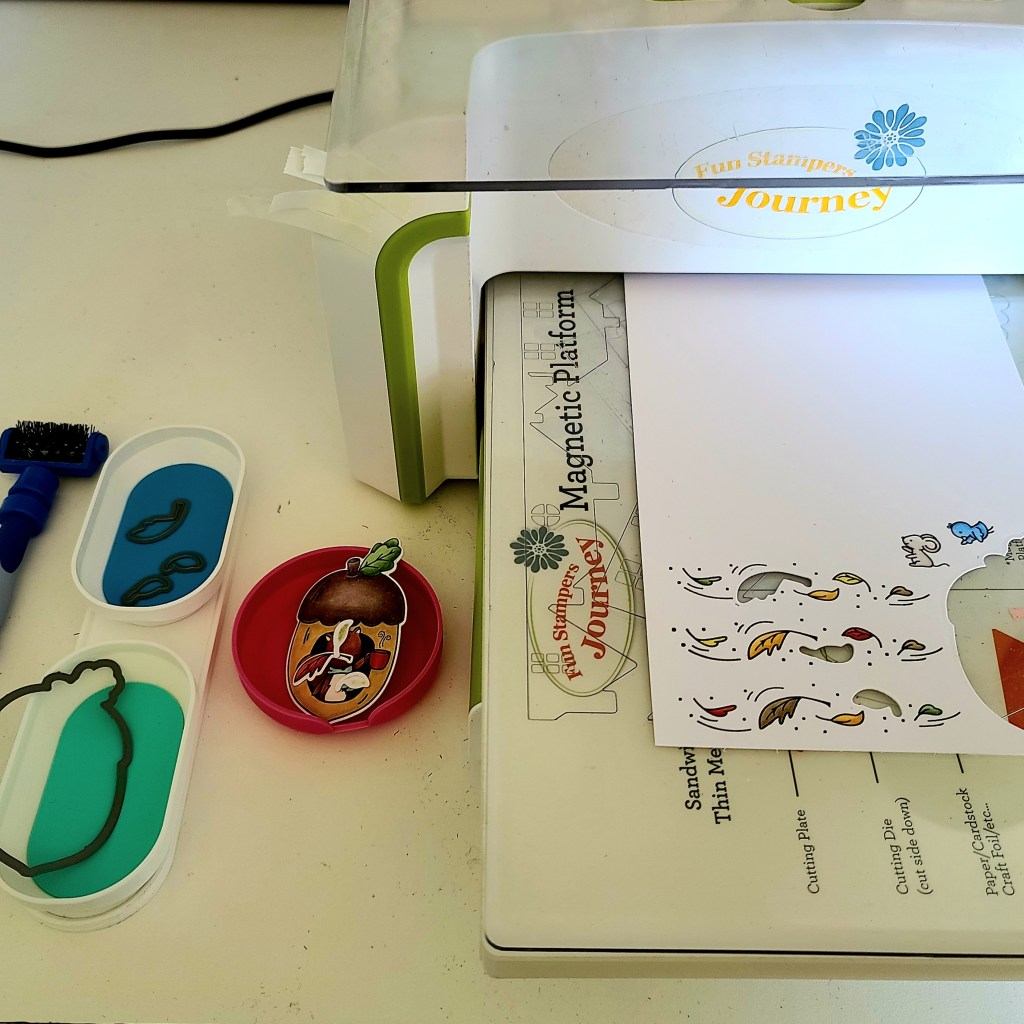
For my card, I stamped and colored critters and other images from St. Nick, Warm and Cozy, and Hot Cocoa. Then I used my scan-n-cut to cut them all out and set to work on my background. I cut a slimline panel at 3.5×8.5 and another at 2×8.5 to create a snow bank. Using my images as a guide I used the Trinity Stamps slimline scenic borders die to create my snow. Then, I used that as a guide where to place my trees in the background.

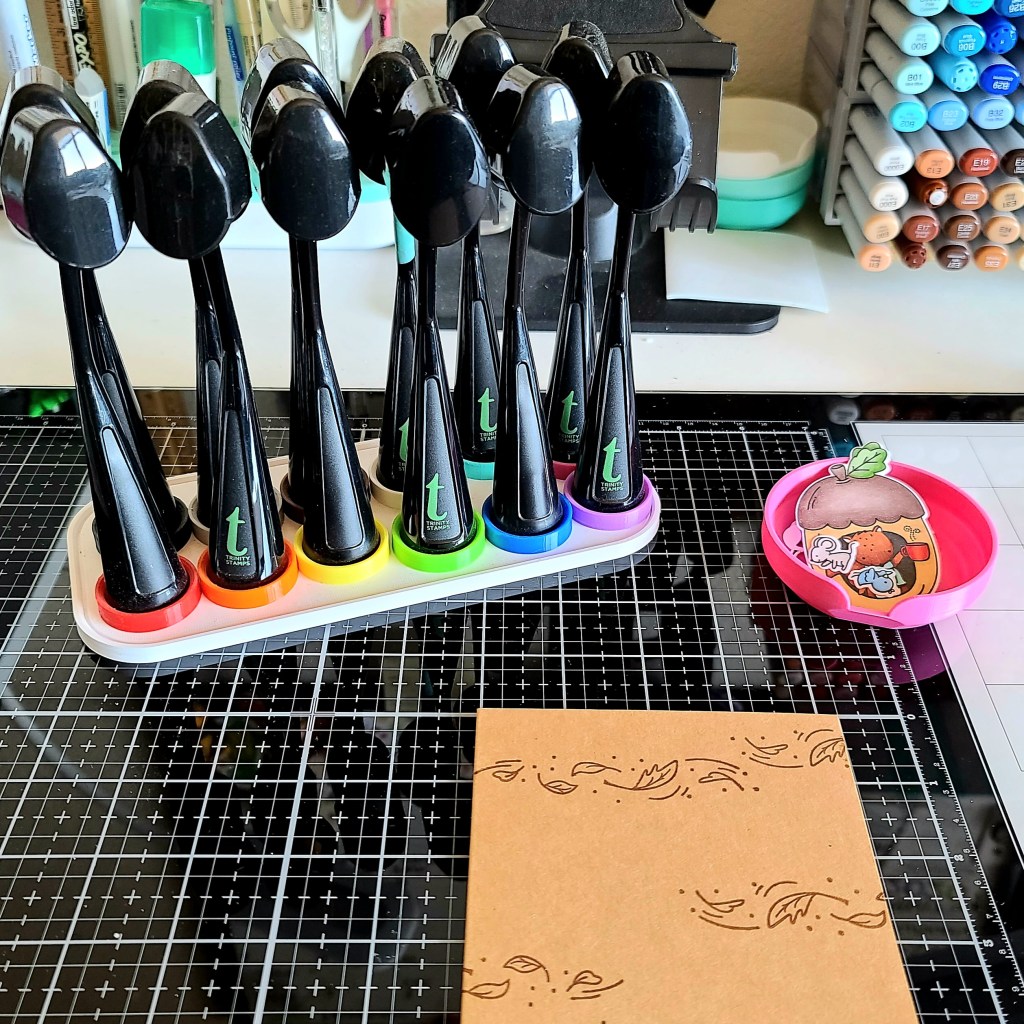
I used Trinity Stamps blending buddy brushes to blend on some light blue ink coming from behind the snow bank and a little pink ink coming from the top for a soft sky.

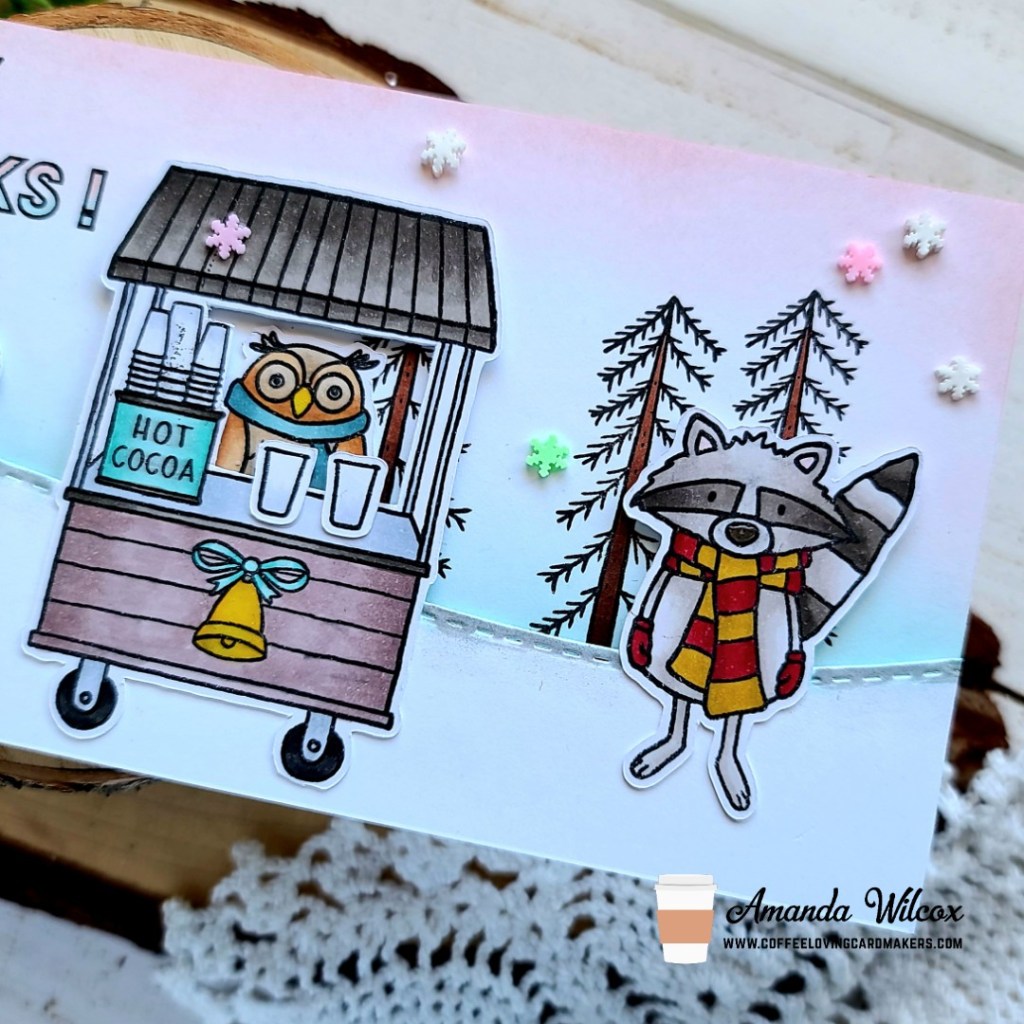
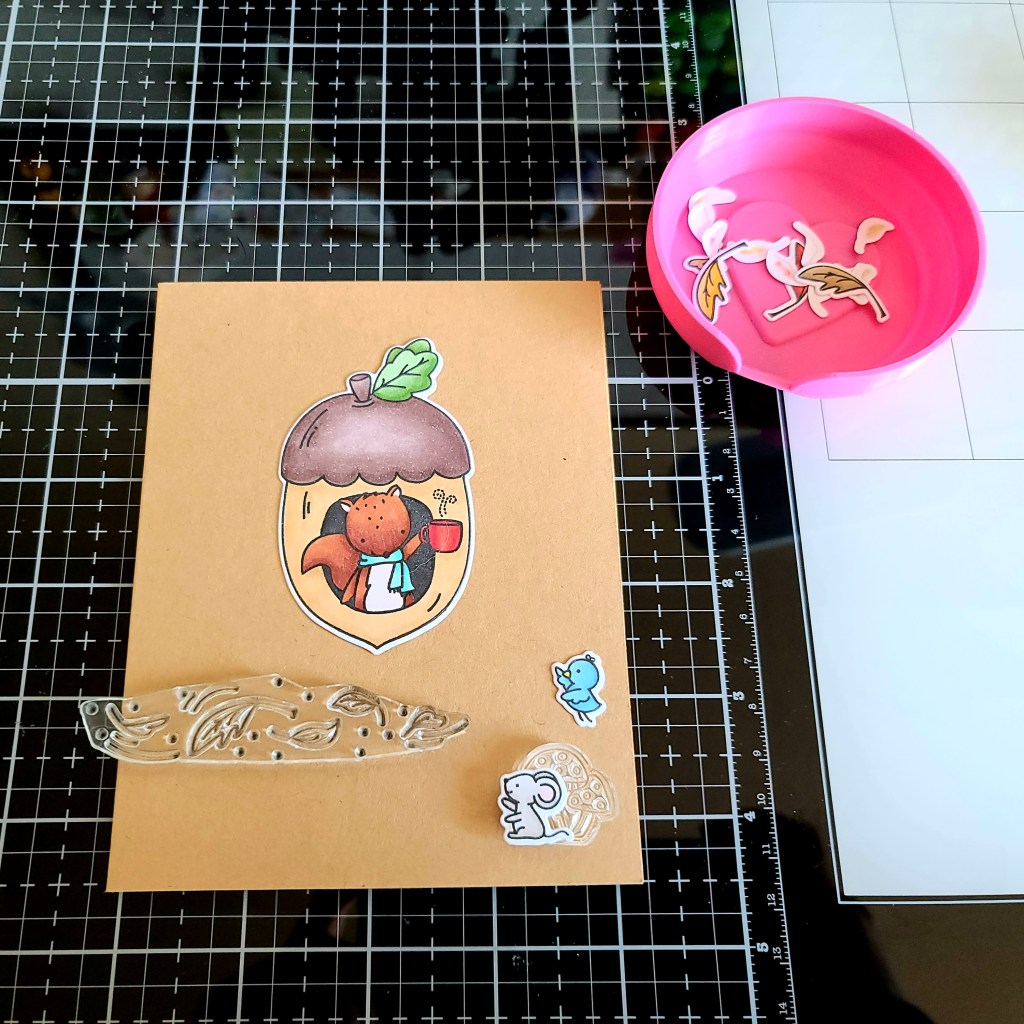
I adhered my snow bank with foam tape for a little dimension and my images with a combination of liquid glue and foam tape to keep everything nice and level. Once those were all in place, I popped my panel in the MISTI and stamped the sentiment in the open area I left in the sky. I used similar copics to color the thanks as the sky so it coordinates.

I finished things off with some glossy accents on critter noses and beaks, and a scattering of Rainbow Blizzard clay snowflakes from Trinity Stamps in the sky. Last, I added some silver Wink of Stella glitter brush on the top of the snowbank and then blended it out a little with the clear glitter pen.

I appreciate you sharing your time with me. Have a fabulous day!

Coffee Loving Cardmakers – National Tea Day

Hey everyone! It’s a super special day because, not only is it Tuesday Tea with Twiddler’s Nook, but it’s actually National Tea day and we’re going to celebrate with a whole lot of fun! I’ve got a card share for you and then Amy will pop in with some information about a guest designer opportunity and link up at the bottom. Let’s get started with today’s card share!

Today I decided to pull out a fantastic set by The Cat’s Pajamas called Make Tea. I absolutely LOVE the critters in this set and had so much fun coloring them up. For this card, I stamped and colored them with my copics, then used my scan-n-cut to cut them all out. Next, I pulled out some Lawn Fawn snow day remix paper and the reverse stitched scalloped circle window dies to set my mini scene. 

After die cutting and assembling my papers, I used my MISTI to stamp a sentiment over this very chill tea party that’s going on. Since I chose to make this a last minute Christmas card with the patterned paper used, I pulled out the Trinity Stamps Merry Christmas Senti-mini set and stamped a quick Merry Christmas banner which is popped up with foam squares.

For finishing touches on my card, I added some glossy accents to the critter eyes and noses and their mugs. Then I used Wink of Stella glitter brush pen on the steam coming from the cups. Last, I glued a scattering of Trinity Stamps Cinnamon Red Hots Jelly Drop Hearts across the design.

AND THEN, on a whim, I decided to stamp on the inside of my card today too. I never do this but I have a couple of crafty friends who do and I always think it’s super cute. So I grabbed a bunny that I didn’t use on the front and another sentiment from Make Tea and stamped it in red ink to coordinate with the colors on the front. 

Now, it’s your turn to play! Head over to the Coffee Loving Cardmakers Blog for information on a chance to become a guest designer with us!

I appreciate you sharing your time with me. Have a fabulous day!

Coffee Loving Cardmakers – A Forest Christmas

Hey friends! It’s Tuesday Tea over on the Coffee Loving Cardmakers and I am thrilled to share a fun card featuring my prize from the Fall | Winter Coffee Lovers Hop from Flora and Fauna! As soon as it came in the mail this weekend I pulled out all of my sets to see how I could mix and match.

I stamped images from Outline Deer Wonderland, which was my prize and added others from Mini Sloth (we’re pretending he’s a sasquatch this time though) and Woodland Snowglobe and colored it all with my copic markers. Then I used my scan-n-cut to cut them all out. I cut an oversized panel and stamped some of the tree trunks from Outline Deer Wonderland and used my copics to color them in. Then I used my Trinity Stamps blending buddy brush to ink up the sky just a bit with a light blue ink. I cut it out with a Trinity Stamps Slimline Scalloped Panel die, along with a couple of white panels too. Then I used the Slimline Scenic Borders and Slimline Great Outdoors Borders to cut some snowy hills.

I used liquid glue to adhere my layers together and used my images as a guide to stamp the sentiment I chose from the Woodland Snowglobe set. Then using a combo of liquid glue and foam squares I attached all of my critters.

I cut a cardbase from green cardstock that matched my penguin’s scarf for festive fun and attached my whole scene panel down. Moving on to finishing touches, I added Unicorn Stickles to the Santa hat and reindeer scarves. Then I added glossy accents to things like noses and eyes and beaks. My card is all finished and ready to go.

I had so much fun mixing and matching so many products together for this whimsical scene! I hope you enjoyed it too!

I appreciate you sharing your time with me. Have a fabulous day!

Coffee Loving Cardmakers – Shaker Ornament and Card Combo

Hi friends! It’s time for Tuesday Tea and I’m really excited to share with you today so grab your cuppa and settle in. Today’s project is a card with a removable shaker ornament on it! I just love how it turned out!

I started my card thinking it would be a shaker snow globe with the cute bear and her coffee inside it. Once everything was colored and die cut I realized that she’s just a bit too big for my liking so I switched gears.

I used the Ready, Set, Snow set by Lawn Fawn to create the snow globe shaker and decided it would be fun to have the bears on either side. Even better, if I use foam tape behind the bears, they hold the ornament in place for a cute card front and removable ornament! I’m quite please with myself in this moment, you have no idea.

Here’s a little peeky peeky at the card and ornament separate too. I wanted to hide something behind but nothing I tried worked for me so I let go and left it how it is. I did, however, decorate the back of the shaker so it doesn’t matter how it hangs on the tree.

Simple but super cute and the glitter paper I used for the snowflake will catch the lights on the tree nicely I think.

How are your Christmas cards coming along? I still need to come up with one of those simple, mass produce-able designs but things like today’s card keep popping in my head and I can’t resist!

I appreciate you sharing your time with me. Have a fabulous day!

Lawn Fawn – Critter Christmas

Hey there! I’m back with my daily entry and inspiration for the 2020 Fall | Winter Coffee Lovers Hop! I had some fun die cutting last night and playing with my Lawn Fawn goodies, which I don’t do as often anymore.

This card is pretty straight forward, die cutting my critter hugger elements and the holiday add on elements too and then I glued it all together. I used the scalloped stitched frames in green woodgrain over the plaid stitched rectangle. Then I pulled out the stitched snowflakes in white glitter paper for a little extra interest. I finishing things off with scripty merry and stamped Christmas from Cheery Christmas and cut it into a strip.

For finishing touches I added Unicorn Stickles to the mittens, whipped cream, holly berries and owl’s cheeks. Then I added glossy accents to the owl’s eyes and beak.

You can guarantee I’ll be playing with these cuties again very soon! I think maybe some shaped cards for Thanksgiving place markers would be a blast! Writing a thankful message inside each one! Wouldn’t that be great?

I appreciate you sharing your time with me. Have a fabulous day!

Avery Elle – Happy Holidays

Hello again! I’m popping in a little late today because I made this super fun card yesterday for the Coffee Lovers Hop but ran out of daylight to take photos. I got some taken this morning and couldn’t wait to share. I had fun putting this one together.

I had an idea so I started stamping and coloring my images from Avery Elle’s Cocoa Stand right away. I used the coordinating dies to cut them out and moved on to my die cut sentiment. At first I thought I would ink blend it and then I looked at my glitter cardstock and had to use that instead. There are 3 white sentiments glued together with the gold glitter glued on top.

Then I die cut a white Wonky Frame and set it all aside while I ink blended my background. This ended up being distress inks in evergreen bough, mermaid lagoon, cracked pistachio and black soot spritzed with water and blotted dry.

I used a combination of liquid glue and foam squares to adhere all of my images and then added them all to the inked panel. The panel was glued to a white card base and I moved on to finishing touches.

For those I used a combination of glossy accents and Unicorn Stickles on the various images throughout the whole design.

I just love all the fun glitter and shine that’s going on with this happy card. I hope you enjoyed it too. I’m linking up to the Coffee Lovers Hop. Are you playing along?

I appreciate you sharing your time with me. Have a fabulous day!

Coffee Loving Cardmakers | Newton’s Nook – Cup of Cheer

Hello everyone!!! Today is a very special day in our house…our daughter’s 14th birthday. Seriously, where the heck has the time gone??? I have no idea but we’re loving every minute of it. She’s amazing and we’re having a blast celebrating this weekend.

And on here I’m also still celebrating the Fall | Winter Coffee Lovers Hop! I have a fun Newton’s Nook shaker card to share with you featuring shaker bits from my shop too!

A few weeks ago we went away for the weekend so I stamped some images and packed my Zig markers to watercolor while we were gone. This fun batch of mugs were part of that. The images are from Cup of Cocoa and I used the coordinating dies to cut them out. Then I pulled out my tiny trees stencil and used texture paste for an intentionally imperfect background.

Moving on to my shaker mechanism, I die cut a frame from Framework dies and the ticket looking shape too. I backed the frame with vellum and foam tape. I poured some Burning Embers and Pixie Dust Micro Beads in the Vidia color to the center of my stenciled panel and adhered the shaker frame on top. I stamped my sentiment on the ticket shape and attached it to the vellum.

I attached my mugs around the frame and moved on to finishing touches. For those I added Stickles in unicorn to each of the mugs somewhere and a few white clay hearts to by the sentiment.

Such a fun and sweet card! Are you linking up fun projects to the Coffee Lovers Hop? I hope so! I can’t wait to see them all!

I appreciate you sharing your time with me. Have a fabulous day!

Coffee Loving Cardmakers | Pink & Main – Fintastic Together

Hello again! I’m popping in with a quick, fun card featuring some goodies from Pink & Main. This card was on their blog this morning as part of the Coffee Loving Cardmakers Fall | Winter hop but I wanted to explain the process, in case anyone had questions.

This Mermazing Coffee set was my first purchase from them and I just love it sooo much still! It’s super fun to create with so I just had to pull it out!

This was a pretty simple card to make but fun and messy, just how I like it! I stamped and heat embossed the mug and heart images from the set on watercolor paper. Then I did ink smooshing with my Tombow markers and set it aside to dry. I stamped the mermaid image and colored her with copics, cutting her out with the coordinating dies. I used the A2 layered rectangles to create a frame for my sentiment and mermaid to go on.

The black panel is adhered to the watercolor panel directly, then the white panel is popped up and the mermaid is popped up from there. I finished things off with a small scattering of cute embellishments and, voila, my card is finished!

I appreciate you sharing your time with me. Have a fabulous day!

2020 Fall | Winter Coffee Lovers Blog Hop

It’s finally here! The 2020 Fall | Winter Coffee Lovers Blog Hop is here and we’re going to have so much fun over the next week! Twiddler’s Nook is a sponsor of the hop so today I’m sharing some fun product photos with you to show how our products can help your crafting life while I’m creating a fun caffeinated card!

Before we get too far, I wanted to let you know that we’re having a sale in the shop for the week of the Coffee Lovers Hop! Embellishments are buy 3 get 1 free with the code: CLH2020. Be sure to put all 4 embellishments in your cart and enter the code in the coupon section at checkout.

Now, lets get on to some crafting, shall we?!? 😉 For today’s card, I chose a few fun Avery Elle products to create a sweet caffeinated thank you card. I thought it was fitting for the season.

I stamped and colored my images from Avery Elle’s Aw, Nuts with my copic markers. Then I used the coordinating dies to cut them out and set them aside. But woah, let’s take a look at how some of the fun products that Twiddler’s Nook creates can help keep you sane and not losing pieces on a crazy craft table.

So, after I color my images, I pull the dies out from the set that I need and put them on my magnetic die stand. Then I can take them one at a time and tape them in place with post it tape.

Heading over to my die cutter, I run the sheet through the machine and over here I have a couple of products that keep me organized. An embellishment tray to put my cut out images in and 2 magnetic trays to put my dies in. I separate the dies I’m finished with from the ones that I’ll need to use again, like the leaves on this card. One note here, I have the magnetic trays on a single wide platform which keeps them in place nicely too.

Once all my images were cut out, I moved back to my desk with my tray full of cuteness to finish off my card. I figured out placement of the colored images and did some additional stamping directly on my card front.

Once that was finished, I brought in my double wide platform base and Trinity Stamps blending brushes to add some dimension to the edges of my card. Full disclosure…these brushes are within reach but I brought them in for the photo. The magnetic caps on the bottom let me know what color the brush is for and the platform has metal to help them stay in place so they don’t fall over when I grab one from the middle.

From here I finished up my card by adhering the leaves with liquid glue and popping my cute critters up with foam squares. At the end I couldn’t find a great way to add the sentiment included in Aw, Nuts so I pulled out Cool Beans and Speech Bubbles to create my own and glued it so the squirrel is sharing his thanks with the critters below.

For finishing touches on today’s card, I added glossy accents to the mug, black glaze pen to all the critter eyes and noses, and a little unicorn Stickles to the squirrel’s scarf and hot cocoa steam too. Lastly, I took a white gel pen and added highlights to all of the images.

I just love this set so much and had a blast creating this card. I hope you enjoyed it too!

Remember we have the embellishment sale going on and all of our other products are available for purchase at the Twiddler’s Nook shop too!

For the Coffee Lovers Hop we will be giving away 2 $15 codes to the Twiddler’s Nook shop so be sure to link up those projects! Can’t wait to see what you all create!

Caffeinated crafty hugs to you all! I appreciate you sharing your time with me. Have a fabulous day!

Coffee Loving Cardmakers – Miss Ink Stamps | Caffeine First

Happy Tuesday everyone! It’s time for tea with Twiddler’s Nook over on the Coffee Loving Cardmakers today. I had some fun with powdered watercolor and stencils over the weekend. It’s quite addicting. I could easily sit and make bunches of backgrounds at once with this technique.

Obviously, I started today’s card with the background. I took watercolor paper and laid my Miss Ink Stamps Jitters stencil over the top. Then I sprinkled powdered watercolor over the stop and spritzed it with water. I carefully removed the stencil and smooshed another piece of watercolor paper on it for the negative so I have another background the play with later on. I set those aside to dry and stamped out my images which are also from Miss Ink Stamps. They are from Big Mugs and Brewtiful. I colored them with my copics and used the scan-n-cut to cut them out.

Using the Newton’s Nook Framework dies I cut a frame and adhered vellum to the back. I heat embossed my sentiment from Big Mugs on it and lined the back of the frame with foam strips. I popped it up on the watercolor background and moved on to my images. The strip of coffee beans are adhered with liquid glue and the other images are popped up with foam squares.

For finishing touches I added glossy accents to the coffee beans that are popped up and to the gnome’s mug.

I think this is such a fun card and the colors I used represent the college team we root for at home so I know exactly who this card will be going to.

I appreciate you sharing your time with me. Have a fabulous day!