Hey friends! Is anyone else just searching for all the sunshine they can get? I really feel like I am, which is seeping into the craft room. I’m so excited and happy for all of these summer themed releases starting to come out.
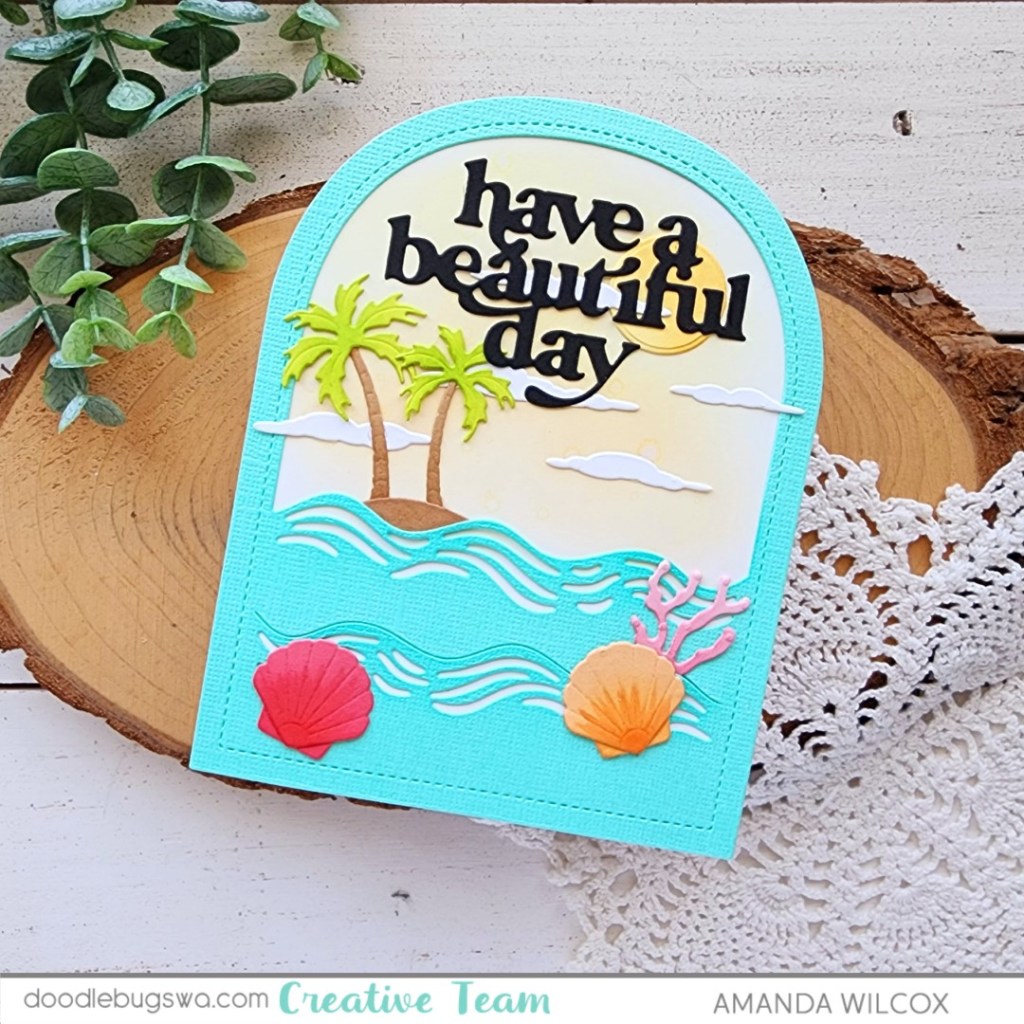
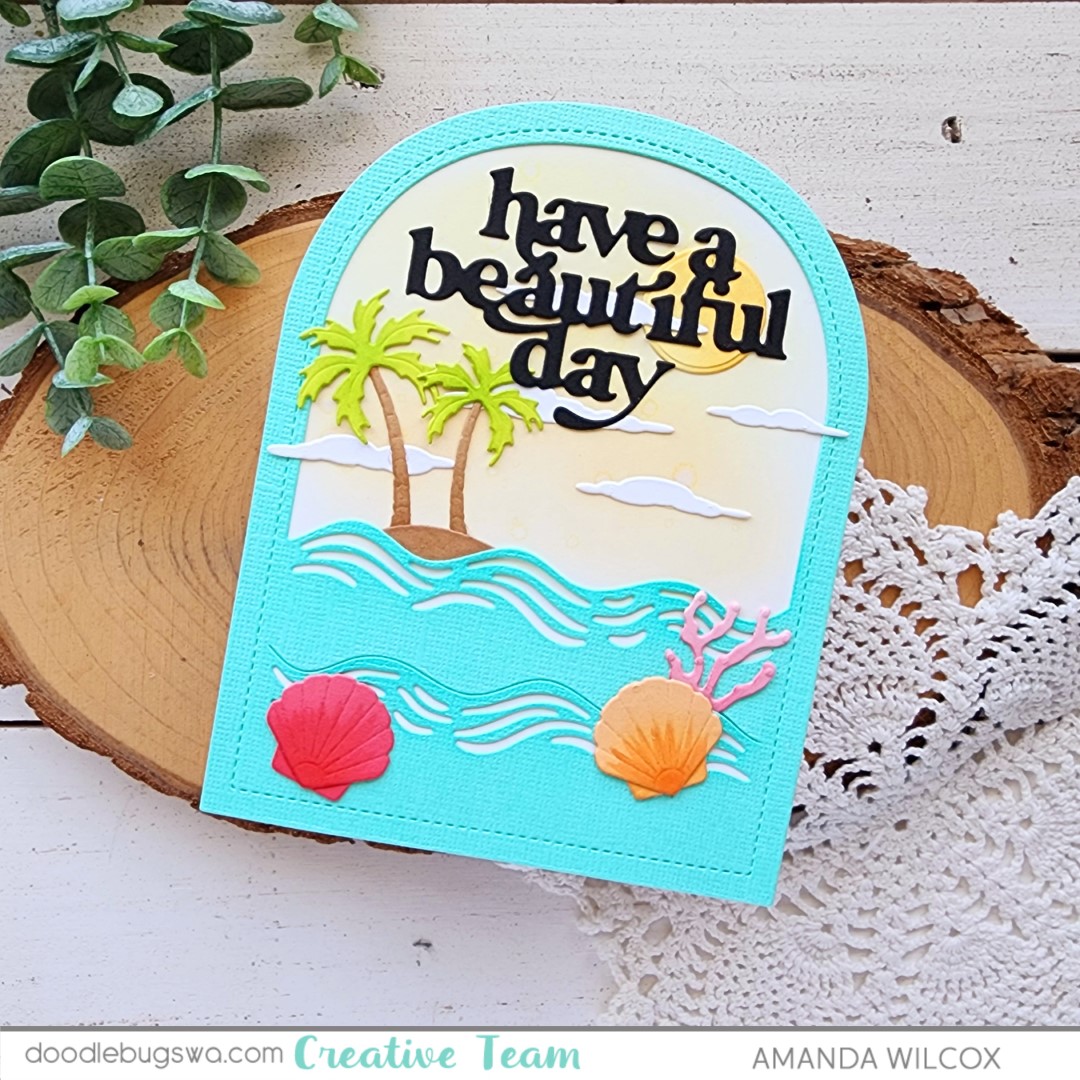
Today we’re creating and all die cut card combining fun products from Spellbinders and Mama Elephant. I love the new Seaside Vibes die set from Mama Elephant so I had to create with it as soon as it hit my mailbox. And when I ordered it, I thought the new Spellbinders Coastal Escape View dies would go perfectly so I snagged it at the same time. And I wasn’t wrong!
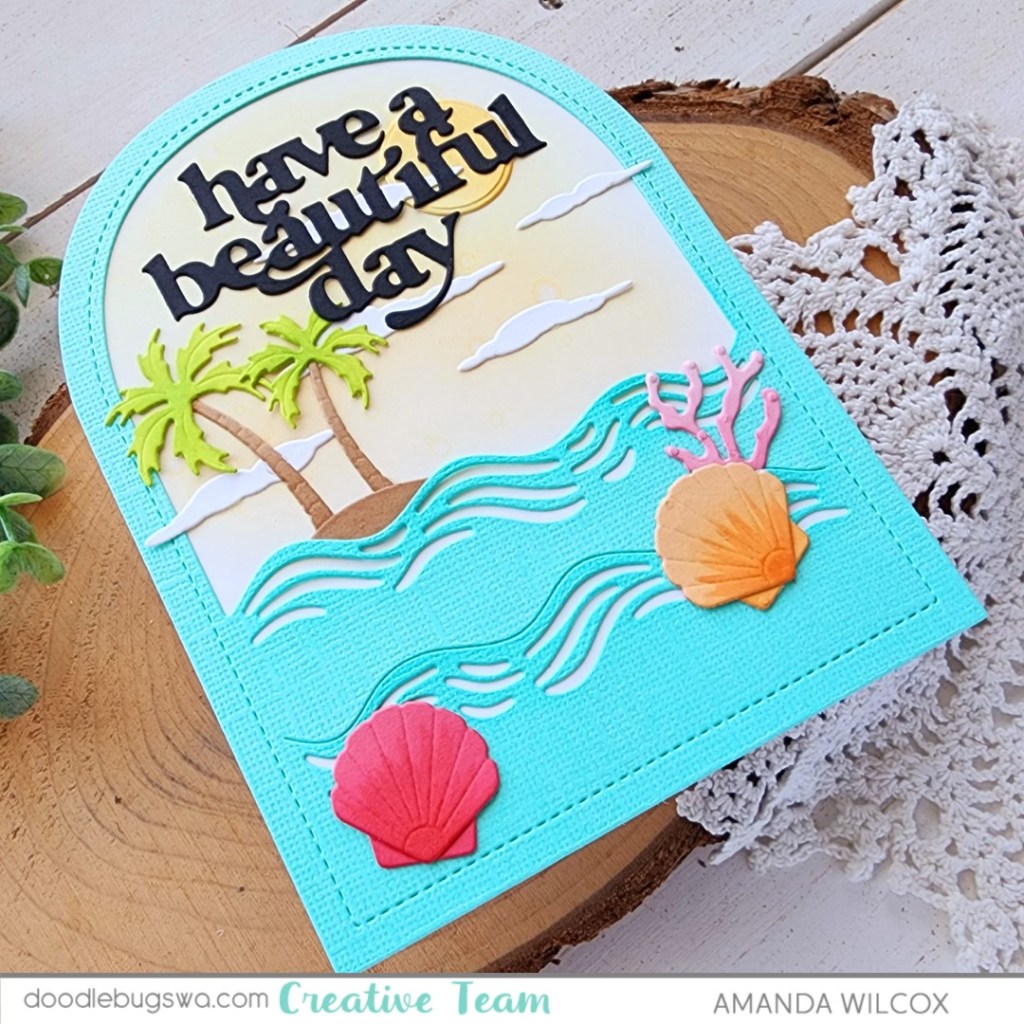
I used all of the dies from the Seaside Vibes set and pulled in the coral, seashells and palm tree island from Coast Escape View. I cut everything from colored cardstock and gave them some ink blending shadows, with a little copic detail on the seashells and palm trees too.

For once, this is a one-layer card, with no foam tape in sight. Trust me, this was difficult but I do love how it turned out. I also held back on sparkly and shiny because it felt complete once I finished gluing everything in place.
To create the card base, I traced the outer arch on white cardstock and cut it out by hand. Then I scored it on the left side 3/8″ in and adhered the flap to the back of my scene panel with tear tape. *Remember, you can use this technique on pretty much any shape to create a shaped card.*
I appreciate you sharing your time with me. Have a fabulous day!