Doodlebugs – Halloween Word Art

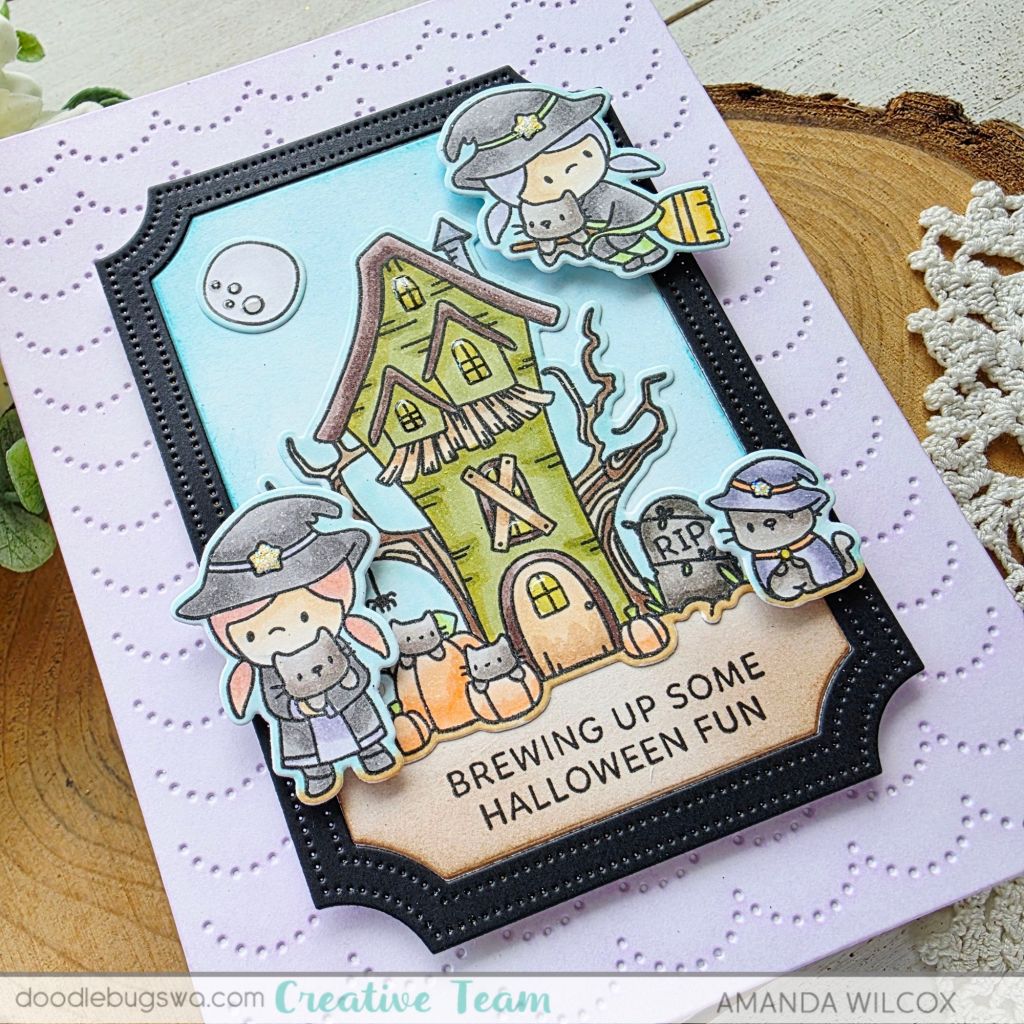
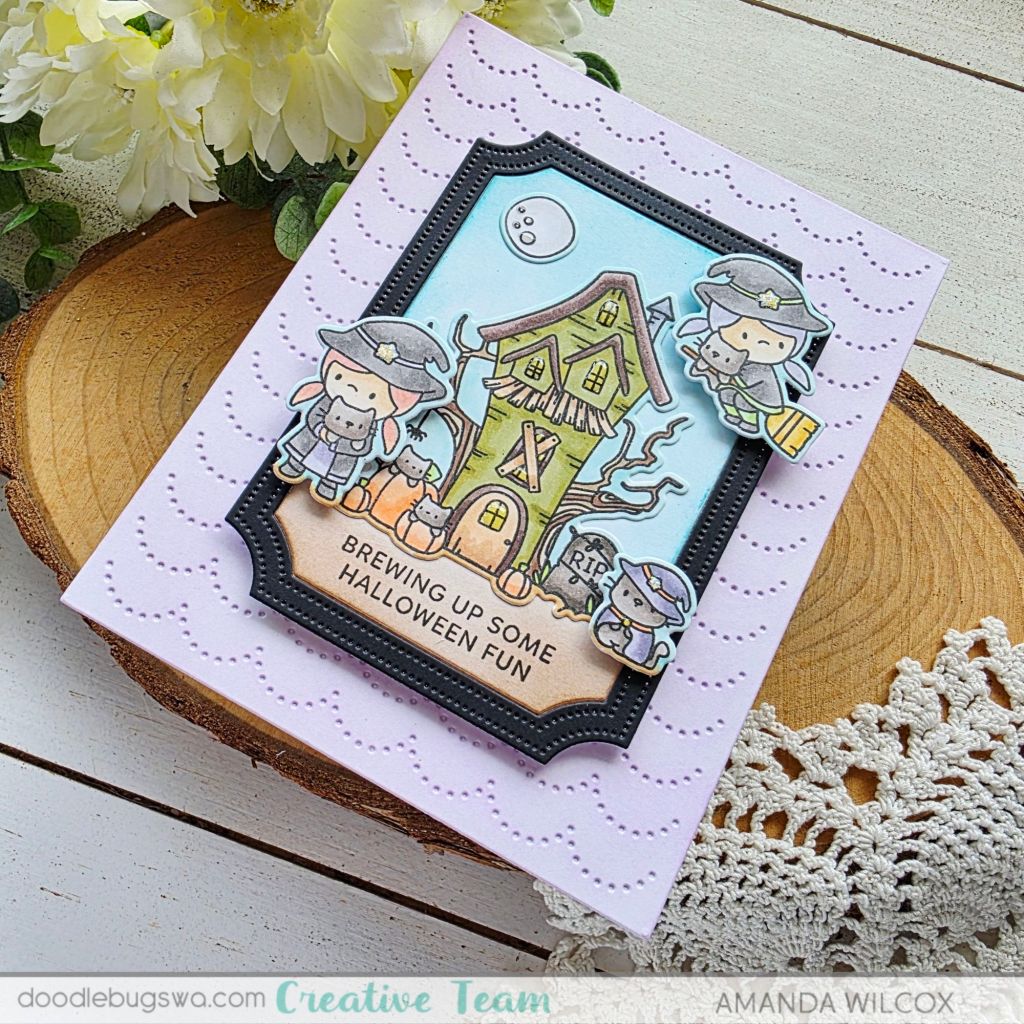
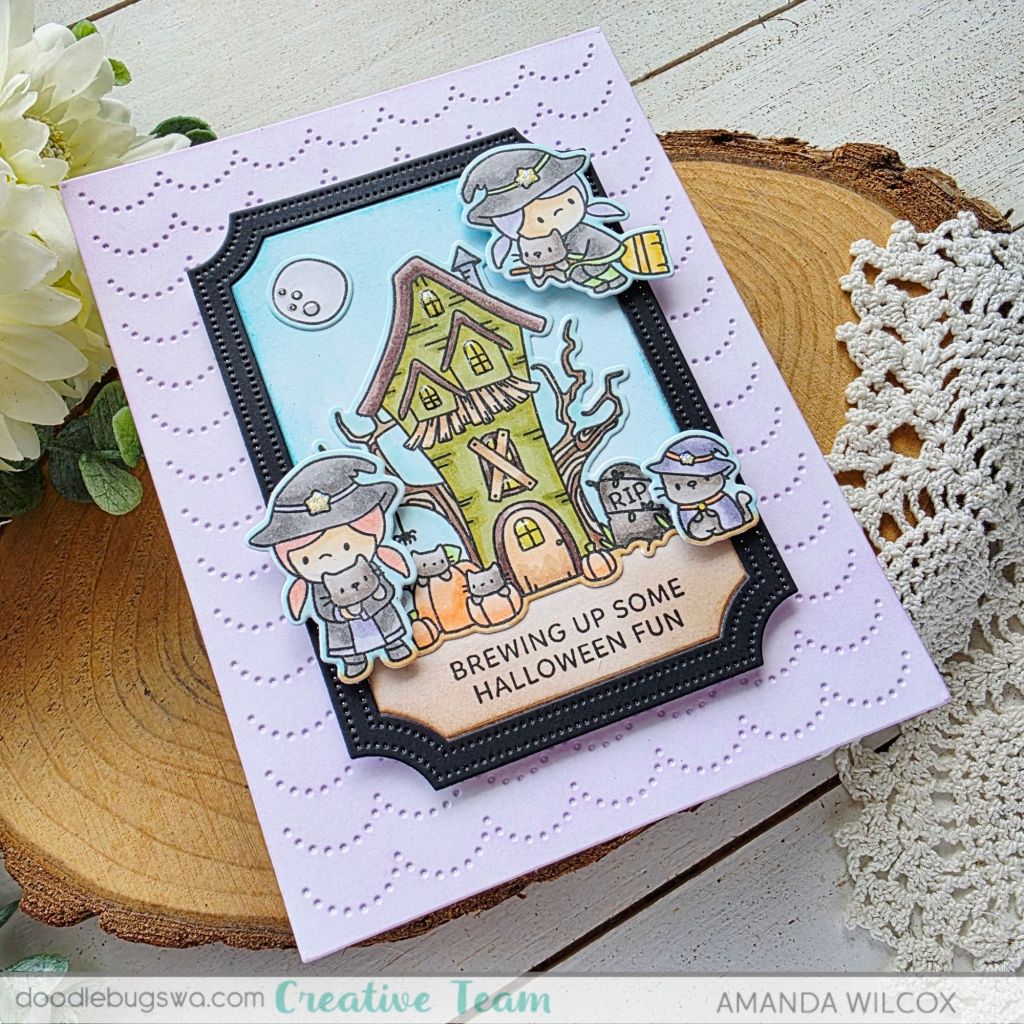
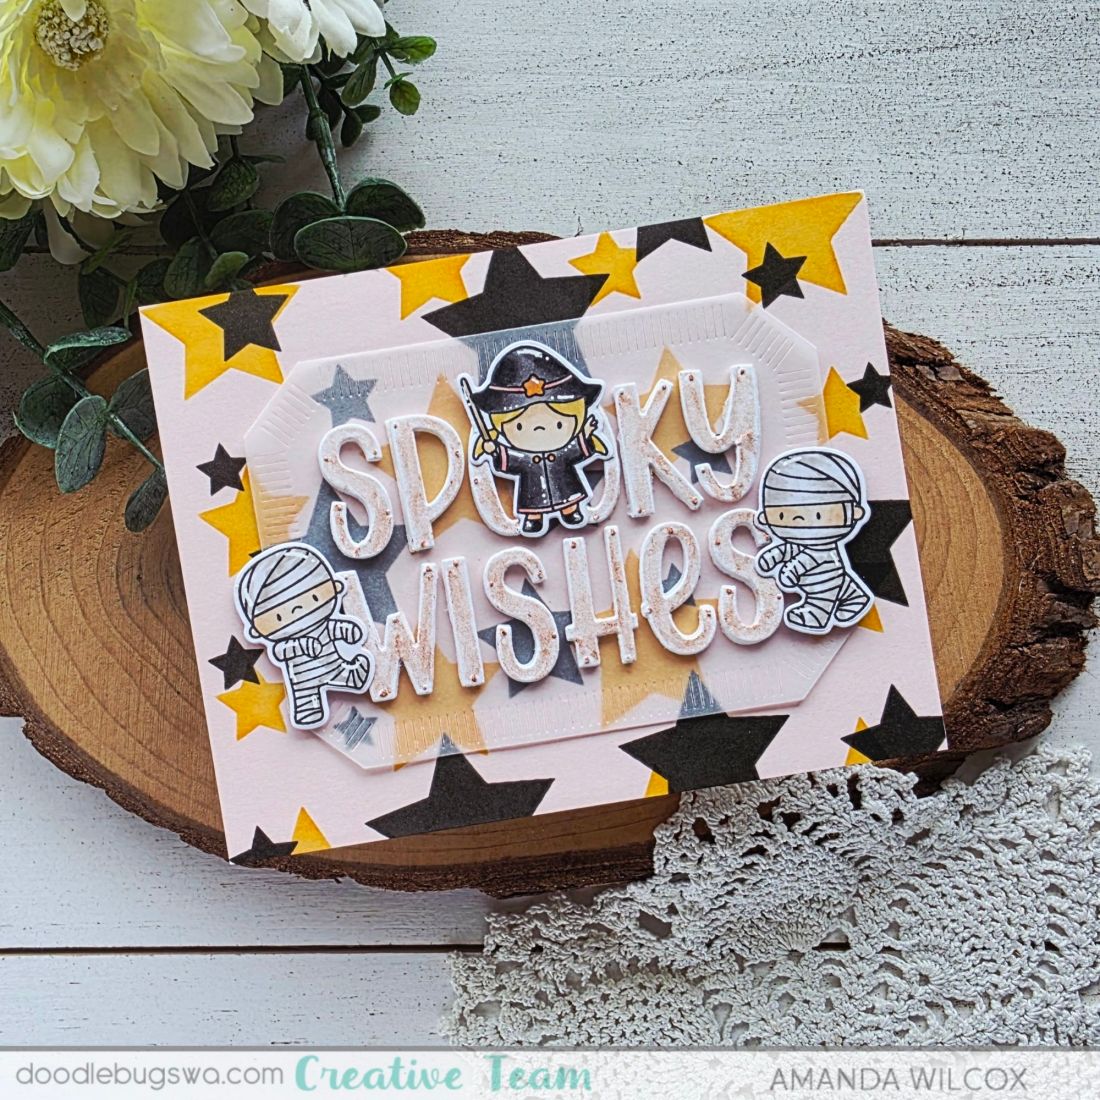
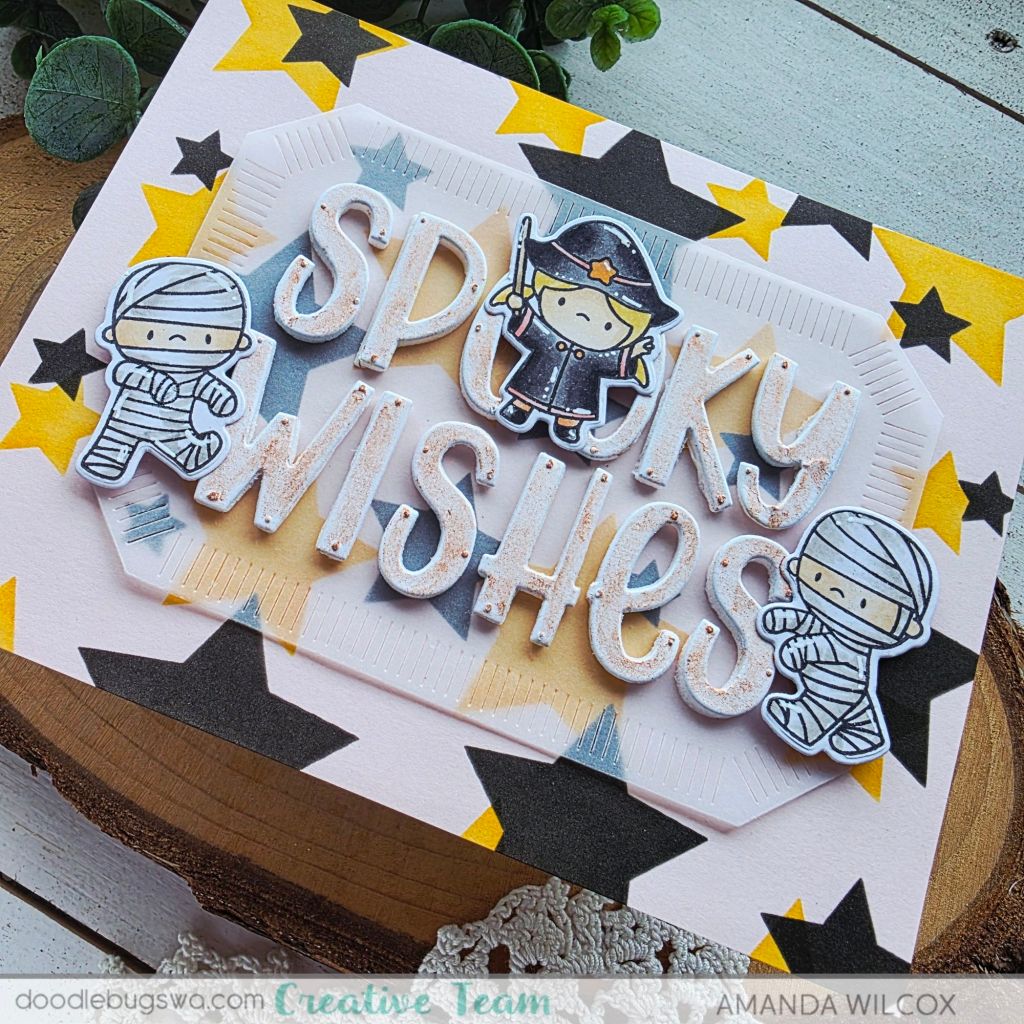
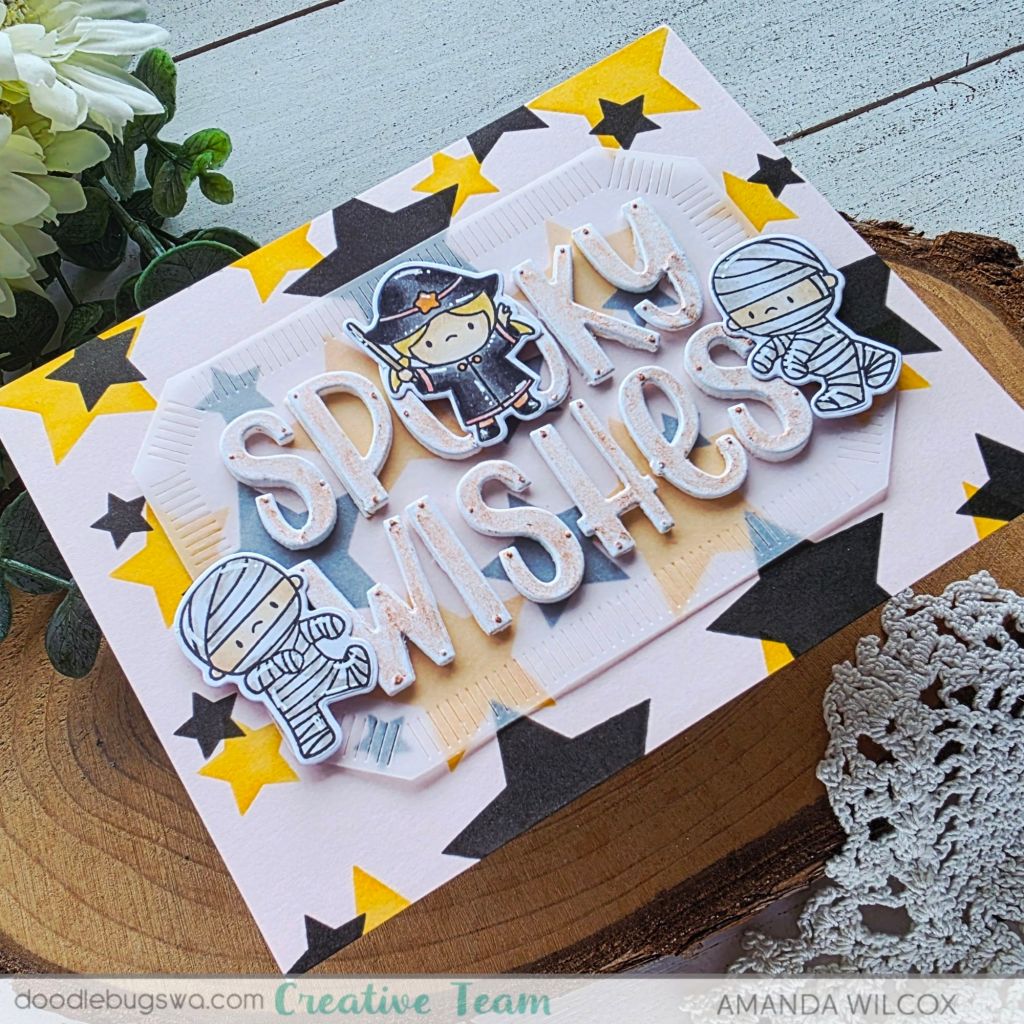
Hi there! Today for Doodlebugs Mix-it-up Monday I’m playing with this new set from Pretty Pink Posh called Halloween Word Scenes. They are really fun spooky words and sayings with images in place of some letters. They’re adorable and a fun way to combine your sentiment and images into one.

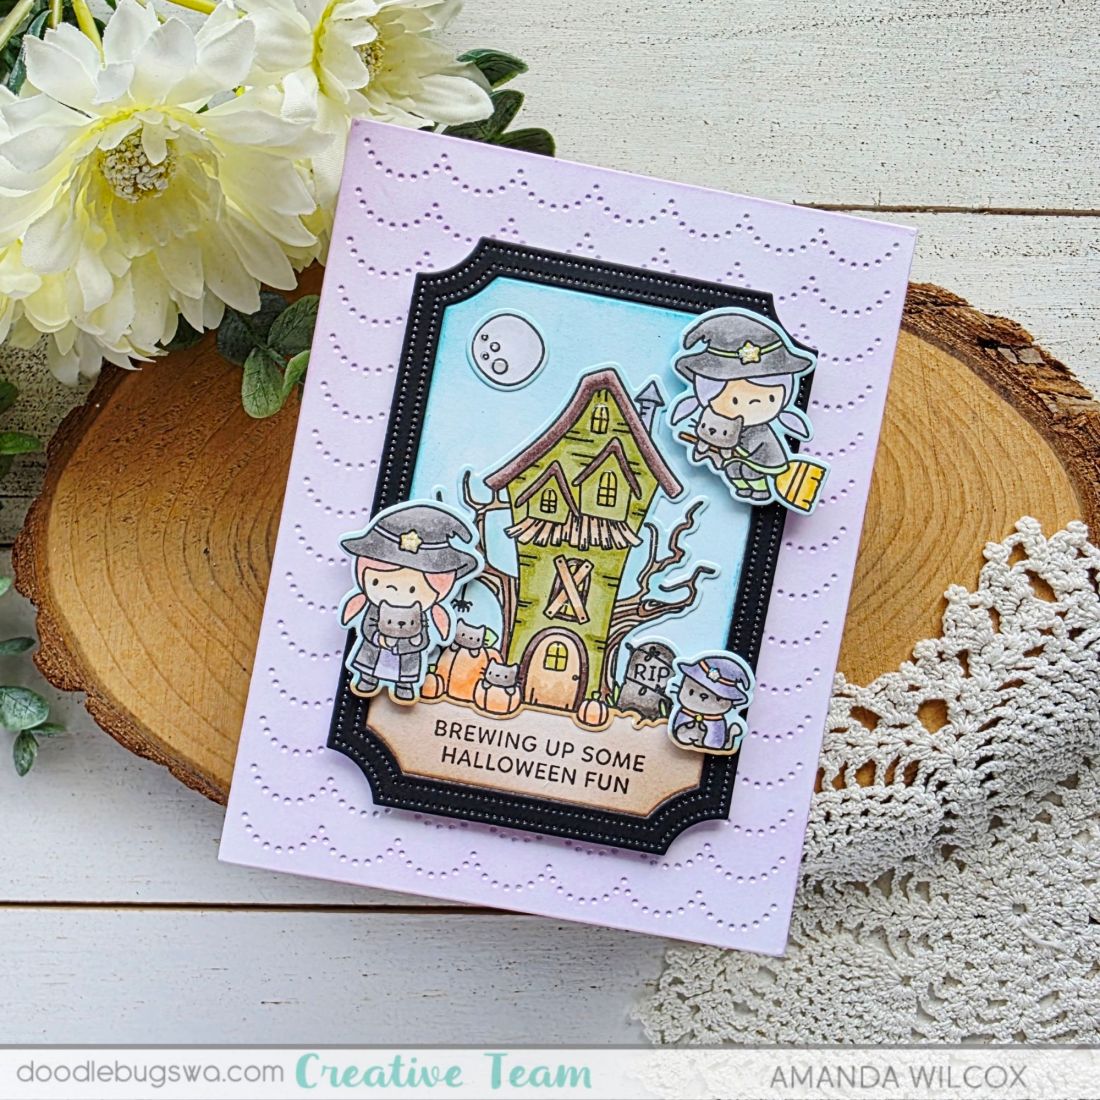
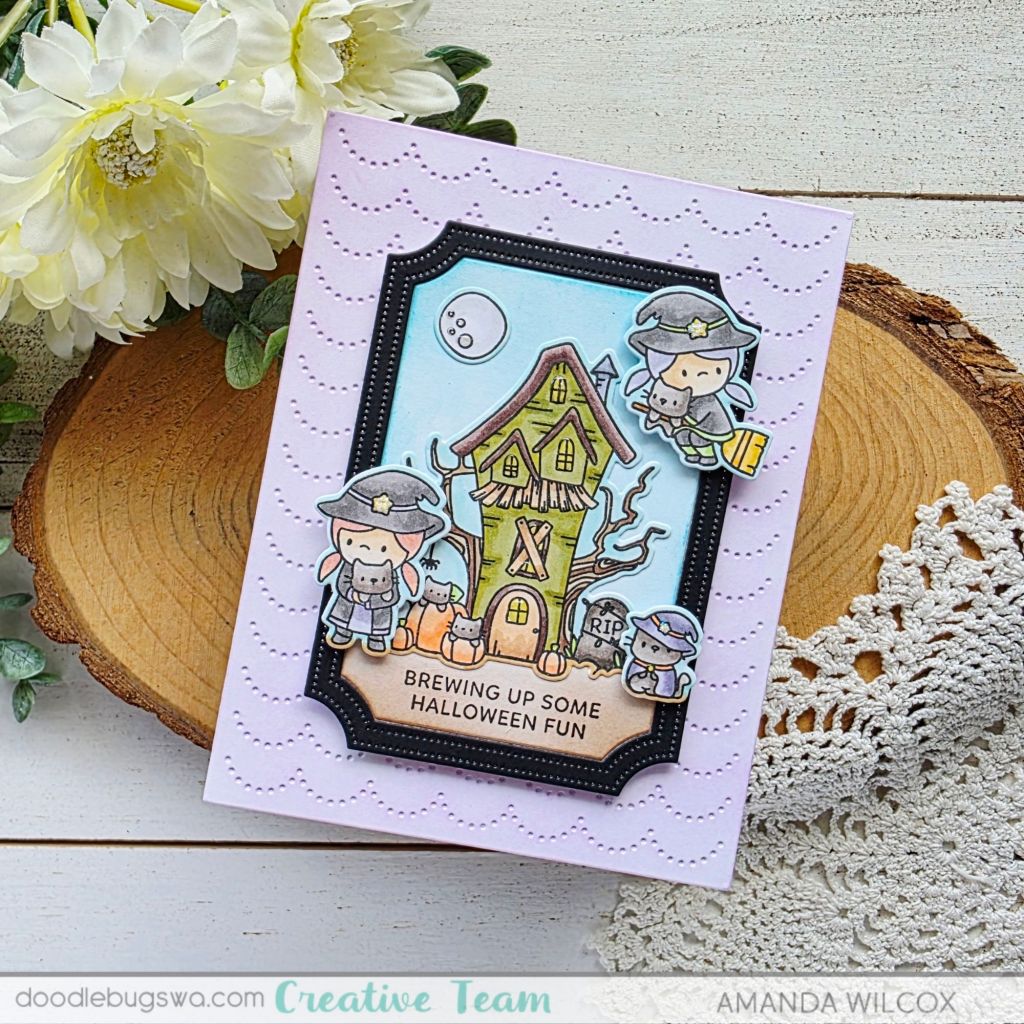
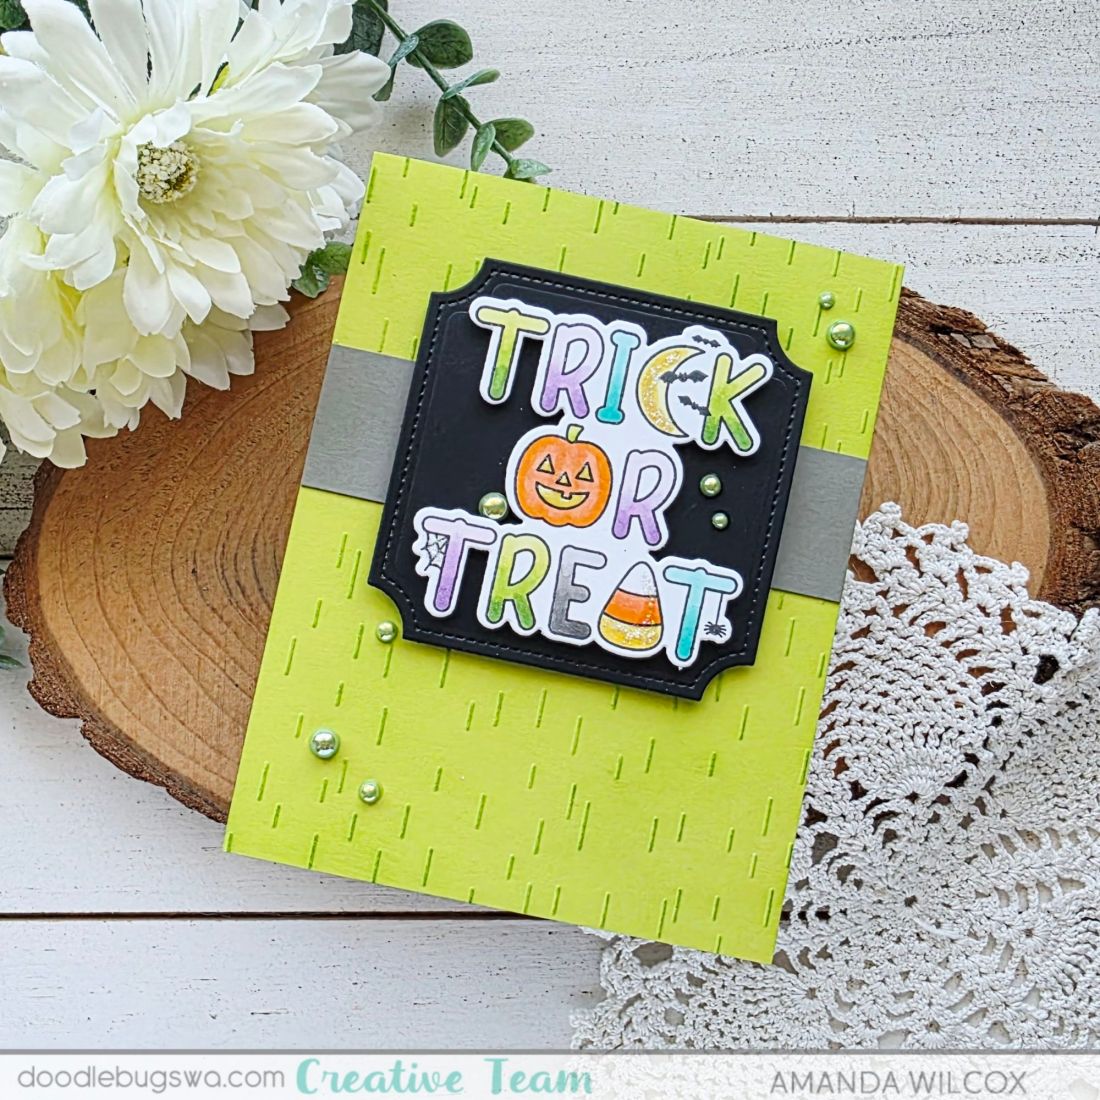
I was really stuck on the “trick or treat” sentiment so I stamped and colored that first, then used the coordinating die to cut it out. I immediately went to the notched rectangle dies because it seemed like it would fit and I was right. It’s perfect!

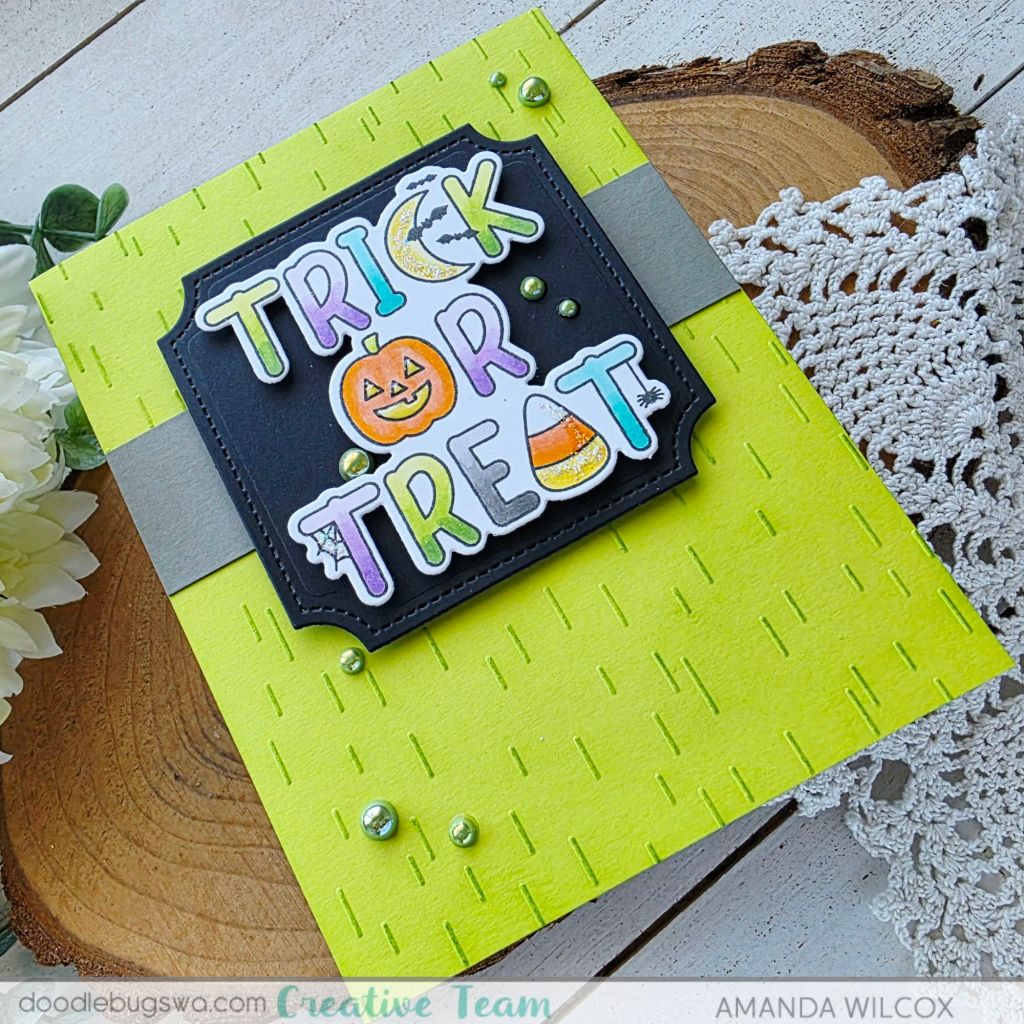
After popping the sentiment up with foam squares on the black square, I switched to deciding what I wanted to do with my background. That’s when I remembered this new Concord & 9th embossing folder called Dashed Lines that I hadn’t played with yet. So I embossed a green panel and went over it with my blending brush to help those lines pop.

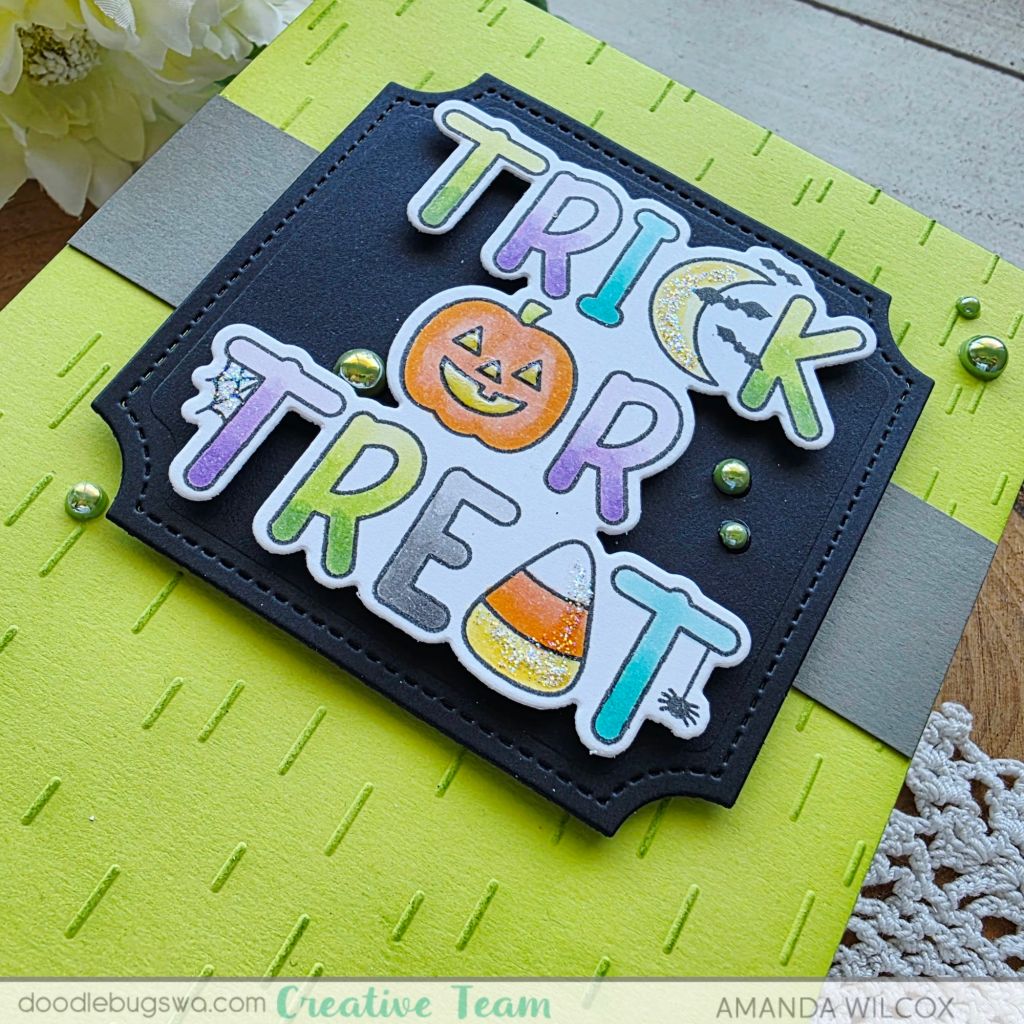
After gluing the embossed panel to a card base I thought it was missing something so I added a gray strip about 1″ wide behind the notched square. Then I finished things off with a scattering of Pretty Pink Posh pearls and some stardust Stickles on some of the images, plus glossy accents on the jack-o-lantern’s face.

Products used:
Pretty Pink Posh Halloween Word Scenes stamps and dies
Pretty Pink Posh Notched Square dies
Pretty Pink Posh pearls – pistachio
Concord & 9th Dashes Lines embossing folder
Foam tape and squares
Liquid glue
Blending brush
Lawn Fawn ink – artichoke
Stickles – stardust
Glossy accents

I appreciate you sharing your time with me. Have a fabulous day!

Doodlebugs – Rustic Christmas Inspiration

Welcome everyone! So glad you stopped by for this week’s Mix-it-up Monday for Doodlebugs! I’m squeezing in a little Christmas in between all my fall and Halloween crafting for the fun of it.

Today I created 2 of the Waffle Flower Poinsettia Frames with the die and stencil combo. I added some glitter brush pen to the yellow centers and die cut white glitter centers for the poinsettias themselves.

Next I used the Concord & 9th Woodgrain embossing folder on dark brown cardstock. I ink blended it with ground espresso distress oxide ink and splattered it with white paint. After gluing that to a card base, I popped the poinsettia frame pieces up with foam squares.

Last, I die cut the Merry Christmas sentiment from Spellbinders. I didn’t love the stark white background so I went over the edges lightly with my brown blending brush; I just didn’t add any more ink to it and used a light hand. Last, I added the sentiment to the center of the card with foam squares and liquid glue.

Products used:
Waffle Flower Poinsettia Frame dies and stencil
Concord & 9th Woodgrain embossing folder
Spellbinders Merry Christmas dies
Foam squares
Blending brushes
Lawn Fawn dye inks
Wink of Stella glitter brush pen
Liquid glue

I appreciate you sharing your time with me. Have a fabulous day!

Doodlebugs – Beach Days

Hi friends! I’m here with my installment of Mix it up Monday for Doodlebugs. I’m still intermittently playing with my summer goodies and having fun before it’s all things holiday! I have two cards to share today and they happened by accident in a really cool way.

I wanted to play with my recently ordered Concord & 9th Beach Days dies so I pulled out some colored cardstock and started cutting umbrella pieces. Once I had a good variety I just started assembling, honestly thinking it would be enough for one card. Nope, easily enough for two.

Once I figured that out, I pulled out watercolor paper and kraft cardstock to start making some sky and sand. I used distress oxide sprays for my sky and a splattering of watered down ink and paint for my sand. Those panels ended up being the perfect size to cut in half and use on both cards too. The umbrellas perfectly span the seam.

Once all of that was assembled, I stamped and heat embossed sentiments from the Waffle Flower Coastal Greetings set and used the coordinating dies to cut them out. But things were still a little empty so I die cut and added a sea gull to each card. Aren’t they funny up there?!? They make me giggle.

Products used:
Concord & 9th Beach Days dies
Waffle Flower Coastal Greetings stamps and dies
Distress Oxide spray – salty ocean
Lawn Fawn ink – walnut
White paint
Anti-static bag
Embossing and watermark ink
Embossing powder – white
Foam squares and tape

I appreciate you sharing your time with me. Have a fabulous day!

Doodlebugs – Brewing Up Some Halloween Fun

Happy Mix it up Monday everyone! I’m creating for the Doodlebugs shop as usual, but the shop blog is no longer being used so I thought it would be important to keep things going here in case anyone has questions on the creation process.

Today I’m playing with Mama Elephant spooky goodness and adding some Pretty Pink Posh and Waffle Flower dies to round things out.

I started by choosing images from Mama Elephant Bewitched to stamp, color and die cut out. The Mummified set came out in the same release and would be a lot of fun to mix with this or substitute if you have that one but like this layout.

Next, I cut the Waffle Flower Nested Piercing Ticket Frame from black and white cardstock. I kept the white insert and ink blended it for my scene with teal and brown inks, adhering the insert to the black frame with washi tape on the back side. I glued the house and moon directly to the panel and quickly thought it would be cool to color the edges of the images to match, so I did. Then I placed the scene in my MISTI and stamped the sentiment from Pretty Pink Posh Sentiment Strips | Fall on the bottom.

Next, I popped the witches and kitty up with foam squares on my scene panel. To add more interest to the background, I cut a piece of white cardstock with the Pretty Pink Posh Pierced Scallops cover plate and ink blended it with purple ink to coordinate the reoccurring color in my images.

I glued the scallop panel to a card base and popped the scene panel up with foam tape. Then I finished the design off with glossy accents and stardust Stickles on bits of the images – windows, moon, stars, etc.

Products used today:
Mama Elephant Bewitched stamps and dies
Pretty Pink Posh Sentiment Strips | Fall stamps
Pretty Pink Posh Pierced Scallops cover plate
Waffle Flower Nested Piercing Ticket Frames dies
Blending brushes
Lawn Fawn dye inks
Foam tape
Liquid glue
Stickles – stardust
Glossy accents

I appreciate you sharing your time with me. Have a fabulous day!

Doodlebugs – Special Delivery from Out of this World

Happy Mix it up Monday friends! I’m here with a lighter and brighter take on outer space than I typically choose. It’s been hot so I’ve had watercolors out to play with and had the urge to try some lighter galaxy vibes. I had fun and the outcome is really pretty!

To create my card, I played with watercoloring the background one evening and then chose some images from the Pretty Pink Posh Outer Space set to stamp. The next morning, I splattered the watercolor panel with white and black paint and colored my images with copic markers before it heated up.

That evening I die cut the background panel with one of the Mama Elephant Mod Heart dies. Then I used coordinating dies to cut the images out as well. For my sentiment I chose a Banner Greeting from Mama Elephant. I added foam to the back of everything because you know I love my dimension!

Before assembling it all I chose a light periwinkle blue cardstock to adhere to my card base, then I removed the release paper and adhered things one layer at a time. Then for finishing touches I added glossy accents to bits of each image.

Isn’t this a fun card!?! The sentiment is generic enough that it could be used for any number of occasions from new baby boy to just sending love. These kind of cards are my favorite to make and have on hand because that right occasion is just around the corner every single time.

Products used:
Pretty Pink Posh Outer Space stamps and dies
Mama Elephant Mod Heart dies
Mama Elephant Banner Greetings dies
Foam squares, strips and tape
Glossy accents
Liquid glue
Reverse tweezers

I appreciate you sharing your time with me. Have a fabulous day!

Doodlebugs – Spec-taco-lar Birthday

Hi there! It’s Mix it up Monday on the Doodlebugs blog and today we’re celebrating my favorite way…TACOS!!! I love the new taco cart add on to the Lawn Fawn Treat Cart series. It’s so fun and makes me giggle because mexican food is my favorite!

So today, I chose a few images from the Treat Cart original set and the Taco Cart add on set, stamped and colored them. Then I used coordinating ides to cut it all out and a little liquid glue to assemble the pieces together.

Then I snagged the Mama Elephant Scallop Circles dies and cut the stitched circle from white with the two back layers from orange and green. Such a festive color combo! I used liquid glue to adhere the layers together and ink blended a little yellow in the center of the circle to take off the harsh white background.

Next, I took a piece of white cardstock measuring 4×5.25 inches and spritzed it with Distress Oxide spray and Distress Spritz for color and shimmer. Then I took my Lawn Fawn jalapeno ink pad direct to the edges of my card base for texture and color. While that was drying I stamped and heat embossed my sentiment and cut it up into sentiment strips.

For assembly, I popped the orange panel up with foam tape, then popped the circle up on that. The taco stand is glued directly to the circle and the critters are popped up with foam squares. Last, I added the sentiment strips with foam strips filling in some of the white spaces. For finishing touches today I just added white gel pen highlights to the images.

What’s your favorite type of food? The one that makes you happy dance in your seat…

Products used:
Lawn Fawn Treat Cart stamps and dies
Lawn Fawn Taco Cart Add On stamps and dies
Lawn Fawn Taco Cart Sentiments stamps
Mama Elephant Scalloped Circles dies
Distress Oxide Spray – spiced marmalade
Distress Spritz Spray – squeezed lemonade
Lawn Fawn ink – jalapeno
Liquid glue
Foam tape, squares and strips
Sakura jelly roll pen – white
Embossing and watermark ink
Embossing powder – white
Anti-static bag

I appreciate you sharing your time with me. Have a fabulous day!

Doodlebugs – You’re Tops in my Book

Happy Mix it up Monday everyone! On the Doodlebugs blog today I’m mixing some really fun bookish products together. I have a very special librarian in my life who I needed a card for so this was extra fun to pull together.

I started by die cutting and inking up the Waffle Flower Open Book die and stencils. I used blending brushes and Lawn Fawn dye inks to color the layers. It was so much fun! I can’t believe it took me this long to give it a try. I’m for sure hooked and excited to make some with the new Christmas stencils too!

Once that portion was finished I pulled out the Concord and 9th Wood Plank embossing folder for my background panel. I trimmed it down to 4×5.25 inches after it was embossed and inked it lightly with gray to bring out the texture.

Next, I pulled out the Lawn Fawn Little Woodland Library stamps and dies to choose the sweet reading critters to place around my open storybook. After those were stamped, colored and die cut I moved on to assembling the parts together.

Wanting a little contrast I added deep sea ink to my card front before popping the wood plank panel up with foam tape. Then I glued the storybook down with liquid glue and popped up my critters and sentiment strip with foam squares and strips.

For finishing touches I just added a little glossy accents on the worm’s glasses and white gel pen highlights on all the stamped images.

Products used:
Waffle Flower Open Book dies
Waffle Flower Open Book stencil
Waffle Flower Open Book Dragon Castle stencil
Concord & 9th Wood Plank embossing folder
Lawn Fawn Little Woodland Library stamps and dies
Lawn Fawn Sentiment Strip die
Embossing & Watermark ink
Embossing powder – white
Anti static bag
Blending brushes
Lawn Fawn dye inks
Foam tape, squares and strips
Liquid glue

I appreciate you sharing your time with me. Have a fabulous day!

Doodlebugs – Seashell Shaker Card

Hi friends! I’m on the Doodlebugs blog today with a really fun seashell shaker card to share with you. I mixed and matched more of the Pretty Pink Posh and Waffle Flower June beach releases to make this one. They just play so well together, it’s natural.

I started this card by playing with the Waffle Flower Seashell Frame die and stencil combo. I cut the frame from white cardstock and chose an assortment of Lawn Fawn dye inks to color it in, one layer at a time.

Next, I cut the Pretty Pink Posh Seashell Shaker die – solid once from white cardstock and once from acetate, then I cut the shaker frame from white cardstock 6 time. I inked one of them lightly with teal and apricot inks. I glued all of the white frames to the solid base, and glued the inked frame to the acetate. Next, I filled the shaker wells with glitter, microbeads and heart confetti before gluing the top layer in place.

While that was drying, I took a piece of white cardstock and spritzed it with Distress Oxide Spray and Distress Spritz for color and shimmer.

Last, I stamped and heat embossed a sentiment from the Waffle Flower Coastal Greetings stamp and die combo. Now, with all the elements finished and dry, I started assembling the layers with liquid glue, except the sentiment which I popped up with foam squares.

Products used:
Waffle Flower Coastal Greetings stamps and dies
Waffle Flower Seashell Frame die and stencil
Pretty Pink Posh Seashell Shaker dies
Lawn Fawn inks – juice box, blue jay, guava, peach fuzz, mermaid
Embossing and watermark ink
Embossing powder – white
Magic anti-static bag
Foam squares
Liquid glue
Blending brushes

I appreciate you sharing your time with me. Have a fabulous day!

Doodlebugs – Heading Back to the Beach

Happy Monday everyone! Back this week to playing with all things beach! Have you noticed how much amazing beach-themed product has been released this year? It’s over the top and I’m here for it! Today I took the time to play with Waffle Flower and Pretty Pink Posh beach releases from June. Still loving it all!

This card starting with the Waffle Flower Lighthouse and Coastline die sets. I love that the Coastline set comes with a simple coloring stencil and the lighthouse dies were so easy to put together! I used some copic markers on the lighthouse for dimension. Plus I added splatter to my sandy beach panel from the coastline.

Moving on to the background panel, I chose the Pretty Pink Posh Seashell background stencil and Lawn Fawn forget me not ink. Then I spritzed it with Solar Spray for shimmery texture.

I used liquid glue to adhere the lighthouse to the rock and then glued that whole scene to my background panel. I adhered that to a card base and moved on to choose my spattering of sentiment strips.

The Pretty Pink Posh sentiment strip dies and stamp series are literally one of the best investments I’ve ever made. They’re available for every occasion and the perfect little addition to almost any design. I chose three from the Summer stamp set and cut them out with the smallest strip die, then adhered them with liquid glue too.

This might be the flattest card I’ve ever created. But it works so well and I love it!

Products used:
Waffle Flower Lighthouse dies
Waffle Flower Coastline dies
Pretty Pink Posh Seashells background stencil
Pretty Pink Posh Sentiment Strip dies
Pretty Pink Posh Sentiment Strip | Summer stamps
Liquid glue
Solar Spray – golden hour
Blending brush
Lawn Fawn forget me not, peacock, narwhal and walnut inks

I appreciate you sharing your time with me. Have a fabulous day!

Doodlebugs – Spooky Wishes

Hey friends! I interrupt your regularly scheduled summer fun for some spooky wishes featuring the Mama Elephant Halloween awesomeness that recently released! If you’ve been here for just a minute, you know Halloween is my favorite and any excuse to create for it has me ALL IN!

I had a general idea that I wanted to create a big sentiment with the adorable mummies and witches around and in the letters somehow. So I started with my background to set the tone and choose my color palette…perfect summerween colors! I used the Pretty Pink Posh Layered Stars stencil set on pink cardstock to start off with. I used Lawn Fawn carrot and jet black inks.

Next, I adhered white cardstock to craft foam and covered the back with adhesive sheet. Then I die cut my sentiment using the Lawn Fawn Henry’s ABCs die set. This gave instant dimension with less work than cutting each letter 4 times and gluing them together. After arranging my letters together I chose a Spellbinders Emerald Cut Label die to cut from vellum as a backdrop.

Now that I had a general placement and size of open space, I chose a couple of mummies and a witch from the new Mama Elephant sets – Mummified and Bewitched. I stamped, colored and die cut them, then adhered each mummy with foam squares and the witch with liquid glue.

Hiding adhesive behind the letters and images, I adhered the vellum panel with tape runner to the stenciled background. Next, I used liquid glue to adhere the whole thing to a card base.

For finishing touches I added orange glitter brush pen to the sentiment and white gel pen highlights to the images.

On a scale from 1 to spooky, how much do you love crafting for Halloween?

Products used:
Mama Elephant Mummified stamps and dies
Mama Elephant Bewitched stamps and dies
Pretty Pink Posh Layered Stars stencils
Spellbinders Emerald Cut Labels dies
Blending brushes
Lawn Fawn inks – carrot and jet black
Liquid glue
Adhesive sheets
Craft foam
Foam squares
Tape runner

I appreciate you sharing your time with me. Have a fabulous day!