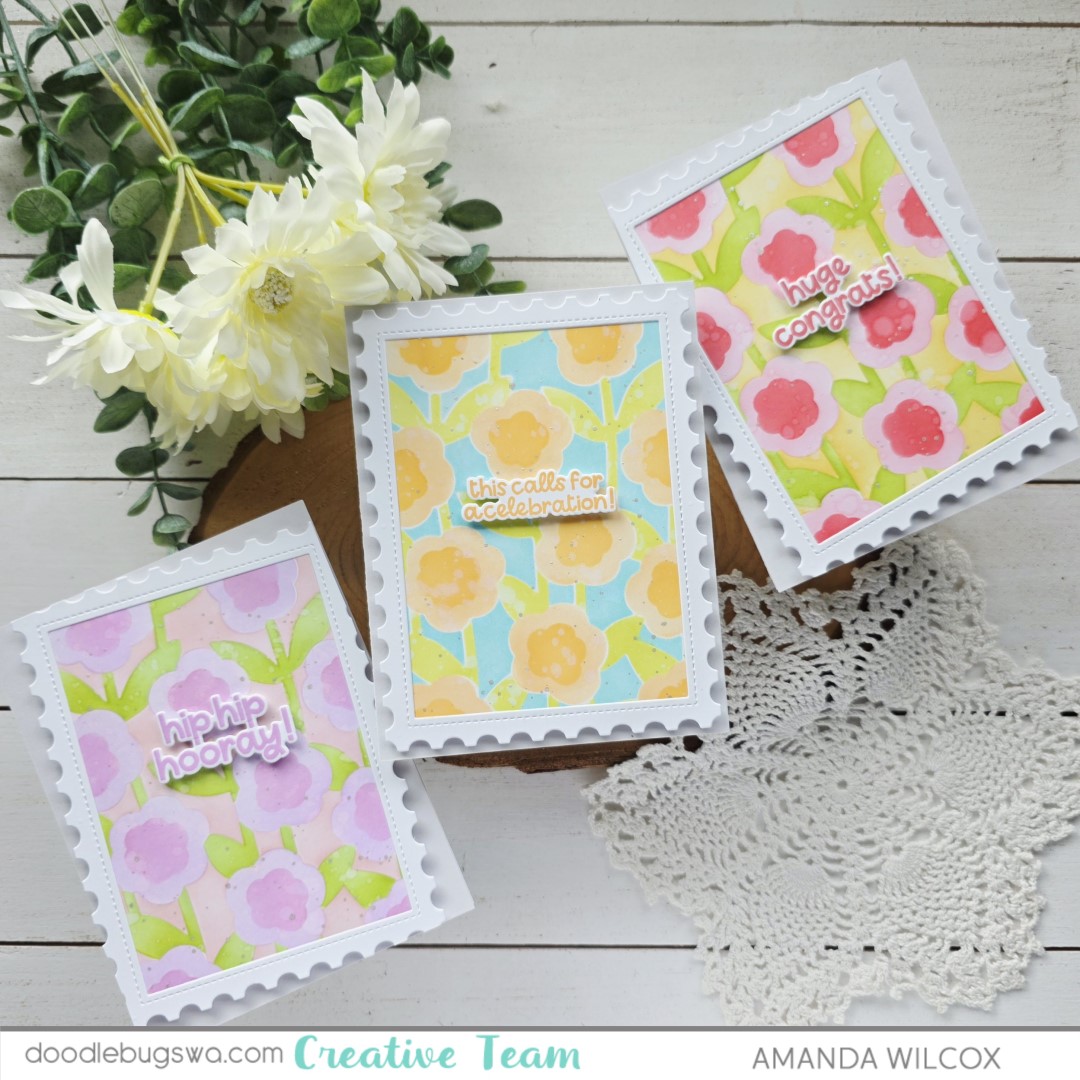
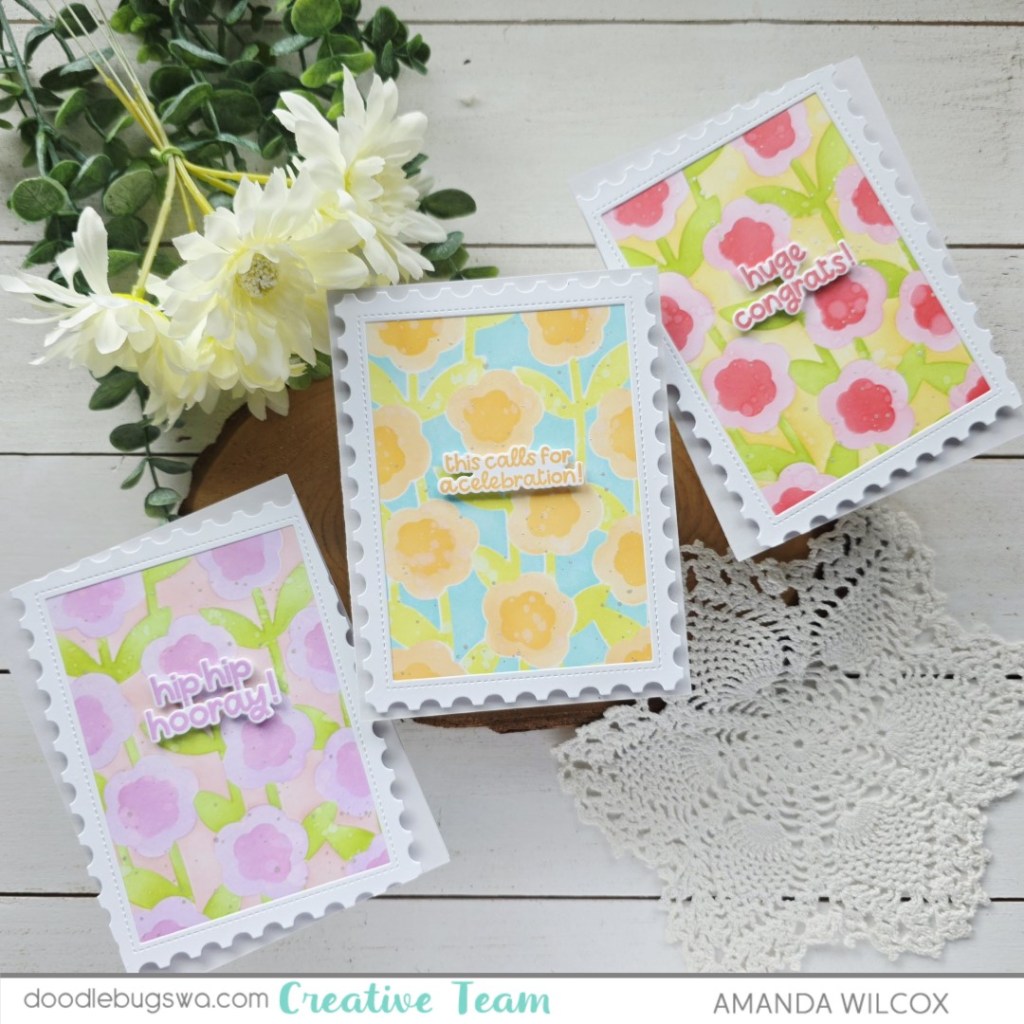
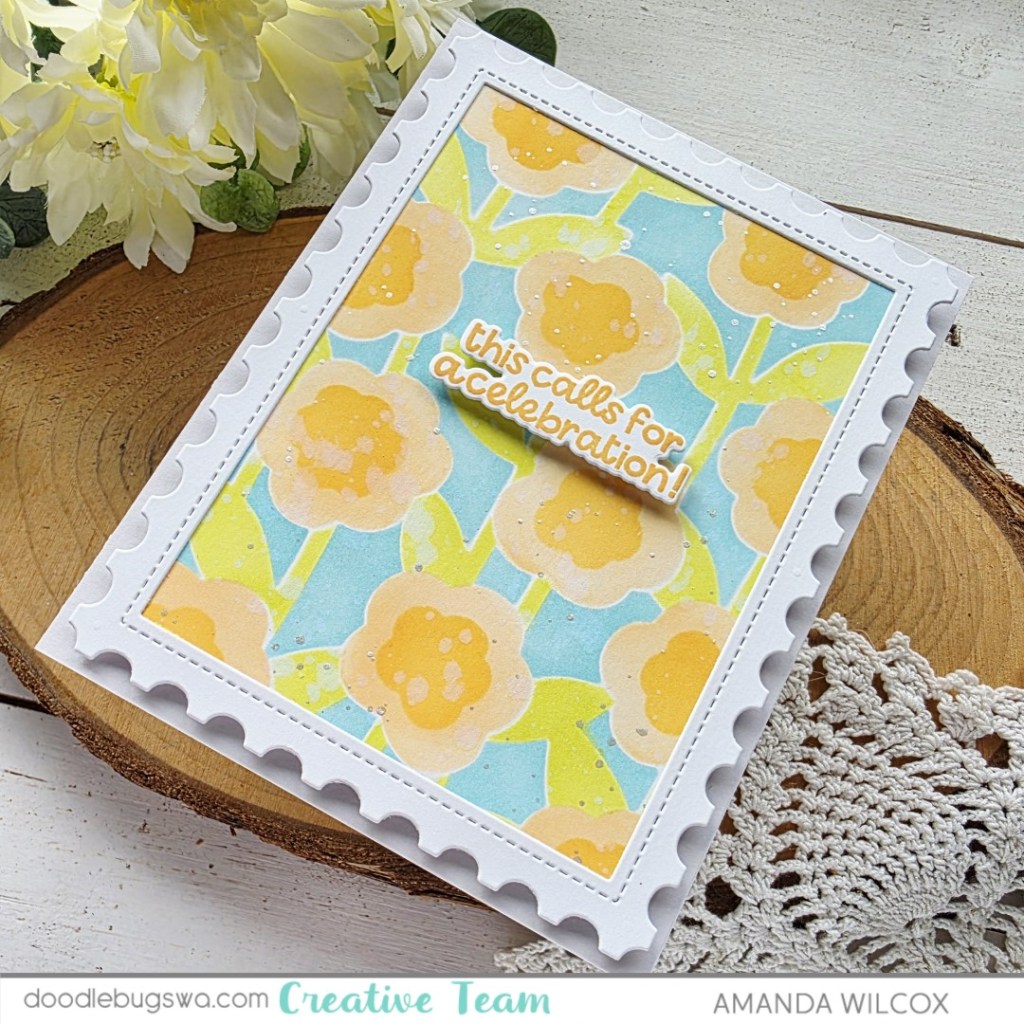
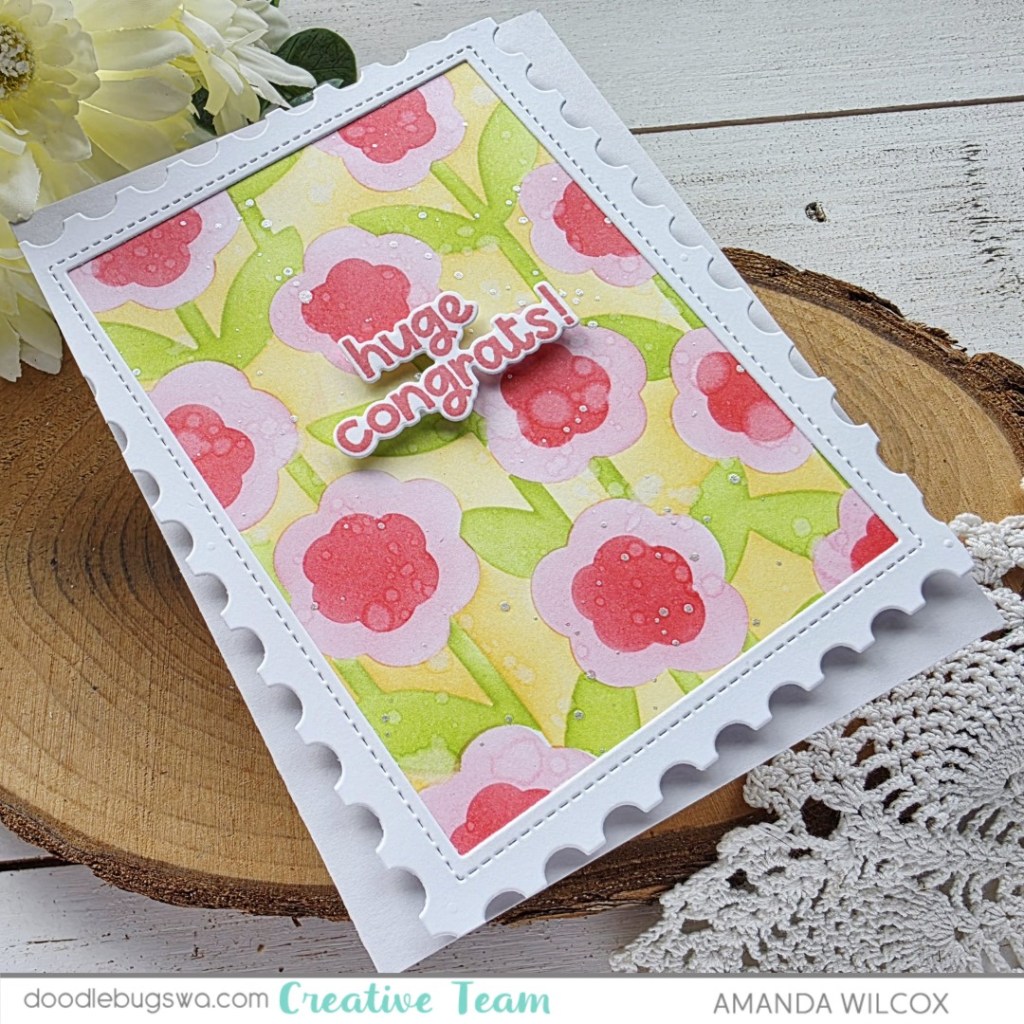
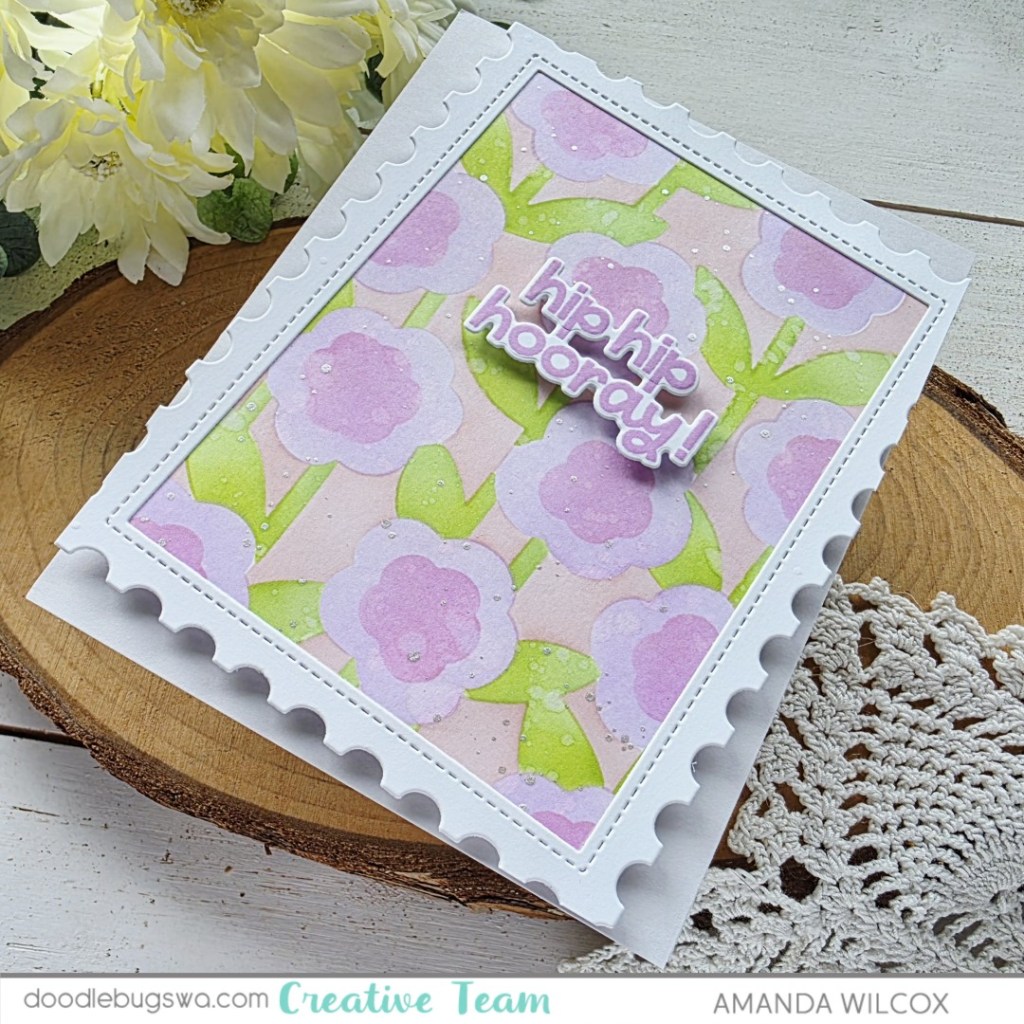
Hello friends! Today for Mix it up Monday, I’m playing with some more of the Waffle Flower Postage Collage series. I love all of these and that you can mix and match bunches of them together if you want. It adds life to the product and makes it more fun today play with. Today I had a hard time breaking up my rainbow of envelope stamps though.
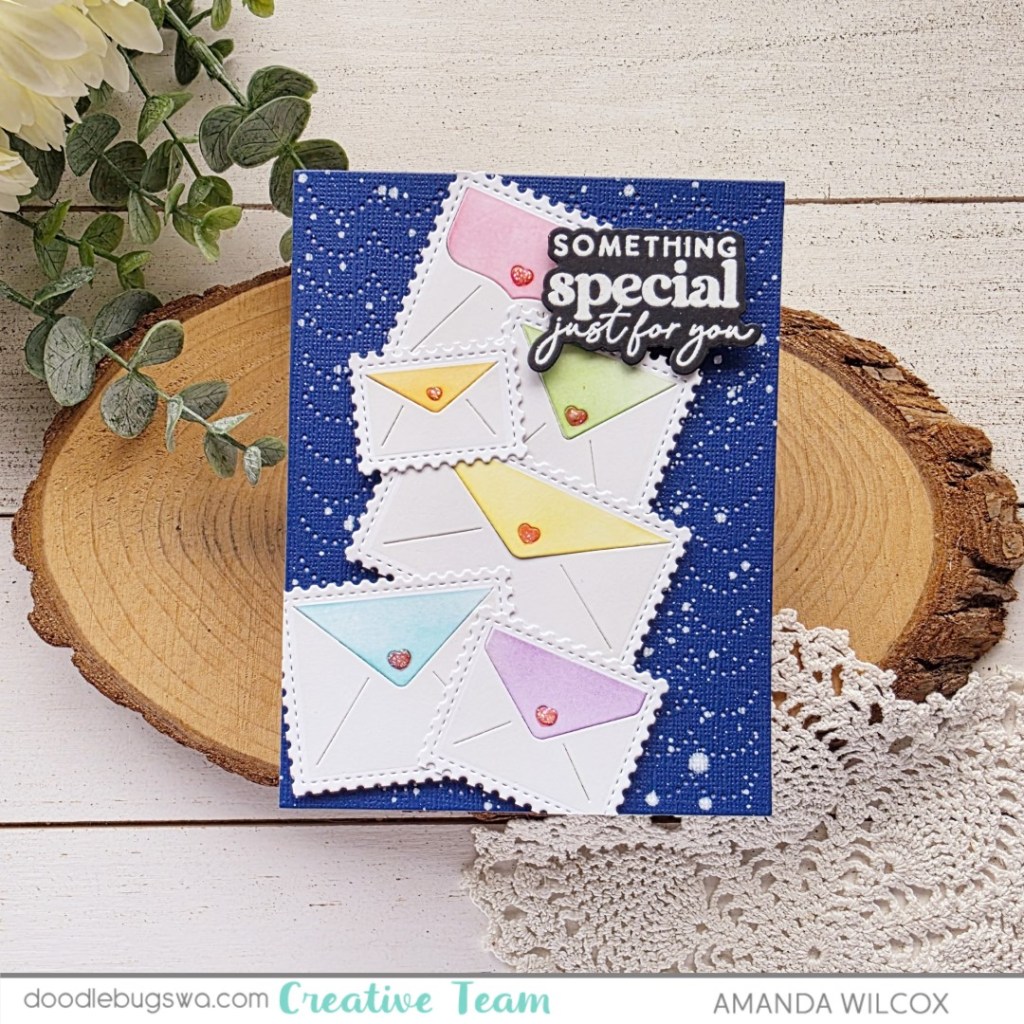
After die cutting the postage collage base, I cut that with the postage collage envelope base. Then I stuck it to my grip mat and used the postage collage envelope stencil to ink them up in a rainbow of colors.
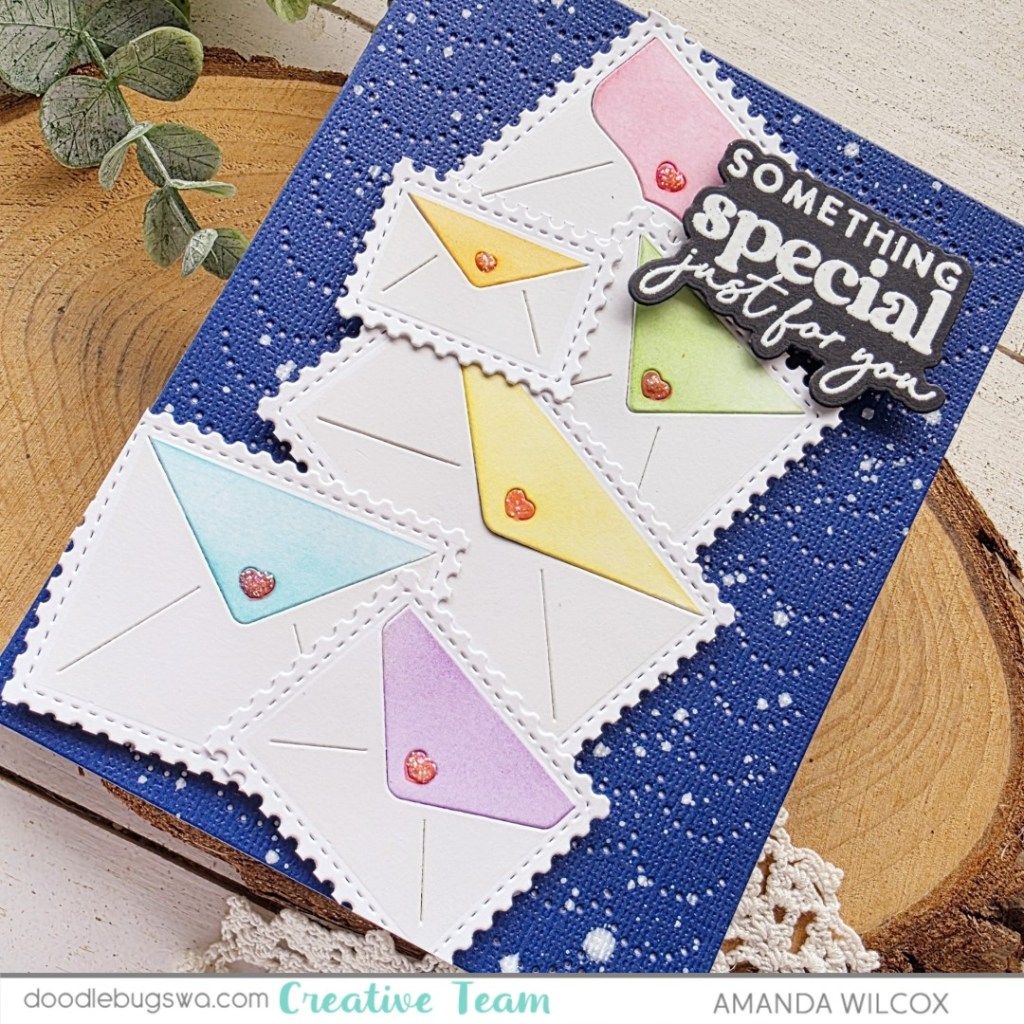
I used my scissors to trim them apart and arranged them on an A2 scrap of cardstock before using liquid glue to adhere them all together. While those were drying, I cut a piece of dark blue cardstock with the Pretty Pink Posh Pierced Scallops cover plate and splattered that with white paint.
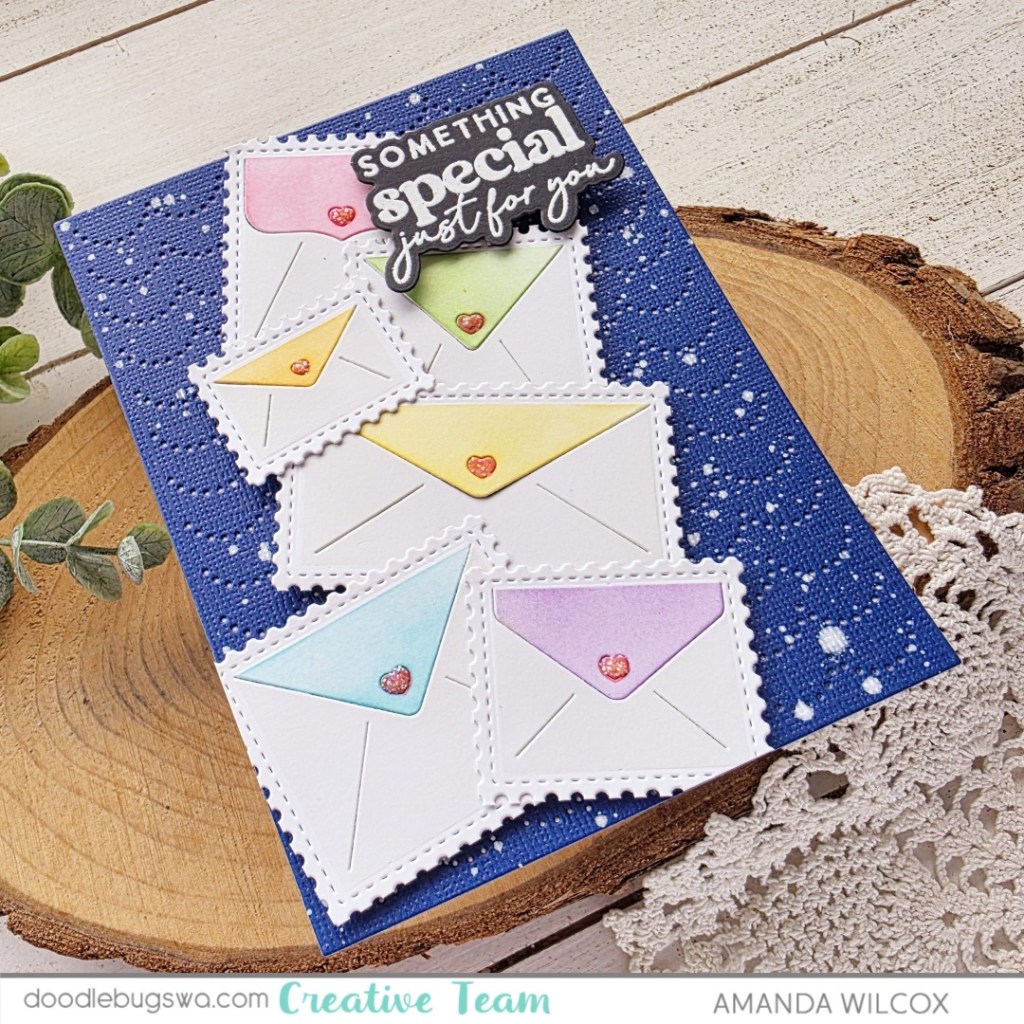
Once all of that was dry, I glued the blue panel to a white card base and popped the envelopes up on that with foam squares. After trimming off the excess I stamped and heat embossed my sentiment from the Waffle Flower Birthday Wishes set. This set has coordinating dies so I also cut it out before popping it up with foam squares to match the level of the envelopes.
For finishing touches here I added a little sparkle to the envelope hearts with stardust Stickles.
Products used:
Waffle Flower Postage Collage dies
Waffle Flower Postage Collage Envelope die
Waffle Flower Postage Collage Envelope stencil
Waffle Flower Birthday Wishes stamps and dies
Pretty Pink Posh Pierced Scallop cover plate
Blending brushes
Lawn Fawn inks – guava, juice box, mermaid, cilantro, sunflower, carrot
Anti-static pouch
Embossing & Watermark ink
Embossing powder – white
Foam squares
Liquid glue
Stardust Stickles
I appreciate you sharing your time with me. Have a fabulous day!