Happy Mix it up Monday everyone! This week I have a couple of sweet little strawberry shaped cards using Lawn Fawn and Mama Elephant goodies together. This is a fun way to use your larger shape dies in a different way so be sure to dig through your stash and see what you’ve got!

The base of my cards are created with the Lawn Fawn Outside In Stitched Strawberry and a couple of accents from the Stitched Strawberry Frame die set too. Although you absolutely could create this without the frame die set. The only thing I borrowed from it was another layer on my topper leaves and the extra leaf attached to the stem.
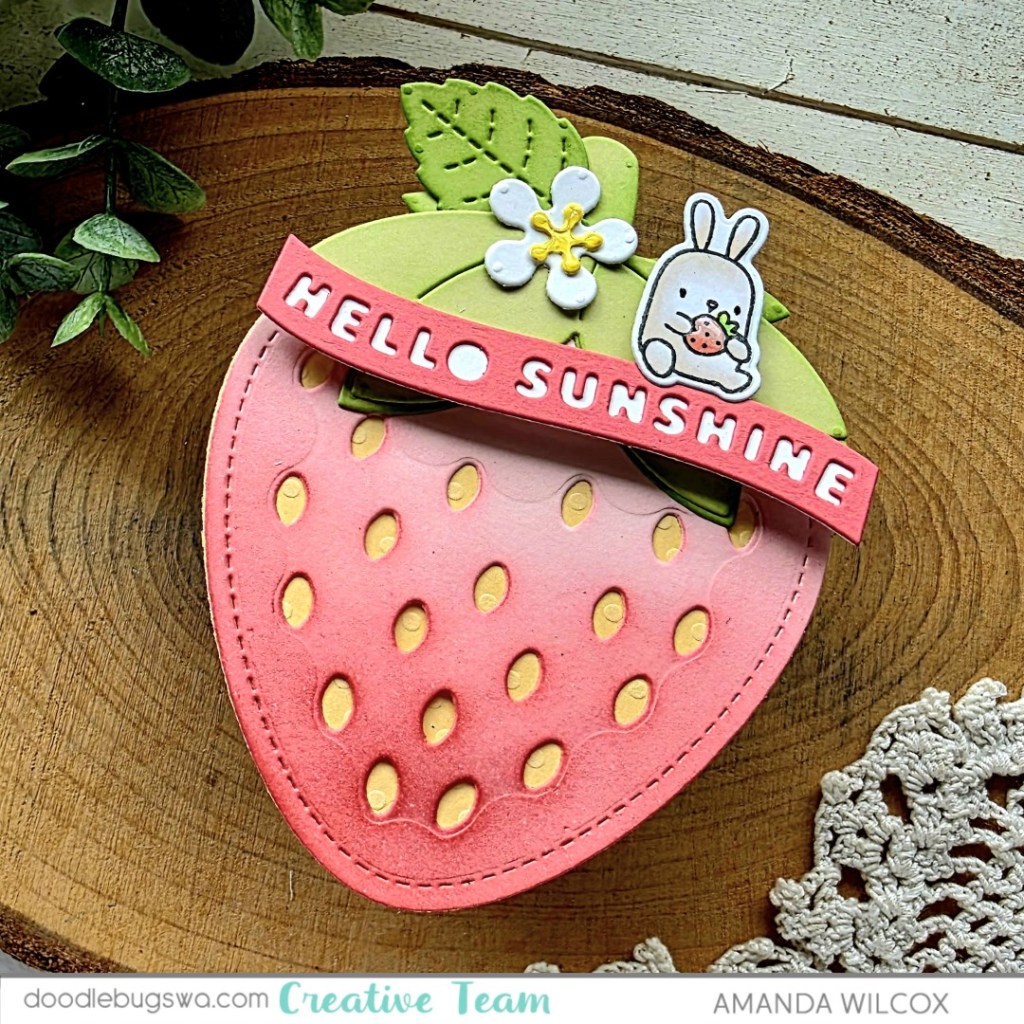
I cut the layers from yellow, pink and green cardstocks and then did some ink blending on all of them to add deeper color before using liquid glue to adhere them together. Then I cut another full strawberry from pink cardstock, scored it about 3/8″ from the top and glued that flap to the back of my strawberry to create my card.
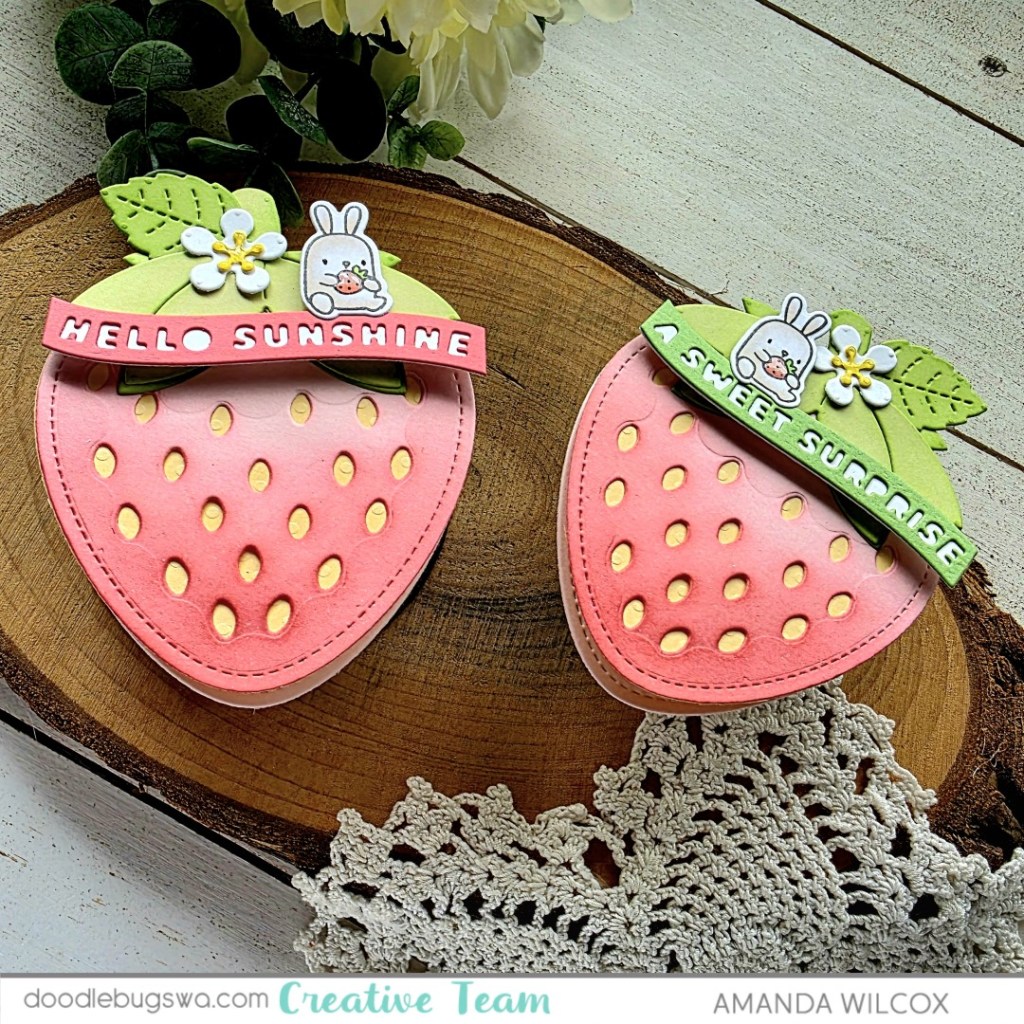
Next, I went digging for a fun critter to add and a sentiment of some sort. At first I was going the punny route but didn’t find anything that spoke to me, so I landed on sweet Mama Elephant Little Agenda bunnies and Spring Banner Greetings. I also had commitment issues on my sentiment banner color so I did one of each for fun. I still don’t know which I like better.

After the bunny and sentiment banner were added with foam squares and strips, I finished things off with black glaze pen on the bunnies’ eyes and glossy accents on their strawberry and the center of the flower on the big strawberry too.
I have no plans for these at the moment but I think pulling out my envelope punch board to make a custom sized envelope would be super cute or tying them to the handle of a gift bag would be adorable as well. Maybe even lunchbox notes!
I appreciate you sharing your time with me. Have a fabulous day!