Hey friends! Happy to be here with another Mix-it-Up Monday for the Doodlebugs blog. I’m squeezing in one more bit of Valentine inspiration before the big day is here. I really love Valentine crafting of all sorts so it’s hard for me to be done right up until the day.

Today I played with the Pretty Pink Posh fringe heart dies. I started with white and graduated up to red on my layers. After gluing them today, I fluffed the fringe a bit and splattered the heart with gold watercolor.
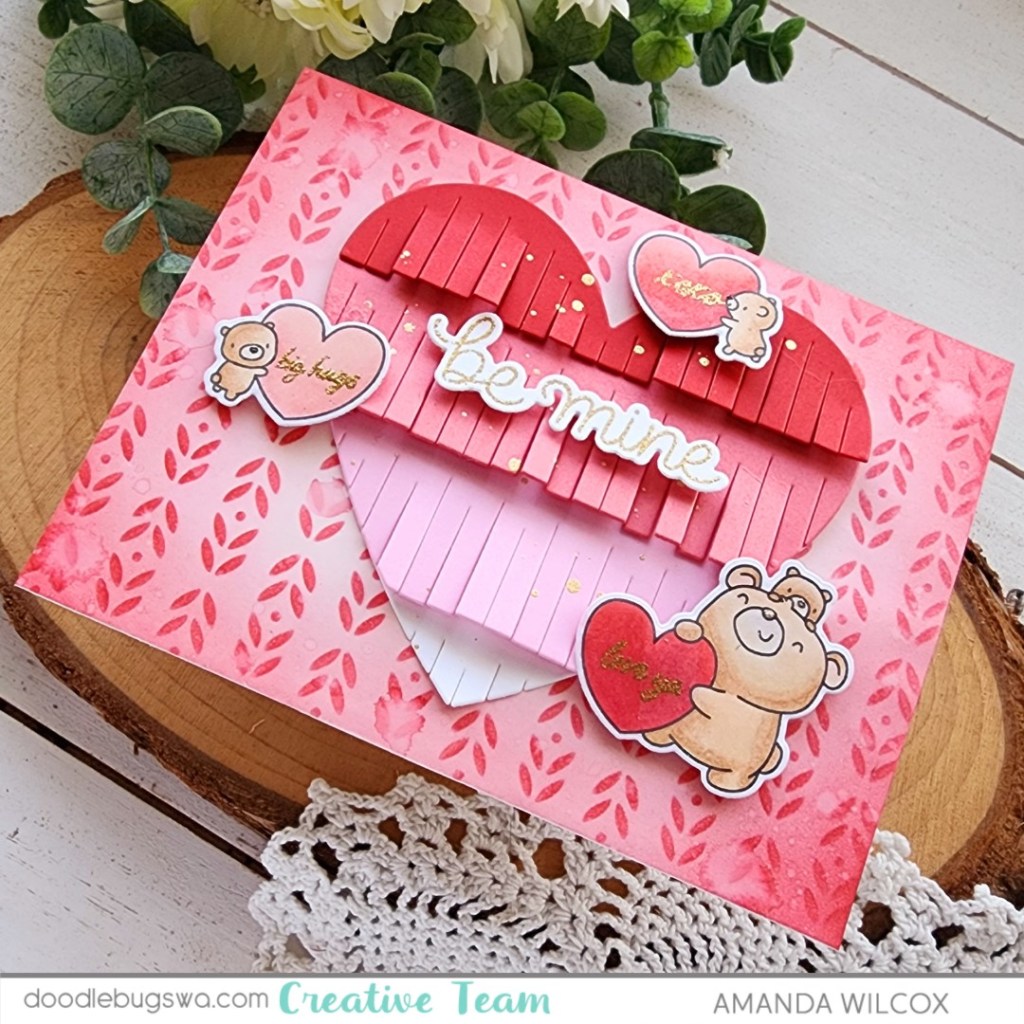
Then I stamped and colored some Mama Elephant cuties from the set My Favorite Person. After die cutting them I stamped and heat embossed mini sentiments on each from the set in gold. Next, I ink blended the Pretty Pink Posh Deco Leaves stencil in red on a pink cardstock panel.

It seemed very stark so I went around the edges with the same blending brush after removing the stencil and also splattered it would a little water. I used liquid glue to adhere this panel and the fringe heart to a card base. Then I added the bears with foam squares.
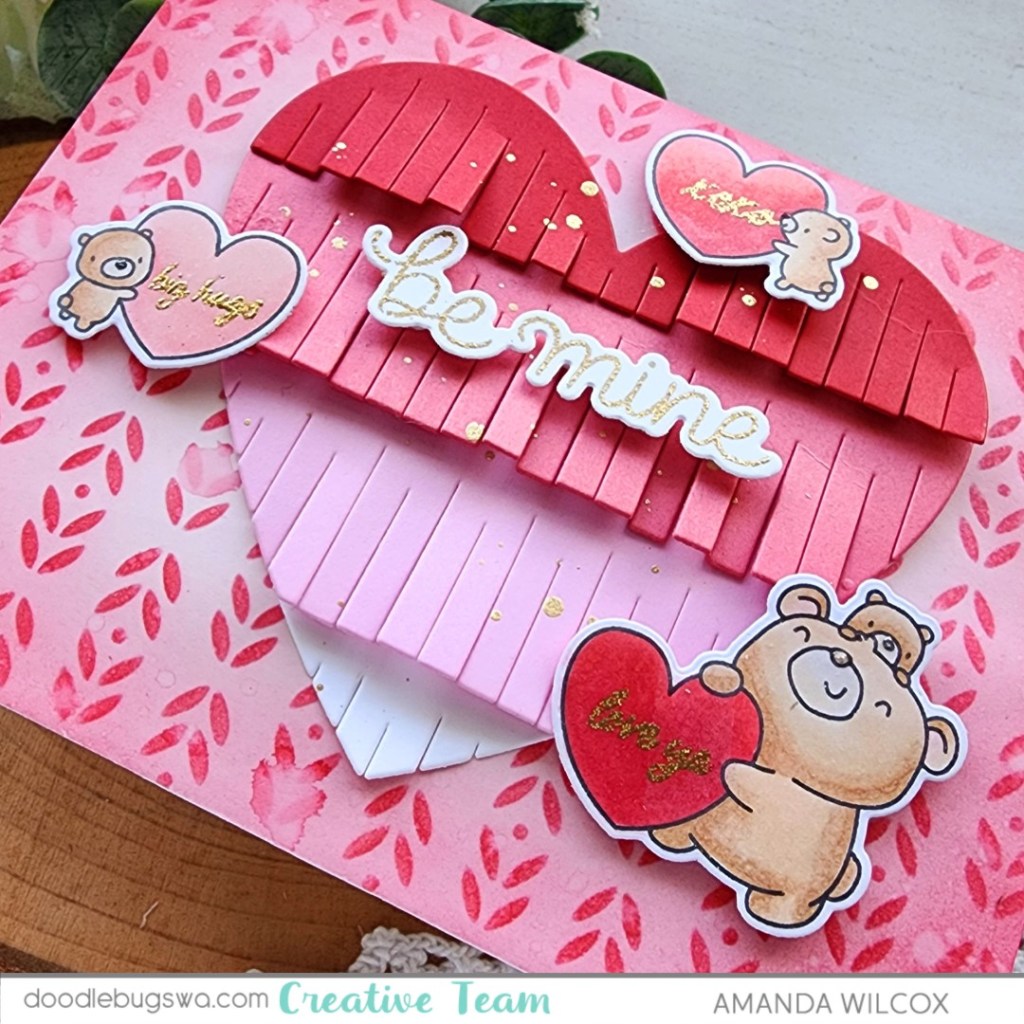
Last I stamped and heat embossed a sentiment from Pretty Pink Posh Valentine Greetings and used the coordinating die to cut it out. I popped it up on the fringe heart with foam strips. For finishing touches I did add tiny glossy accents dots to the bear noses.
Products used:
Pretty Pink Posh Fringe Heart dies
Pretty Pink Posh Deco Leaves stencil
Pretty Pink Posh Valentine Greetings stamps and dies
Mama Elephant My Favorite Person stamps and dies
Lawn Fawn lobster ink
Blending brush
Liquid glue
Foam squares and strips
Gold watercolor
Glossy accents
Embossing and watermark ink
Embossing powder – gold
Anti-static bag
Distress sprayer
I appreciate you sharing your time with me. Have a fabulous day!