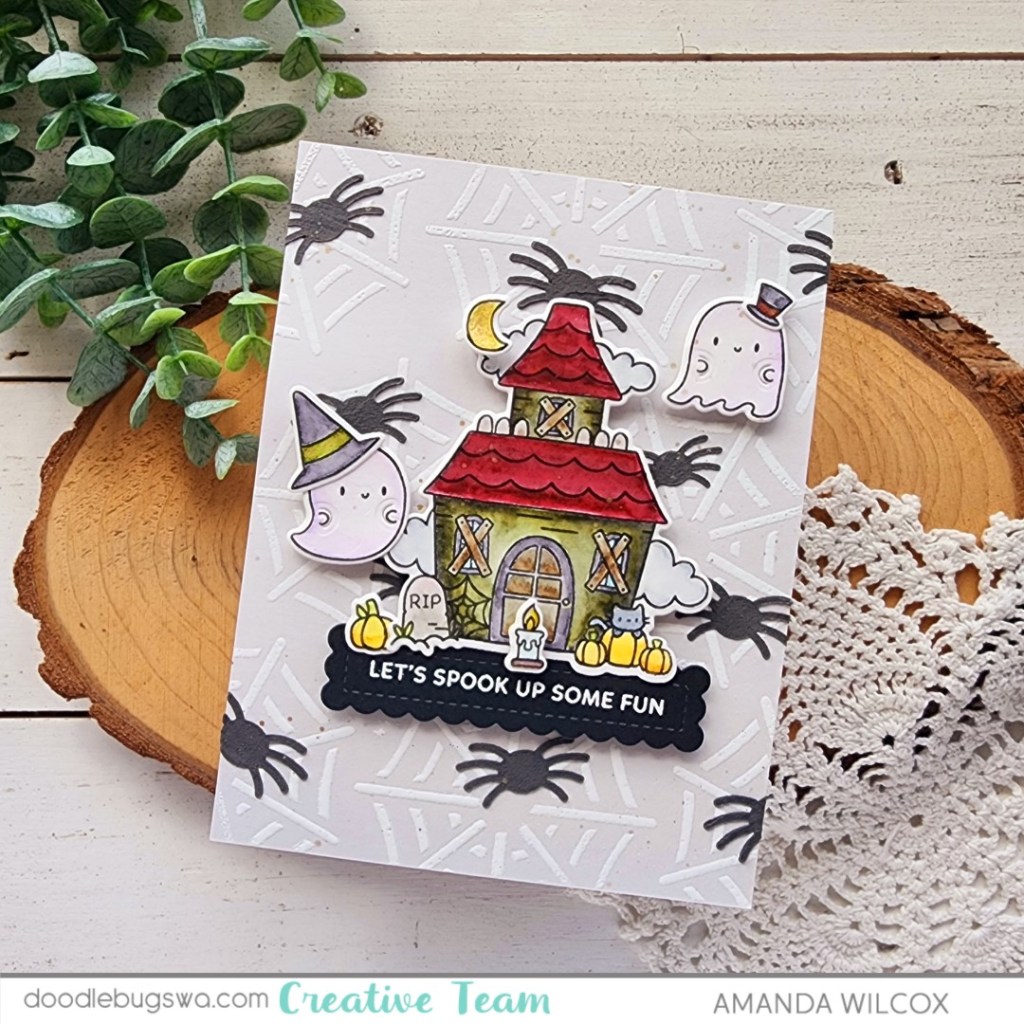
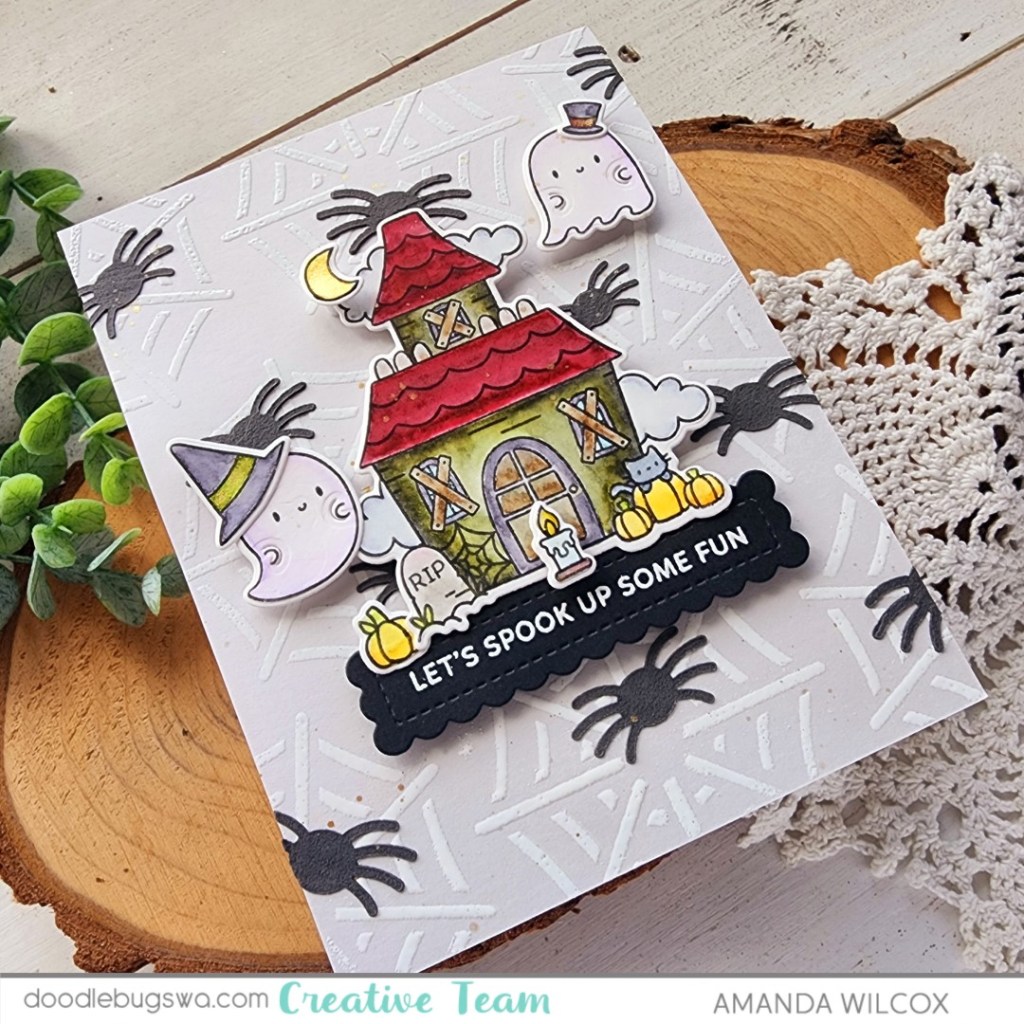
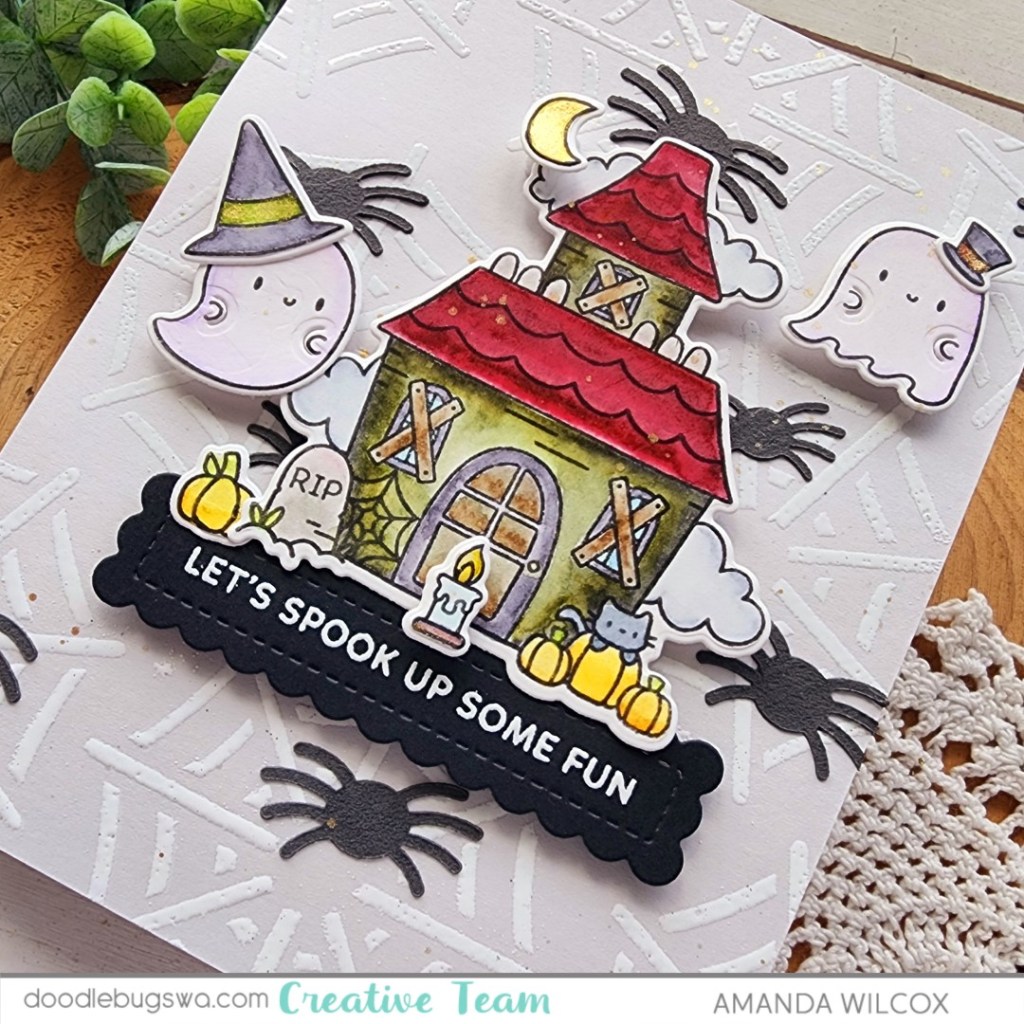
Hey friends! It’s Mix-it-up Monday on the Doodlebugs blog and with the recent spooky release from Mama Elephant, I jumped at the chance to make a Summerween card!
We had a hot spell recently and I try not to use my copic markers when it’s too hot because they leak so I stamped and watercolored these images from Mama Elephant Big Boo, then used the coordinating dies to cut it all out.
I used a combo of liquid glue and foam squares to assemble my mini scene. Then I switched gears to the background panel.
For that, I used the Pretty Pink Posh Spider Web stencil set. I inked the web layer with white pigment ink and then heat embossed white over it so it was shiny and stood out more. Then I added black paint to Ranger Texture Paste for my spiders. This made them puffy and matte next to the shiny webs.
When the spiders were dry, I added the panel to a card base and popped up my scene elements with foam squares. For the sentiment, I grabbed the trusty Pretty Pink Posh Sentiment Strip dies and stamps. After heat embossed one, I popped the strip up under the house for a nice grounding look.
For finishing touches I added some gold watercolor to parts of the images and then splattered a bit across the whole card front too. Last, I added glossy accents to the flame on the candle in front of the haunted house.
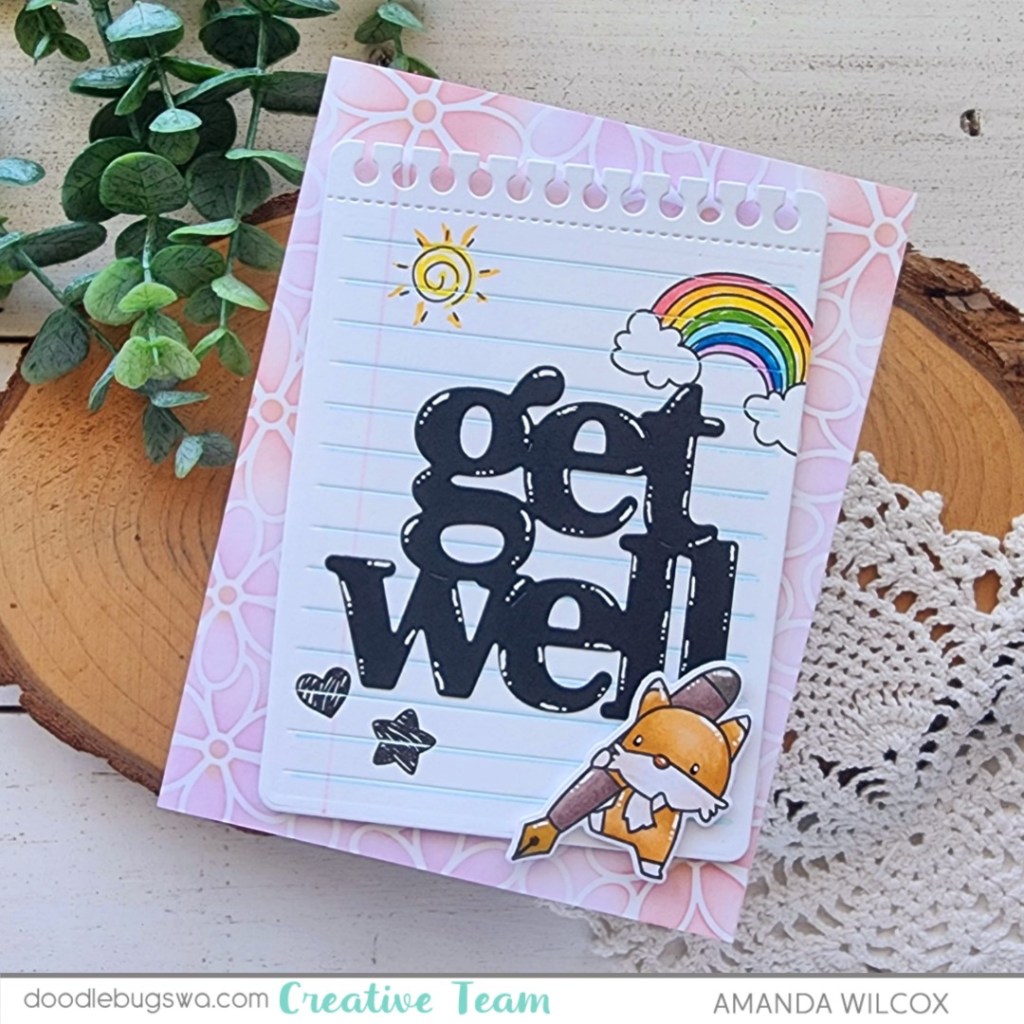
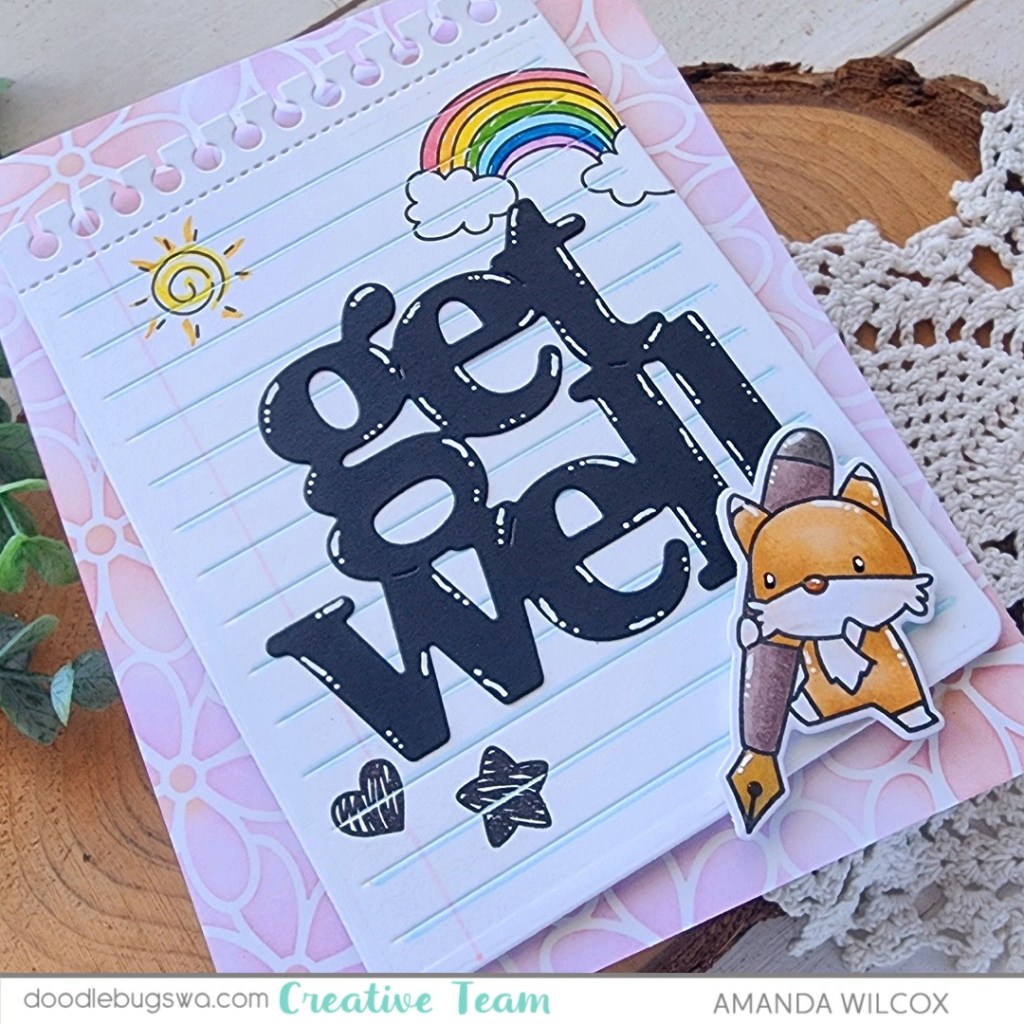
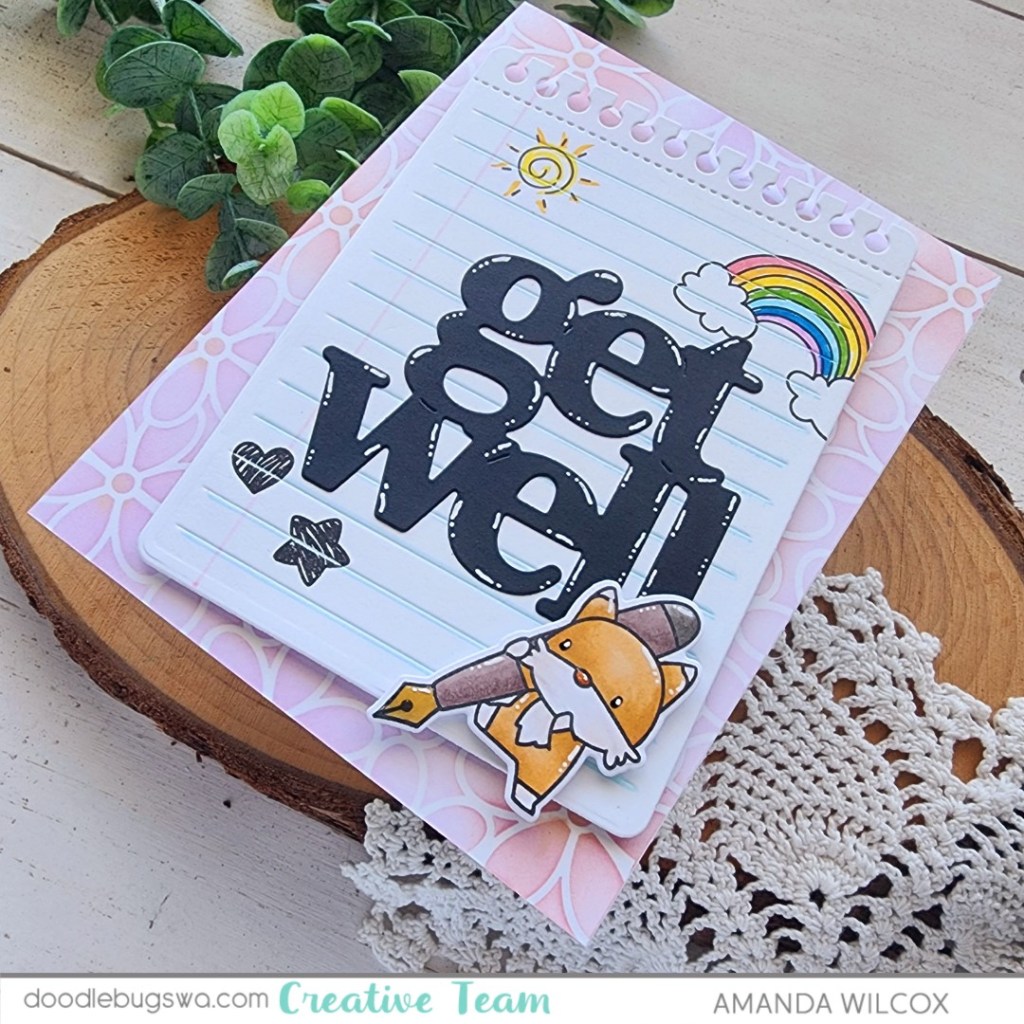
Hi friends! Mix-it-up Monday on the Doodlebugs blog is a fun design that is completely interchangeable for sentiments to make it whatever you need. I never had get well cards on hand so I thought this was the perfect time to make an extra. This combo of Waffle Flower and Mama Elephant products is really fun and sure to bring a smile.
I started by using my Waffle Flower Grip Mat and Daisy background stencil to ink up a subtle background. I used a mix of pink and purple for the flowers with apricot ink in the centers. I didn’t spend a lot of time on that because it doesn’t show much but definitely adds a little something.
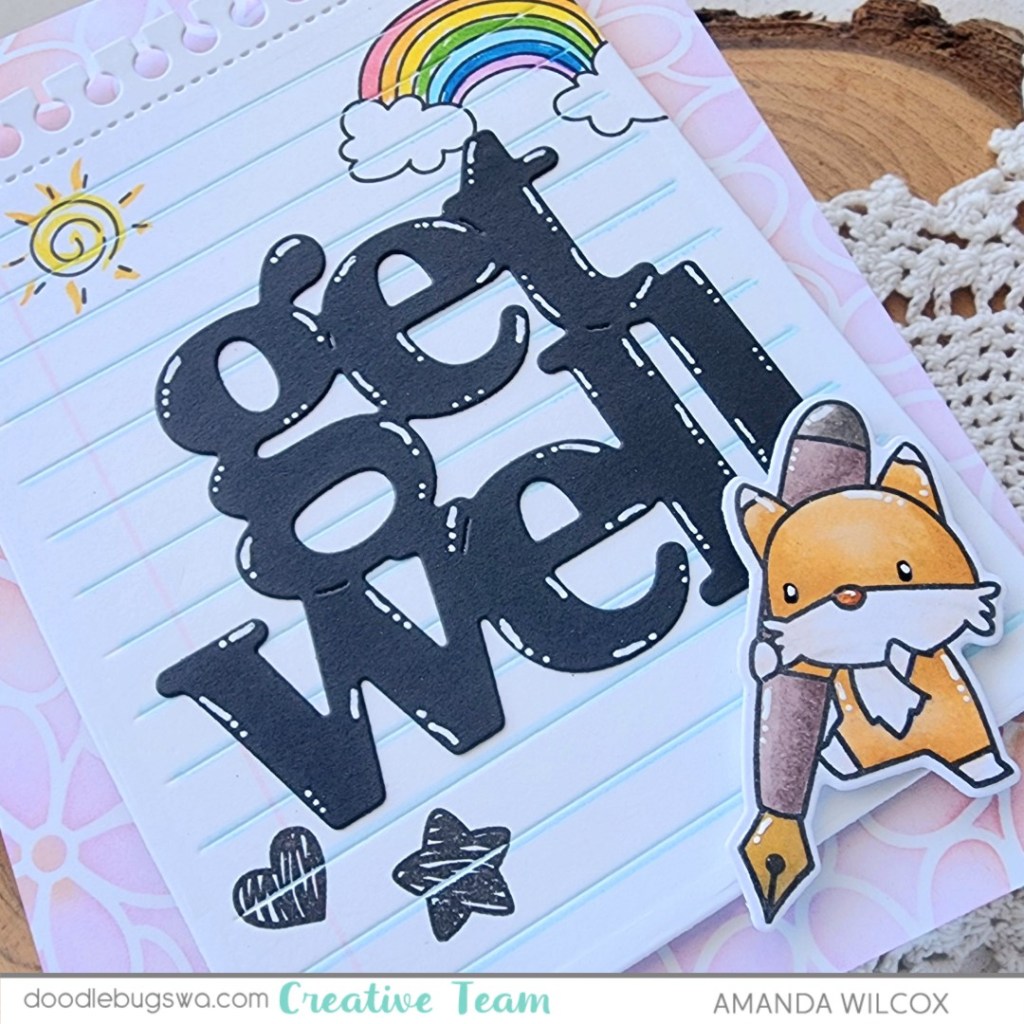
Next, I cut the new Mama Elephant Note Page die with the embossed lines insert still attached. I took some Tombow markers to draw notebook lines on the paper for fun and then stamped some of the scribble images from Mama Elephant Write With Me stamp set on it. I used Zig Clean Color Real Brush markers to color them in quickly.
I cut the Waffle Flower Oversized Get Well from black cardstock and glued it in place, adding fun white gel pen accents for interest. Then I chose the cut fox image from the Mama Elephant Write With Me to stamp and color with copic markers. I used the coordinating die to cut him out and added the note page and fox to the stenciled panel with foam tape and squares.
I decided to match the white gel pen from the sentiment to the fox image and also glossy accents on his nose and pen nib. *Pro tip: Let glossy accents dry and add white gel pen on top of it. It looks really cool and goes on smooth and easy.
Products used: Mama Elephant Note Card dies Mama Elephant Write With Me stamps and dies Waffle Flower Daisy Background stencil Waffle Flower Oversized Get Well dies Waffle Flower Grip Mat Blending brushes Liquid glue Foam tape and squares Lawn Fawn Ink – apricot, fresh lavender, ballet slippers Glossy accents Sakura Gelly Roll pen – white
I appreciate you sharing your time with me. Have a fabulous day!
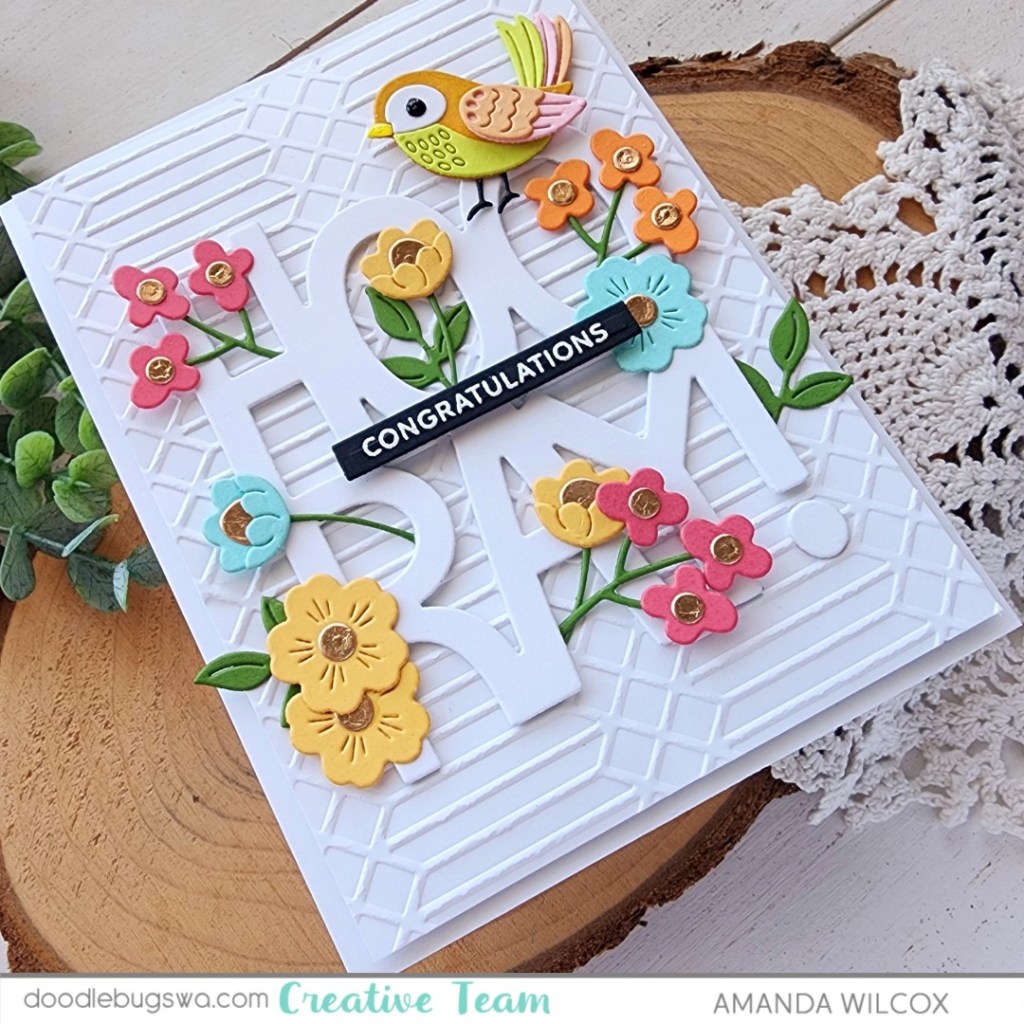
Hello again. I have a fun mix-it-up Monday card to share with you that started with a very simple idea and definitely evolved into its own. I think it turned out so pretty and I had fun playing with some of my favorite dies while I was at it.
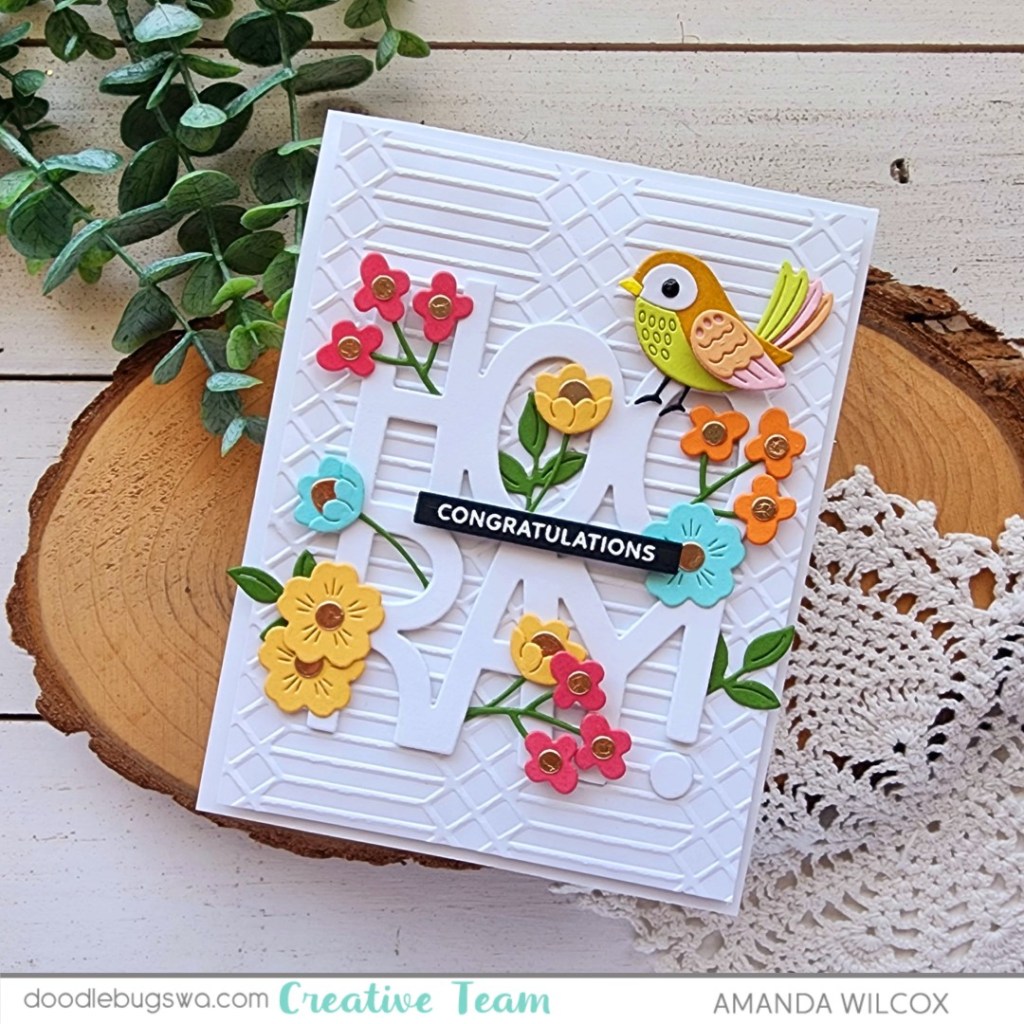
I needed a congratulations card so I went digging in my large sentiment dies to see what struck me with inspiration. I landed on the Lawn Fawn big hooray die, cutting it from white cardstock three times and gluing the layers together before I even formed a solid plan. Then I went digging for a good mini sentiment to go across the center and landed on the Pretty Pink Posh Sentiment Strips collection, and the coordinating dies.
Next, I wasn’t sure what to add around or in the large letters. My initial go-to was cute critters but nothing was vibing for me. So I pulled out my favorite Spellbinders birdie and while I was digging for that, I came across the Spellbinders Kaleidoscope Arch stamp and die set. The florals in this set are so pretty and very low stress to cut and assemble. Some of the more detailed sets stress me out with all the layers and my lack of floral knowledge.
So, I cut all the pieces for the florals and the sweet birdie, using liquid glue to adhere the pieces together. After playing around for a bit I also used liquid glue to adhere the florals popping out of the hooray letters all over. To keep the background interesting but subtle, I embossed a 4×5.25 inch piece of white cardstock with the Spellbinders columns embossing folder.
I popped the background panel up on a white card base with foam tape and then used liquid glue to adhere the floral hooray to that. Last, I added the birdie with a combo of a foam square and liquid glue, and the sentiment strip with a foam strip.
I liked the shine that the foil cardstock gave the flower centers so my finishing touches for this card were just glossy accent on the birdie’s beak and eye. Isn’t she the cutest?!? I love that you can’t go wrong with any variation of color combos on this bird. It’s always fun.
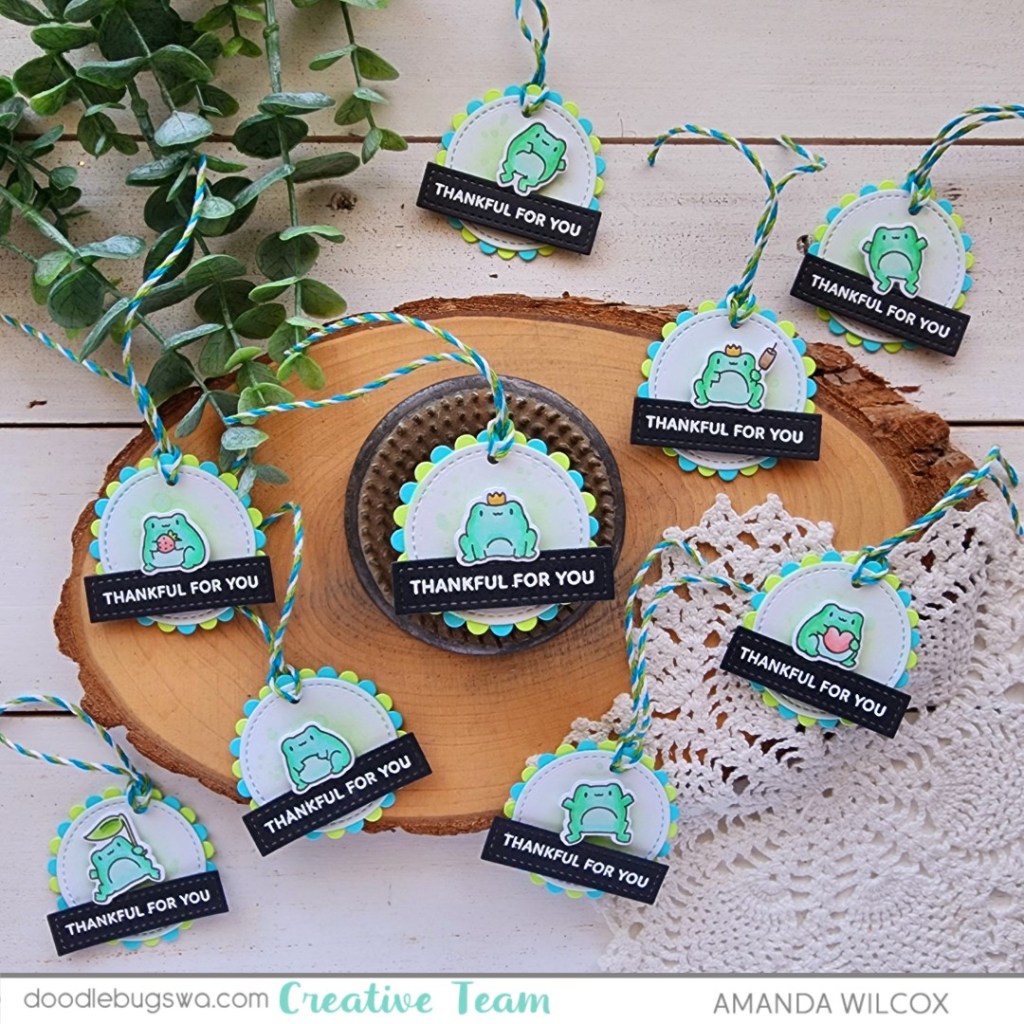
Hello everyone! For this week’s Mix-it-up Monday I’m sharing a gift tag project I created for work. We just had our annual Conference last week and I made gift bags for some of the Board as an end of year thank you to them. You know I can’t have gift bags without cute tags to go with them. So I spent a little bit and assembly lined a batch of froggy cuteness.
This whole project started with me playing around with the Mama Elephant Combo Circle creative cuts. They’re so fun and I thought they would be great for a different tag. Once I chose my scallop colors I started die cutting all the pieces – 2 white centers (front and back), a blue scallop and a green scallop.
I couldn’t decide which little agenda critters to use so I solicited my daughter’s help and she chose my favorite frogs. I can’t get enough of them. So I stamped out nine different ones, colored them all and used the coordinating dies to cut them out.
After assembling the layers of the combo circles, I blended a little green and teal inks in the center and splattered them with cracked pistachio distress oxide ink.
While the splatter was drying, I stamped and heat embossed a sentiment from Pretty Pink Posh Sentiment Strips | Fall and cut them out with a Pretty Pink Posh Sentiment Strip die. This die set and the coordinating collection of sentiments will not collect dust on your shelf. I promise. I am constantly reaching for them to add that perfect something.
Last, I popped the sentiment strips and frogs up with foam squares and strips. I used a Fiskars hole punch and threaded some twine through the holes. Now these are ready to be tied to the bags and handed out.
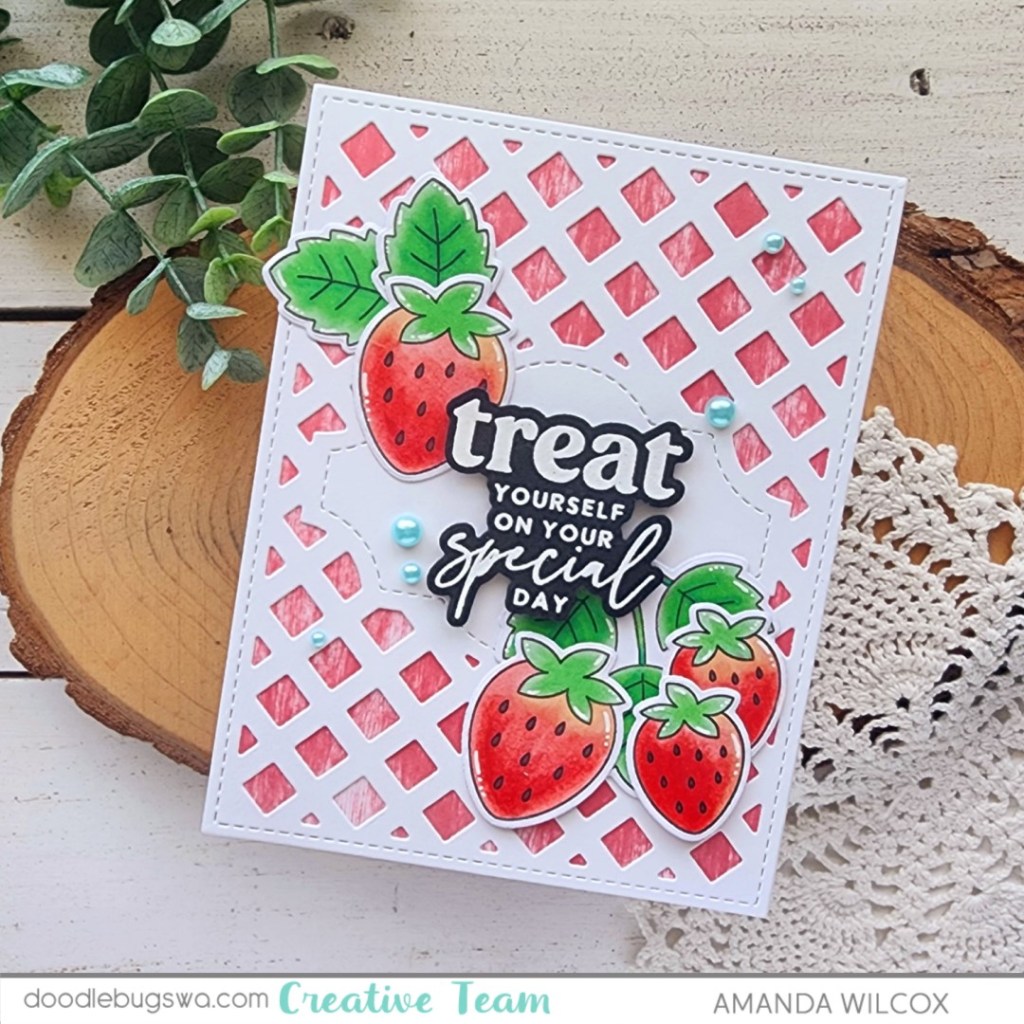
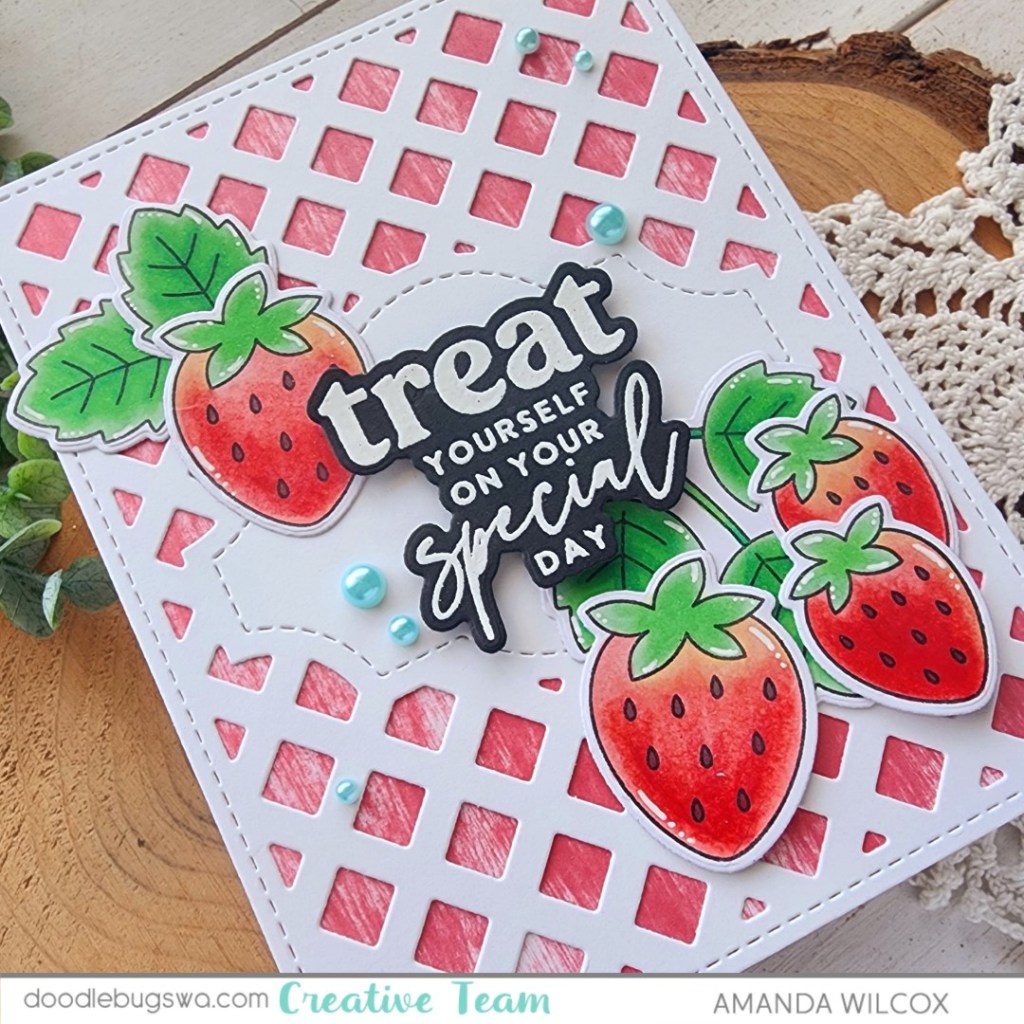
Hello everyone! It’s time for another mix-it-up Monday on the Doodlebugs blog. Today we’re mixing all the strawberry things together again in a different way. I love how bright today’s card turned out! It’s so sweet you can almost taste it.
I started with the Pretty Pink Posh Fresh Berries stamp set. I stamped out a few berries and leaves, coloring everything with copic markers before using the coordinating dies to cut it all out.
Next, I stamped and heat embossed a sentiment from the Waffle Flower Birthday Wishes stamp set and cut it out with the coordinating die. I also cut a Waffle Flower Sweet Lattice panel for my background.
With all the pieces ready to go, it’s time to assemble some. Using the sentiment as a guide on the background panel, I used liquid glue to adhere the strawberries and foliage in place. Then I added the sentiment with foam squares so there is some dimension.
Not wanting white on white for my background, I took the Lawn Fawn guava ink pad direct to my card base for some textured color. Then I used liquid glue to adhere the lattice in place.
For finishing touches I added a few Spellbinders pearls and white gel pen highlights to the images.
Products used: Waffle Flower Sweet Lattice die Waffle Flower Birthday Wishes stamps and dies Pretty Pink Posh Fresh Berries stamps and dies Lawn Fawn guava ink Liquid glue Foam squares Spellbinders Pearls – fashion topaz Sakura gelly roll pen – white
I appreciate you sharing your time with me. Have a fabulous day!
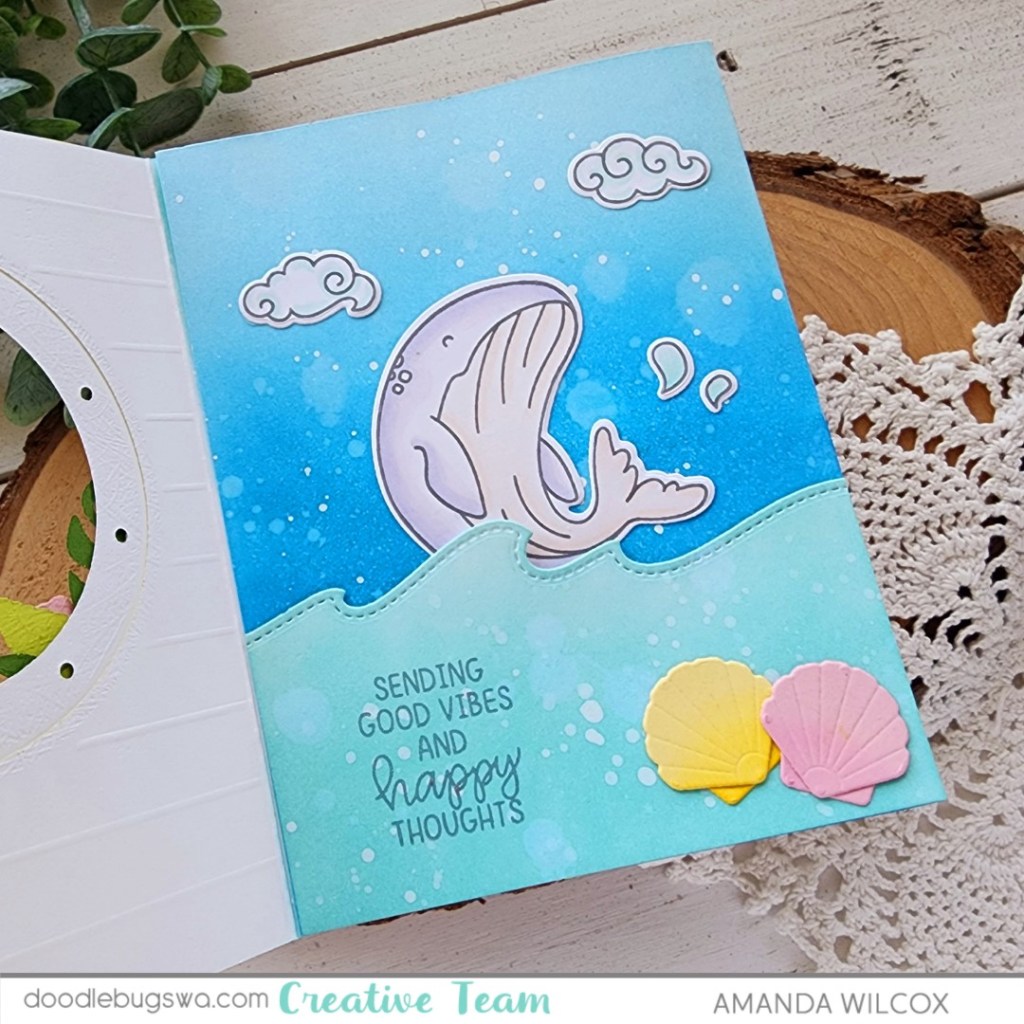
Hey everyone! Today’s mix-it-up Monday is packed full of amazing! I went a little extra coloring some images from the Mama Elephant Me and My Whale set. After cutting everything out and playing around I had a fun thought to make a window card that opened into the scene but I had too much so I went a step further and created a tri-fold card with an ever unfolding scene and still room to write a message.
Okay, starting things off, you just need 2 regular card bases, flip one backwards and slide them together. You’ll glue the back flaps together and it will give you a tri-fold card base to work with.
My front panel is scored every half inch for a shiplap look on the front. Then ink blended with peeled paint distress oxide ink. I used the Spellbinders Coastal Escape View die set to cut my window and add all of the fun porthole decorations to the front. My sentiment is from Mama Elephant’s Essential Tag Sayings. It has a great bubble font that stands out perfectly.
For the scene our card opens up to, I inked a wave panel with salvaged patina and the card flap itself with salty ocean and tumbled glass. The seashells are more great dies from the Spellbinders Coast View set and the other images are from Mama Elephant Me and My Whale. This sentiment comes from Mama Elephant’s Mixed Wishes Greetings.
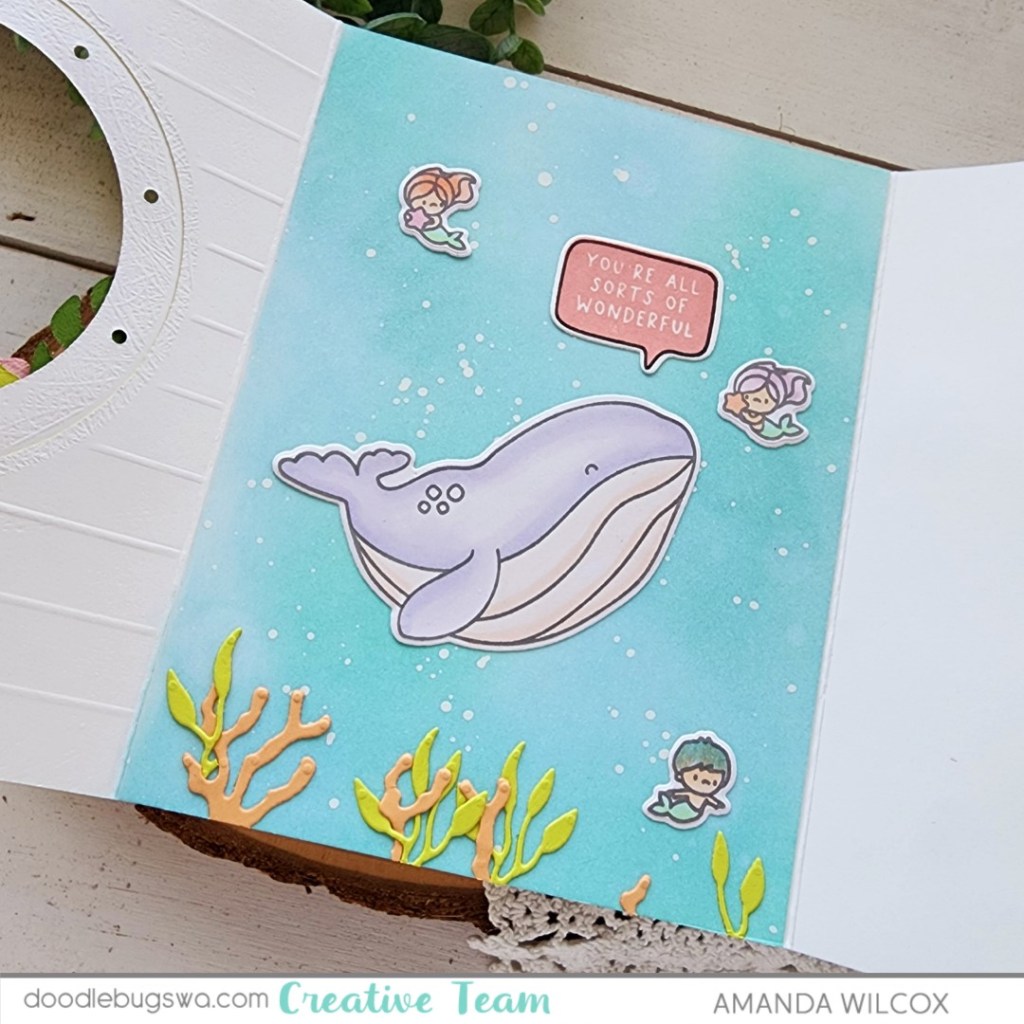
Our final descent brings us to the center of the card and down in the depths with more Me and My Whale images, paired with a little coral and seaweed from the same Spellbinders die set. I did pull in another sentiment set from Mama Elephant because I couldn’t resist the whale talking to his mermaid friend. This one is called Simple Friends Bubbles and it stamps and die cuts 6 sentiments at once!
The background on this panel is ink blended with mermaid lagoon and tumbled glass distress oxide inks. All of the panels were also spritzed with water and splattered with white paint for texture.
Because of the nature of this card, everything is glued flat and there are no extra embellishments on the inside. I always get nervous that the dimension will ruin the layer above it or pages will stick together. So I kept it all simple except for a little stardust Stickles on the stamen of the front flowers.
It has been years since I’ve created a card this extra. I loved taking my time and enjoying the entire process of this project. I’d love to know if you create cards this involved or like to keep it simple.
Products used: Mama Elephant Me and My Whale stamps and dies Mama Elephant Simple Friends Bubbles stamps and dies Mama Elephant Mixed Wishes Greetings stamps Mama Elephant Essential Tag Saying stamps Spellbinders Coastal View dies Lawn Fawn Stitched Wave Border dies Distress Oxide Ink – peeled pain, mermaid lagoon, salvaged patina, tumbled glass, salty ocean Liquid glue Stickles – stardust Scoring board
I appreciate you sharing your time with me. Have a fabulous day!
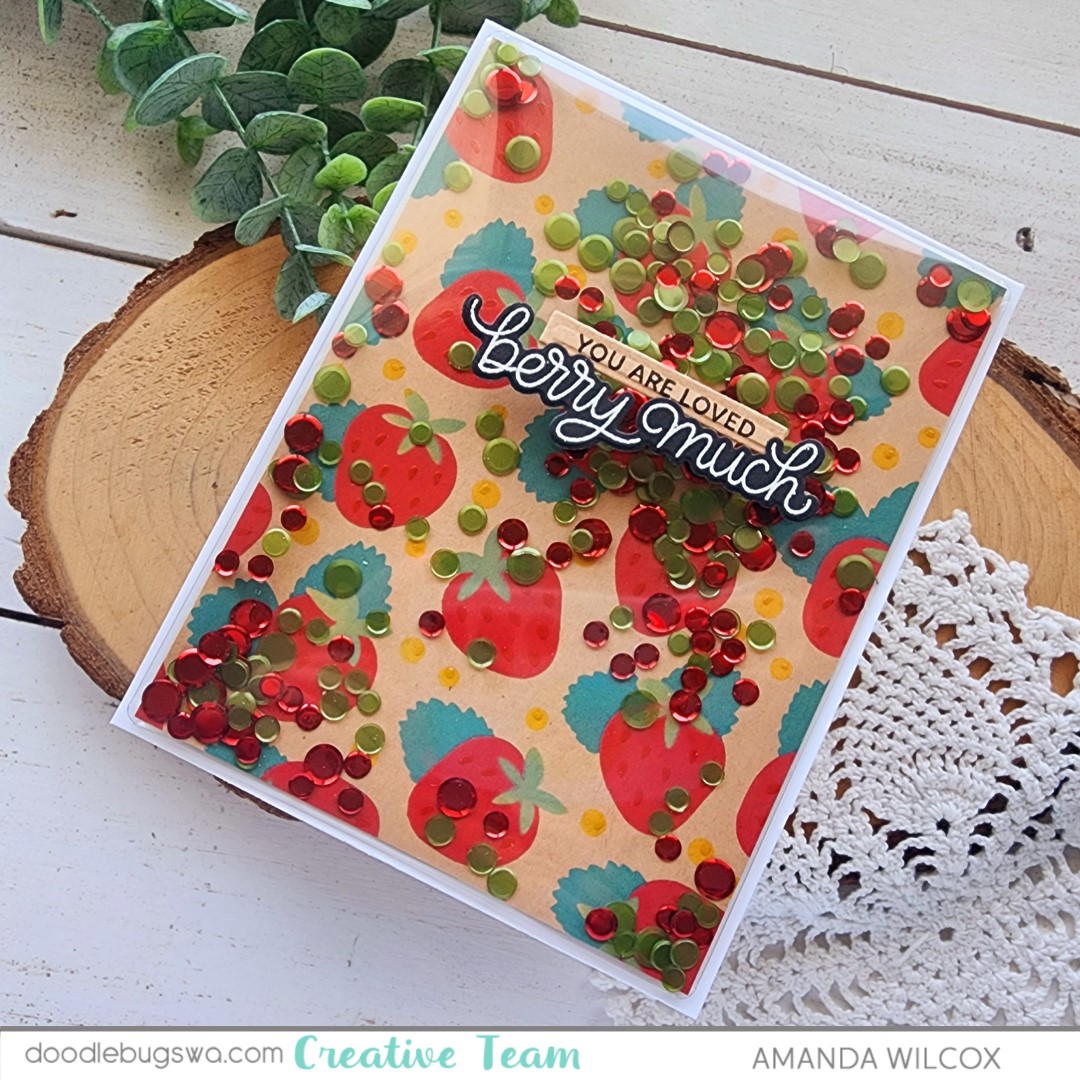
Welcome to mix-it-up Monday on the Doodlebugs blog! We’re creating a quick and fun full card front shaker with a summery strawberry theme. We’ve had a little relapse in weather but I’m not giving up on summer crafting in the slightest!
I started my card today by inking up the Waffle Flower Strawberries background stencil set. To be sure the ink showed up really well on my kraft base, I used distress oxide inks. The colors I chose were candied apple, pine needles, mowed lawn and mustard seed. Then I spread a little glossy gel through the final seed layer for subtle shiny details.
Once the glossy gel was dry, I trimmed the panel to 4×5.25 inches and wrapped a Waffle Flower shaker cover around it. I only adhered 3 sides at first, pouring in my shaker bits and then securing the last side down. I used tear tape for this because it’s strong and instant. I find it works best with the plastic shaker covers. My sequins are from Pretty Pink Posh and Spellbinders.
Next, I stamped and heat embossed a sentiment from Pretty Pink Posh Fresh Berries and used the coordinating die to cut it out. Then I stamped another small sentiment from Pretty Pink Posh Sentiment Strips | Valentine and cut it out with the smallest Pretty Pink Posh Sentiment Strip die. I adhered both of these to the front of my shaker panel with foam strips.
Last of all, I added more tear tape to the back of the shaker panel and adhered it to a white card base. Once again, the tear tape is great against the plastic and gives you instant bond.
Now, just give it a little shake, shake, shake and it’s ready to go!
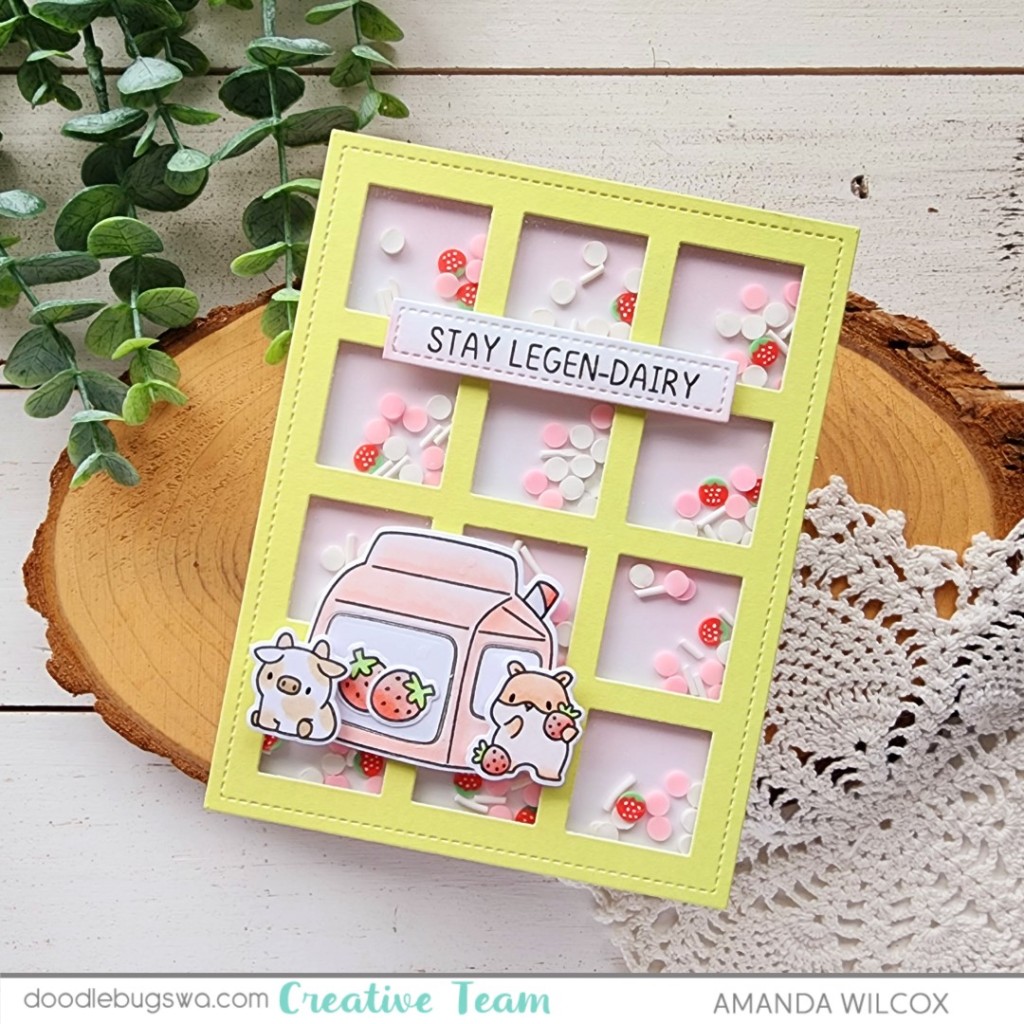
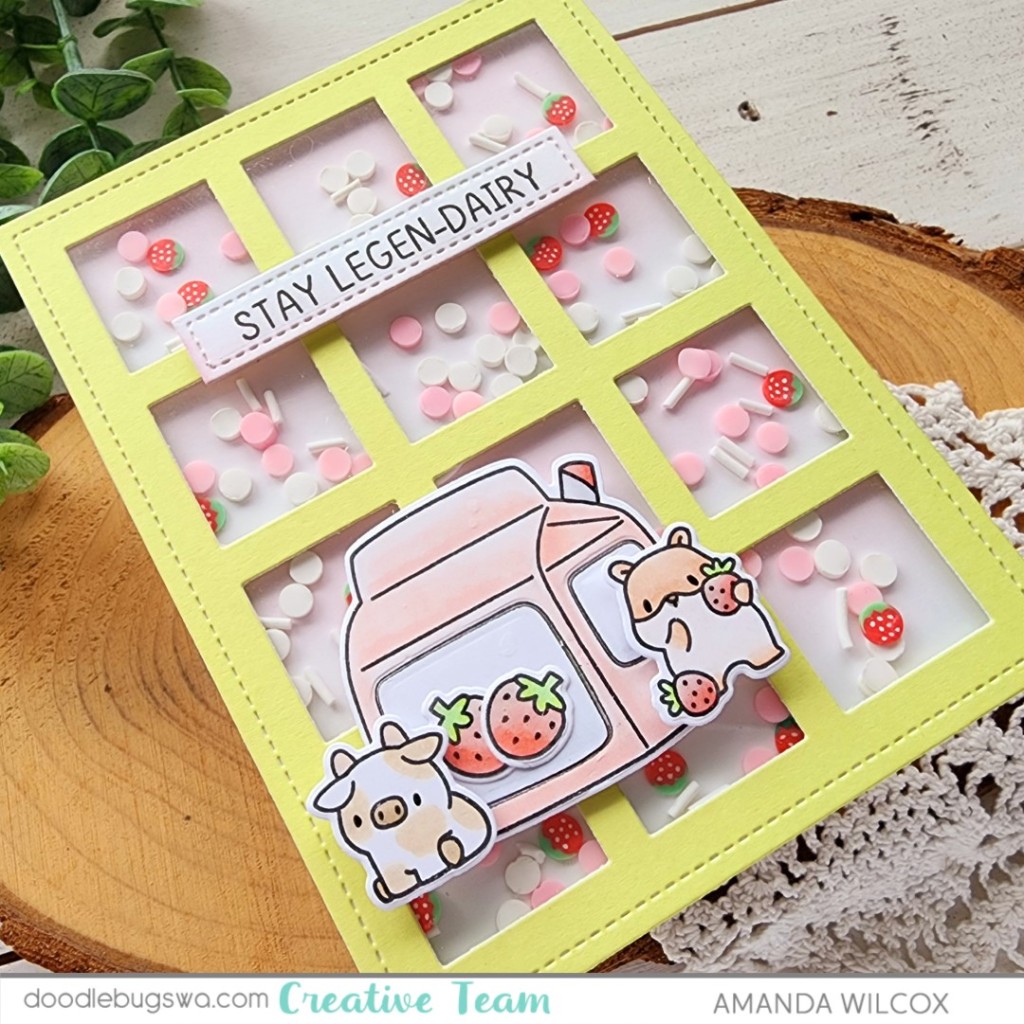
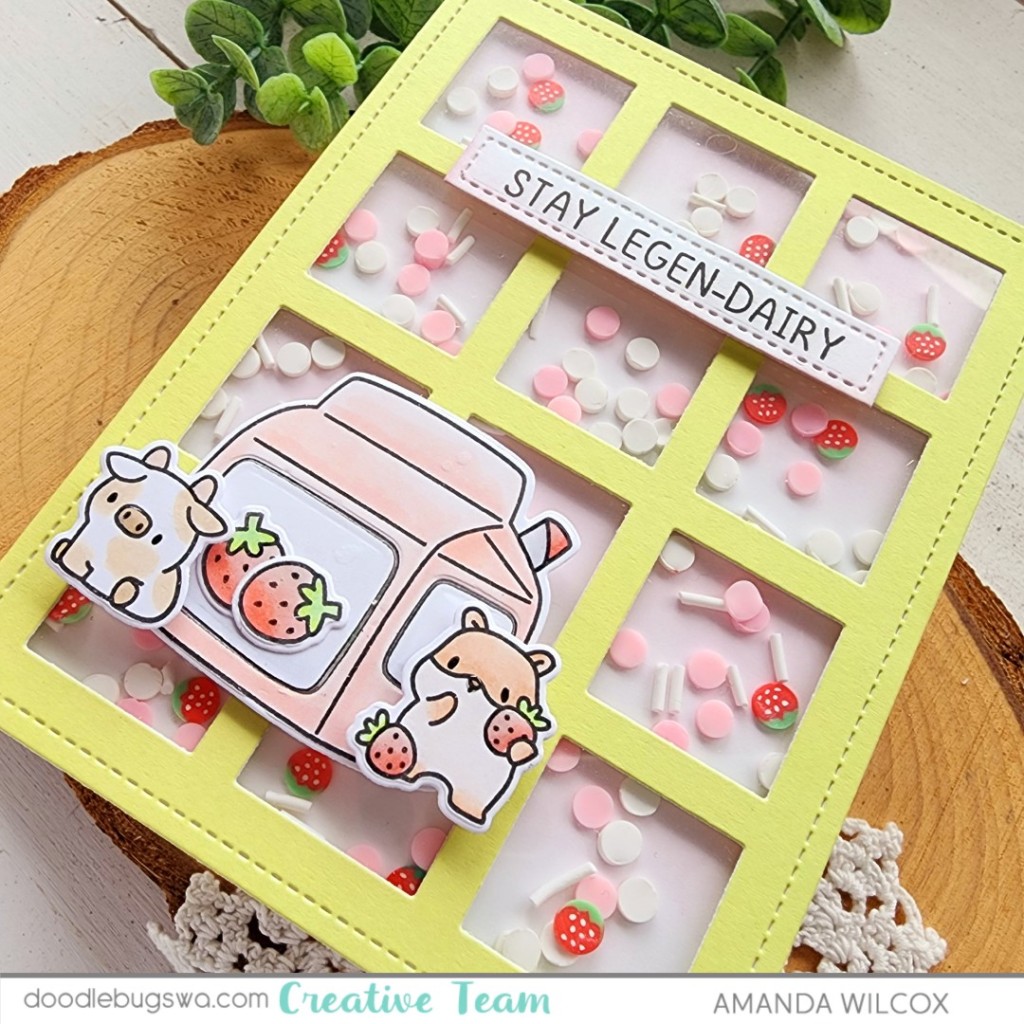
Hey friends! Let’s shake it up for mix it up Monday! I’m on the Doodlebugs blog today with this ADORABLE strawberry shaker card. Isn’t it the cutest thing?!?
I had a general design in mind so I pulled out my Mama Elephant Boxed Drinks stamps and dies. I really wanted to make a strawberry milk carton so naturally I reached for the sweet cow and hammy holding strawberries to go with it. I colored everything with copic markers and used the coordinating dies to cut them out.
Next, I used the Mama Elephant Grid Window cover die to cut a green front panel. I lined the back with acetate and then each window with foam strips. I wanted to make sure the shaker bits stayed in each window and didn’t fall all the way to the bottom. Then I took a piece of white cardstock and ink blended pink fading to nothing for each row of windows. I filled each window well with Pretty Pink Posh Strawberry Shortcake embellishments, removed the release paper and sealed it up with the ink blended panel.
I added my images with foam squares. Then stamped and die cut a sentiment strip with the Pretty Pink Posh Sentiment Strip dies. I ink blended the bottom of that with the same pink for a little interest from the stark white too.
For finishing touches I added glossy accents to all the strawberries, the straw and noses on both critters. It’s fun and adds a little something but doesn’t take away from the awesome shaker happening in the background!
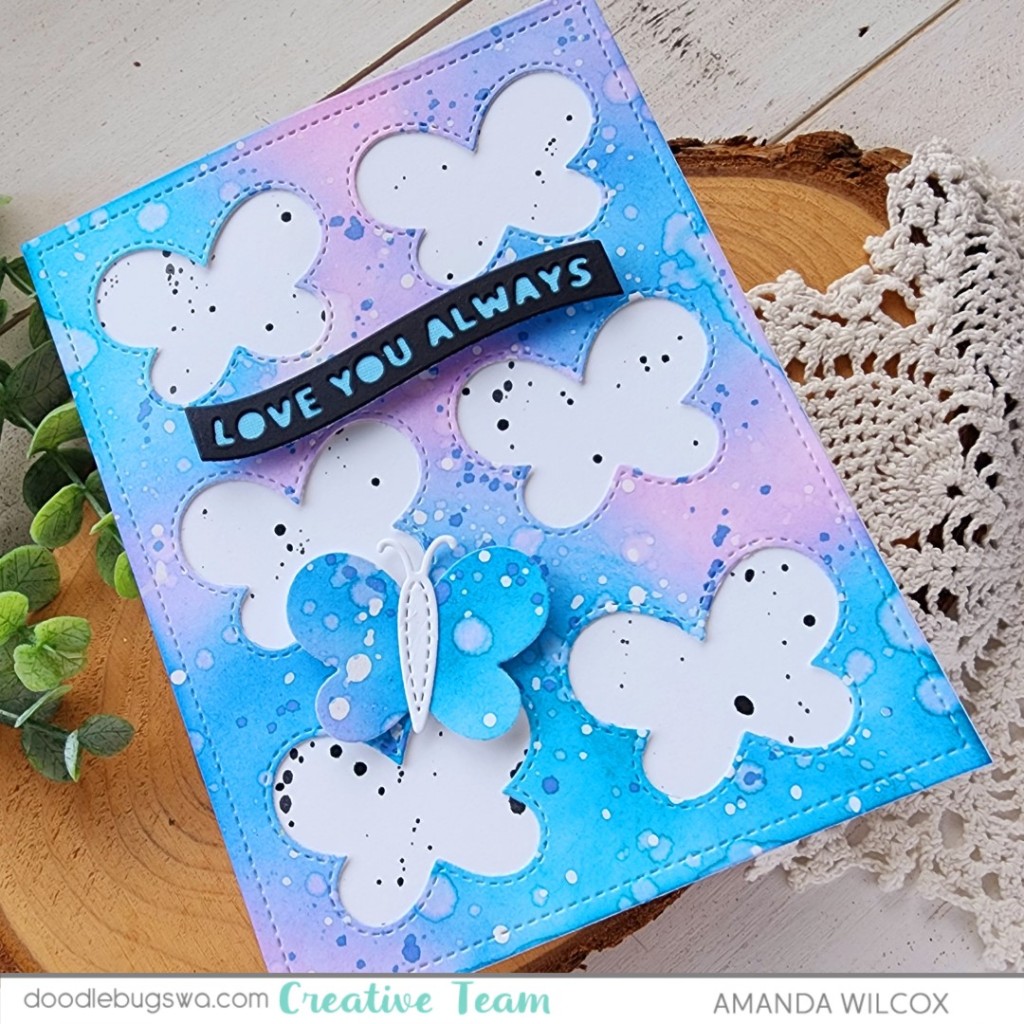
Hello friends! For this week’s Mix It Up Monday, I’m combining dies from Pretty Pink Posh and Mama Elephant to create a fairly fun and quick card with an awesome surprise inside! Let’s get inky!
I started with a piece of white cardstock and ink blended it with Lawn Fawn inks randomly. My color palette today was forget me not, fish tank and fresh lavender. I spritzed the panel with water and blotted it dry. Then I squished my Lawn Fawn deep sea ink pad on an acrylic block, spritzed it with water and flicked the darker color all over the panel. Once that was dry I went it with white paint splatters too. Once the whole panel was dry, I die cut it with the Pretty Pink Posh Butterfly cover plate.
I removed and saved all of the butterflies. Die cutting the smallest body from the Pretty Pink Posh Stitched Butterflies set, I glued it to the solid butterfly and set it side. Keeping with my typical love for splatter, I used black paint to splatter the front of my card and then glued the panel over top of that.
I chose a sentiment from Mama Elephant Banner Greetings dies, using liquid glue to adhere the layers together and foam strips to pop it up on the card front. Finally, I added foam squares to the edges of the butterfly wings and liquid glue to the center. Once it was in place I used reverse tweezers to hold the butterfly body down while the glue dries.
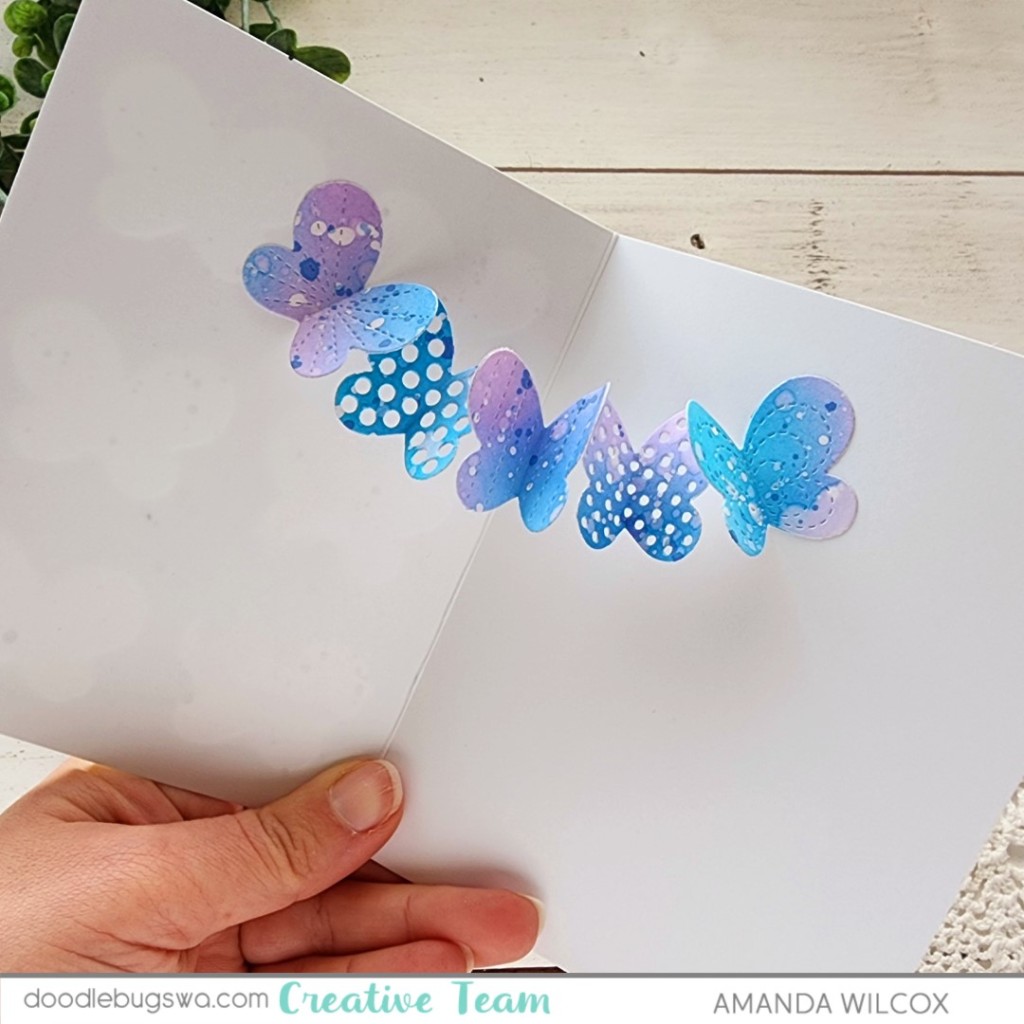
For the inside surprise! I took the remaining five butterflies from the plate and folded them in half. I glued the tips of the wings together with liquid glue. Once they were dry I glued the right butterfly inside the card, added glue to the left one and closed the card securing both end in place. I made sure to let this dry with heavy blocks on top for a while before trying to open it.
I had to much fun pulling this card together and love the extra element of the inside fun when the recipient opens it.
FYI – that many layers of butterflies in the inside makes it pretty thick so I think I’ll save these cards for hand delivery or those going in a box of other goodies to mail. I don’t think the USPS machines will like it very much.
Products used: Pretty Pink Posh Butterfly cover plate Pretty Pink Posh Stitched Butterflies dies Mama Elephant Banner Greetings dies Lawn Fawn ink – fish tank, deep sea, forget me not, fresh lavender Blending brushes Liquid glue Foam squares and strips
I appreciate you sharing your time with me. Have a fabulous day!
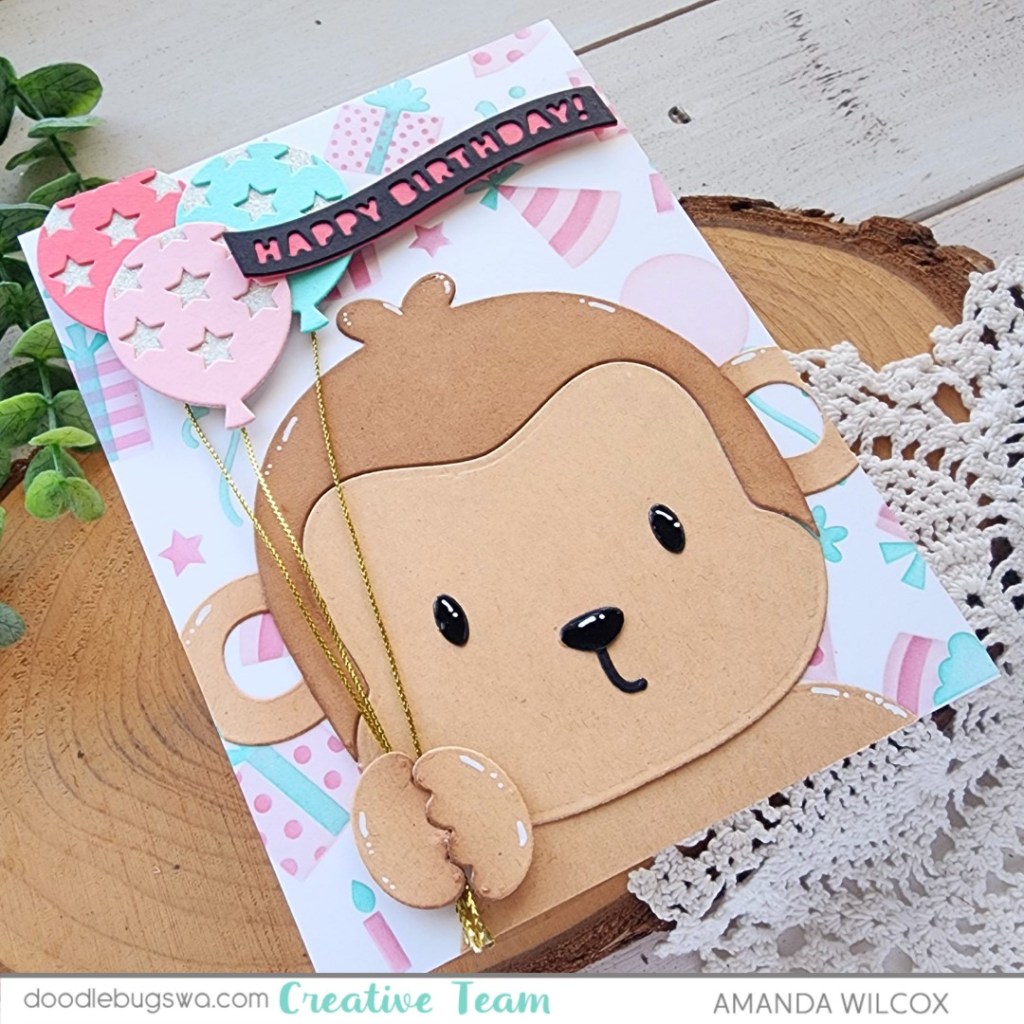
Hey friends! Once again for mix-it-up Monday we’re combining dies from different companies to create adorable scenes! This one is for a birthday but changing the background and sentiment could easily lend itself to lots of other happy occasions too.
For this card, I created my Mama Elephant Favor Bag Add On Monkey first with the intention he would hold the balloons. I ink blended parts for depth and used liquid glue to assemble him as much as possible ahead of time. Then I cut some balloons from the Pretty Pink Posh Party Balloons die set and assembled them with liquid glue as well.
Next I took a piece of white cardstock and inked it up with the Pretty Pink Posh Birthday Wreath stencil set. This set has 3 layers so I used the 3 colors in my balloon bouquet so everything coordinates. I trimmed the panel down and glued it on a card base before adhering the monkey head and body. I glued my strings behind the balloons and brought them down to the monkey’s paws before popping both parts up with foam squares.
Last, I cut a sentiment banner using the Mama Elephant Banner Greetings die set. After adhering the layers together I added it to my card with foam squares. Moving on to finishing touches I added glossy accents to the monkey’s nose and eyes, let it dry and finished the design off with white gel pen highlights all over.
Isn’t this just too cute for words?!? I had fun creating it and think it would be fun to make a set with different favor bag add on critters from Mama Elephant.