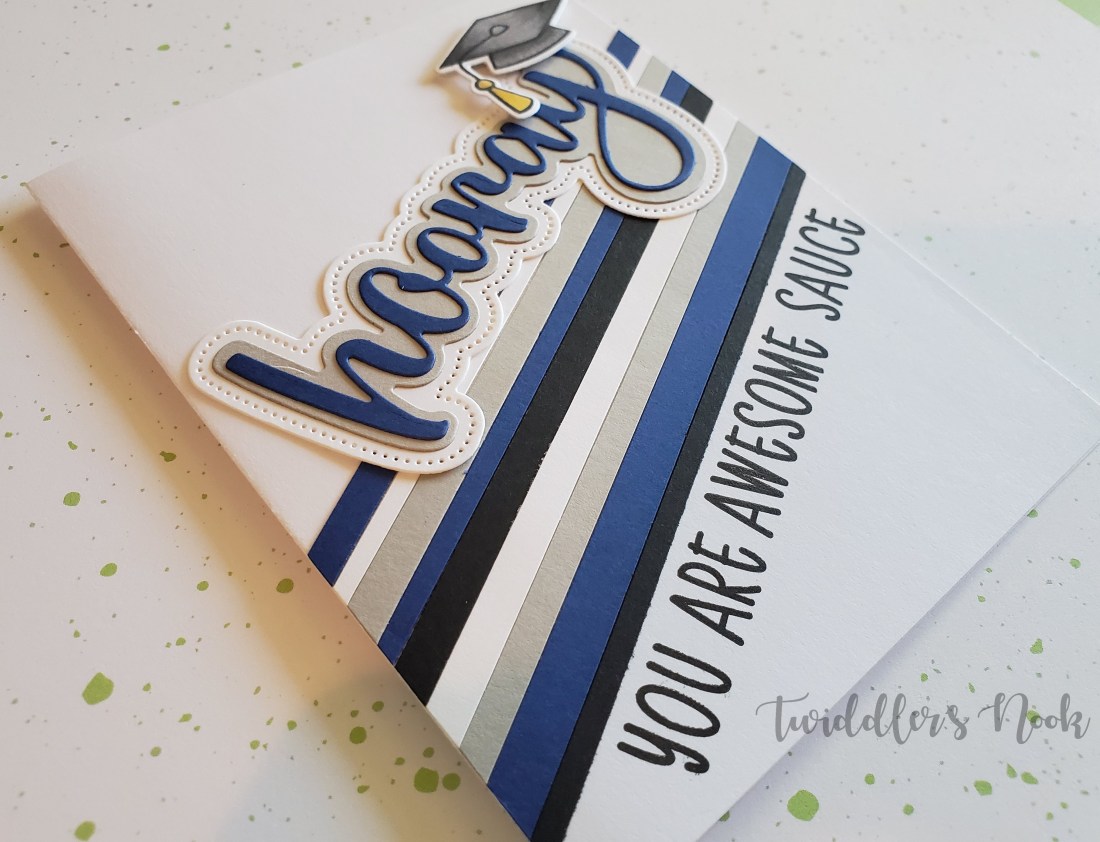
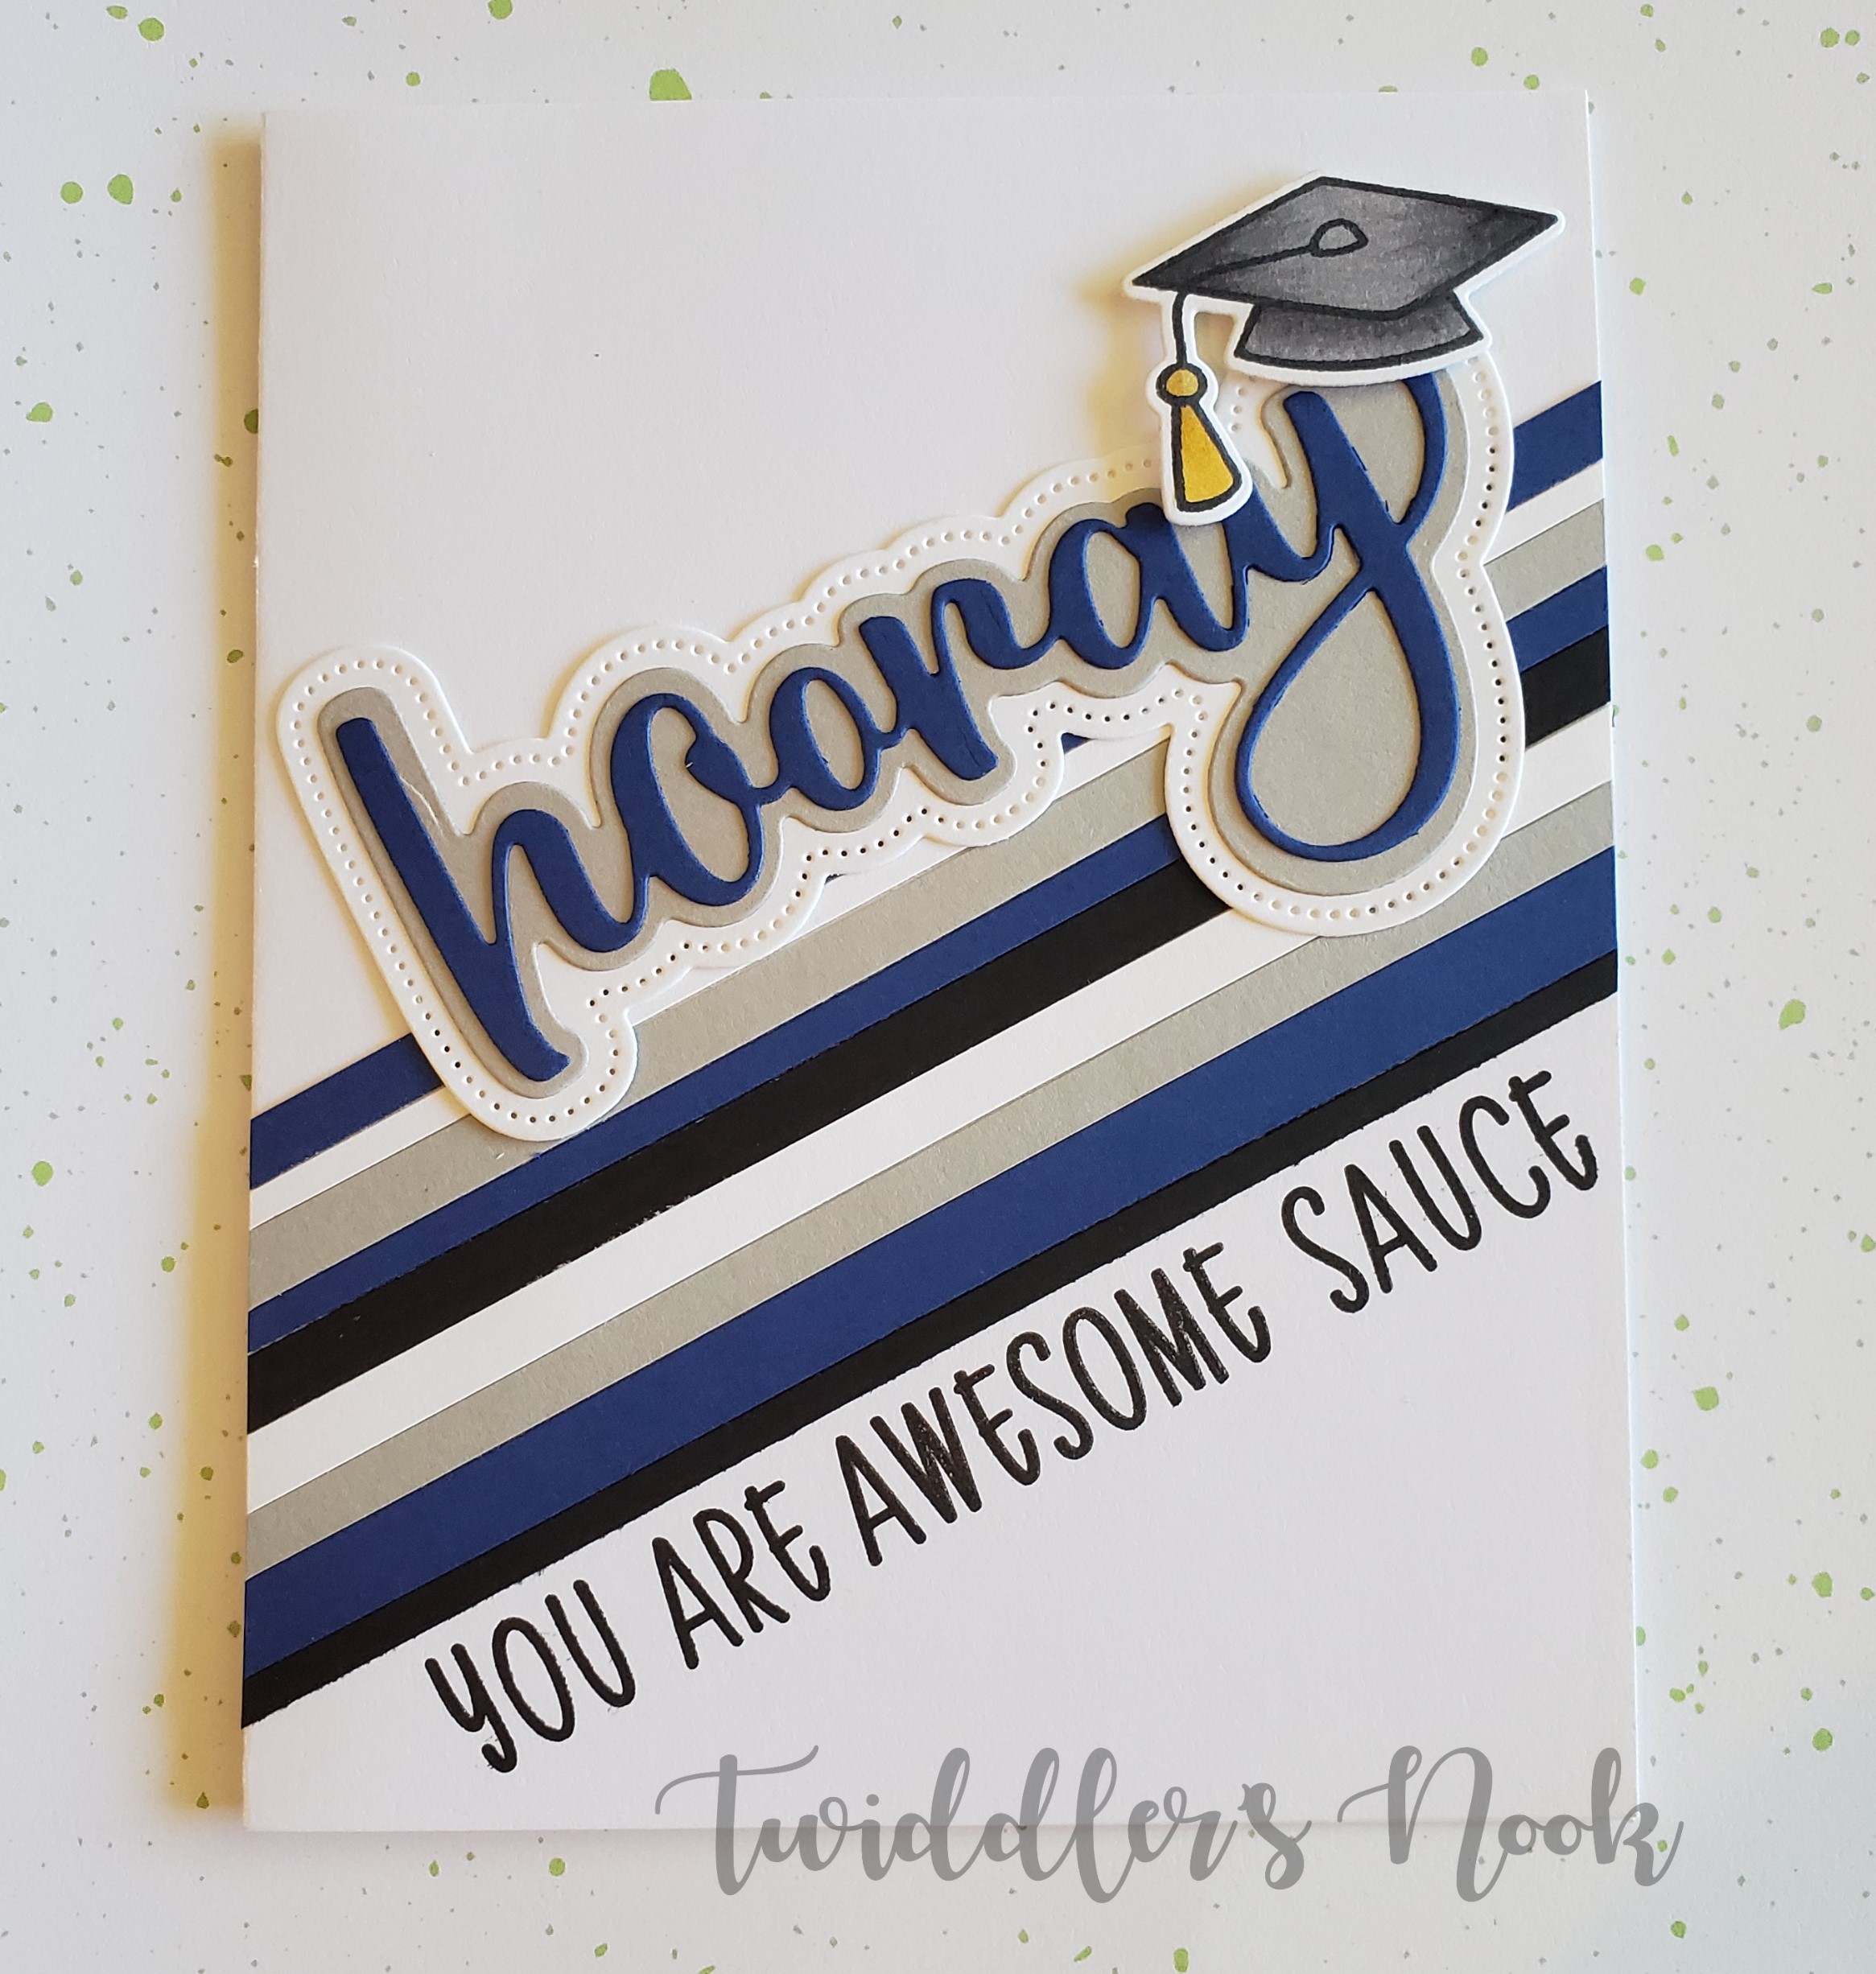
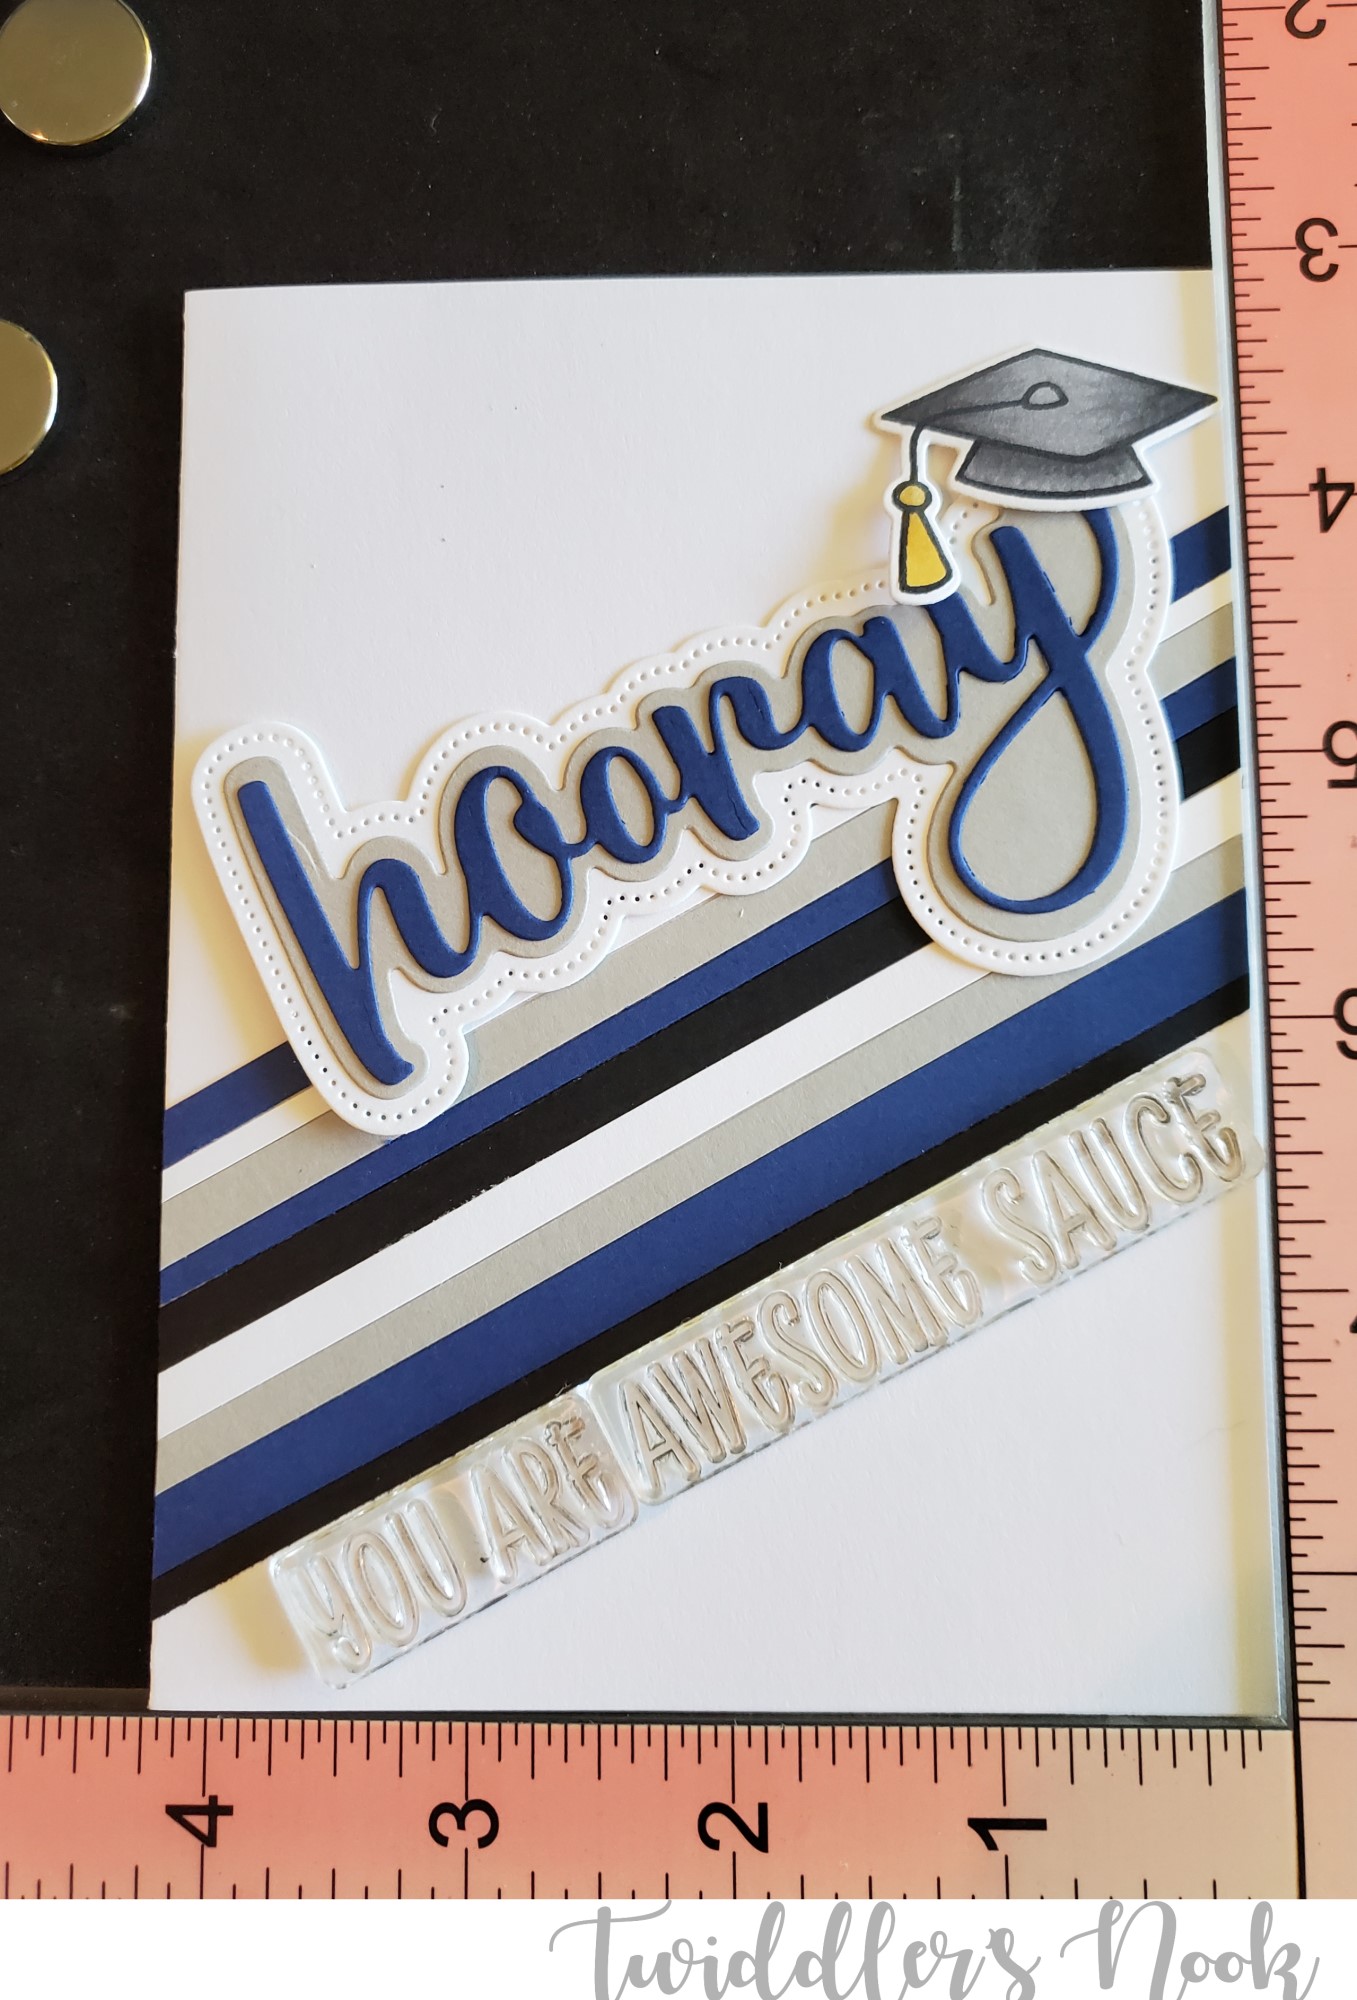
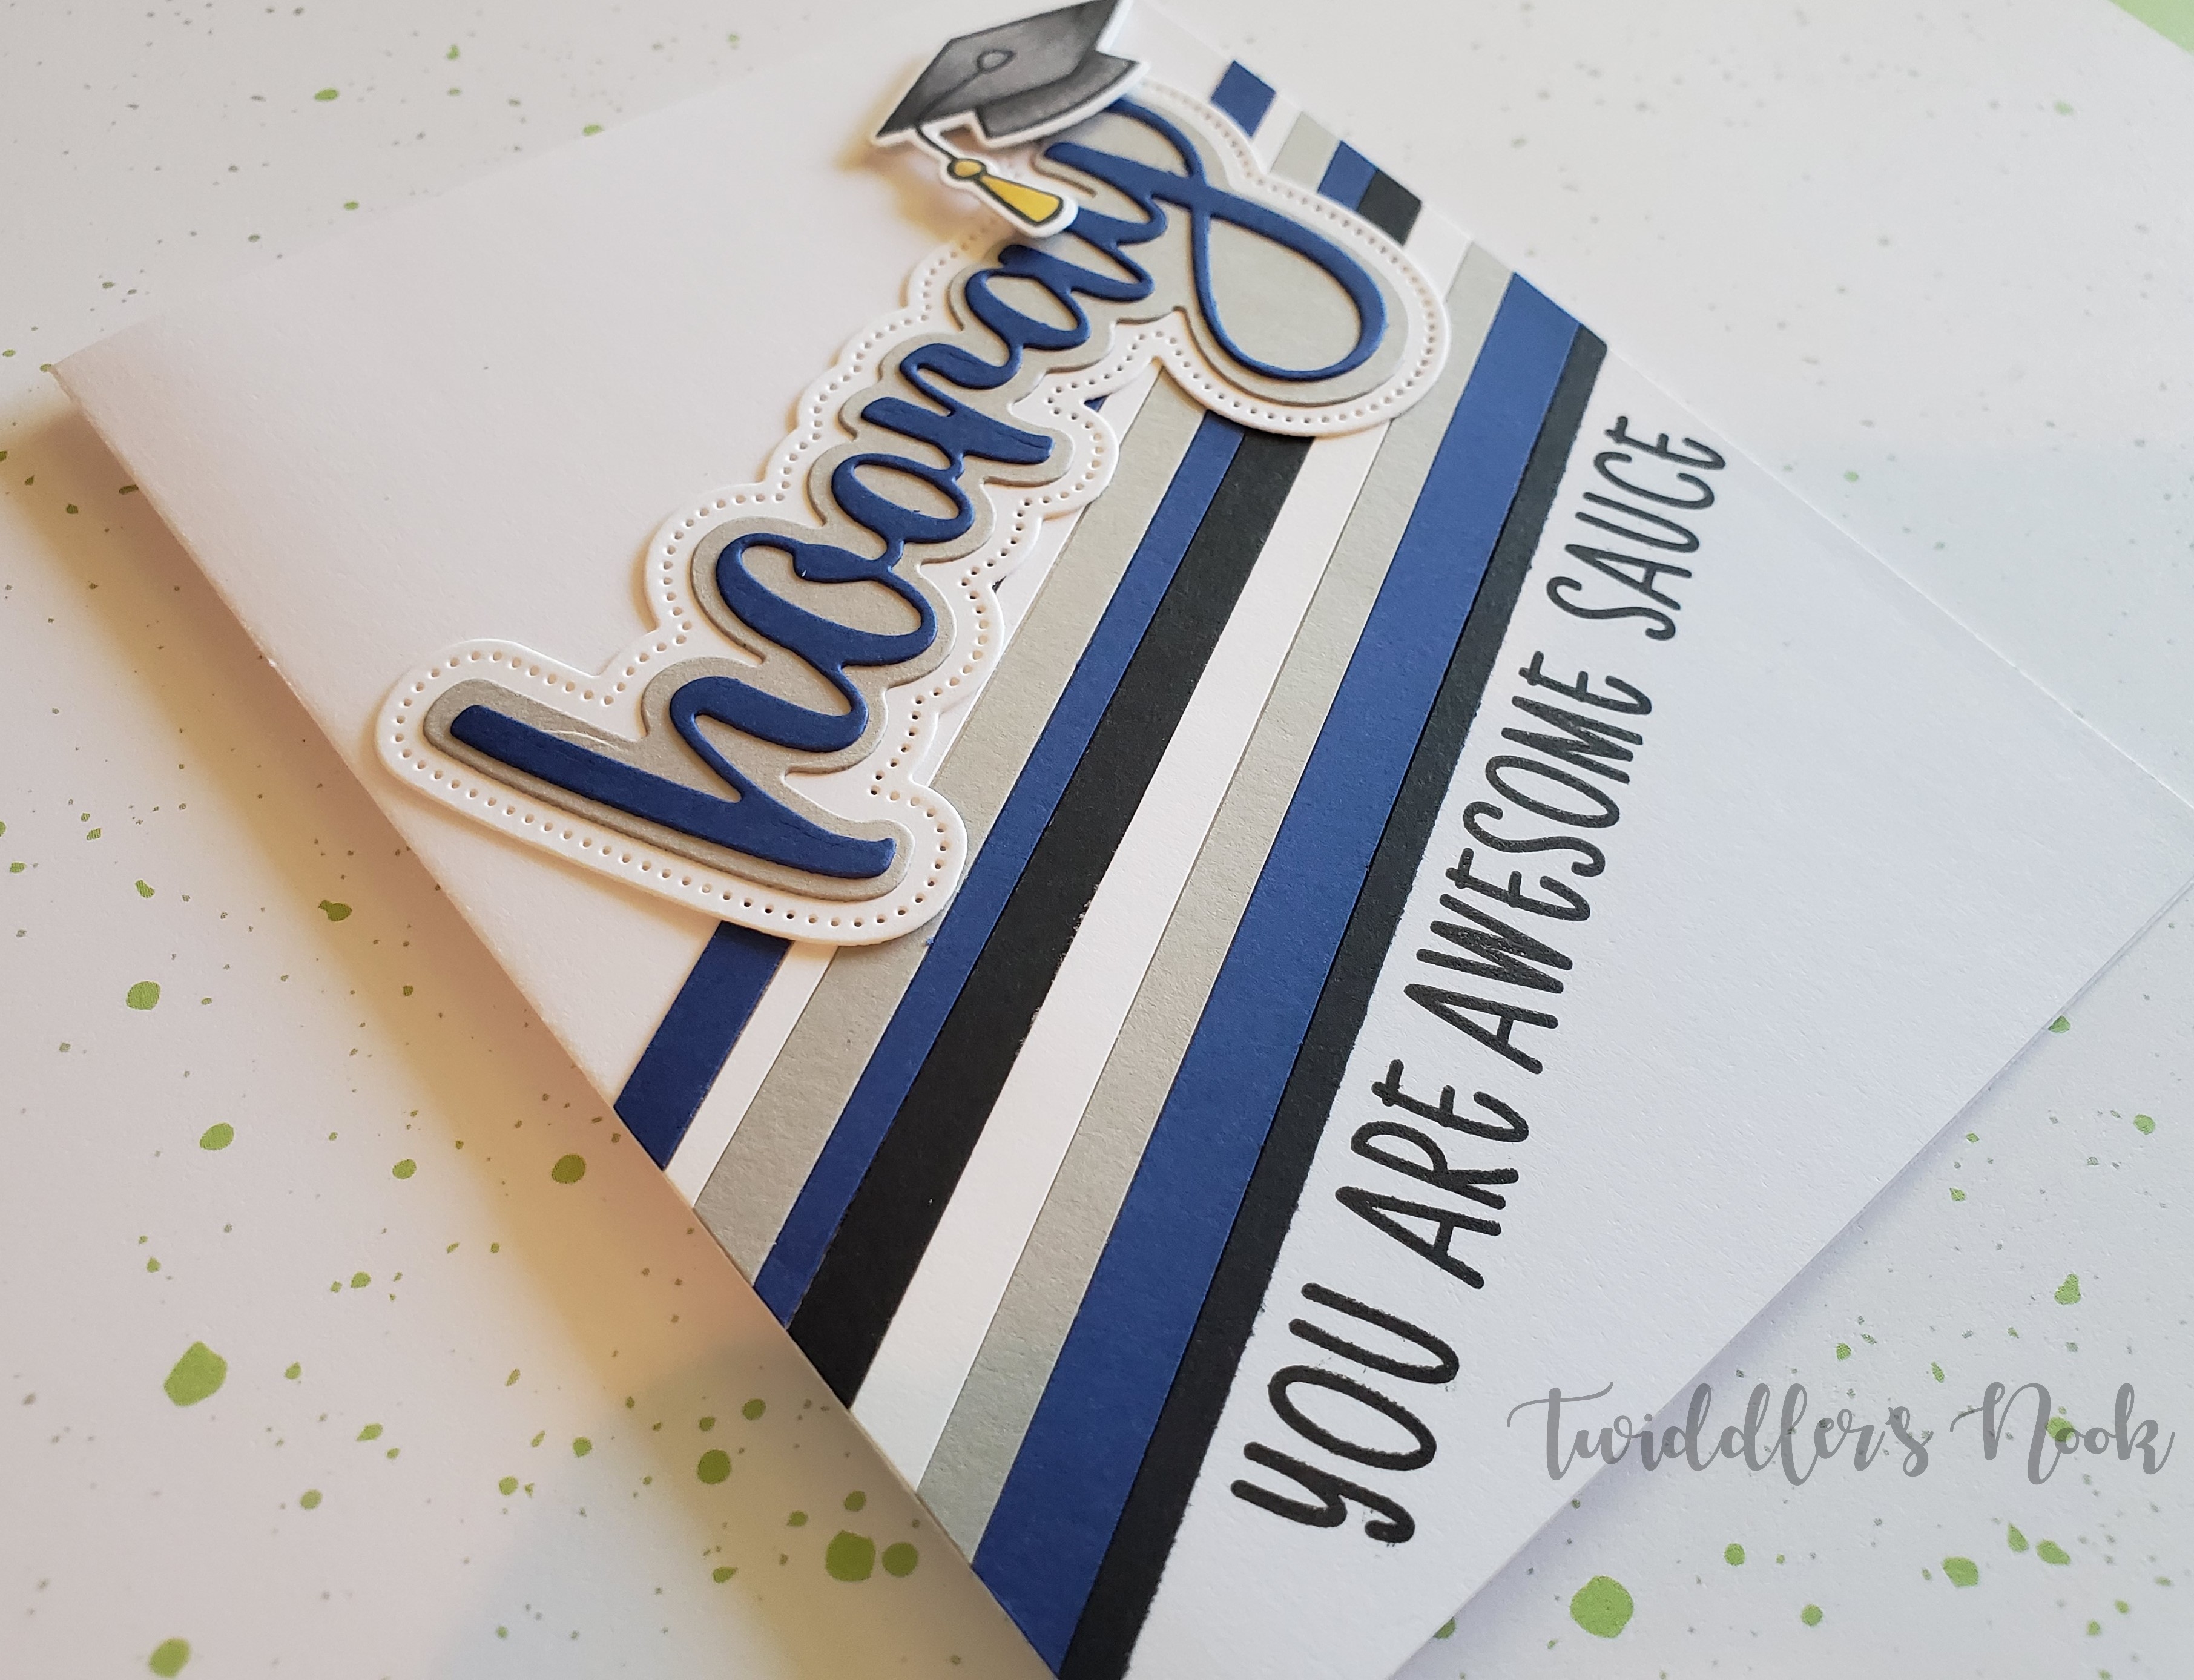
Thanks for stopping by. Today I’m here with a CAS graduation card using Honey Bee Stamps Awesome Sauce sentiment set, Hooray die cut set and Lawn Fawn Hats Off to You stamps and coordinating dies.
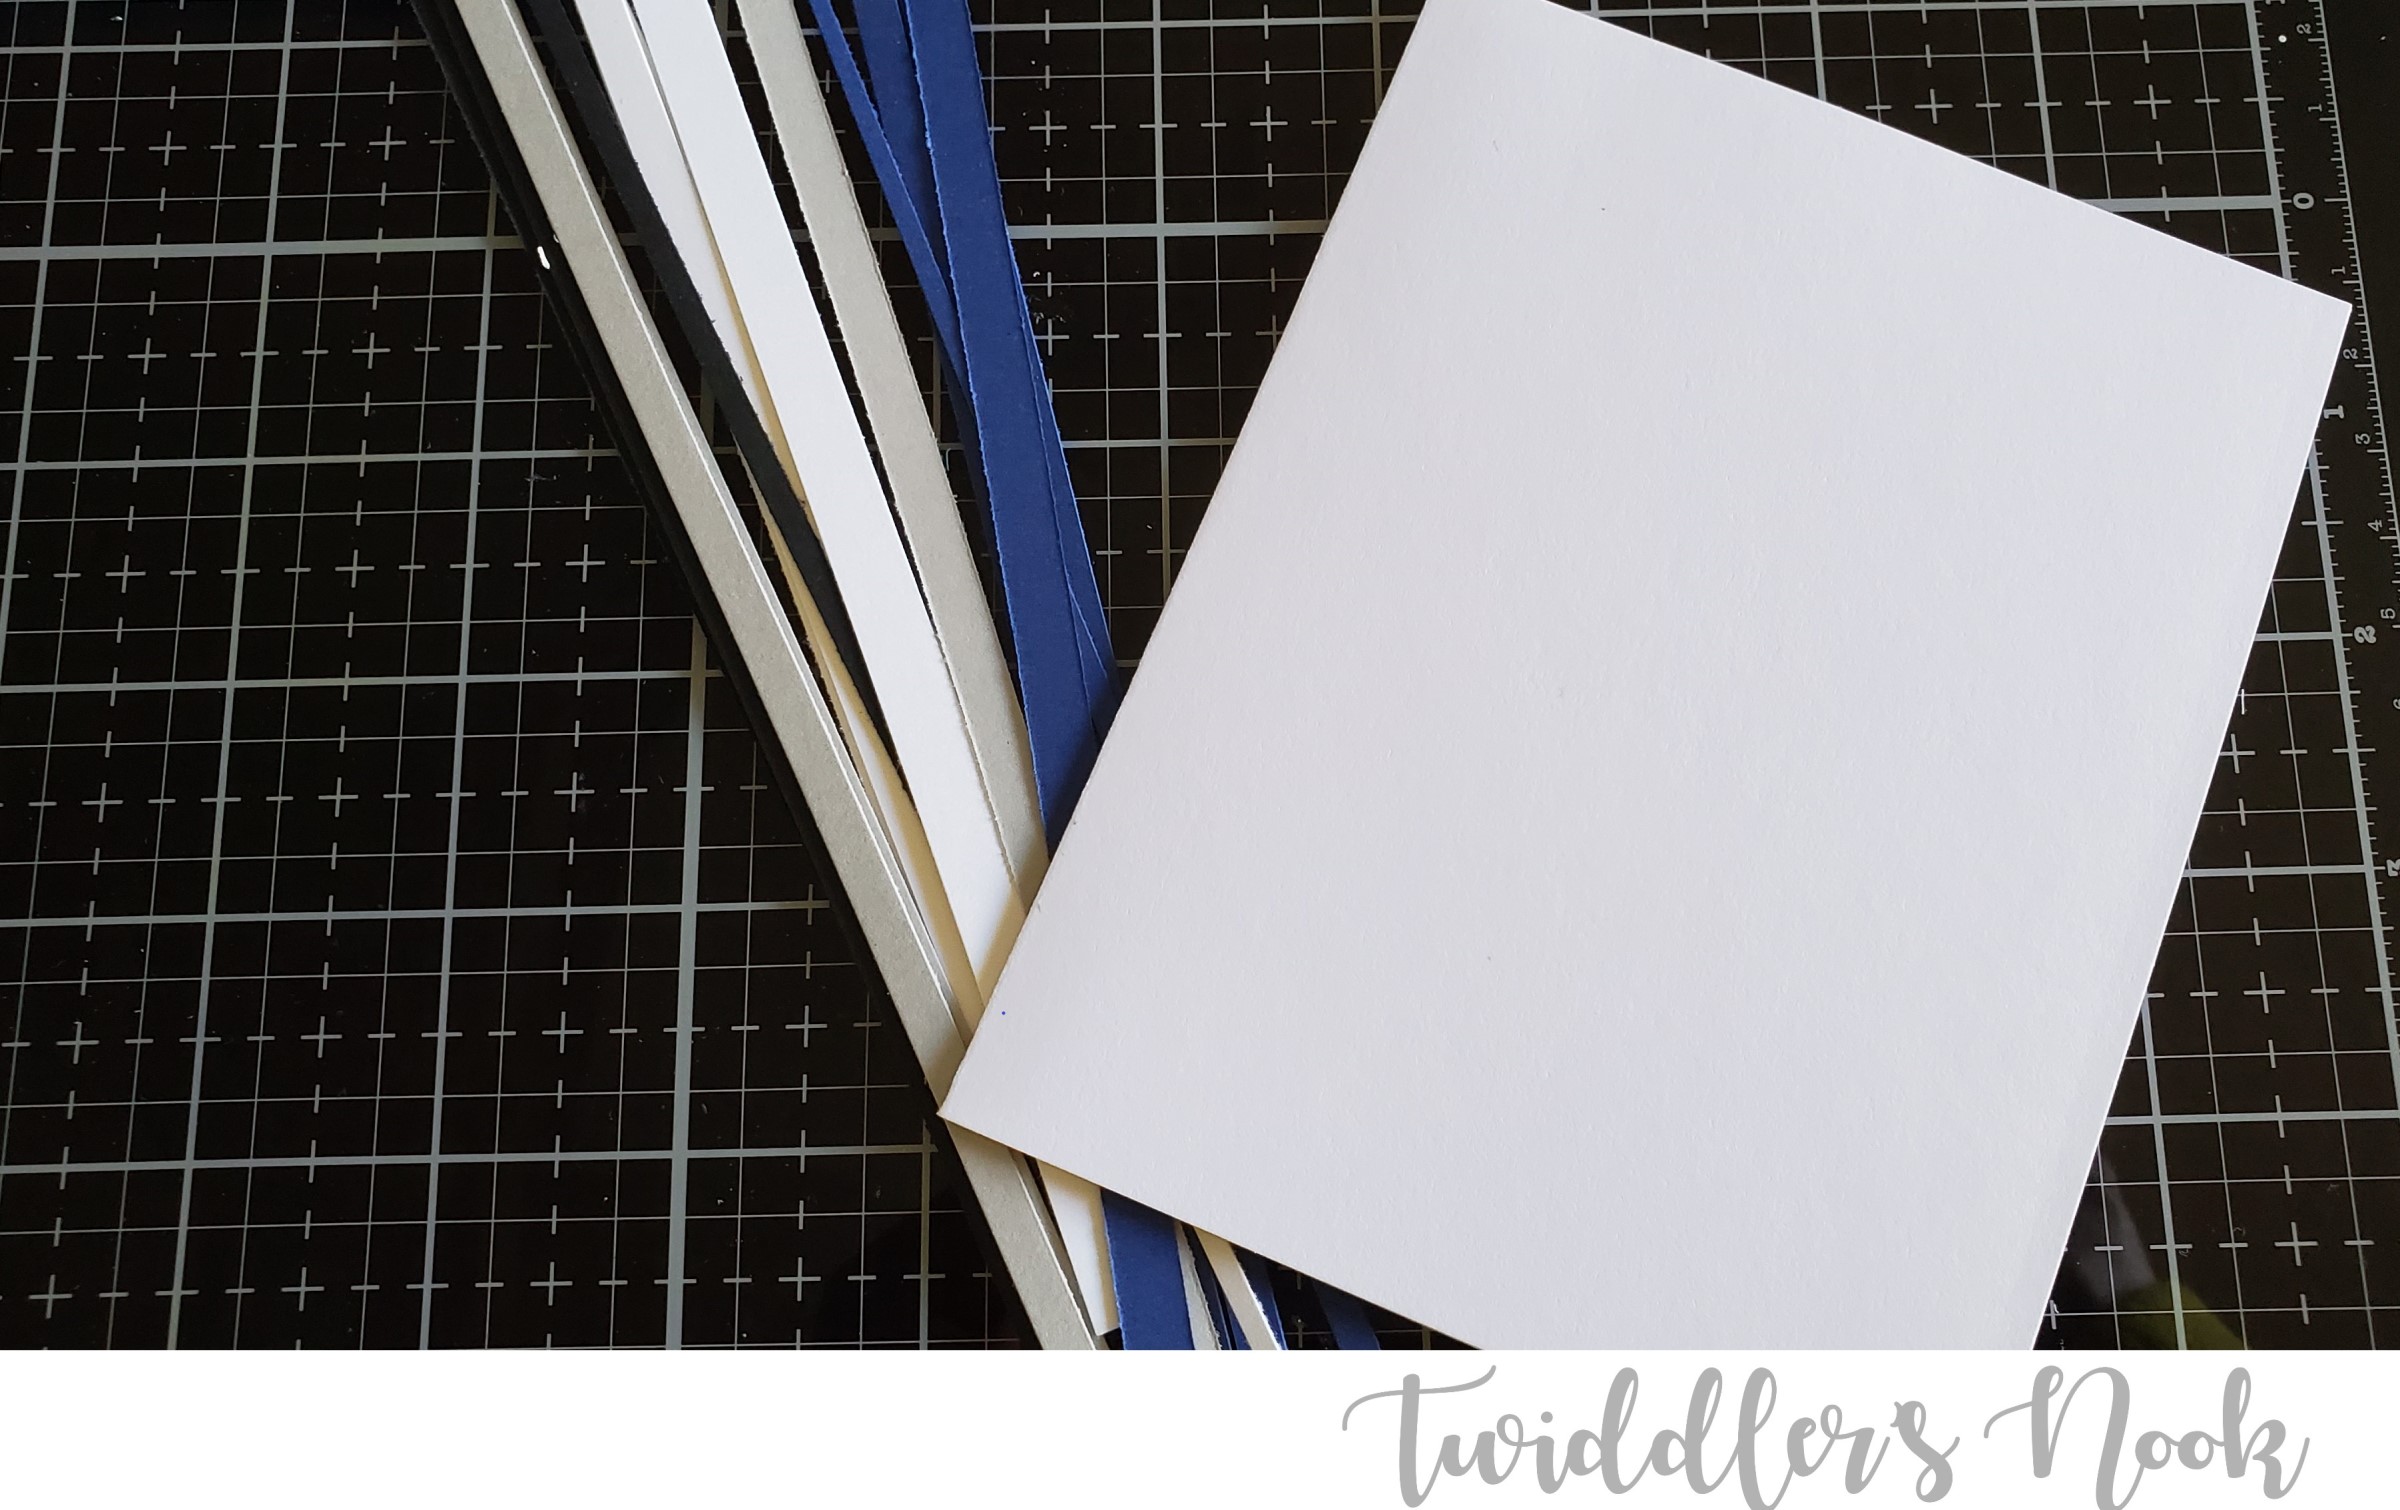
I started with a card base and chose my color palette. I took cardstock of the colors I chose and cut thin strips. I didn’t measure them, trying to make them vary in thickness. Somewhere between 1/8 inch and a 1/4 inch.
Then, I put tape runner on the section of the card that I wanted to add my stripes to and laid the strips down, pressing firmly. I trimmed the excess off the edges of the card sides.
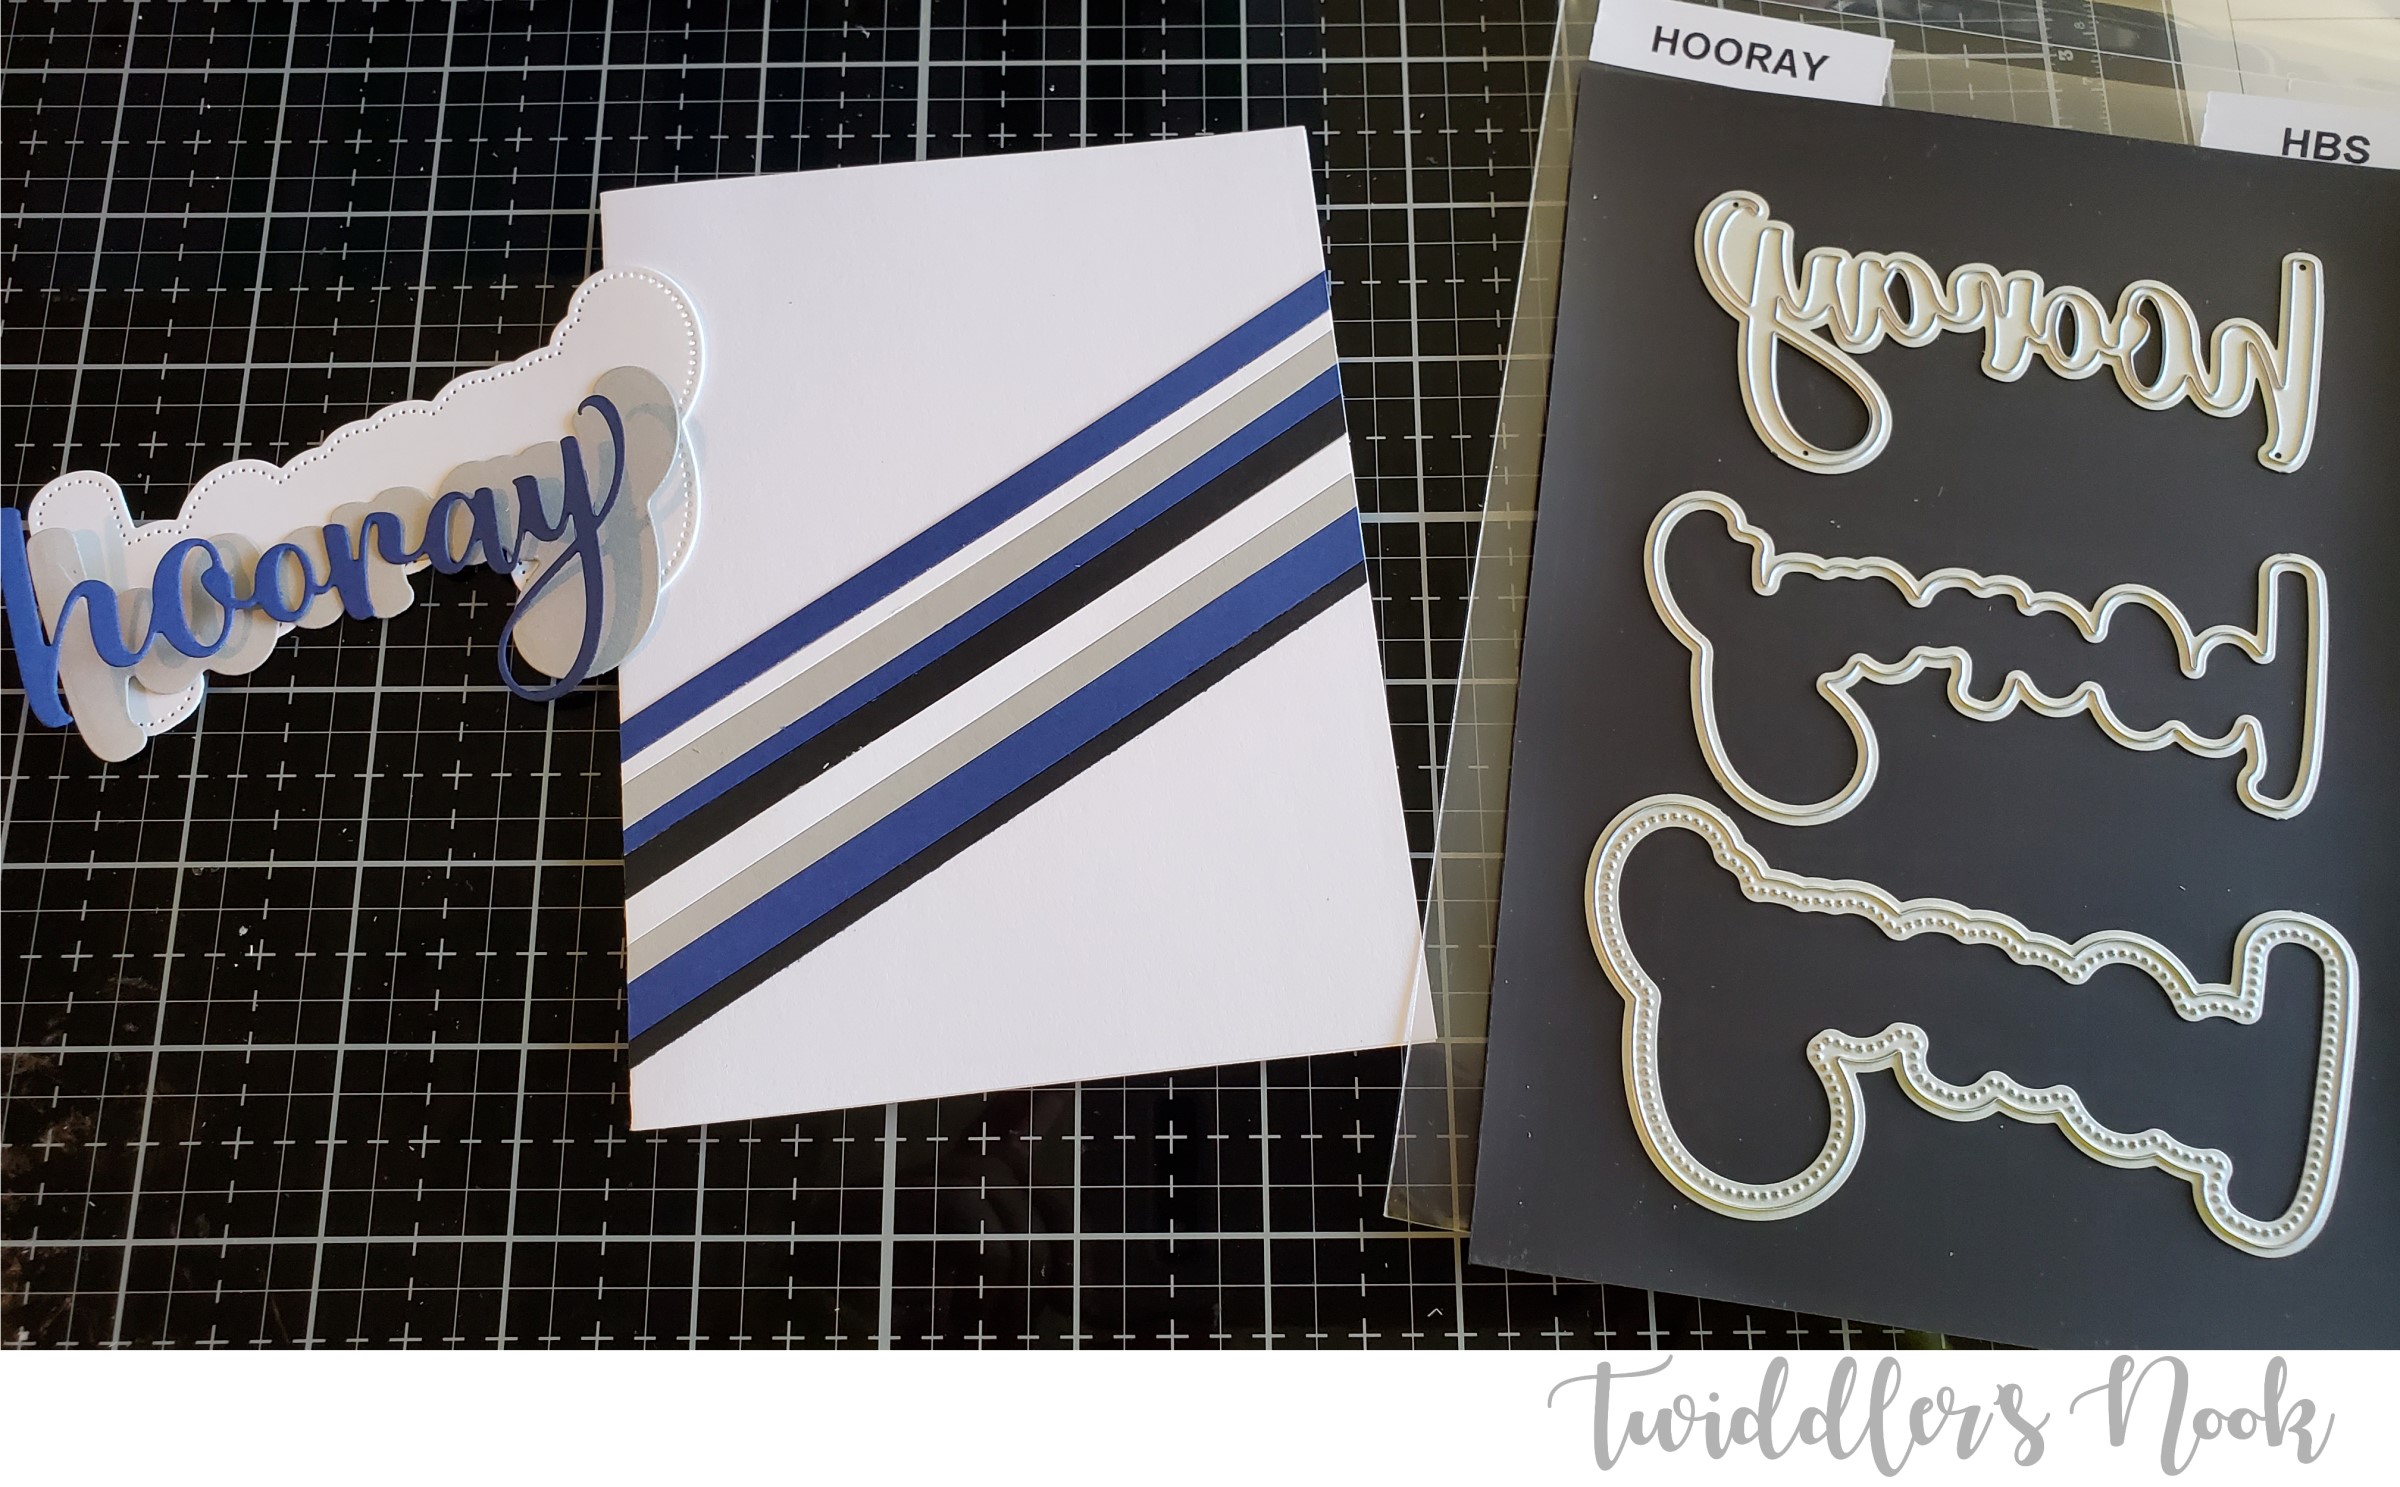
Then I die cut the hooray sentiment from blue, gray and white cardstocks to match the stripes and glued the layers together.
I stamped, color and die cut the graduation hat from the Lawn Fawn Hats Off to You set and laid everything out. At this point I decided to add the “You Are Awesome Sauce” sentiment below the stripes.
After stamping the sentiment I glued the hooray down and popped the hat up with foam squares.
This awesome graduation card is finished and so simple to customize for any senior’s school colors.
I appreciate you sharing your time with me. Have a fabulous day!
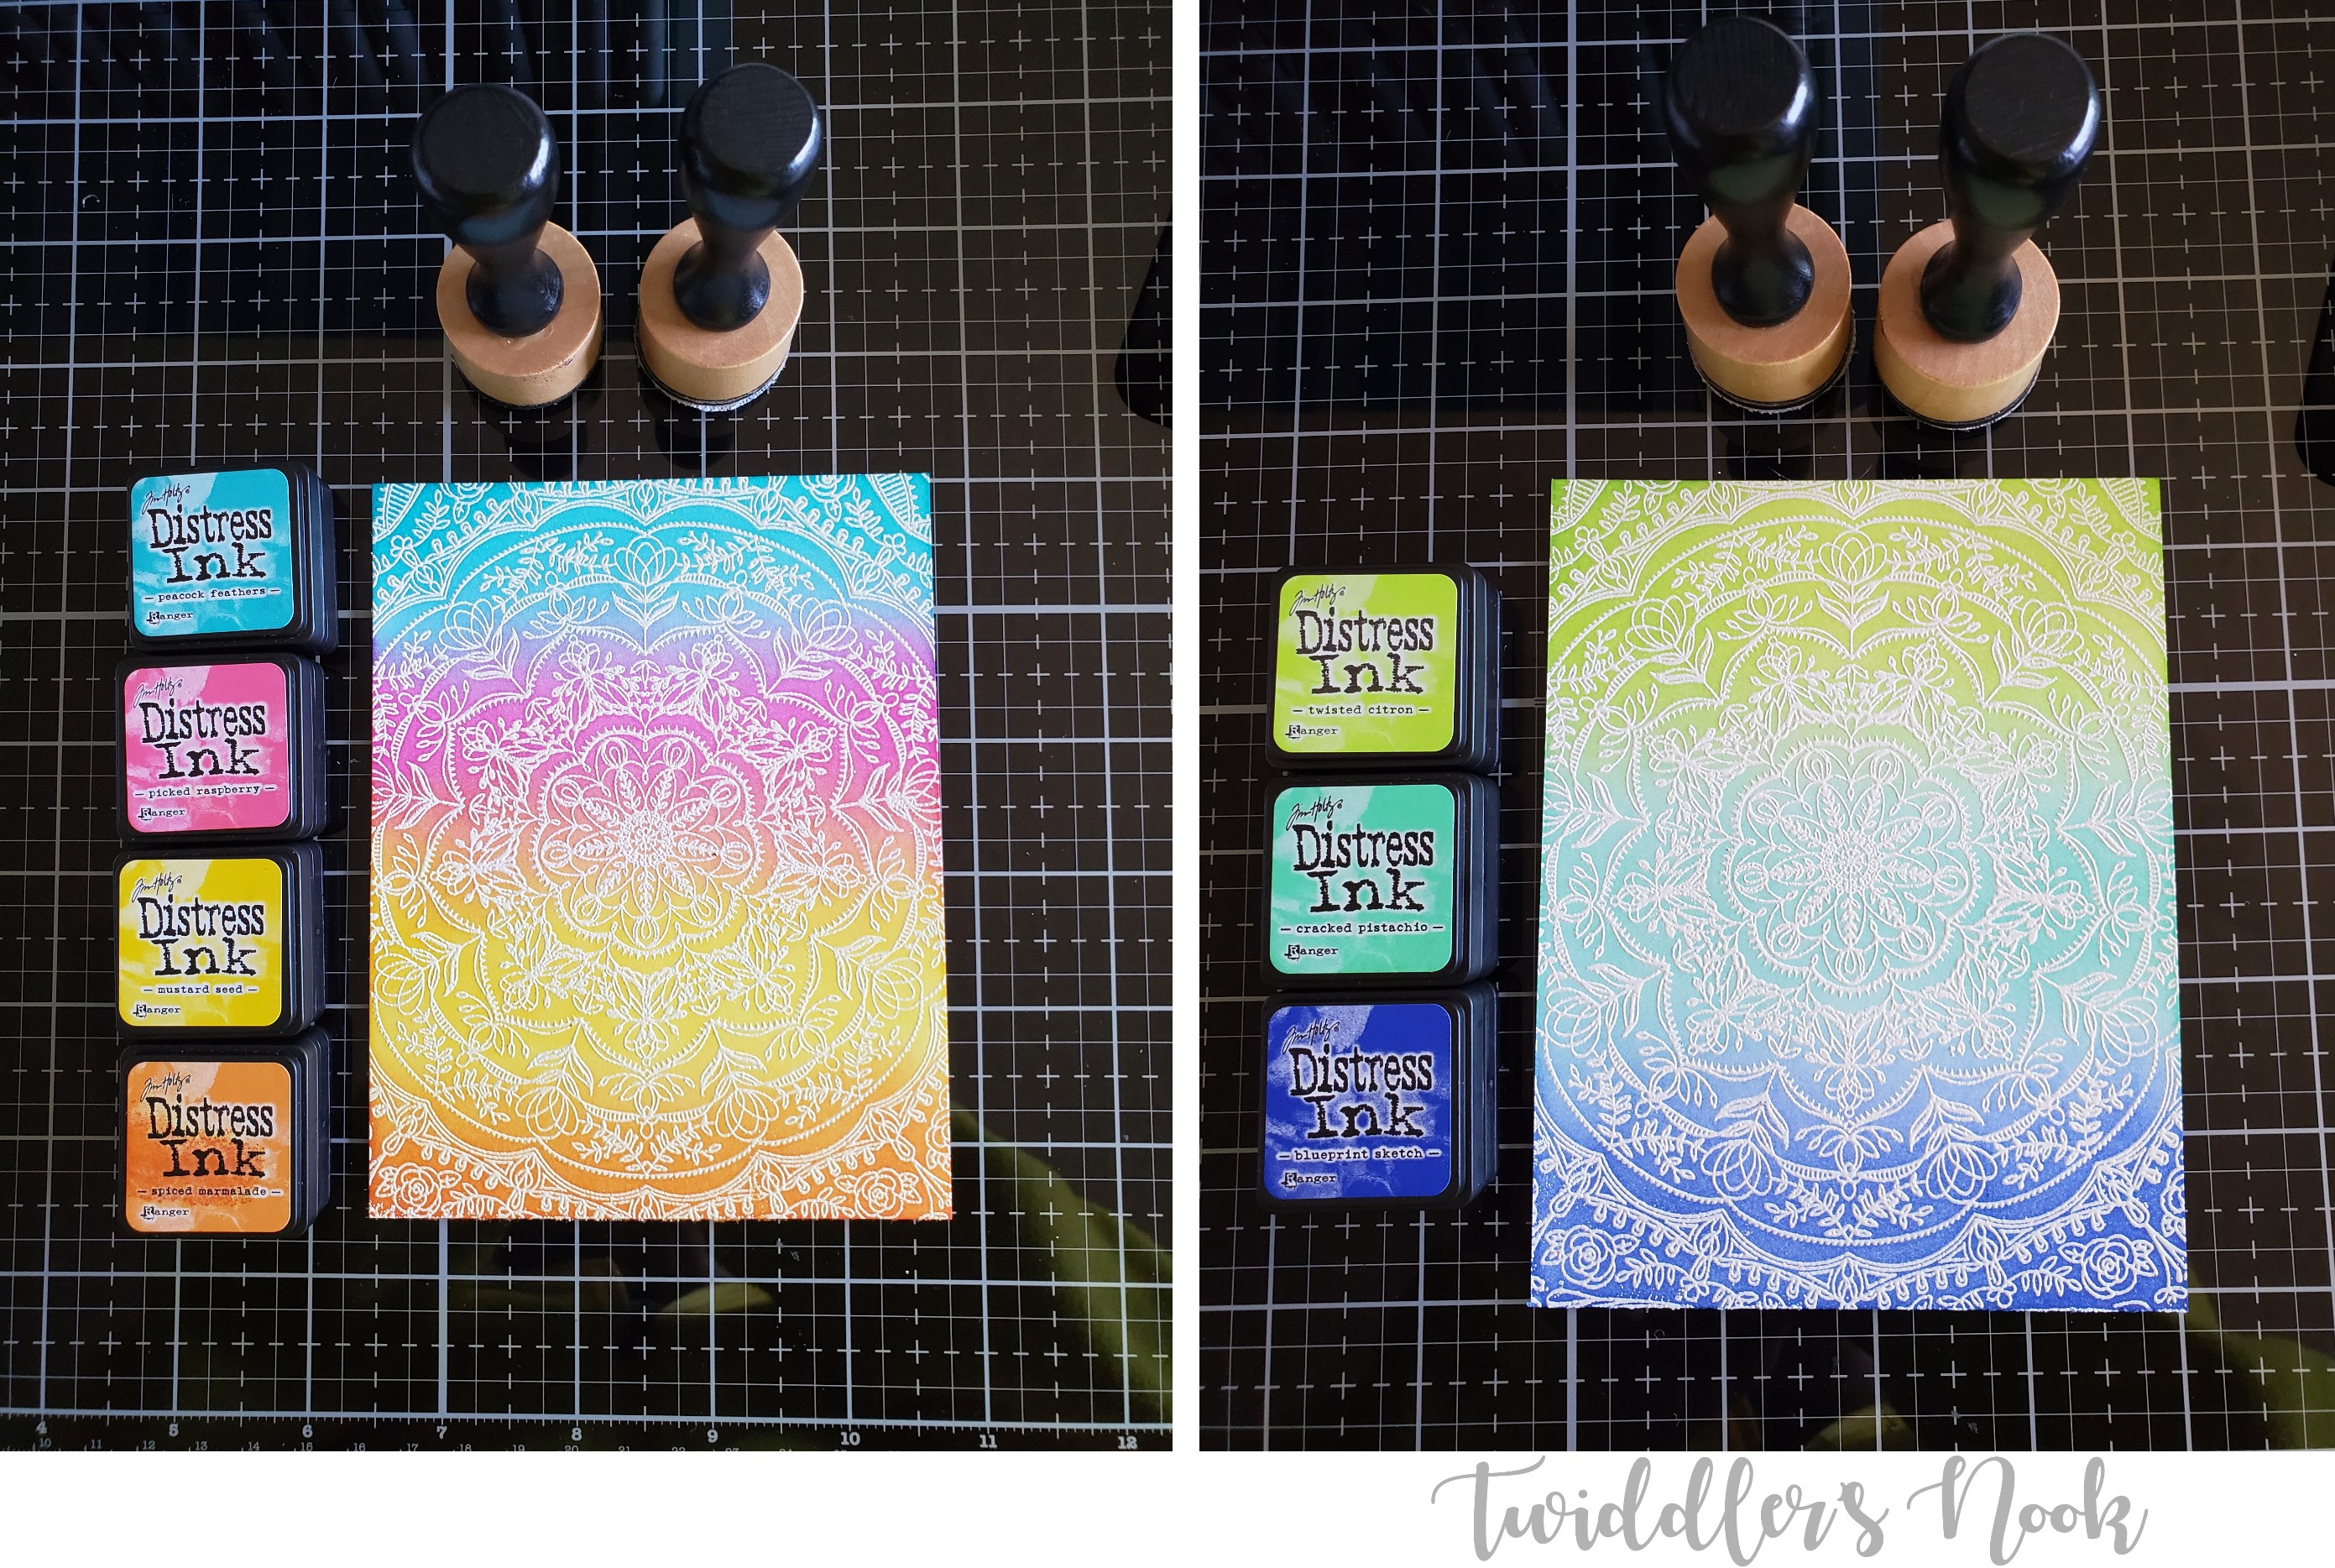
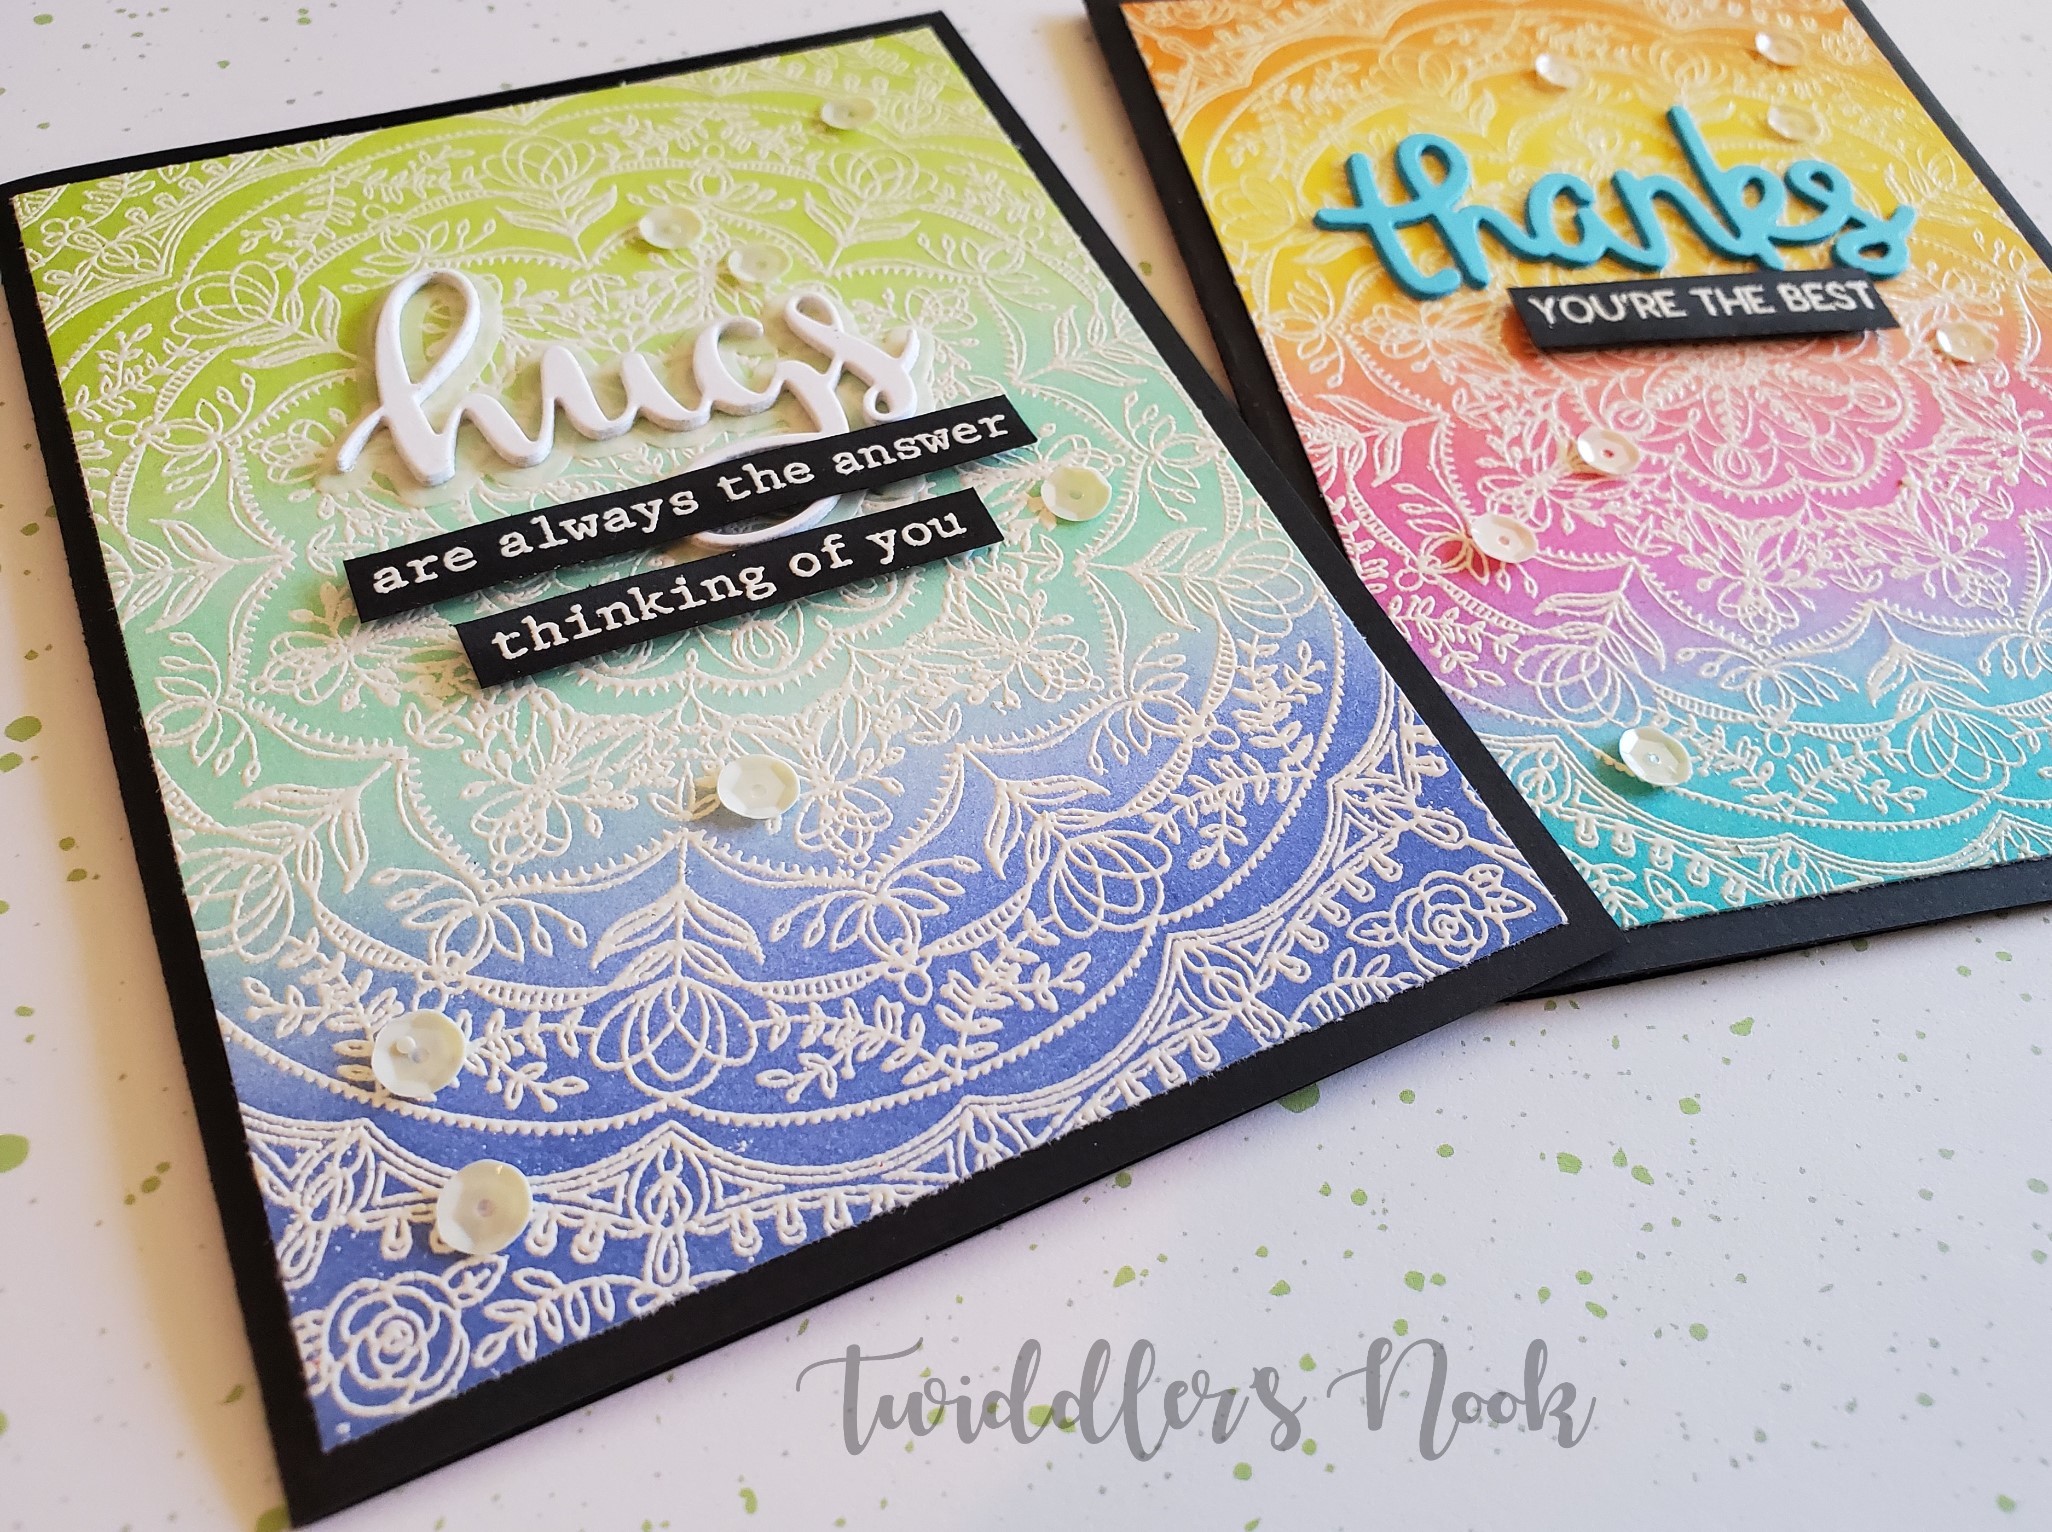
Hi there and thanks for stopping by! Today I’m going to share a simple and very impactful technique – distress ink resist. You can use this with any stamps you have, heat embossing supplies and distress inks.
With a large background stamp, like I’ve chosen, or any individual image you choose, stamp with an embossing ink such as VersaMark. Sprinkle with embossing powder and heat set. I almost always use white for this but you can use colored powder if you choose.
Next, choose your distress inks and blend them right over the top of your embossing. Once it’s blended how you want, take a clean cloth or paper towel and buff off any ink that’s sitting in top of the embossing. Now you have this fabulous background that on its own is beautiful!
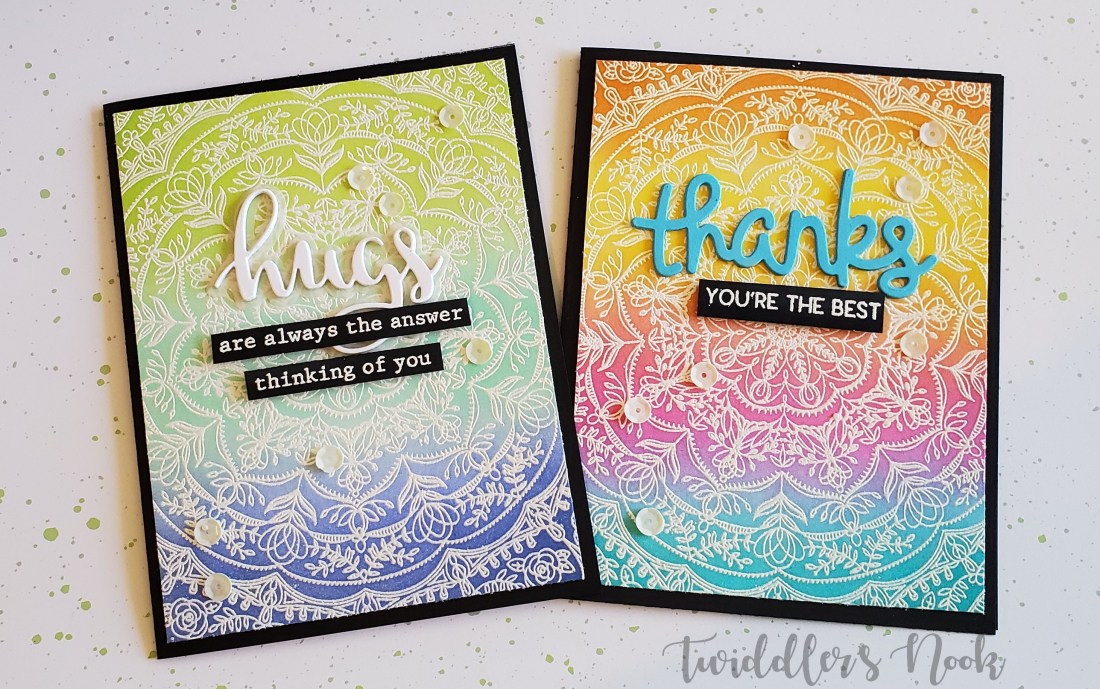
With these two, I trimmed them down to 4×5.25 and glued them to a black card base.
For the green/blue one, I die cut the hugs sentiment from the Avery Elle Simply Said Hugs 4 times from white cardstock and glued them together. Then I glued that to a vellum die cut of the shadow that comes in that same set. I adhered that to the card front. Next, I stamp and heat embossed the other sentiments from the same set, trimmed them into thin strips and popped them up with foam squares.
For the rainbow card, I die cut the Lawn Fawn scripty thanks sentiment 4 times from a teal cardstock and glued them all together. After adhering that to the card front, I stamped and heat embossed the small sentiment underneath from the Avery Elle Peek-a-boo Pals stamp set and popped it up with foam squares.
To finish both of these cards off I scattered sequins randomly from the bottom left to the top right corner.
I hope you’ll give this technique a try. I know you’ll love it!
I appreciate you sharing your time with me. Have a fabulous day!
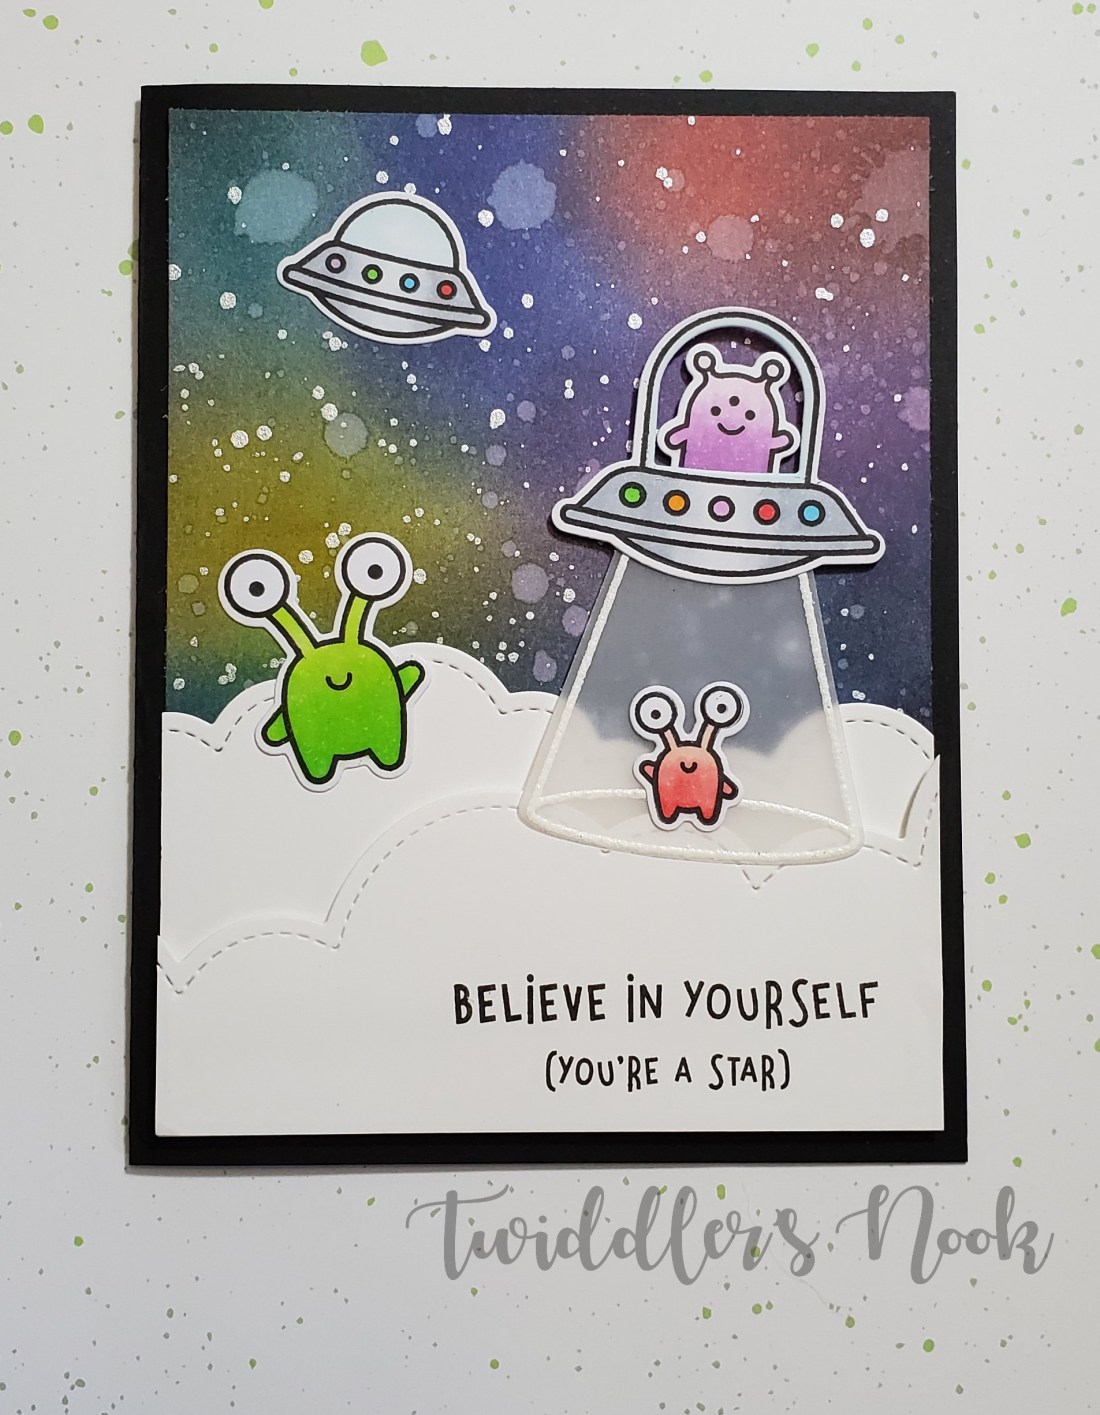
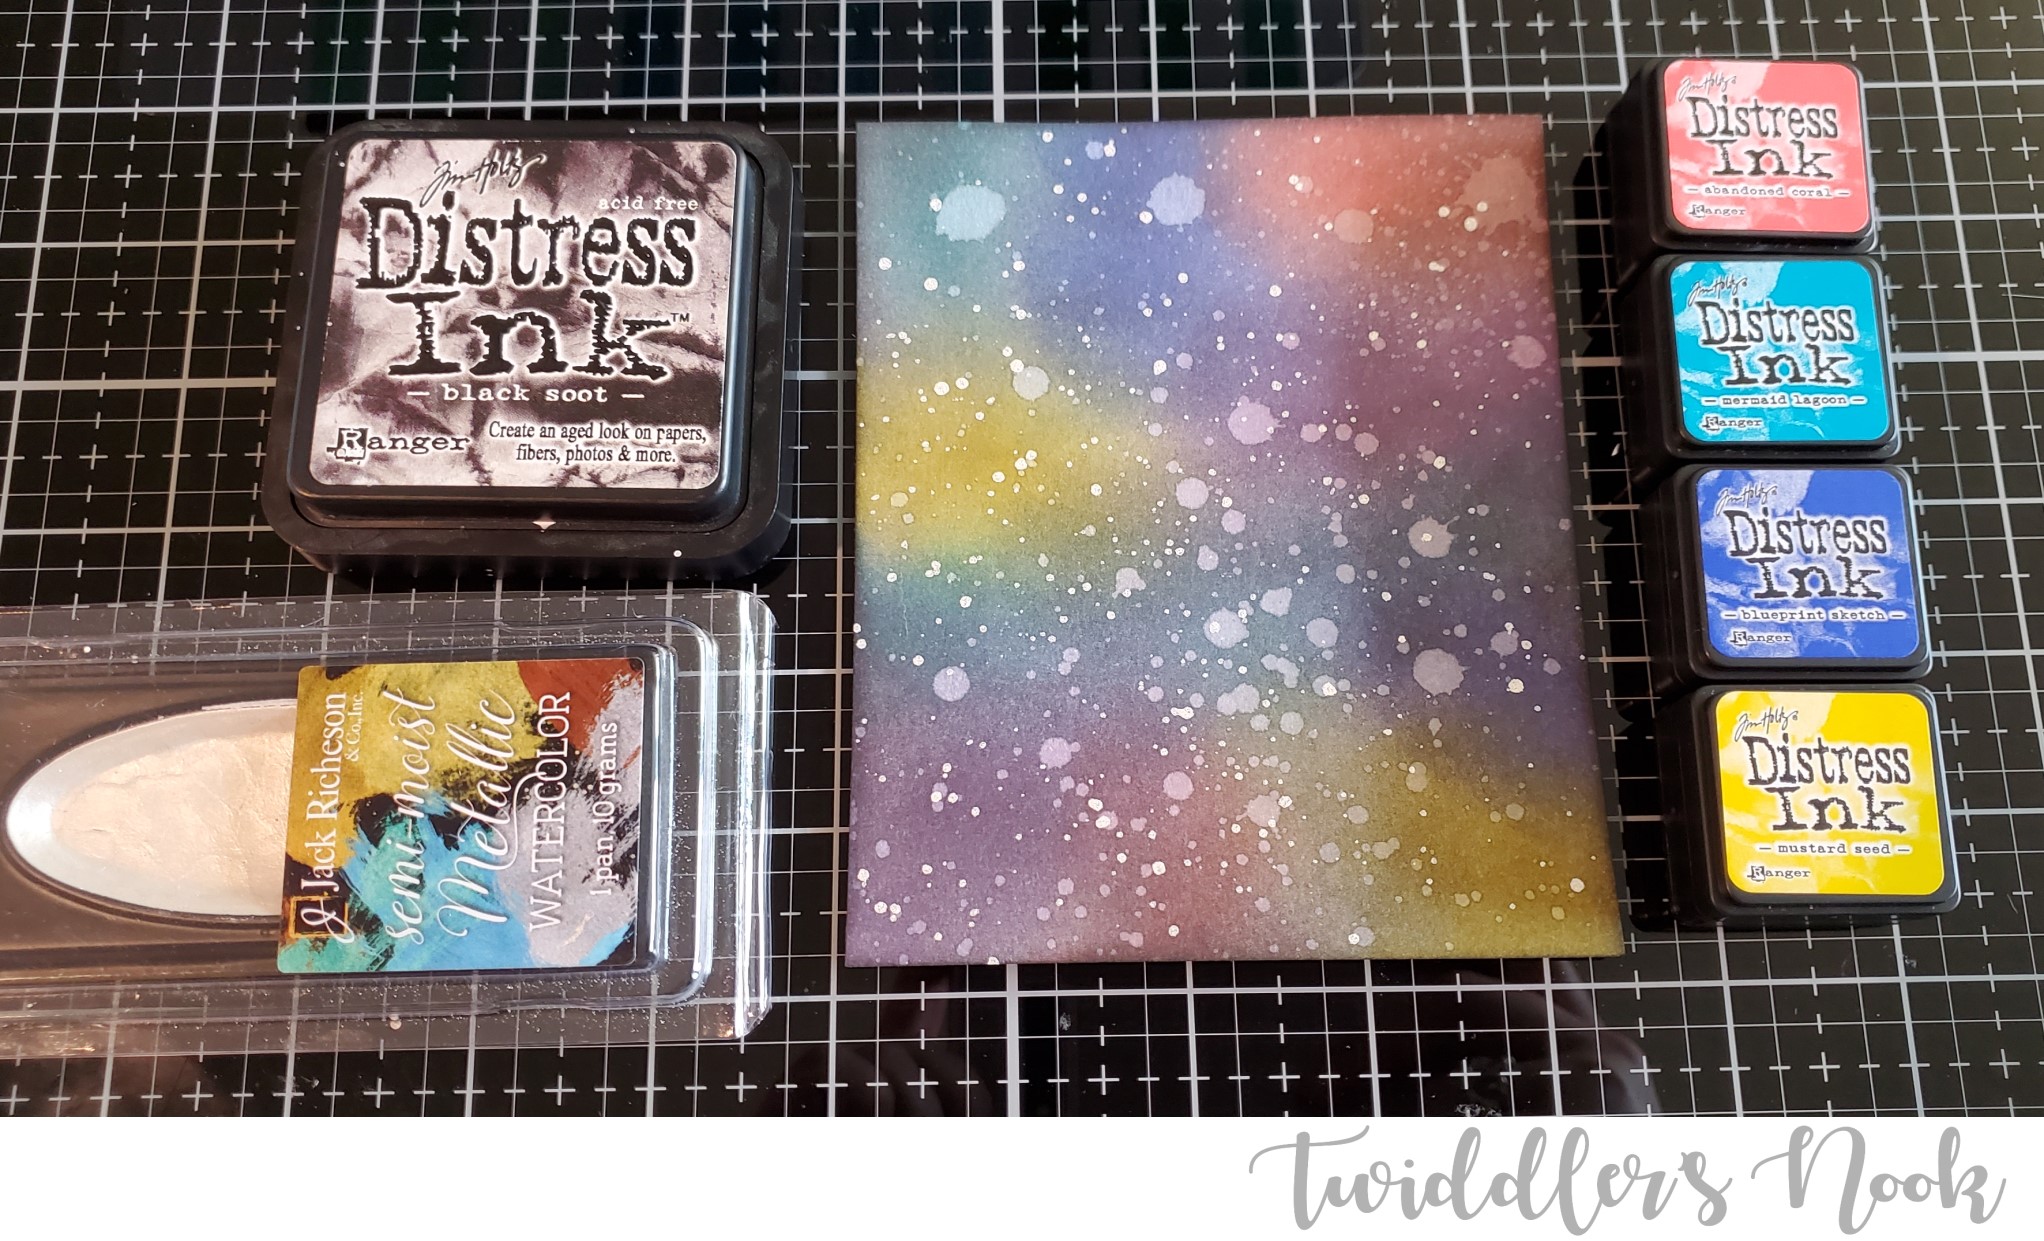
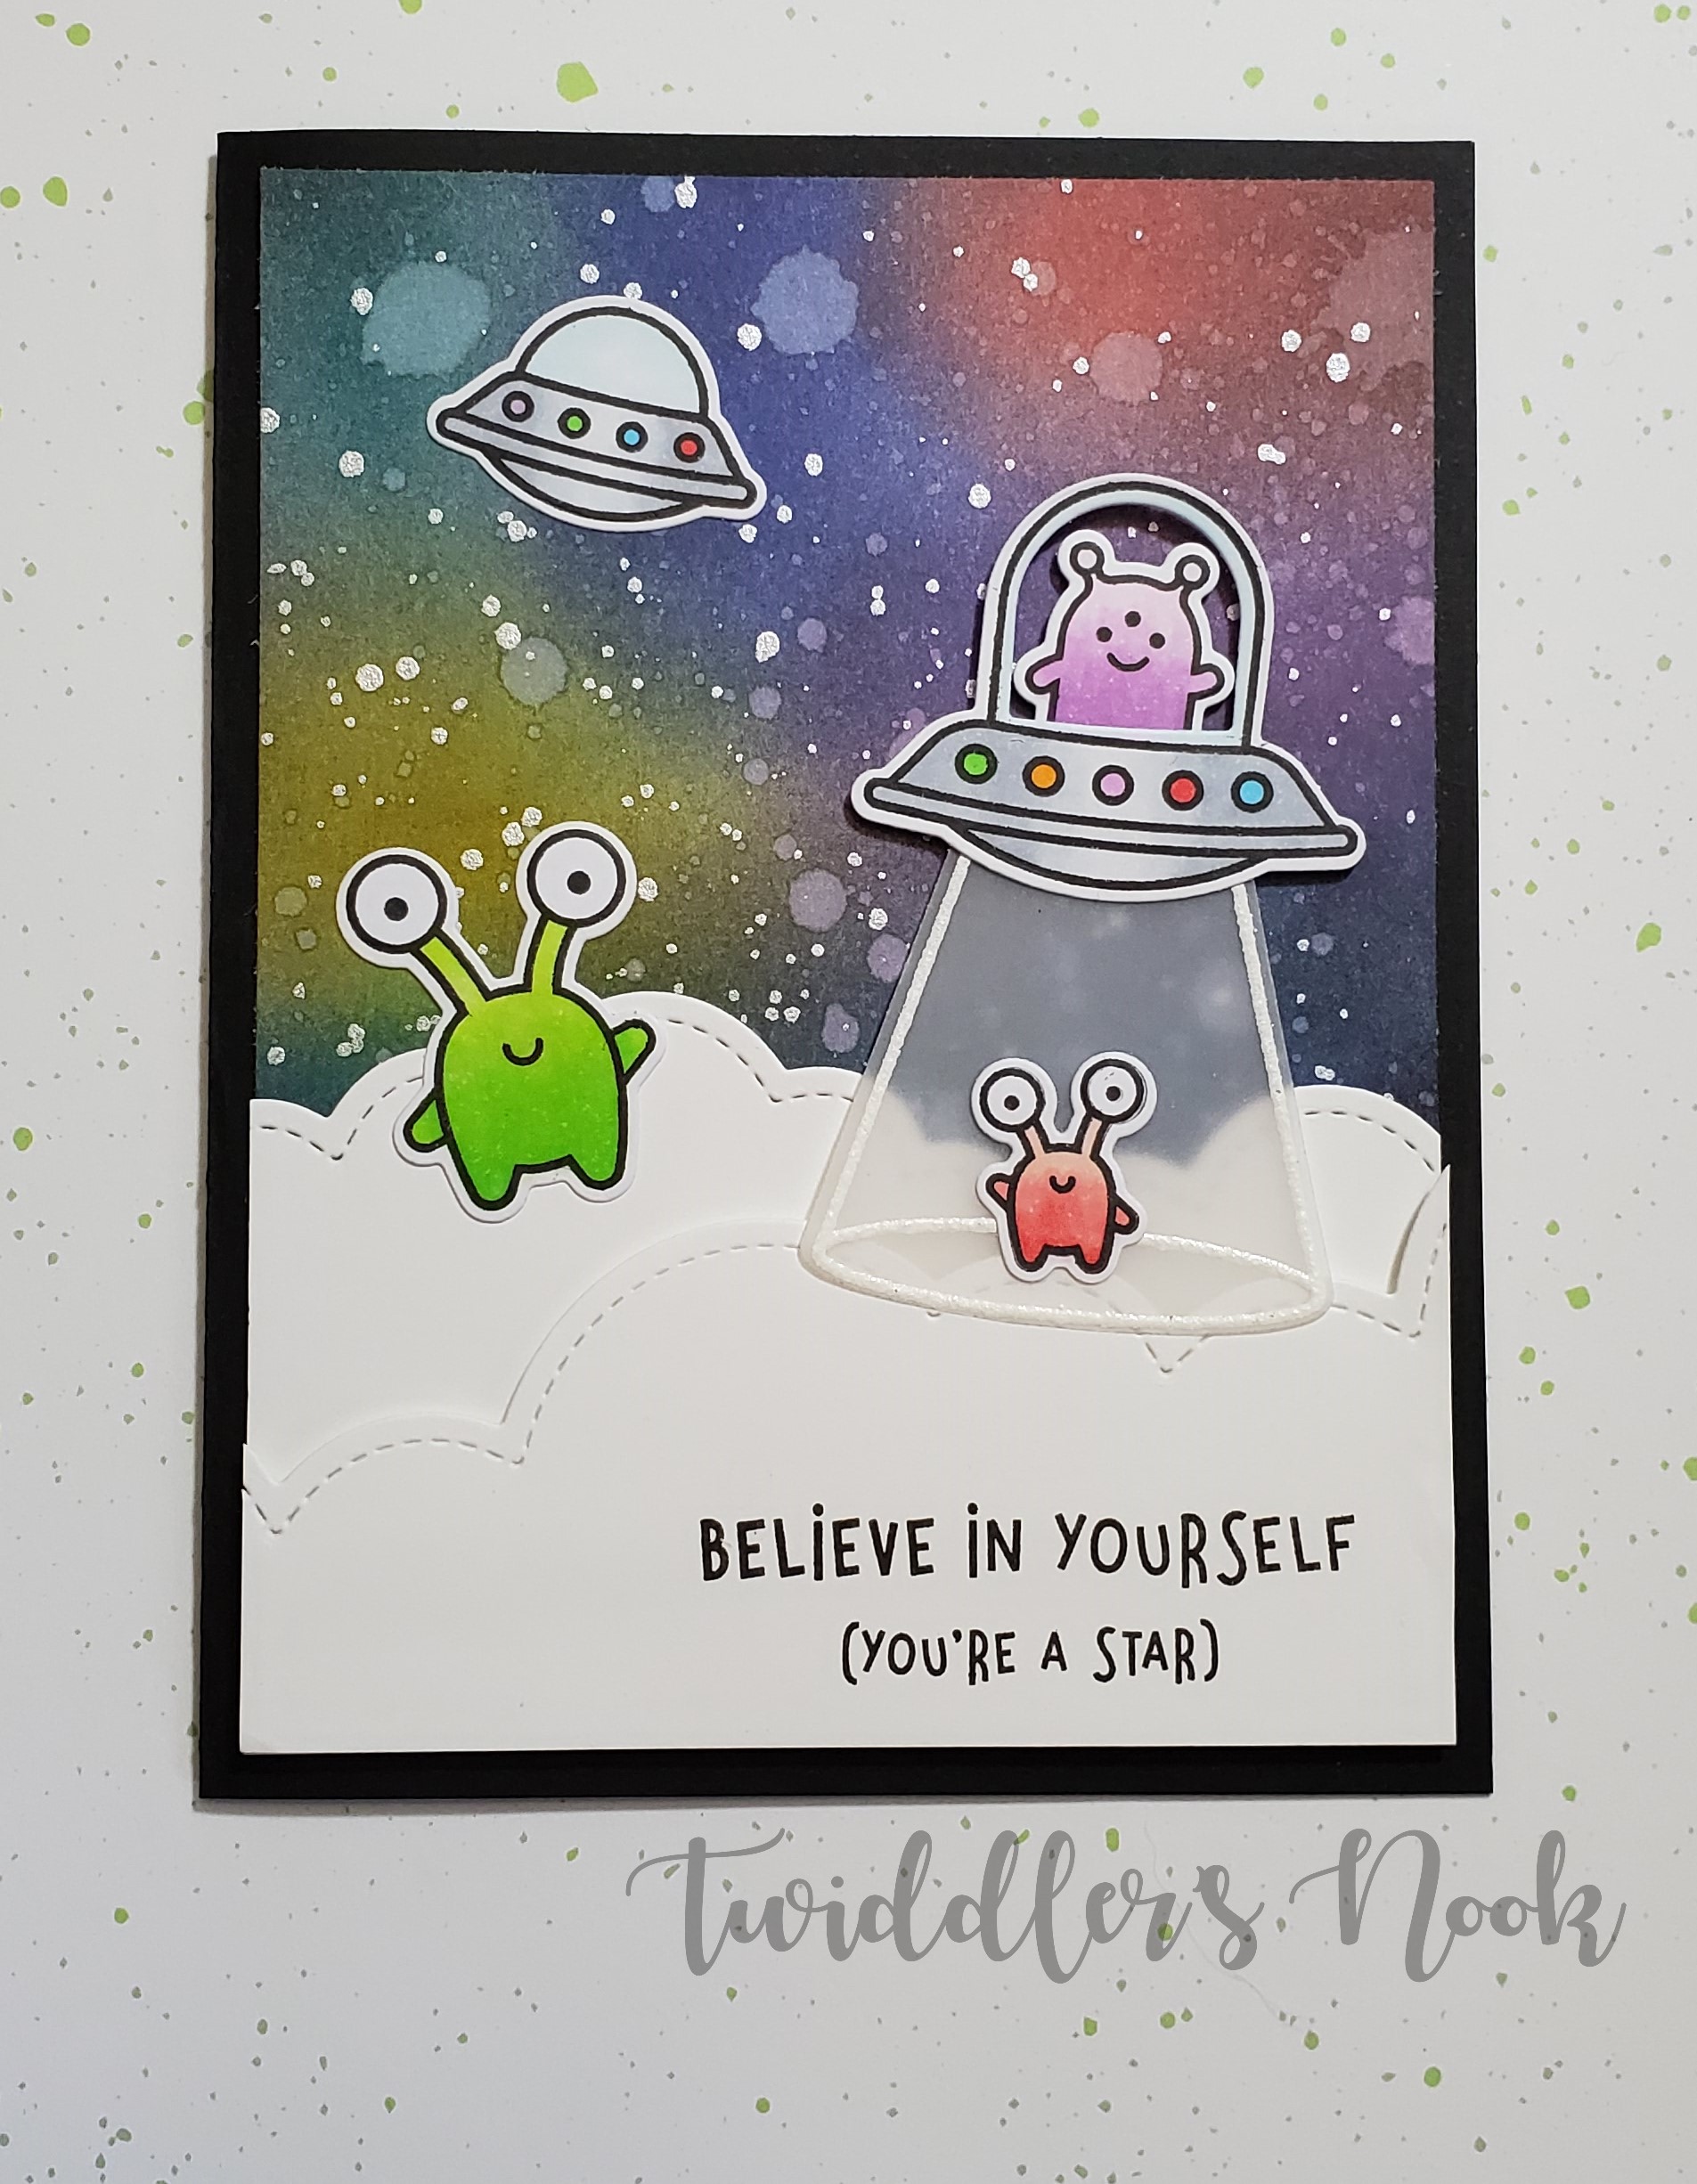
Happy Sunday! I’ve had so much fun in the craft room lately. Busy trying new ideas. The other night I decided to get messy again, in a new way. This time I cut a bunch of cardstock to A2 size (4.25X5.5 inches) for backgrounds and got out my distress inks and blending tools. I almost always make a bunch of these at a time when I’m doing them just like the ink smooshing idea. After I had done a couple that were just simple ink blending across the paper I decided to try out a galaxy idea.
To do this, I used the four colors on the right and covered the background. The colors are Abandoned Coral, Mermaid Lagoon, Blueprint Sketch, Mustard Seed and *not pictured, oops* Dusty Concord. After I covered the whole background randomly with each color, I took my Black Soot and went over the whole piece with a light hand. After I did it once, I went around the edge a second time to add another layer of color. Then I spritzed it with a water sprayer and dabbed up the water drops with a paper towel. Once I liked how much distressing I had with the water, I got out my silver watercolor and flicked it all over the paper. This is the key to a really cool galaxy background. It’s amazing how much dimension the metallic watercolor gives the whole thing. Stars everywhere!
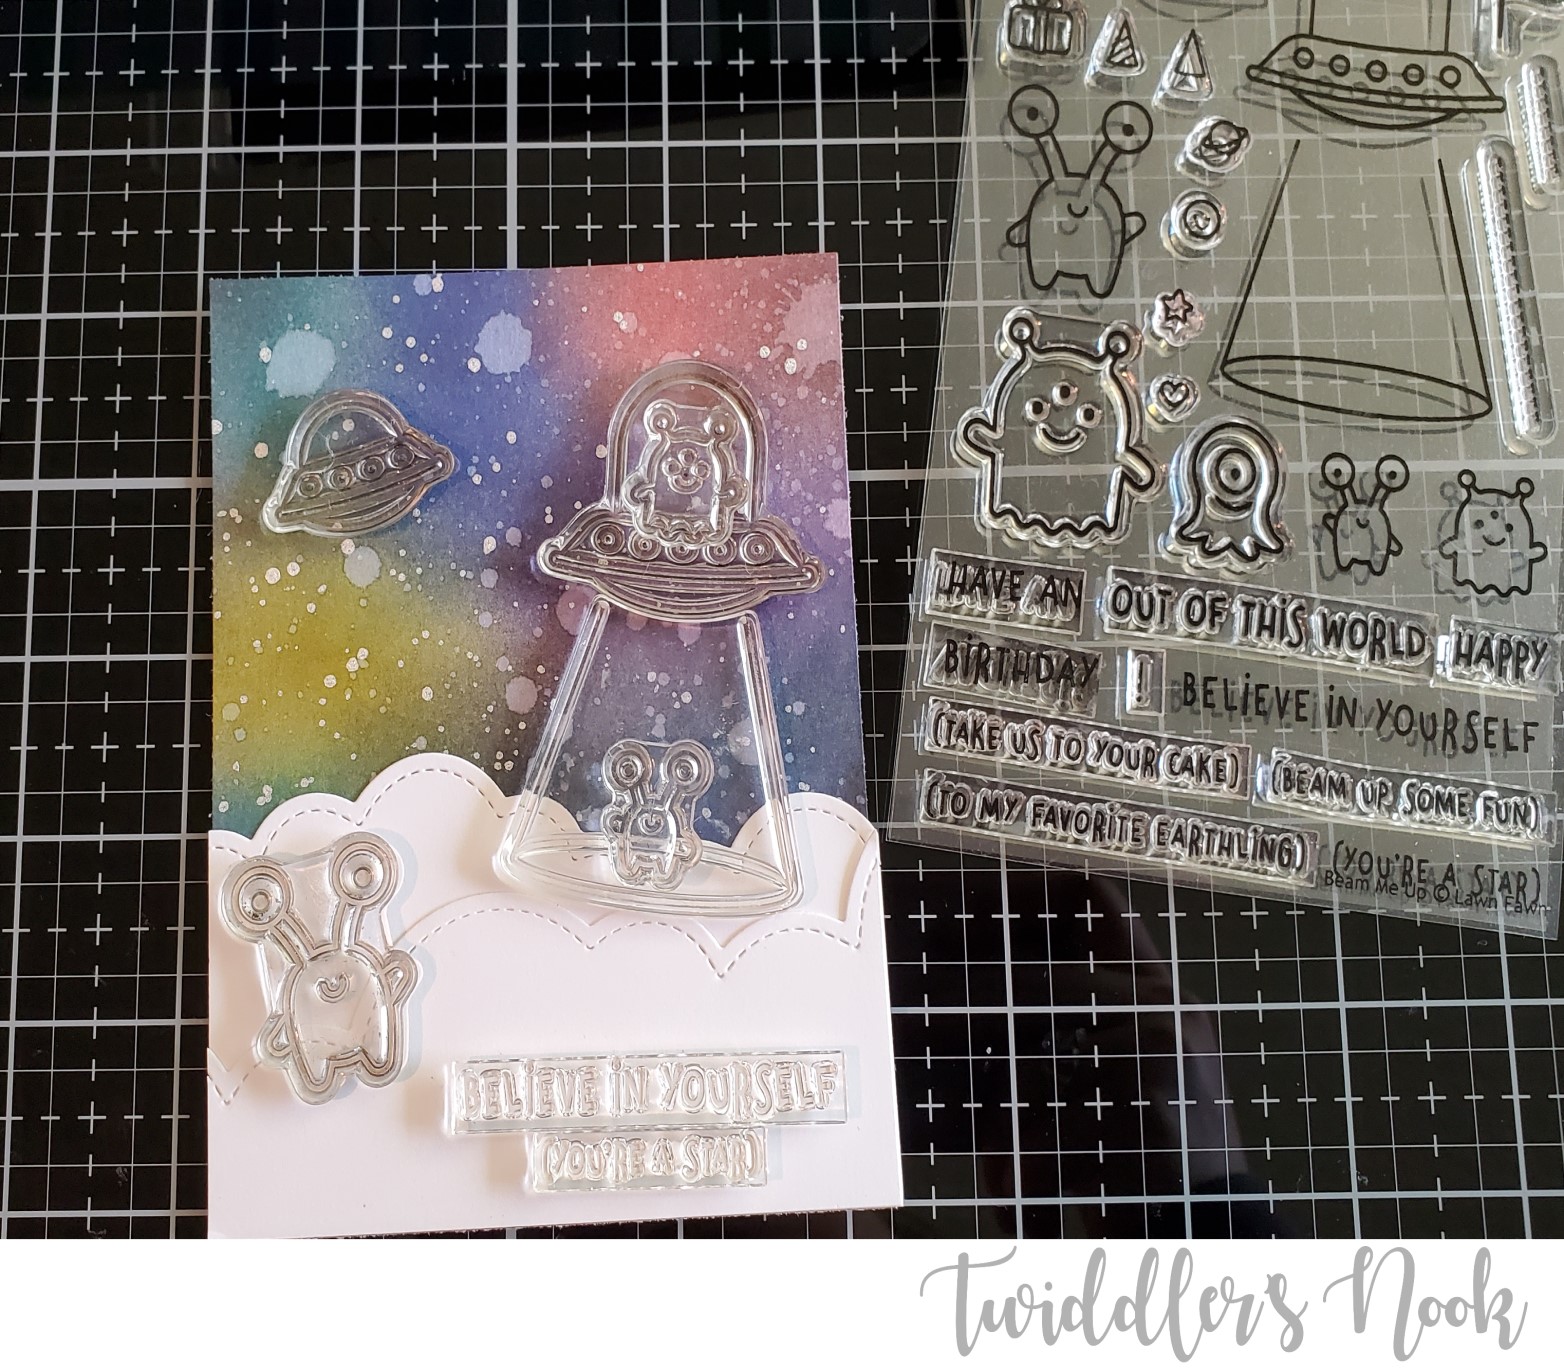
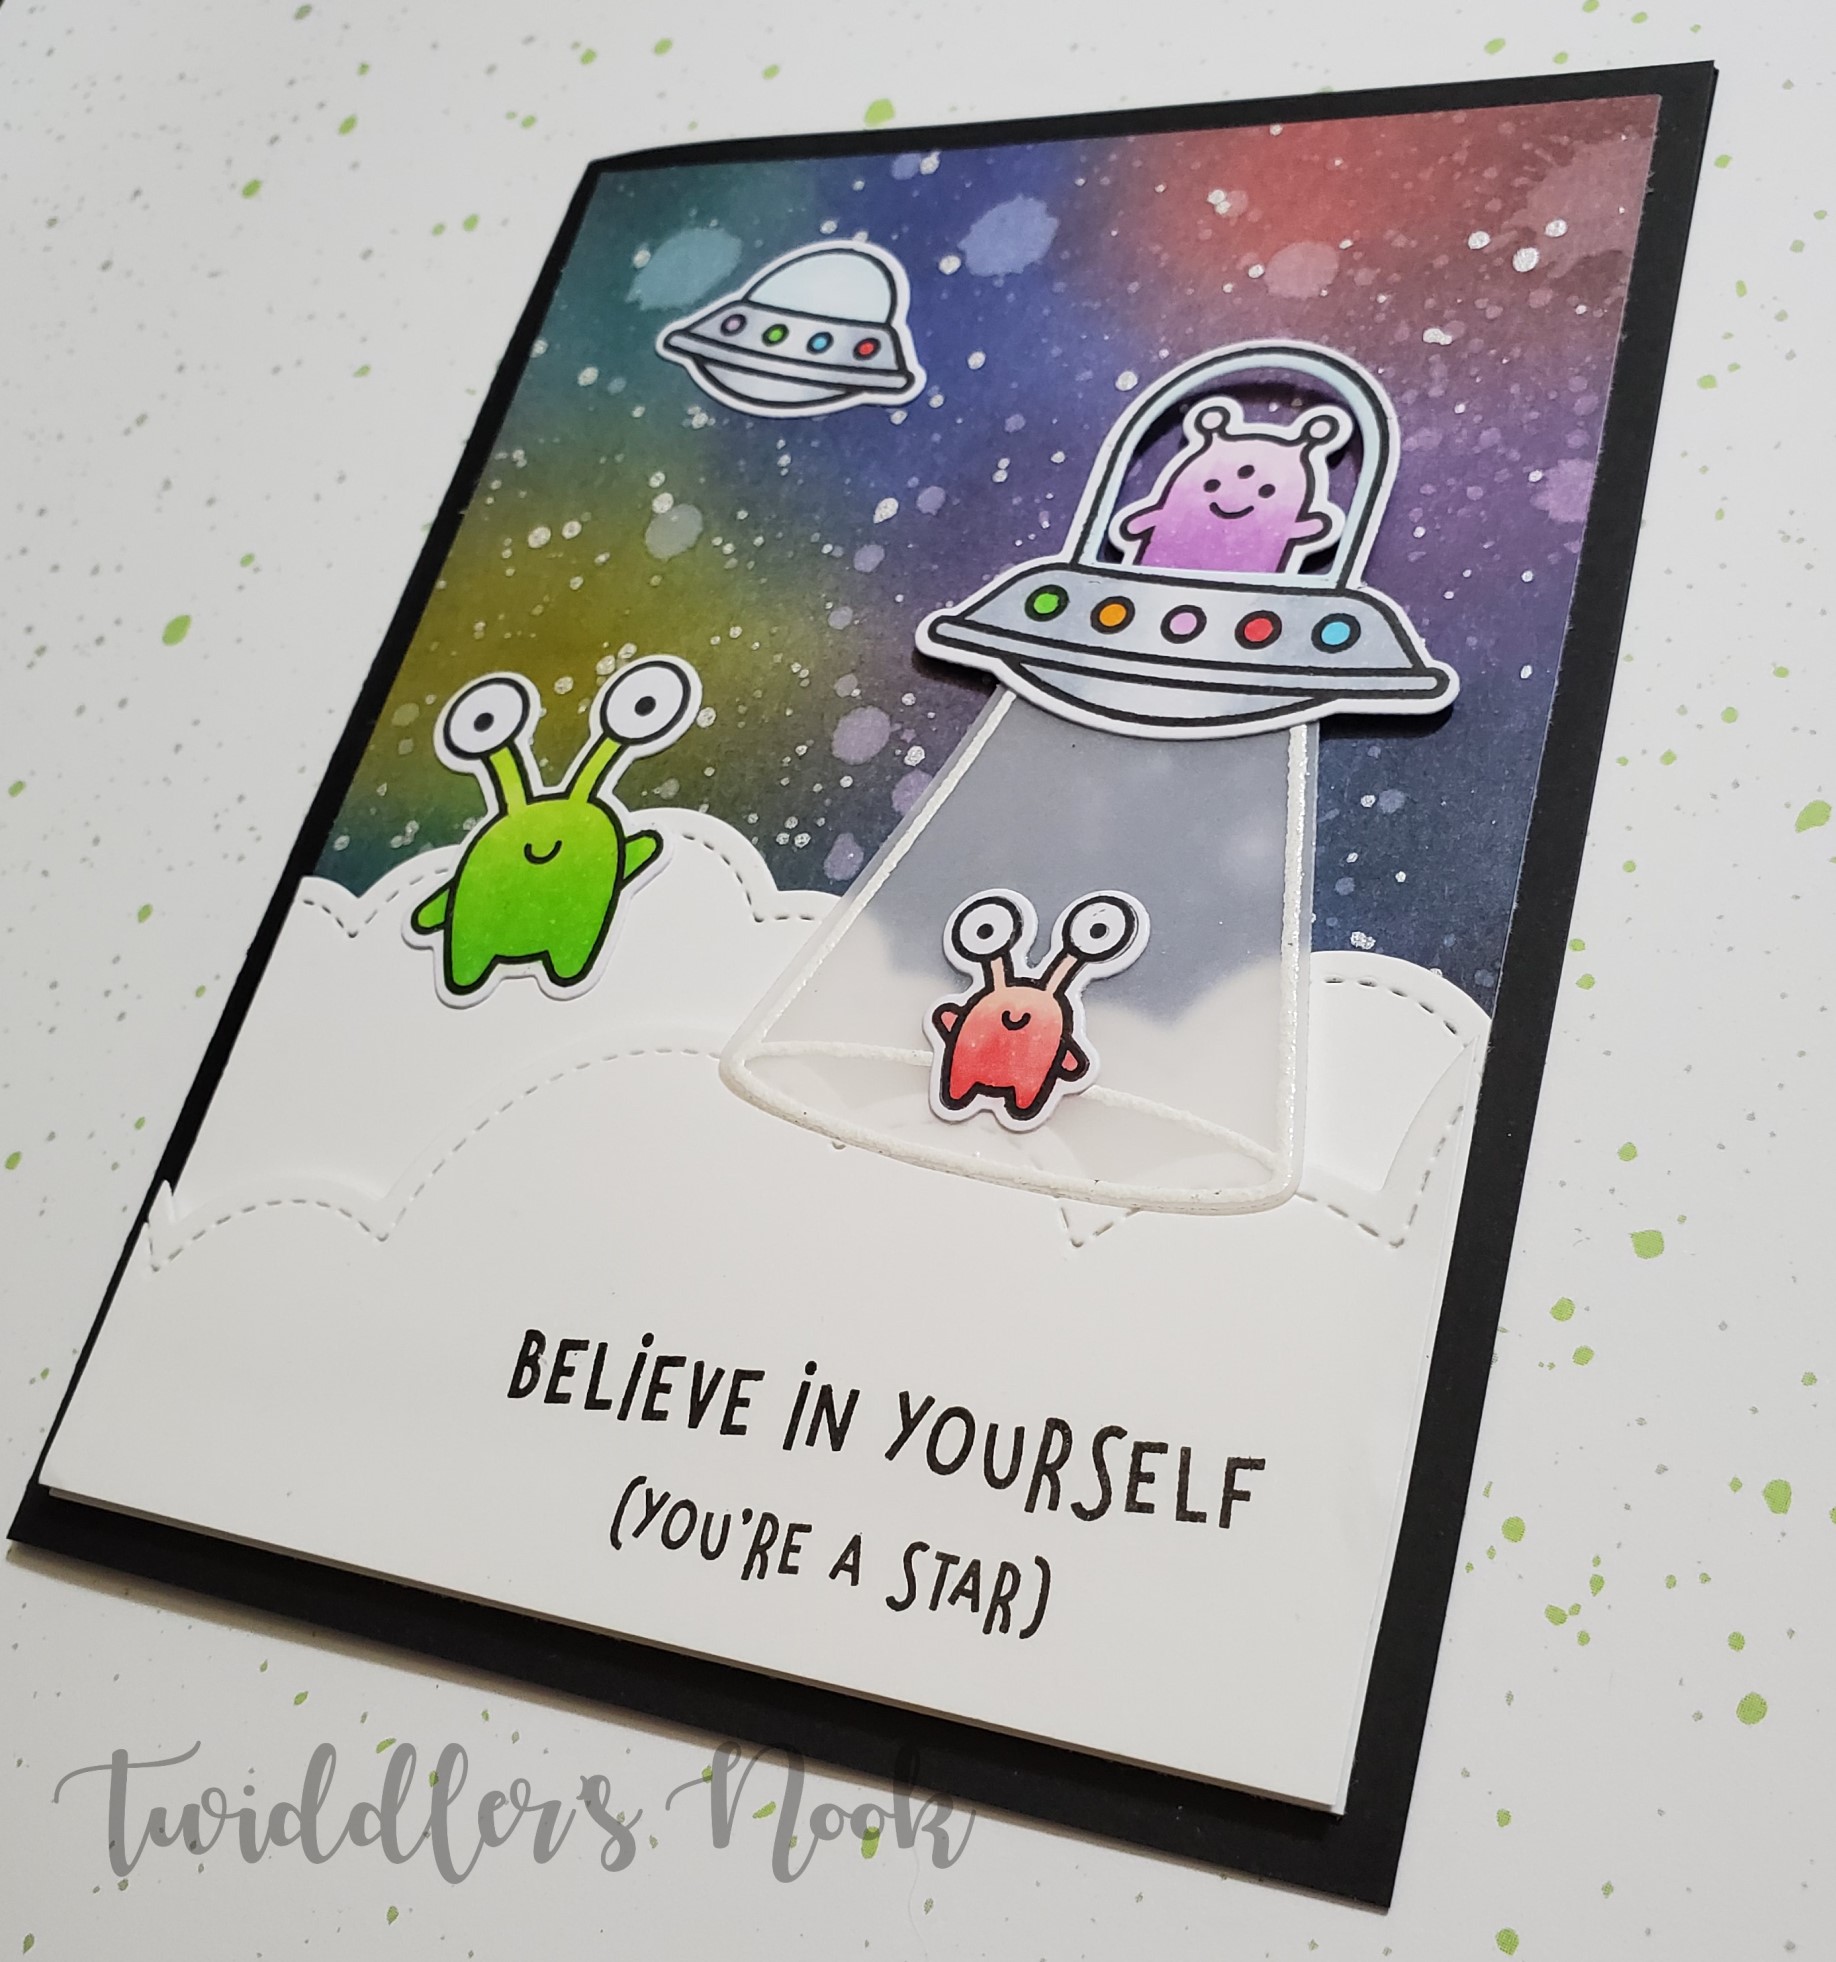
While that was drying I got out my Lawn Fawn Stiched Puffy Cloud Borders and cut two different layers of those out of white cardstock. I also reached for my Lawn Fawn Beam Me Up stamp set to figure out what characters I was going to use. I stamped the aliens and space ships out on Copic XPress cardstock and colored them with copic markers. I stamped and heat embossed the “beam” from the spaceship on velum with white embossing powder and then die cut everything.
I adhered the galaxy background to a black card base and then the bottom layer of clouds directly onto the background. I stamped my sentiment on the second layer of clouds and popped it up with foam tape. The big spaceship, alien and beam are also popped up so they meet the level of the clouds the red alien is standing on. The large alien and small spaceship are glued directly to the card front.
And just like that, this super cute encouragement card is all finished and ready to be mailed. I love these aliens. They are sure to make the recipient smile.
I hope you enjoyed today’s card and will give the galaxy background a try. They always come out different and are so fun to make over and over again.
I appreciate you sharing your time with me. Have a fabulous day!
Yesterday I shared the process of making these awesome faux watercolor/ink smooshing backgrounds and today I wanted to share two of the final products that came out of them.
The mini story behind this project was my lack of creative motivation and my daughter’s desire to help me out of the slump. She chose the stamp sets and the color palettes and told me to go! It was great fun and lots of giggles in the craft room.
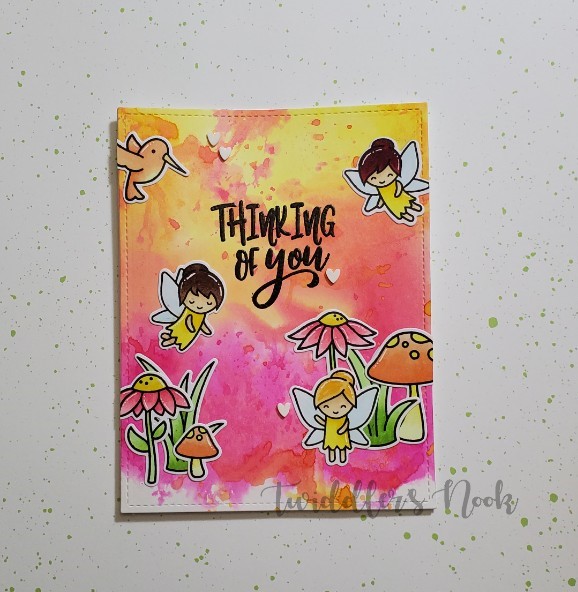
I actually started by taking a half sheet of copic xpress paper and filling it with all of the images from the Lawn Fawn Fairy Friends and Gleeful Gardens stamp sets. Then I colored them with copic markers that matched the color palettes I used for the backgrounds. I die cut everything out and sorted it by color family. Then I used my largest Lawn Fawn stitched rectangle frame to cut the backgrounds down to A2 size and started laying out my cards.
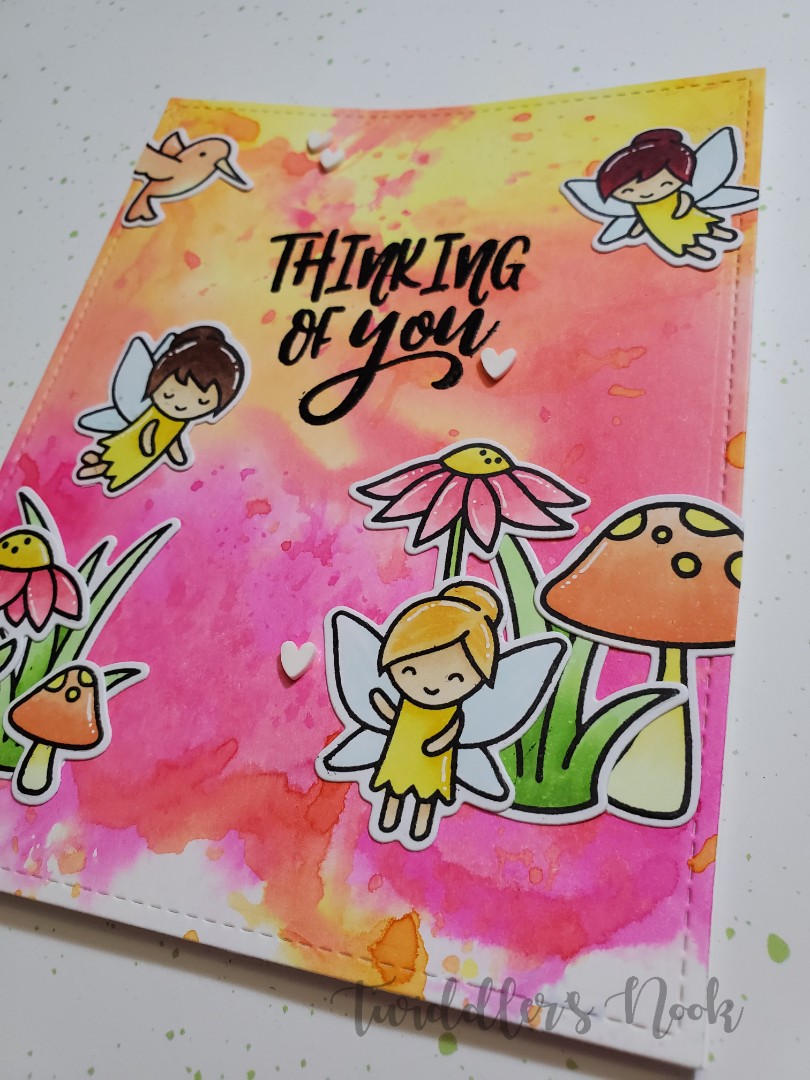
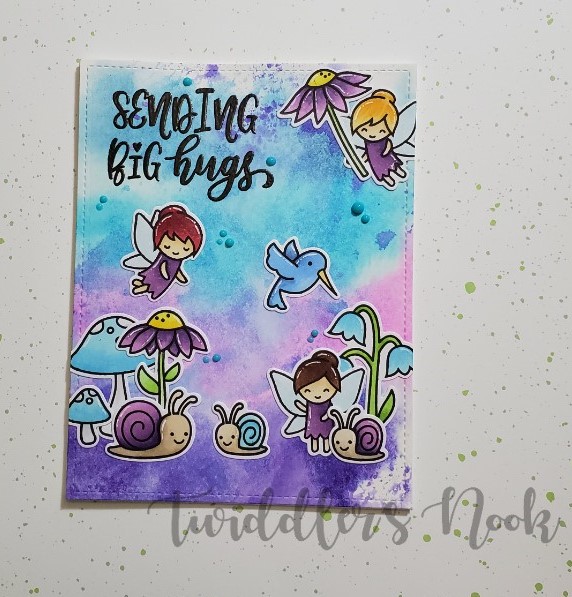
Here is the first one with the pink/orange/yellow color palette. I just love the whimsy of these fairies paired with the background. To finish it off I added a stamped, heat embossed sentiment from Avery Elle and some clay hearts from Honey Bee Stamps.
Next I moved on to the blue/purple background and set of images. It’s close to the same layout with a few variations. These fairies never get old for me and I love the snails with them.
Adding the snails to this card made the bottom feel heavy. I needed to counter this with a substantial sentiment which came from the same Avery Elle stamp set.
This time instead of the hearts, I used Nuvo crystal drops in caribbean blue randomly throughout the background. I love the texture these give.
I added white gel pen accents to everything in both cards and also Wink of Stella clear glitter pen to all the fairy wings.
I love how these cards turned out and am excited to see what comes of the other two backgrounds I still have waiting to play with.
I appreciate you sharing your time with me. Have a fabulous day!
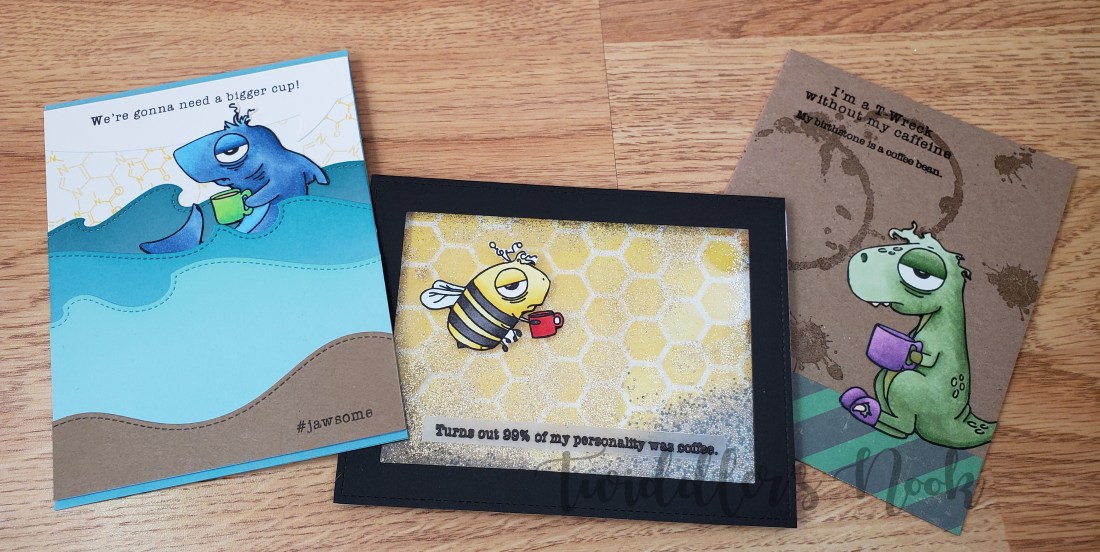
I am over-the-moon excited to share with you these three cards featuring The Rabbit Hole Designs caffeinated critters stamps and sentiments.
This past Monday, April 29, was a new release day for them! They added 5 new stamps to their collection – 3 new critters and 2 sentiment sets. So obviously, I needed to order some of these hilarious, coffee deprived critters. And I did just that. Then, I (im)patiently waited until Thursday when the mail came with my new toys. By then I knew exactly what I wanted to try with each of them first.
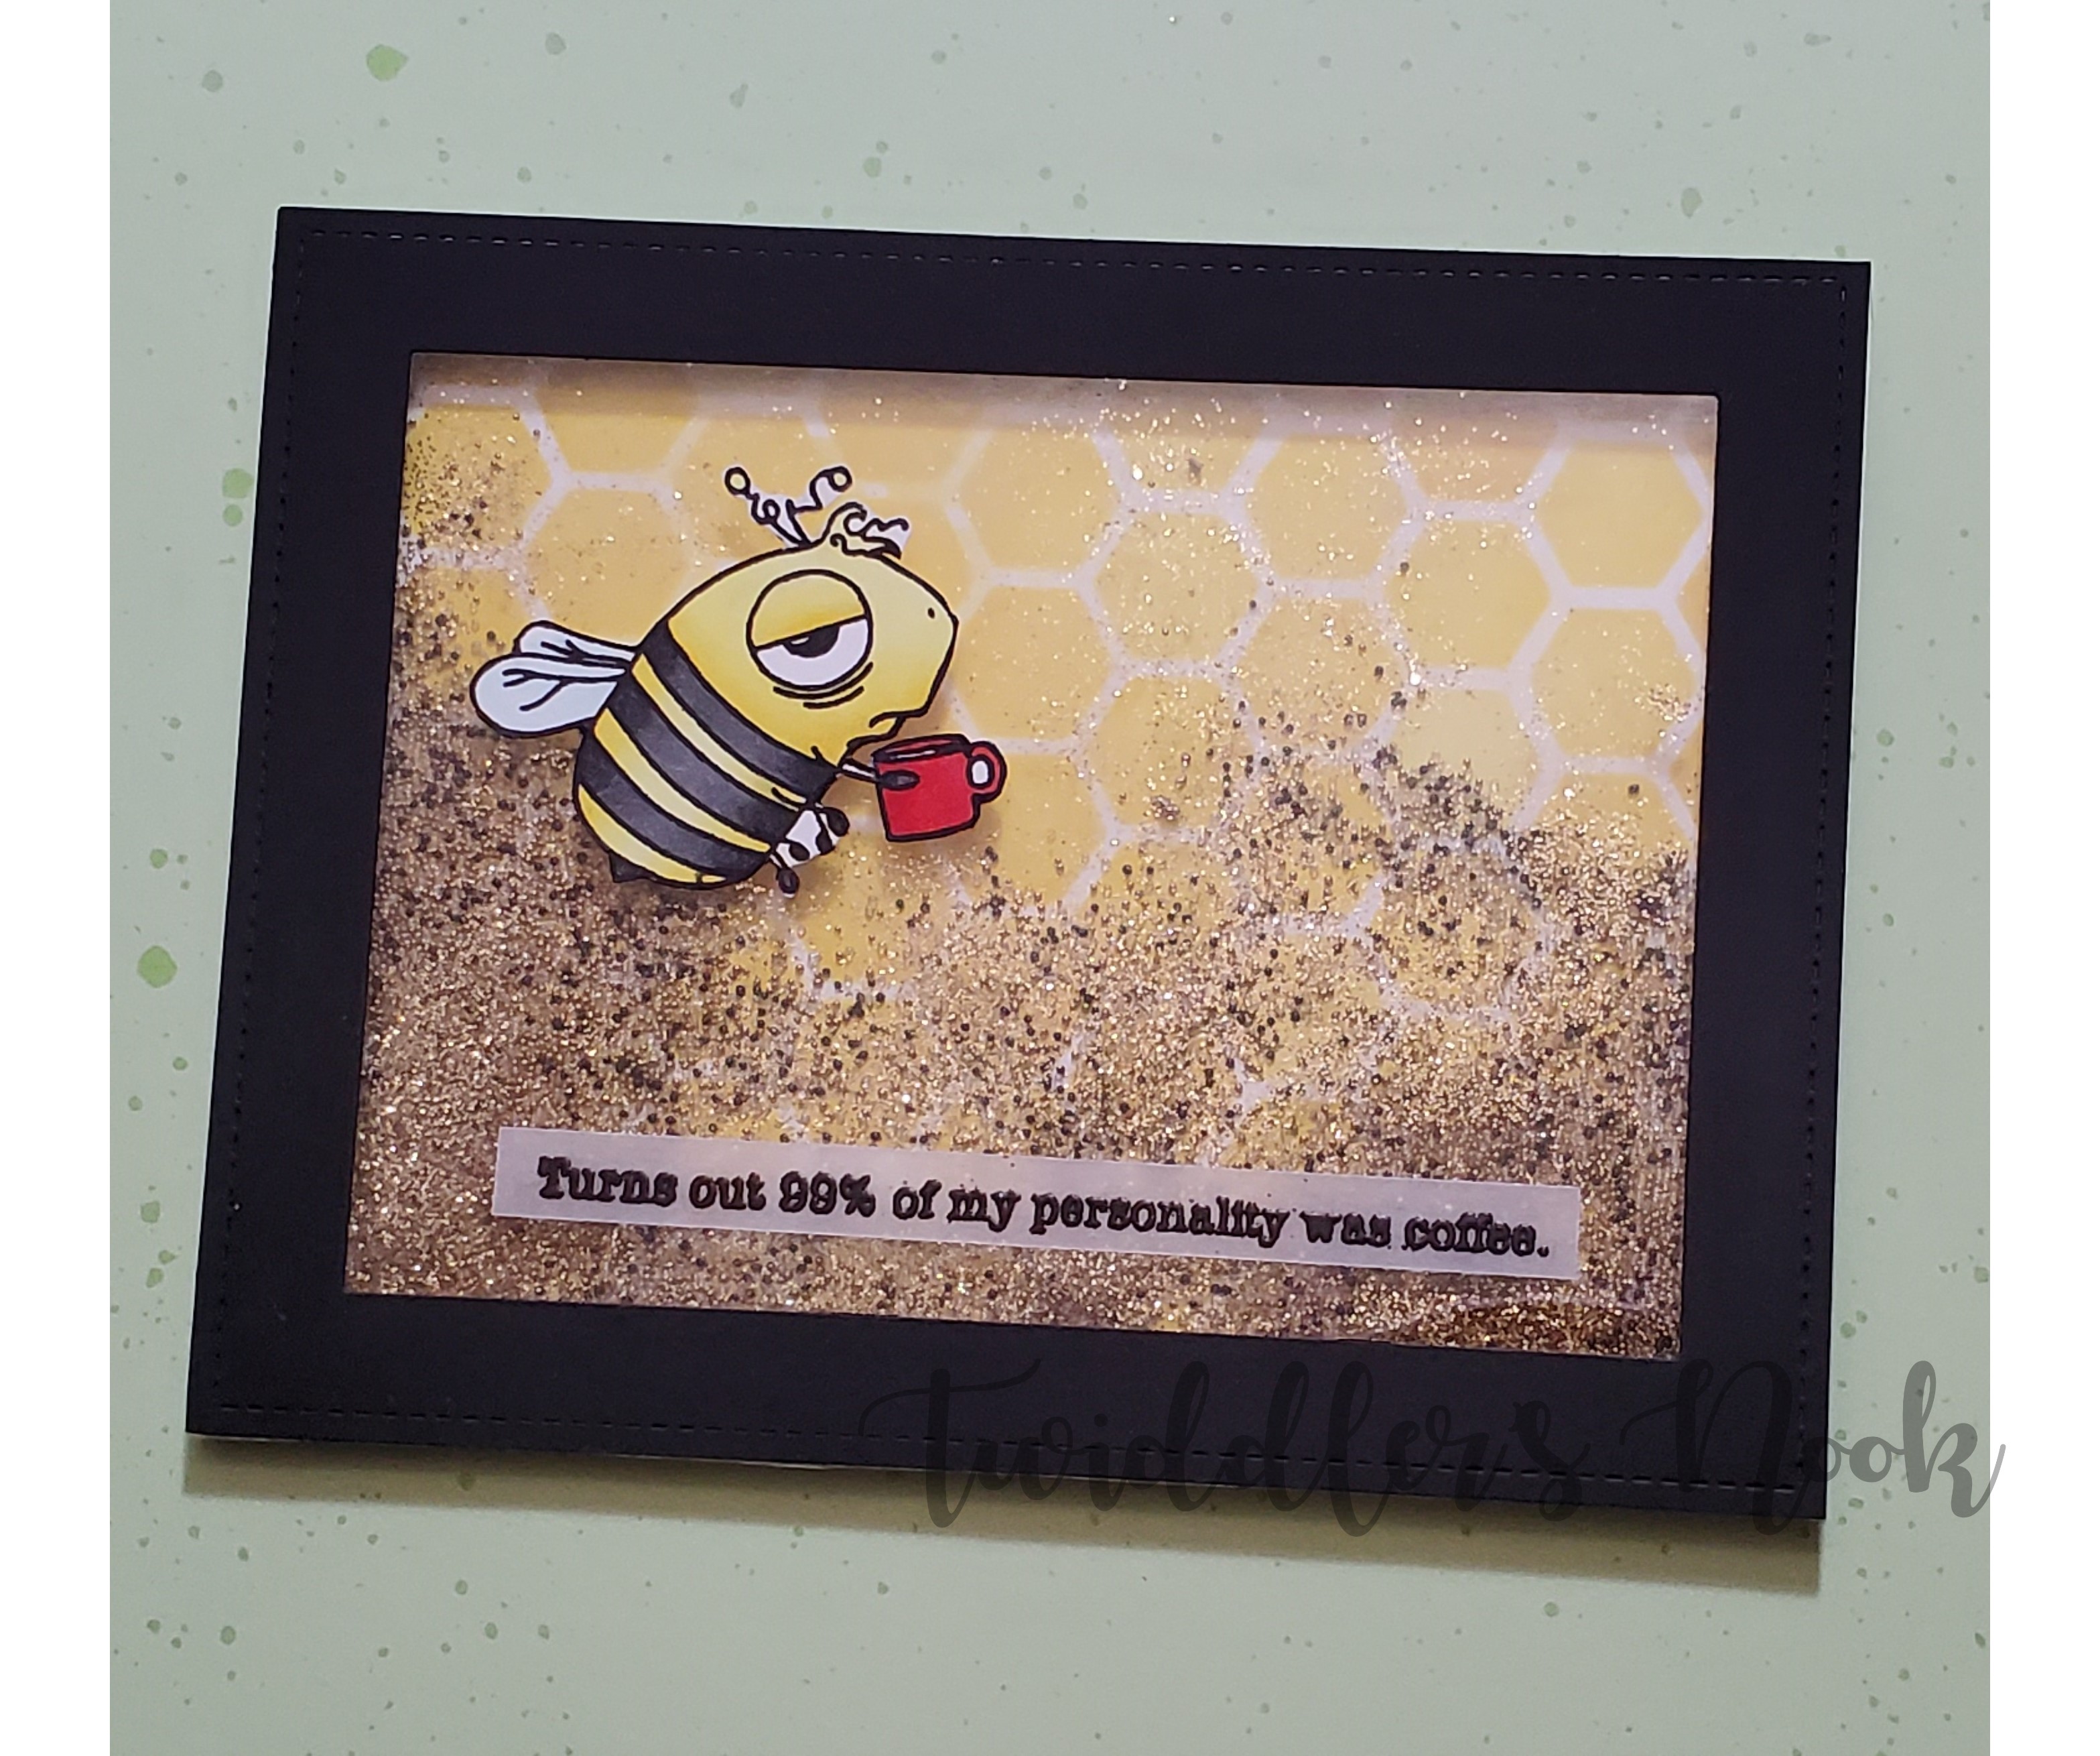
Let’s start off with this too-funny bee desperately in need of some honey-infused coffee. I knew two things: I wanted to stencil the background and I wanted to make it a shaker card.
So, I started by using mustard seed distress ink and some Honey Bee Stamps layered hexagon stencils to make this cool hive background. Then I copic colored my bee using the following colors: T5, T7, Y11, Y13, Y15, R24, R27, R29 and BG000. I fussy cut him out, then stamped and heat embossed this hilarious sentiment on a vellum strip.
Next, I began to build my shaker. Since I don’t have frame dies, I took two nested rectangles and just cut the smaller one out of the bigger one leaving me with a perfect frame! I attached the frame to a sheet of acetate and then used my anti-static powder bag on the inside and the distressed background. I added foam tape around the edge and filled it with some shaker bits that I had in clear, gold and black. Then I layered the backing onto the frame, sealing the shaker. Next, I added my bee and sentiment to the front and attached the entire thing to a card base. Voila! Honey-infused, caffeinated fun to mail to a friend!
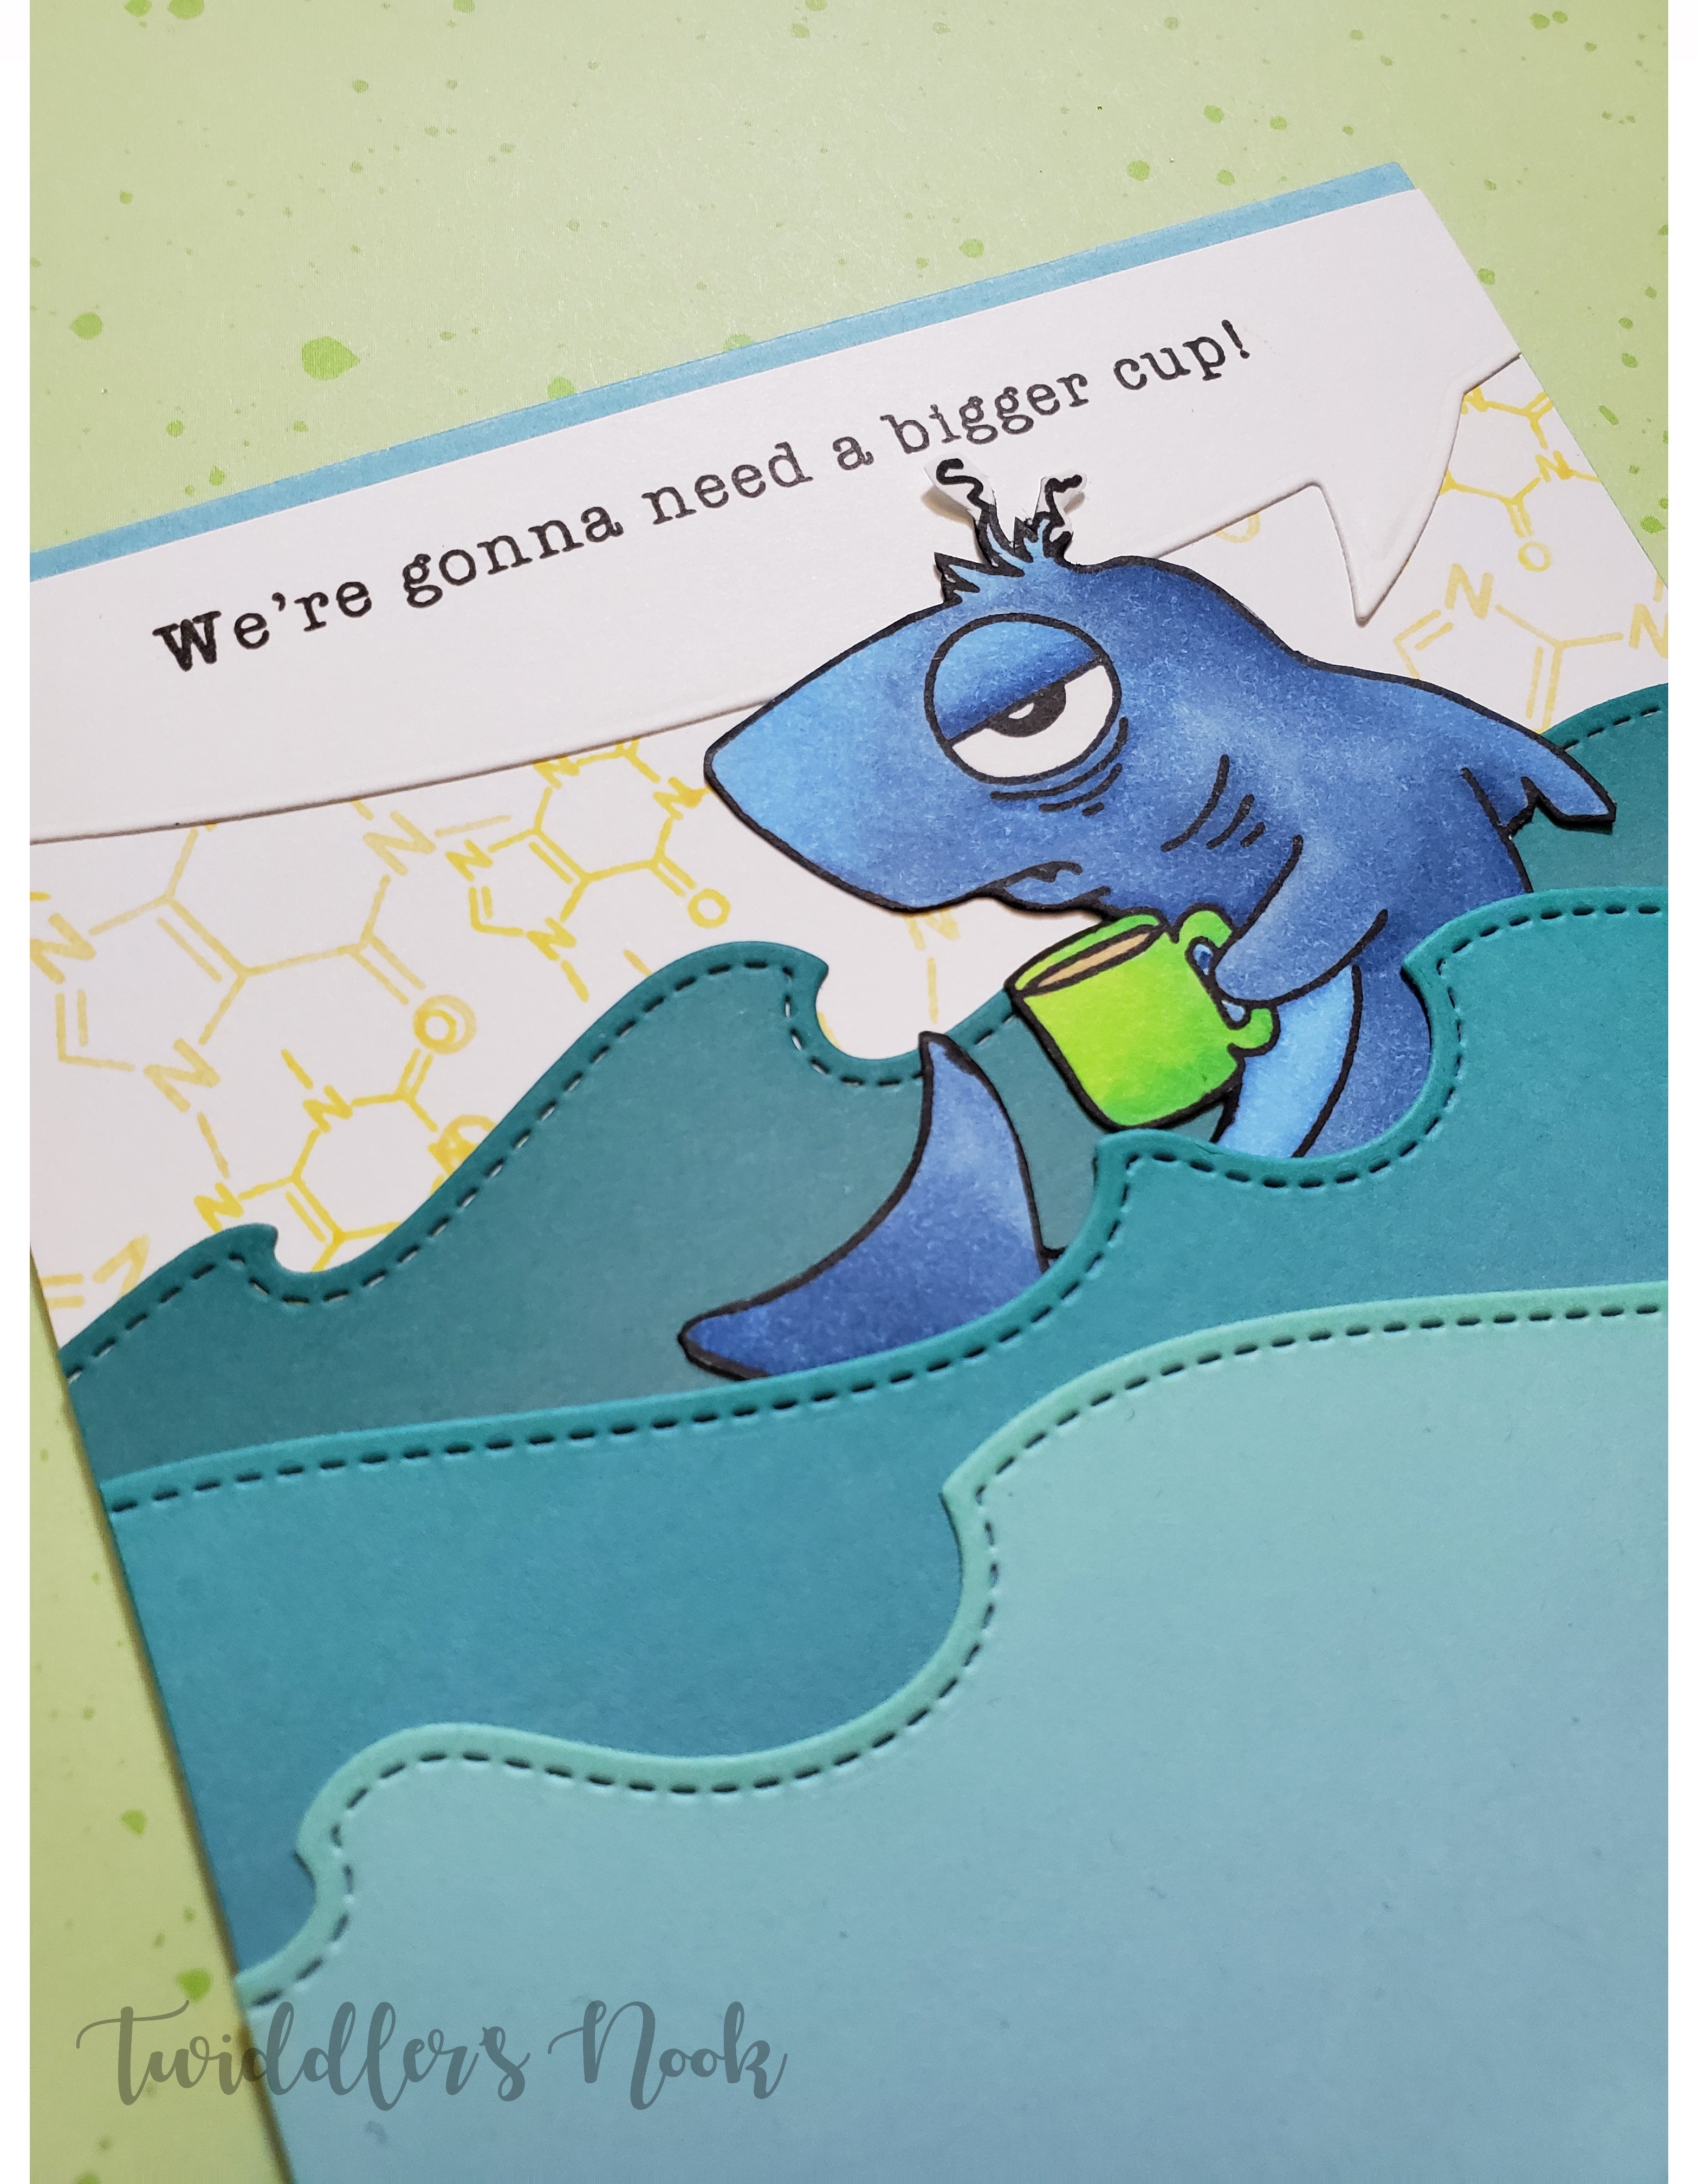
On to this amazing shark! For this card I knew that I wanted to try using the molecular compound stamp as a background and what better way than to make it the sunshine in the sky.
I stamped and colored my sleep deprived shark with copic markers using the following colors: C1 is a base for the entire shark, B32, B34, B37, YG05, YG07 and YG09. I fussy cut him out as well and then began die cutting some waves using the Lawn Fawn stitched wave borders. I also used the speech bubble die from Lawn fawn and stamped the sentiment on that. Then I layered it all together, hiding my shark in the waves like he’s just bobbing there waiting for a refill.
Once, I adhered my panel to my card base I thought it was missing something. With an Aha! moment, I grabbed some kraft cardstock and used a Lawn Fawn stitched hillside border, stamped the hashtag on it from the shark stamp set and glued it to the bottom for an ocean floor. I think it rounded out the card perfectly. Because, let’s be real…this shark is #jawsome!
Finally, I moved on to the T-Rex. Honestly, he’s my favorite! I have a serious thing for dinosaurs.
I started this card by stamping my cup rings and splatters on the kraft cardstock background. Then I colored my T-Rex with the following copic colors: YG93, YG95, YG61, YG63, YG67, E00, V12, V15 and V17 and fussy cut him out. I added a floor with some patterned paper and adhered it to the card base with the dino on top of it. Then I stamped my sentiments at the top left and this simple, funny card was done.
These cards were an absolute blast to make. The critters are so fun and expressive! I can’t wait to make more funny cards with these guys and all of the great sayings.
Check out The Rabbit Hole Designs. To celebrate their new release they have deals going on until May 10. Go ahead, treat yourself!
I appreciate you sharing your time with me. Have a fabulous day!
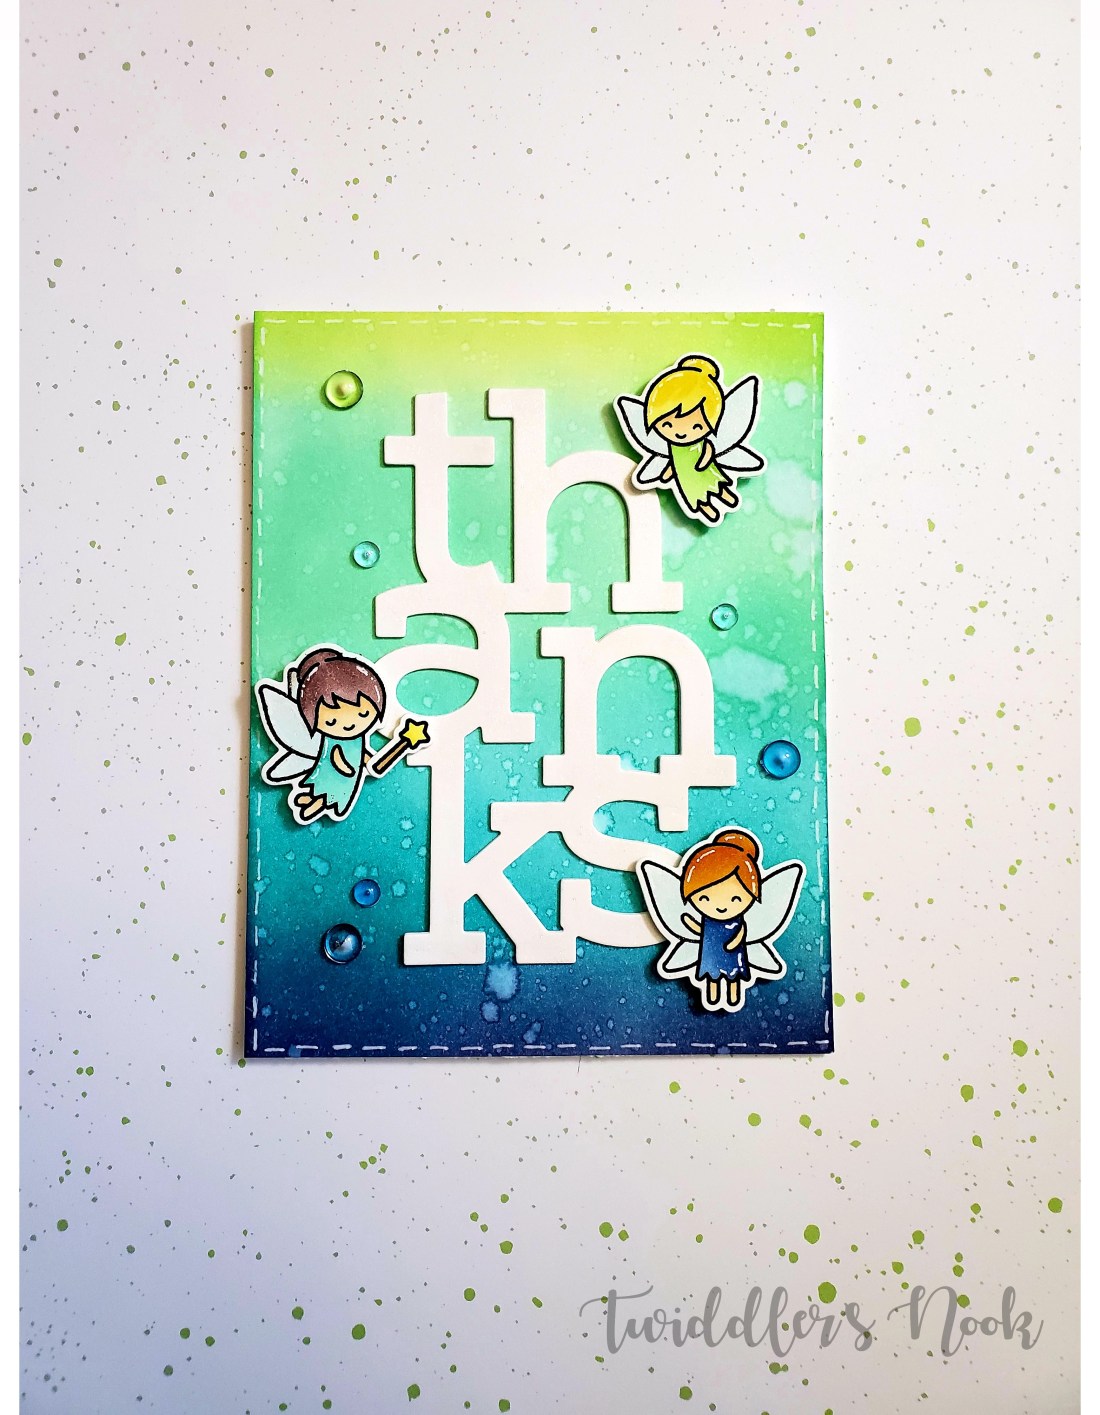
I’m so excited to share this adorable, bright fairy thank you card with you today. I recently placed a fun order with Scrapbookpal.com, including some things I wouldn’t typically choose. I love this site and they have recently added some new, big names to the companies they carry including Concord and 9th, The Stamp Market and Gina K Designs to name a few.
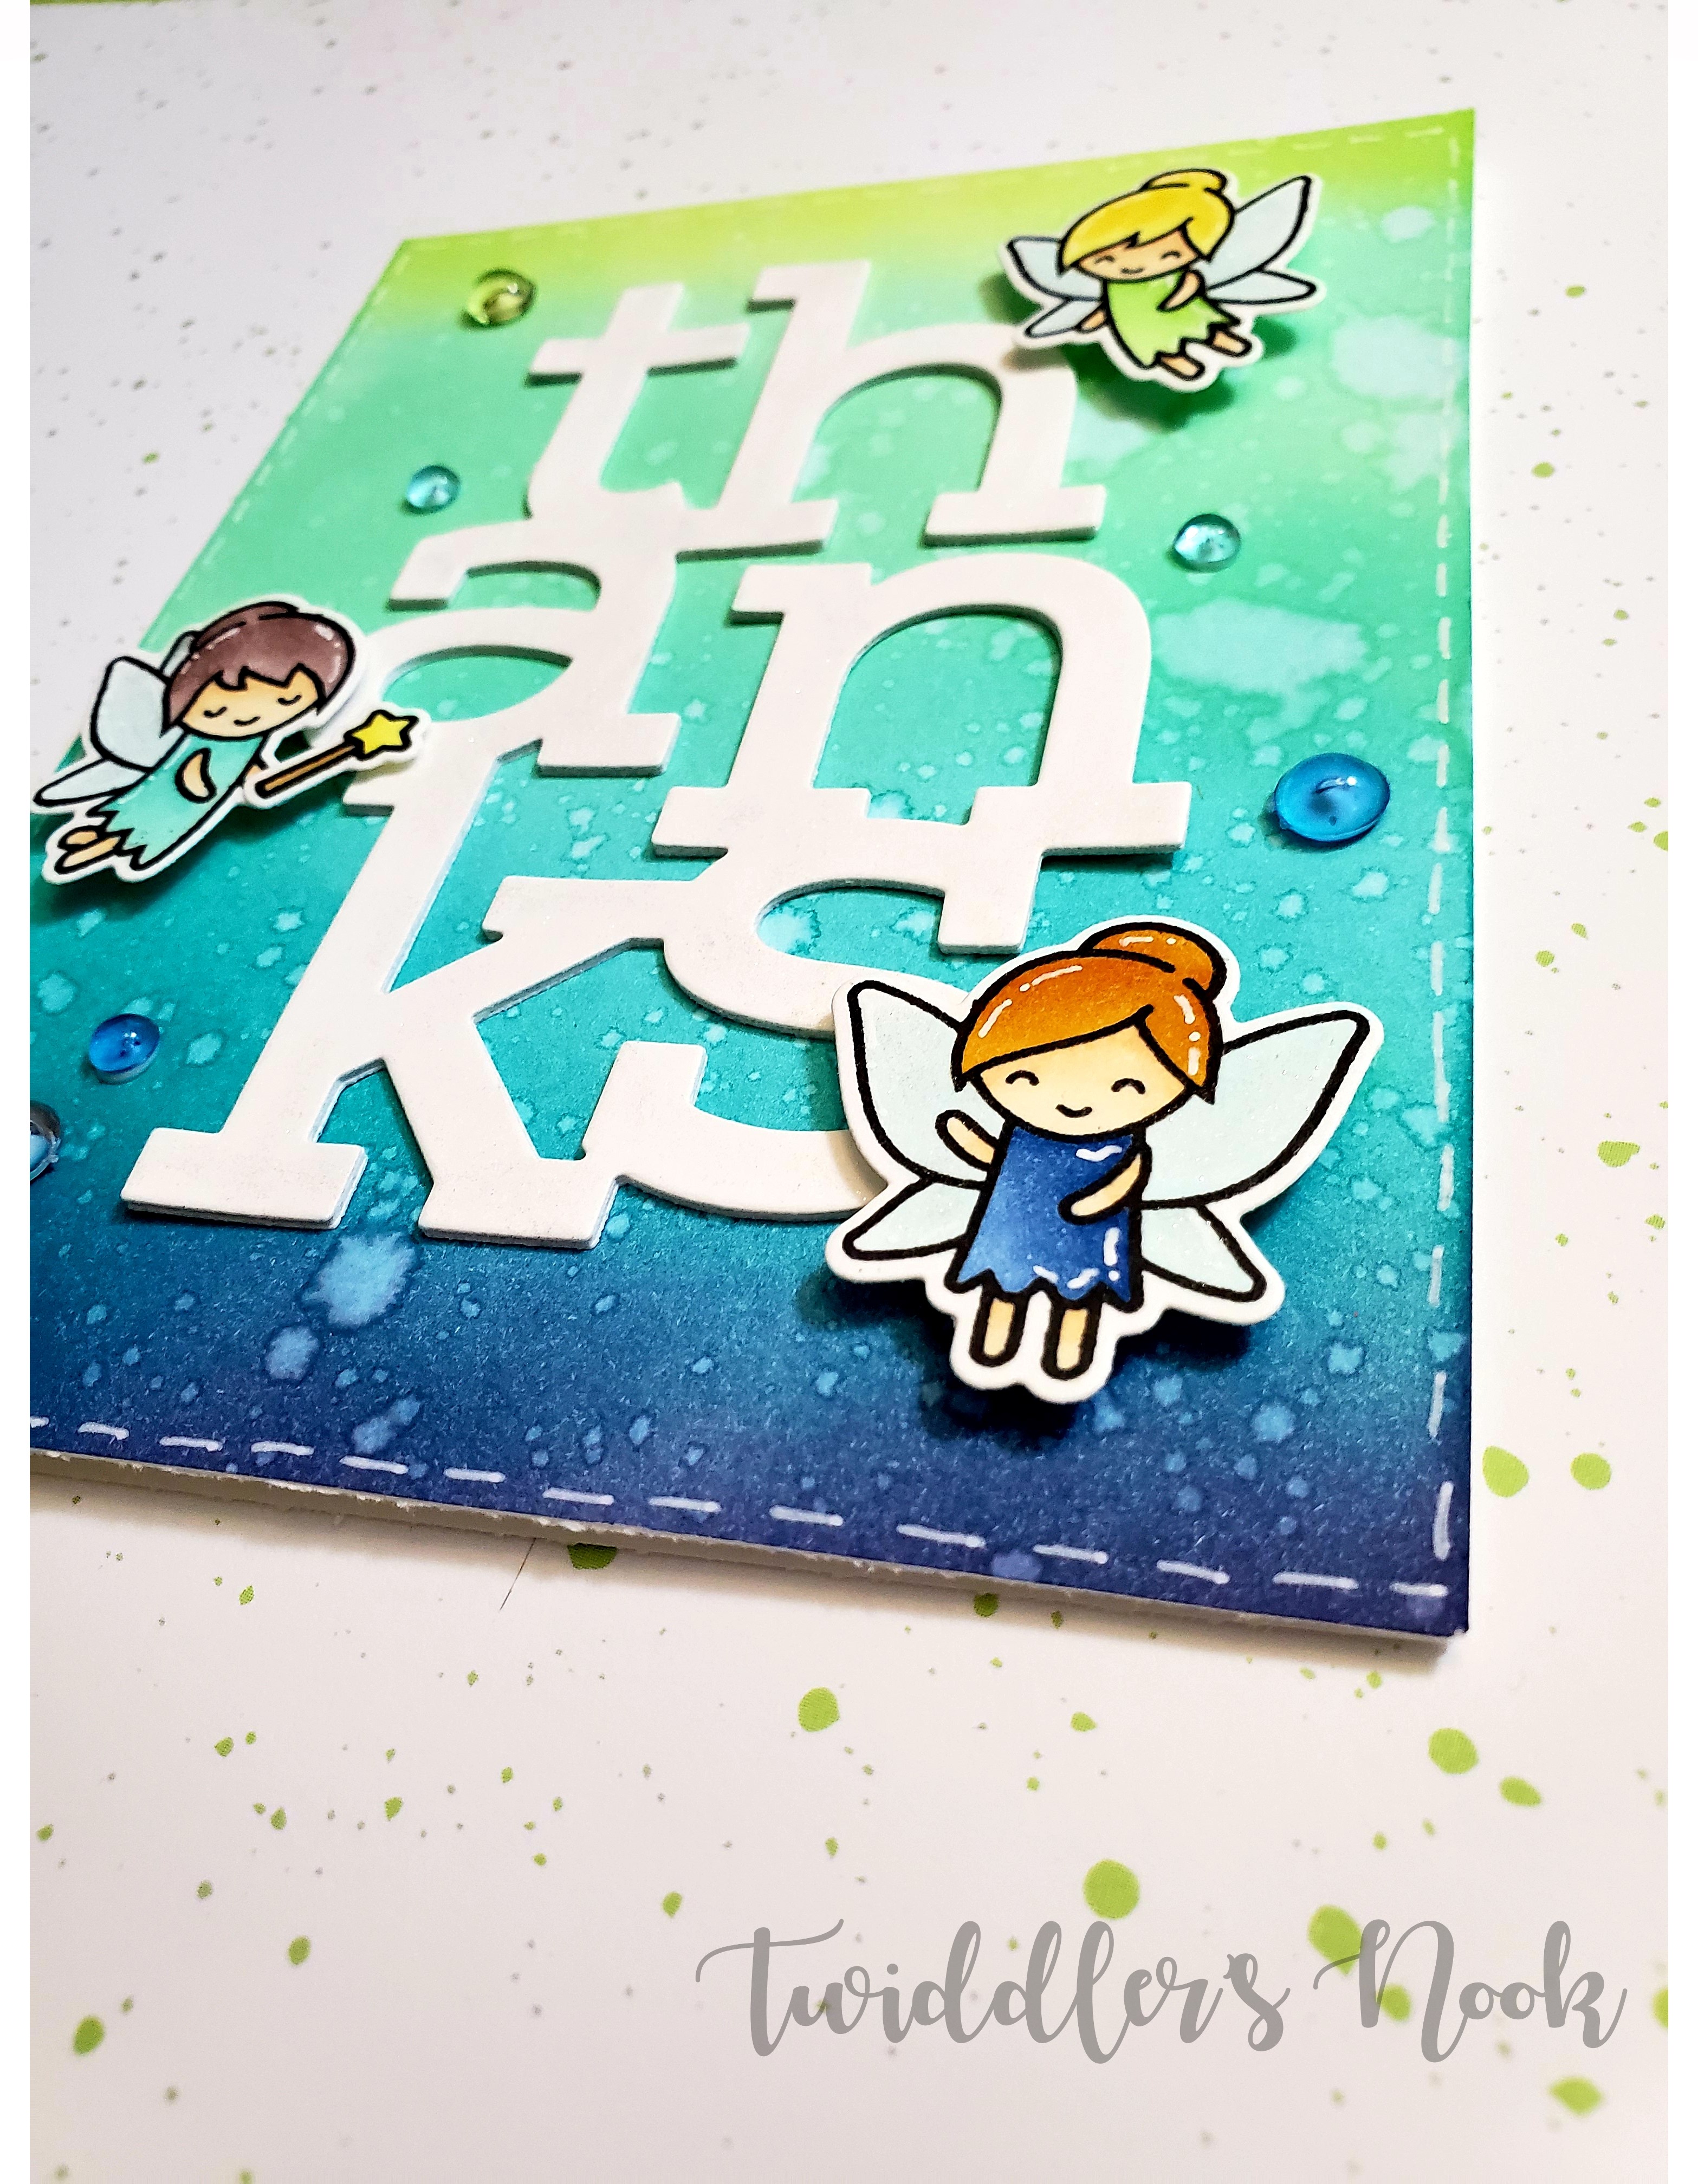
In this order I was sure to add this amazing Concord and 9th Big Thanks die as soon as I saw it. I immediately had so many ideas for it and couldn’t wait for it to arrive so I could start playing. Today’s card showcases this die with Lawn Fawn Fairy Friends stamps and coordinating dies.
I started by blending distress inks on smooth white cardstock and then spritzing them with water for that great oxidized look. The colors used here are, from the top down, twisted citron, cracked pistachio, mermaid lagoon and blueprint sketch.
Then I laid out my card before stamping the images, just to make sure I knew everything was going to fit okay on the card front.
I also want to mention that this is my first time using Lawn Fawn’s Jet Black ink pad which is copic friendly. I was excited since I haven’t been happy with the other stamp pad I’ve been using for copics. I’m elated to report that it worked amazing and I’m instantly in love!
When I colored the fairies, I planned their outfit colors to match the area of the distress ink they were in the most.
After I colored and die cut the fairies, I also die cut the big thanks die four times from white cardstock and stacked them together for some fun dimension. I attached the die cut word first with liquid glue and then added foam to the back of the fairies.
I used my Wink of Stella clear glitter brush to add shimmer to the fairies’ wings and the entire thanks die cut. Then I added these great bubbles from Honey Bee Stamps around the card and finished off the front with some white gel pen accents.
The very last thing I did was stamp the sentiment “Thank you fairy much!” on the inside with Bermuda Bay Stampin’ Up ink.
I appreciate you sharing your time with me. Have a fabulous day!
I love creating and I love sharing what I create with those around me. I go through phases of spamming my Facebook and Instagram accounts with my creative process and end result projects. In doing so lately I thought, maybe I should focus my audience to people who actually want to see these things instead of my unassuming and innocent friends and family.
Since you’ve made it this far, I assume you’re interested in seeing fun paper creations and maybe even find some inspiration. I hope you enjoy it. Please feel free to leave me comments and let me know what you like and what you don’t. Constructive criticism is fabulous and appreciated as I find my way along this journey.
I’d like to start by sharing some cards I’ve made in the past that stuck out to me as a favorite or specific success.
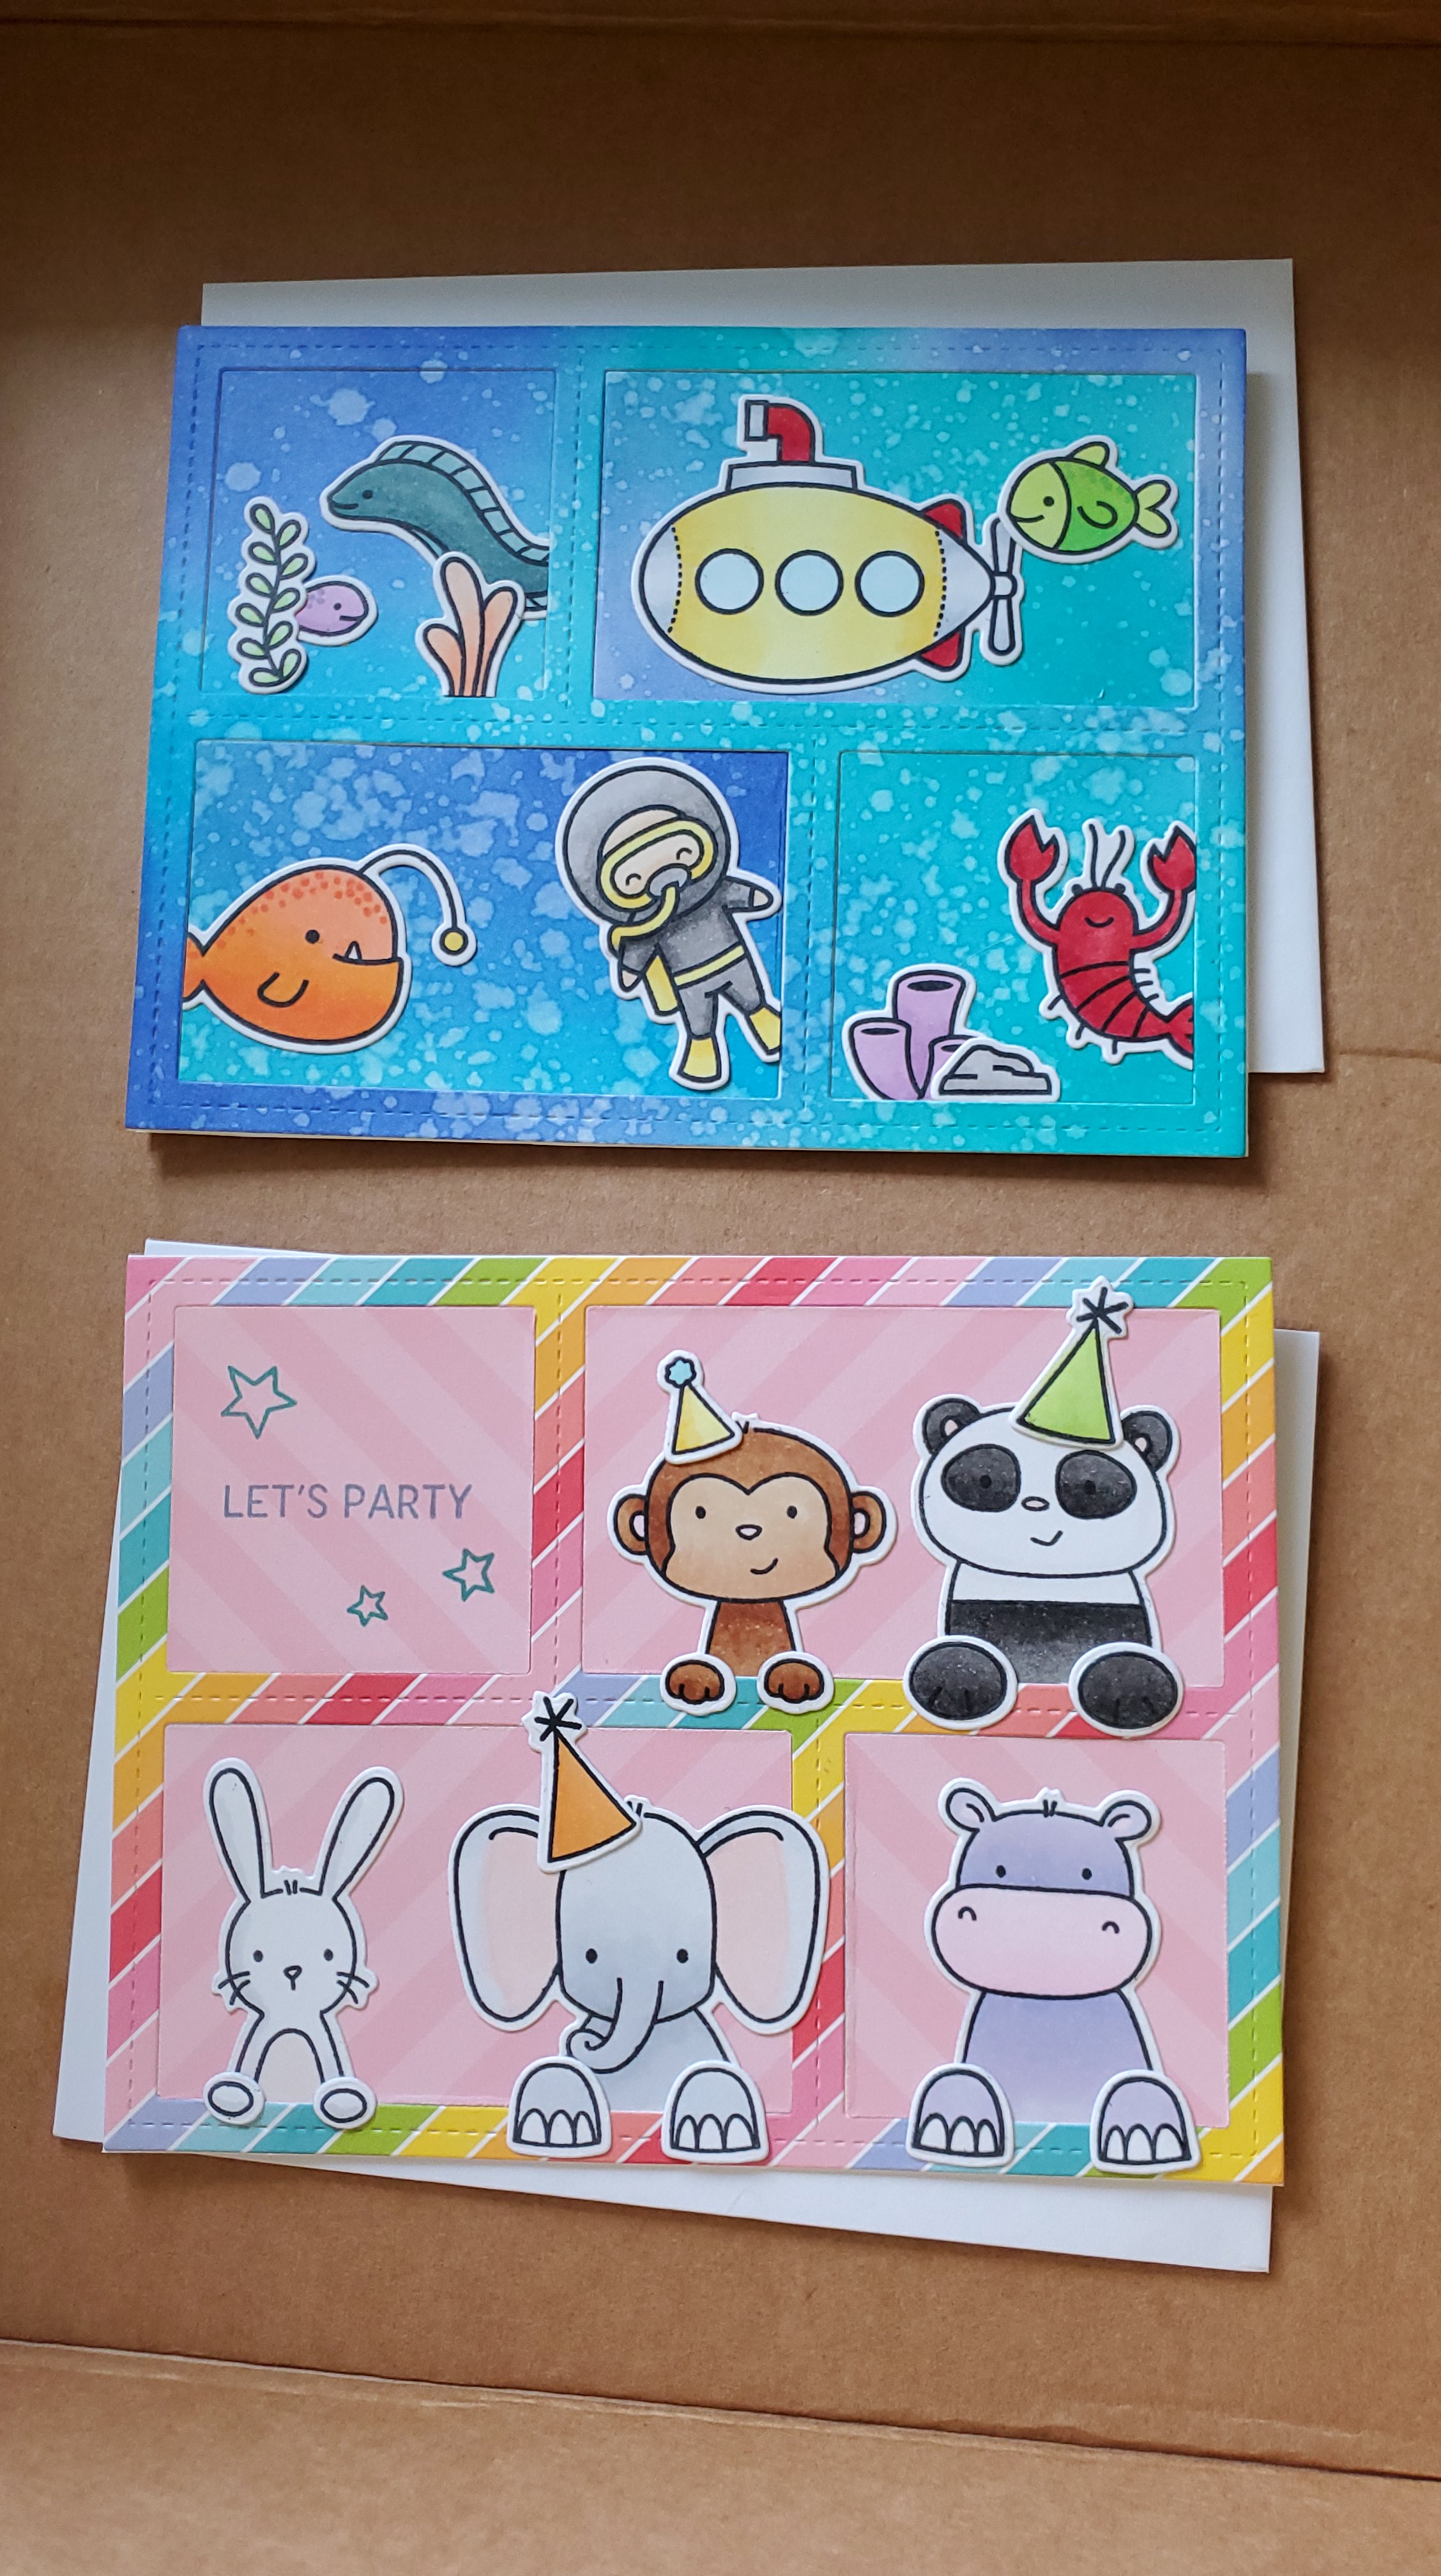
Here I’ve used the Lawn Fawn peek-a-boo backdrop die on both cards which gives you four fun windows to play with. For the top card I used distress inks to blend a water background and spritzed it with water give the cool distressed look. Then I added critters, a diver and the submarine from the Lawn Fawn You Are Sublime stamp set. It turned out so cute, I loved it! The bottom card showcases Lawn Fawn’s Really Rainbow paper and an Avery Elle stamp set called Peek-a-Boo Pals. I colored all of the stamped images in these two card with copic markers.
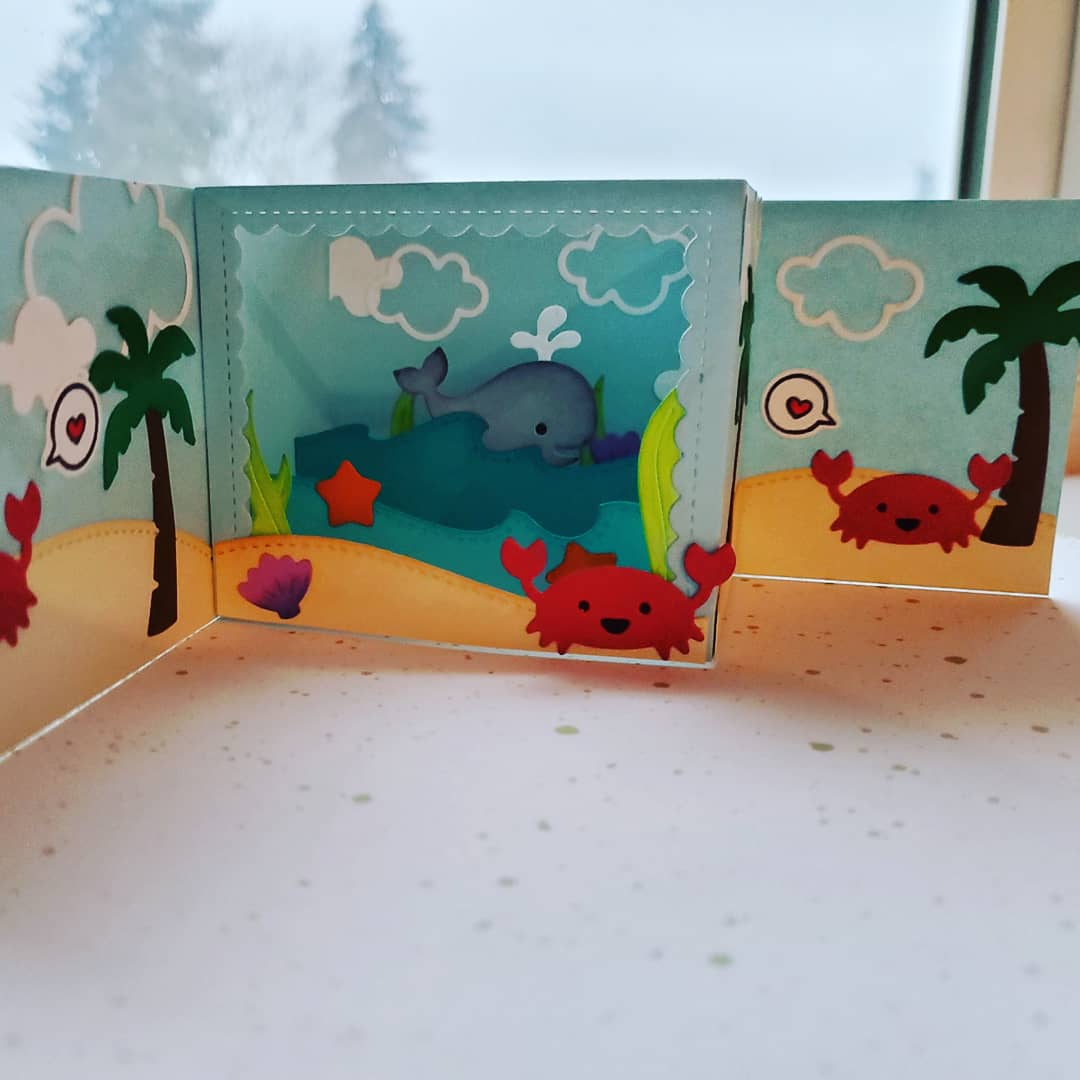
Next I am really excited to share a shadow box card features a spattering of Lawn Fawn dies. The only stamping on this card is the sentiment. I was so excited how it turned out. I love it so much!
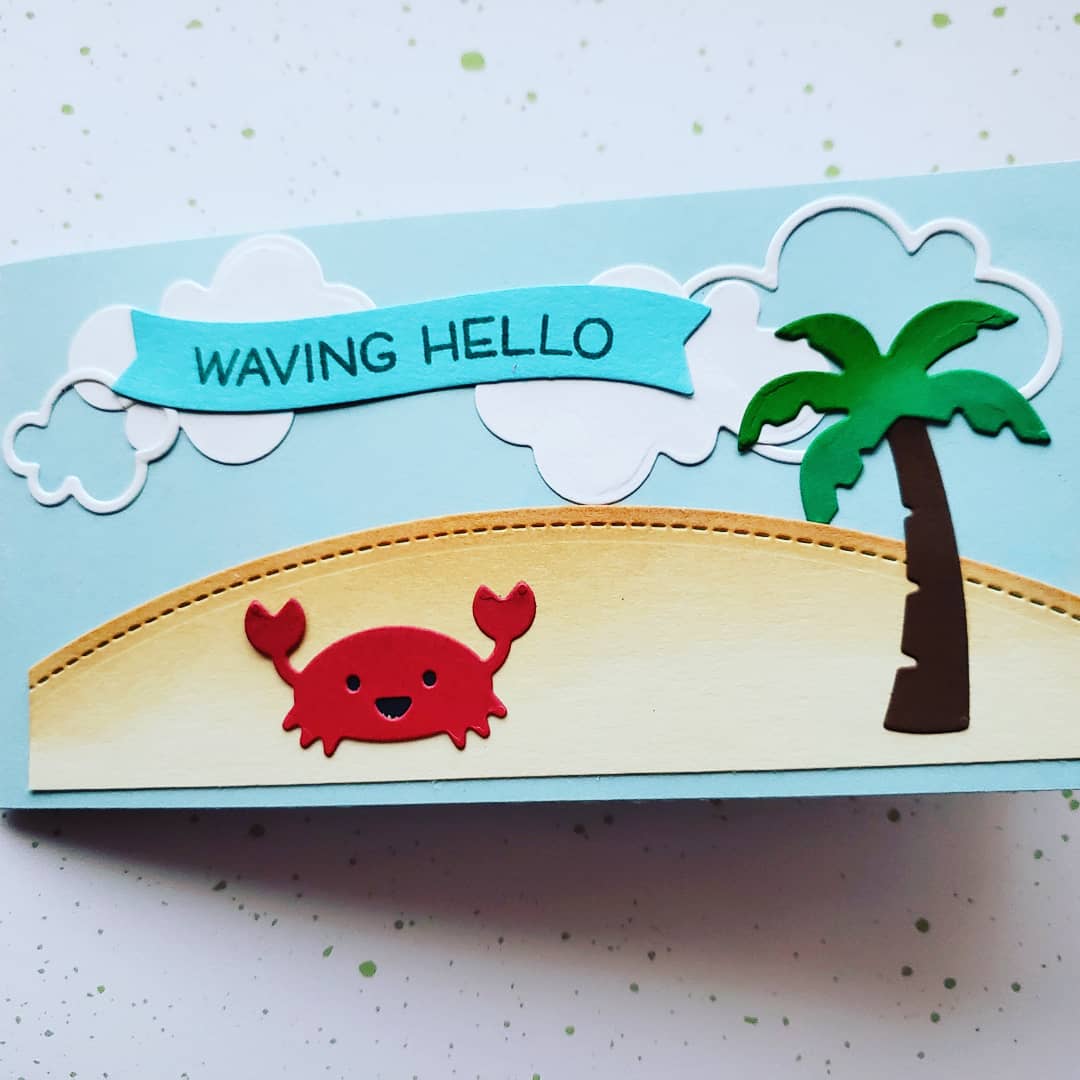
Here is the front giving the recipient a little clue about the fun in-store when they open it. I love this little crab and palm tree. But once they open it…
there is this amazing shadow box filled with a whole ocean/beach scene! Love from the crabs all around and a little whale peeking in to say hello too! This card was so much fun to make.
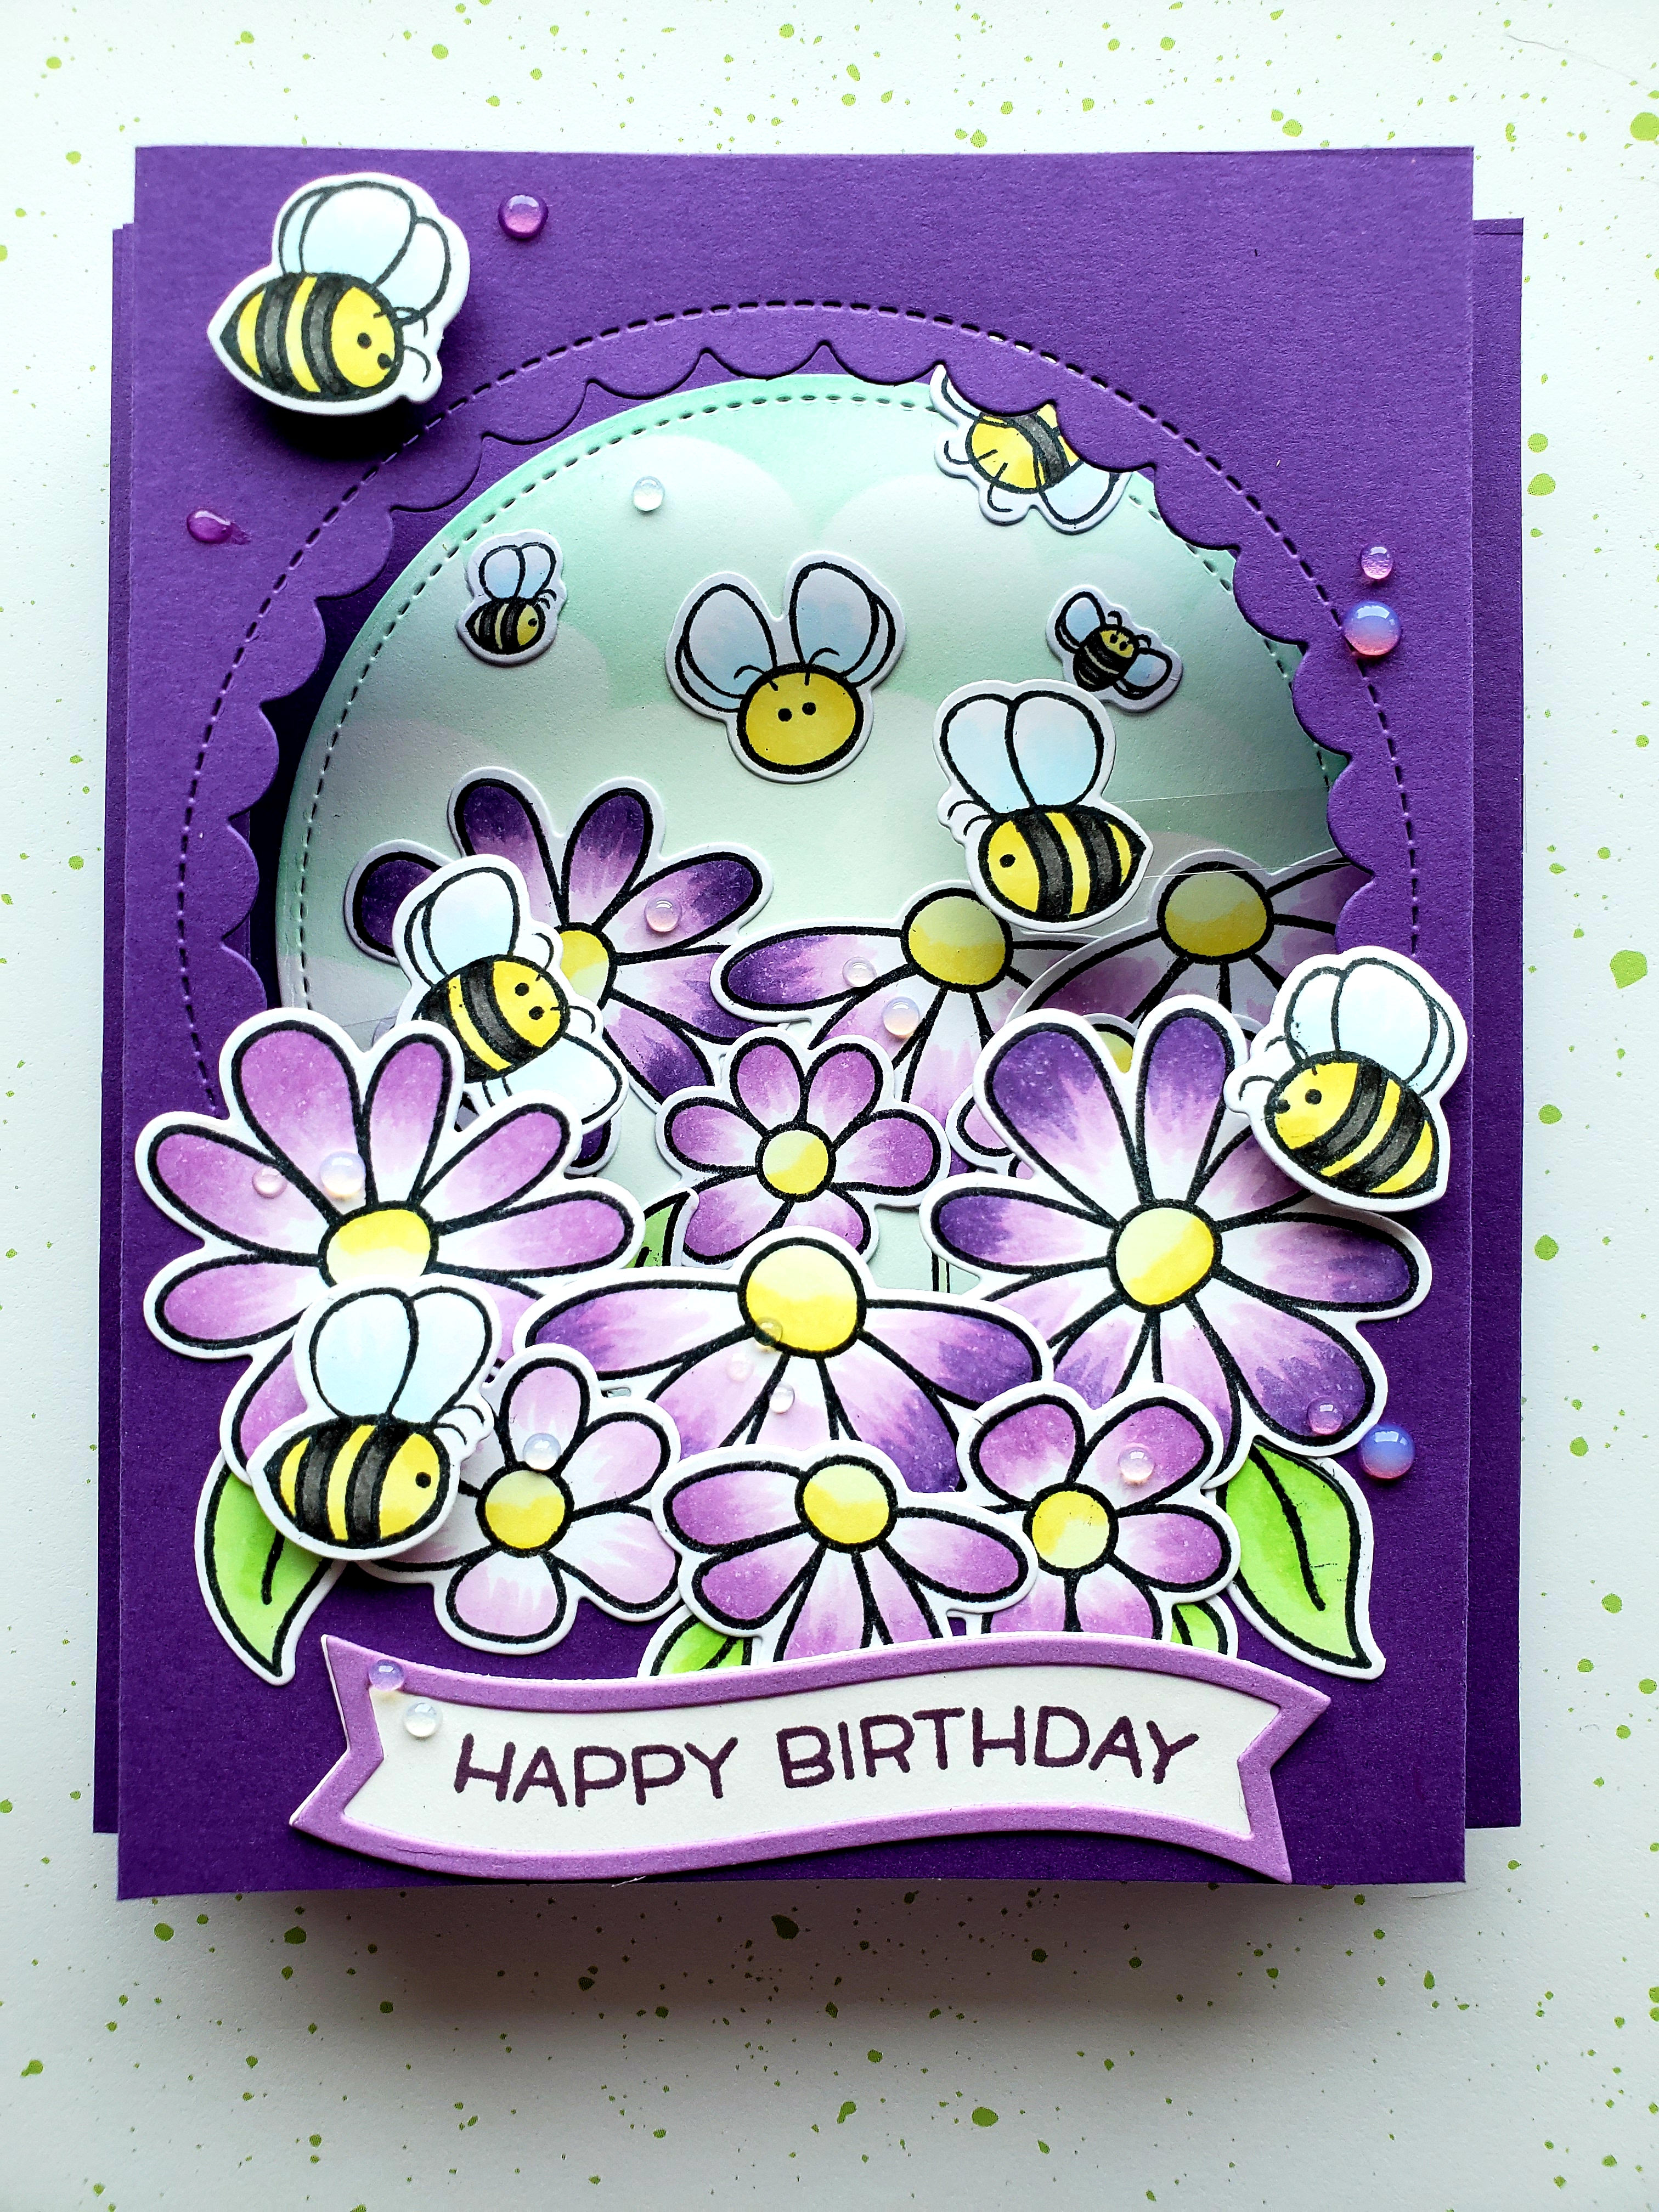
This last card is my latest pièce de résistance. It was a card for my grandma’s birthday. I spent over a week planning it out in my head and most of a day stamping, coloring and assembling it.
It features Honey Bee Stamps Busy Bees stamp set and dies, along with the Lawn Fawn Fancy Wavy Banners stamps and dies for the sentiment and finally some Nuvo Crystal Drops in Morning Dew. This is a shadow box card that squishes flat to fit in an envelope and then pops open when you pull it out. If you look carefully, two of the bees inside are mounted on clear acetate strips and move from side-to-side when you pull on the tabs of the card. It looks like they are buzzing around the flowers. I love the dimension of this card and how well the colors came together.
This is just a small sample of some cards I have made in the past few months and was excited to share. I can’t wait to share more with you and have some fun themes planned over the next few months. I hope you come back to see what I’m up to.
I appreciate you sharing your time with me. Have a fabulous day.