Doodlebugs – Spooky Wishes, Using Repeat Dies to Create a Fun Background

Hey friends! I’m back to my usual antics with a fun Halloween card for Mix it up Monday on the Doodlebugs blog. Today we’re playing with repeat die cuts to create a fun background on your card.

I’ve had the Mama Elephant Circle Combo dies out quite a bit lately so they were my first to reach for with the variety of stitched circle sizes in that set. I chose 3 fabulous colors that seem to be my Halloween palette for 2024 and cut the 3 smallest circles from each one. I arranged them on my 4×5.25 inch piece of white cardstock and used liquid glue to adhere them in place. I trimmed off the excess of the circles hanging over the edge and splattered the panel with orange metallic watercolor.

Next, I pulled out some of the Pretty Pink Posh Halloween release and cut bats from the Ghost Holder die set. I used mini foam squares to pop them up all over my design. Then I used a sentiment from the new Halloween Corners stamp set using Distress Oxide ink in kitsch flamingo and spiced marmalade. I love that this stamp set has dies for the sentiments along with the images.

I popped my sentiment up along with one final bat. Then I popped the panel up one an A2 size piece of black cardstock and used liquid glue to adhere the whole thing to a white card base. Sometimes I use black card bases with another white insert inside but I’m running low on black cardstock we have to ration things until my order comes. haha!

How do you feel about the abundance of non-traditional color palette for holidays lately? I feel like it’s getting more popular every year and I’m absolutely here for it!

Products used:
Mama Elephant Circle Combo dies
Pretty Pink Posh Halloween Corners stamps and dies
Pretty Pink Posh Ghost Holder dies
Liquid glue
Foam squares
Distress Oxide Ink – kitsch flamingo and spiced marmalade

I appreciate you sharing your time with me. Have a fabulous day!

Doodlebugs – Florals For All Through the Year

Hey friends! It’s Mix it up Monday on the Doodlebugs blog and I’m moving outside of my typical and playing with florals. There are some newer die sets from Spellbinders that are a fabulous price point but adorable, fun to create with and really versatile. The one we’re playing with today is called Little Blooms. The dies in this collection range from $7 to $15 and you can use them for a billion and one different cards!

For today’s card, I cut the different elements from a limited color palette (happens to be a favorite these days) and used liquid glue to assemble all the pieces. I played around with arrangement on my craft mat and landed on a loose circle. To make it easy to add them to a card front, I used a piece of Press-n-Seal to hold them together while I added foam squares to the back of everything. This also made it a piece of cake to figure out what size circle die I could use for my background and actually adhering all the pieces to that circle at once. Definitely a kitchen item to keep in your craft room.

So after the florals were stuck to the Press-n-Seal, I die cut a white circle from the Mama Elephant Circle Combo dies and ink blended distress oxide spun sugar to the center. I spritzed it with water and blotted it dry. Then I cut two of the scallop layers from a peach-orange cardstock and used liquid glue to adhere all my layers together.

After removing the release paper from the foam squares on my flowers I popped them in place on the scalloped circle card front. To turn this into a card, I cut the same stitched circle a second time, scored it 3/8″ from one side and used liquid glue to adhere it to the back.

I went digging for a specific theme of sentiment and landed on it in the Spellbinders I’ve Got You Covered stamp and die set. I stamped it with celery stick ink and cut it out before popping it up across the center with foam strips.

I’m not a floral crafter but sometimes they’re just what you need. This little die set will be a long standing part of my stash for that reason. It’s simple and so pretty.

Products used:
Mama Elephant Circle Combo dies
Spellbinders I’ve Got You Covered stamps and dies
Spellbinders Little Blooms dies
Liquid glue
Reverse tweezers
Blending brushes
Distress Oxide Ink – spun sugar
Lawn Fawn Ink – celery stick

I appreciate you sharing your time with me. Have a fabulous day!

Twiddler’s Nook Spooktacular

Happy 31st of the month everyone! Please hop on over to Instagram and join us for one of the final Spooktacular hops of 2024. We’ve got a super fun lineup of spooky inspiration for you just in time for the masses to really start fall crafting.

Today I’ve mixed Hello Bluebird cuties with some of my favorites from Mama Elephant for a sweet scene card that extends into the inside of my card too.

The images I chose today are from Hello Bluebird Spooky Spellers. They are adorable and can be dressed up and their signs customized too! I love how these features make this stamp set super versatile all year long!

For my background, I ink blended distress oxide ink from twisted citron to mowed lawn with an edge of black soot to darken things up. I added a spooky black grass border from Newton’s Nook along the bottom and a spooky tree and ghost from the Hello Bluebird Halloween Tree die set.

I stamped and heat embossed the beginning of my sentiment using the Mama Elephant Be Scary stamp and die set. I adhered it by hiding dabs of liquid glue behind the embossing powder.

Before finishing things up on the front, I went to the inside with the rest of my sentiment and also added some Mama Elephant Little Ghost Agenda cuties to liven things up a bit.

Back to the front, I added glossy accents to noses, the pumpkin face and accents on the bat and skunk. Then I added black glaze pen to all the critter eyes so they stood out a bit better too.

Finally, I glued a scattering of Twiddler’s Nook Pastel Wishes clay embellishments across the sky. I really like the combination of softer pastel elements and the dark black shadows on this card. The contrast is really cool!

Products used:
Twiddler’s Nook Pressure Pal
Twiddler’s Nook Pastel Wishes embellishments
Twiddler’s Nook Paw Print embellishment tray

Hello Bluebird Spooky Spellers stamps and dies
Hello Bluebird Halloween Tree dies

Mama Elephant Little Ghost Agenda stamps
Mama Elephant Be Scary stamps and dies

Distress Oxide Ink – mowed lawn, twisted citron, black soot
Newton’s Nook Land Borders dies
Liquid glue
Embossing powder – frosting
Embossing ink
Magic anti-static brush
Foam tape and squares

Lawn Fawn ink – cilantro, jalapeno

Remember to head to Instagram and hop along with us for a chance to win a gift certificate to the Twiddler’s Nook shop.

I appreciate you sharing your time with me. Have a fabulous day!

Doodlebugs – Monochromatic Fun and Shaped Cards

Happy Mix it up Monday everyone! On the Doodlebugs blog I’m playing with monochromatic designs and shaped cards to make things a little extra interesting.

I started by creating an adorable Spellbinders Roller Disco Dottie with a red collar and red skates. She’s the cutest but I couldn’t decide on a complimentary color that I liked today. So I decided to keep it all in the family, the red family.

Next, I pulled out some Mama Elephant dies and created a sentiment banner using Spring Banner Greetings dies. Then I created my card base with the Mama Elephant Circle Combo dies. I love the wiggle room of liquid glue for all of these types of things. It gives you that couple of seconds to line things up.

After creating the 3 top layers of my circle, I cut an additional white circle, scored it about 3/8″ away from one edge and then used liquid glue to adhere it to the back of the stacked circle combo. You can decide if your card opens up or to the side this way too. Total flexibility.

I ink blended the center of the circle on the front and splattered it with the same red ink color. Then I popped Dottie and her sentiment banner up with foam squares and strips.

I’m excited to pop this cutie in the mail to a special friend along with some crafty goodies I picked up.

Products used:
Spellbinders Roller Disco Dottie dies
Mama Elephant Circle Combo dies
Mama Elephant Spring Banner Greetings dies
Liquid glue
Foam squares
Scoring board
Blending brush
Lawn Fawn lobster ink
Reverse tweezers

I appreciate you sharing your time with me. Have a fabulous day!

Doodlebugs – Summer Birthday Fun

Hey friends! I’m on the Doodlebugs blog today sharing a fun birthday Mix it up Monday with summer vibes. We don’t have many summer birthdays in our family and friends so I don’t make many cards this style and it was really fun!

I started with the fun Pretty Pink Posh Celebration Cupcake dies, wanting to expand the use from 4th of July vibes to general summer, so I cut the fruit and sunglasses, omitting all the other parts at first. I added some detail with copic markers instead of ink blending this time and used liquid glue to adhere all the parts and pieces together.

Next, I cut 2 Mama Elephant Arches from vellum and a green polka dot cardstock in my stash. I used tape runner to adhere the layers together and foam tape to add the cupcake to that.

I started with a blank pink background but didn’t like that so I ran the panel through my die cutter with the Spellbinders Tiny Dots embossing folder, ink blended the edges with some picked raspberry distress oxide ink and splattered it with white paint. Ahhh, that feels so much more like me. Then I popped the arches up with foam tape.

I cut a couple of Pretty Pink Posh sentiment strips from white cardstock and stamped sentiments from the Pretty Pink Posh Sentiment Strips | Birthday stamp set in guava and peacock inks. These are popped up with foam strips.

Now my card is really bottom heavy so I went back to the cupcake die set and cut some of the other decoration type shapes out and glued them all around with liquid glue. I think they add a fun touch and extend the design up without pulling everything apart.

The last thing I did was add white gel pen accents to all of the images.

Products used:
Pretty Pink Posh Celebration Cupcake dies
Pretty Pink Posh Sentiment Strips dies
Pretty Pink Posh Sentiment Strips | Birthday stamps
Mama Elephant B2B Arches dies
Spellbinders Tiny Dots embossing folder
Lawn Fawn ink – peacock and guava
Distress oxide ink – picked raspberry
Liquid glue
Foam squares, tape and strips
Gelly roll pen – white

I appreciate you sharing your time with me. Have a fabulous day!

Doodlebugs – Birthday Fun with Cool Colors

Hey friends! It’s Mix it up Monday on the Doodlebugs blog. Today I’m thinking color theory while creating a birthday card for one of my very favorite humans! She loves those cool tones so that’s where I pulled my color palette from…keeping to the blues and purples more than anything. Do you do that when creating for someone specific?

I started my design my playing with the Pretty Pink Posh Stitched Stars dies. I cut them from lots of different cardstocks and arranged them on a piece of white cardstock. After gluing them down, I cut the panel out with the Mama Elephant Postage Frame die, keeping the inside and frame pieces.

Next I cut the Mama Elephant Big Happy Birthday from white cardstock 3 times and glitter white cardstock once. I used liquid glue to adhere the layers together. Then went hunting for cute critters to add to the mix. I landed on a combo of Mama Elephant Summer Floaties and the balloons from Mama Elephant Peekabuddies. After stamping and coloring the images, I used the coordinating dies to cut them out and switched to assembling everything.

I drug my Lawn Fawn fish tank ink pad across the edges of my card base for some fun textured color. Then glued the outside frame of my background panel down with liquid glue. I popped the center up with foam tape and then glued the sentiment to that. I popped the images up with foam squared and finished things off with a little stardust Stickles and glossy accents.

Products used:
Pretty Pink Posh Stitched Stars dies
Mama Elephant Postage Frame dies
Mama Elephant Peekabuddies stamps and dies
Mama Elephant Summer Floaties stamps and dies
Lawn Fawn fish tank ink
Liquid glue
Foam tape and squares
Stickles – stardust
Glossy accents

I appreciate you sharing your time with me. Have a fabulous day!
Doodlebugs – Out of this World Combos

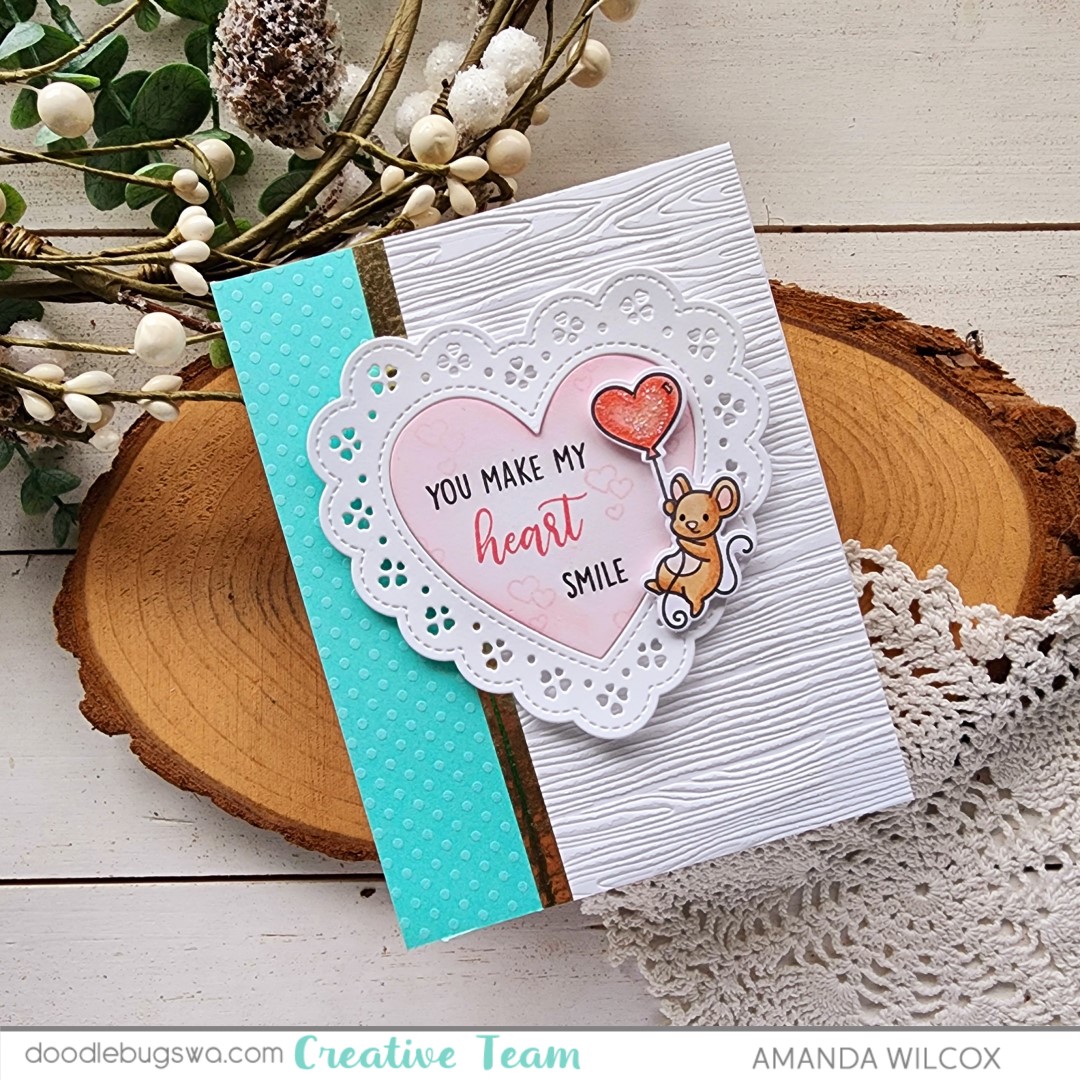
Hey friends! I’m on the Doodlebugs blog today for Mix it up Monday and it’s totally out of this world! I mixed some fun Pretty Pink Posh and Mama Elephant goodies together to create an anniversary card for my husband recently and am excited to share it with you.

I started by choosing a few images from Mama Elephant Little Agenda Spaceship, stamping and coloring them with copic markers. Then cut them out with the coordinating dies and glued my pup in his rocket with liquid glue.

Switching gears to the background, I cut the Pretty Pink Posh Pierced Stars cover plate from black cardstock and backed it with yellow cardstock from my stash. I inked the edges with Lawn Fawn yeti ink and then went over that with distress oxide mustard seed for a faint glowy look. Then I splattered it with iridescent watercolor for some shimmer.

While the watercolor was drying, I heat embossed the sentiment from Pretty Pink Posh Outer Space and fussy cut it out. With the watercolor dry, I added the images with foam squares and carefully added liquid glue to the back of the vellum and adhered it as well.

For finishing touches I added bits of glossy accents to each of the images and a scattering of clay stars across the whole design. We are in outer space after all.

Products used:
Mama Elephant Little Agenda Space Ship stamps and dies
Pretty Pink Posh Pierced Stars cover plate
Pretty Pink Posh Outer Space stamps
Liquid glue
Foam squares
Glossy accents
Lawn Fawn Yeti ink
Distress Oxide Mustard Seed ink
Blending brushes

LH Colors iridescent watercolor
Twiddler’s Nook Sailor Moon clay embellishments

I appreciate you sharing your time with me. Have a fabulous day!

Doodlebugs – Let’s Spook Up Some Fun Summerween Card

Hey friends! It’s Mix-it-up Monday on the Doodlebugs blog and with the recent spooky release from Mama Elephant, I jumped at the chance to make a Summerween card!

We had a hot spell recently and I try not to use my copic markers when it’s too hot because they leak so I stamped and watercolored these images from Mama Elephant Big Boo, then used the coordinating dies to cut it all out.

I used a combo of liquid glue and foam squares to assemble my mini scene. Then I switched gears to the background panel.

For that, I used the Pretty Pink Posh Spider Web stencil set. I inked the web layer with white pigment ink and then heat embossed white over it so it was shiny and stood out more. Then I added black paint to Ranger Texture Paste for my spiders. This made them puffy and matte next to the shiny webs.

When the spiders were dry, I added the panel to a card base and popped up my scene elements with foam squares. For the sentiment, I grabbed the trusty Pretty Pink Posh Sentiment Strip dies and stamps. After heat embossed one, I popped the strip up under the house for a nice grounding look.

For finishing touches I added some gold watercolor to parts of the images and then splattered a bit across the whole card front too. Last, I added glossy accents to the flame on the candle in front of the haunted house.

Products used today:
Mama Elephant Big Boo stamps and dies
Pretty Pink Posh Spider Web stencils
Pretty Pink Posh Sentiment Strips dies
Pretty Pink Posh Sentiment Strips | Halloween stamps
Embossing powder
VersaMark ink
Anti-static bag
Texture paste
Gold watercolor
Zig Clean Color Real Brush markers
Water brush pen
Glossy accents
Foam squares

I appreciate you sharing your time with me. Have a fabulous day!

Doodlebugs – Mix-it-Up Monday Get Well Card

Hi friends! Mix-it-up Monday on the Doodlebugs blog is a fun design that is completely interchangeable for sentiments to make it whatever you need. I never had get well cards on hand so I thought this was the perfect time to make an extra. This combo of Waffle Flower and Mama Elephant products is really fun and sure to bring a smile.

I started by using my Waffle Flower Grip Mat and Daisy background stencil to ink up a subtle background. I used a mix of pink and purple for the flowers with apricot ink in the centers. I didn’t spend a lot of time on that because it doesn’t show much but definitely adds a little something.

Next, I cut the new Mama Elephant Note Page die with the embossed lines insert still attached. I took some Tombow markers to draw notebook lines on the paper for fun and then stamped some of the scribble images from Mama Elephant Write With Me stamp set on it. I used Zig Clean Color Real Brush markers to color them in quickly.

I cut the Waffle Flower Oversized Get Well from black cardstock and glued it in place, adding fun white gel pen accents for interest. Then I chose the cut fox image from the Mama Elephant Write With Me to stamp and color with copic markers. I used the coordinating die to cut him out and added the note page and fox to the stenciled panel with foam tape and squares.

I decided to match the white gel pen from the sentiment to the fox image and also glossy accents on his nose and pen nib. *Pro tip: Let glossy accents dry and add white gel pen on top of it. It looks really cool and goes on smooth and easy.

Products used:
Mama Elephant Note Card dies
Mama Elephant Write With Me stamps and dies
Waffle Flower Daisy Background stencil
Waffle Flower Oversized Get Well dies
Waffle Flower Grip Mat
Blending brushes
Liquid glue
Foam tape and squares
Lawn Fawn Ink – apricot, fresh lavender, ballet slippers
Glossy accents
Sakura Gelly Roll pen – white

I appreciate you sharing your time with me. Have a fabulous day!

Doodlebugs – Mass Producing Gift Tags

Hello everyone! For this week’s Mix-it-up Monday I’m sharing a gift tag project I created for work. We just had our annual Conference last week and I made gift bags for some of the Board as an end of year thank you to them. You know I can’t have gift bags without cute tags to go with them. So I spent a little bit and assembly lined a batch of froggy cuteness.

This whole project started with me playing around with the Mama Elephant Combo Circle creative cuts. They’re so fun and I thought they would be great for a different tag. Once I chose my scallop colors I started die cutting all the pieces – 2 white centers (front and back), a blue scallop and a green scallop.

I couldn’t decide which little agenda critters to use so I solicited my daughter’s help and she chose my favorite frogs. I can’t get enough of them. So I stamped out nine different ones, colored them all and used the coordinating dies to cut them out.

After assembling the layers of the combo circles, I blended a little green and teal inks in the center and splattered them with cracked pistachio distress oxide ink.

While the splatter was drying, I stamped and heat embossed a sentiment from Pretty Pink Posh Sentiment Strips | Fall and cut them out with a Pretty Pink Posh Sentiment Strip die. This die set and the coordinating collection of sentiments will not collect dust on your shelf. I promise. I am constantly reaching for them to add that perfect something.

Last, I popped the sentiment strips and frogs up with foam squares and strips. I used a Fiskars hole punch and threaded some twine through the holes. Now these are ready to be tied to the bags and handed out.

Products used:
Mama Elephant Little Agenda Frogs stamps and creative cuts
Mama Elephant Combo Circle creative cuts
Pretty Pink Posh Sentiment Strips | Fall stamps
Pretty Pink Posh Sentiment Strips dies
Foam squares and strips
Embossing powder – white
Embossing and watermark ink
Anti-static powder bag
Liquid glue
Distress oxide ink – cracked pistachio
Lawn Fawn ink – mermaid and jalapeno

I appreciate you sharing your time with me. Have a fabulous day!